
 Email
Support
Email
Support Frequently
Asked Questions
Frequently
Asked Questions
Accessing Admin Settings
Table Of Contents
Chapter 1. Introduction
You use the Admin Settings page to set up all aspects of your restaurant (printers, menus, floor plans, staff members, and more).
Note: You should avoid making changes to your restaurant while you’re in service. Making a lot of changes while you’re also processing orders can lead to data corruption. Wait until your end of day or before you’ve opened for the day to make changes to your menu items, floor plan, and the like.
To access the Admin section, login with your Admin passcode. The default login pass for Admin is 1234. If you are still using the default passcode, you should change this as soon as possible (see Staff for how to change your passcode).
From your Floorplan screen, you will see the Admin menu option in the menu bar. Tap that. The Admin menu section is available to anyone using the Administrator login.
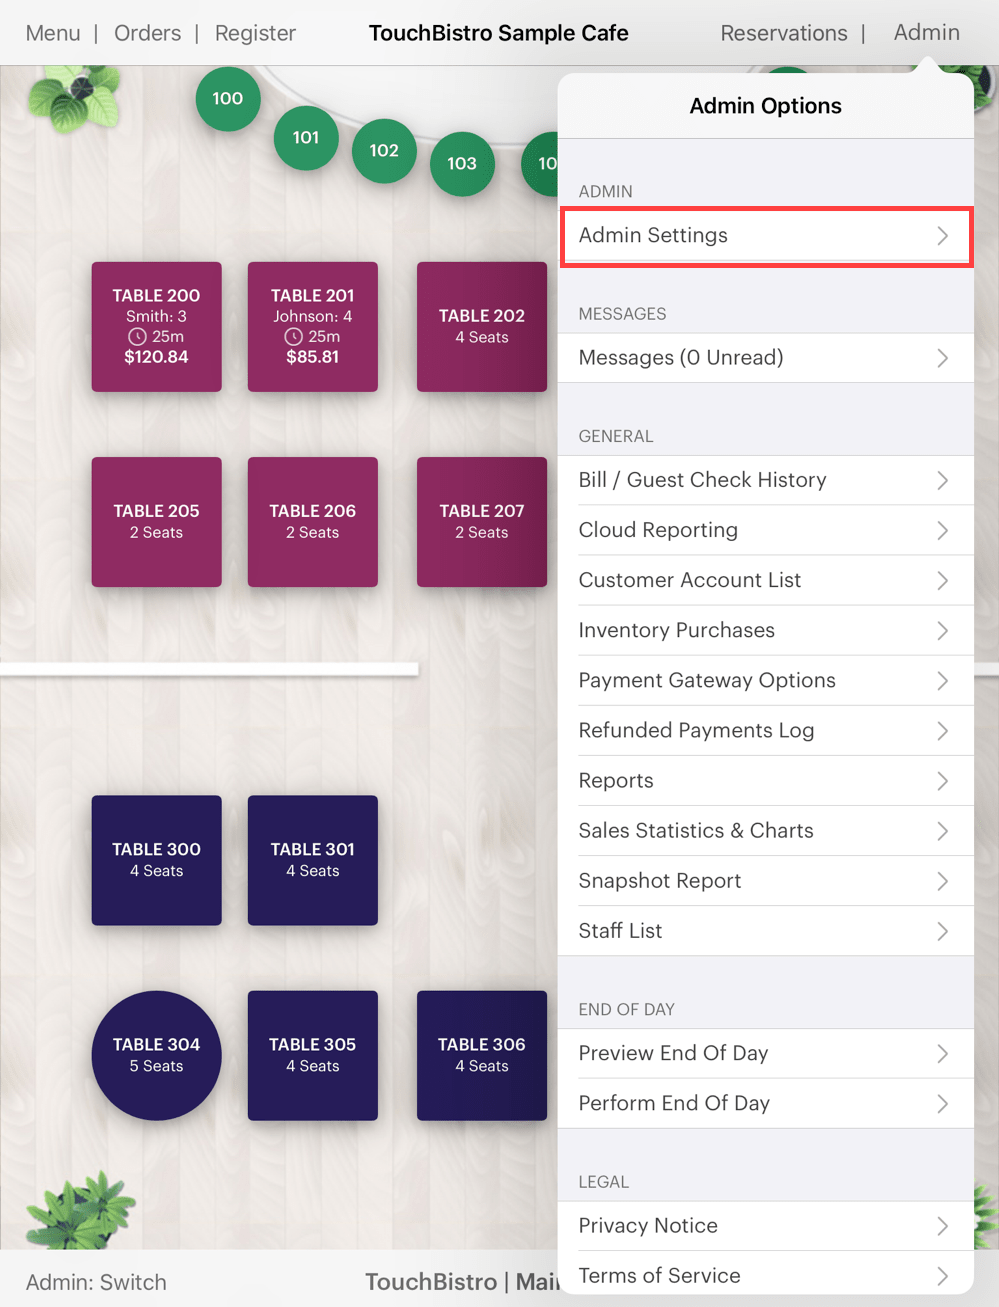
To access the Admin section, tap Admin Settings.
Chapter 2. Available Settings
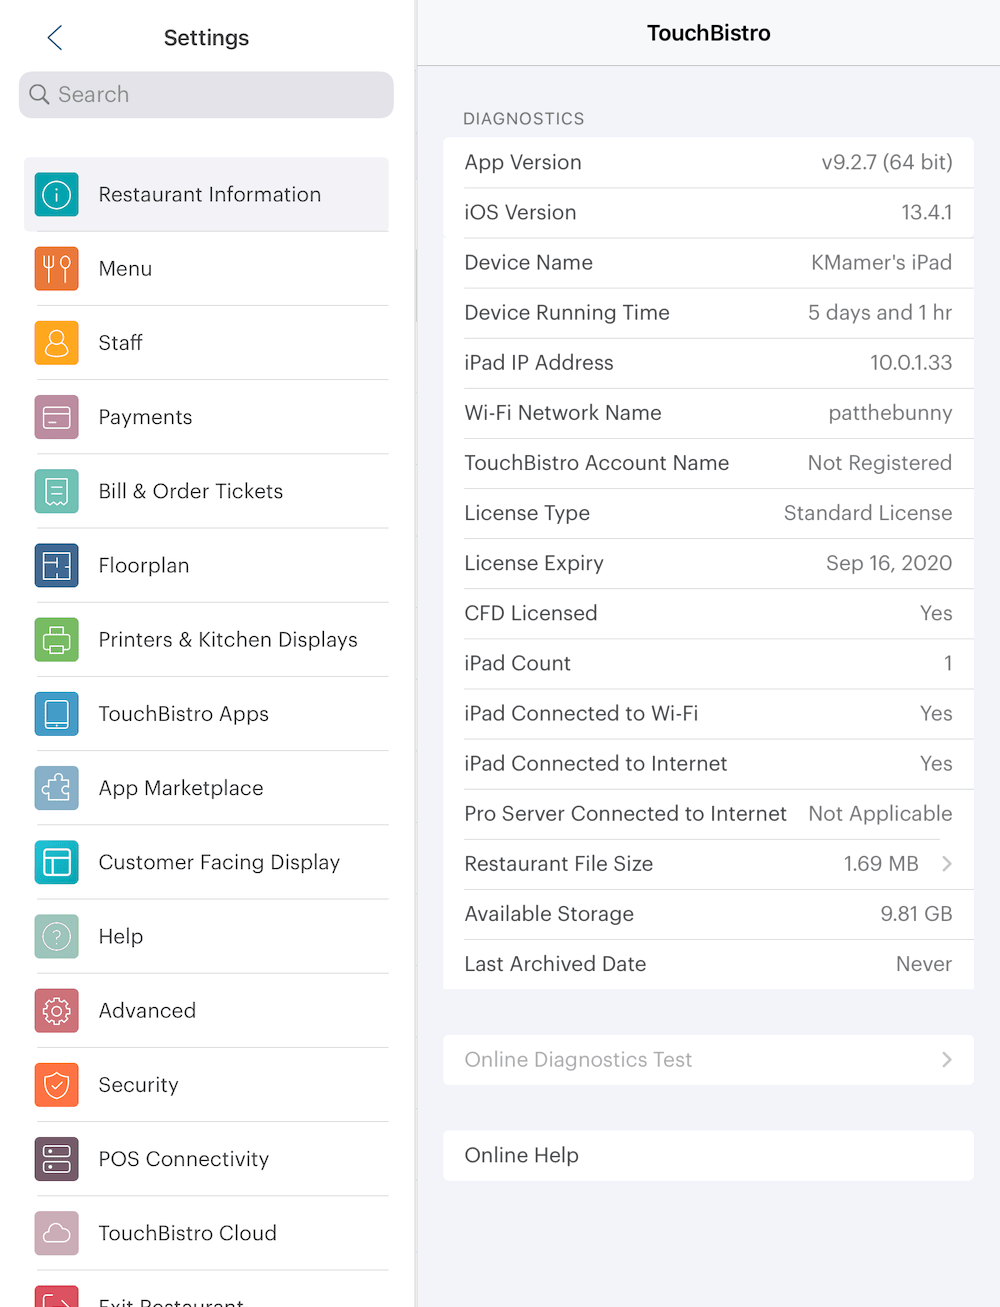
Along the left side are the available Admin settings. You’ll need to visit each setting to properly set up TouchBistro. Tapping an Admin setting icon (for example, Printers & KDS) opens available setting options.
|
Admin Setting
|
Description
|
|
TouchBistro
|
The TouchBistro Settings screen provides some critical information that may be requested by technical support.
|
|
Restaurant
|
Your restaurant profile is entered here
|
|
Licensing
|
Your licensing and purchasing options are found here.
|
|
Printers & KDS
|
Printers and the TouchBistro Kitchen Display System (KDS) are set up here.
|
|
Customer Facing Display
|
If you’ve purchased the TouchBistro CFD, this setting lets you configure how TouchBistro interacts with your CFD.
|
|
Menu
|
Your Sales/Menu Categories, Modifications, Menu Items, and Promotions are setup here.
|
|
Staff
|
Add and manage your staff and review/edit shift hours.
|
|
Floorplan
|
Here you set up your restaurant floor plan and sections
|
|
Bill & Chit
|
Area to customize your bills/guest checks and your kitchen chits (sometimes called kitchen tickets).
|
|
Payment Gateways
|
Integrated payment processors are configured and managed here.
|
|
Partners
|
Ways to connect with third-party integrated applications.
|
|
Advanced
|
Ways to customize your restaurant processes are found here.
|
|
Security
|
Options related to TouchBistro security features.
|
|
TouchBistro Cloud
|
Options related to TouchBistro and its access to cloud features are found here.
|
|
POS Connectivity
|
If you are using more than one iPad, you can configure your system here.
|
Chapter 3. Returning to your Restaurant’s Floor
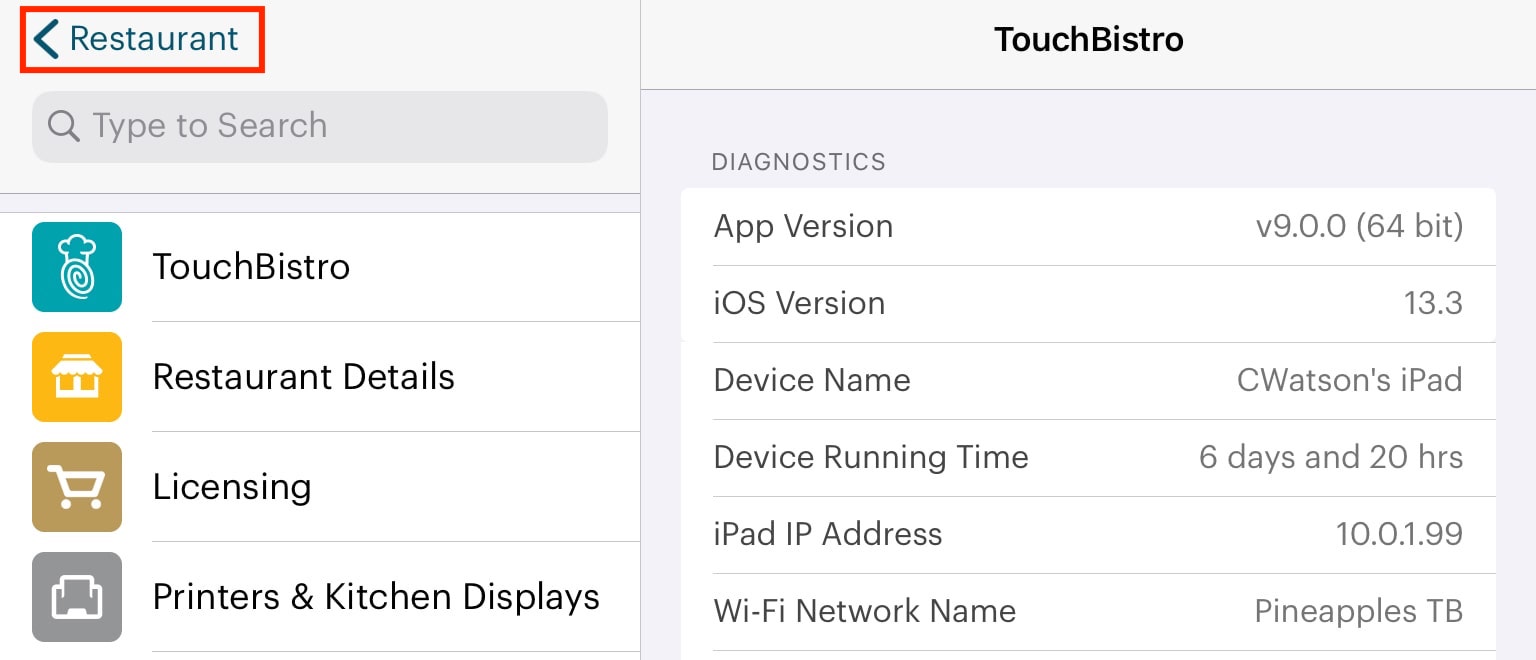
You can return to your active restaurant at any time by tapping Restaurant on the top left.
Chapter 4. Exiting Your Restaurant
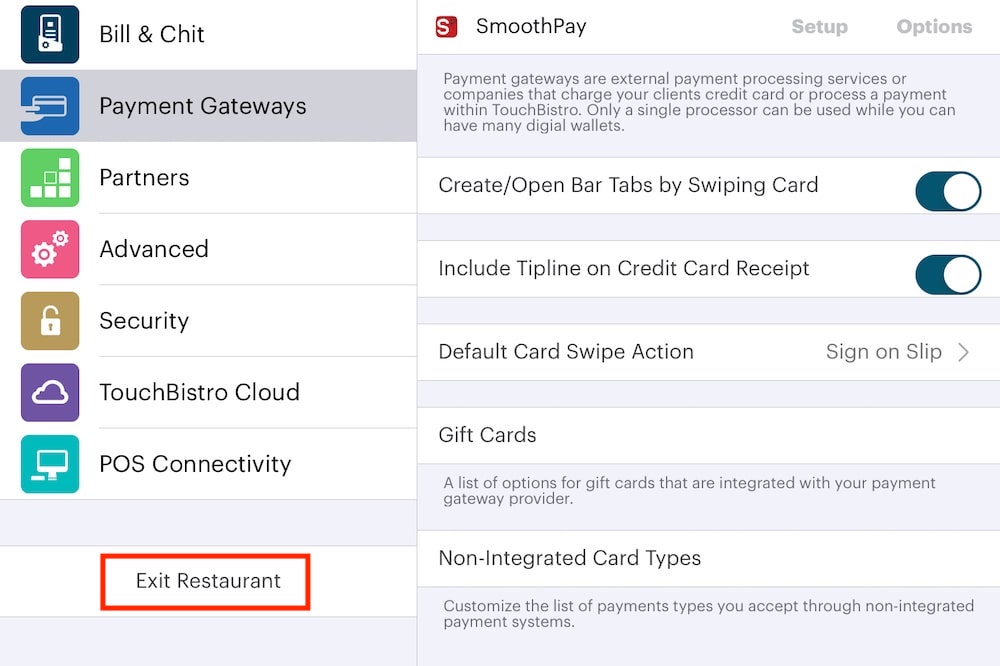
If you want to exit your restaurant, open another restaurant, or re-open your restaurant, tap Exit Restaurant at the bottom of the Settings column. When you exit the Admin settings for the first time, you will be asked to accept or decline TouchBistro Terms of Use.
 Return to Table of Contents