Setting Up Menu Items using RMM
Table Of Contents
Chapter 1. Set Menu Item Name and Taxes
After creating your Menu Category, you can now add Menu Items to the category. To create Menu Items via the bulk upload process, see the section below on bulk uploading.
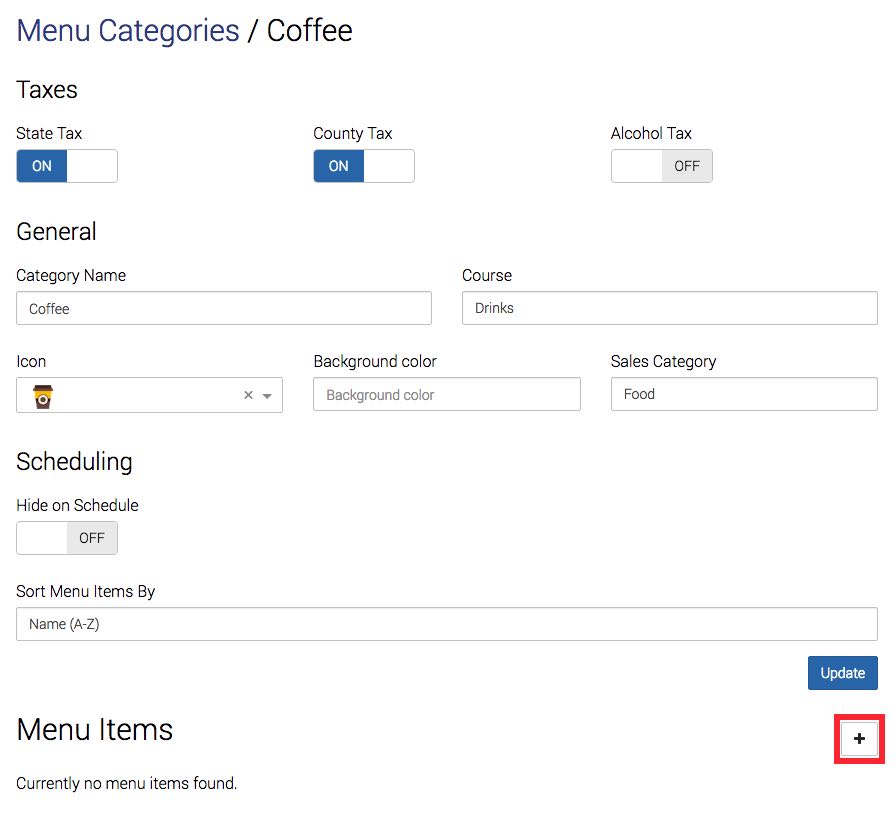
1. At the bottom of the Menu Category screen you wish to add a menu item too is the Menu Items section where you can create new menu items. Click the Add + icon to add your Menu Item.
Chapter 2. General Area

2. Enter a name for this menu item in the Name field. If the menu item name is over 30 characters and you’re using impact kitchen printers, you can enter a shorter alternative name for the kitchen ticket in the Short Name field.
3. Enter a price in the Price field. This field is required. It can, however, be $0.
4. If this item is charged “market price”, enable Open price.
5. If you’re not using the Ingredient Inventory system to cost this item, you can enter the item’s simplified cost calculation in the Cost field.
6. If you are using the Ingredient Inventory system, enable Recipe Cost. The menu item recipe needs to be completed for this menu item on the iPad.
7. If you use barcode scanning or TouchBistro Loyalty, you can enter the UPC/SKU in the UPC field.
8. This menu item will use the Menu Category‘s settings for Course and Background Color. If this menu item needs to have a different course (for example, you have iced coffee drinks you want set for a dessert course), you can specify it here. If you prefer to give this menu item a unique color, click Background Color and use the color picker tool to select its color. Others wise, leave these items set to the Menu Category default.
Chapter 3. Images
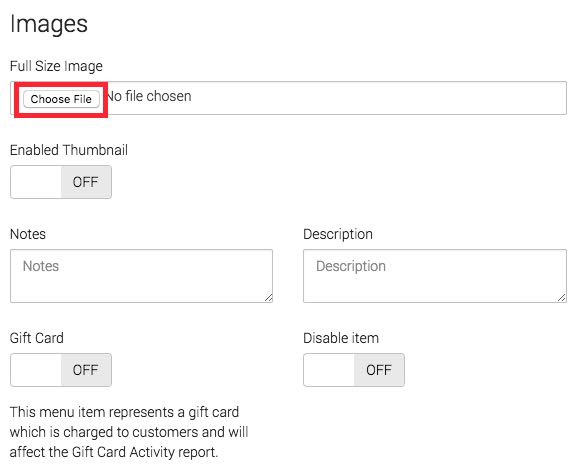
9. To add a customer-facing image to this menu, click Choose File.
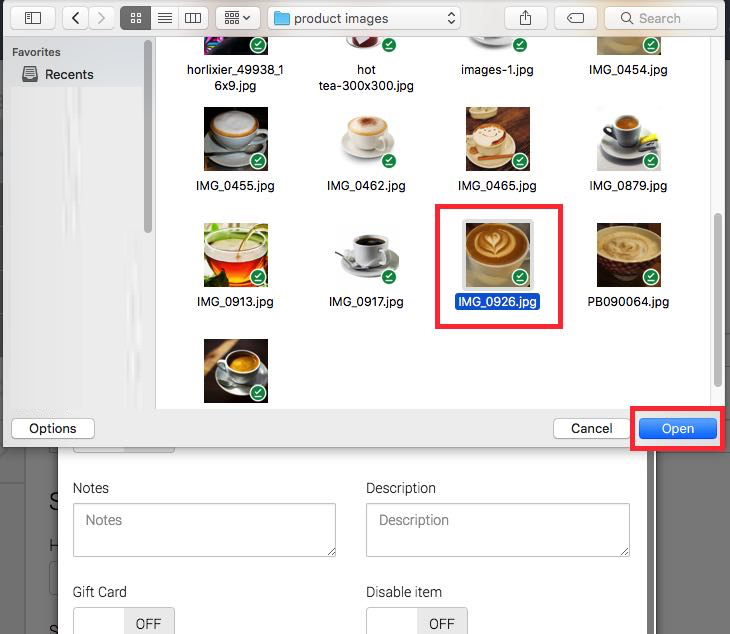
10. Locate the image and open it. We recommend your menu photos be 2044 pixels wide x 2216 pixels high for best resolution on the customer facing Menu.
11. TouchBistro will create thumbnails from your menu image. However, if you wish to use different thumbnails for the Menu Image view on the order screen, turn on Enabled Thumbnail.
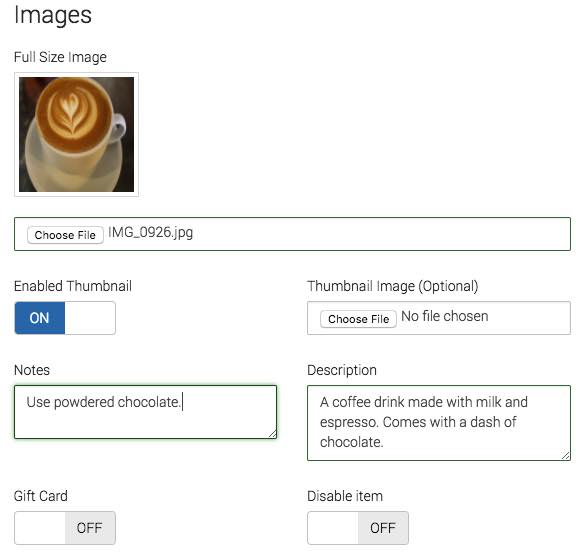
12. Complete the Description field. This is customer facing. Add any internal notes you need to the Notes field.
13. If you need to temporarily hide this particular menu item (for example, it’s out of stock or seasonal), enable Disable item.
Chapter 4. Categories

14. Menu Category and Sales Category settings default to the Menu Category‘s settings. You can click these if you want to change it. For example, you have your coffees under Food but you might have an Irish Coffee item in this Menu Category. But because it has a shot of alcohol, it would have to be classified under the Alcohol sales category.
Section 1. Modifier Groups

15. If you created modifiers that are applicable to this menu item, you can add them here.

16. Click on the Selected Modifiers field and select your desired modifier.

17. If you need to adjust the number of this modifier’s options that must be selected, you can enter a new number in the forced modifier count field.
Chapter 5. Taxes

18. If you need to adjust the default taxes for this menu item (for example, this is an Irish Coffee menu item and requires enabling the Alcohol Tax setting), you can do it in the Taxes section.
Chapter 6. Advanced Settings and Update

19. If you prefer to get a manager or admin passcode before this item can be added to the Order screen, enable Requires Manager Approval to Order. You might enable this is, say, this menu item is a particularly expensive bottle of wine and you want to ensure a manager approves the sale.
20. If this item is capable of being returned to inventory (for example, this is a package good from your gift shop), enable Allows returns.
21. Finally, click Create to create this menu item (or Update if you’re editing this item)

22. If you are editing this item, to return to your menu category after clicking Update, scroll to the top and click the previous level “breadcrumb”.
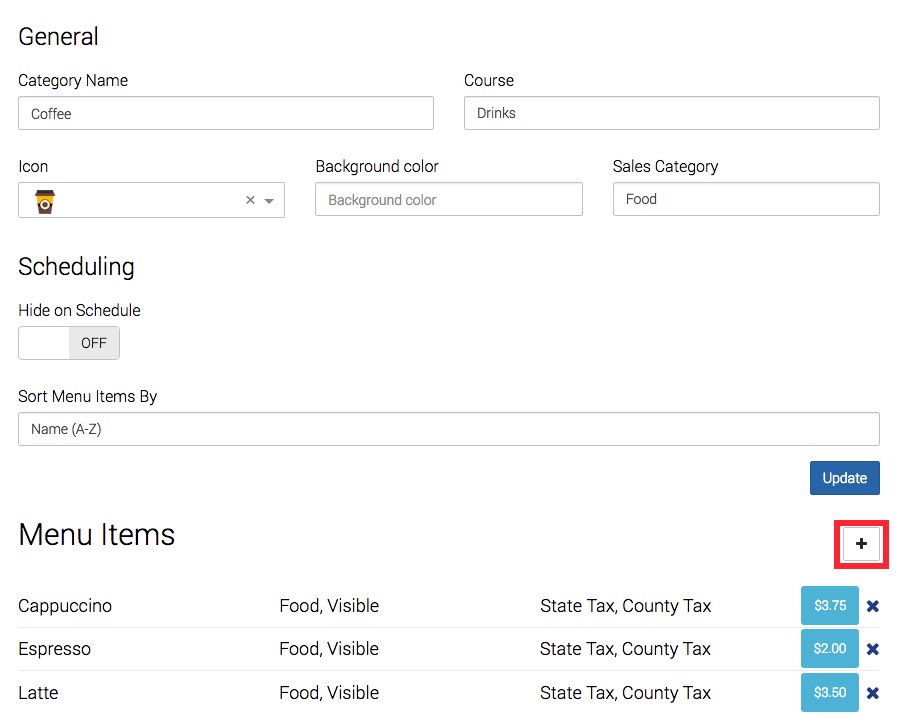
23. Click the Add + icon to add a new menu item.
See Next Step
Step 6 – Create Modifier Groups
See Previous Step
Step 4 – Set Up Menu Categories


 Email
Support
 Frequently
Asked Questions
