Advanced Settings
Table Of Contents
Chapter 1. Introduction

Tap Advanced to fine-tune TouchBistro to your operational specifics. TouchBistro has set the most likely defaults. Under Advanced you can override those defaults. Tap and scroll up on the Advanced settings screen to reveal additional settings.
Chapter 2. Order Input
|
Setting
|
Description
|
|
Automatically Proceed to Order Input Screen
|
Toggle off if you wish TouchBistro to remain on the floor plan screen after choosing the table’s party size.
|
|
Send All Items From Order Input
|
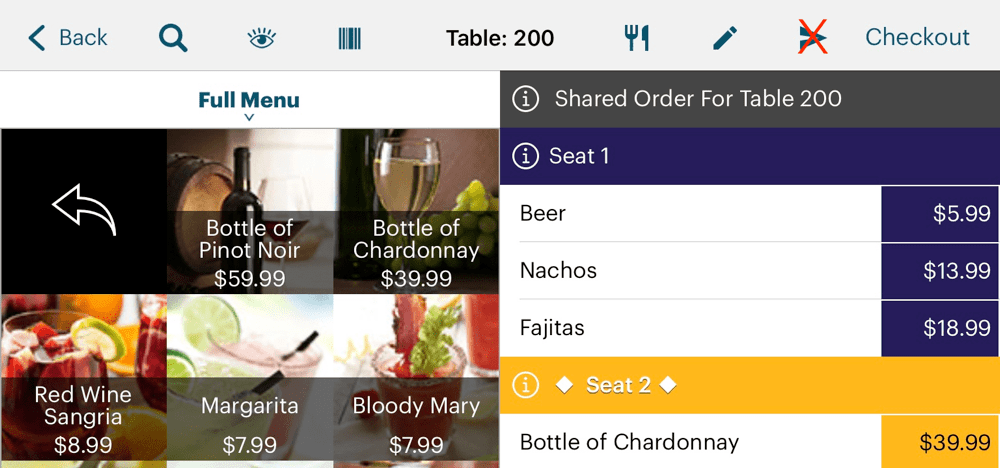
If toggled off, the Send All button on the front end Order screen (which will send all items ordered to the appropriate chit printers), will no longer appear. Individual orders will then need to be sent via the Course Options icon and sent on a course by course basis.
|
|
Allow Discounts on Alcohol
|
Toggle off to prevent any discounts you’ve set up to be applied to items flagged as an alcohol sales category. See Discounts for more information about setting up discounts. |
|
Show “Email Receipt” option when closing paid order
|

If you do not want to offer emailed receipts, you can toggle this off.
|
|
Auto Close Forced Modifiers
|
Leave on to speed ordering of items with forced modifiers. If you have items that have a mix of forced and optional modifiers (for example, burger toppings), you might want to disable this.
|
|
Show Menu Item Modifier Category
|
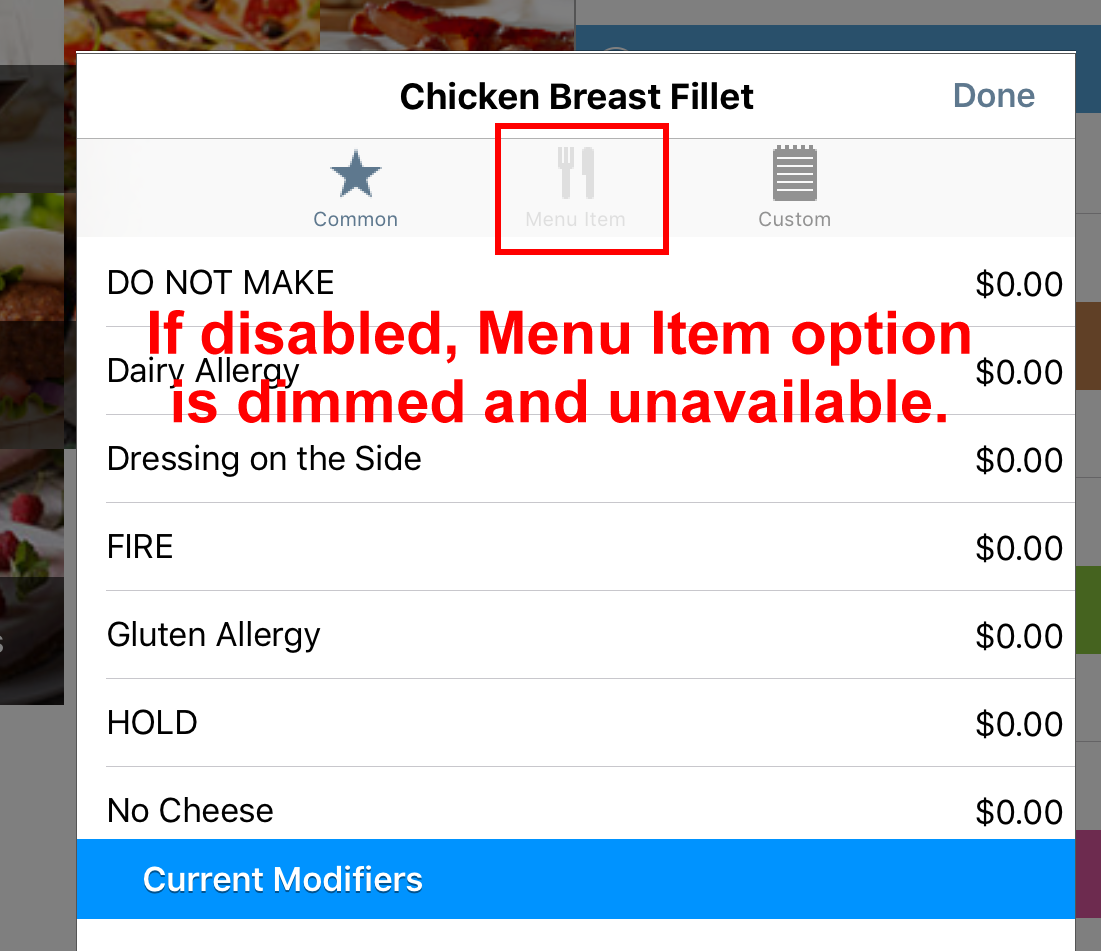
If disabled, TouchBistro turns off the Modifier option to add another menu item as a modifier.
|
|
Default to seat
|

Tap to set for the seat/shared order default on the Order screen. Select Seat 1 if you want the initial focus to be on Seat 1. Select Shared Order if you want the initial focus to be on Shared Order (orders intended for all party members and all party members are responsible for paying equally).
|
|
Lock Menu View Toggle
|
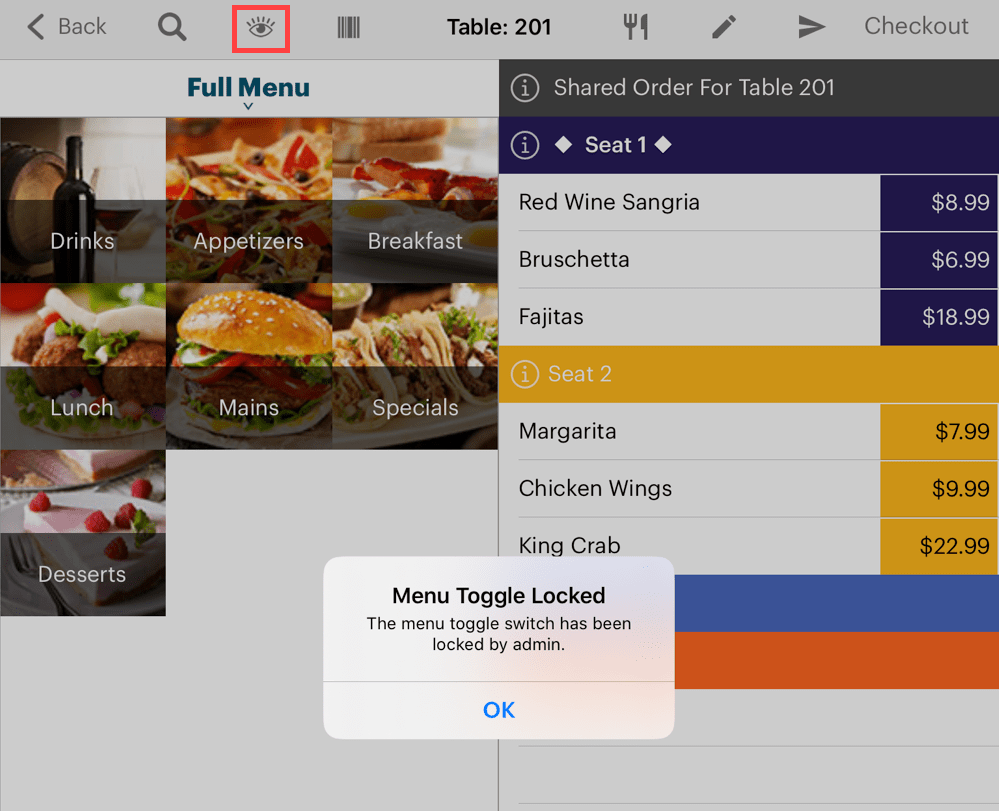
Tap to lock the view to a specific view: List View, Image Grid View, or Text Grid View. If locked to a view, TouchBistro will indicate the view is locked if the View icon is tapped.
|
|
Prompt for Guest Name
|
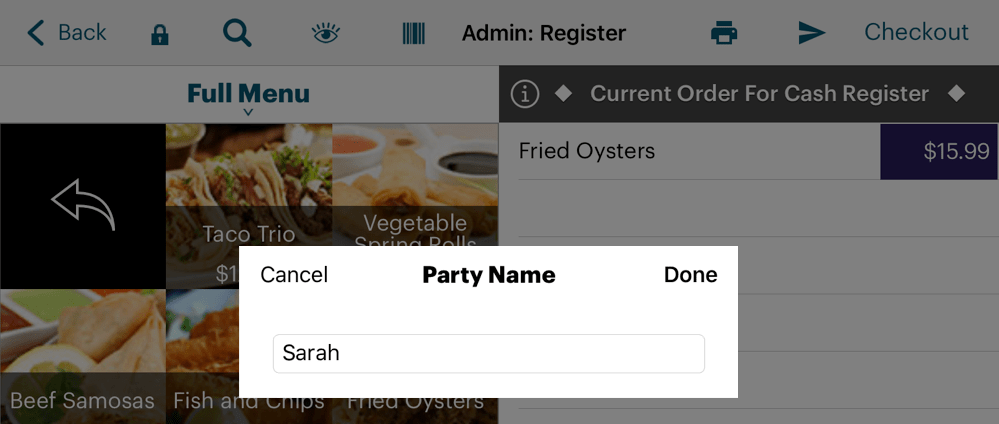
If toggled on, TouchBistro will prompt the user to enter a party or guest name when the POS (cash register) is accessed. The name entered will appear on the receipt. This is useful if you use names on receipts to help expedite orders.
|
|
Enable Max Order Number
|
Some venues prefer their Order Number resets to 1 after a certain number of orders have been created. For example, after 100 orders, the order number resets to 1. If you would like your Order Number to reset to 1 after an upper limit is reached, enable Enable Max Order Number.
|
|
Max Order Number
|
If you’ve enabled Enable Max Order Number, enter the highest order number in the Max Order Number field.
|
Chapter 3. Printing
|
Setting
|
Description
|
|
Printer Items’ Short Name
|
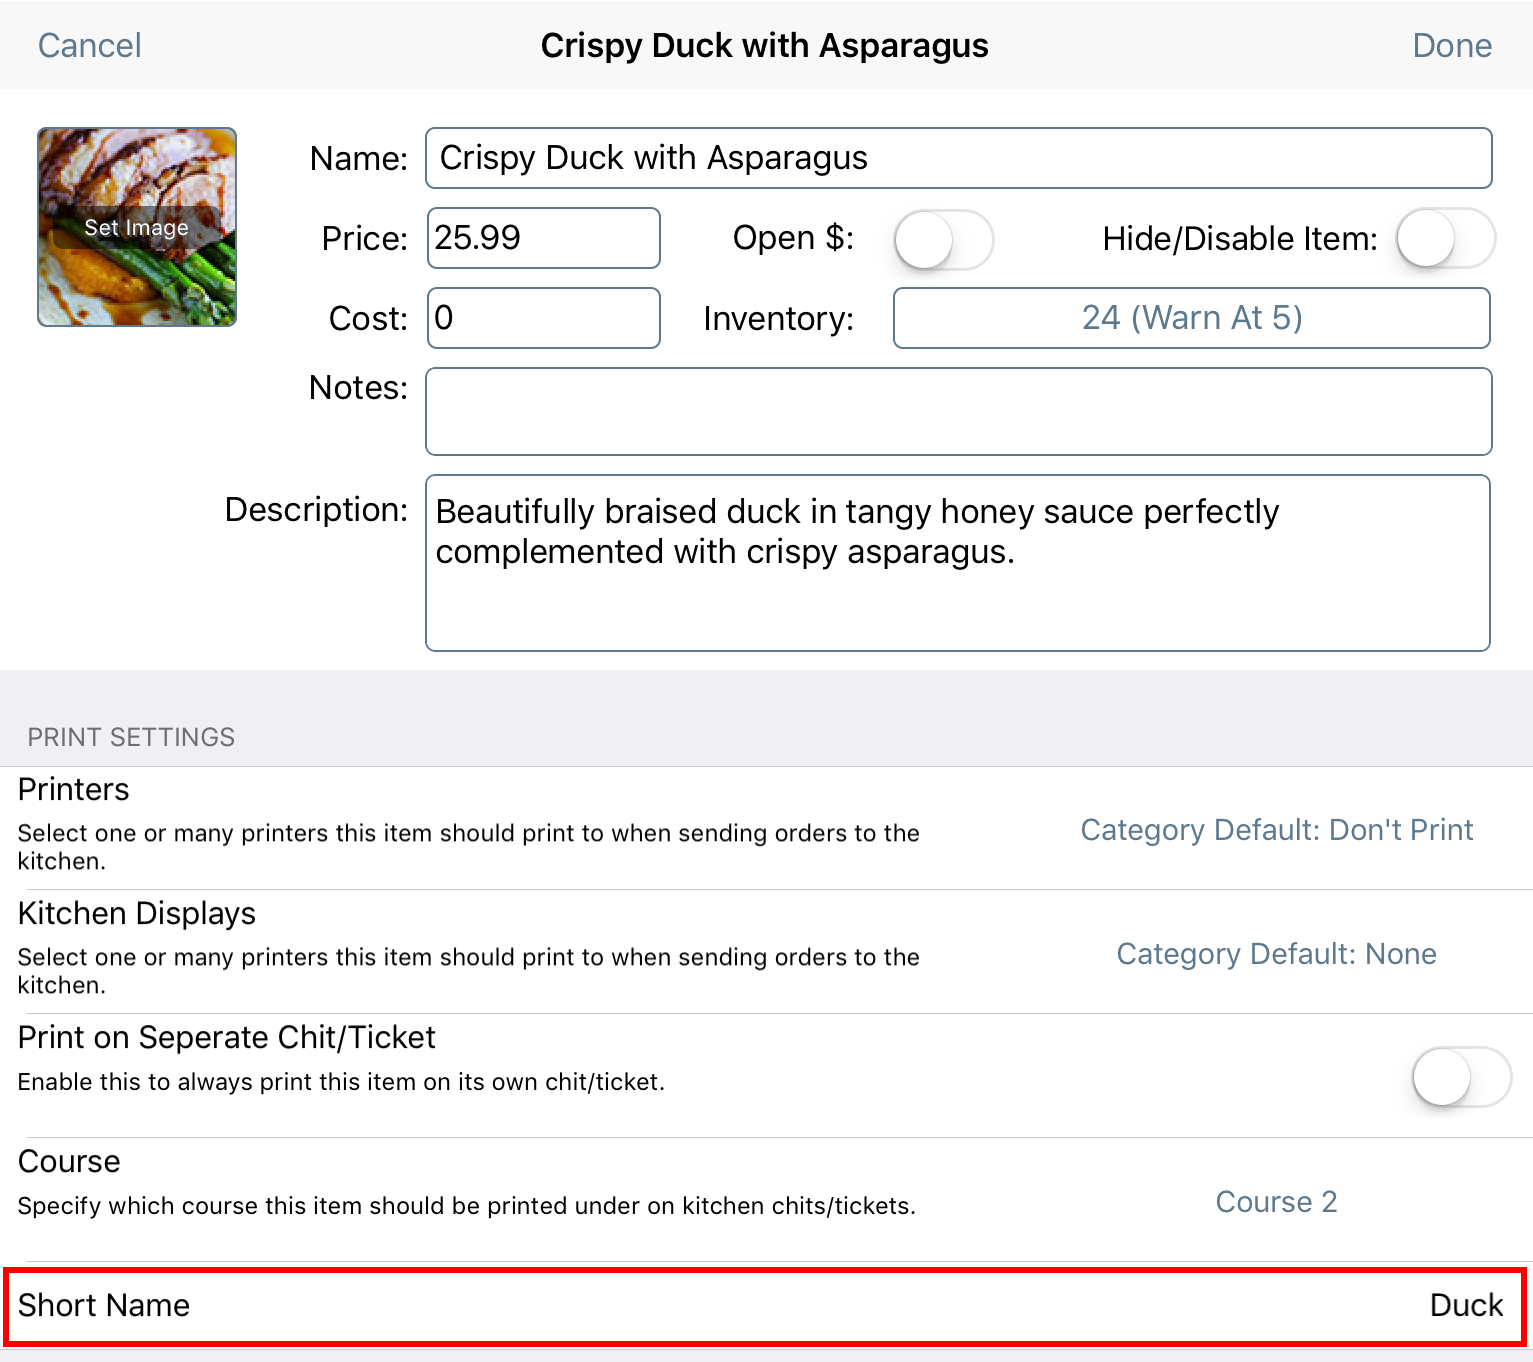
Tap to set where TouchBistro should use a menu item’s short name. You can have TouchBistro use it on the kitchen chit/ticket, on the guest receipt, or in reports. If you tap Receipt, the TouchBistro Customer Facing Display and the KDS will also use the short name.
|
|
Enable Safe Printing
|
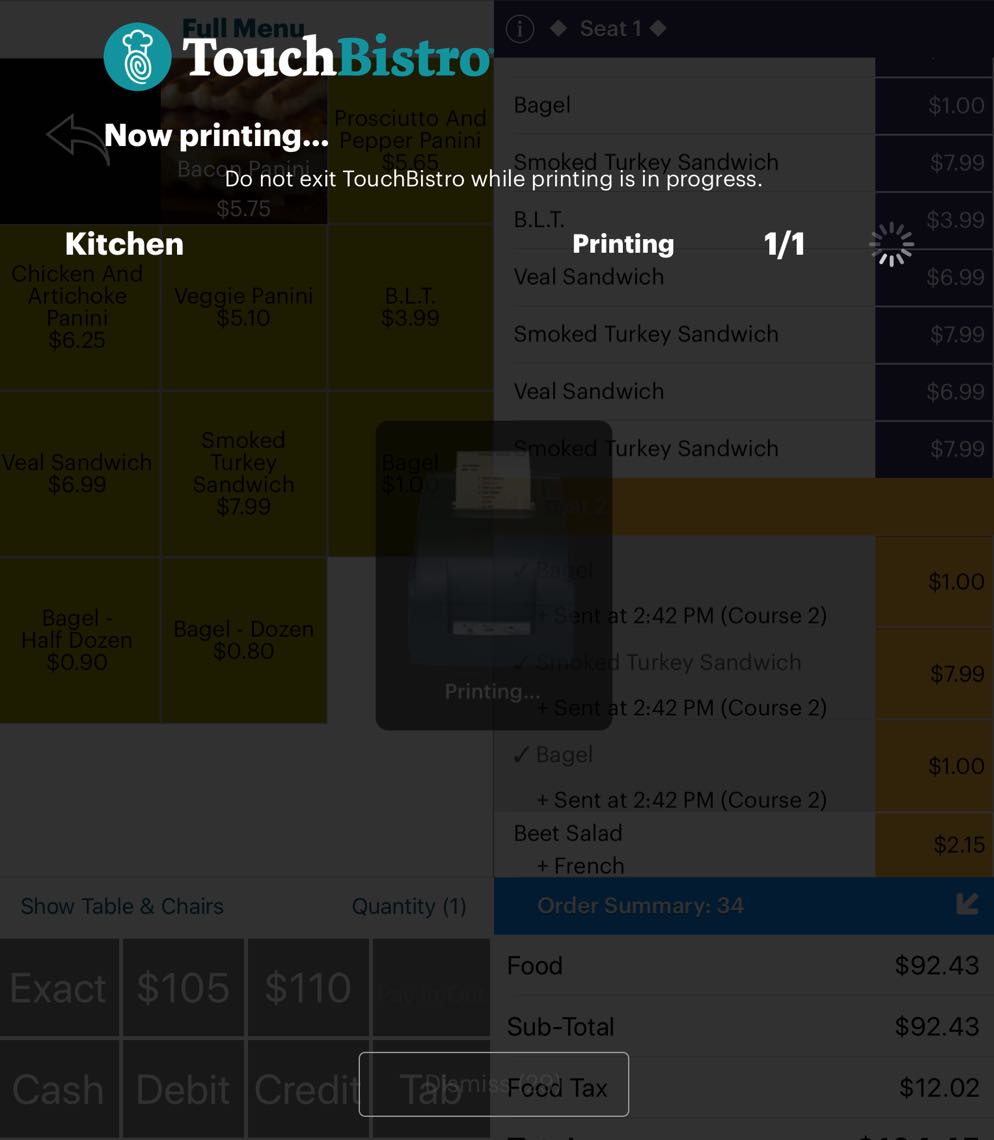
If safe printing is enabled, TouchBistro will ensure the printer you are sending a ticket or receipt to is online (connected, turned on, and loaded with paper) before attempting to print.
The printing dialog box (pictured above) will remain on screen until the job is fully sent to the printer.
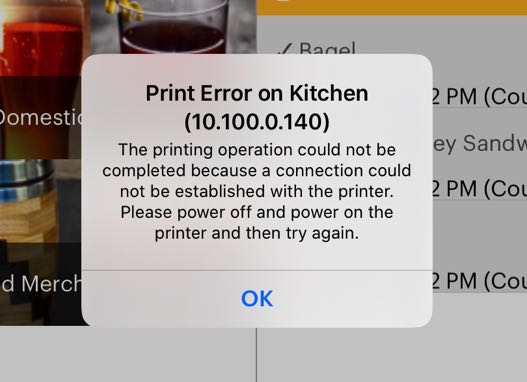
If TouchBistro does not find the designated online printer, it will make a few attempts to connect before allowing you to dismiss the dialog box. Because TouchBistro does not return control to the user until the print job is complete, you may find having safe printing enabled slows your workflow. You can disable printing by disabling safe printing. If disabled, TouchBistro will send the print job without first verifying the printer is online or the print job has completed. Control will be returned to you immediately. However, this can result in things like TouchBistro thinking a kitchen ticket has been sent when it has not because, for example, the printer was out of paper. For maximum certainty that things like kitchen tickets have printed, we strongly recommend enabling safe printing.
|
|
Show Voided Items On Bill/Guest Check
|
If you prefer not to show voided items on receipts, toggle this off.
|
|
Print Void Chits When Items Are Voided
|
If you prefer not to print chits recording voids, toggle this off.
|
|
Return After Printing
|
By default, after sending an order to the kitchen, you will be returned to the floor plan screen. Tap to set TouchBistro to send the user to the login screen or tap Disable for no action. Tap Done when selected.
|
|
Print and Close from Table
|
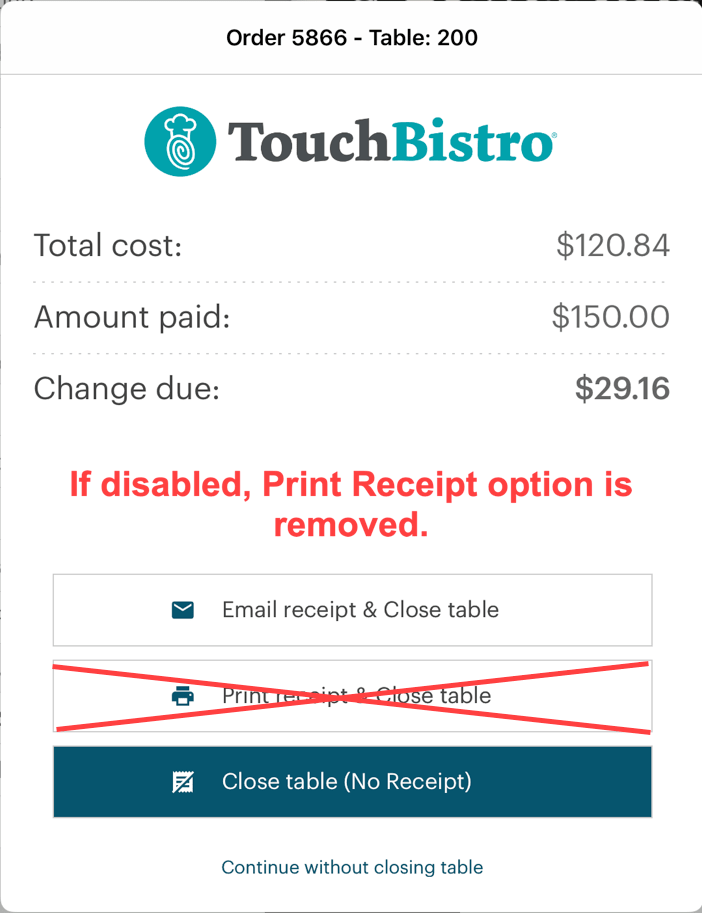
This option only controls the receipt options when you cash out a table. If toggled off, TouchBistro will not display the options to print the receipt.
|
|
Print and Close From POS
|
This option only controls the receipt options when you cash out the cash register. If toggled off, TouchBistro will not display the options to print the receipt.
|
Chapter 4. Register Buttons
|
Setting
|
Description
|
|
Credit on Fast Bar
|
Disable if you want to remove the credit card button from the fast bar screen.
|
|
Debit on Fast Bar
|
Disable if you want to remove the debit card button from the fast bar screen.
|
|
Change Register Buttons
|
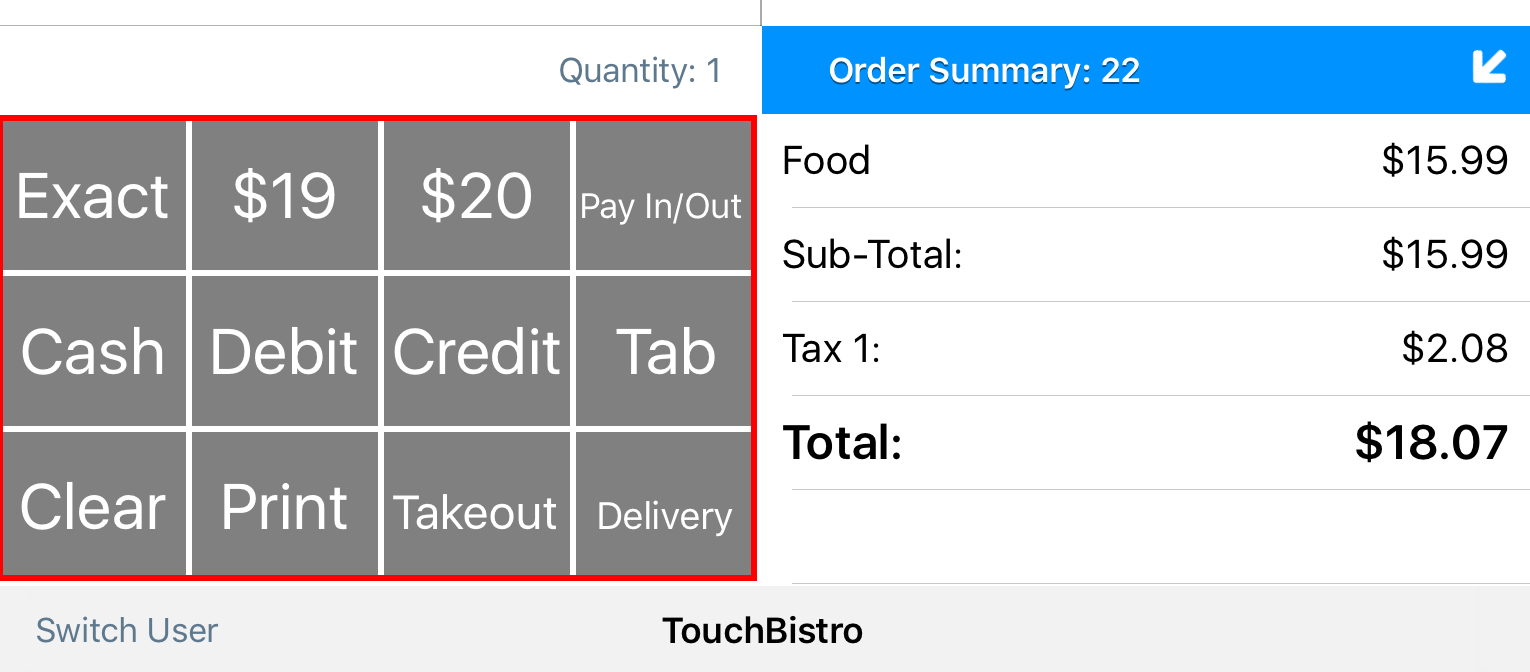
You can enable or disable which buttons you want to appear on the Point of Sale cash register. See the section below for further details.
|
Section 1. Changing Your Register Buttons
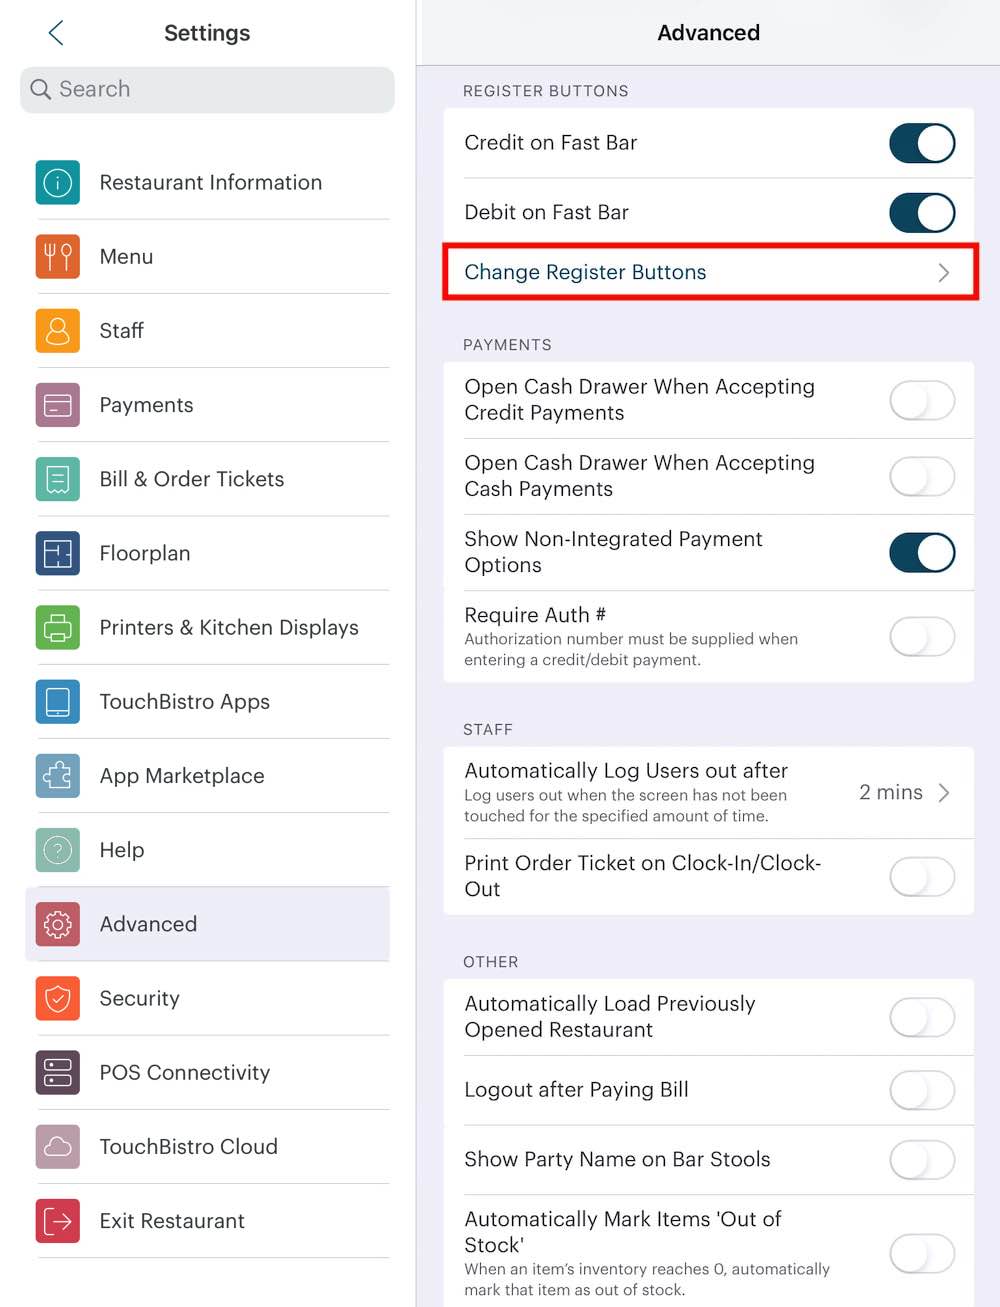
1. If you tap Change Register Buttons, you can customize what buttons appear in the “fast pay” area of the cash register.
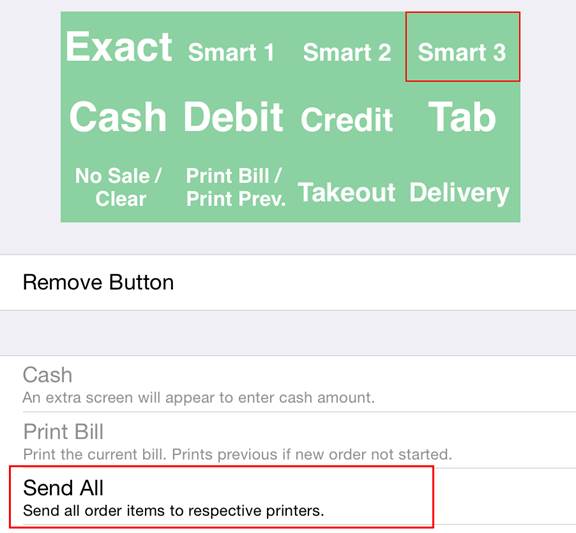
2. To add or change a button, first tap the cell you want to add a button to or change.
3. Then tap the button you want to appear in that cell.
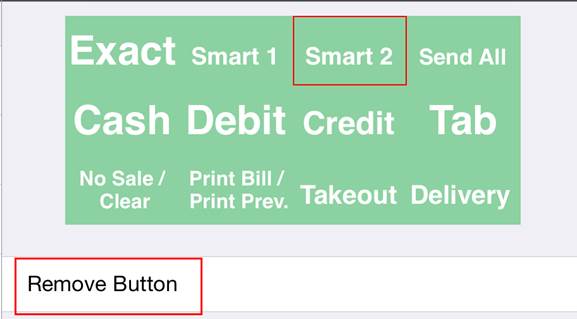
4. If you want to remove a button, you can tap the cell and then tap Remove Button.
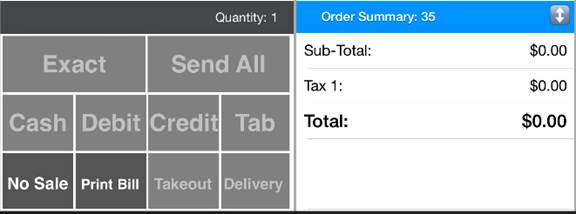
5. On your Order screen the remaining fast pay buttons will resize to fit the space.
6. Make sure you tap Done to save your changes.
7. If you tap Reset All, you can return the fast pay buttons back to the TouchBistro default.
Section 2. Button Options
|
Option
|
Description
|
|
Exact
|
Tap if exact change is given.
|
|
Smart 1, 2, 3
|
Smart buttons try to predict what kind of bill or bills will be presented to pay based on the total.
|
|
Cash
|
Tap to access the cash payment dialog box.
|
|
Debit
|
Tap to access the debit payment dialog box.
|
|
Credit
|
Tap to access the credit card payment dialog box.
|
|
Tab
|
Convert this POS order to a Bar Tab.
|
|
No Sale/Clear
|
The No Sale button opens the cash drawer if there’s no items ordered. Clear deletes all items ordered.
|
|
Print Bill/Print Prev.
|
Print Bill prints the current bill. Print Prev. prints the last closed bill.
|
|
Takeout
|
Convert this POS order to a Takeout order.
|
|
Delivery
|
Convert this POS order to a Delivery order.
|
|
Paypal
|
Pay with PayPal.
|
|
Send All
|
Sends all the items ordered to the kitchen ticket printer.
|
|
Pay In/Out
|
Makes the payout/pay in feature available on the cash register screen.
|
|
SmoothPay
|
Pay with SmoothPay.
|
Chapter 5. Payments
|
Setting
|
Description
|
|
Open Cash Drawer When Accepting Credit Payments
|
If you want TouchBistro to be able to open your cash drawer automatically when a credit card is entered, toggle this on. |
|
Open Cash Drawer When Accepting Cash Payments
|
If you want TouchBistro to be able to open your cash drawer automatically when a cash payment is entered, toggle this on. |
|
Show Non-Integrated Payment Options
|
 If you’re using an integrated payment solution (e.g., TouchBistro Payments, Moneris, etc.), you can remove the non-integrated payment options on the checkout screen to avoid confusion. If you’re using an integrated payment solution (e.g., TouchBistro Payments, Moneris, etc.), you can remove the non-integrated payment options on the checkout screen to avoid confusion. |
|
Require Auth #
|
If you’re using an external credit card payment system not integrated into TouchBistro but want to match the system’s authorization numbers with payment information recorded in TouchBistro, toggle this on. |
Chapter 6. Staff
|
Setting
|
Description
|
|
Automatically Log Users out after
|
If TouchBistro detects a period of inactivity, it will automatically log the user out and require a new login. You can set the inactivity time or set it to Never. Use Never with caution, as it might make TouchBistro vulnerable to unauthorized use.
|
|
Print Order Ticket on Clock In/Clock Out
|
Toggle on if you want a paper record of when staff members are clocking in and out.
|
Chapter 7. Other
|
Setting
|
Description
|
|
Automatically Load Previously Opened Restaurant
|
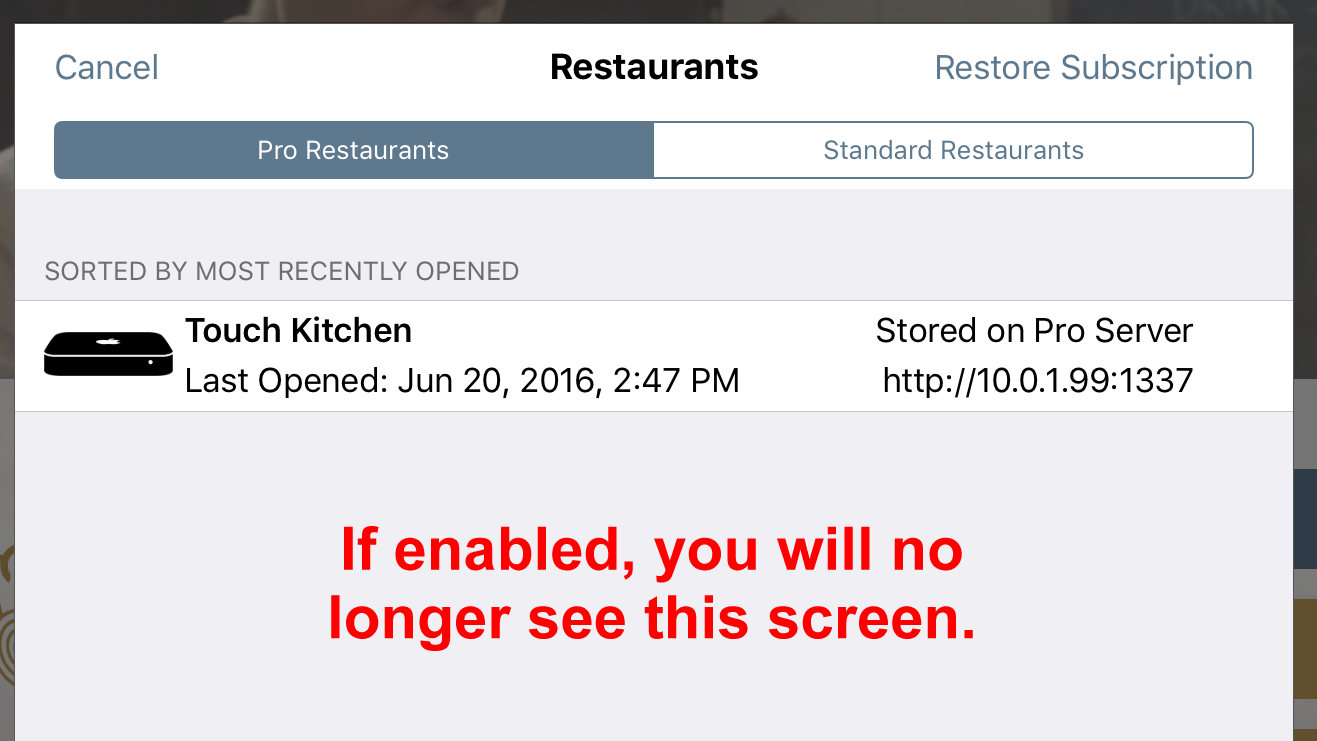
Toggle on if you don’t want TouchBistro to prompt you with which restaurant to open.
|
|
Logout After Paying Bill
|
If you want to always force the user to log back in after closing a table, toggle this on.
|
|
Show Party Name On Bar Stools
|
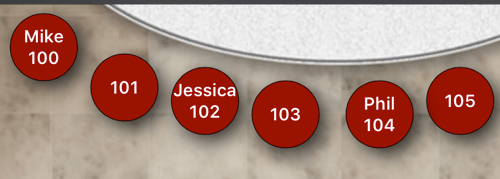
If enabled, TouchBistro will display any entered party name on bar stools. Long names will be truncated.
|
|
Automatically Mark Items Out Of Stock
|

You can have TouchBistro automatically mark a menu item unavailable and prevent staff from adding it to an order when its inventory count reaches zero. Note: List view only.
|
|
Enable Animations
|
Disable to suppress slide-like transition effects when moving between screens or opening dialog boxes. If you are having issues with changing between Portrait and Landscape, disable animations.
|
|
Show Contact List when Entering Names
|
Enable for TouchBistro to autofill on name fields when creating Orders.
|
|
Custom Modifier Suffix
|

The text entered here will be appended to any custom modifier entered by a server, helping alert kitchen staff the modifier is a custom modifier.
|


 Email
Support
 Frequently
Asked Questions
