Avero
Table Of Contents
Section 1. Editing Your Day Parts
Section 2. Adding New Sections
Section 3. Changing Times of your Day Parts
Chapter 1. Before You Begin
If you plan to use multiple Day Parts (breakfast, lunch, dinner, etc.), Avero requires you to have floor plan sections defined and tables/bar stools assigned to those sections. You need at least one (“Main floor” “Dining room” etc.).

1. If you’ve not yet set these up and assigned them to tables/bar stools, access Admin | Admin Settings | Floorplan.
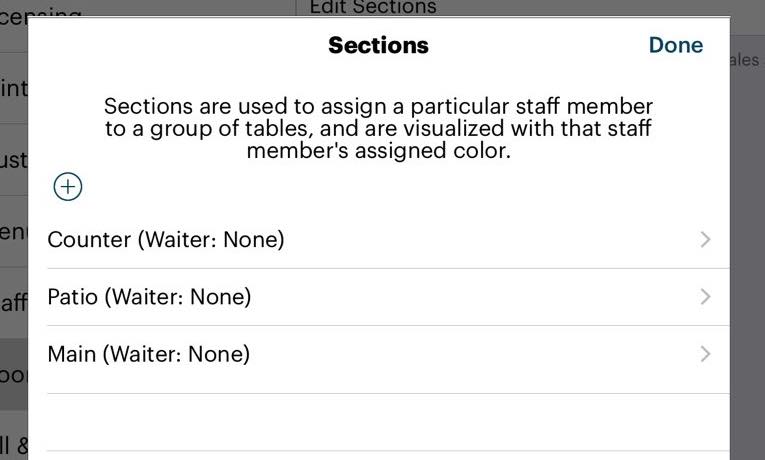
2. Tap Edit Sections and create at least one section.
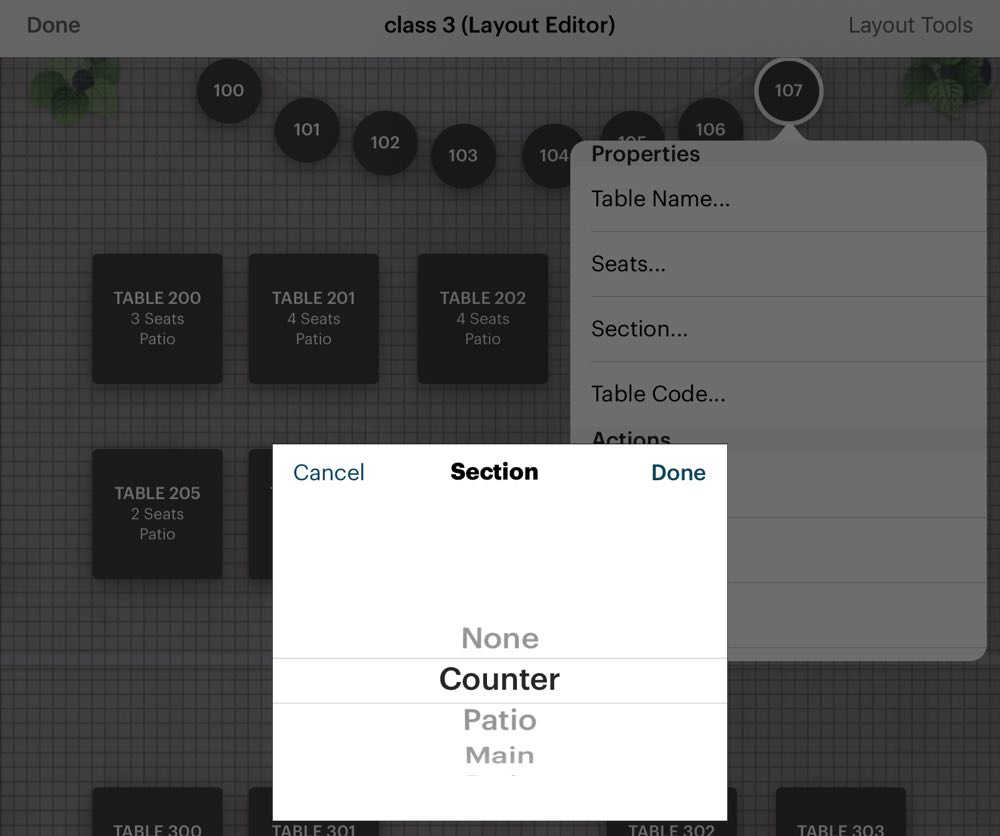
3. Return to your floor plan. Tap all your tables and bar stools. Tap Section and then assign a section.
Chapter 2. Set Up
1. Log in to your cloud account.
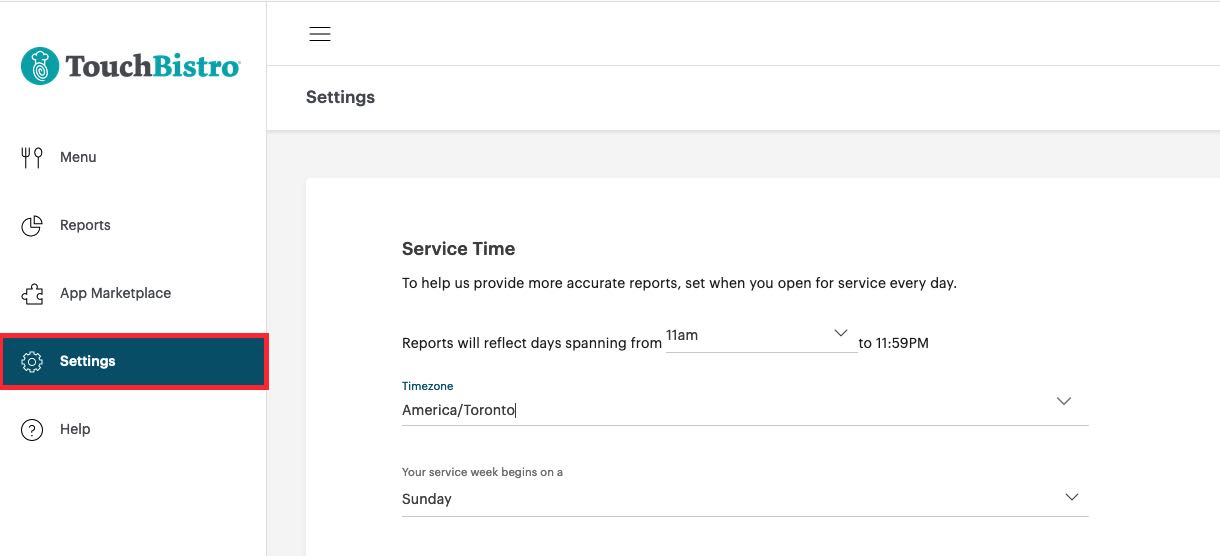
2. Click Settings.
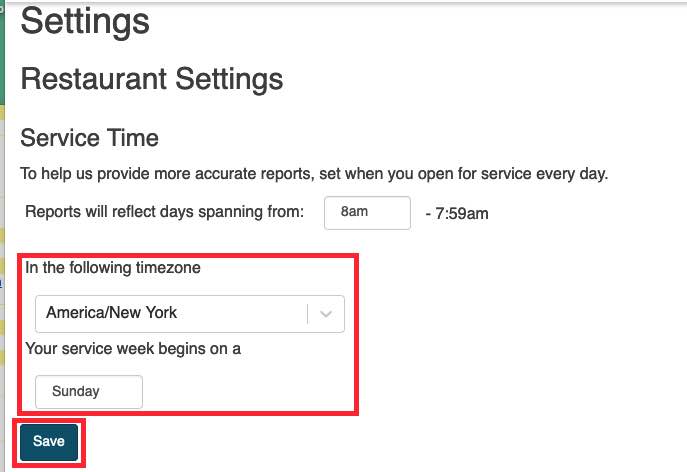
3. Ensure you set when your earliest service day starts. For example, if you start service at 8 am Monday to Friday but 10 am Saturday to Sunday, set your Service Time for 8 am.
4. Set your time zone. It’s very important to set an accurate time zone if you’re using Avero.
5. Click Save when you’re done.
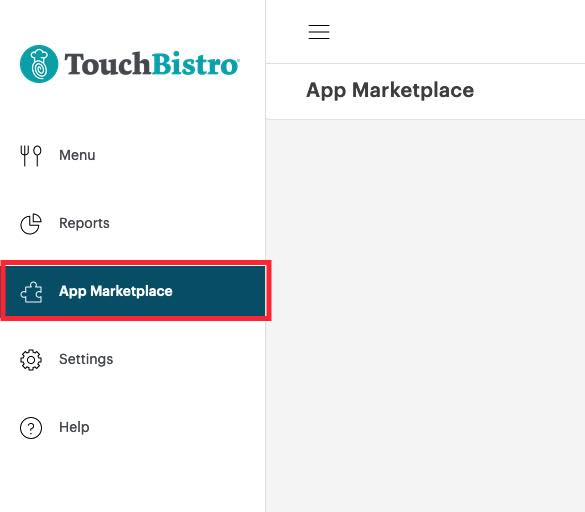
6. Click App Marketplace.
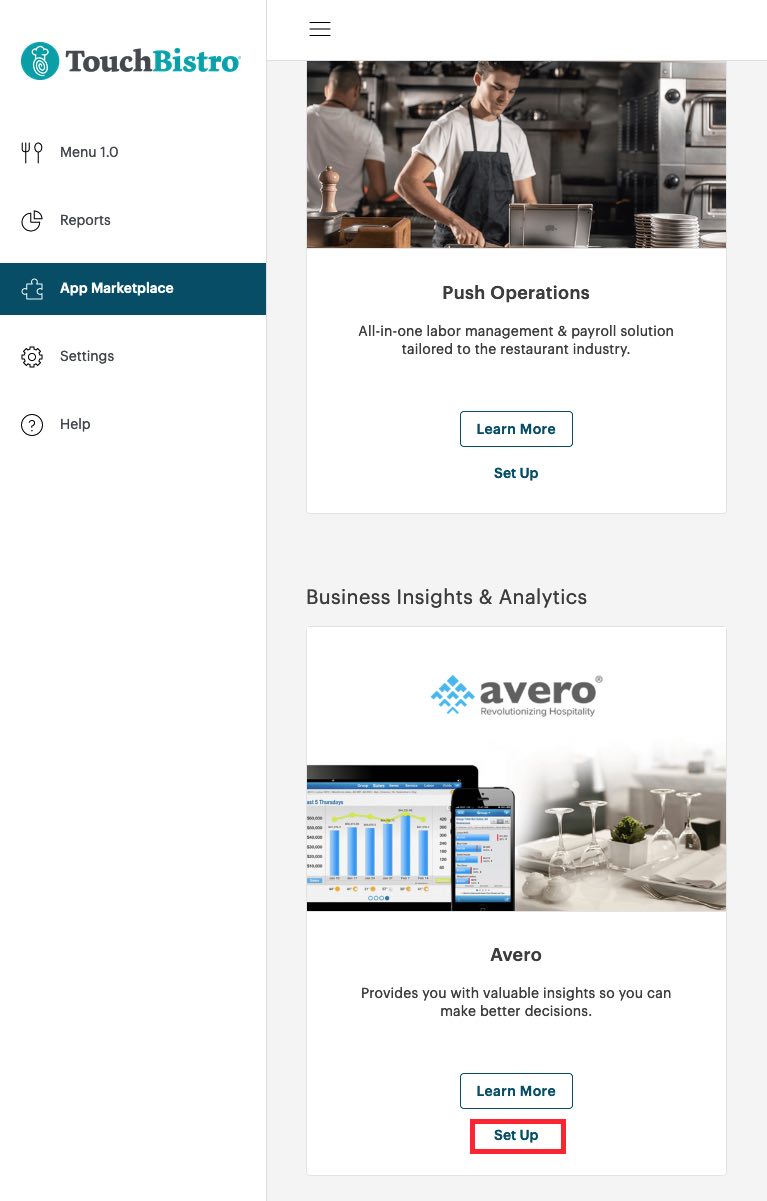
7. Locate your Avero “chicklet” and click Set Up.
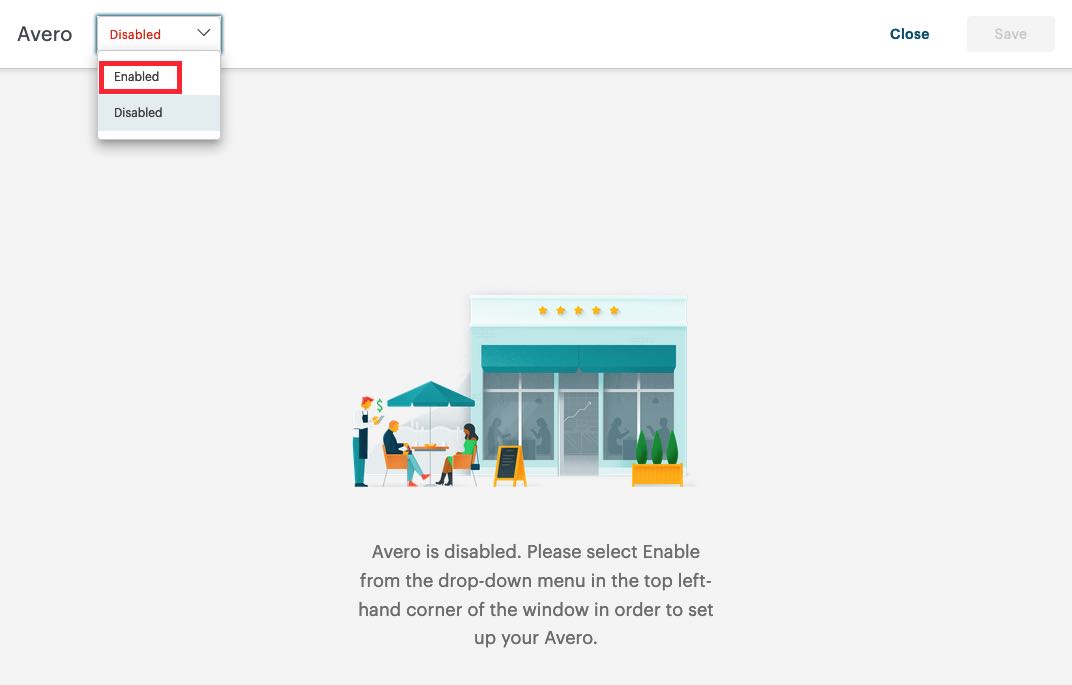
8. The Avero Configuration screen will open. Select Enable from the drop-down box on the top left.
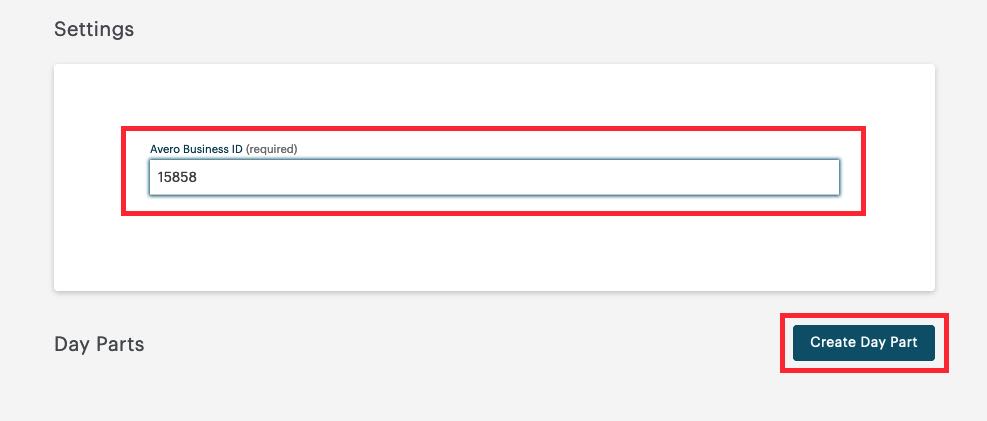
9. Enter your business key in the Avero Business ID field.
10. Click Create Day Part to set your Day Parts or meal periods. You will need to set all at once.

11. Enter a name for your first Day Part, for example “Breakfast”. Set the start time.
12. In the Section area, select each TouchBistro section that is open for this service time. For example, during breakfast hours you only open your Main section. If you do not have sections created and you do not want to create any, all bills will be assigned to an All Day Day Part by default. If all your sections are open for this service time, ensure you tap and select all sections. (See Using Personal Registers for limitations if staff ring up sales via a Personal Register.)
13. Click Create Day Part to save these settings.
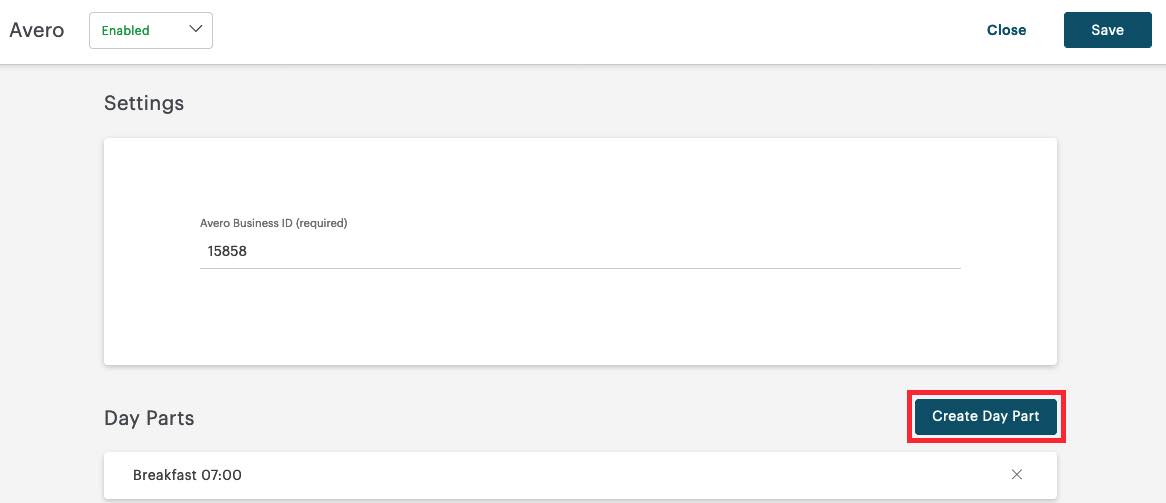
14. Click the Create Day Part again to add another meal time. Repeat the set up procedure above.
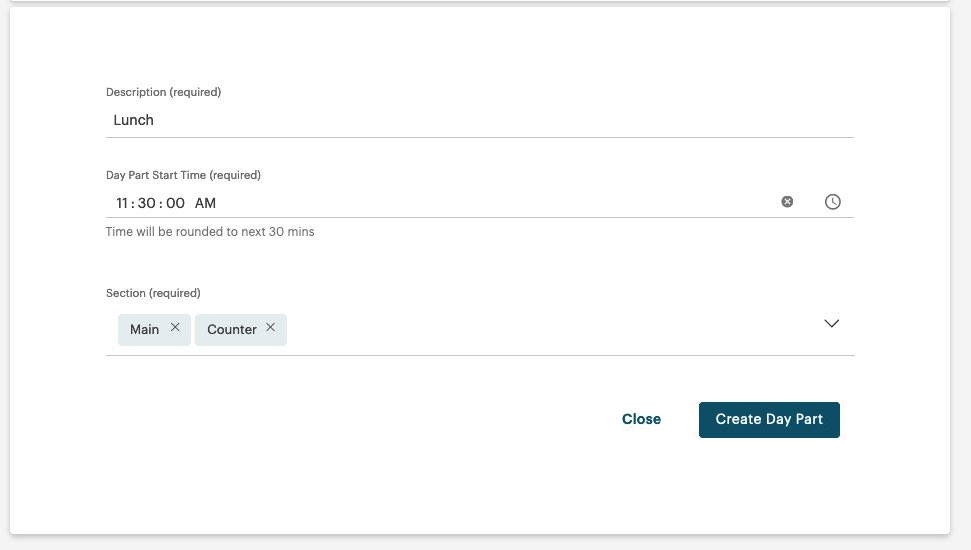
15. In this example, we’ll add a lunch time. We’re also adding in a second section (Counter) that becomes available at lunch.
16. Click Create Day Part to add the lunch Day Part.
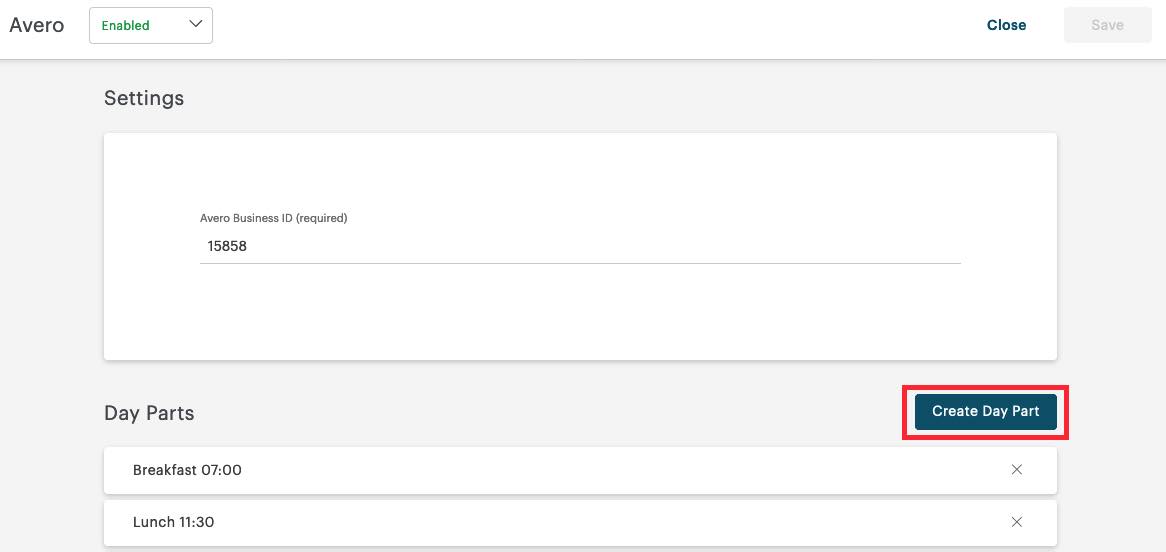
17. Finally, we’ll add a dinner Day Part. Click Create Day Part.
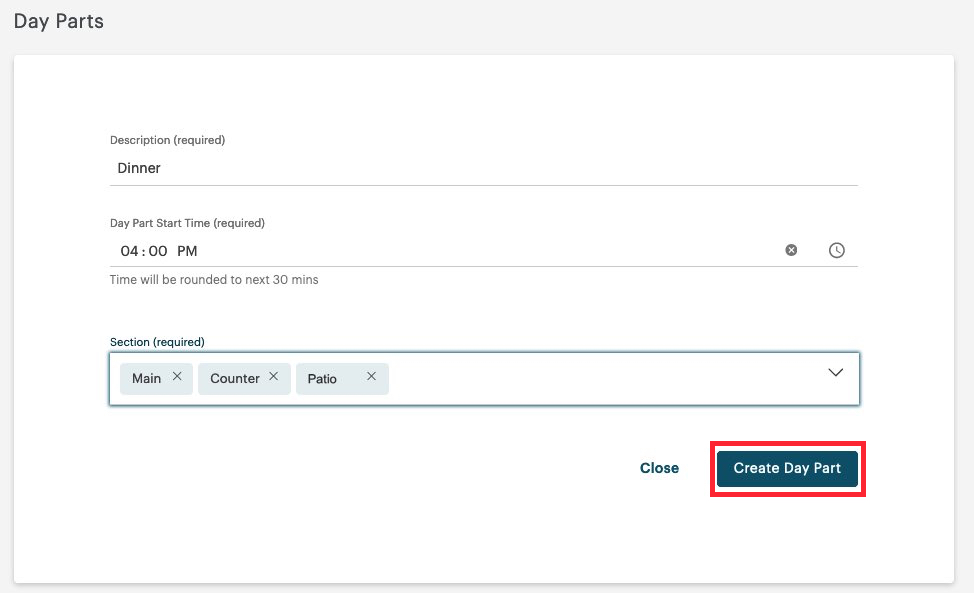
18. Set the time and in this example, we open a third section (the patio) during dinner hours. Click Create Day Part.
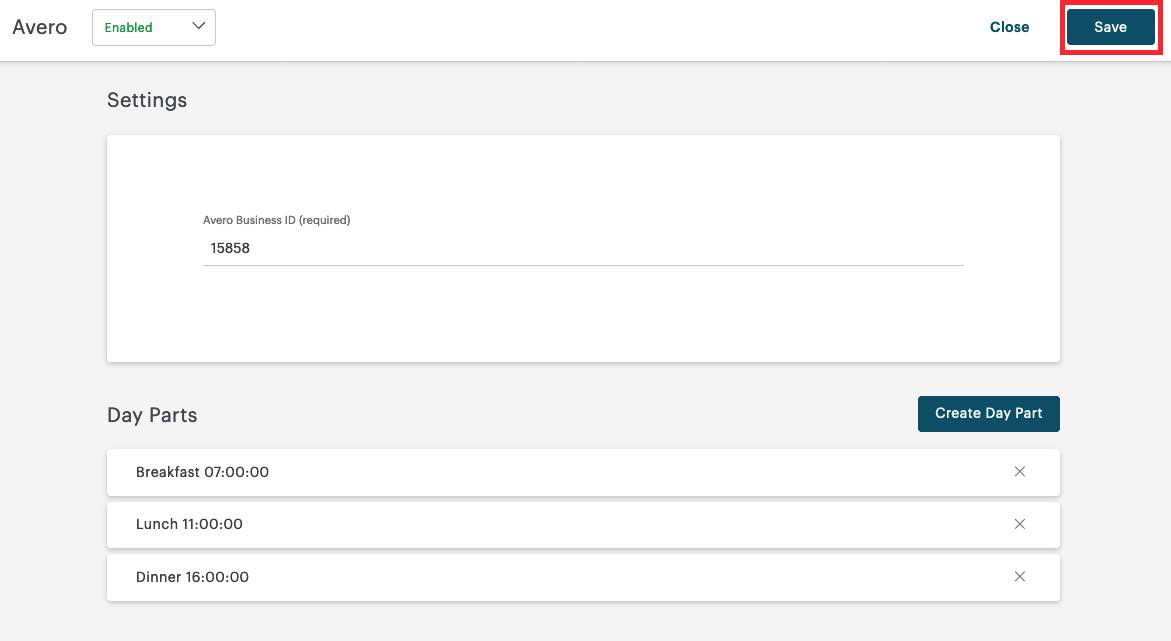
19. Click Save when you’re done.
Section 1. Disabling Avero

1. If you need to disable Avero, return to Avero’s partner page. Click Open Configuration.

2. From the drop-down box select Disabled.
Chapter 3. Making Changes
Section 1. Editing Your Day Parts

1. If you need to edit a Day Part, return to Avero’s partner page. Click Open Configuration.
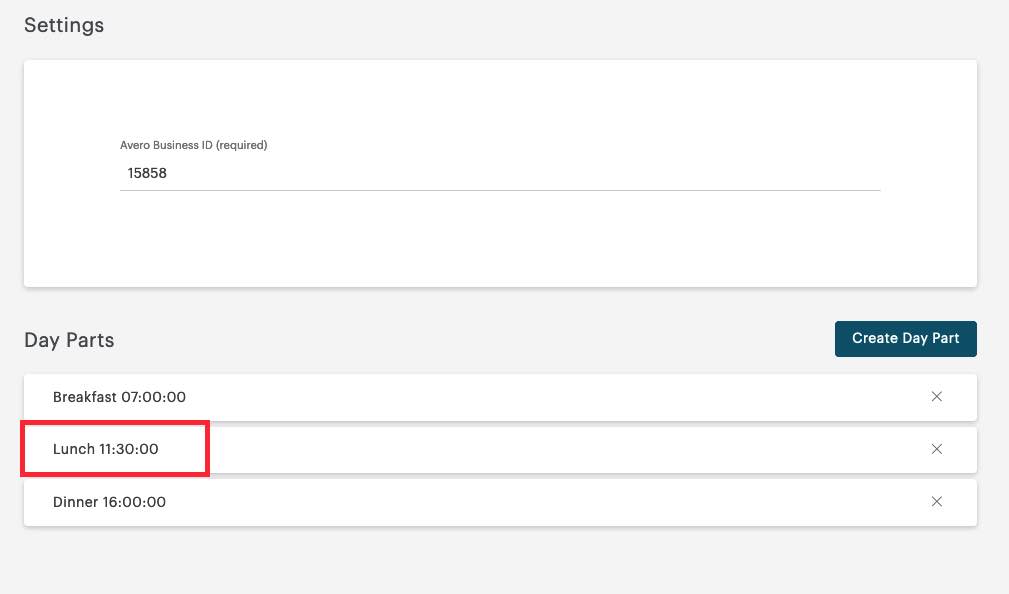
2. Click on the Day Part you wish to edit. For example, we’ll edit our Lunch Day Part.
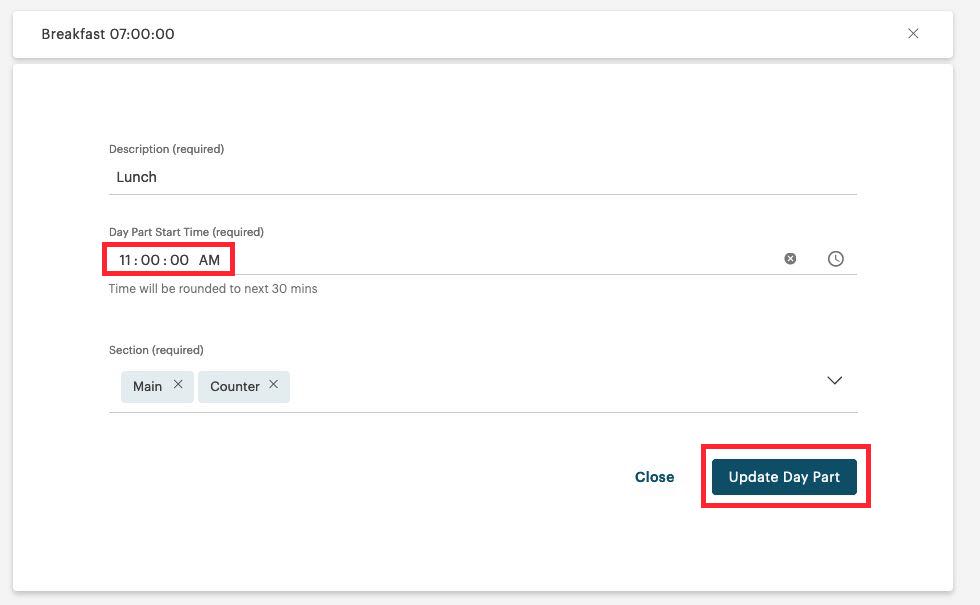
3. Edit the Day Part as appropriate. In this example, we’re changing the lunch start time from 11:30 am to 11:00 am. Click Update Day Part when you’ve made your changes.

4. Click Save.
Section 2. Adding New Sections
If you add new sections to your Day Parts, new bills closed in the section will be posted to the associated Day Part. If there are any old bills that were closed in the section before you added it to your Day Part, those old bills will also get posted to the associated Day Part.
Example 1
You’ve added a patio section on June 1 your floorplan. You add the new patio section to your Lunch and Dinner Day Parts. Any bills closed on the patio June 1 and after will get posted to Lunch and Dinner Day Part.
Example 2
You’ve added a patio section on June 1 to your floorplan. You closed multiple bills on the patio on June 1. On June 2 you add the new patio section to your Lunch and Dinner Day Parts. Any bills closed on the patio June 1 and after will get retroactively posted to the Lunch and Dinner Day Part.
Section 3. Changing Times of your Day Parts
If you change a Day Part time, only new bills closed after the change will get posted to the appropriate Day Part. For example, June 2 you change the Lunch Day Part from 11:30 am to 11 am. Bills closed on June 1 between 11 am and 11:29 am will retain their Breakfast Day Part posting. However, new bills on June 2 closed 11 am and after will get posted to the Lunch Day Part.
Section 4. Using Personal Registers

If staff members are using Personal Registers, those cannot be added as a Day Part section. Personal Register sales will be included but listed as No Section. Personal Register sales will be broken out by the server who used rang up a sale via his/her personal register.
Chapter 4. When does TouchBistro send your data to Avero?
TouchBistro will send your data for the previous day about two hours after the start of your service time you set under Settings. For example, if you set the start of your service time for 8 am, TouchBistro will send May 1’s data (all sales accrued between May 1 8 am and May 2 7:59 am) on May 2, 10 am. The data will not include any sales done May 2 8 am to 10 am.
If for some reason your Internet goes down before your end of day and does not return until after the data upload window the next day, TouchBistro may not upload your full data to Avero. If this happens (i.e., you notice your Avero reports seem to be missing some TouchBistro data), contact [email protected].


 Email
Support
 Frequently
Asked Questions
