Chapter 10: Standard Support Features
Table Of Contents
Chapter 3. Send Screen Shots to Support
Chapter 4. Wi-Fi and Internet Connectivity Check
Section 1. Wi-Fi and Internet Connectivity Check from your Login Screen
Section 1. Repair Restaurant Data
Section 2. Upload Restaurant Data to Support
Section 3. Download Support Patch
Section 5. Accessing Support Options if You’re Logged In
Chapter 1. Diagnostic Options
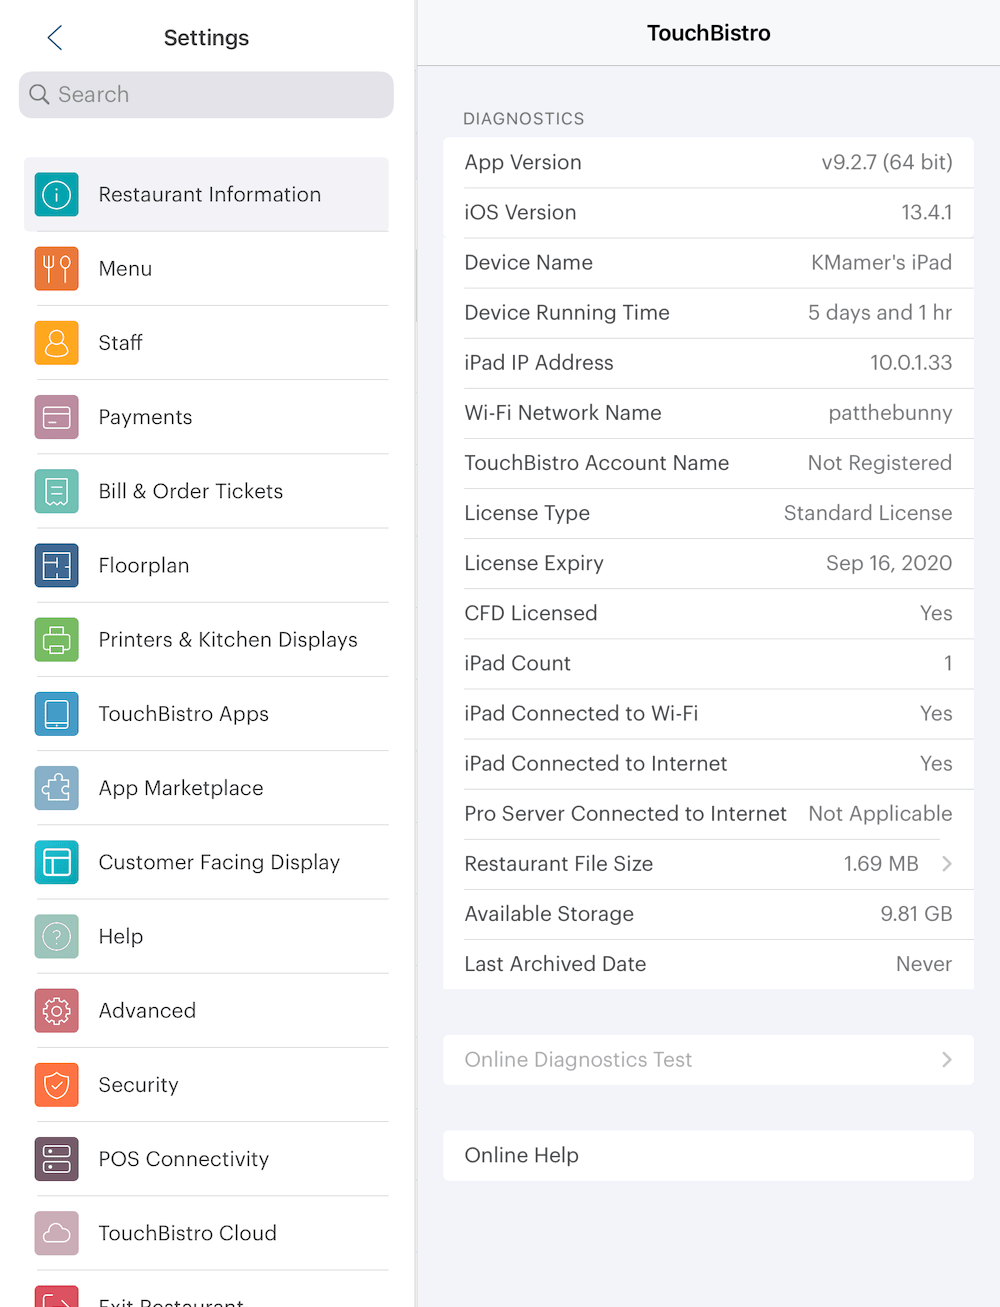
Tap TouchBistro to get key data about your iPad, network, and details about TouchBistro. If you call or email support, this information may be requested. Note, Last Archived Date is no longer used.
Additional diagnostic tools are below:
|
Option
|
Description
|
|
Online Diagnostic Test
|
Tap to quickly run a connectivity test for your integrated payment provider and cloud syncing.
|
|
Online Help
|
This will launch your iPad browser and take you to this help site.
|
Chapter 2. iPad Run Time
Before attempting any solution, further diagnostic steps, or contacting support, always check your iPad’s run time on the Diagnostics Option screen. You should always power down all your iPads after you close your day.

If the Device Running Time field indicates the iPad has been running for more than 24 hours, you should power down the iPad. To power down the iPad, hold the power button on the top right down for several seconds until the iPad prompts you to slide to power off. After sliding to power off, hold down the power button again to restart the iPad.

When you login to TouchBistro, the passcode screen also indicates the device running time at the bottom. If it’s in yellow, this is a visual prompt to power down your iPad and restart.
Chapter 3. Send Screen Shots to Support
At times, support might need you to send a screen capture of what you’re seeing on your iPad screen, for example your diagnostic screen.
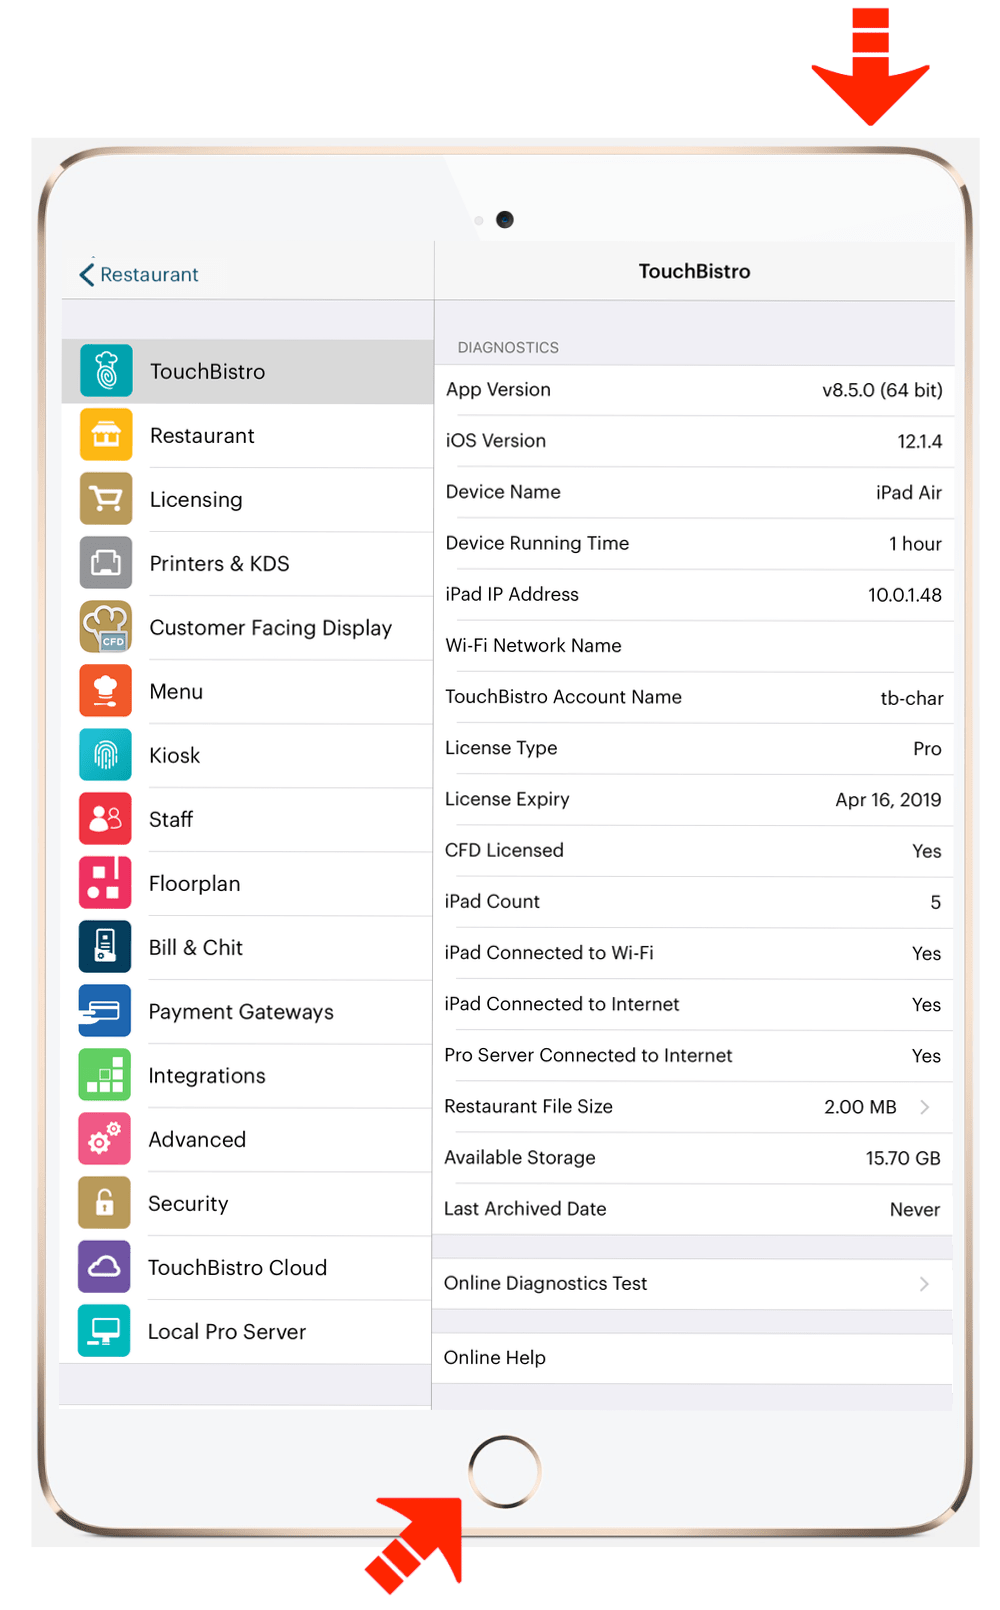
When you’re in TouchBistro, click simultaneously the lock/power button and the Home button, or if your iPad has no Home button, simultaneously the lock/power button and the volume up button. Release and you will hear a shutter sound.

TouchBistro will ask you if you want to send the screen capture to support. You can add a comment to the screen capture, helping you add additional information for support purposes.
Chapter 4. Wi-Fi and Internet Connectivity Check

Most wireless TouchBistro operations only require a local Wi-Fi connection. Some features like credit card processing, accessing cloud reporting, or emailing receipts also require an Internet connection. To aid support in determining your connectivity, your TouchBistro diagnostic screen provides details about your network.
Section 1. Wi-Fi and Internet Connectivity Check from your Login Screen
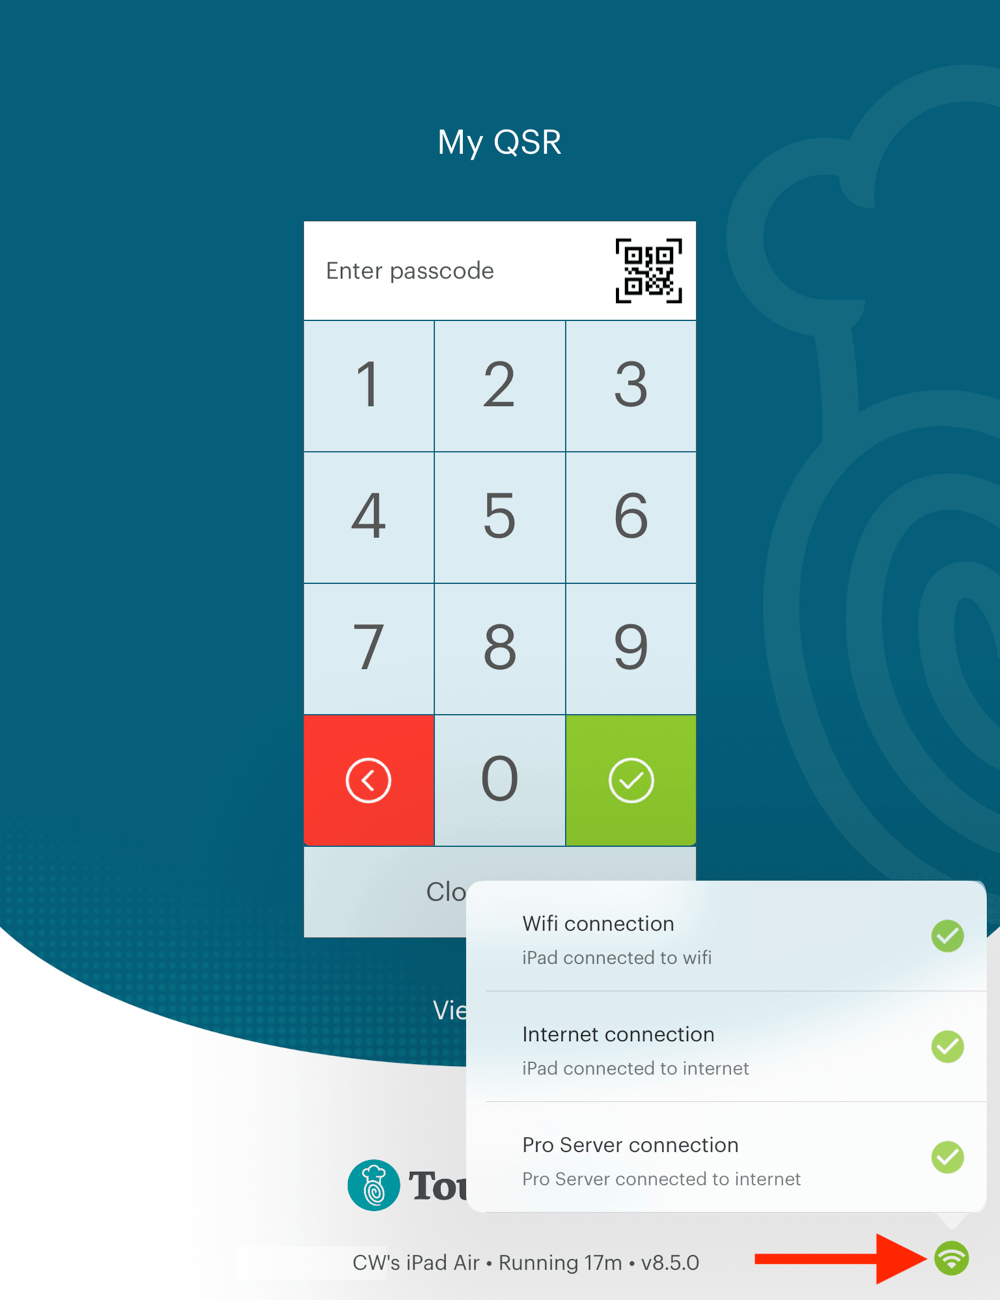
You can also get a quick check of your connectivity status from your login screen. The color of the icon provides the following information.
|
Color
|
Status
|
|
|
You have no Wi-Fi and no Internet connection.
|
|
|
You are missing either a Wi-Fi or Internet connection. If you are using the Pro version a yellow status might also indicate your Pro server has no connection to the Internet.
|
|
|
You have both a Wi-Fi and Internet connection.
|
If your Connectivity Status ![]() is yellow tap the icon to see details of what is missing.
is yellow tap the icon to see details of what is missing.
Chapter 5. Support Options

When you open TouchBistro and you’re prompted to open an existing restaurant, your existing restaurant will have an associated Information ![]() icon. Tapping that will give you several support options. These options should only be used at the direction of a TouchBistro support technician.
icon. Tapping that will give you several support options. These options should only be used at the direction of a TouchBistro support technician.
If you are using the Pro version (with a Mac server and multiple iPads), do not use these support options. See Pro Server Support Features for information on how to run these support features on your Mac server.
Section 1. Repair Restaurant Data
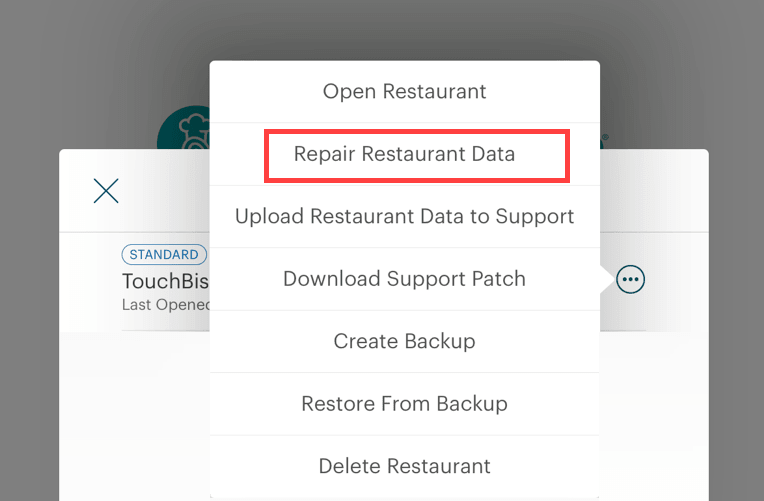
If directed by support, tap this to scan and repair any inconsistencies found in the restaurant’s SQL data file.
Section 2. Upload Restaurant Data to Support

Follow these steps for sending TouchBistro your restaurant data (that is, your SQL files). Only send these files if you’ve been asked by support to send your restaurant data.

When you tap Upload Restaurant Data to Support, TouchBistro prompts you to add contact information and comments to aid support in diagnosing your problem. Complete this and tap Upload.
Section 3. Download Support Patch
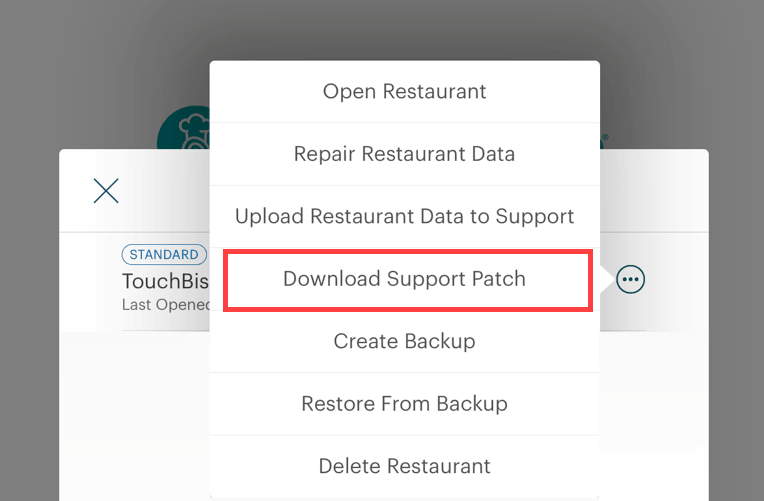
This option lets you download a prepared patch for your restaurant data. Again, only use this option if instructed to by TouchBistro.

If a patch is available for download, your TouchBistro support technician will email you a passcode. After tapping Download Support Patch, enter the supplied patch code. The patch code is not case sensitive.
Section 4. Automatic Backup
Before TouchBistro installs a new version, it backs up your restaurant data, either to your iPad (Standard) or to the Mac Pro server (Pro).
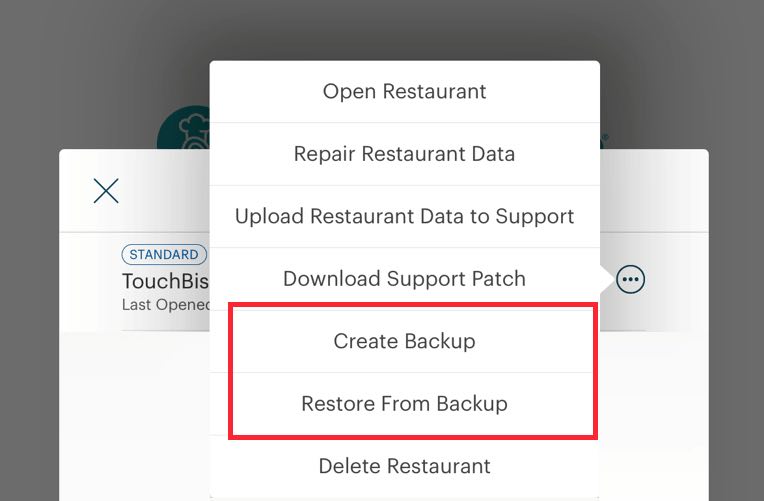
If you need to restore to your restaurant data, tap Restore From Backup. You can also do a manual backup at any time by tapping Create Backup.

If you tap Restore From Backup you will see a list of backups on the iPad. Tap the backup you wish to restore. Before TouchBistro performs any restore from backup it will do a “pre-restore” backup. If for some reason the backup restore is unsatisfactory you can return to your restaurant data before you restored your older data.
Note: All backup data is kept on your iPad (Standard) or your Pro server computer (Pro). If you lose your iPad or Mac you lose this data. Hence, this is not a substitute for backing up your iPad via iTunes or backing up your Pro server. This will not let you “roll back” to a previous version of TouchBistro (for example from 6.2 to 6.1). It is only intended as an extra layer of security for your restaurant data when you do version updates.
Section 5. Accessing Support Options if You’re Logged In
Ensure your iPad is connected to the Internet.
![]()
1. If you are not logged in as an Admin, tap Switch on the bottom left of the screen and login as the Admin.
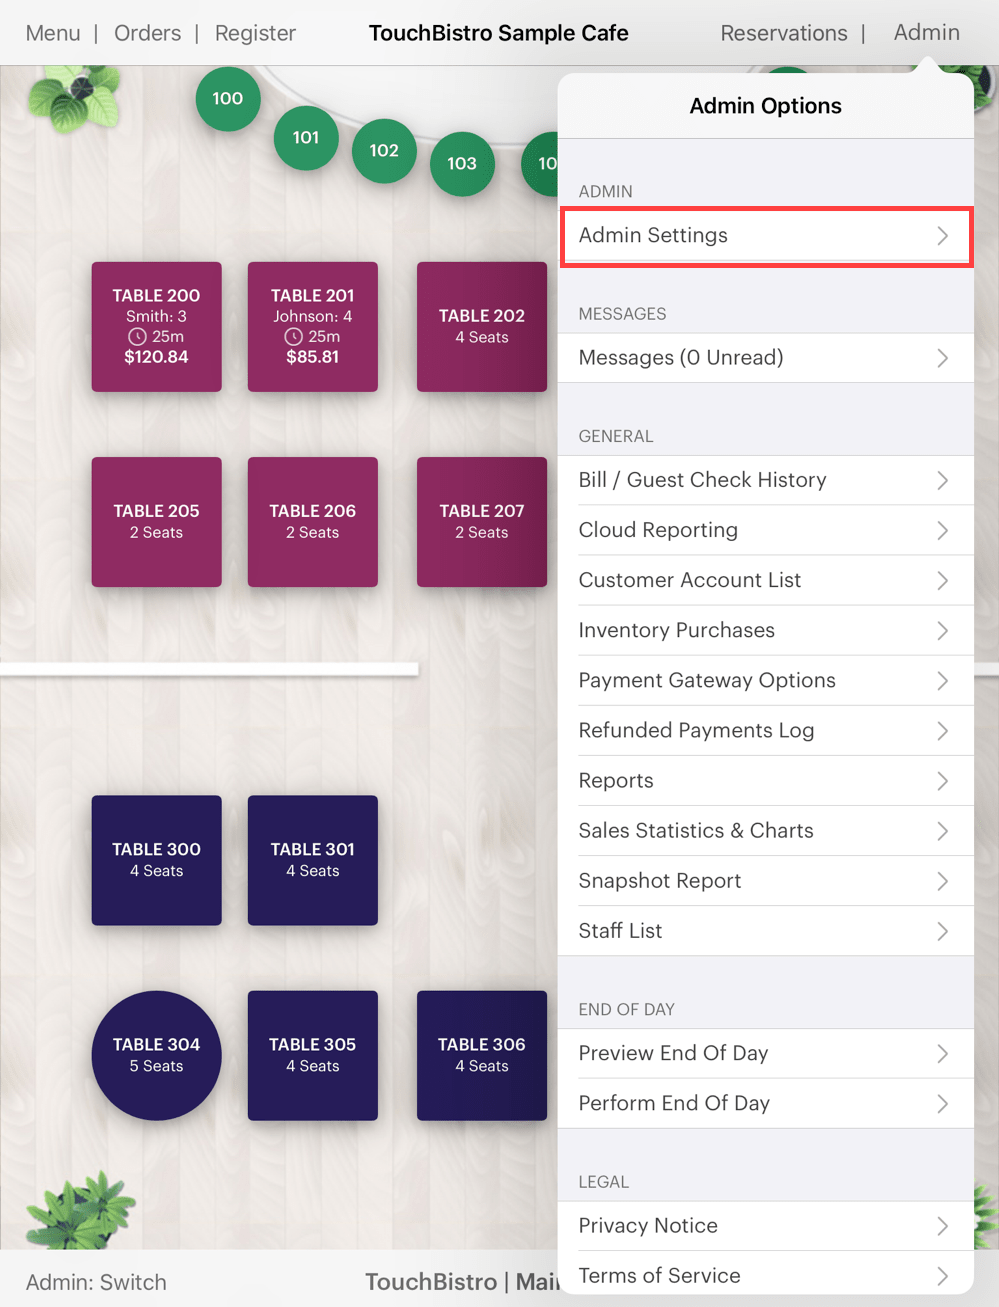
2. Tap Admin in the top right and tap Admin Settings.
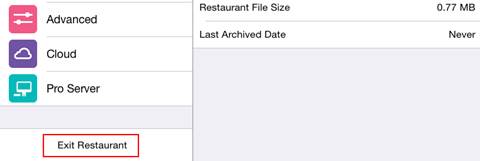
3. Tap Exit Restaurant in the bottom left.
4. Tap Exit Restaurant again to confirm.

5. Tap the Information ![]() icon associated with your restaurant.
icon associated with your restaurant.
Chapter 6. TeamViewer Integration
If TouchBistro support has sent you a TeamViewer invite code, login to TouchBistro as an Admin and tap Admin | Help.
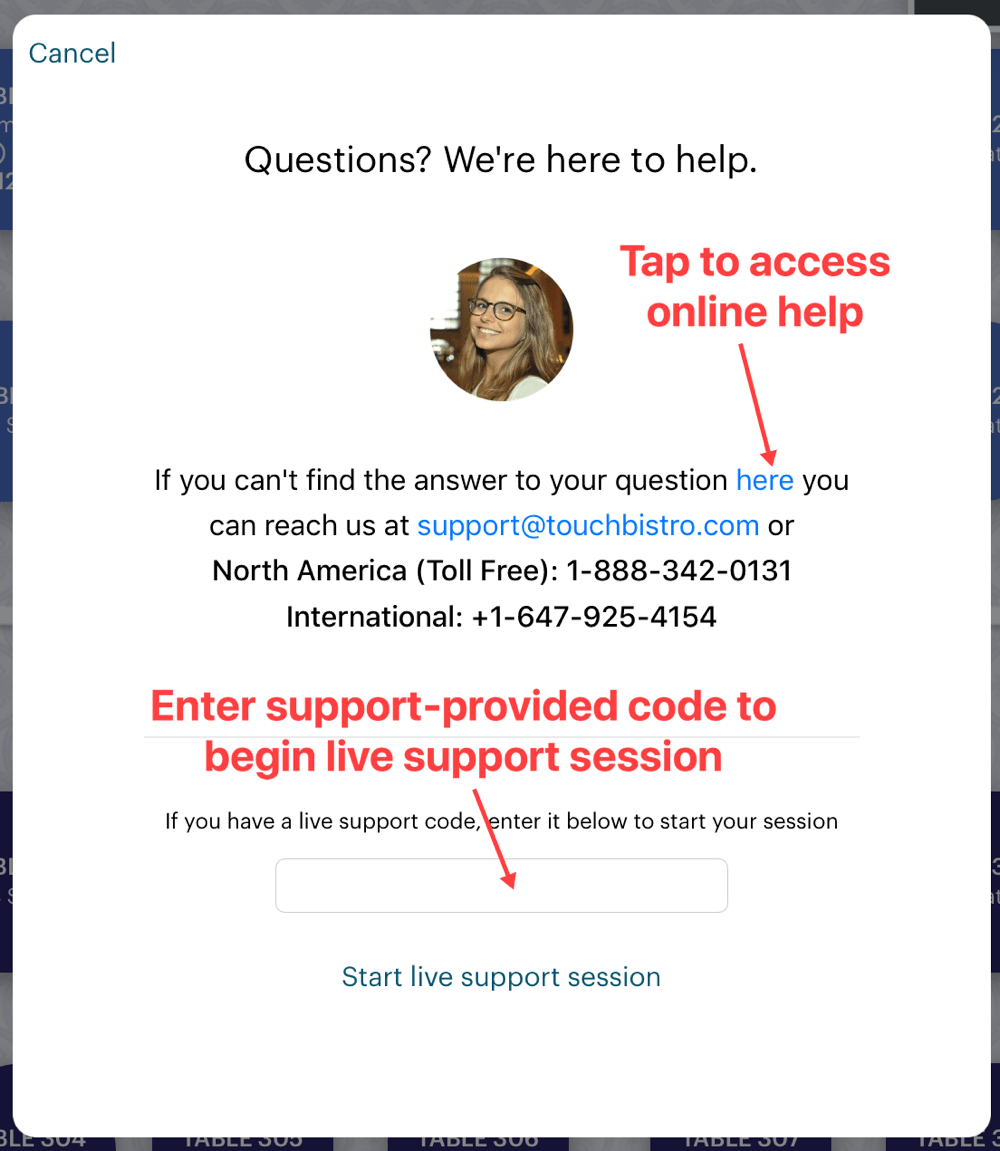
At the bottom of the help dialog box is a field to enter the TeamViewer invite code. After entering it, tap Start live support session. Also if you tap here, you can access TouchBistro’s online help section.
Note: You must have been given an invite code to get this to work.
Chapter 7. Deleting a Restaurant
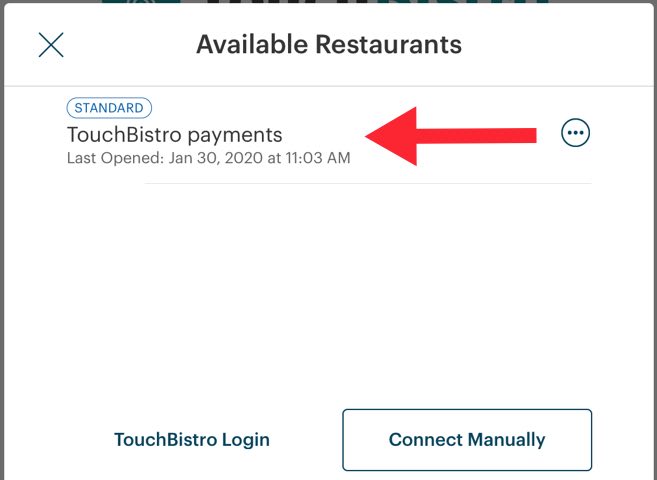
From the Restaurants screen, swipe left on the restaurant you wish to delete.
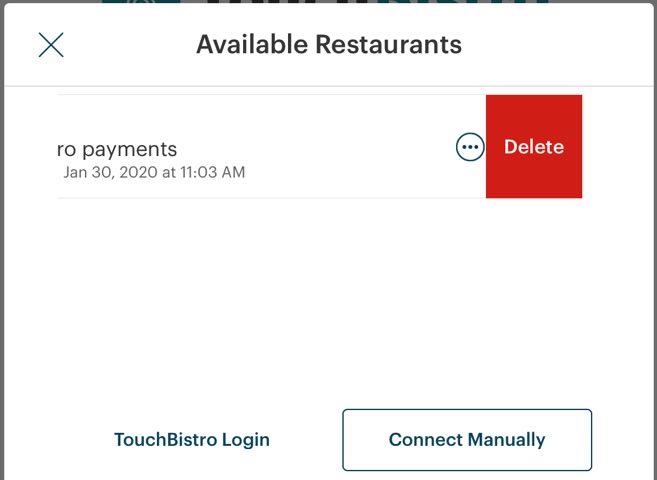
Tap Delete. You will be prompted for your Admin password as a confirmation you wish to delete your restaurant.
Note: You cannot recover a deleted restaurant. It is very important you use this feature with extreme caution.


 Email
Support
 Frequently
Asked Questions
