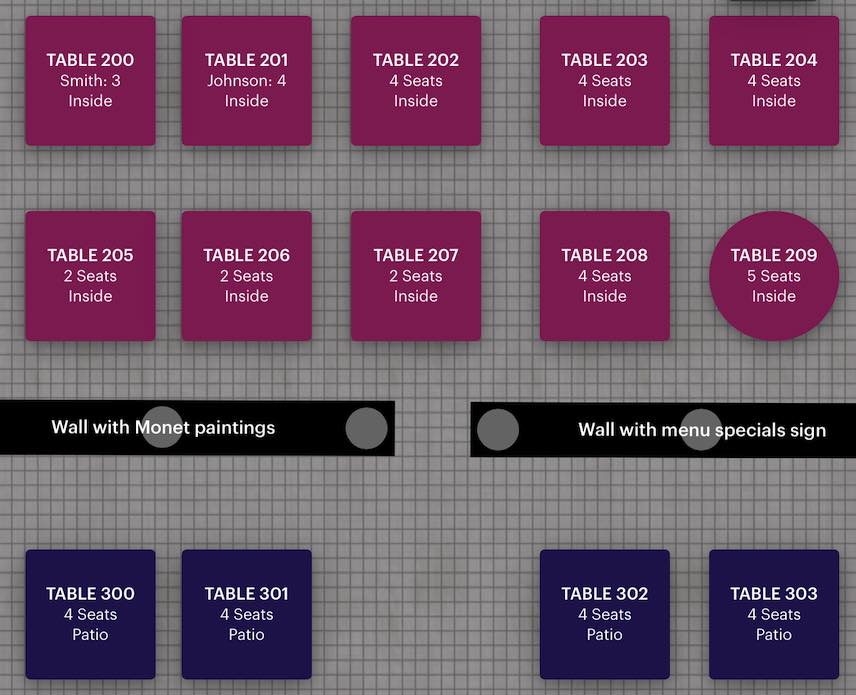
Chapter 6: Setting Up your Floor Plan
Table Of Contents
Section 1. Rename Floor and changing flooring
Section 3. Delete a Floor or Re-Arrange Floor order
Section 5. Adding a table (circular, square, or rectangular)
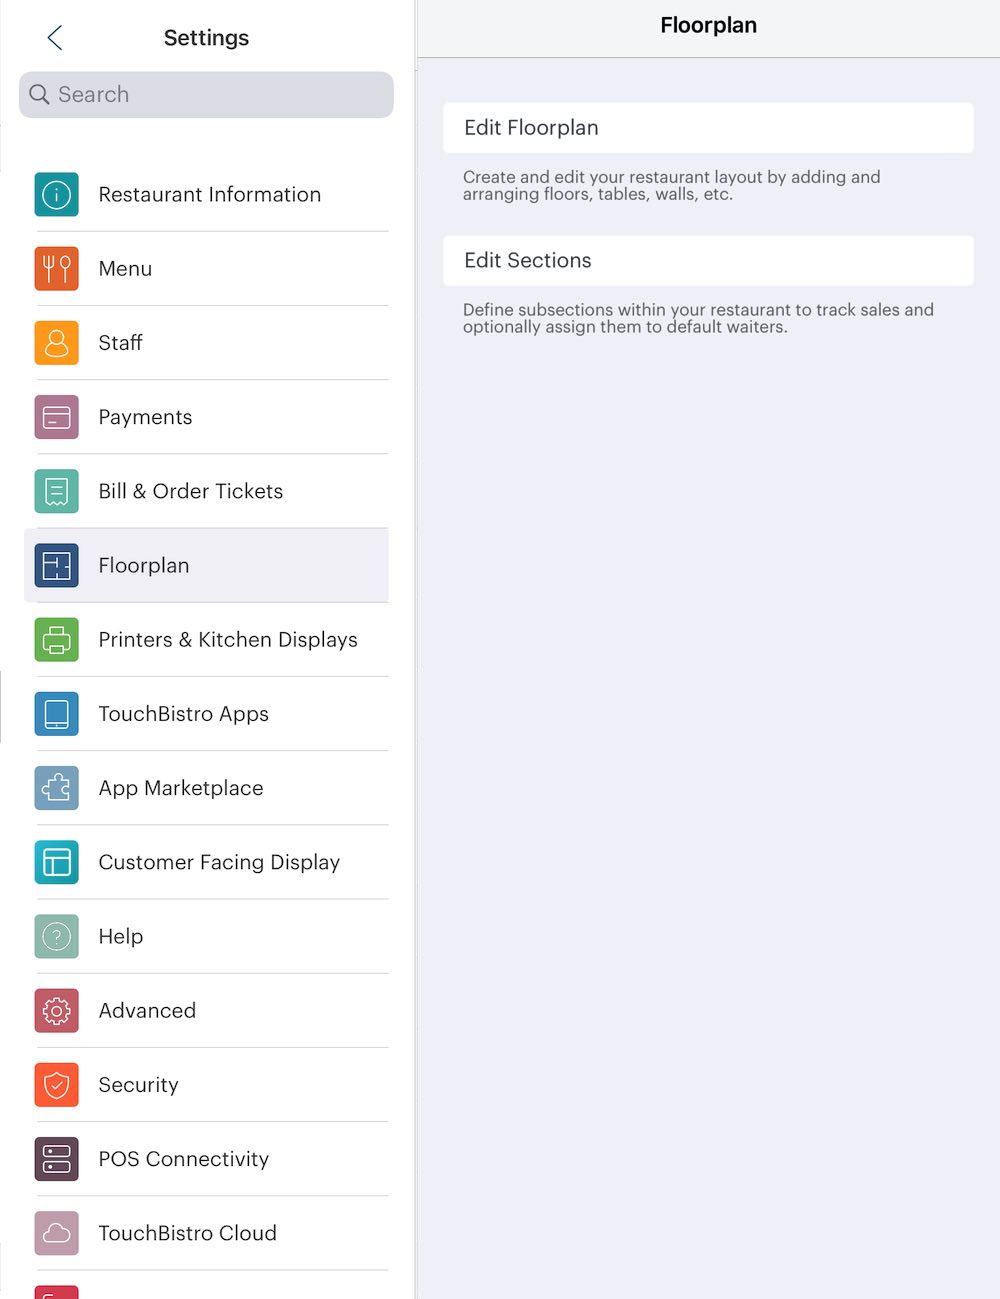
Tap Floorplan to build your floor plan screen.
Chapter 1. Edit Sections
Before you start laying out your restaurant’s floor plan, you might want to create sections. For example, you might want to create a dining room section, a bar area section, and a patio section. You can use these sections to subdivide your main floor or other floors. Sections are used to help track sales. Additionally, you can assign a server to sections.

1. To add a section tap Edit Sections.
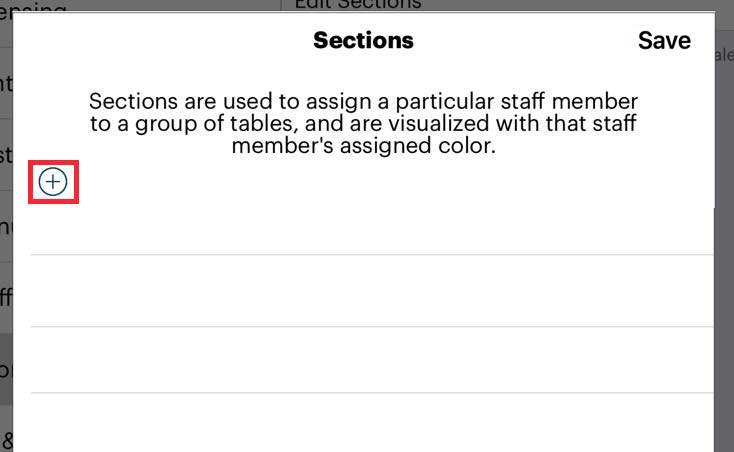
2. Tap the Add ![]() icon to add a section.
icon to add a section.
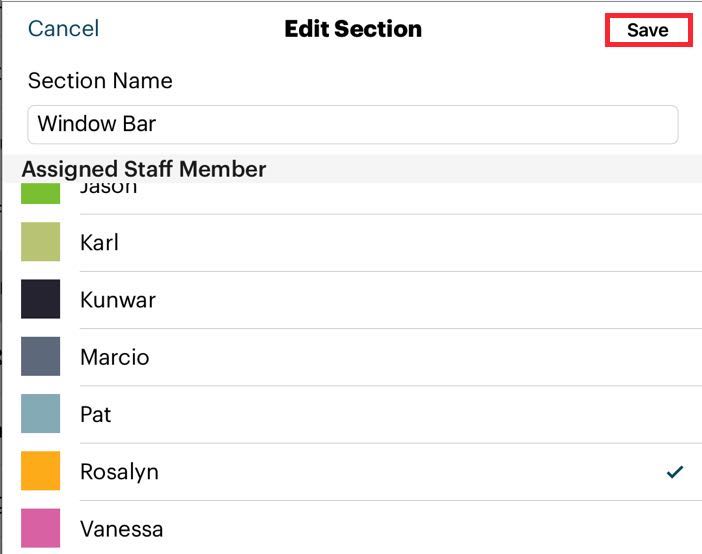
4. Enter a name for the section.
5. Optionally, you can tap any staff member to assign to the section. You can only select one. This will mark all tables in that section with the staff member’s color.
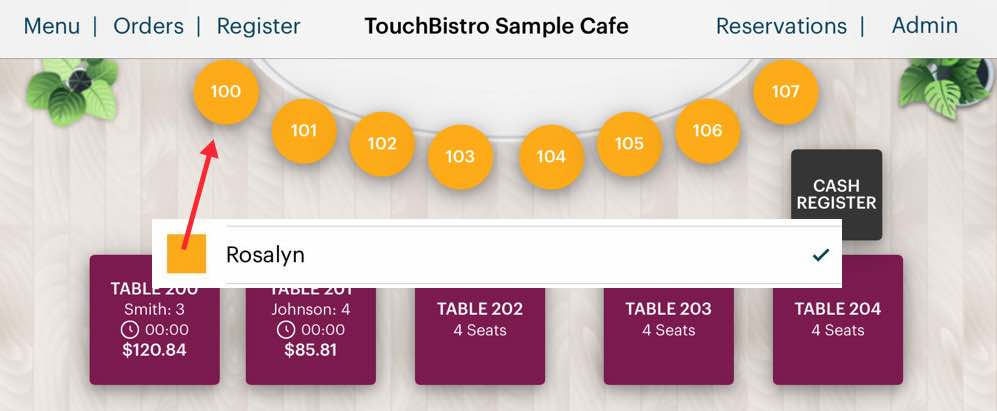
For example, if the Window Bar section is assigned to Rosalyn, all tables (or bar stools) assigned to that section will be given Rosalyn’s yellow employee color. On the floor plan, this can help visually distinguish areas of responsibility.
6. Tap Save.
You can delete a section by left swiping on the section and tapping Delete. You must remove any staff assignments or assignments to tables before you can delete a section.
Chapter 2. Edit Floorplans
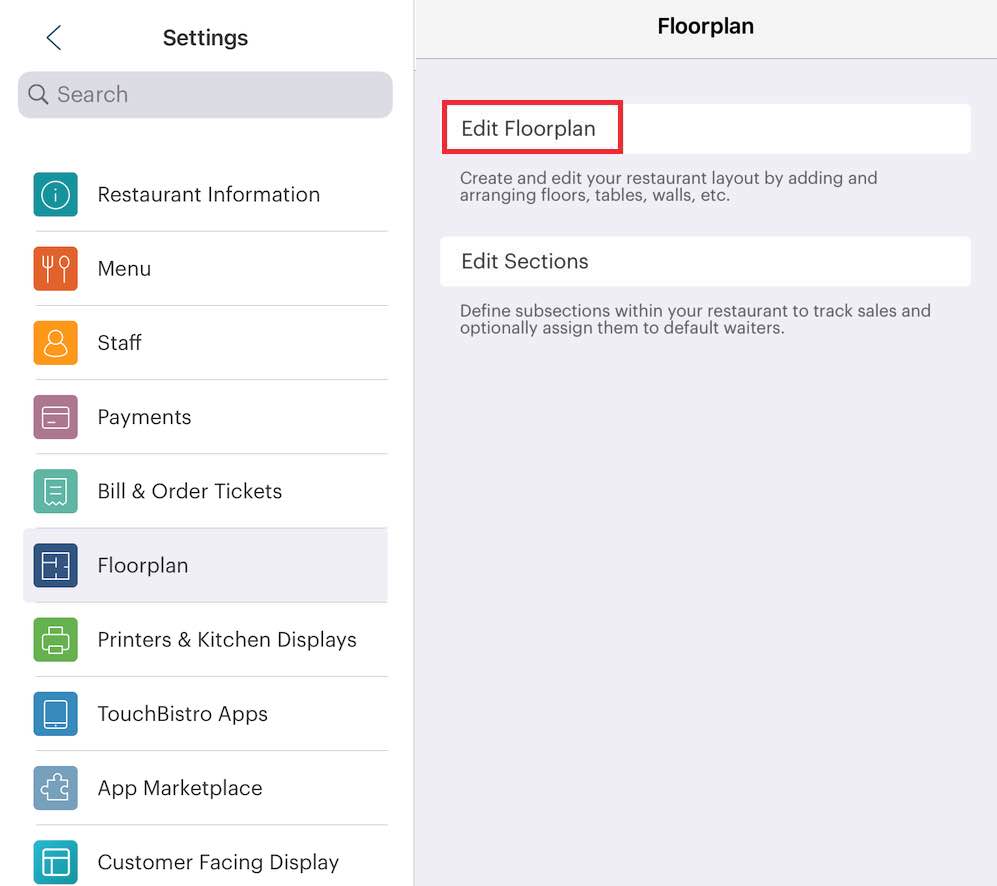
To start laying out your restaurant floor plan, tables, and cash register locations, tap Edit Floorplans. By default you will start on the Main Floor.
Section 1. Rename Floor and changing flooring
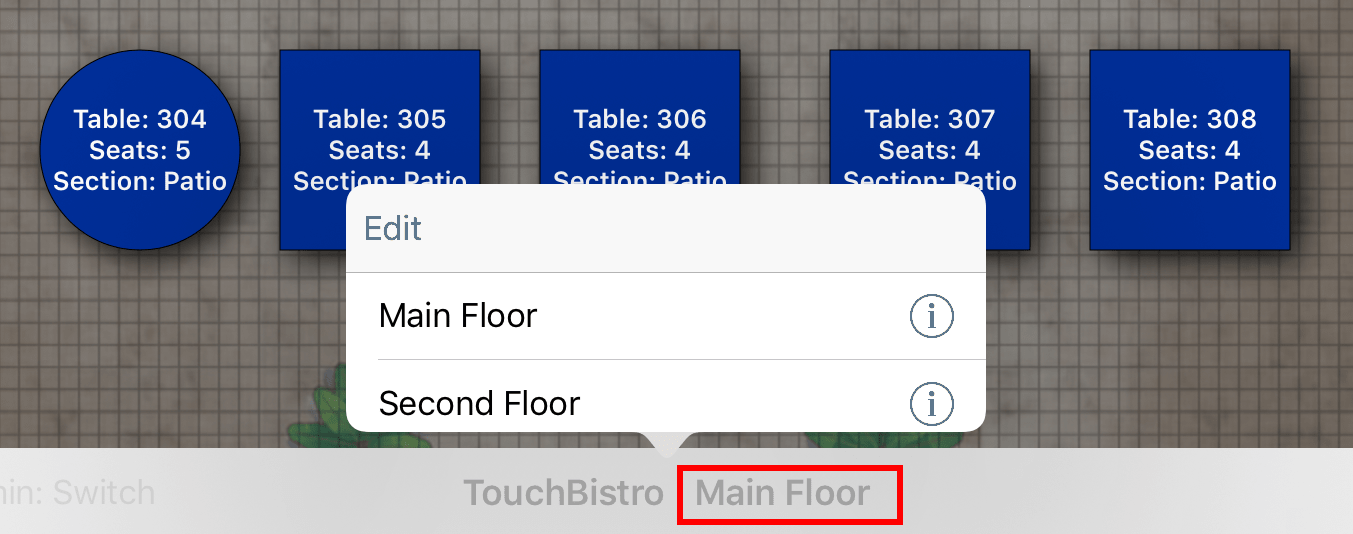
If you would like to rename the main floor tap Main Floor at the bottom and tap its associated Information ![]() icon. Enter a new name. You can also change the background floor image. Choose one of the existing floors or tap Set Custom to import your custom floor.
icon. Enter a new name. You can also change the background floor image. Choose one of the existing floors or tap Set Custom to import your custom floor.
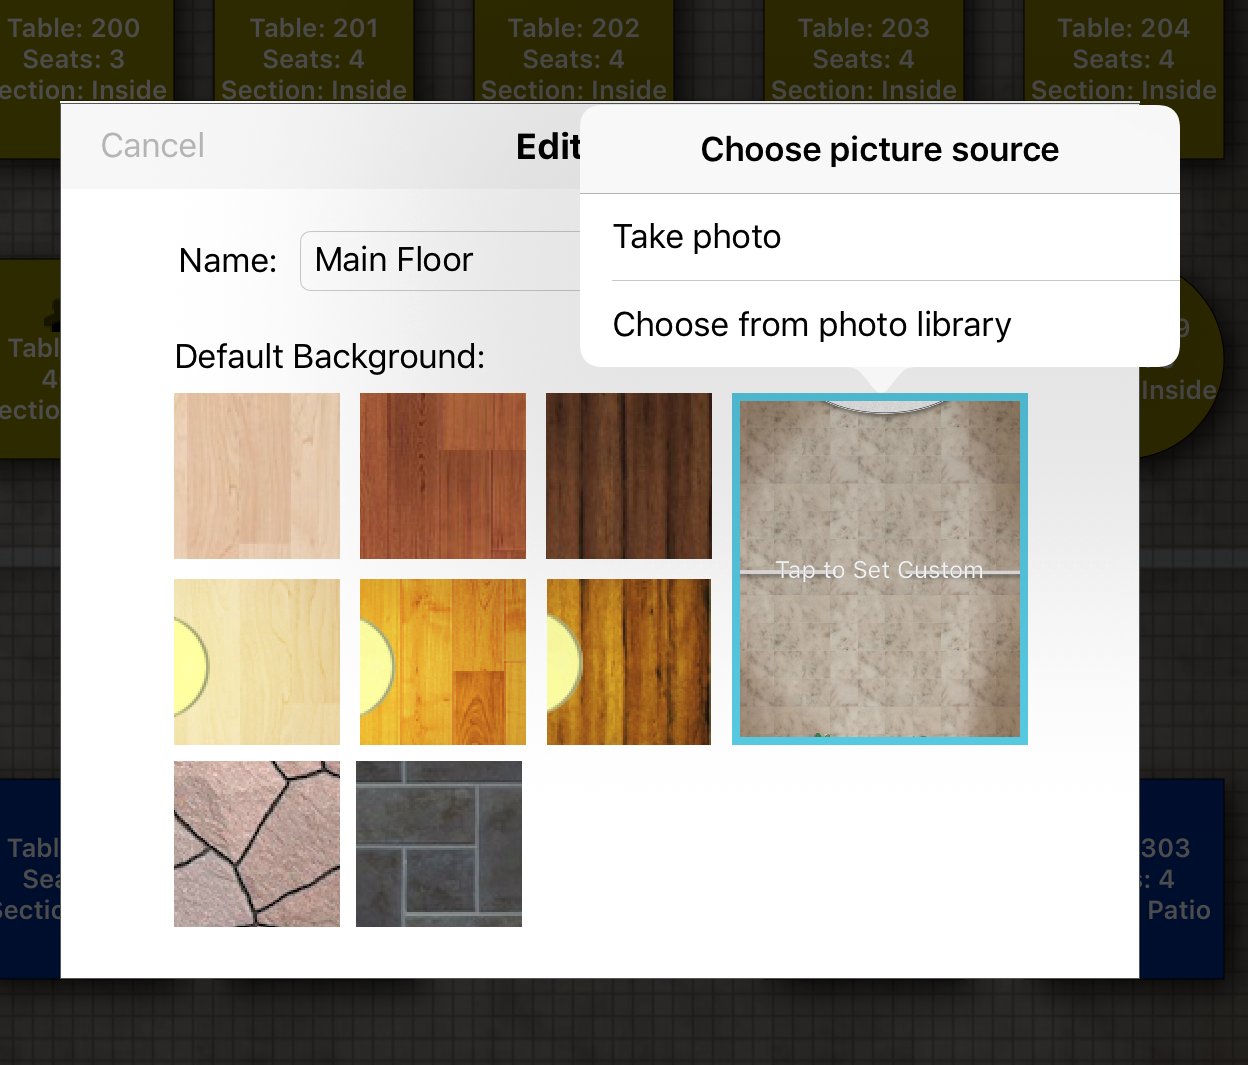
You’ll notice in the Sample Café that comes with the default installation of TouchBistro, the flooring has custom walls, a bar, and plants. You can create a whole customized floor (with custom walls, planters, etc.) by adding a 1024×768 image (representing your real floor plan minus the tables, bar stools, and register) to your photo library and then selecting it as the picture source. If you’re not good with Photoshop, you can use some freely available online floorplan editors to create the customized background. See this tutorial.
Section 2. Add a New Floor
To add a new floor (e.g., a second floor, a patio, or an events hall), see Layout Tools below.
Section 3. Delete a Floor or Re-Arrange Floor order
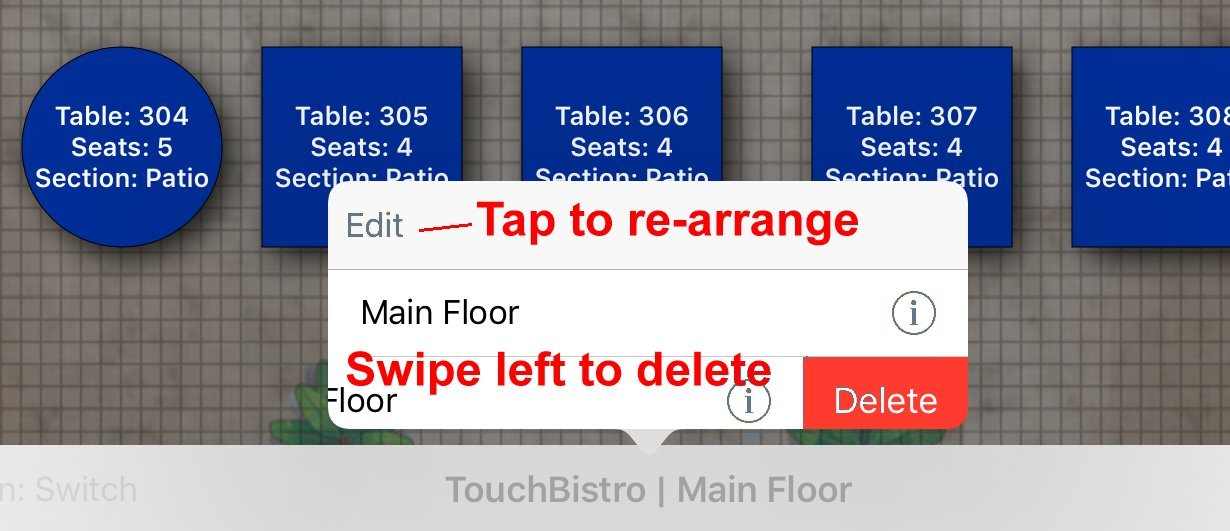
If you would like to re-arrange the order, tap Edit (top left). Tap Edit again to return to the list of floors.
To delete a floor, swipe left on the floor and then tap Delete.
Section 4. Layout Tools
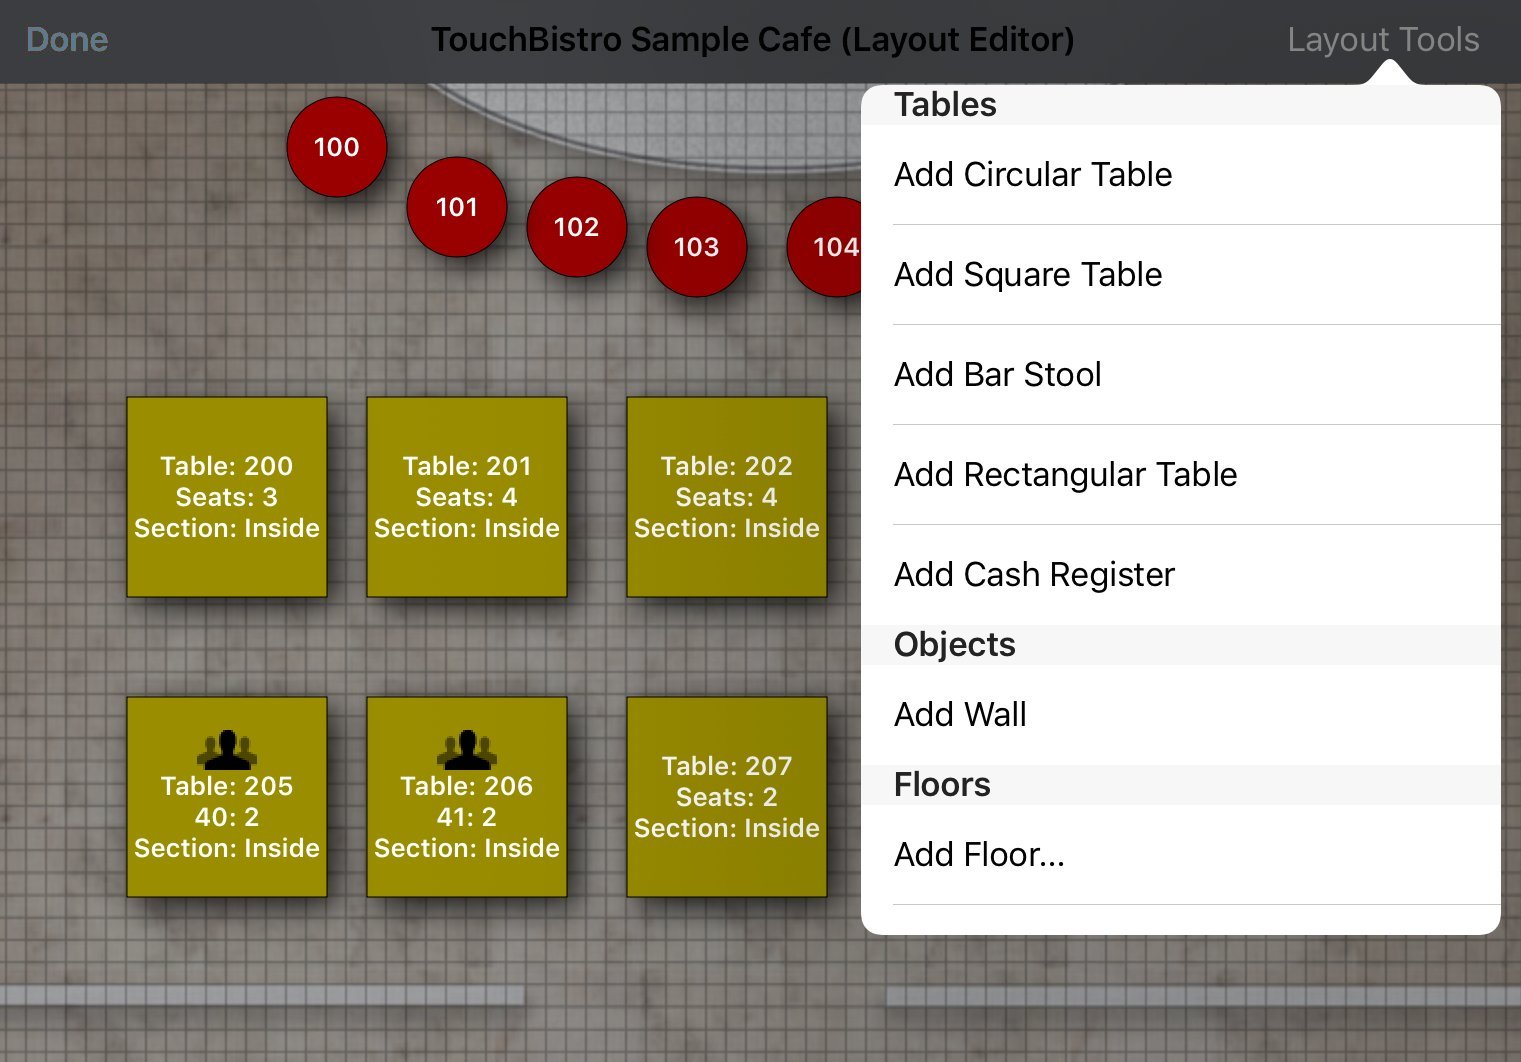
The layout tools allow you to add tables, bar stools, a POS cash register, walls, and whole new floors.
Section 5. Adding a table (circular, square, or rectangular)
Tap Add Circular Table, Add Square Table, or Add Rectangular Table to represent an actual table in your restaurant. There is no functional difference. When you tap an add table option, your table will be added to the floor plan. By default it will default to 2 seats, be given a table number incremented by one, and no section default.
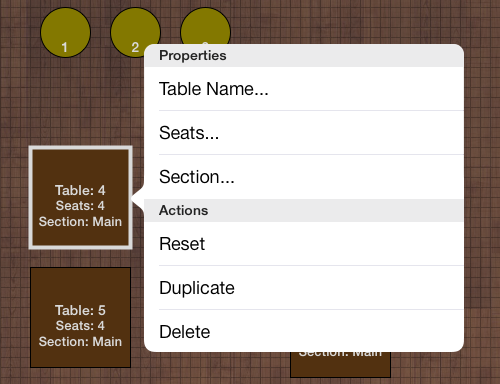
To edit table details tap and hold on the table. You can edit the following details:
|
Property
|
Description
|
|
Table Name
|
Tap if you prefer to change the default number of the table. Tap Save to save your changes.
|
|
Seats
|
Changes the default number of seats. You can adjust the true number of seats for patrons at sitting time. Tap Save to save your changes.
|
|
Section
|
Select which floor section this table should be associated with. Tap Save to save your changes.
|
You may also perform the following actions:
|
Action
|
Description
|
|
Reset
|
To reset the table to the original defaults.
|
|
Duplicate
|
Creates a duplicate of the table with current properties. You can save time by creating similar tables by creating one and then duplicating the table. Before you duplicate a table, ensure you’ve configured the properties you want to duplicate with the table.
|
|
Delete
|
Deletes the table.
|
Section 6. Adding a bar stool
Adding a bar stool is similar to adding a table. However, it will default to 1 seat. If you have a bar section configured, tap and hold and then edit the Section property to set the bar stool for your bar section.
Section 7. Adding a Cash Register
Tap Add Cash Register to add where a fixed point of sale iPad is located. At the time of adding you can specify the register’s name.
Section 8. Adding a Wall
Tap Add Wall to define the walls in your actual restaurant layout. Increase a wall’s length by tapping and holding one of the end circles and dragging. Rotate a wall by tapping an end circle and then turn the wall in the desired orientation. Move the wall by taping and dragging on the center circle.
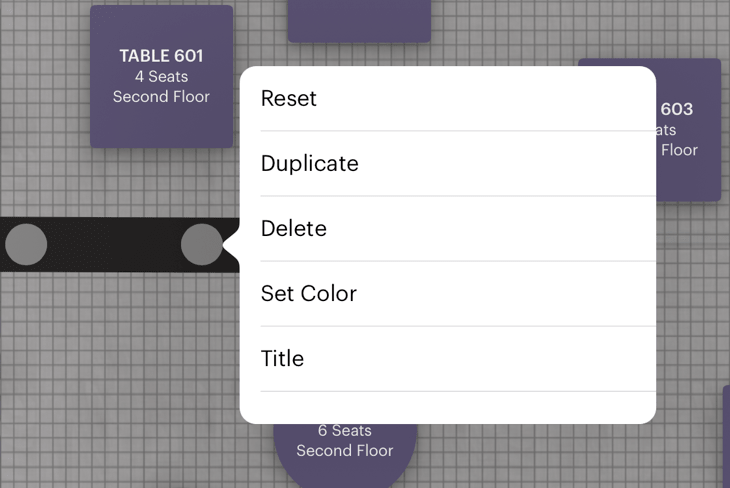
Tap and hold the wall’s center circle to perform the following actions:
|
Action
|
Description
|
|
Reset
|
To reset the wall to the original defaults.
|
|
Duplicate
|
Creates a duplicate of the wall with current properties.
|
|
Delete
|
Deletes the wall.
|
|
Set Color
|
Tap to change the color of the wall. Use the color picker to choose the color and tap Done.
|
|
Title
|
Tap Title to give the wall a descriptive label that will be visible to all staff with access to floor plan (servers, hosts, bartenders etc.). The label font color will always be white. Ensure your wall’s color provides good contrast.
|
You can also add walls to represent a bar. Alternatively, you can use an imported flooring image with walls and bars for an enhanced experience.
Section 9. Moving, Resizing, and Rotating Floorplan Items
See this chart for details on how to move, resize, and rotate tables, stools, walls, and registers.


 Email
Support
 Frequently
Asked Questions
