Checkout
Table Of Contents
Chapter 3. Cashing Out a Single Seat
Chapter 4. Accepting a Cash Payment
Section 1. Correcting an Error
Chapter 5. Using a Non Integrated Payment Processor
Chapter 6. Using an Integrated Payment Processor
Chapter 1. Video Tutorial
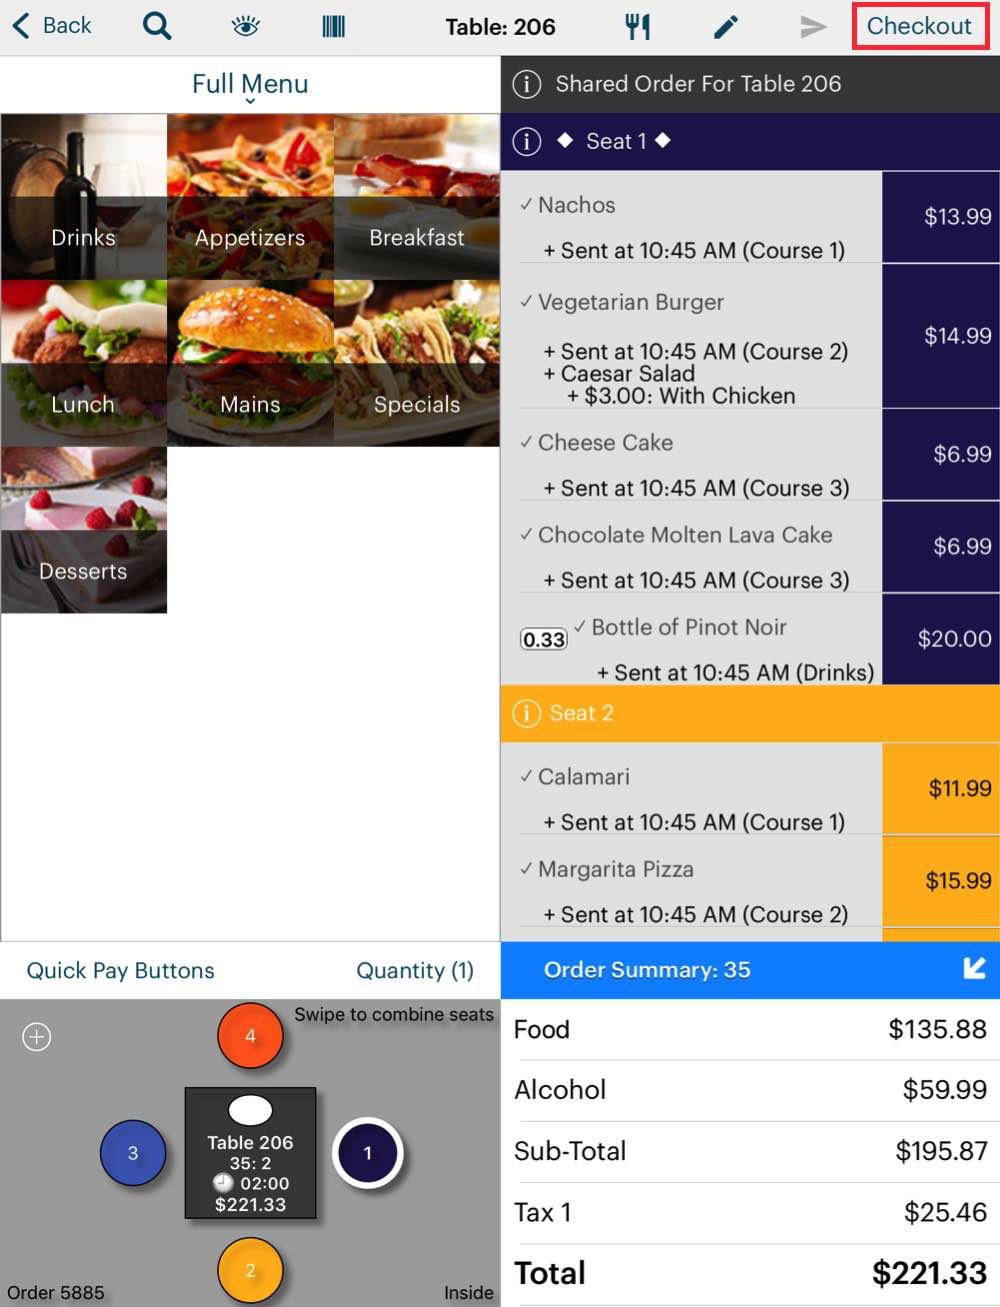
When it comes time for the guests to pay, tap Checkout.
Chapter 2. Splitting Checks

1. You have two options for splitting the check. Tap Split By Seating to allow guests to pay for the items they ordered at their seat as well as any items shared with the table.
2. If the table wants the bill split evenly by the number of guests. Tap Split Evenly By #. Enter the number of bills required.

3. In either case, TouchBistro adds the individual guest checks at the bottom.
Chapter 3. Cashing Out a Single Seat

1. If you need to cash out a single seat, tap the Information ![]() icon of the seat that needs to be cashed out and tap Single Seat Checkout.
icon of the seat that needs to be cashed out and tap Single Seat Checkout.
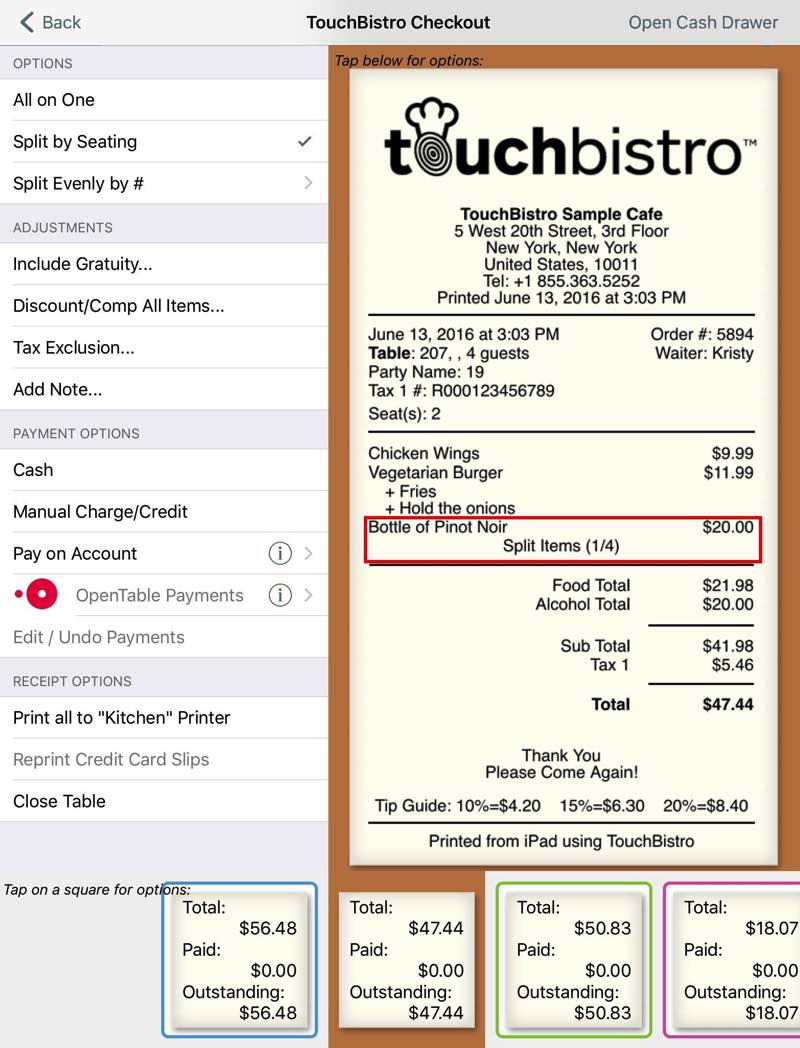
2. TouchBistro will split out all the seats and open the bill for the seat that wants to be cashed out. Any shared order items will be added to the bill in proportion.

3. If you return to the table, the cashed out seat will now be removed. Any shared orders will reflect the portion paid by the cashed out seat and show the remaining balance.
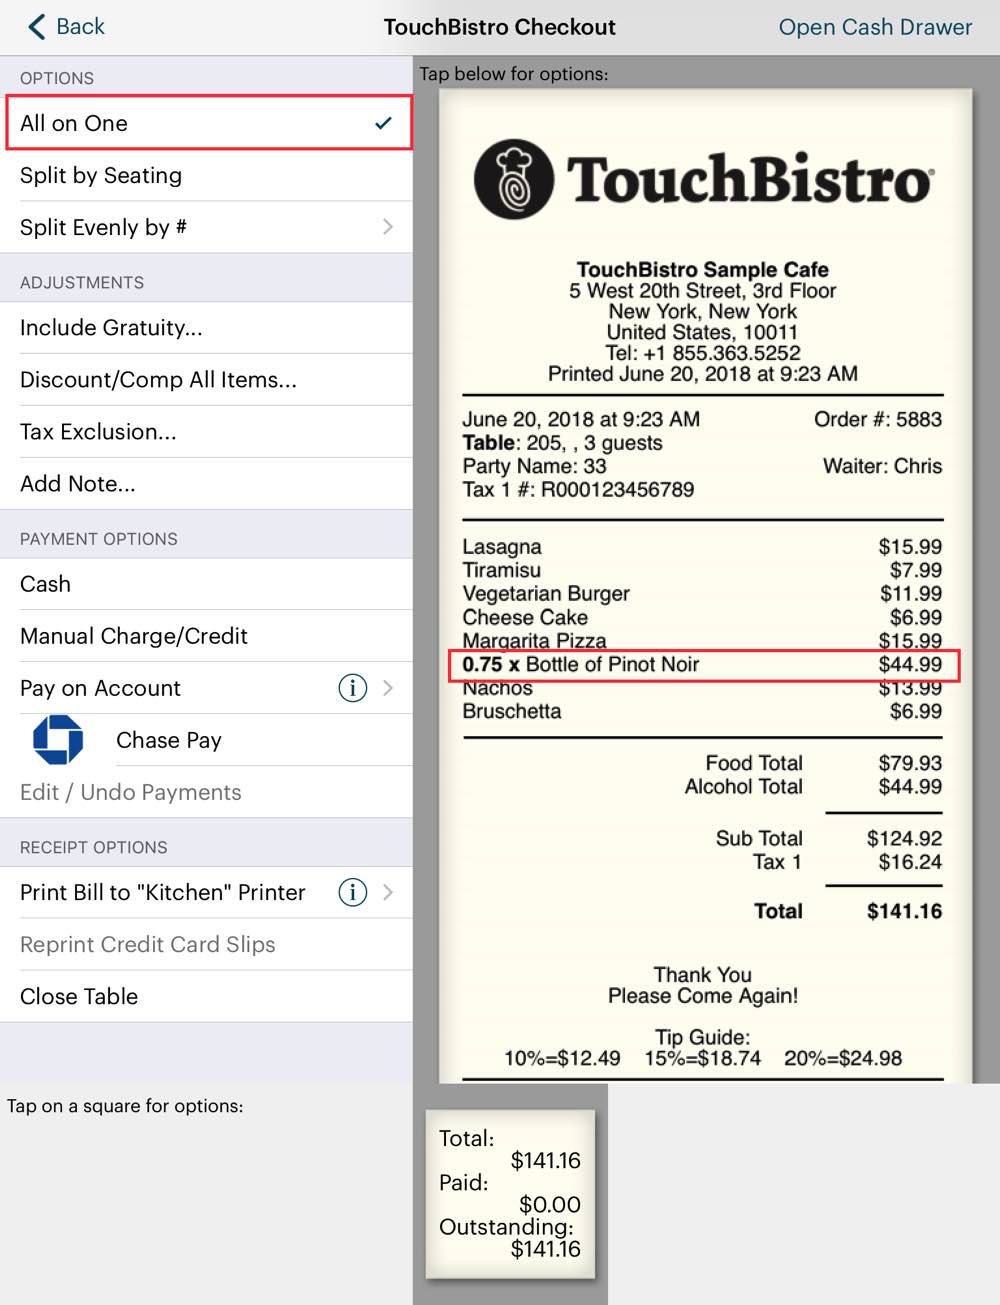
4. If you return to the Checkout screen, TouchBistro will keep the Split by Seating setting. If the remaining guests want to pay the balance as one guest check, tap All on One. Again the shared order items will reflect the remaining balance.
Chapter 4. Accepting a Cash Payment

1. From the checkout screen, tap Cash.
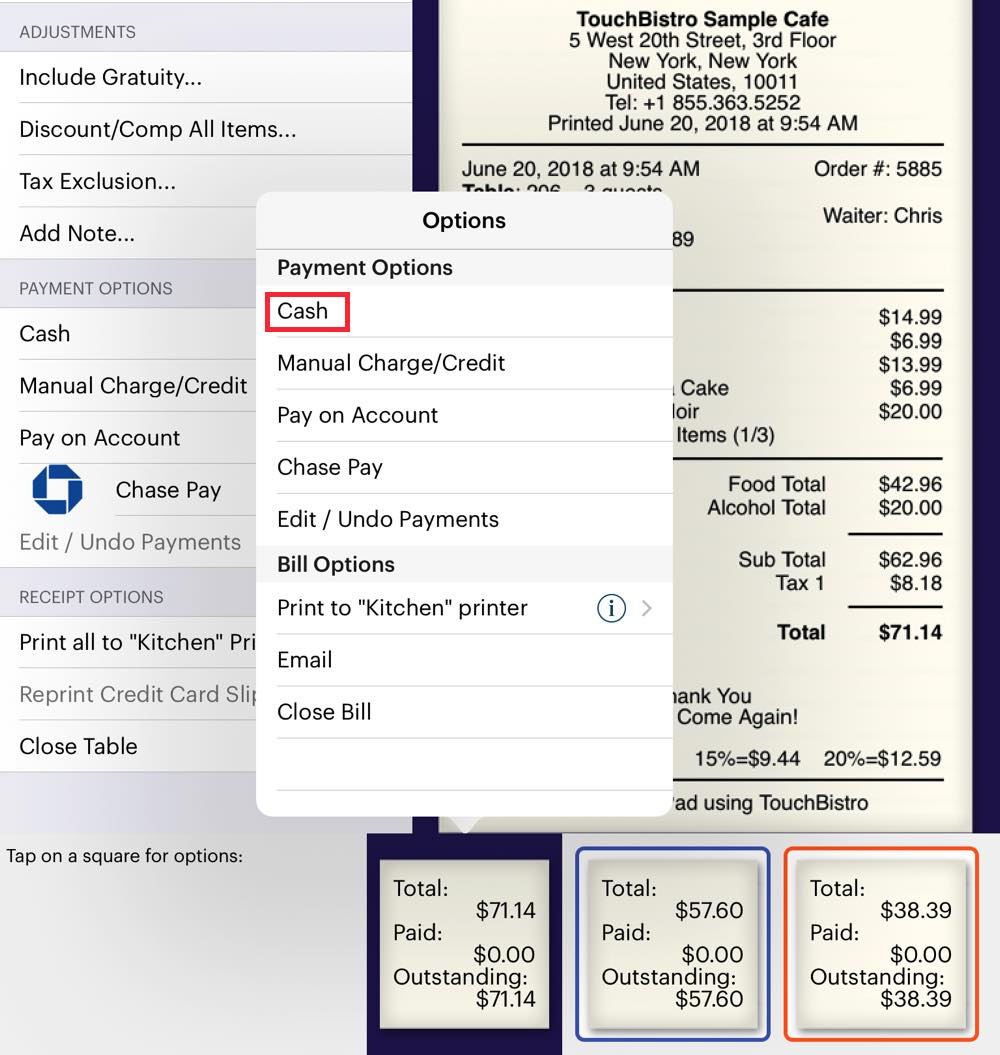
2. If the bill was split by seating or evenly, tap the appropriate guest check and tap Cash.
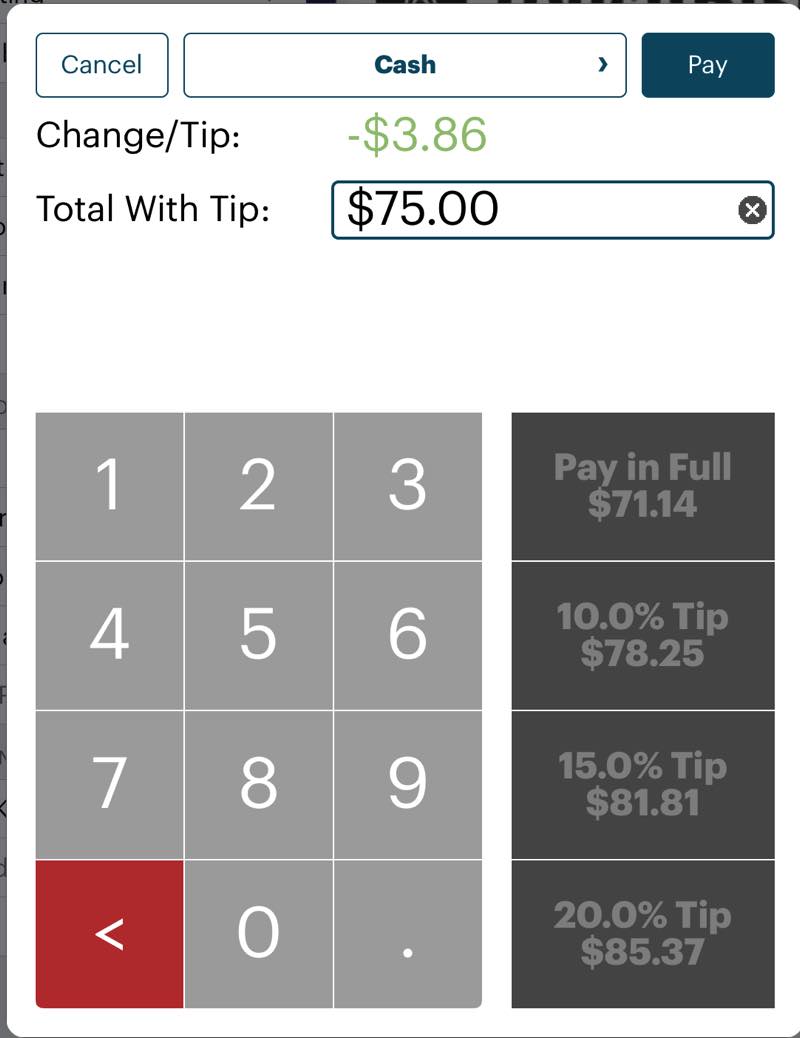
3. Enter the amount offered.
4. In the Change/Tip field, return the change to the customer.
5. Tap Pay.
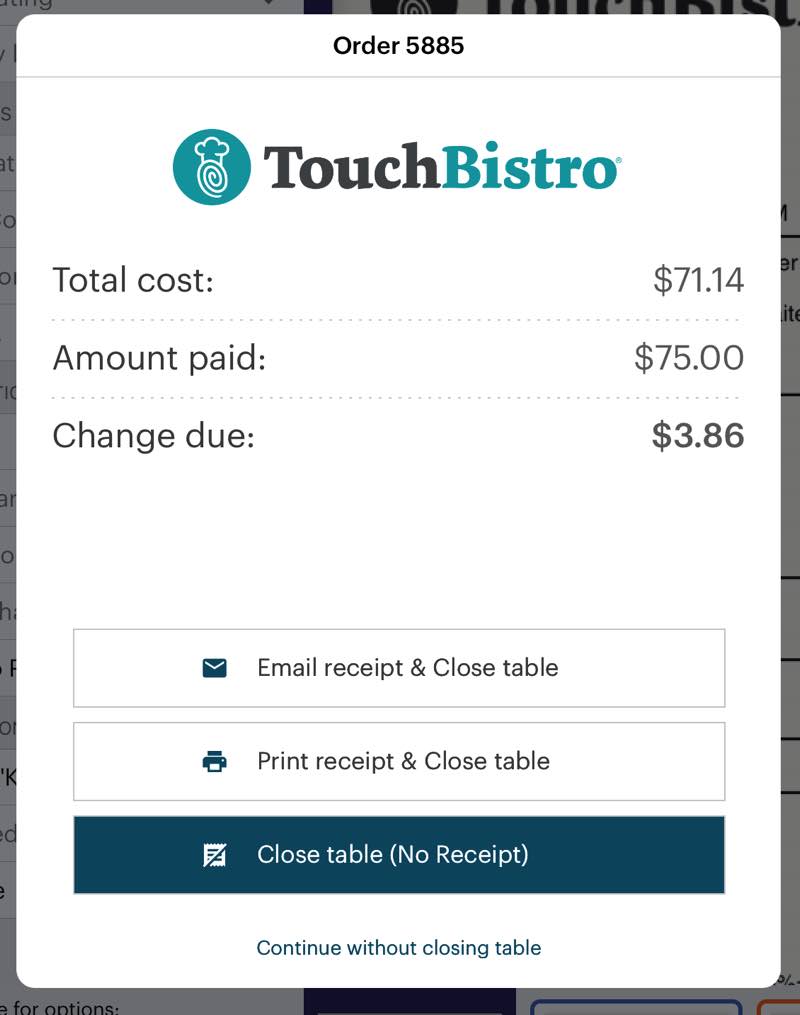
6. You now have options for receipts.
|
Option
|
Description
|
|
Print Receipt & Close Table
|
Prints a receipt and closes the table (if only one bill) or the bill for the seat (if seats were split).
|
|
Email Receipt & Close Table
|
You can email the customer a PNG image of the bill instead of printing the bill. This also closes the table or bill for the seat.
|
|
Close Table
|
If you don’t want to issue any kind of receipt, but close the table or seat, tap this. If you choose this option, all bills are kept within the system for later access.
|
|
Continue Without Closing Table
|
Tap if you make an error or the guests may wish to linger and may order additional items after closing off the current bill
|
7. After that bill is closed, it’s marked as paid and removed from the check out screen. If there are remaining split bills on the Checkout screen, you will be returned to the Checkout screen to process the other bills. If there was only one bill or this is the last bill, the table will be closed and you’ll be returned to the floor plan.
Section 1. Correcting an Error
1. If you made a mistake about the payment and only realize at this point, you can tap Continue without closing table.

2. Tap Edit / Undo Payments.
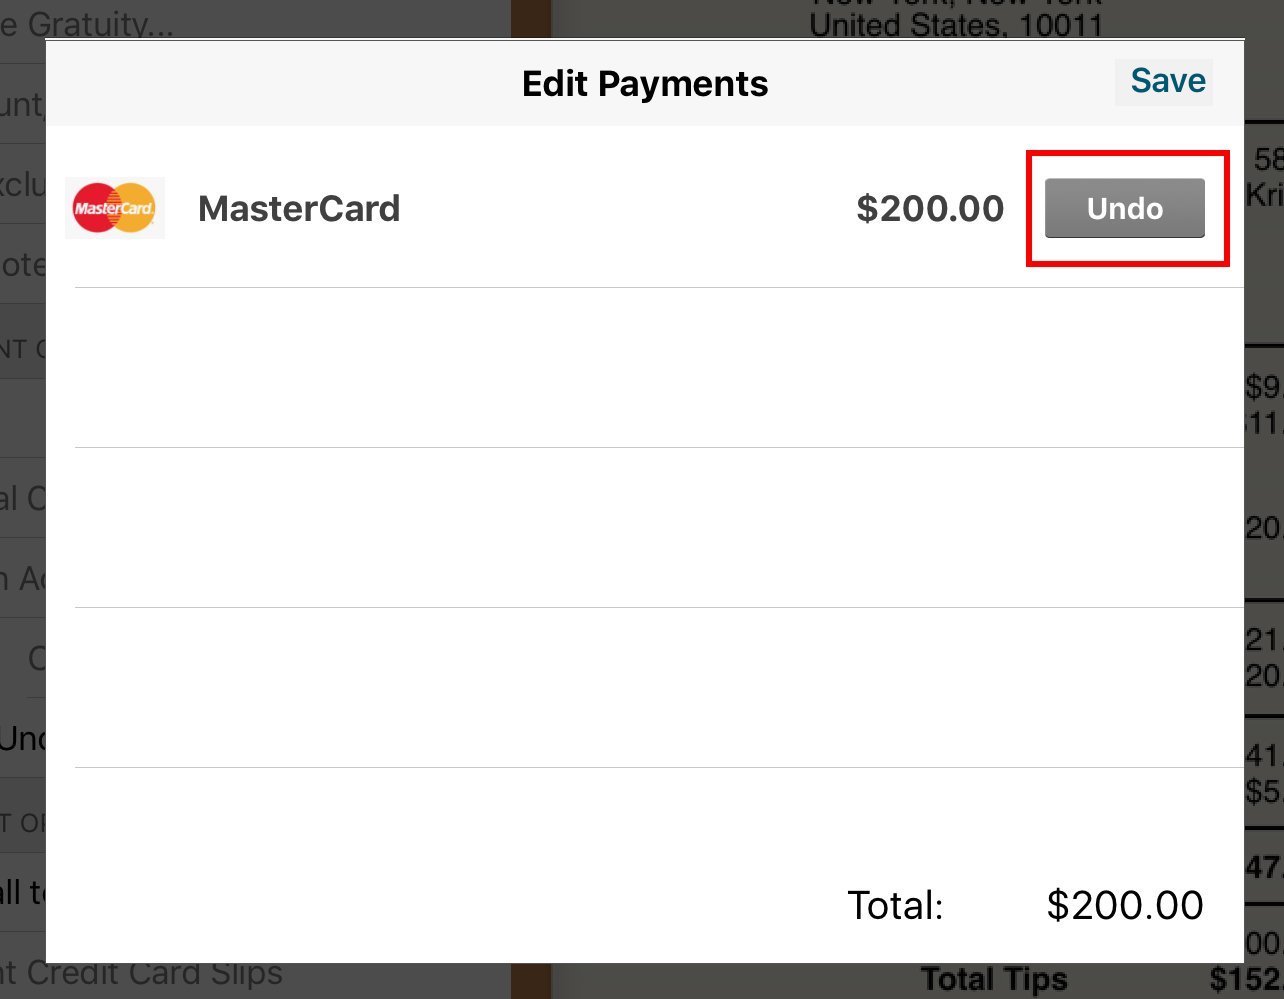
3. Tap Undo.
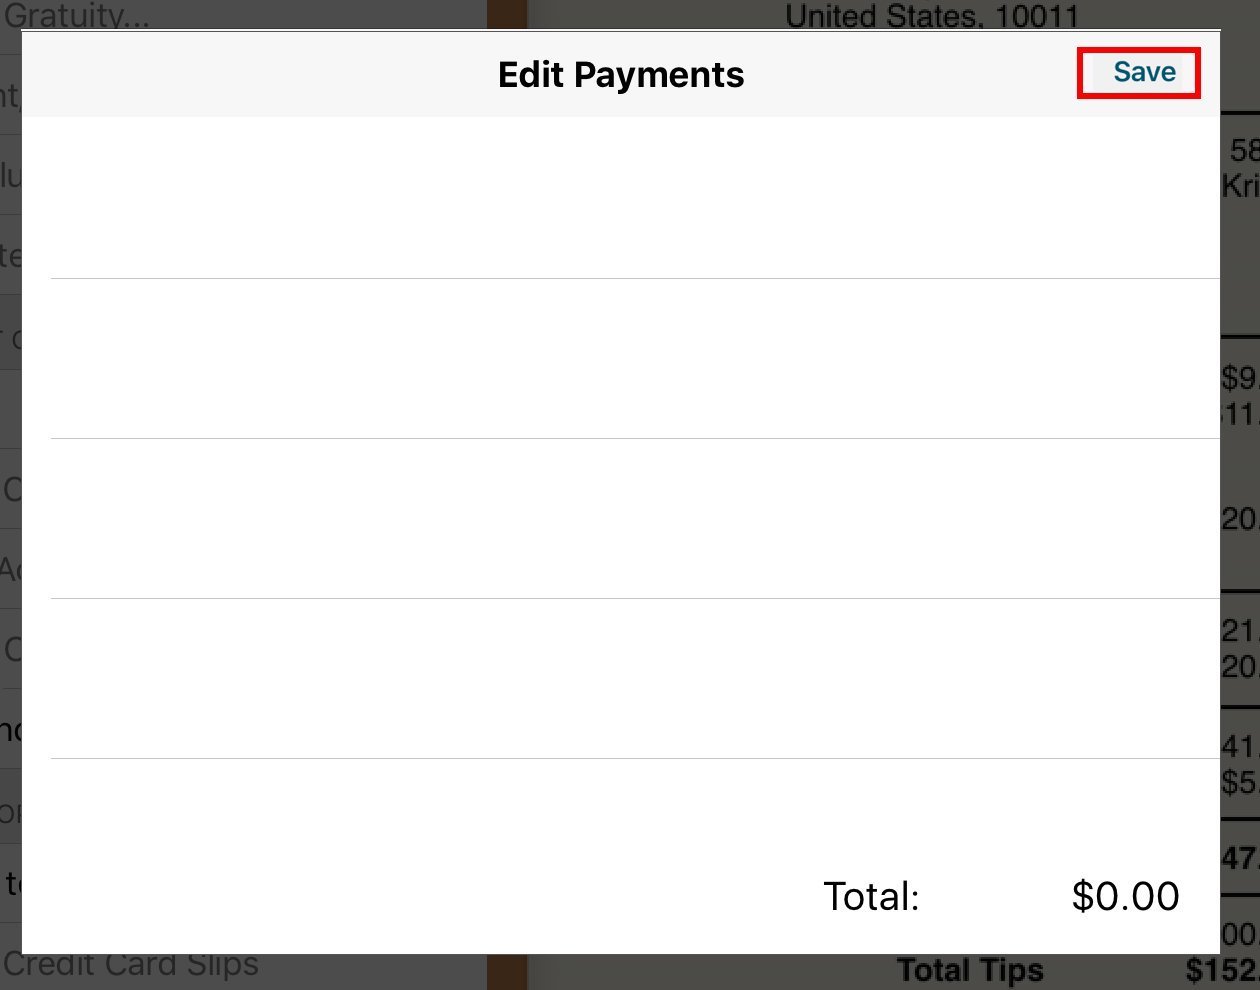
4. Tap Save.
5. Process the payment again.
Chapter 5. Using a Non Integrated Payment Processor
A non-integrated payment processor is one that doesn’t interface with TouchBistro. That is, no payment information is transmitted between the credit card reader and TouchBistro. Because payment information captured by the credit card terminal doesn’t get transferred into TouchBistro, you need to enter payment information. This ensures your end of day figures and your non-integrated terminal batch totals match.
Note: The non-integrated option is not an option to use if your integrated system is offline. It will not capture payment information. It should only be used if you have signed up with a non-integrated.
If your venue is using a non-integrated payment processor, follow these steps to accept a card payment with a non-integrated payment processor:
1. After you’ve processed the payment on the credit card terminal, return to TouchBistro.
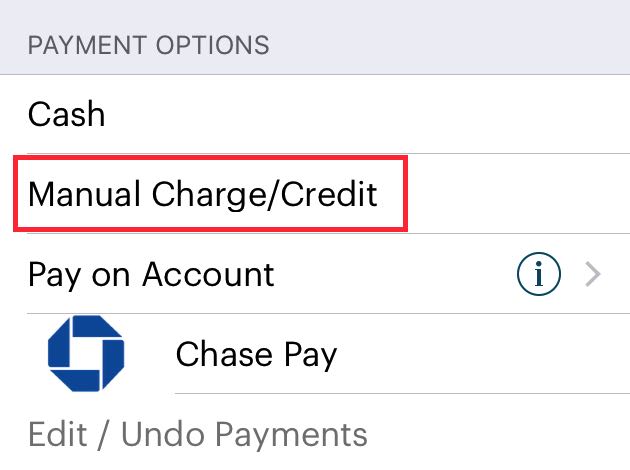
2. If the table has only one bill, tap Manual Charge/Credit under Payment Options.
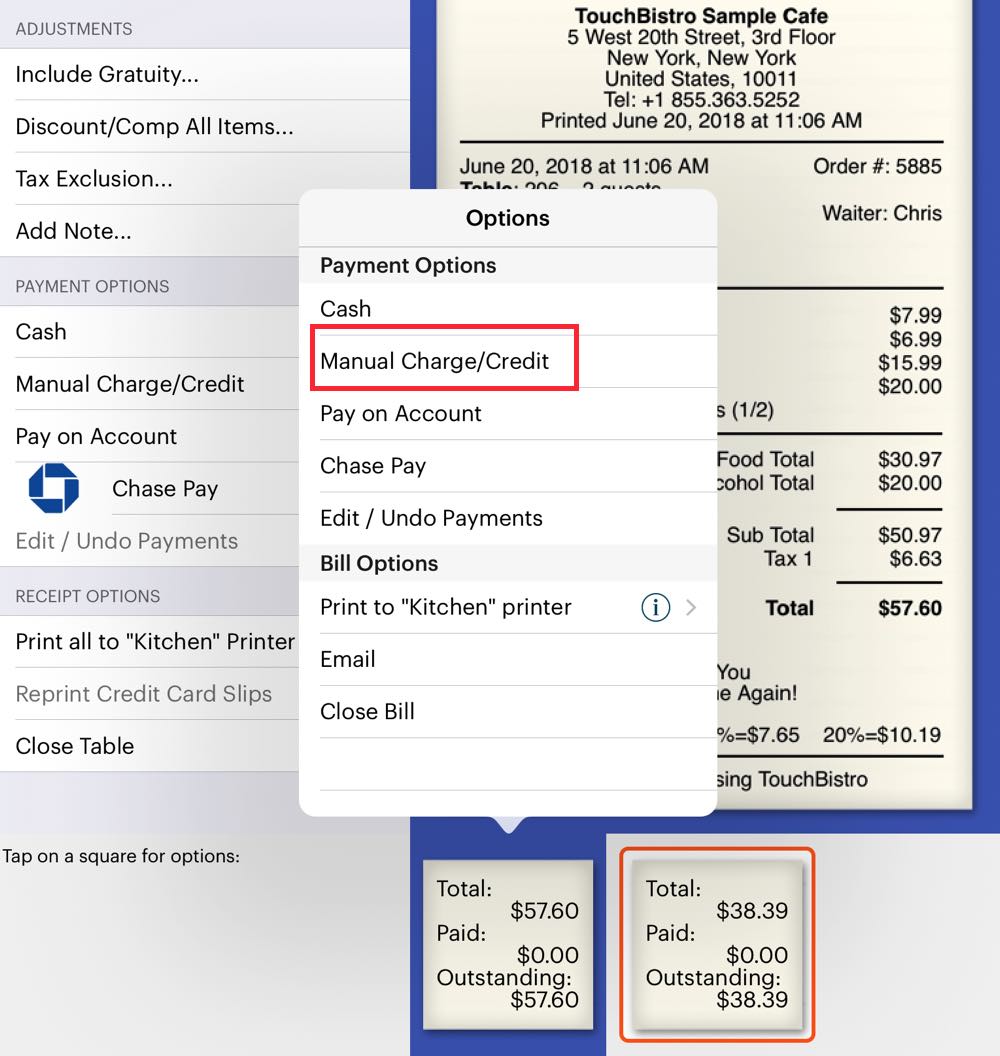
3. If the bill has been split, tap one of the bills and tap Manual Charge/Credit.
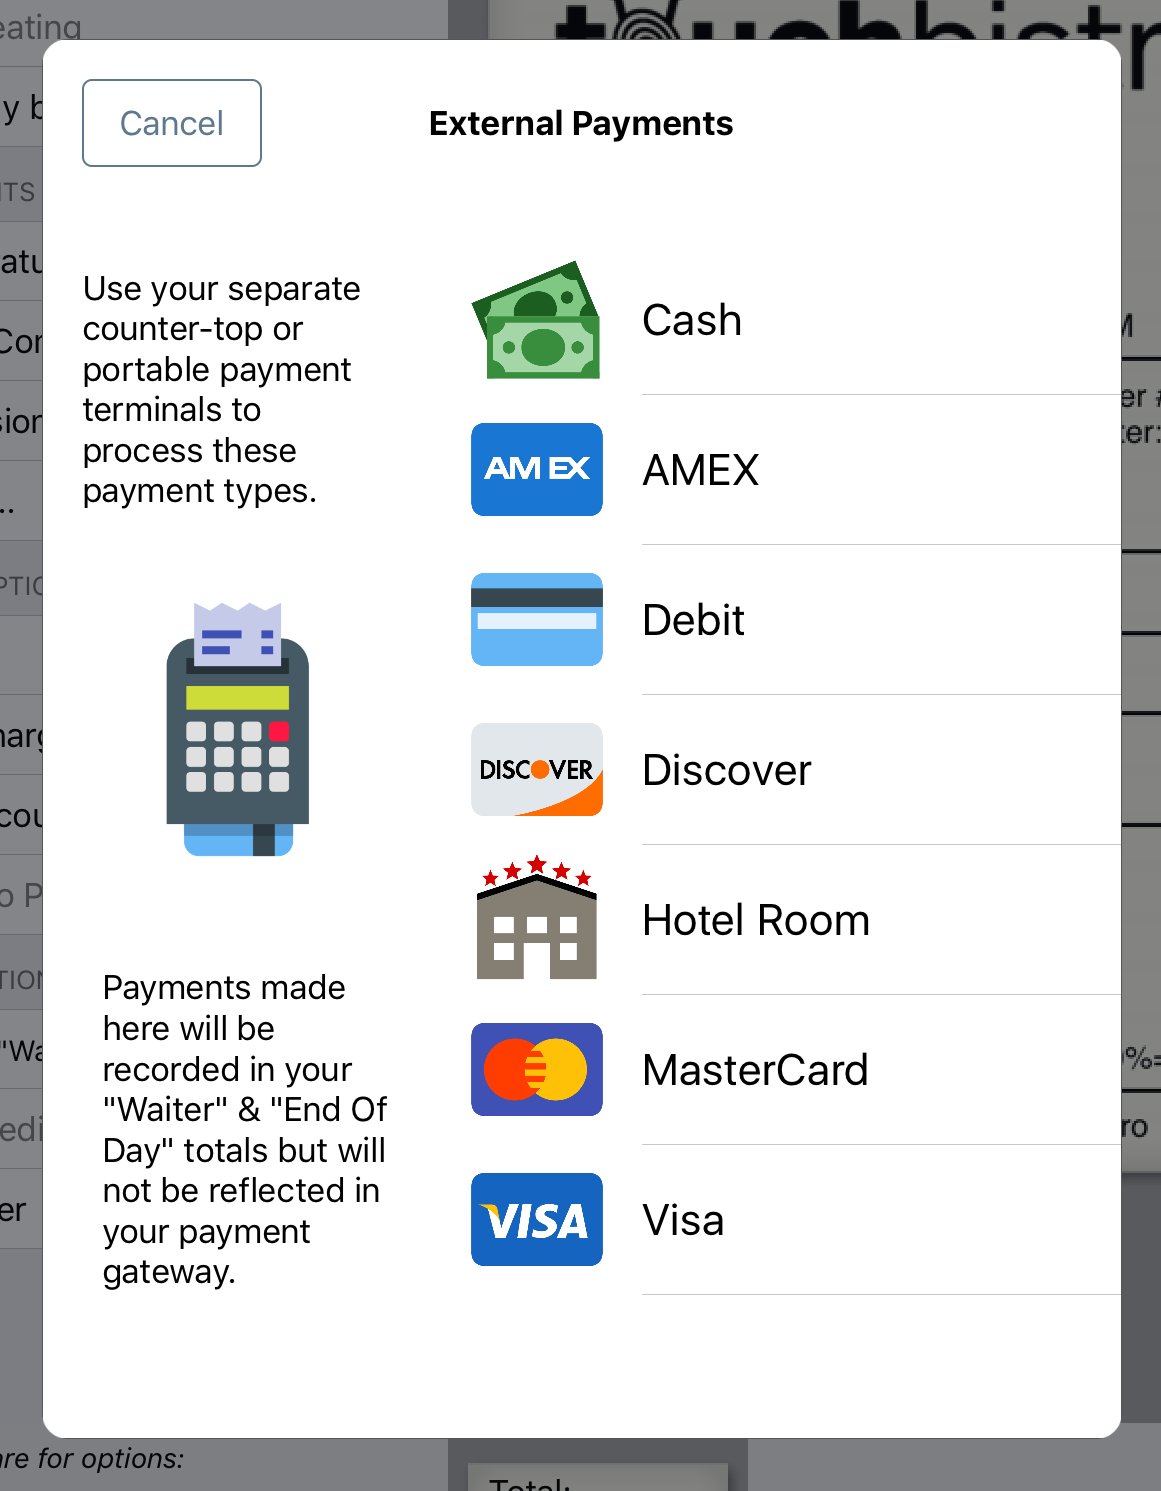
4. Tap the card offered.
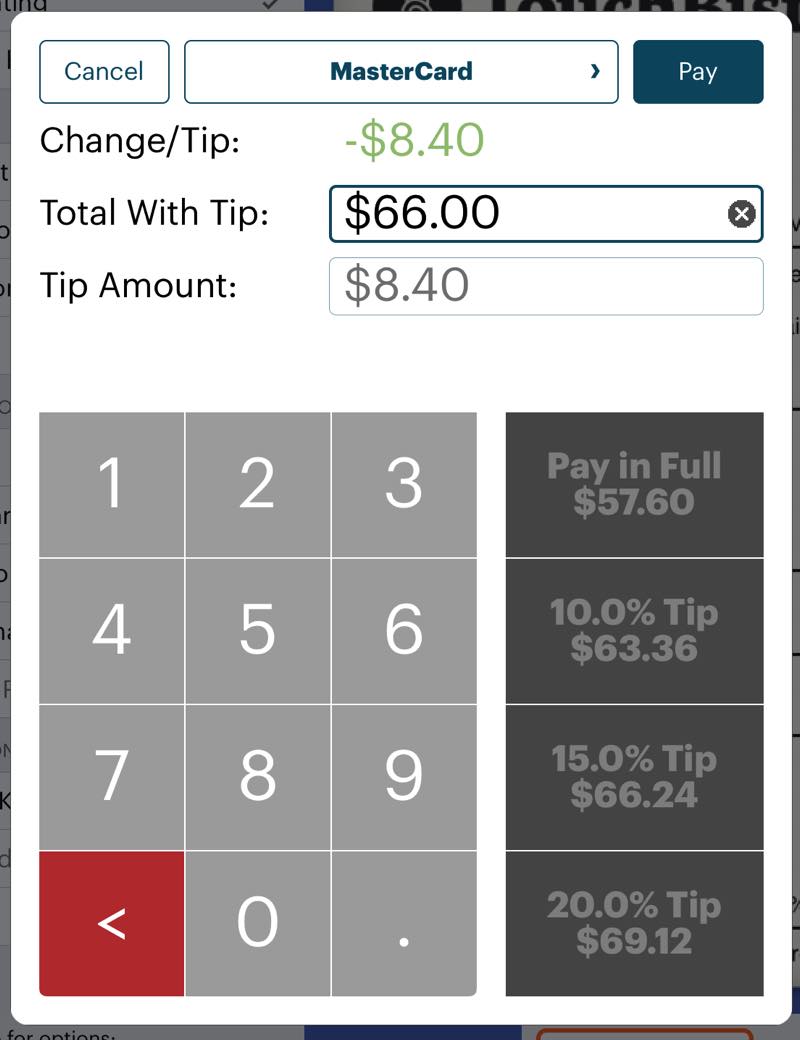
5. Enter the amount paid for the bill and the amount written on the tip line or entered into the mobile card processor.
6. Tap Pay.
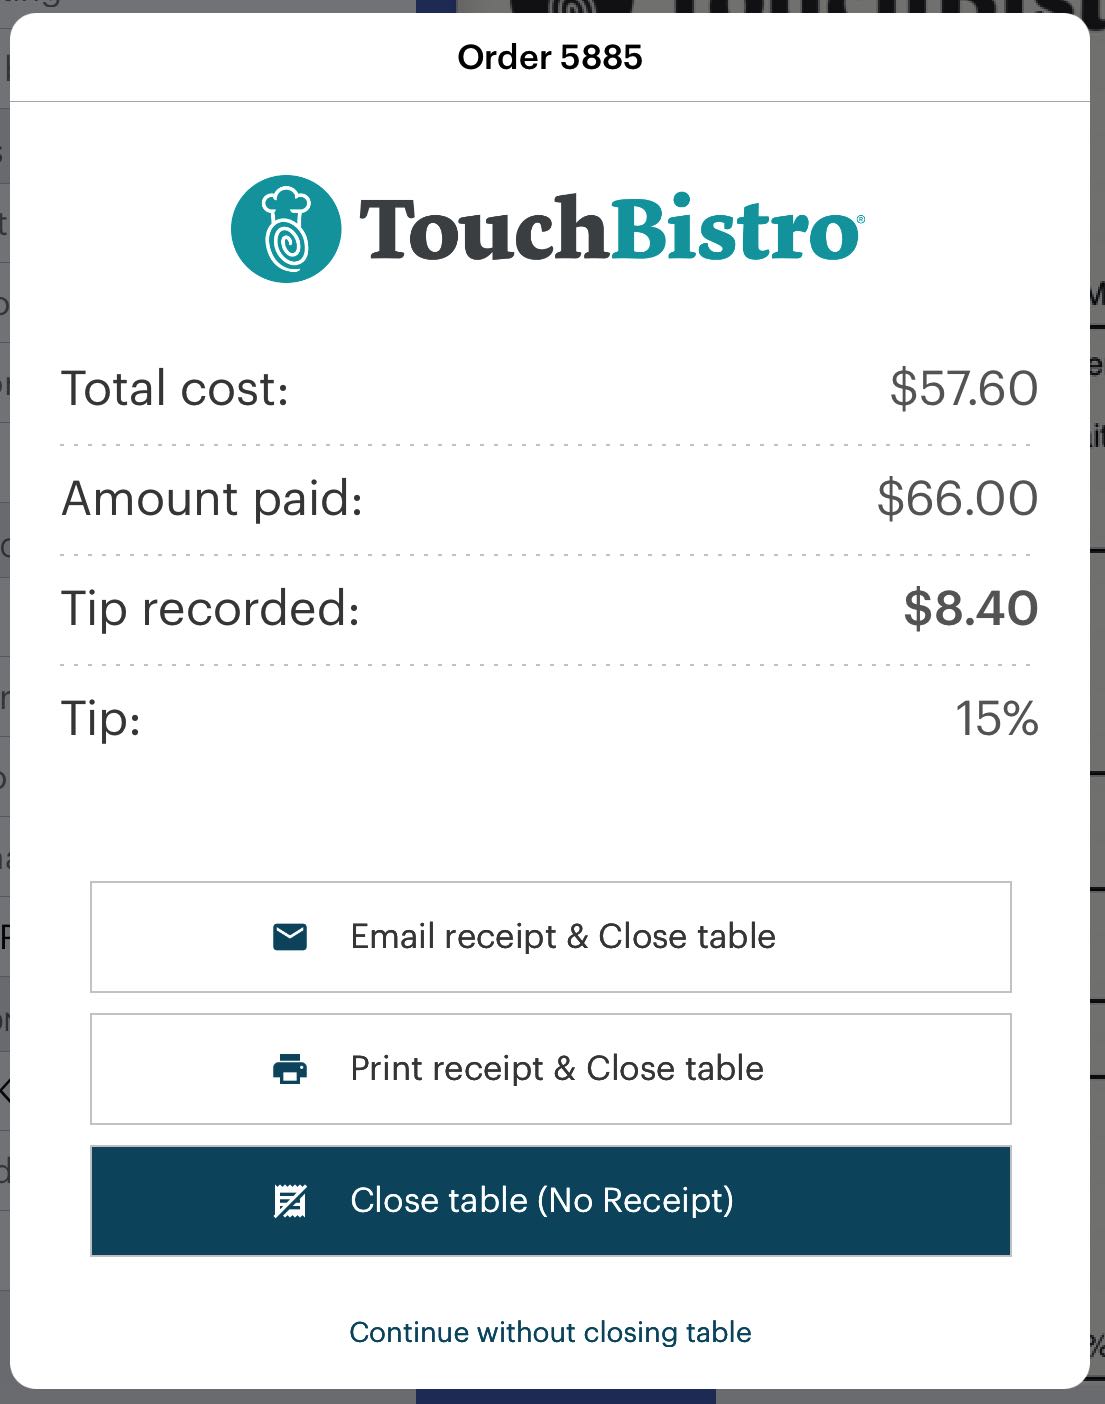
7. Close the table.
Chapter 6. Using an Integrated Payment Processor
If your venue uses an integrated payment processor, payment procedures are different depending on the payment processor. Consult the Payment Gateways documentation for help on using your venue’s chose payment processor.
Chapter 7. Pay on Account
1. If your manager or owner has set up valid accounts that this payment can be charged to, tap the Information ![]() icon next to Pay On Account.
icon next to Pay On Account.
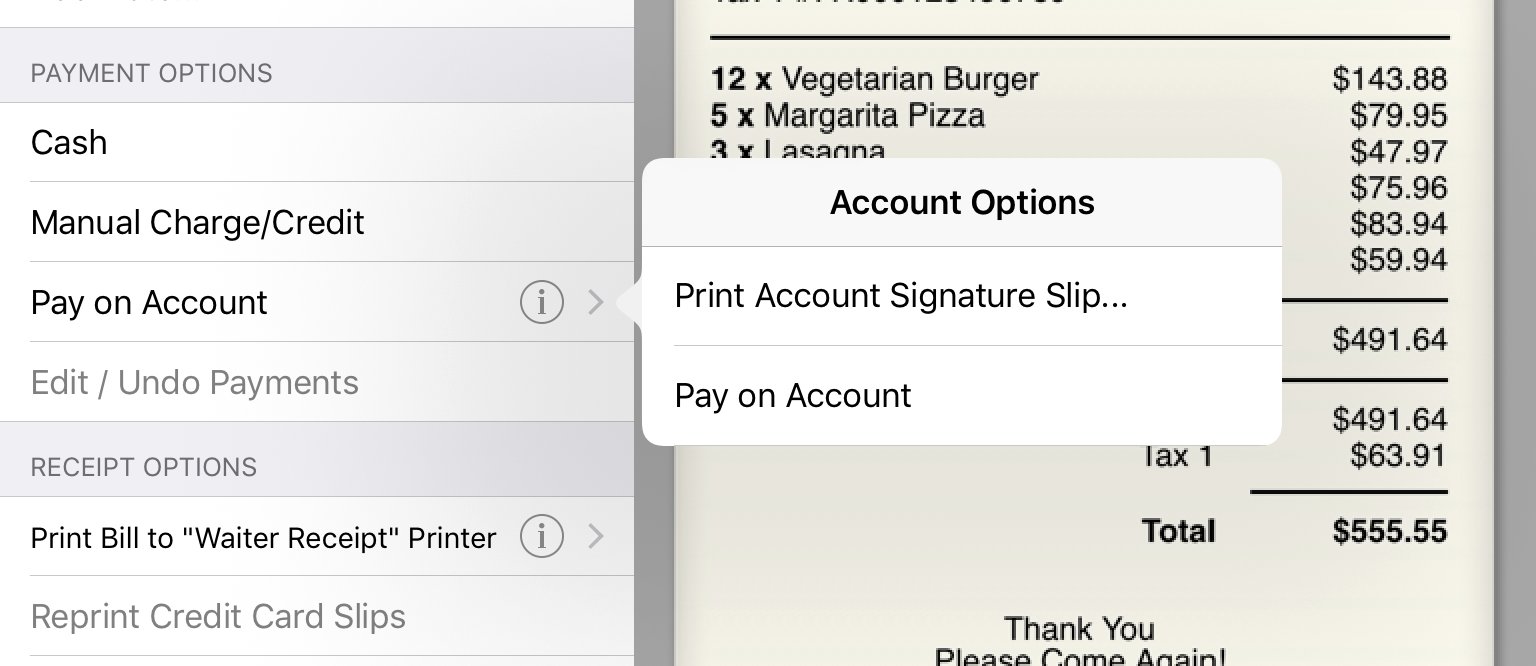
2. Tap Print Account Signature Slip if you’re required to get an account holder signature.
3. Tap Pay on Account when you’re ready to charge the bill to the account.
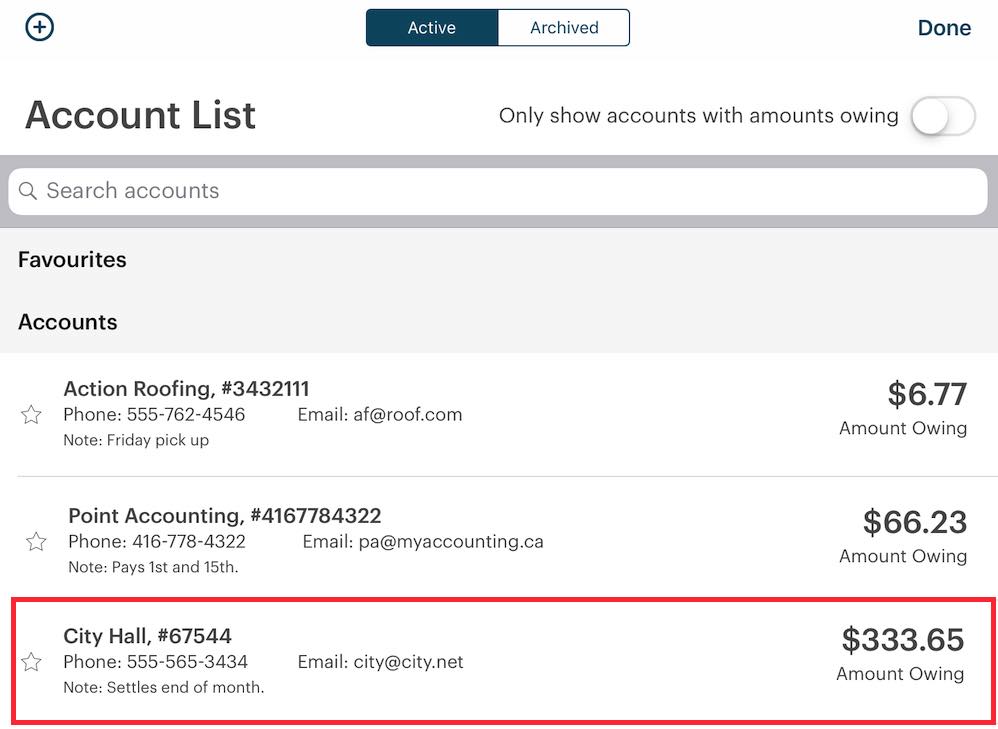
4. Tap the appropriate account to bill this to.
Chapter 8. Adjustments
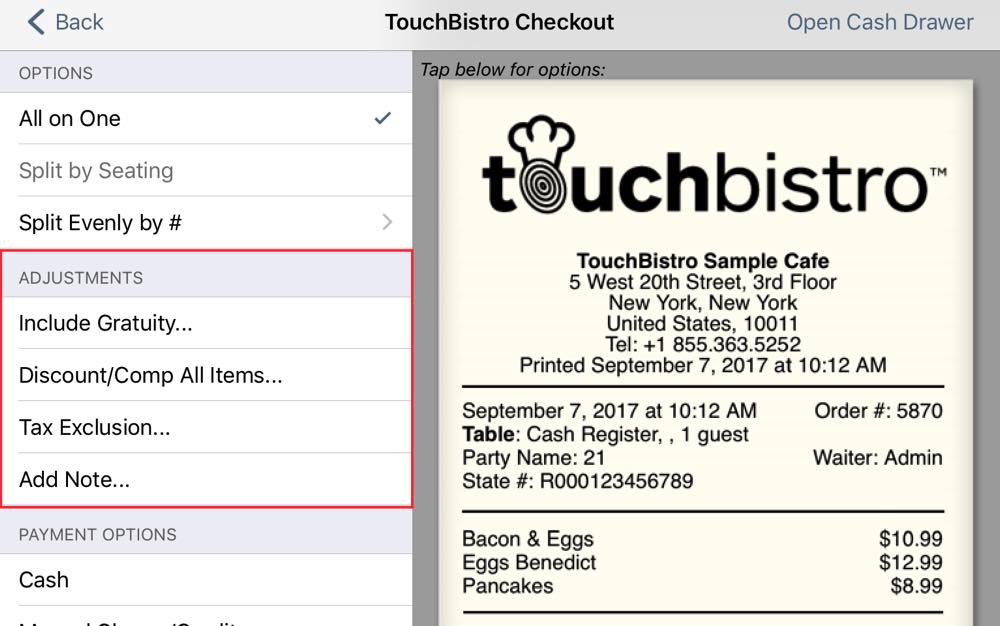
You can make the following adjustments to a bill:
|
Option
|
Description
|
|
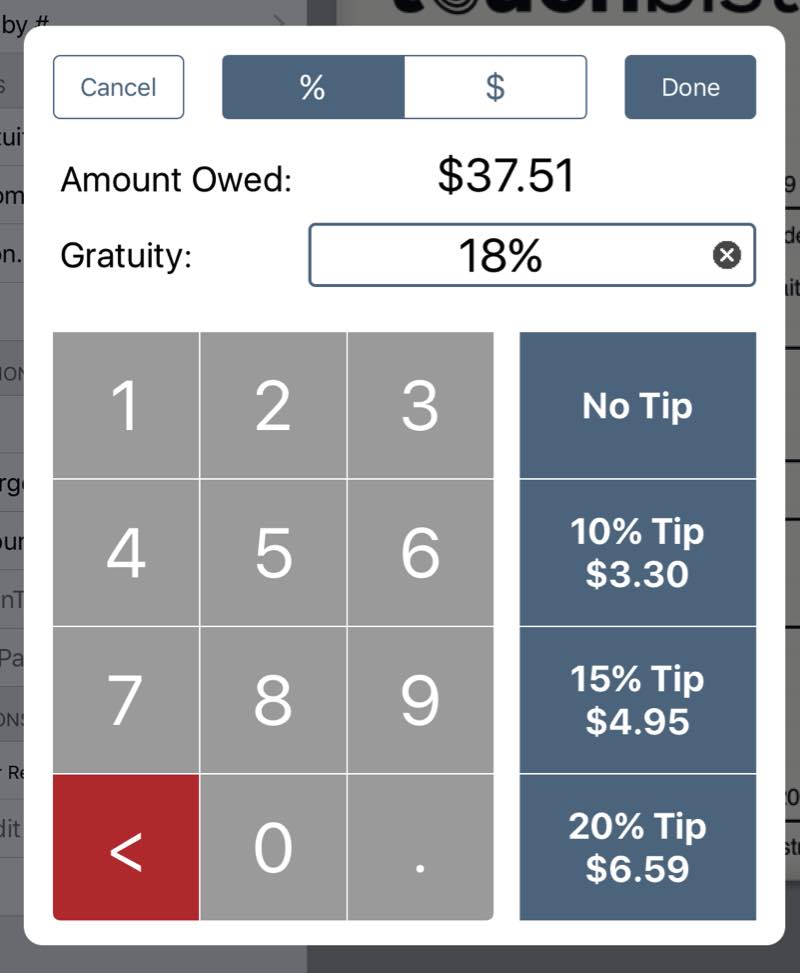
Include Gratuity
|
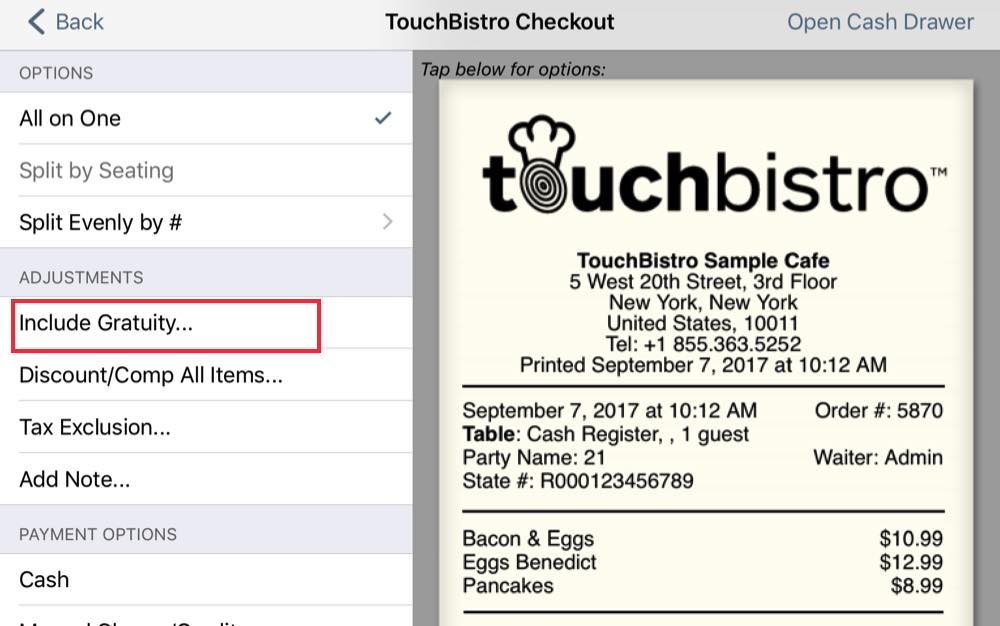
If you need to add an autograt, tap this option.
Enter the gratuity percentage or a fixed amount. If your system is set up to include a gratuity automatically (say for a party of 6 or more), you can remove the autograt by tapping this option. Note: If your autograts are set by the admin to treat them the same as tips, if you remove the gratuity after a customer has paid his/her split seat with cash, TouchBistro will not record the paid autograt on the closed bill. |
|
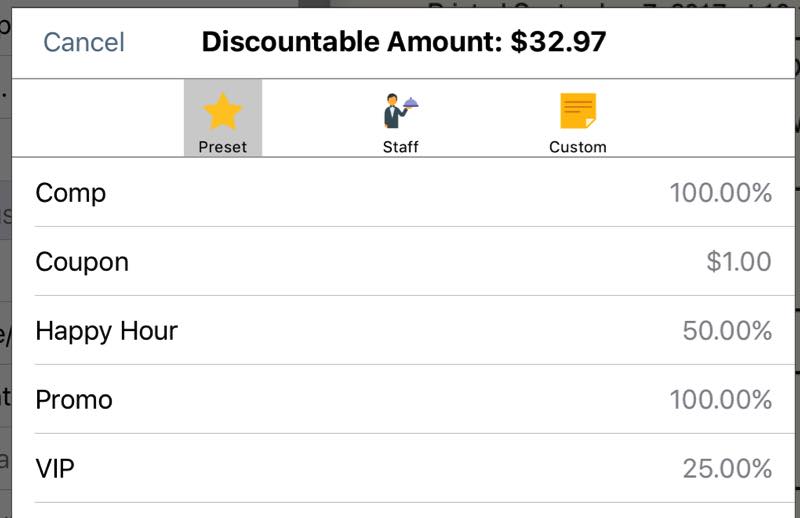
Discount/Comp All Items
|
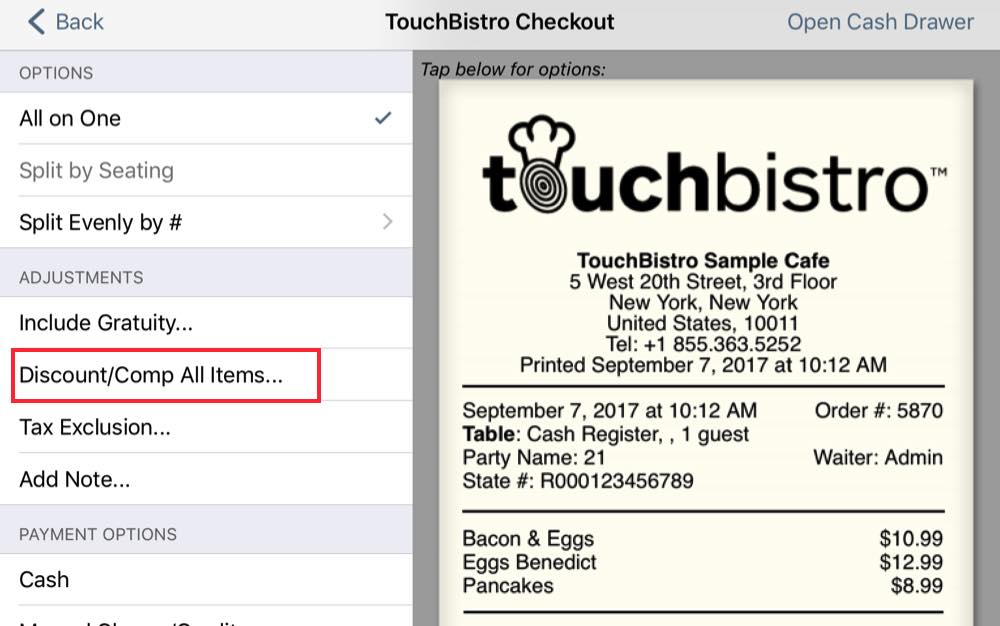
Tap if you need to apply a discount or 100% comp to all items on the bill.
You will be presented with a list of fixed discount reasons as well as the ability to create a custom discount reason.
|
|
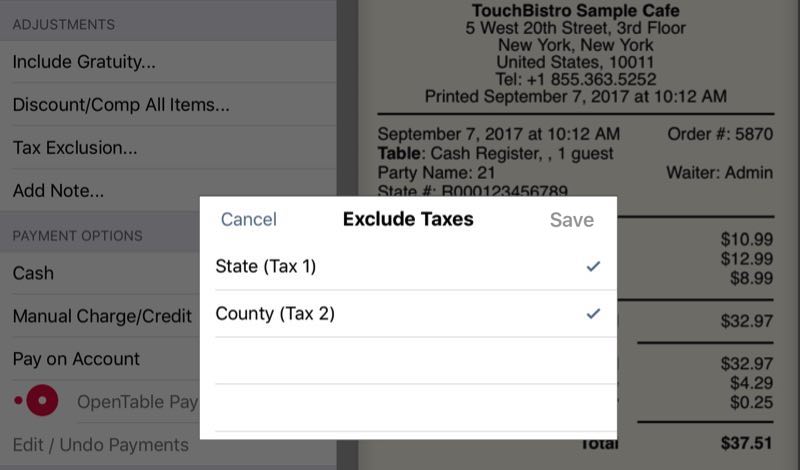
Tax Exclusions
|
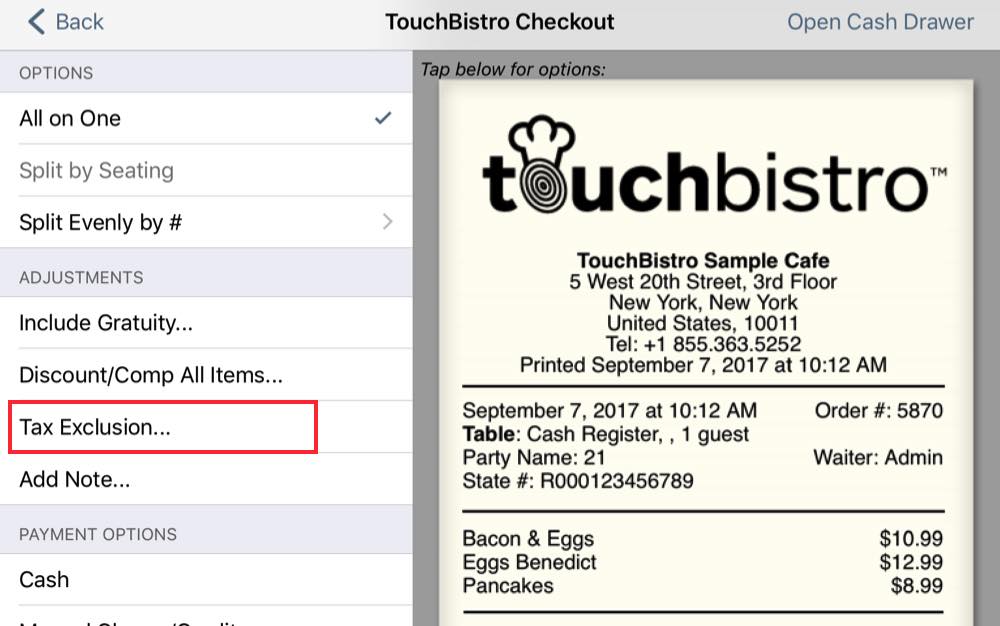
Tap if the customer or table qualifies for an exclusion of one or more taxes (for example, the diner is a diplomat or qualifies for some tourist exemption).
Uncheck which taxes no longer apply.
|
|
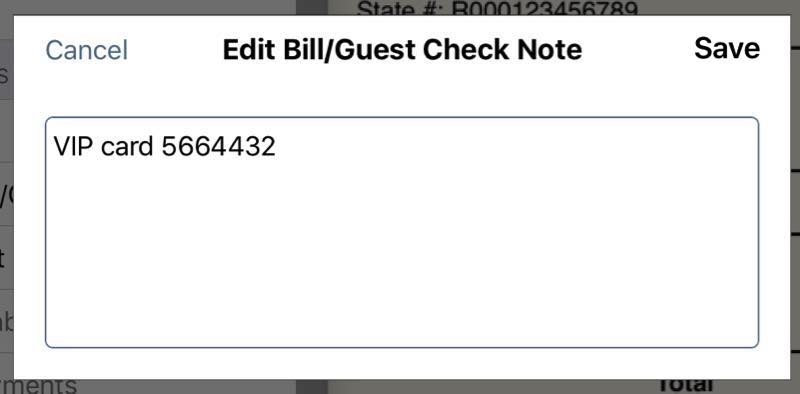
Add Note
|

If you need to add a note, tap Add Note and enter the note.
Notes can be used to support reasons for including or removing an autograt or a comp.
Remember, notes will appear on the receipt. Make sure your notes are public facing.
|
Chapter 9. Change Receipt Printer
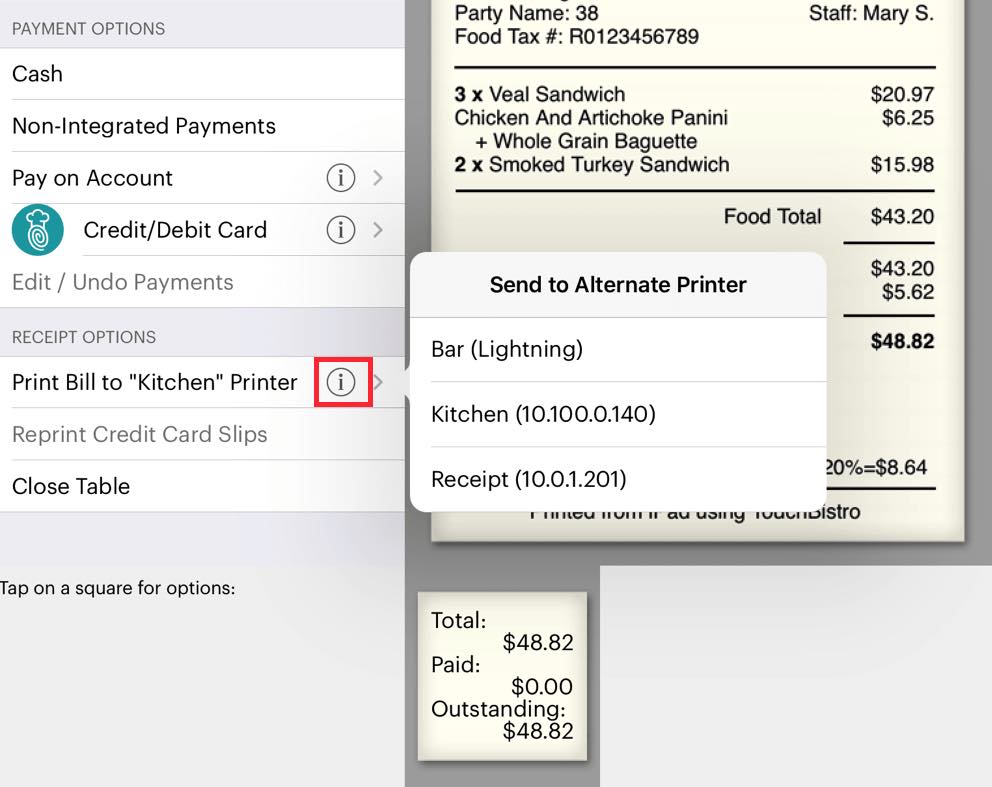
If you need to print the bill to a different printer (for example, your default Receipt printer is temporarily out of paper), you can tap the Information ![]() icon and select another available printer.
icon and select another available printer.
Chapter 10. Making Partial Payments
Some patrons may not wish to split a bill but may wish to make a series of partial payments. Alternatively, a single patron may wish to pay the bill using two or more methods of payment (for example, a gift card with a small remaining balance and then cash or a credit card).
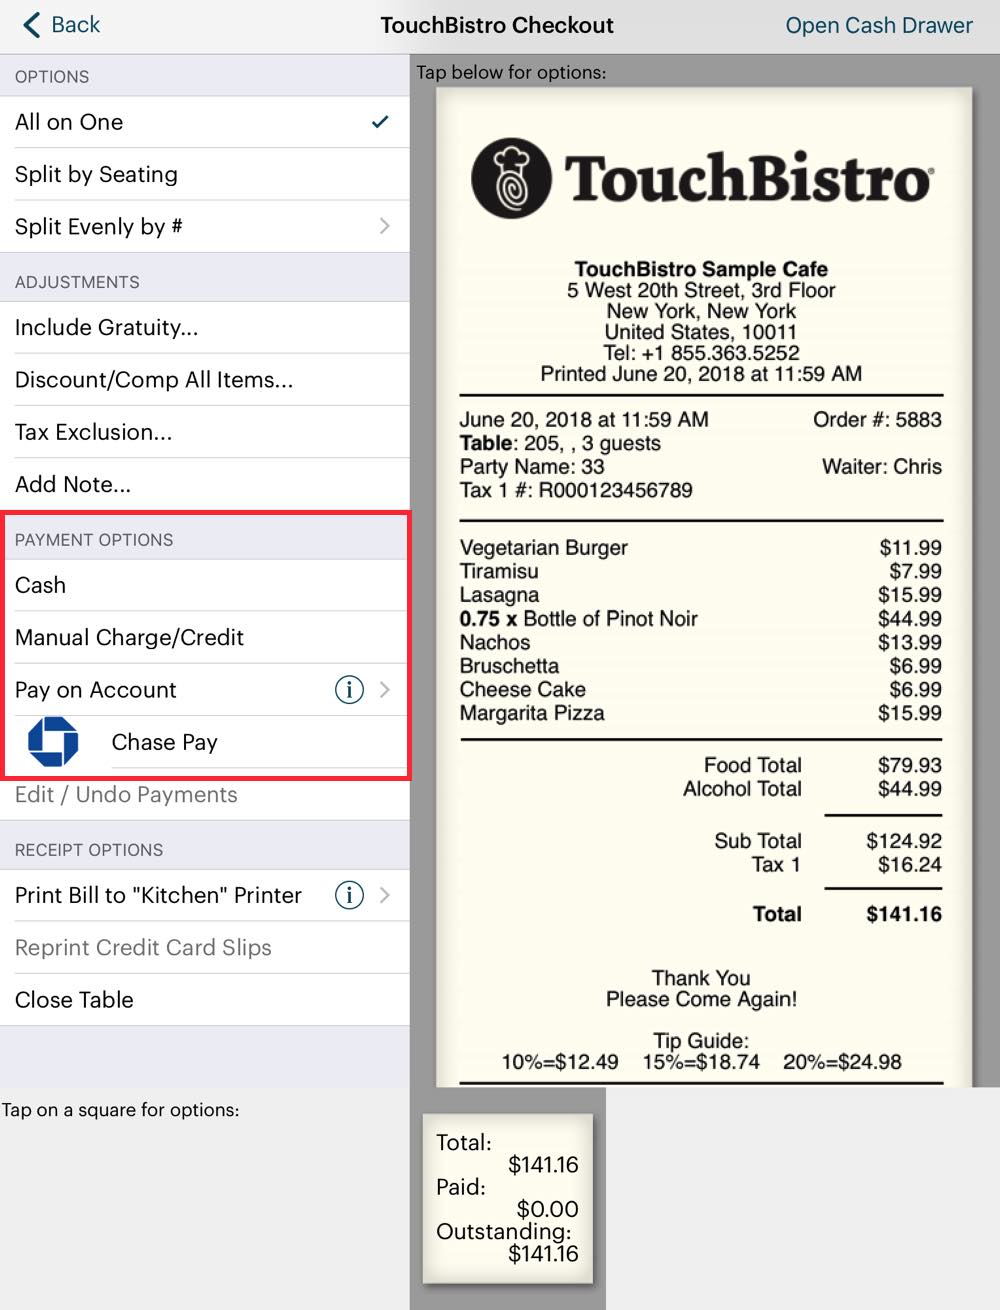
1. To do this, from the Checkout screen, under Payment Options, tap the first offered payment method. In this example, we’ll do a non-integrated Visa payment.
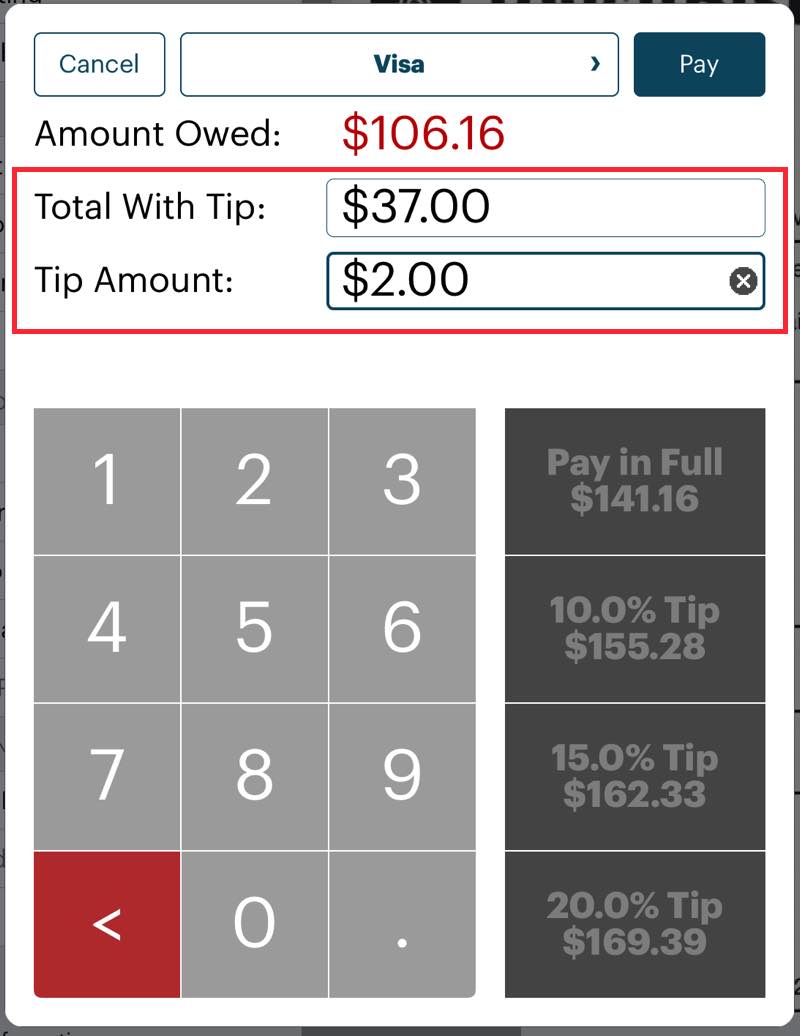
2. If the patron wishes to charge a tip amount, in the Total Payment field enter the full amount to be put on the card (payment + tip) and in the Tip Amount field indicate how much of that amount should be designated as the tip. For example, the customer wants to pay $35 of the bill via Visa and wants to also charge a $2 tip to the card. So enter the final total of $37 ($35 + $2) in Total With Tip and then in the Tip Amount field specify $2 of that should be considered a tip.
3. Tap Pay.
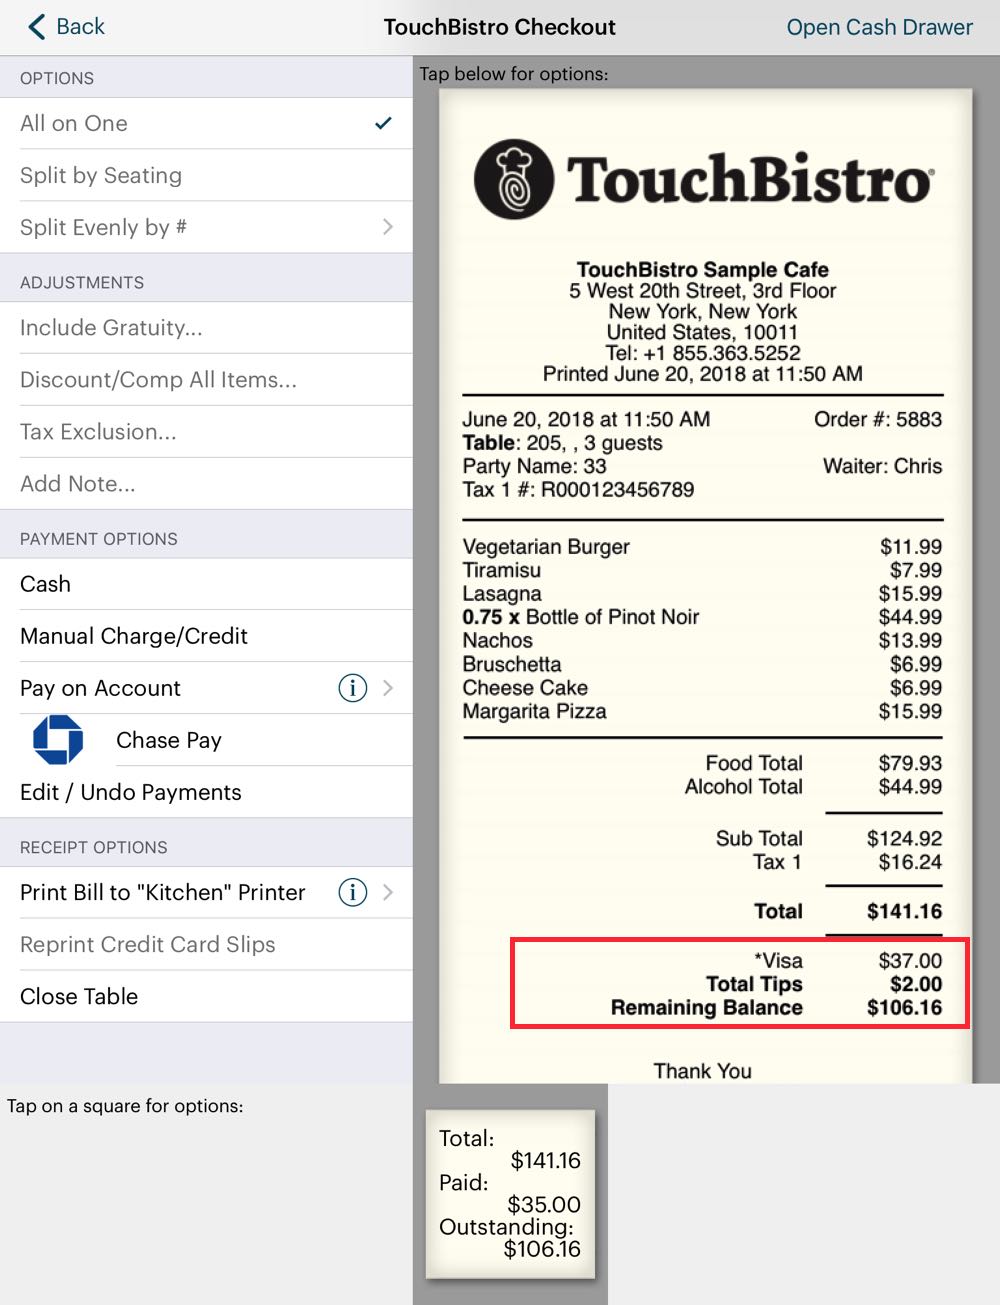
4. We can see now that the bill has been reduced by the amount charged in theTotal With Tip field less the $2 specified in the Tip Amount. The amount specified in Tip Amount is kept separate in the Total Tips line.
5. You can now tap Cash or a Credit/Gift Card option to accept additional forms of payment to close the bill.
6. Let’s say a customer now offers cash. Tap Cash.
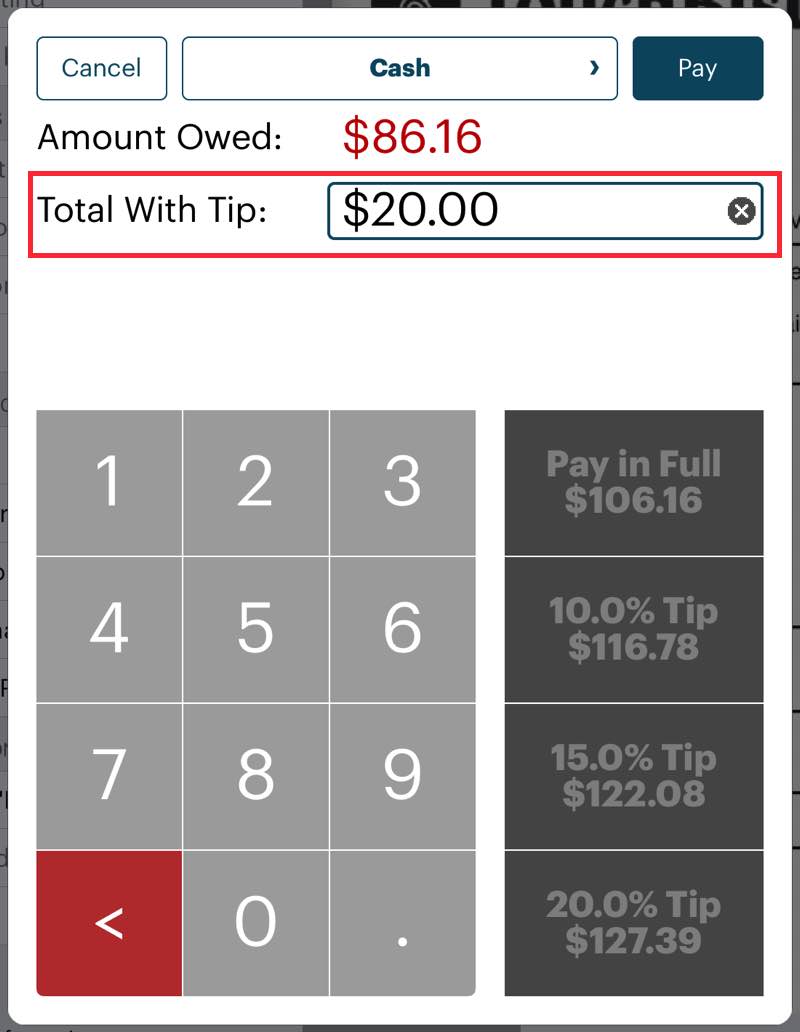
7. Unlike a card payment screen, TouchBistro does not include a Tip Amount line. TouchBistro does not record cash tips. So let’s say the patron offers $20 to cover another portion of the bill. Enter $20 and tap Pay.
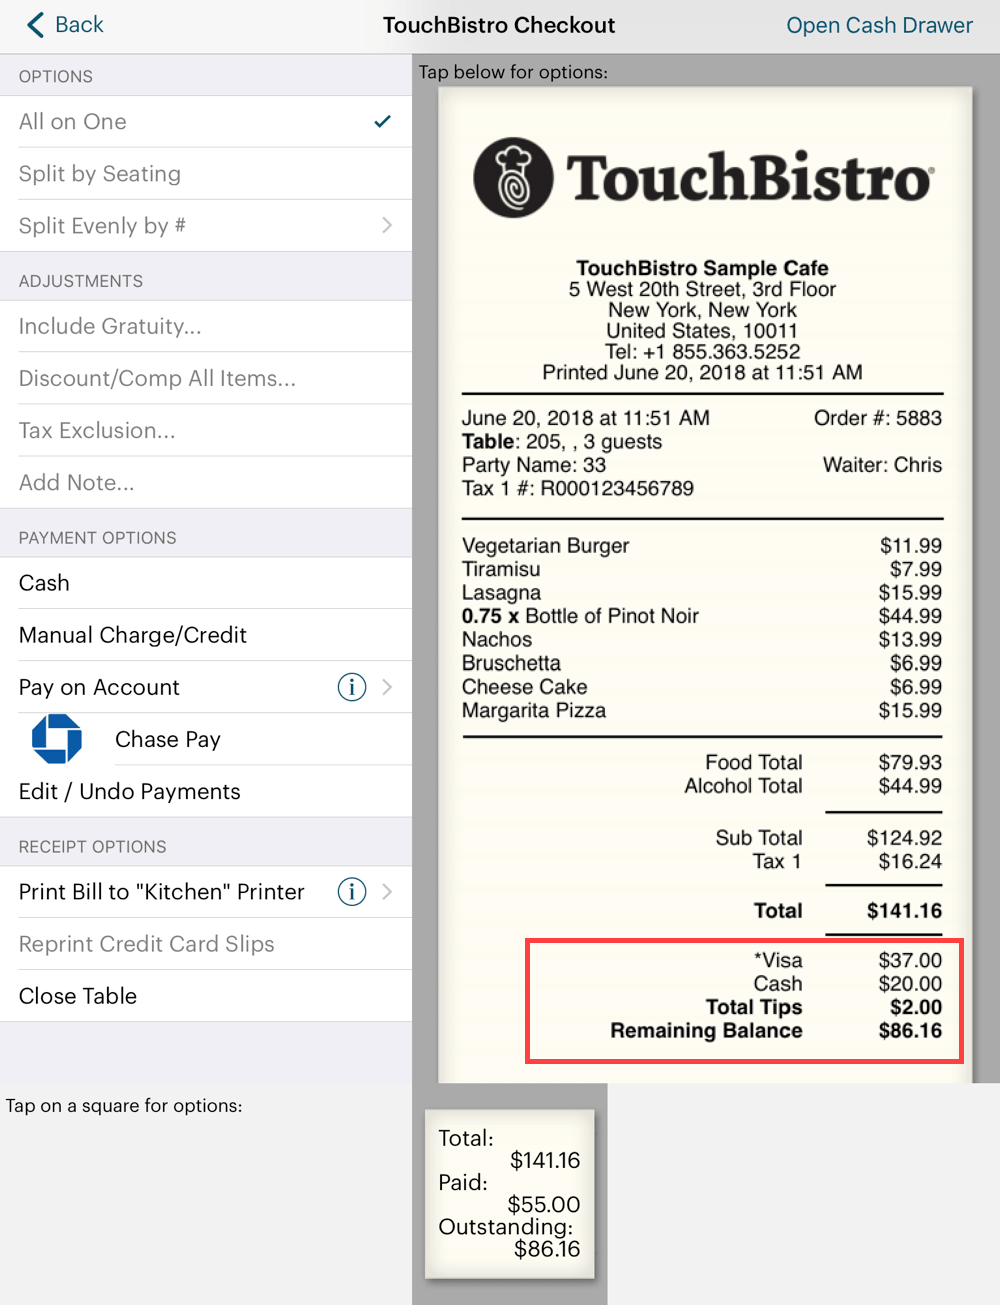
8. We can now see the outstanding amount has been further reduced by $20.
9. Finally, a customer now offers to clear up the remaining balance with a debit card. So tap either your integrated or non-integrated card payment option.
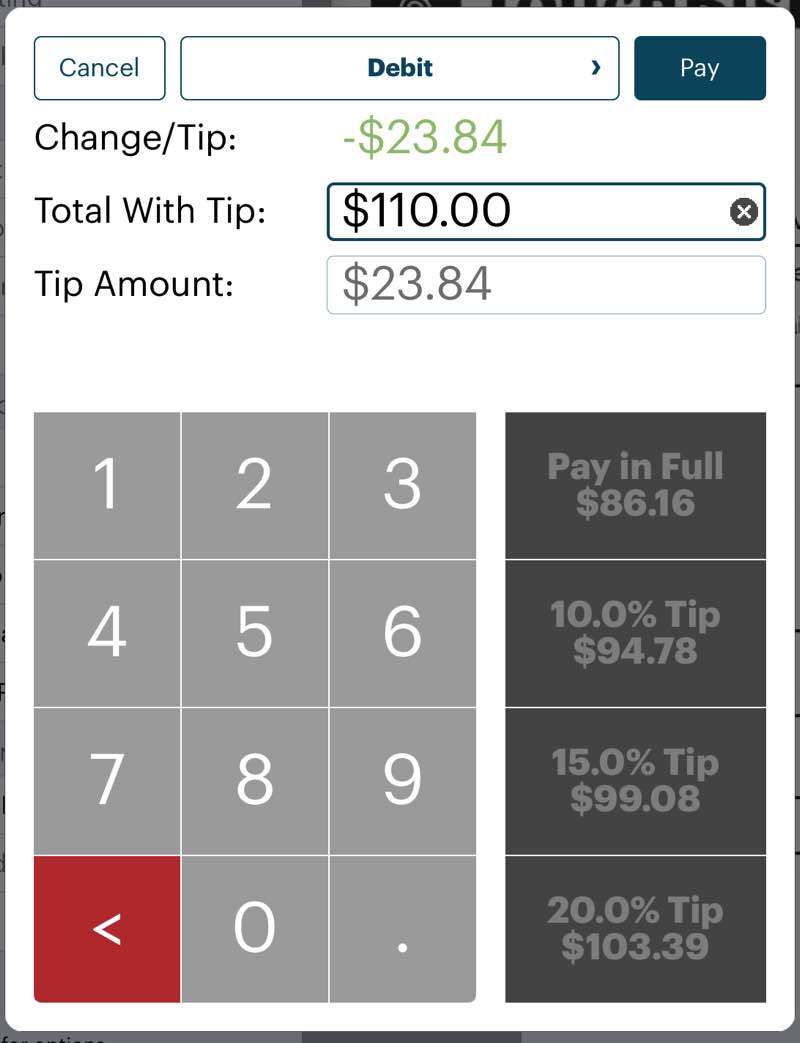
10. Like a credit card payment, enter the total amount (amount to contribute to the bill + tip) in the Total With Tip field. However, since this customer is clearing up the remaining balance and charging a tip to the card, the Total With Tip amount exceeds the remaining balance amount and the excess is automatically calculated in the Tip Amount field.
11. Tap Pay.
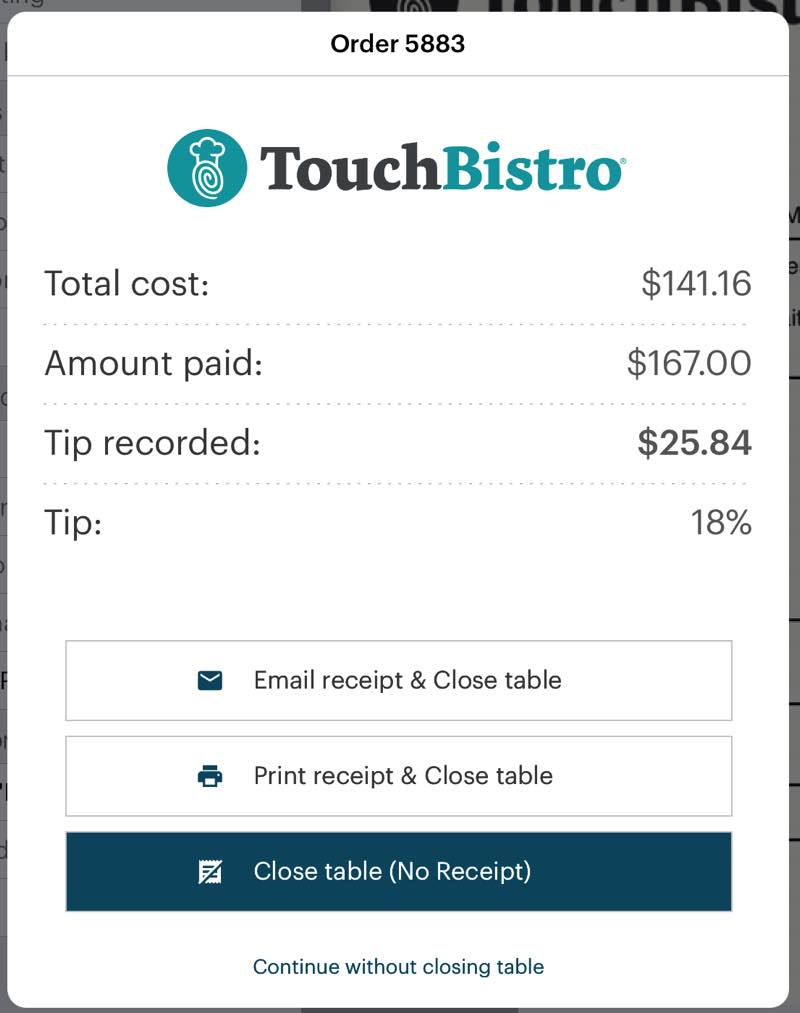
12. We can now close the table and print a receipt. For illustrative purposes, we’ll continue without closing the table.
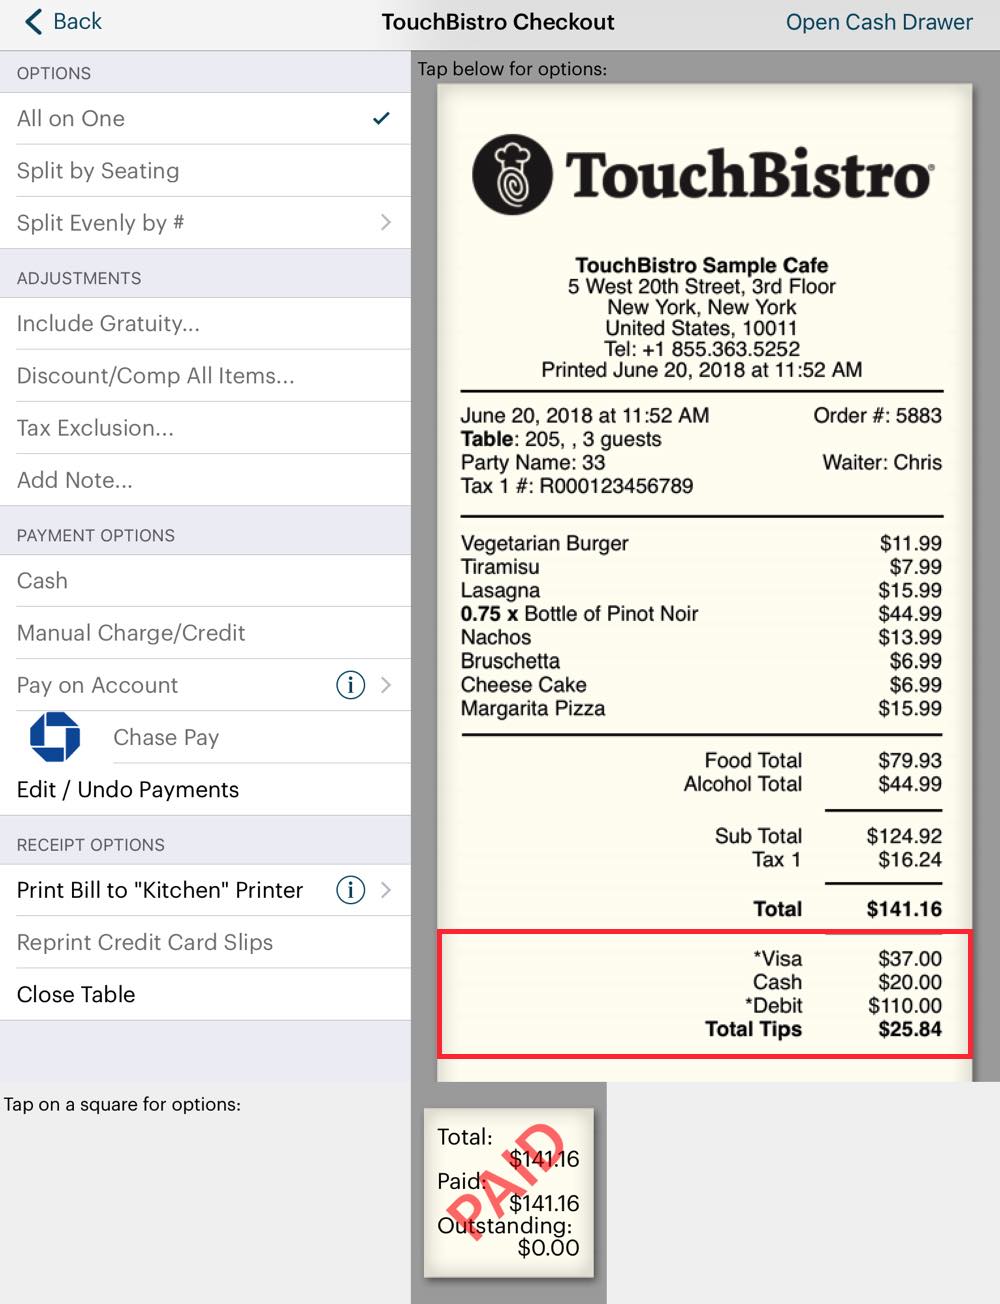
13. We can see the bill is fully paid. Patron 1 charged $37 to his/her Visa and earmarked $2 of that for the tip. Patron 2 put down $20 cash towards the bill. Finally, Patron 3 put $110 on his/her debit card, which paid the remaining balance ($86.16) and the $23.84 was automatically earmarked as a card tip.


 Email
Support
 Frequently
Asked Questions
