Configuring your Moneris eSelect Plus Hosted Pay Settings
Table Of Contents
Chapter 1. Introduction
Moneris offers a hosted pay solution. That is, when a payment needs to be processed, one is directed to a page hosted by Moneris to process the actual payment details. TouchBistro supports payments by this method as well.
Chapter 2. Configuring your account with Moneris
Before you set up TouchBistro to accept hosted pay page payments, you need to first set up your hosted pay page details on the Moneris site. Locate the welcome email Moneris sent to you with your Username, Store ID, and password.
1. Visit Moneris.com.
2. Click on Login at the top.
3. Select eSelect Plus from the drop-down menu.
4. Log in to eSelectPlus using your Username, Store ID, and Password from the welcome email.
5. Click on Admin at the top.
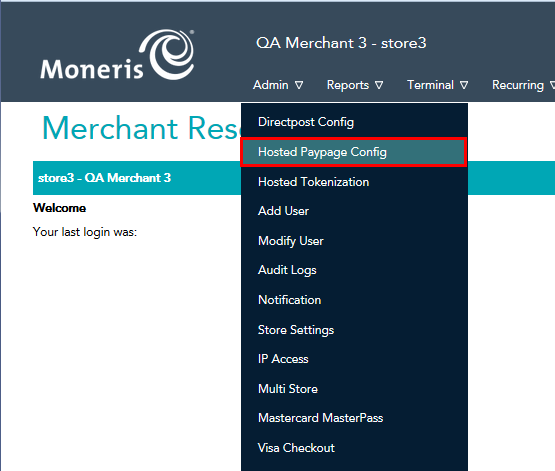
6. Click on Hosted Paypage Config.
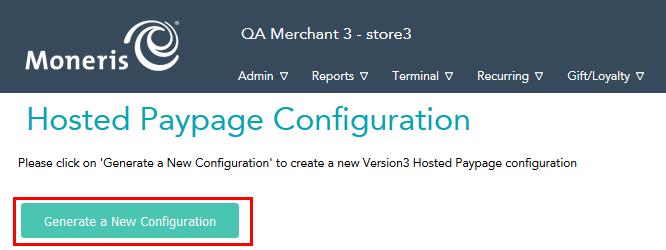
7. Click on Generate a New Configuration.
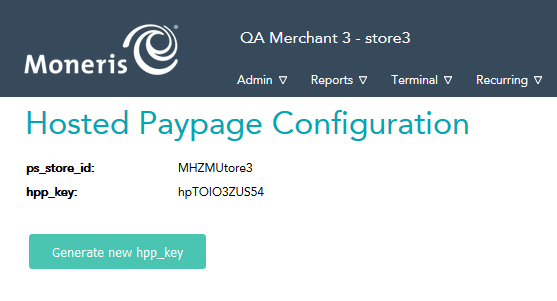
8. Note the ps_store_id (also known as your hpp_id) and hpp_key codes generated. You will need these for your TouchBistro configuration.
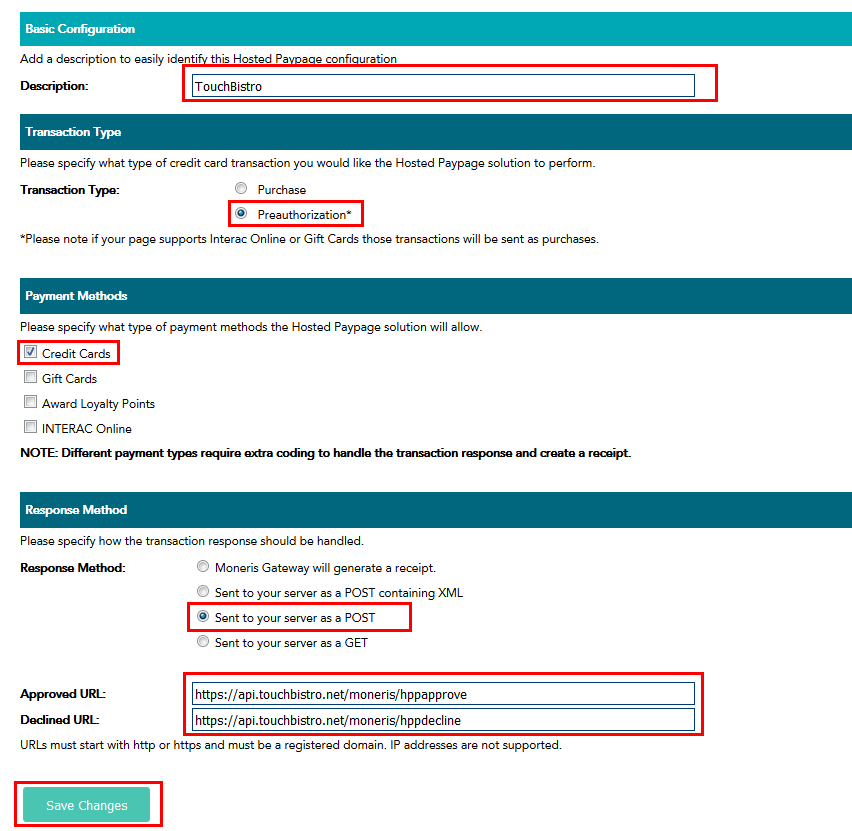
9. Enter the following information under Basic Configuration:
|
Option
|
Description
|
|
Description
|
TouchBistro
|
|
Transaction Type
|
Select either Purchase or Preauthorization
|
|
Payment Methods
|
Ensure Credit Cards is enabled
|
|
Response Method
|
Select Sent to your server as a POST
|
|
Approved URL
|
https://api.touchbistro.net/moneris/hppapprove
|
|
Declined URL
|
https://api.touchbistro.net/moneris/hppdecline
|
10. Click Save Changes. New options will appear.
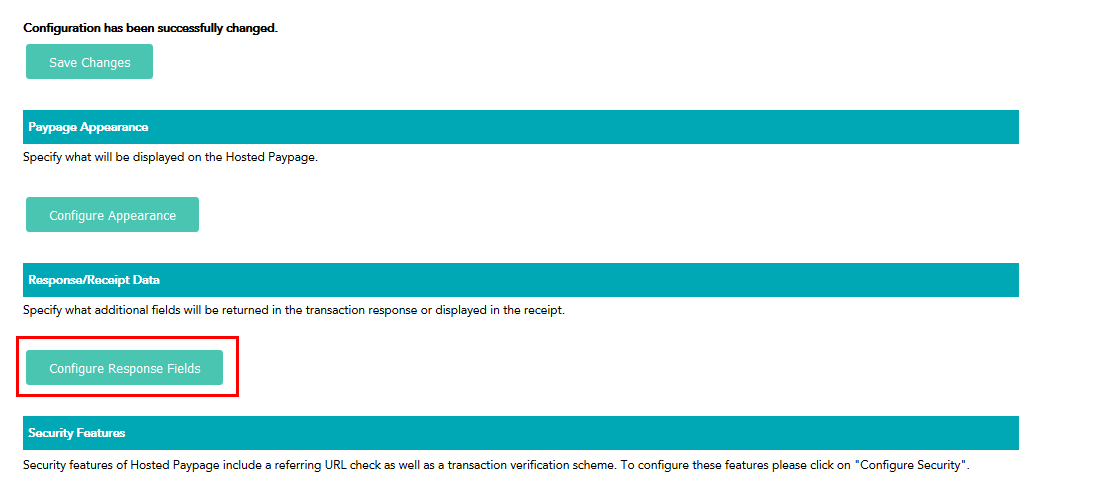
11. Under Response/Receipt Data click on the Configure Response Fields button.

12. Check Return the txn_number.
13. Select Save Response Settings at the bottom.
14. Click Return to main configuration.
15. You can now configure your TouchBistro application.
Chapter 3. Configuring TouchBistro
1. Open your restaurant on TouchBistro.
2. Log in as Admin.
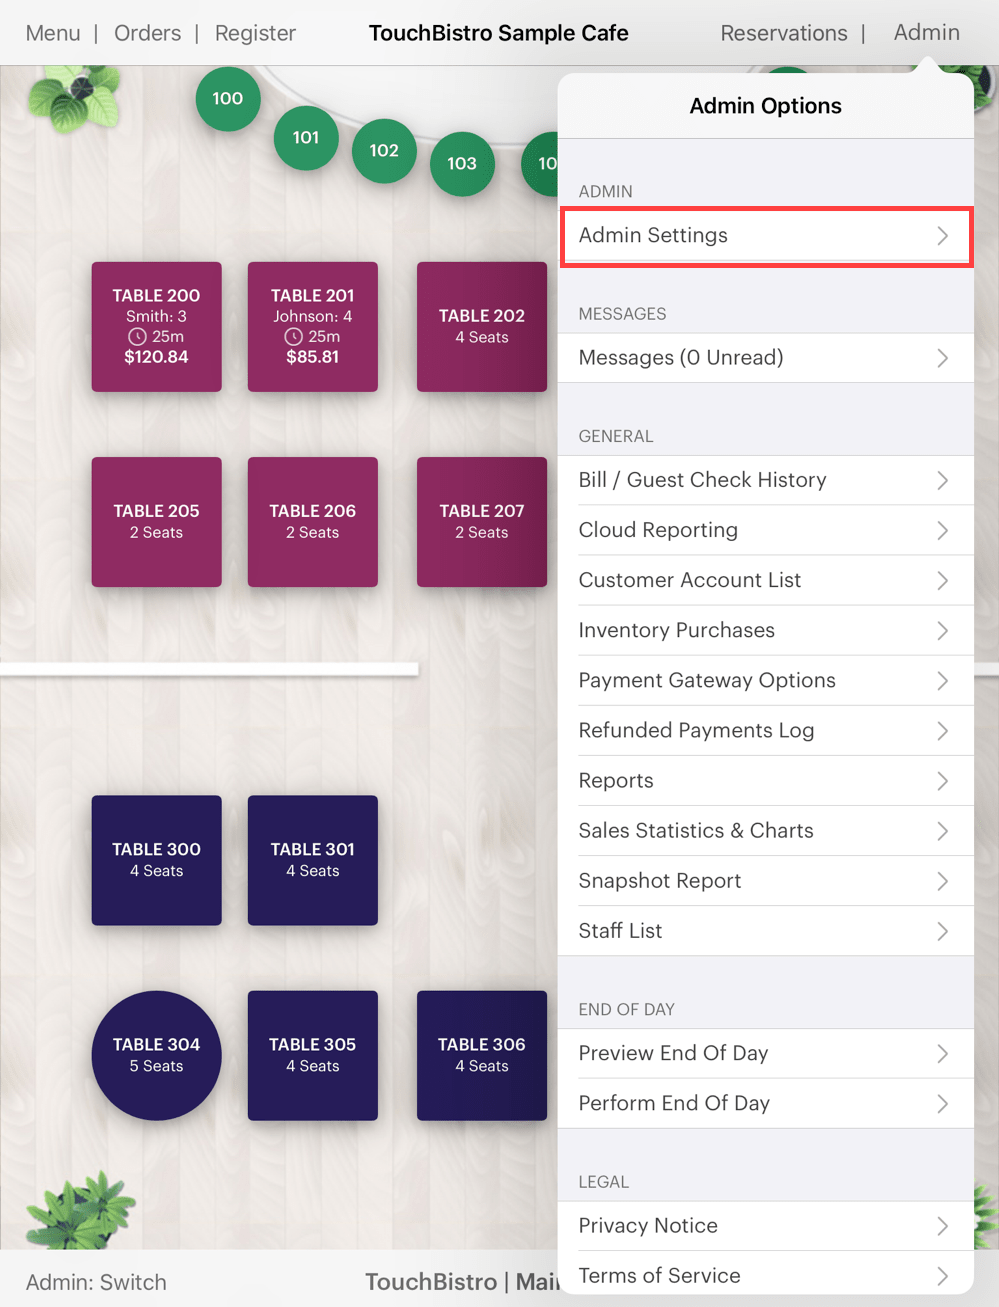
3. Tap Admin | Admin Settings in the top right hand corner.

4. Tap Payment Gateways under Settings.
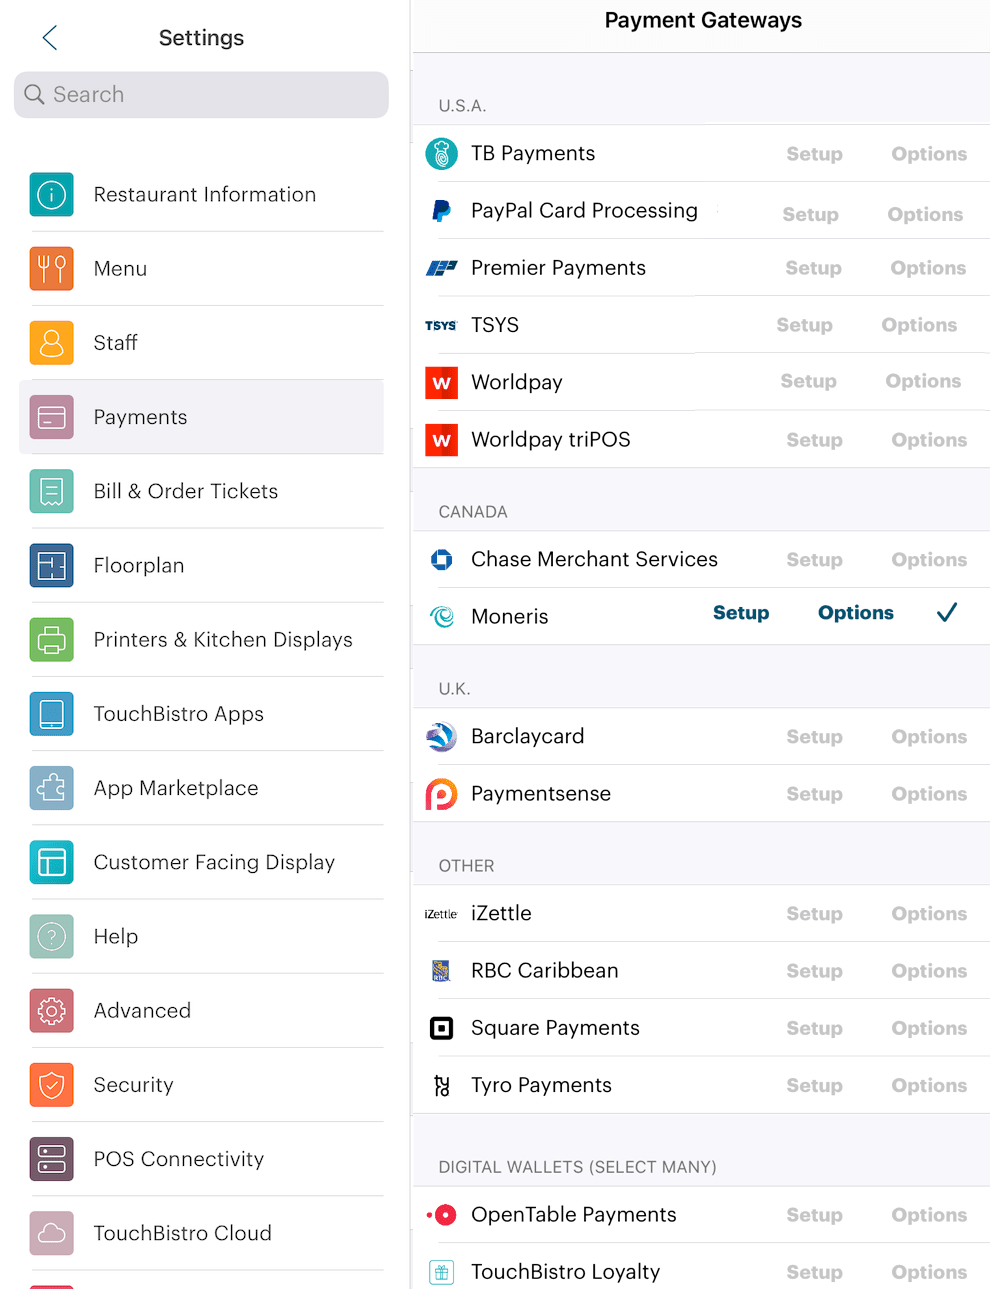
5. Tap on Moneris and ensure that a check mark appears in the cell row.
6. Tap Setup.
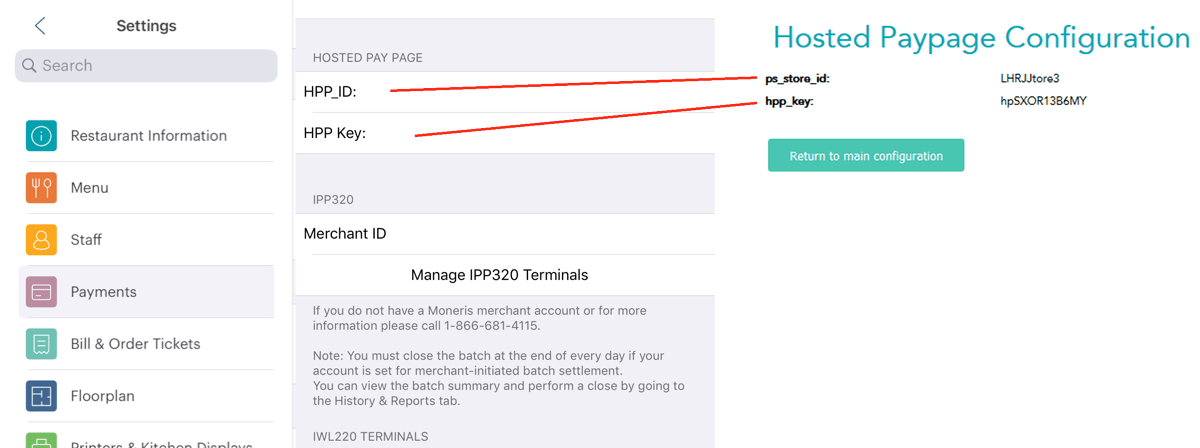
7. Enter the ps_store_id in the HPP_ID field. Enter the hpp_key in the HPP Key field.
8. Tap Done.


 Email
Support
 Frequently
Asked Questions
