Creating a Menu using RMM
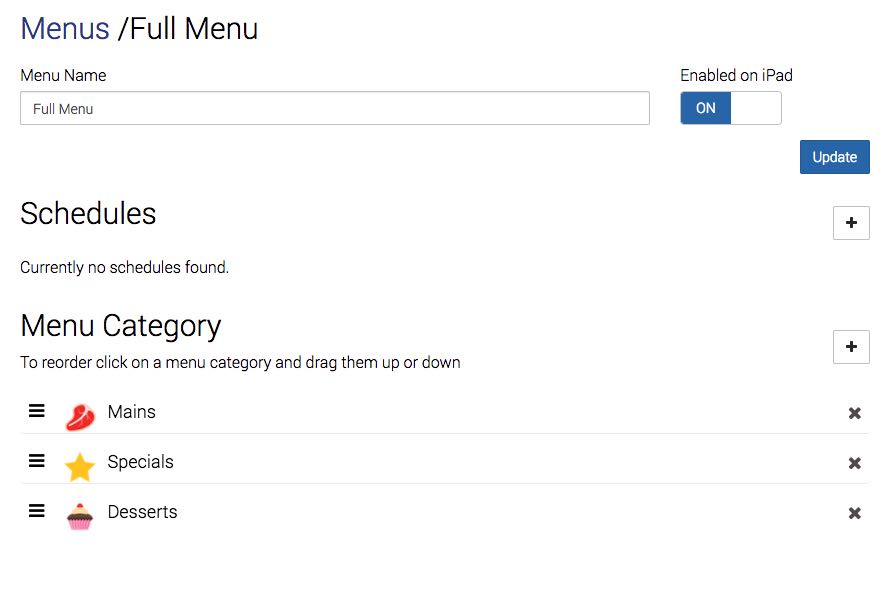
After creating any needed Sales Categories, click Menu Options | Menus. By default you will see Full Menu. This can hold all of your Menu Categories and Menu Items. You could also create specialized menus, such as a dinner menu, a lunch menu, a breakfast menu, and so on.

1. If you want to create Menu Categories under the existing Full Menu, click Full Menu. Otherwise, click the Add + icon to add a new Menu.

2. If you would like to change the name of this menu, enter the new name in the Menu Name field.
3. If you would like to temporarily disable this menu item and make it unavailable on the Order screen, click Enabled on iPad and turn it off.
4. If you would like to make this menu and its Menu Categories available only during certain times, click Schedules.

5. Imagine this is a Brunch menu. To make it available, say, only on Saturday from 10 am to 12:30 pm and Sunday from 10 am to 2 pm, set the start/end time and then click the available days.
6. Click Create.

7. You can click the Add + icon to add additional available times.

8. To add a Menu Category, click the Add + icon next to Menu Category.

9. You are given two tabs. A New Category tab lets you start a new Menu Category from under the Menu. You can also click Existing Category to add any Menu Categories you create outside of the Menus option.
10. Click New Category.
See Next Step
Step 4 – Set Up Menu Categories
See Previous Step
Step 2 – Set Up Sales Categories


 Email
Support
 Frequently
Asked Questions
