
 Email
Support
Email
Support Frequently
Asked Questions
Frequently
Asked Questions
Taking and Closing Deposits for Future Orders using Accounts
Table Of Contents
Chapter 2. Configure your End of Day to Report on Accounts
Chapter 3. Creating the Order Quote (Optional)
Chapter 4. Capturing the Deposit
Chapter 5. End of Day Reporting
Chapter 1. Introduction
Sometimes you may have customers that request a large order for a future date (catering an event) or they wish you to host a large event at your venue for a future date (for example, a company Christmas party). Since such large orders require considerable investments in time and material, it’s customary to require a deposit (either cash or on a credit card). Although you want to account for the deposit in your end of day, you don’t want to book the deposit as a sale for that day. You also want to ensure TouchBistro “remembers” the deposit and the deposit gets credited properly when the customer arrives to pick up the large order or pays for the event upon completion.
In TouchBistro, you can use the Accounts feature to set up an account for the customer, log the deposit with the customer account, and then later charge out the food or completed event to the account. In addition, the Accounts Report and the Detailed Account Report can be added to your End of Day report to help balance out your cash drawer when you get deposits or payments.
Chapter 2. Configure your End of Day to Report on Accounts
If you plan to use Accounts, you need to make it a part of your End of Day report.
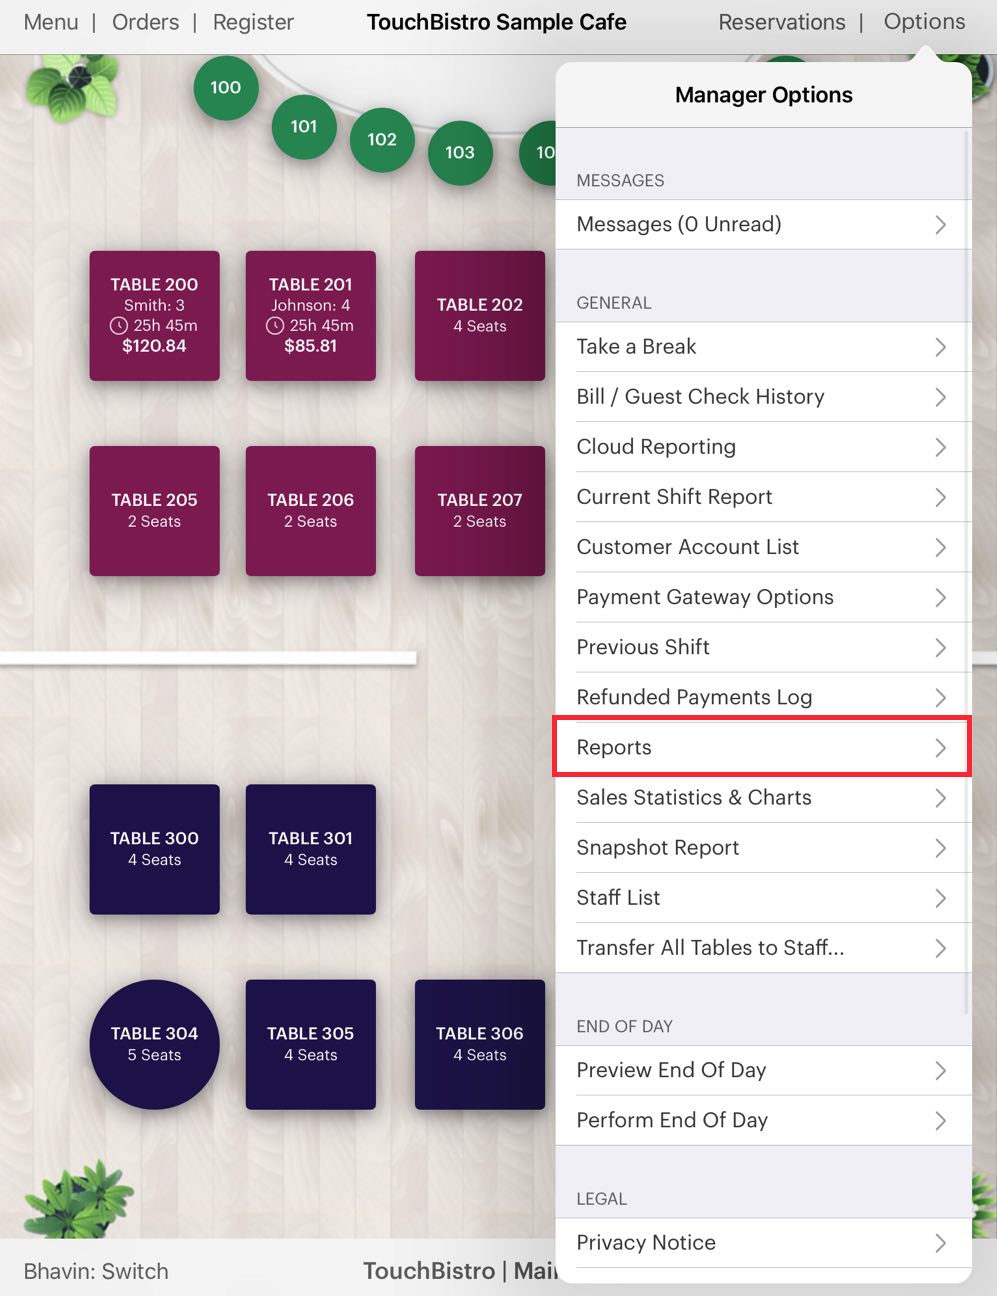
1. Tap Admin | Reports.
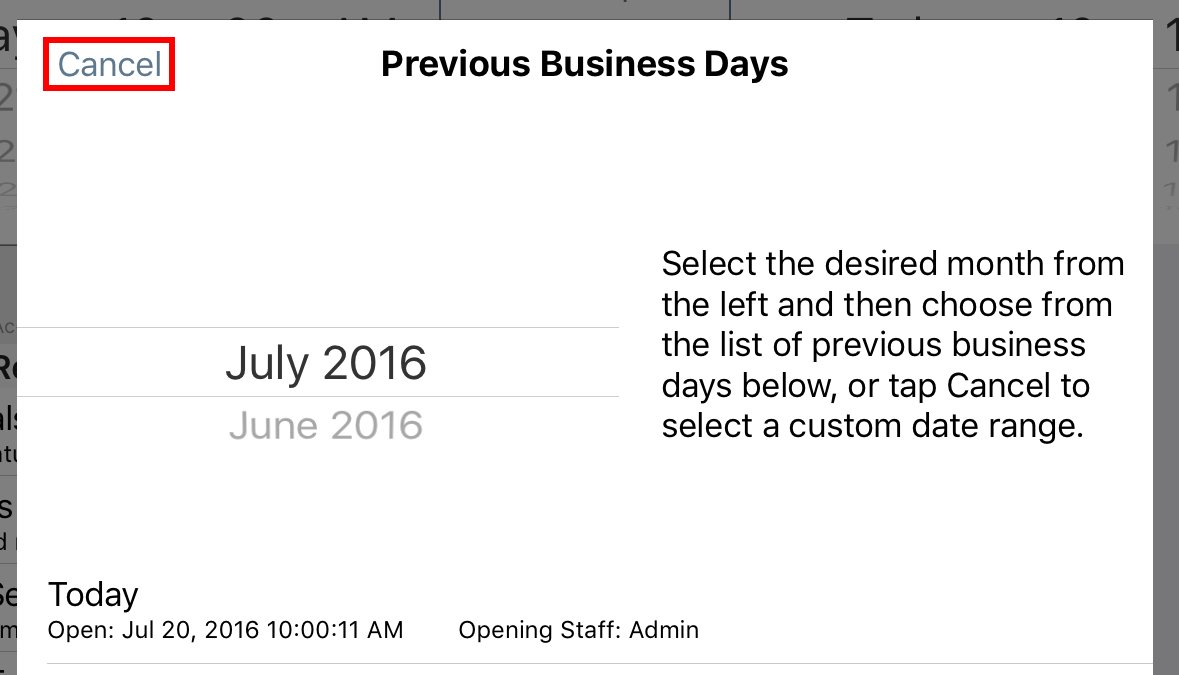
2. Tap Cancel.

3. Tap Load Template.
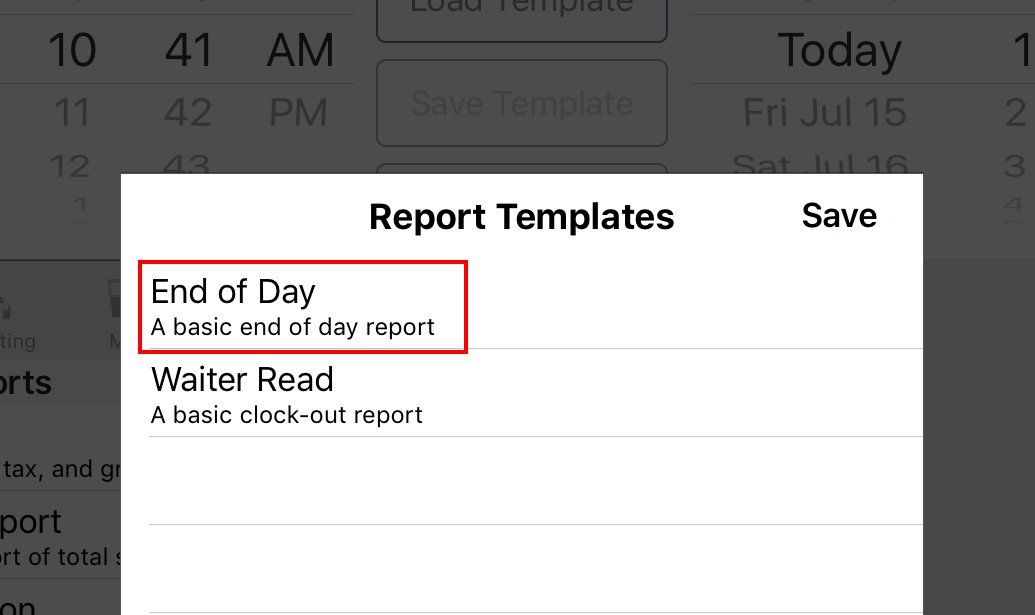
4. Tap End of Day.
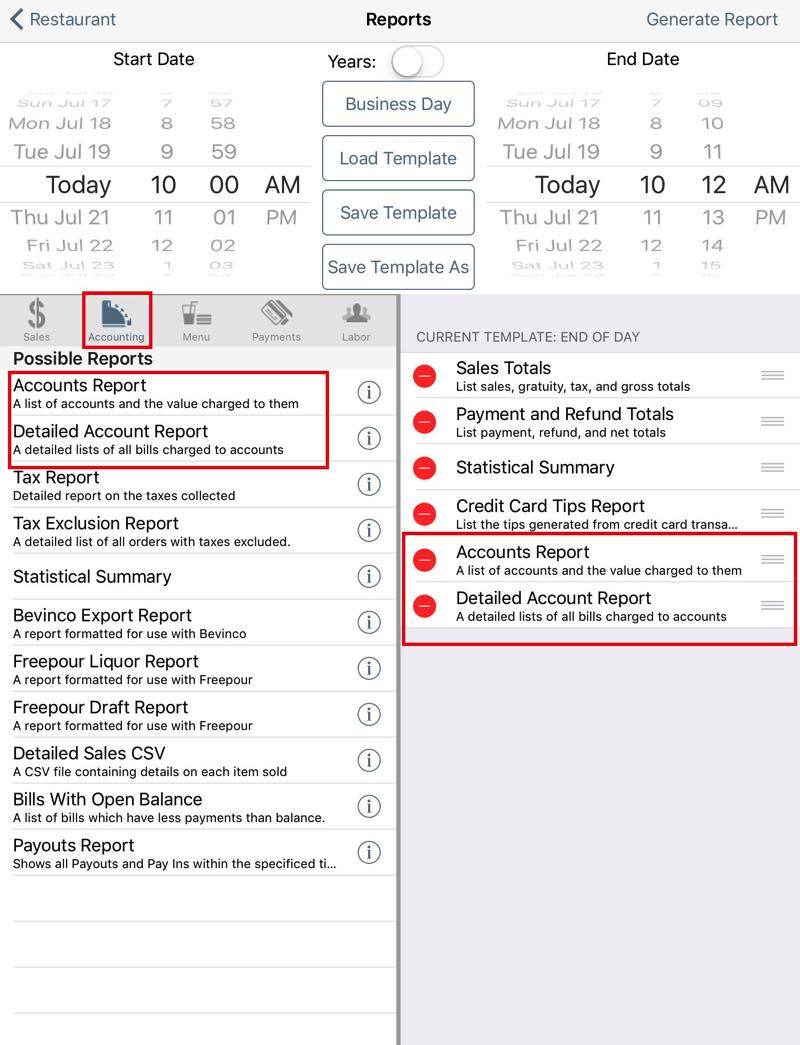
5. Tap Accounting and add the Accounts Report and Detailed Account Report to your list of reports.
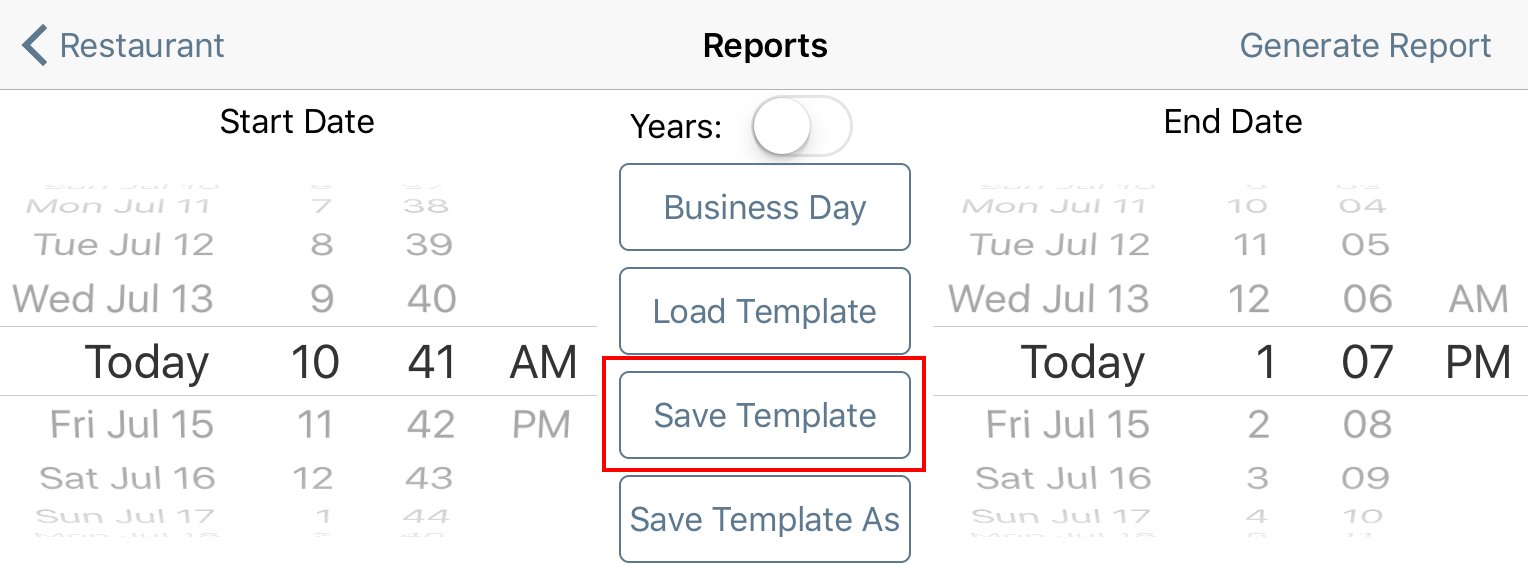
6. Tap Save Template.
Chapter 3. Creating the Order Quote (Optional)
When a customer comes in to order a large advanced order, the first thing you want to do is create a quote and capture details like name, phone number, and agreed upon deposit. This quote can help the customer understand what’s being ordered and the final price. A way to do this is set up an order, print it, and then delete it.
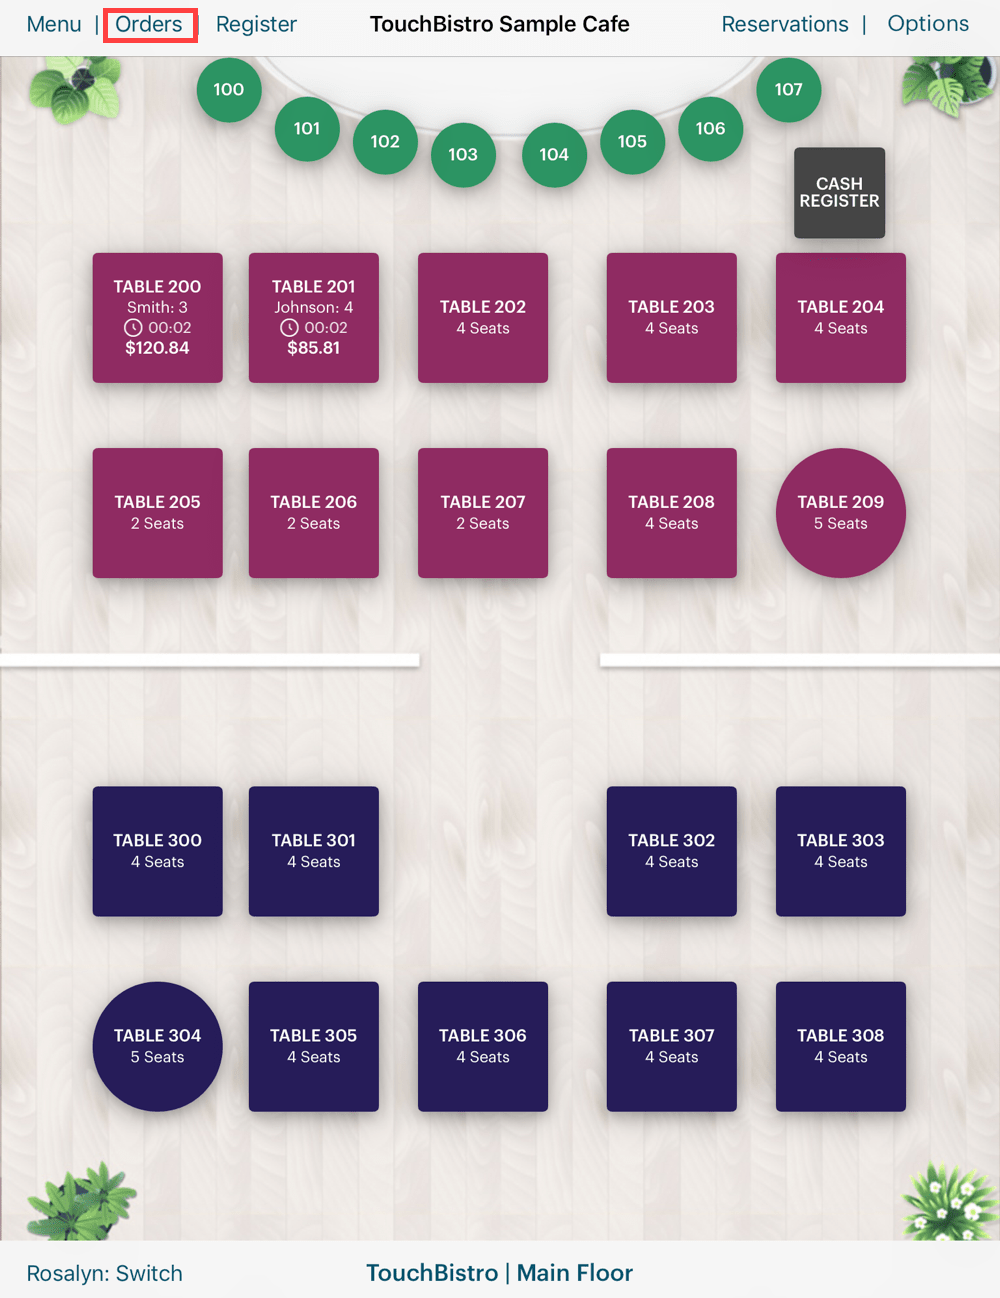
1. From your floor plan, tap Orders.
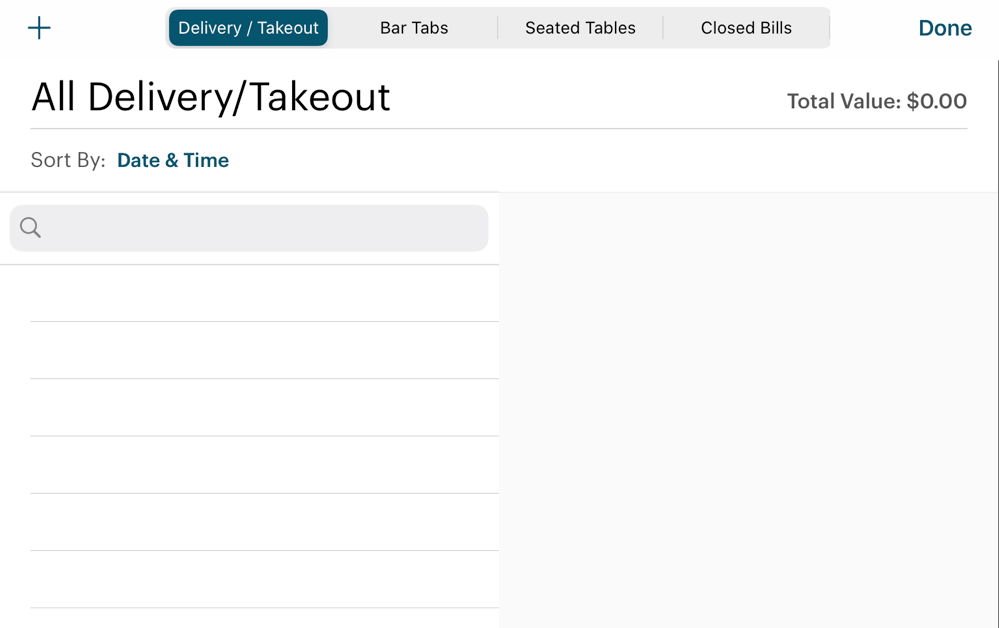
2. Tap the Delivery/Takout tab.
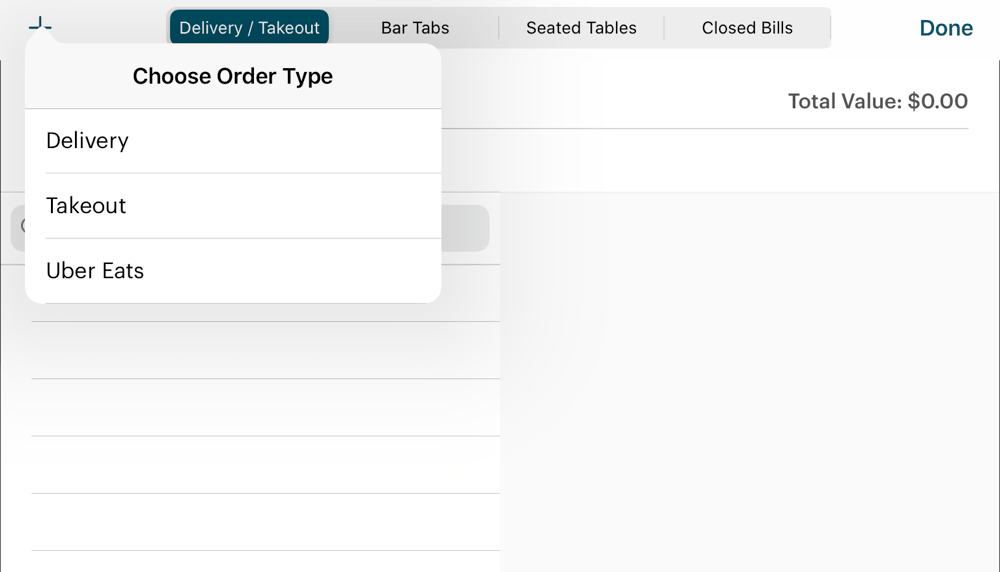
3. Tap Add + icon and add a Takeout order.

4. Enter details. Use the Notes area to record the day of pickup (or delivery) and the agreed upon deposit amount.
5. Tap Done.
6. Now enter the items and quantity.
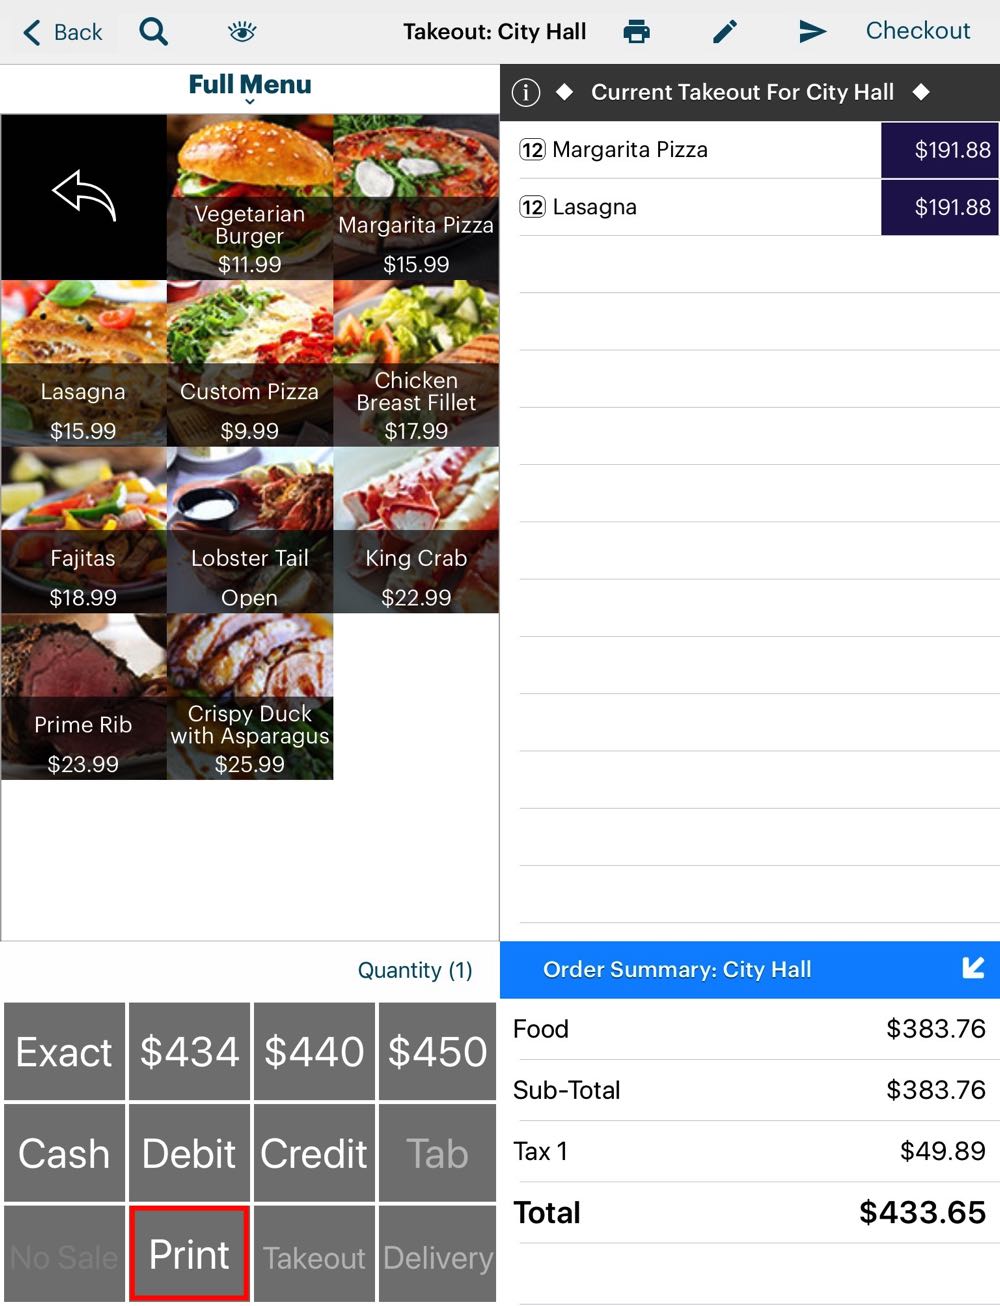
7. Under Receipt Options, tap Print and give a copy to the customer. (Note, if you have Unsent Items Warning set to Warn, you won’t be able to print a receipt this way. You will need to disable this option under Security.)
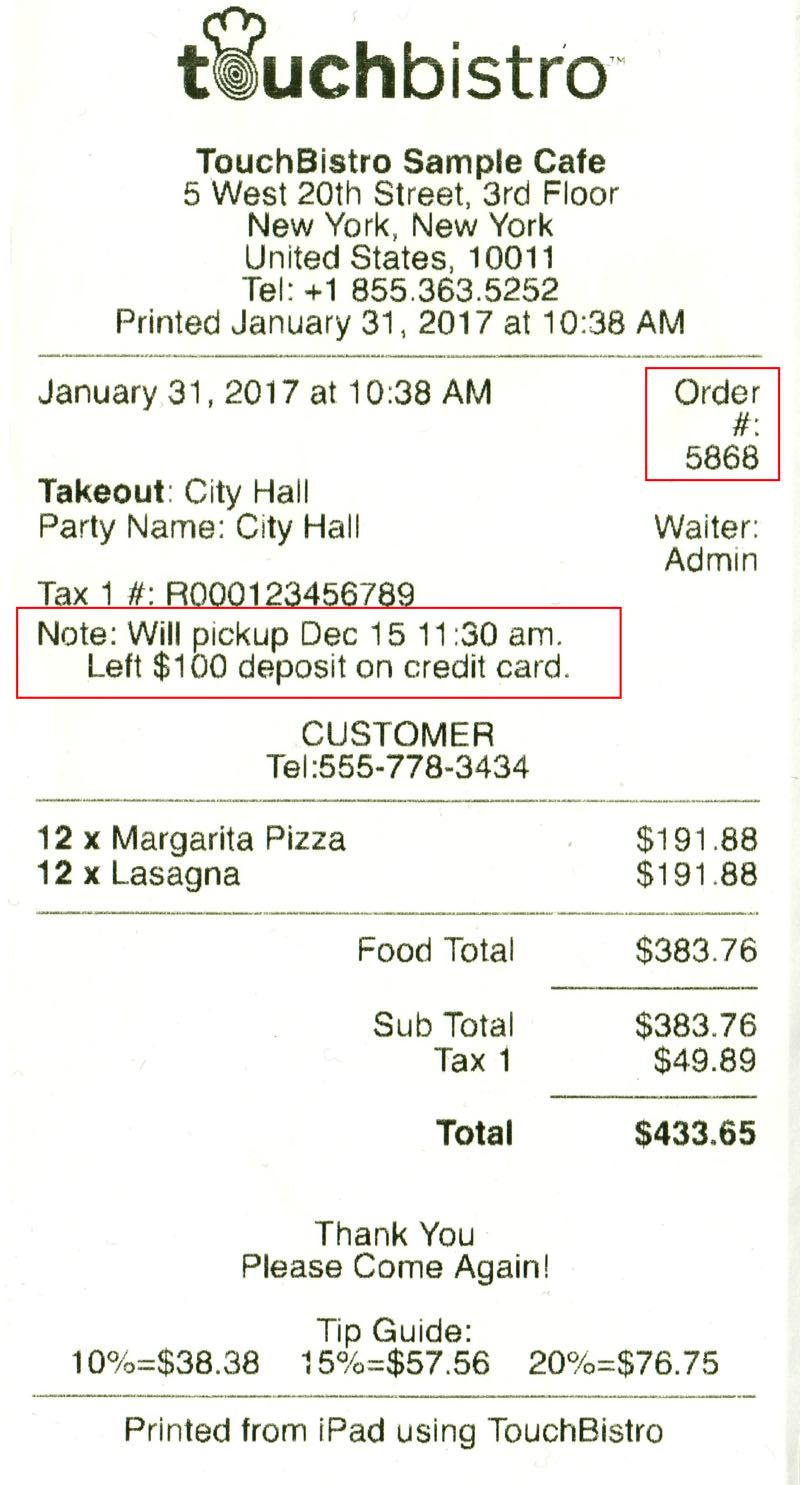
8. Tap Print again to print a copy of this order for your records. You will use this as a reminder of what needs to be prepared for the day of pickup. Note on the bill a deposit is being left. Note the Order #. You will use this later. Mark on your physical calendar or calendar app that this order needs to be prepared and other details.
9. Tap Back to return to the Orders screen.
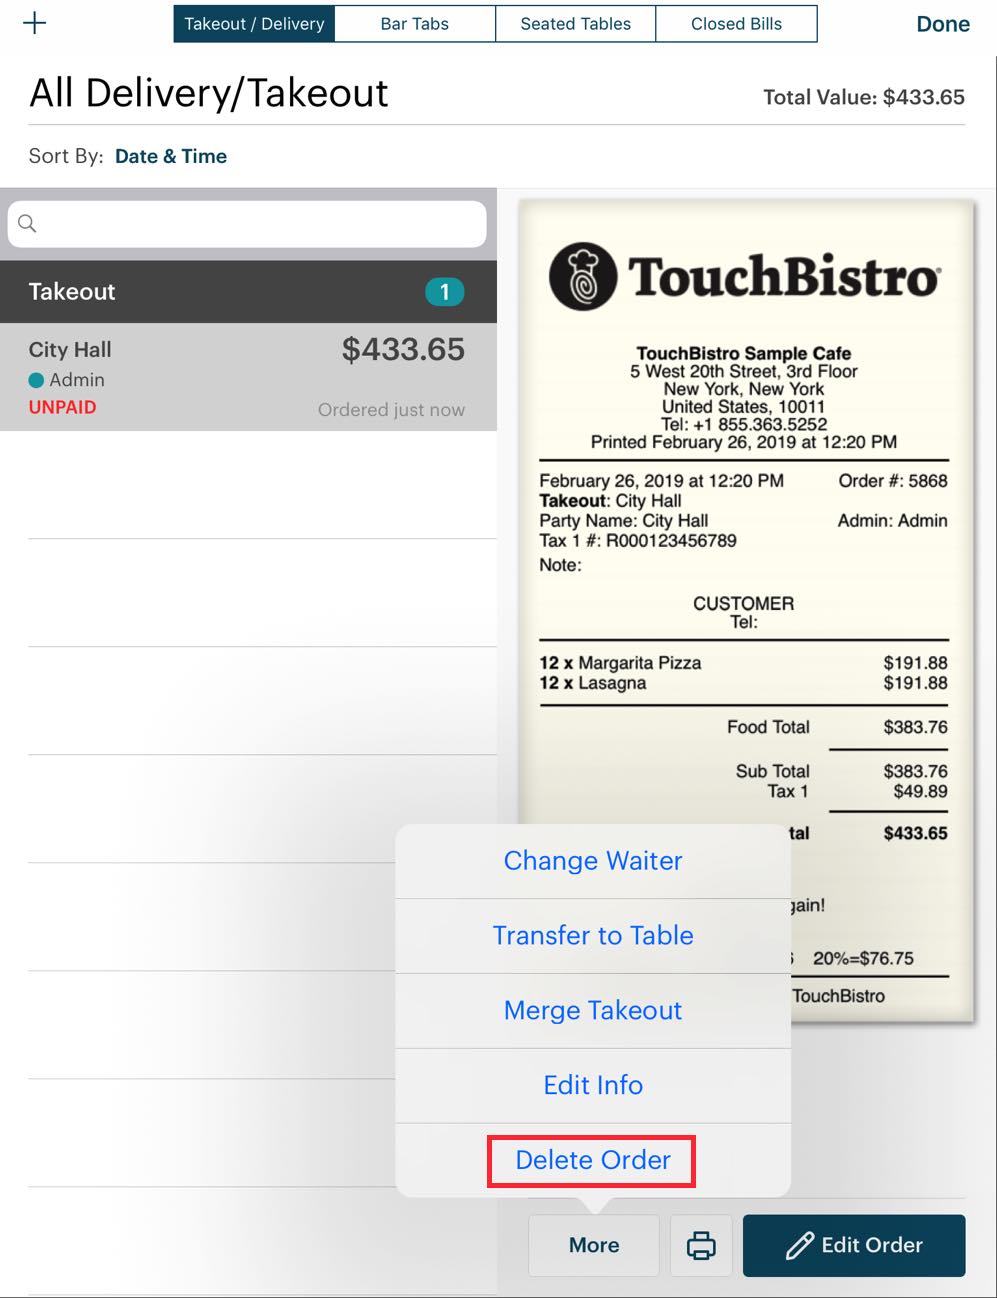
10. Tap More and tap Delete Order.
11. We don’t recommend keeping this order open as you have to keep ignoring it every time you perform an end of day.
12. Tap Done to return to the floorplan screen.
Chapter 4. Capturing the Deposit
After the customer has agreed to the order and the deposit, it’s now time to process the deposit. The next step is to process the deposit and credit this deposit in the customer’s account record.
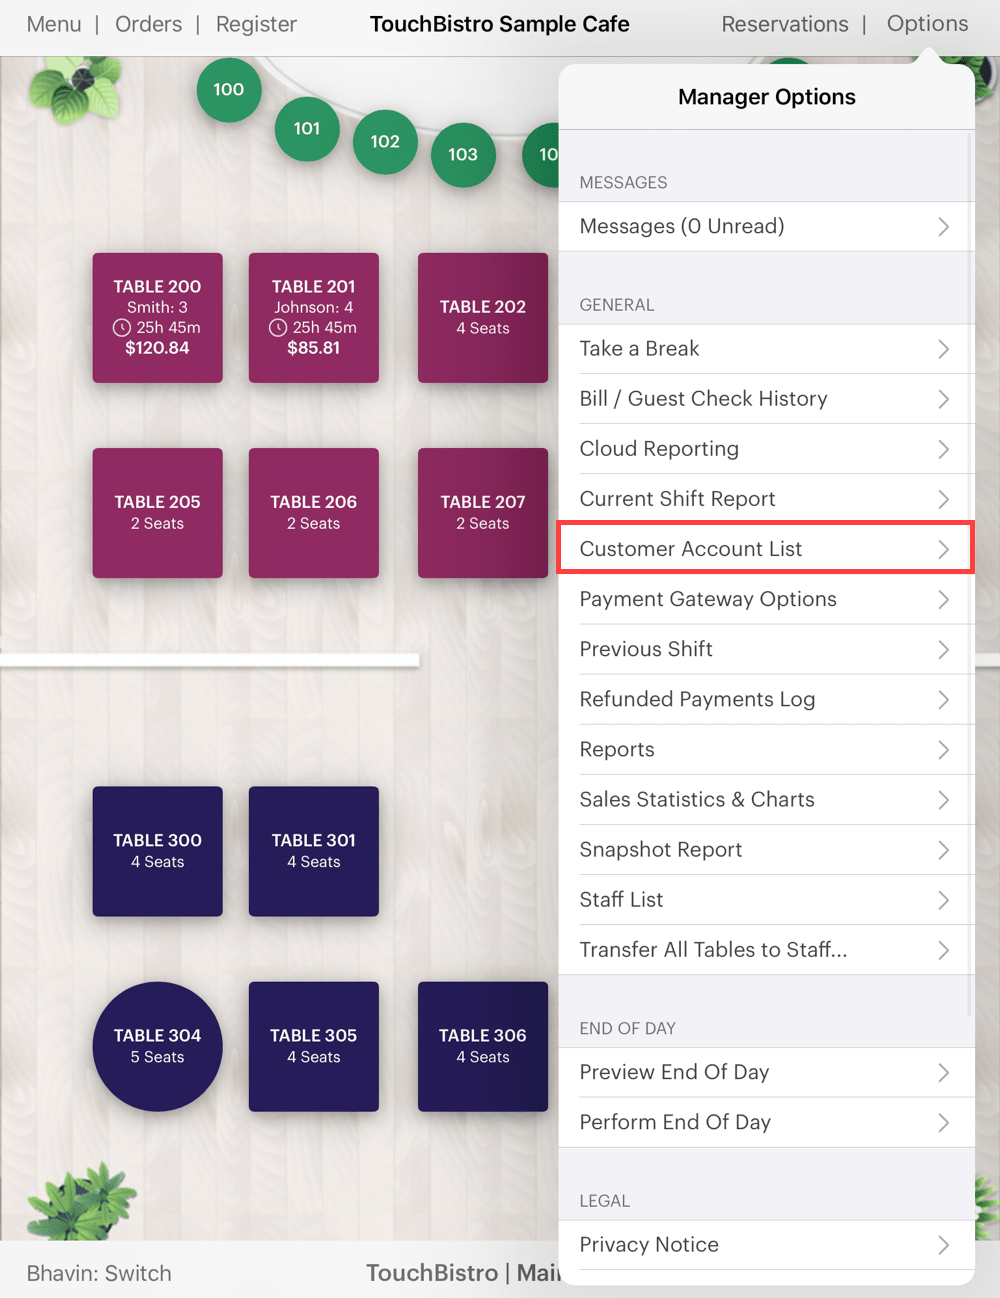
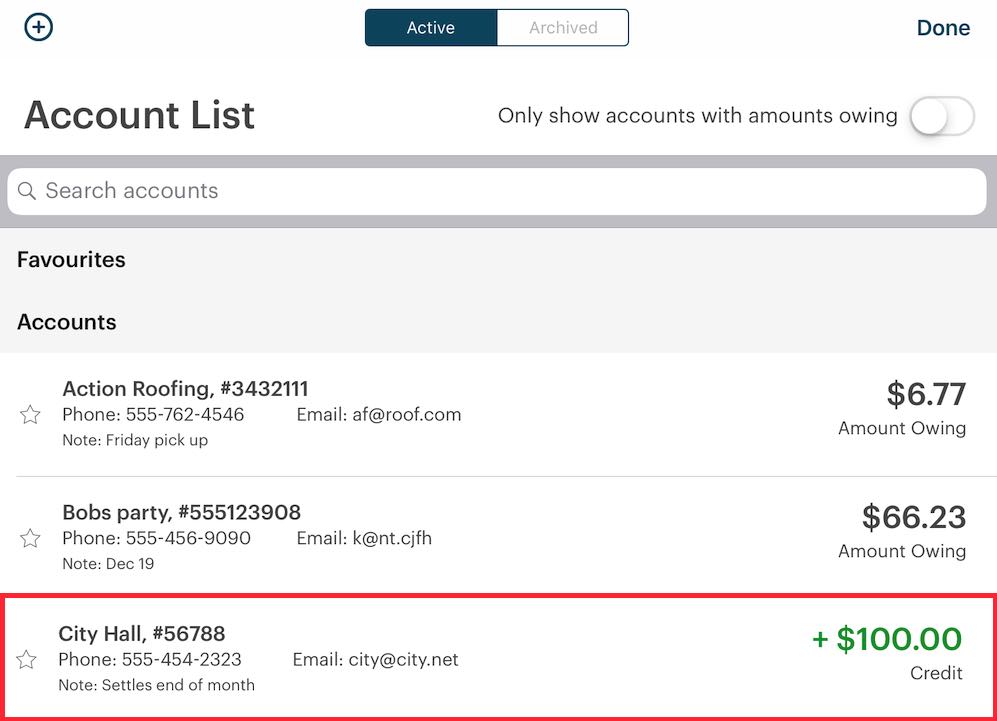
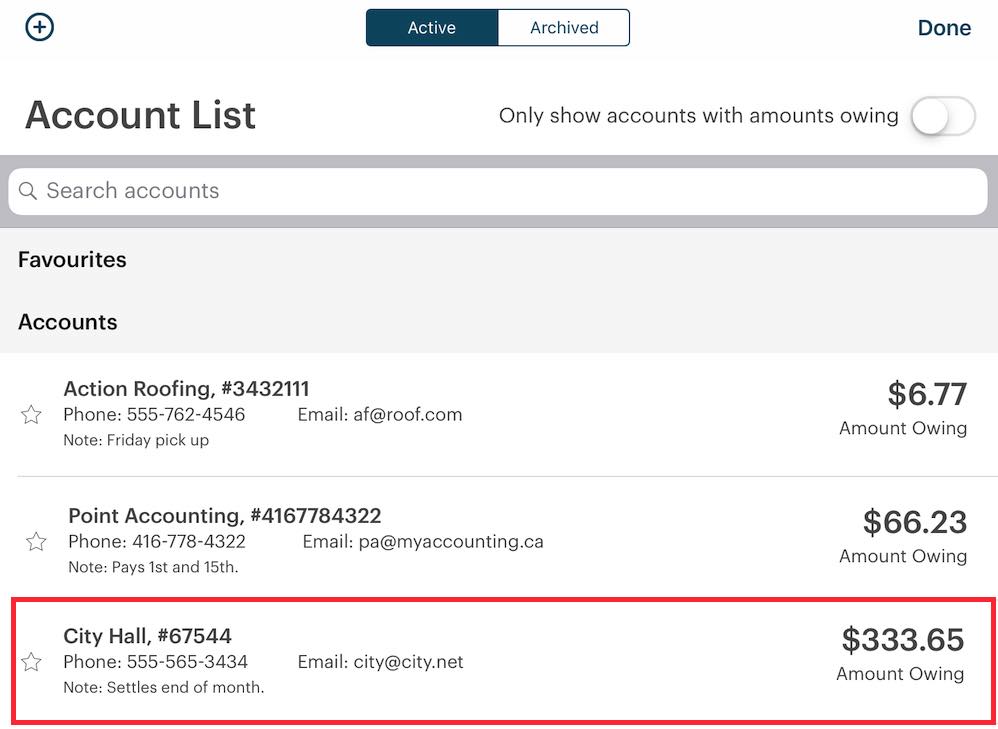
1. Tap Admin | Customer Account List.

2. Tap the customer’s account (e.g., City Hall).
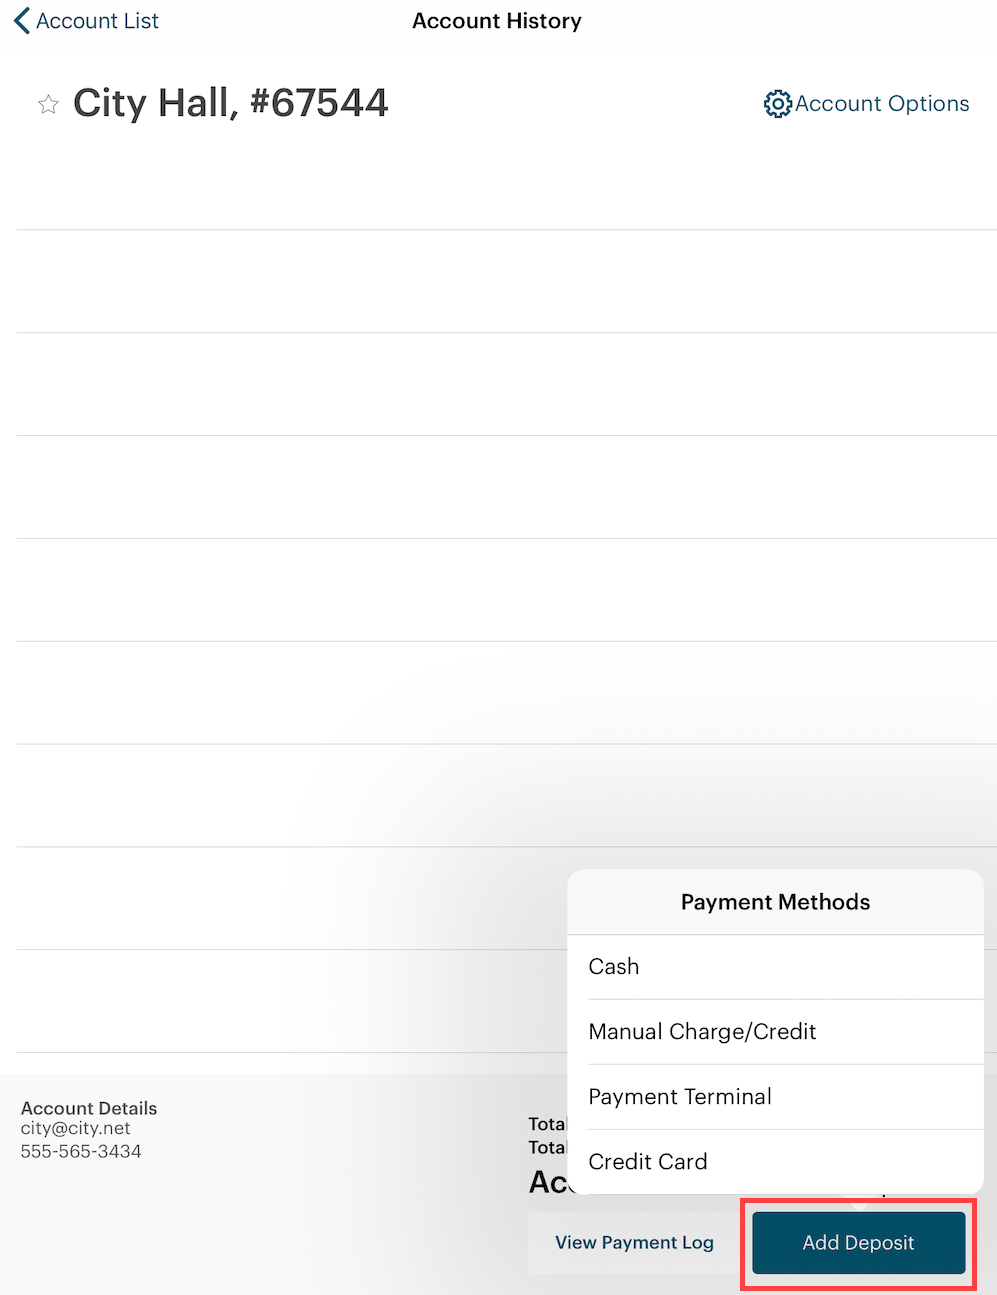
3. Tap Add Deposit and select a payment method. In this example, we’re paying with an integrated credit card. Note: You cannot add a deposit if the account already has an amount owing. If the account wants to add a deposit, the account holder must first reduce the Account Balance to $0.
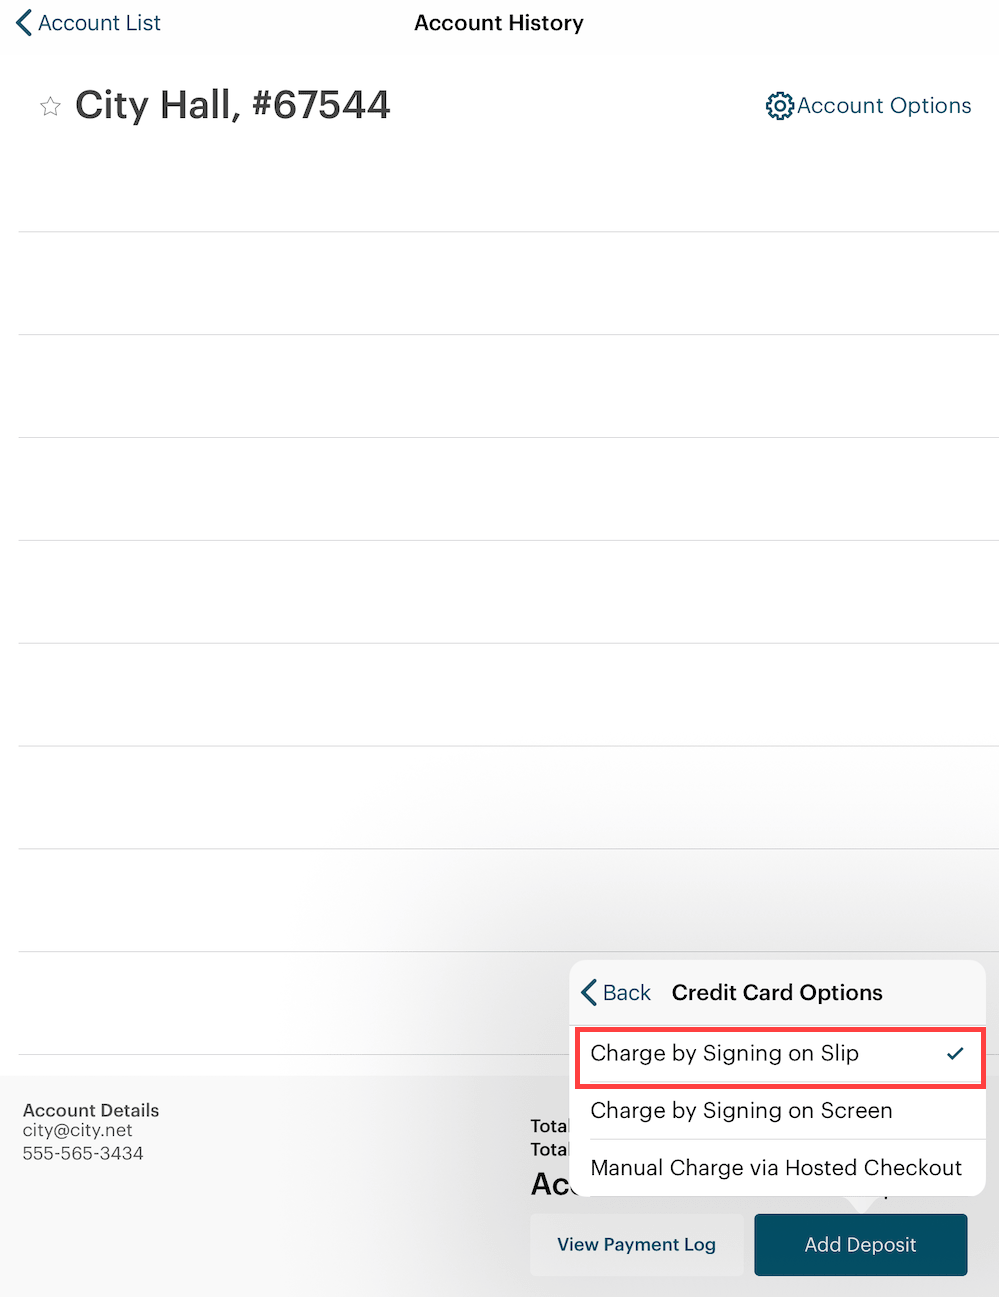
4. For an integrated payment, if prompted, select Sign on Slip.
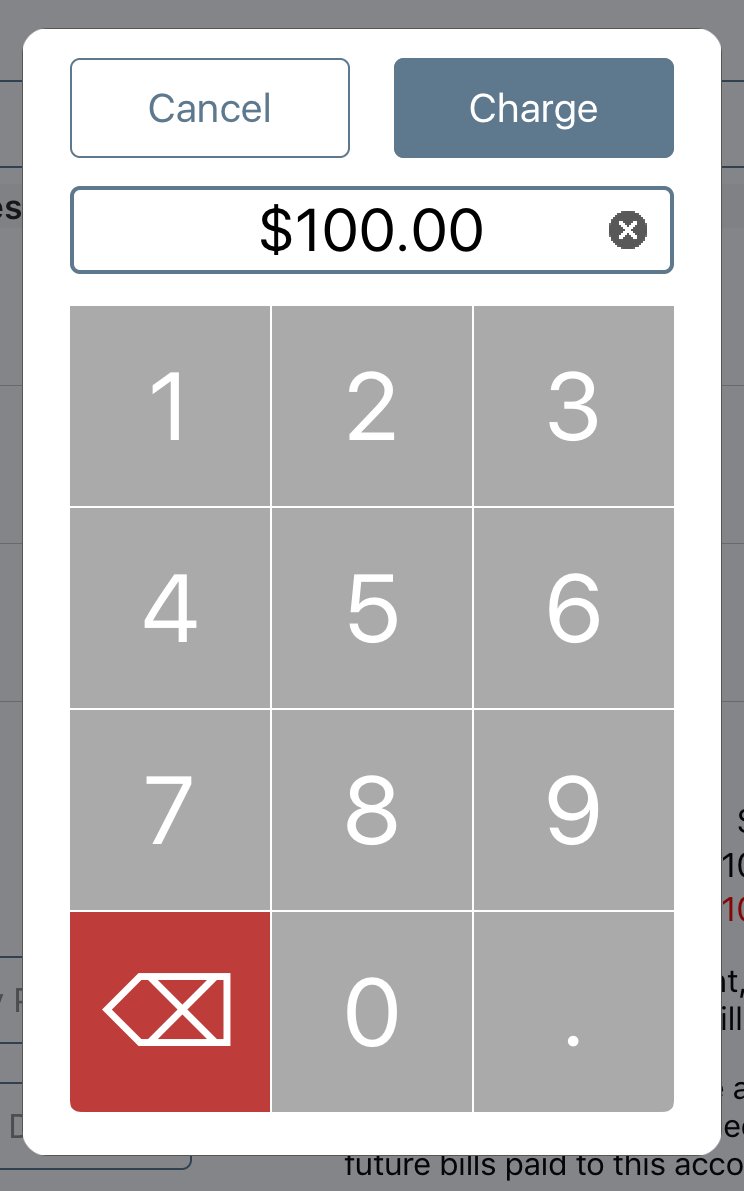
5. Enter the deposit amount. For example, enter $100.00.
6. Tap Charge.
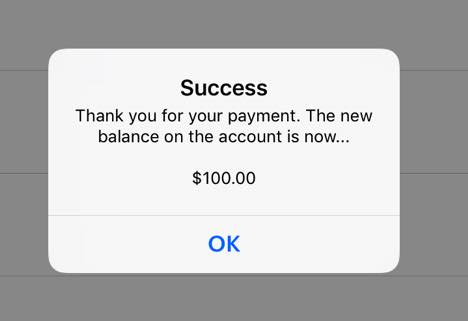
7. TouchBistro notes the deposit. Tap OK.
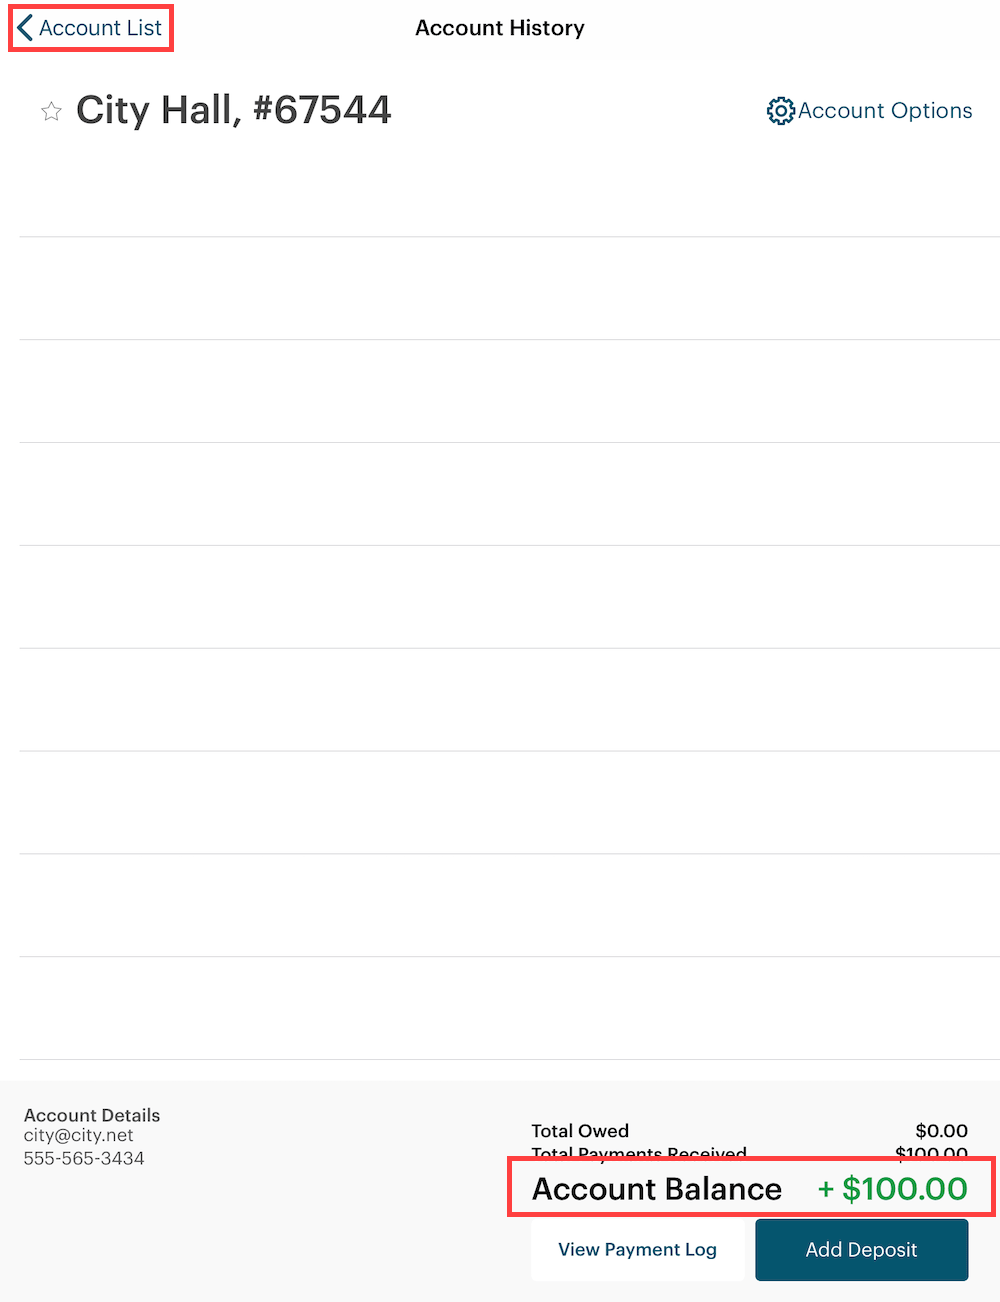
8. You’ll notice the account’s Remaining Balance amount is green with a + sign to indicate the account has a positive balance.
9. Tap < Account List to return.
It’s important to note when you use the Add Deposit feature, TouchBistro will not report the deposit as a sale. It will report as a deposit on the account reports you added to your end of day. In most jurisdictions, one does not recognize a deposit as revenue until you provide the goods or services.
Chapter 5. End of Day Reporting
If the only customer we had for this business day was the City Hall customer placing a $100 deposit and we generated our end of day, we would see the pictured example.

We can see the deposit is not recorded as a sale. However, we can see from our Account Report and Detailed Account Report the deposit is recorded as a non sale deposit. This way we know when we try to balance out our cash drawer at the end of the day, where the extra $100 came from.
Chapter 6. The Day of Pickup
When the customer comes in to pick up and pay for the order, follow these steps:
1. Use Orders | Takeout to recreate the takeout order.
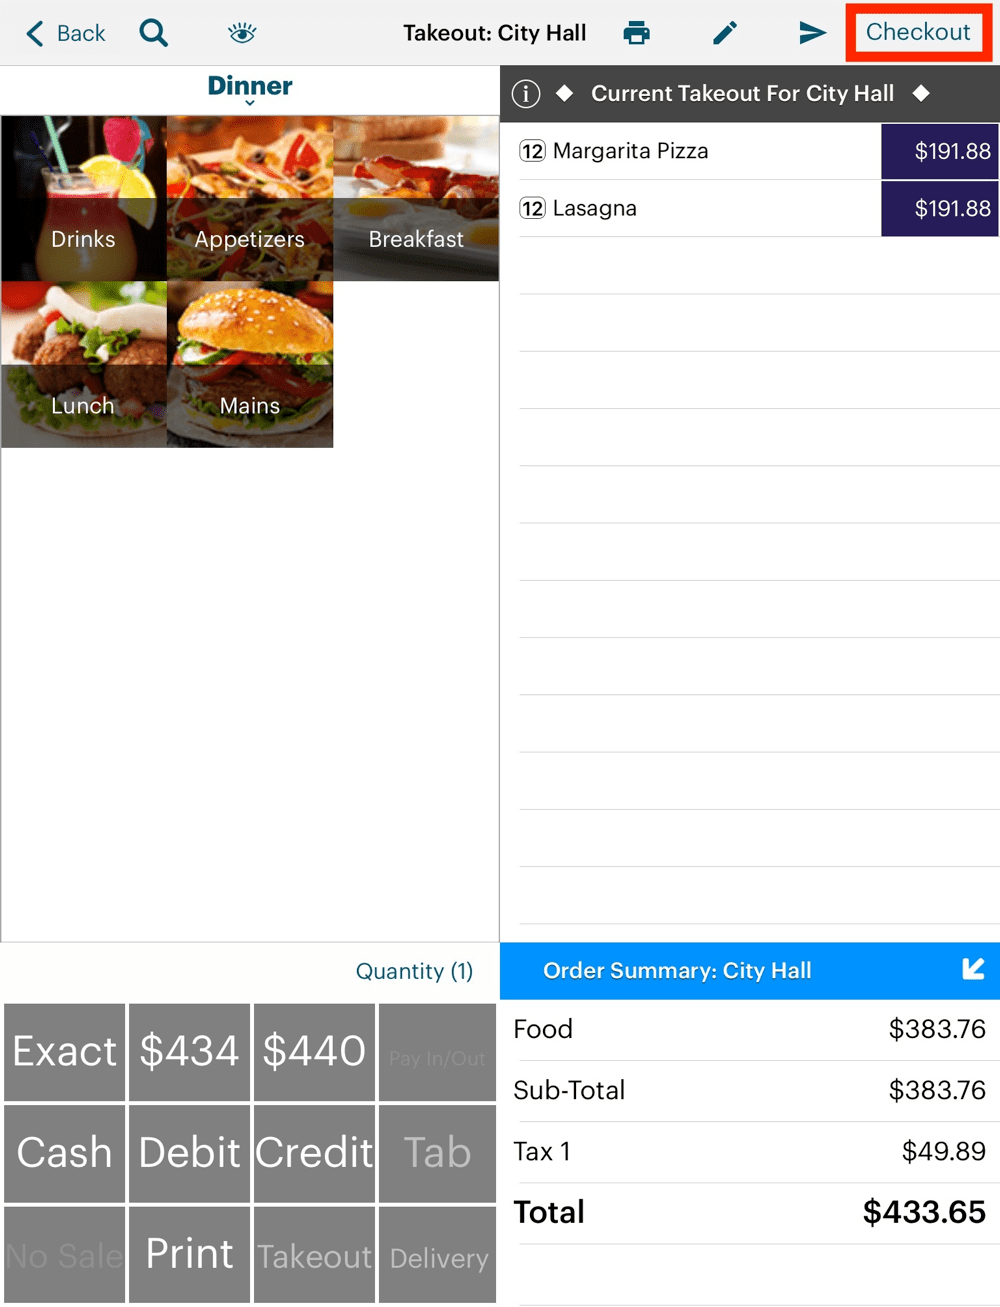
2. Tap Checkout.

3. Tap Pay on Account under Payment Options.
4. Tap the account you set up (e.g., City Hall).
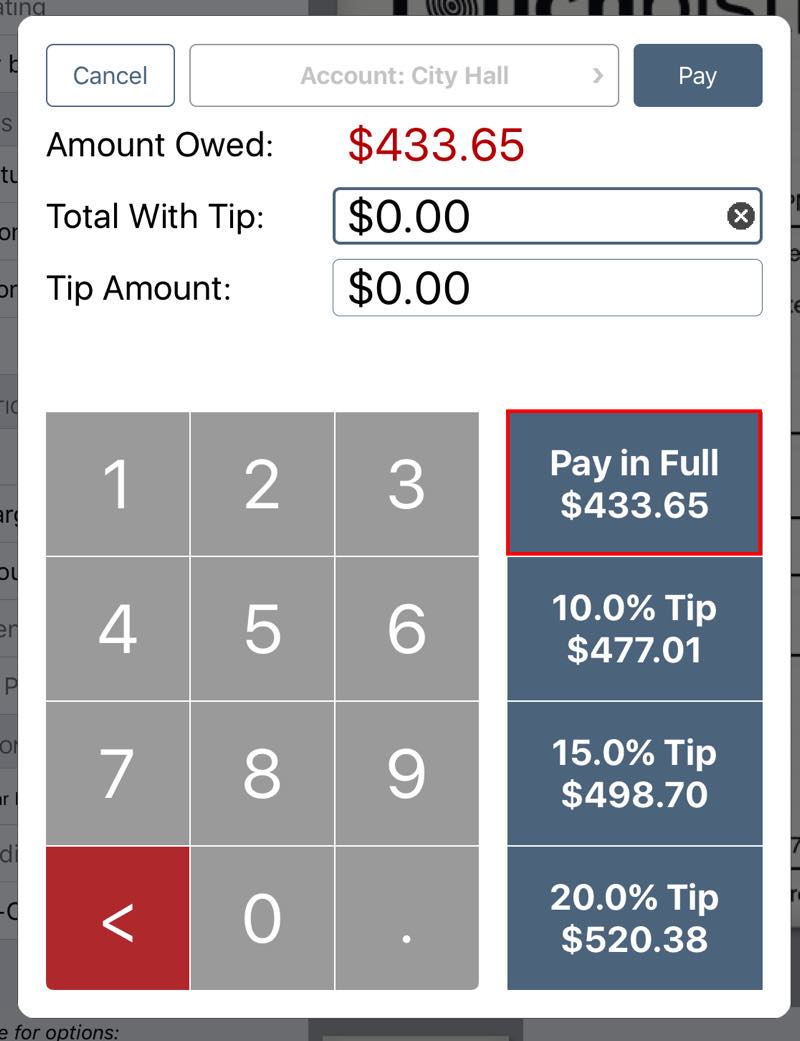
5. Tap Pay in Full.
6. Tap Print Receipt & Close Table.
7. Tap Admin | Customer Account List.
8. Tap the customer’s account (e.g., City Hall).

9. You will now see the order is logged on the account’s Account History screen. As well, the $100 deposit is applied and the Account History screen reports the outstanding balance. Now is the time to settle that balance and accept actual payment for the balance.
10. Tap Apply Payment.

11. Tap the desired payment method. If you are using an integrated payment processor, tap Credit Card and select Sign on Slip or Sign on Screen if prompted.
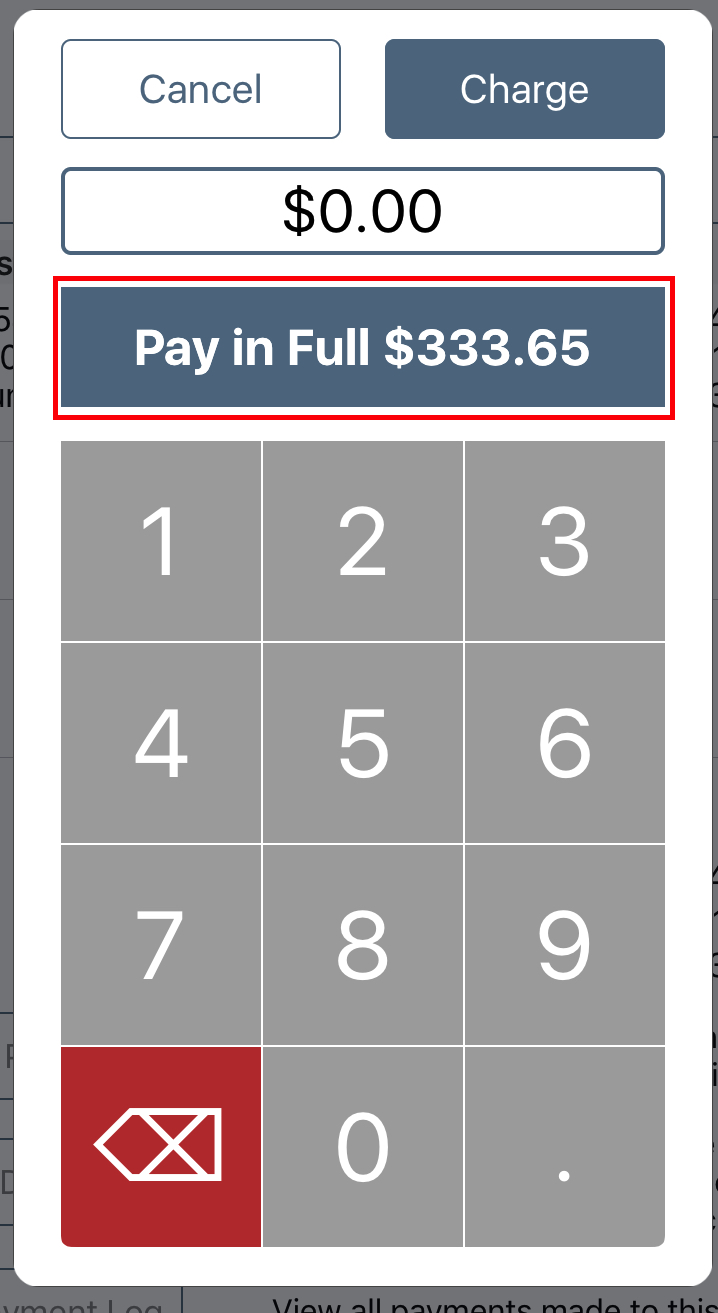
13. Tap Pay in Full. (You’ll notice the Pay in Full amount is the bill total less the deposit.)
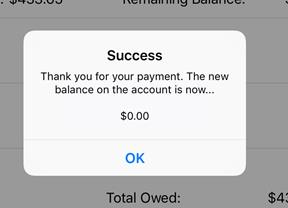
14. TouchBistro prompts you the payment was added successfully. Tap OK.
15. Exit from the accounts screen.
Chapter 7. End of Day Reporting
Similar to the business day where we collected the $100 deposit, we’ll assume the only customer we had was City Hall coming to pay for the catering job.
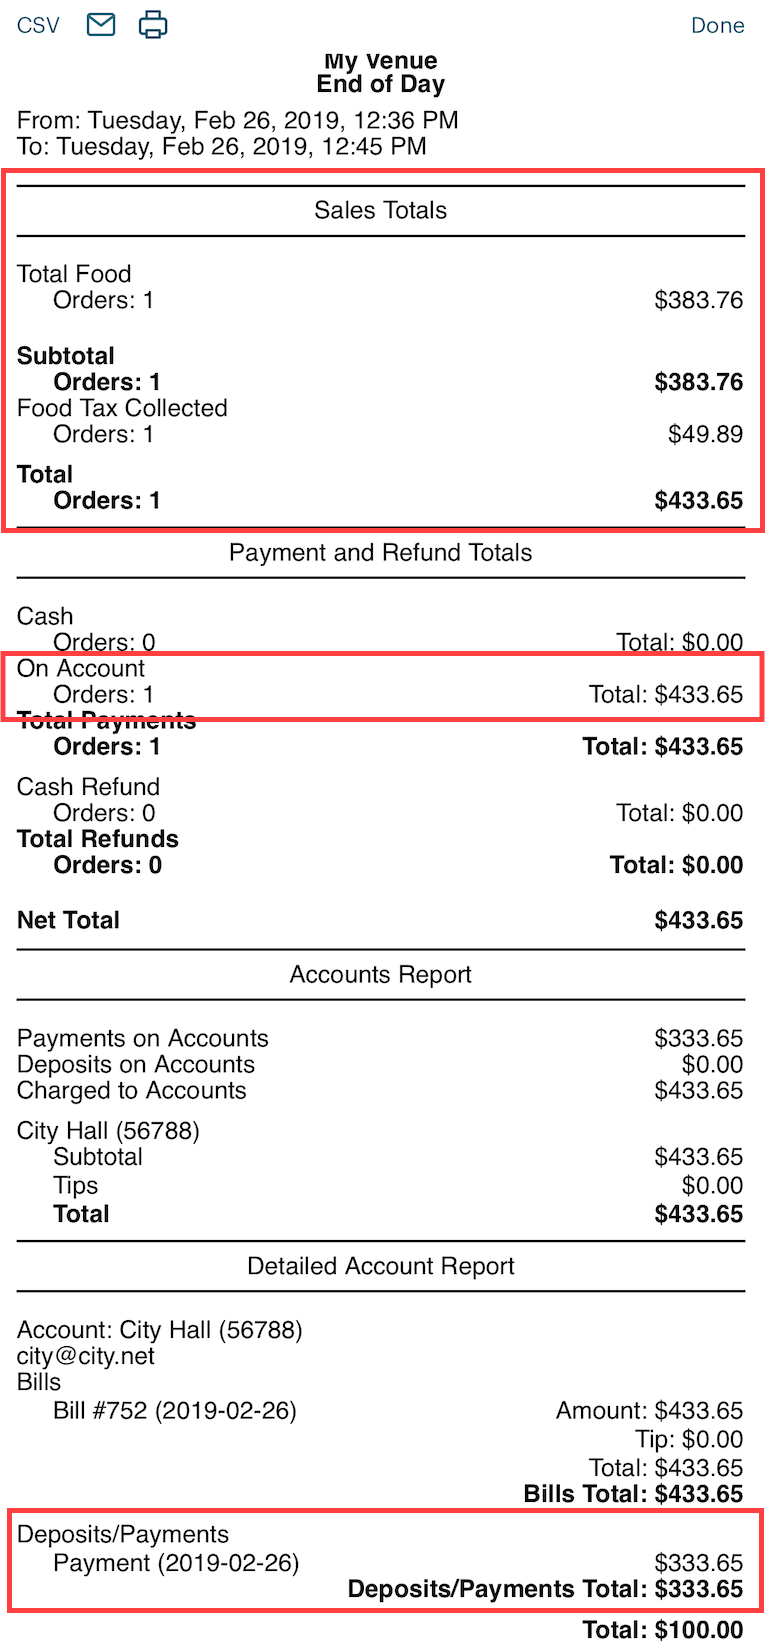
If we ran an end of day, we would see you book the full cost on the day of pickup. Your end of day logs it as paid on account. As well, your account reports also report the client paid $333.65 for the balance of the catering job. If this was the only sale for the day, you would be able to reconcile why there were $433.65 in reported sales but only you only have $333.65 in payments in your cash drawer.