Enabling Online Payments for TouchBistro Online Ordering
Table Of Contents
Section 1. Update TouchBistro POS to the Latest Version
Section 1. Ensure You Are Running TouchBistro in IPS/Pro Server Mode
Chapter 3. Start the Application Process via Cloud
Section 1. Applying for TouchBistro Payments
Chapter 4. Enabling in TouchBistro Online Ordering
Section 1. If I’m successfully adjudicated, can I accept online payments for each of my locations?
Section 2. How do I see my payments and deposits?
Section 3. How long should it take for funds to deposit?
Section 4. Which card types are accepted?
Section 5. Is there anything I have to do in TouchBisto POS to prepare for online payments?
Chapter 1. Introduction
If you are a Canadian or USA venue, you can enable online payments. Diners can pre-pay for their order online before submitting their order. Before you can enable online payments, you need to complete two mandatory steps:
1. You will need to complete an online application.
2. You will need to supply bank account information.
This guide will:
1. Walk you through how to apply.
2. Detail information you will need to have on hand to complete the application.
Section 1. Update TouchBistro POS to the Latest Version
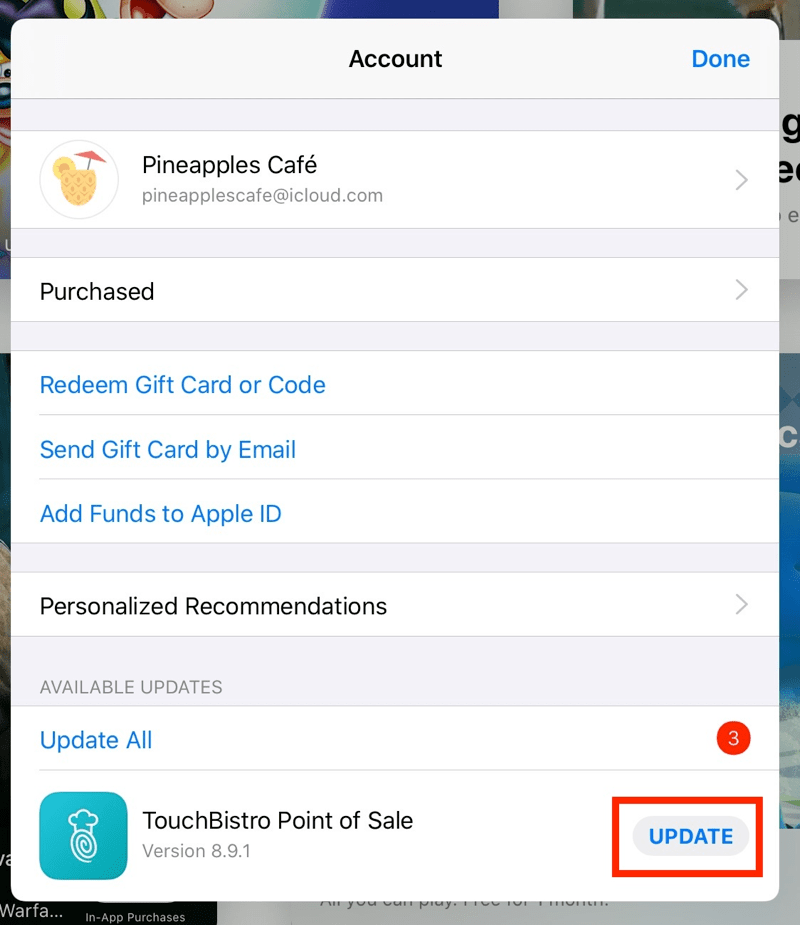
Before you enable Online Ordering on your cloud portal, you must update TouchBistro to the latest version. To find the latest version check your iPad’s App Store and see if an update is available. (Note: if you are using a Mac computer as your Pro Server, ensure you also update your Pro Server after updating your iPads.)
Chapter 2. Before You Begin
Section 1. Ensure You Are Running TouchBistro in IPS/Pro Server Mode
If you are running TouchBistro in single iPad standard mode, you will need to update TouchBistro to multi iPad Integrated Pro Server mode or (if you want to have more than five iPads in your venue) Pro Server mode with a Mac mini computer.
Chapter 3. Start the Application Process via Cloud
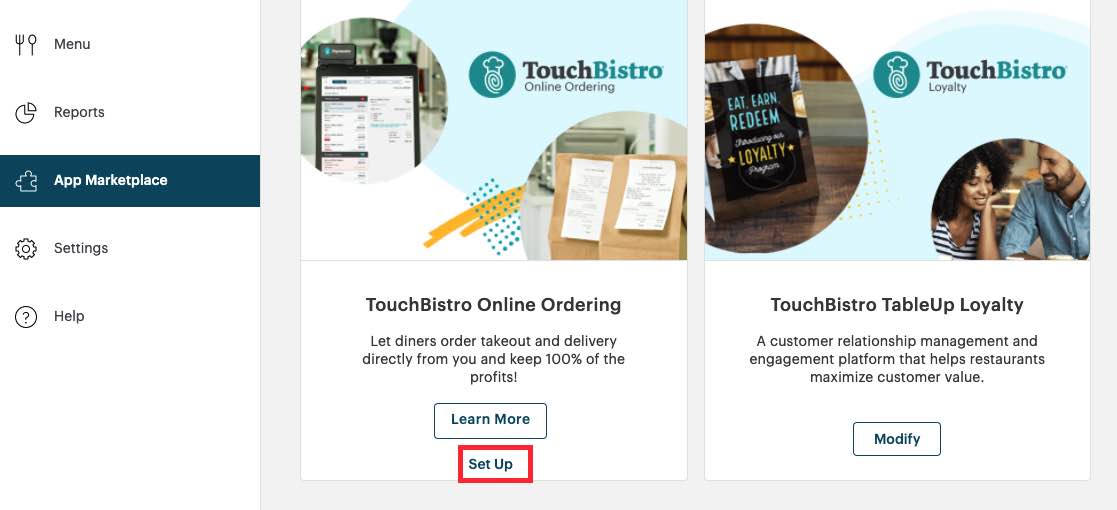
1. Log into your cloud site and click Partners. Click App Marketplace and locate your TouchBistro Online Ordering “chicklet” and click Set Up.
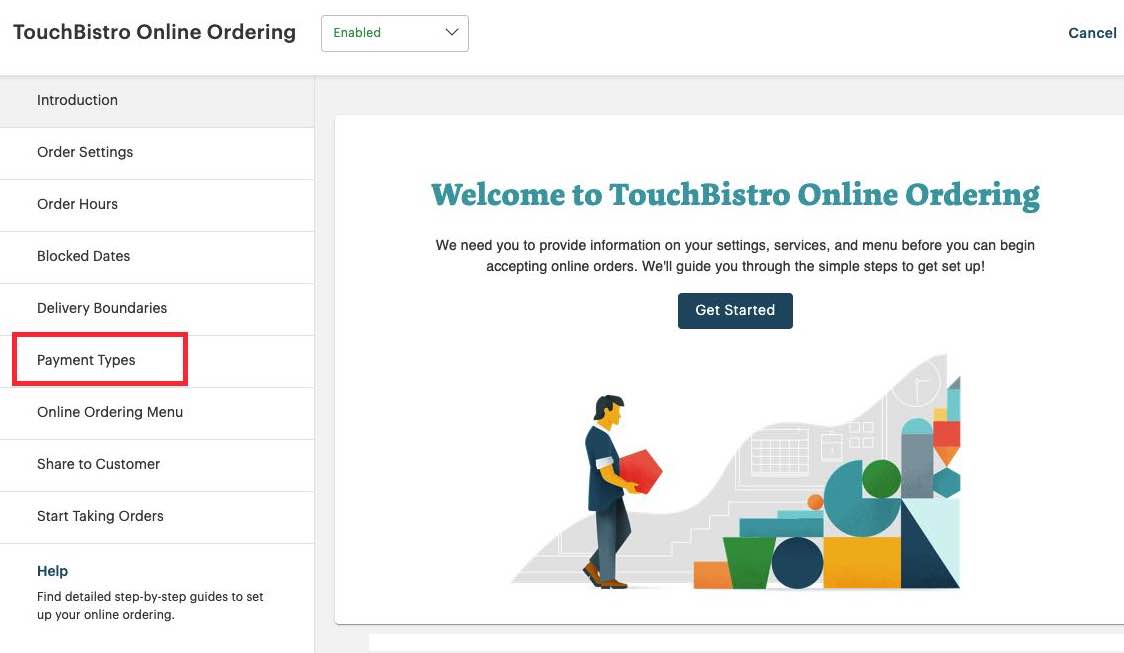
2. Click Payment Types.
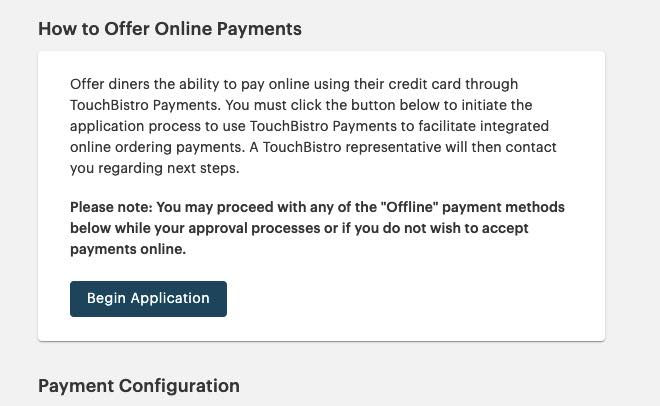
3. At the top of your Payment Types screen you will have a new section for TouchBistro Payments. Please review the terms. If you wish to apply for online payments, click Begin Application.
4. Your request will go to a TouchBistro representative and you will soon be contacted by an account manager to initiate your payment application.
Section 1. Applying for TouchBistro Payments
When you are invited to apply, follow the steps in this guide.
Chapter 4. Enabling in TouchBistro Online Ordering
When approved, you will have the option to return to your cloud’s TouchBistro Online Ordering partners screen.
Section 1. Payment Types
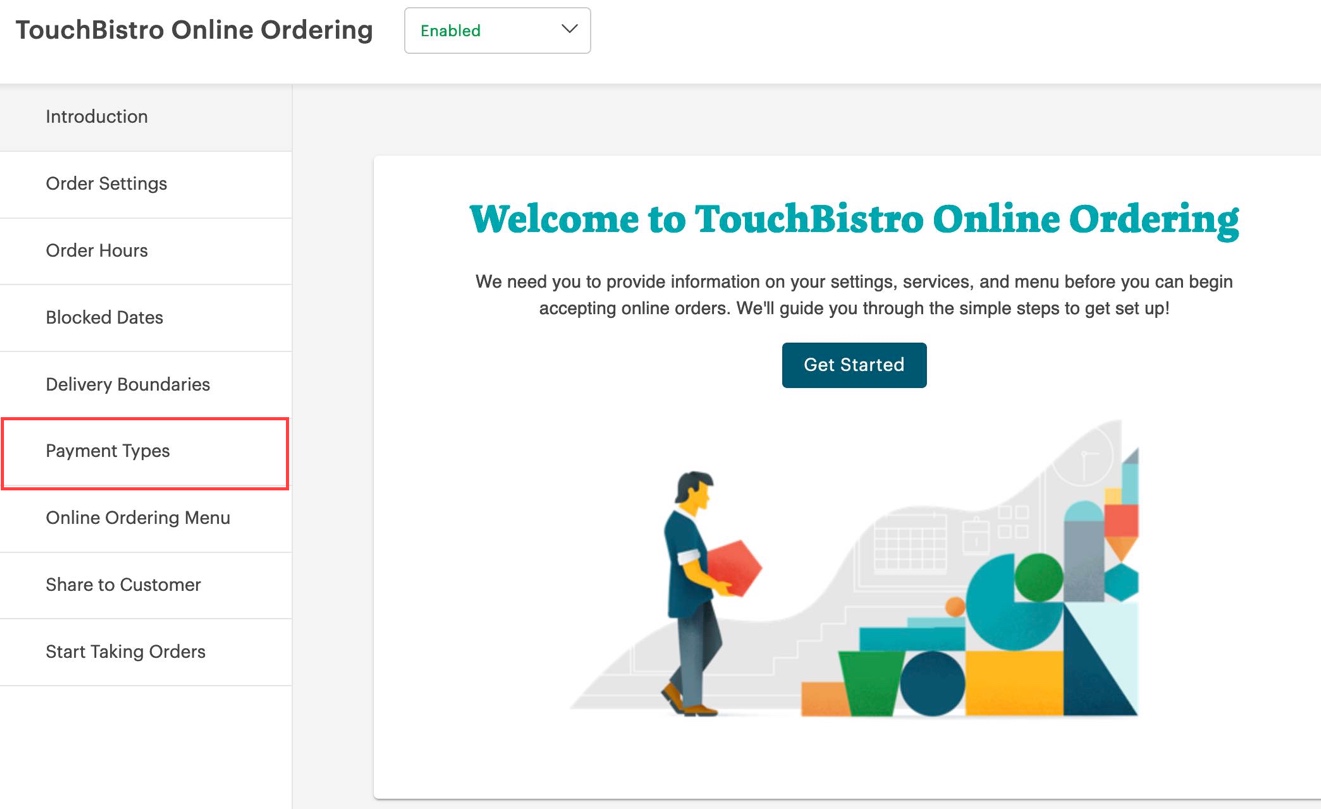
1. Click Payment Types and scroll to the bottom.

2. You will see the Apply For TouchBistro Payments button but do not click it again.
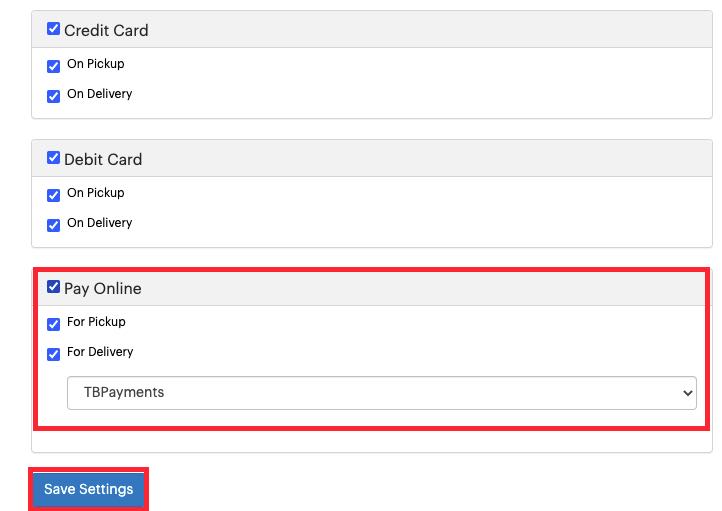
3. Continue to scroll to the bottom. Here you can set if you want to accept online payments for either pickup, delivery, or both.
4. Click Save Settings to save your changes.
Section 2. Tipping Settings
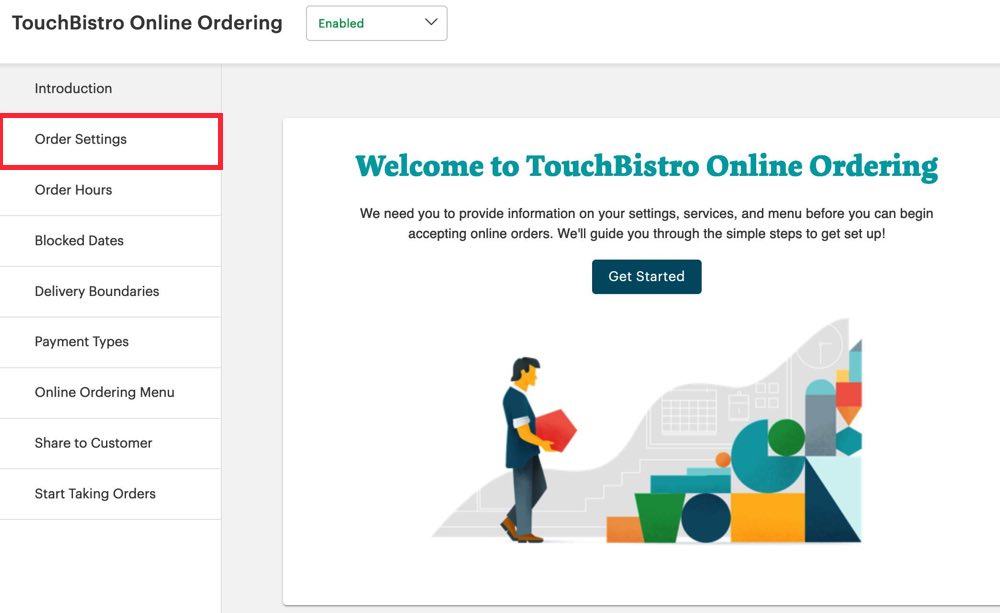
1. Click Order Settings.
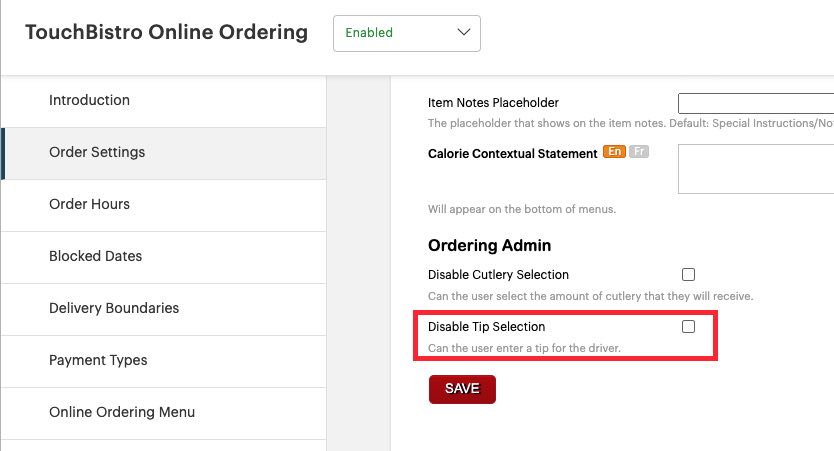
2. Scroll to the bottom and check your setting on Disable Tip Selection. If tipping is not appropriate for your venue, enable Disable Tip Selection.
3. Click Save if you make any changes.
Chapter 5. FAQ
Section 1. If I’m successfully adjudicated, can I accept online payments for each of my locations?
No. Each location will have to go through the TouchBistro payment application outlined above.
Section 2. How do I see my payments and deposits?
Your welcome email should have included a link to your Merchant Portal. Locate that and click the link. Use your TouchBistro cloud site username/password for your Merchant Portal login.
Section 3. How long should it take for funds to deposit?
It typically takes 2-5 business days.
Section 4. Which card types are accepted?
Visa/Mastercard/Amex are currently the only acceptable methods of payment.
Section 5. Is there anything I have to do in TouchBisto POS to prepare for online payments?
Not specifically. However, when you set up TouchBistro Online Ordering initially you were asked to turn off inclusive taxes.
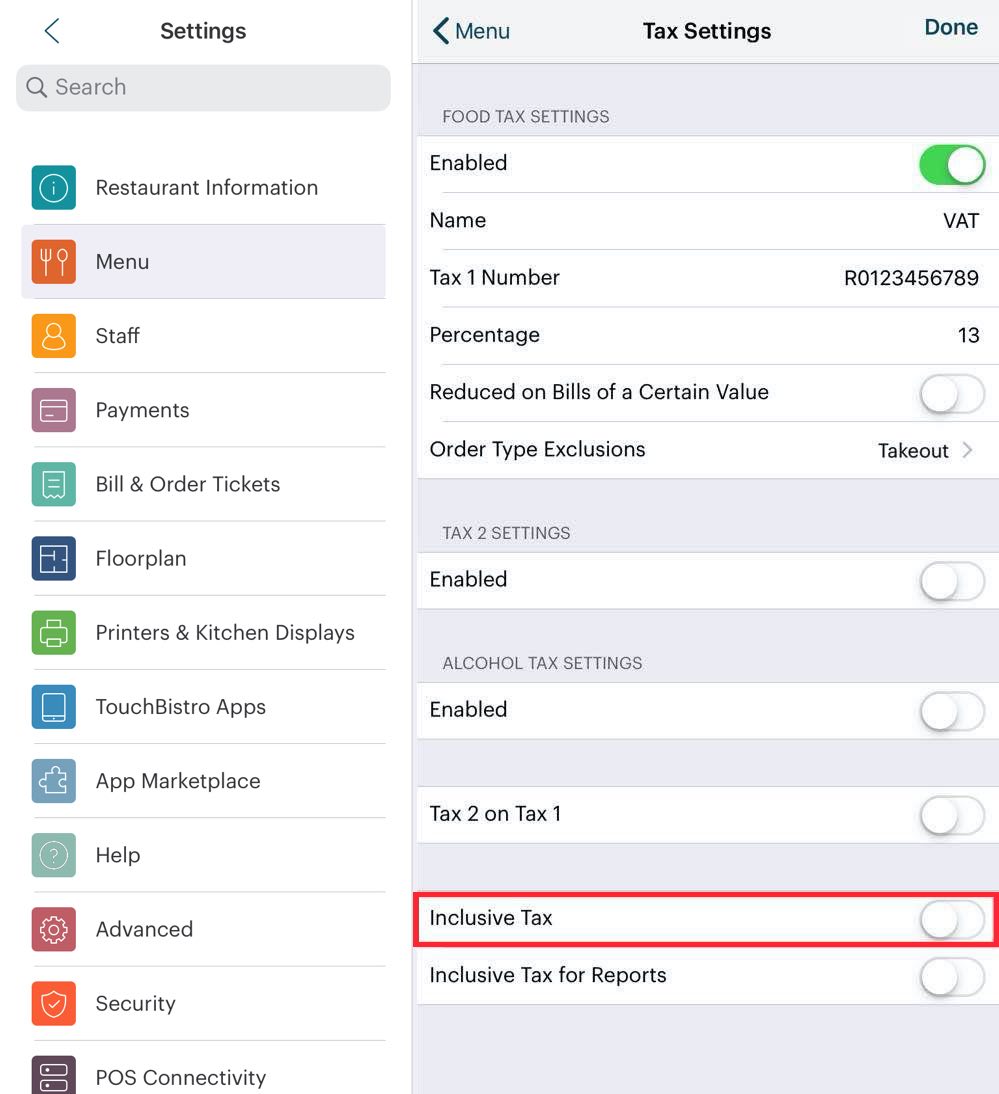
Just double-check inclusive taxes are turned off under Admin | Admin Settings | Menu | Tax.


 Email
Support
 Frequently
Asked Questions
