Limiting who can Open the Cash Drawer
Table Of Contents
Chapter 2. If You Have Two Receipt Printers
Chapter 3. If You Have One Printer
Chapter 1. Introduction
Your cash drawer can be set to automatically open when you process a cash payment and print a receipt to the printer the cash drawer is plugged into. You set this up via the Advanced settings.
When a cash payment option is selected at a table, order, or cash register, the cash drawer will automatically pop open. However, if your servers are processing cash payments at table-side, particularly if they’re carrying their own float, processing a cash payment will result in the cash drawer automatically opening.
Below are two ways to have TouchBistro open the cash drawer electronically (versus having to use the key) and avoid table-side servers opening a distant cash drawer.
Chapter 2. If You Have Two Receipt Printers
If you have two receipt printers or you’re willing to purchase a second printer, this method allows TouchBistro to pop open the cash drawer automatically when a cash payment is taken and a receipt is printed at the register. It also allows servers to print receipts and take cash payments without having to give them access or ability to open the cash drawer.
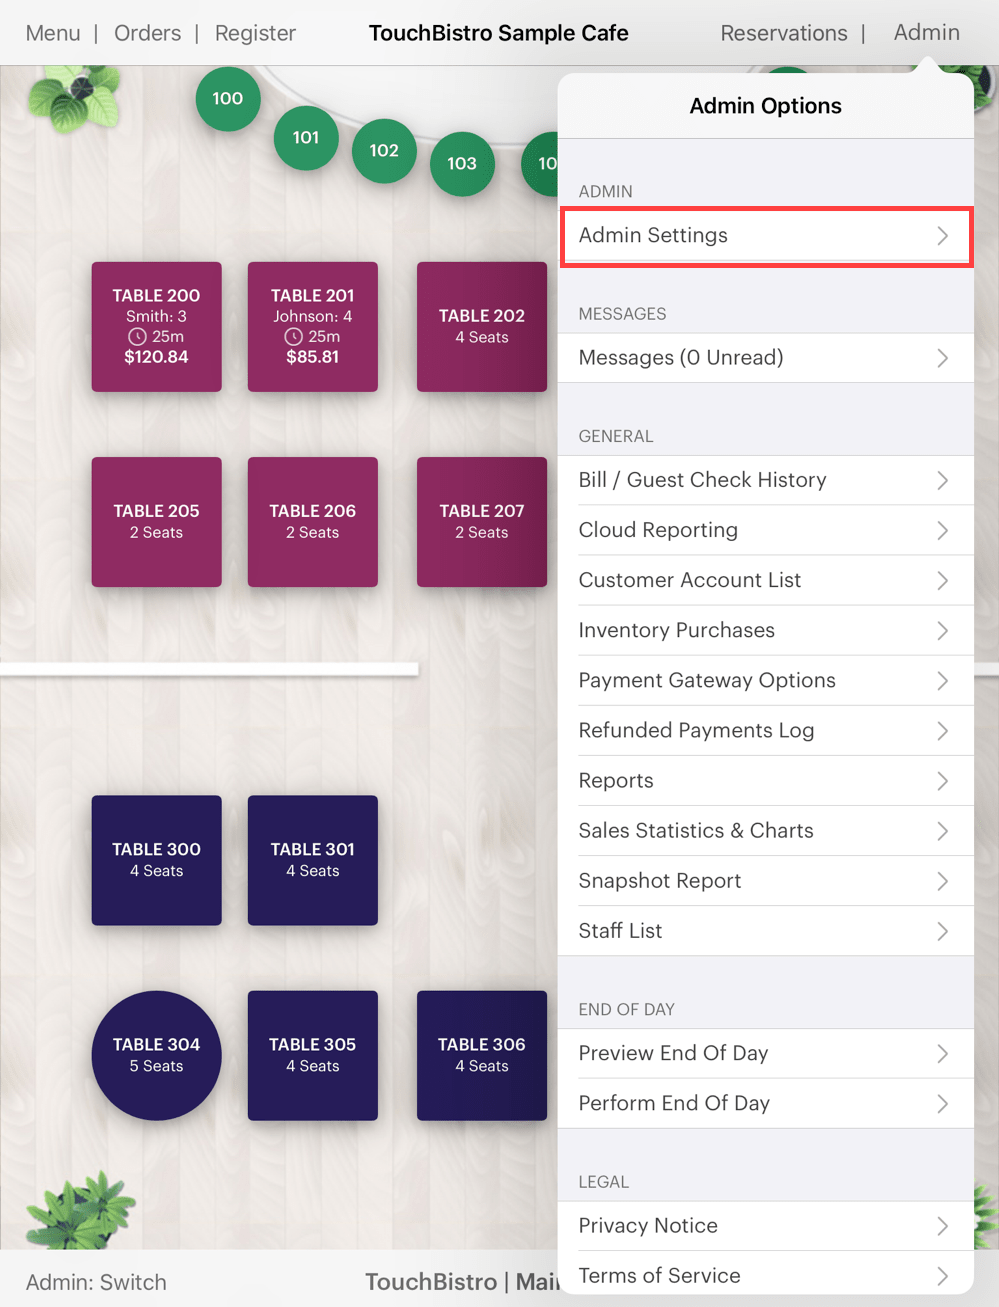
1. Tap Admin | Admin Settings.
2. Tap Advanced.

3. Enable Open Cash Drawer When Accepting Cash Payments.
4. Under Printers, have a Waiter Receipt printer and a Cash Register printer setup. The Cash Register printer has the cash drawer plugged into it. The Waiter Receipt printer has no cash drawer plugged into it.
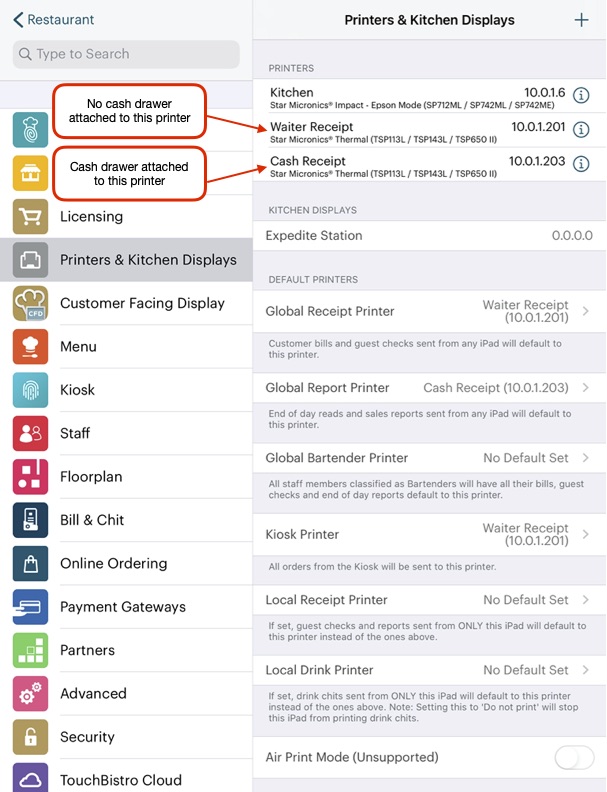
5. Set the Global Receipt Printer as Waiter Receipt. All iPads will print a receipt to this printer. That is, servers when processing cash payments with their iPads will send receipts to this printer by default. Since no cash drawer is attached to the Waiter Receipt printer, the printer will just ignore the “open cash drawer” signal TouchBistro sends.
6. On ONE iPad — the iPad you’re going to fix at the cash register — set Local Receipt Printer to Cash Register. Anyone using THIS iPad will automatically print receipts to the Cash Register printer, not the Global Receipt Printer. Ensure this iPad is fixed at the cash counter or only in the hands of the staffer who is responsible for accessing the cash register.
Chapter 3. If You Have One Printer

1. Tap Admin | Admin Settings.
2. Tap Advanced.
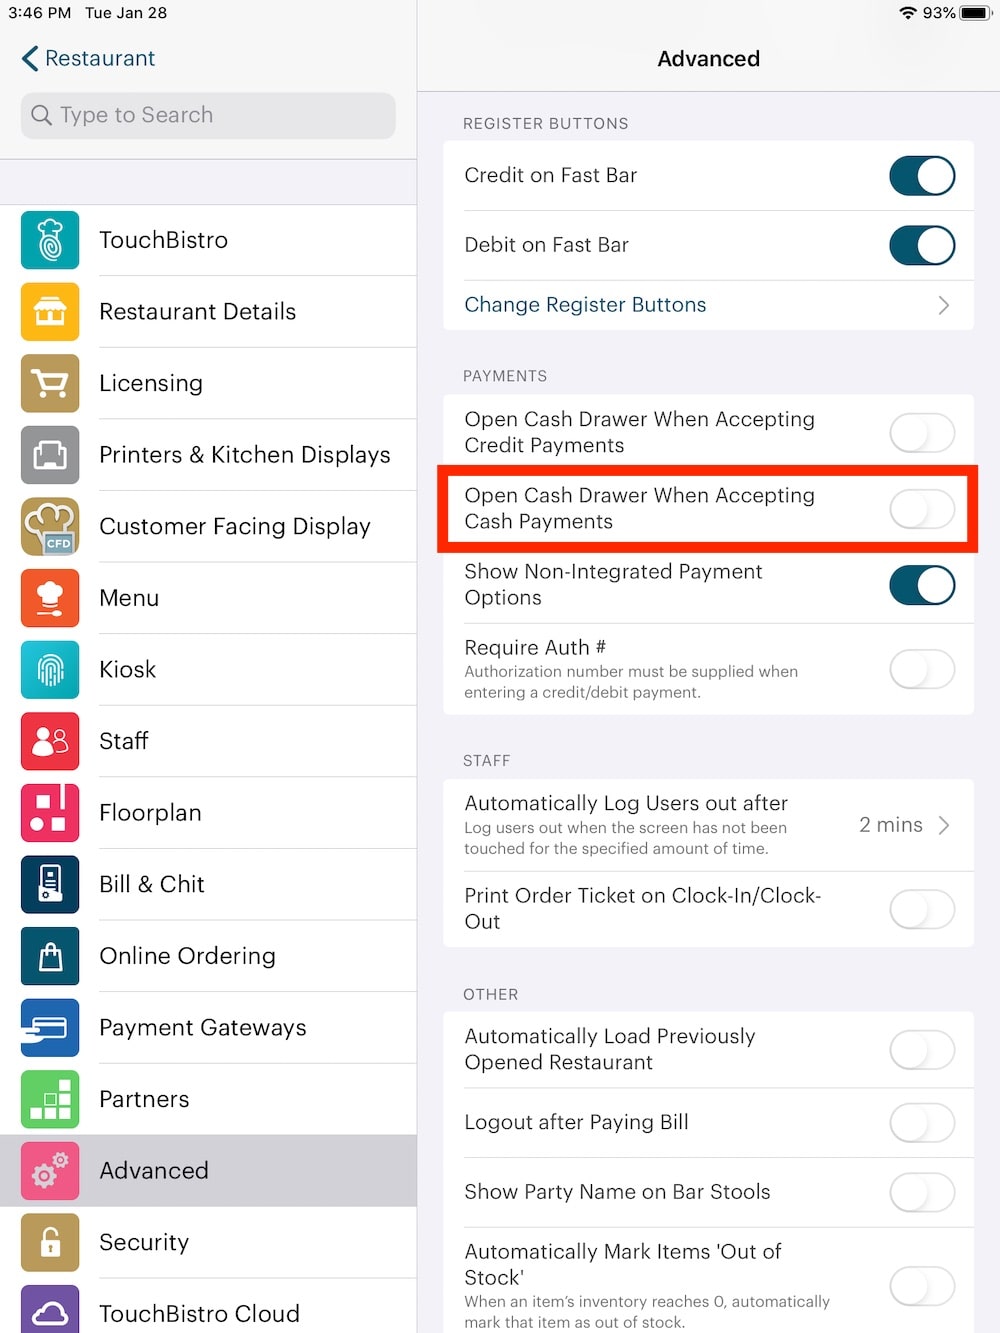
3. Disable Open Cash Drawer When Accepting Cash Payments.
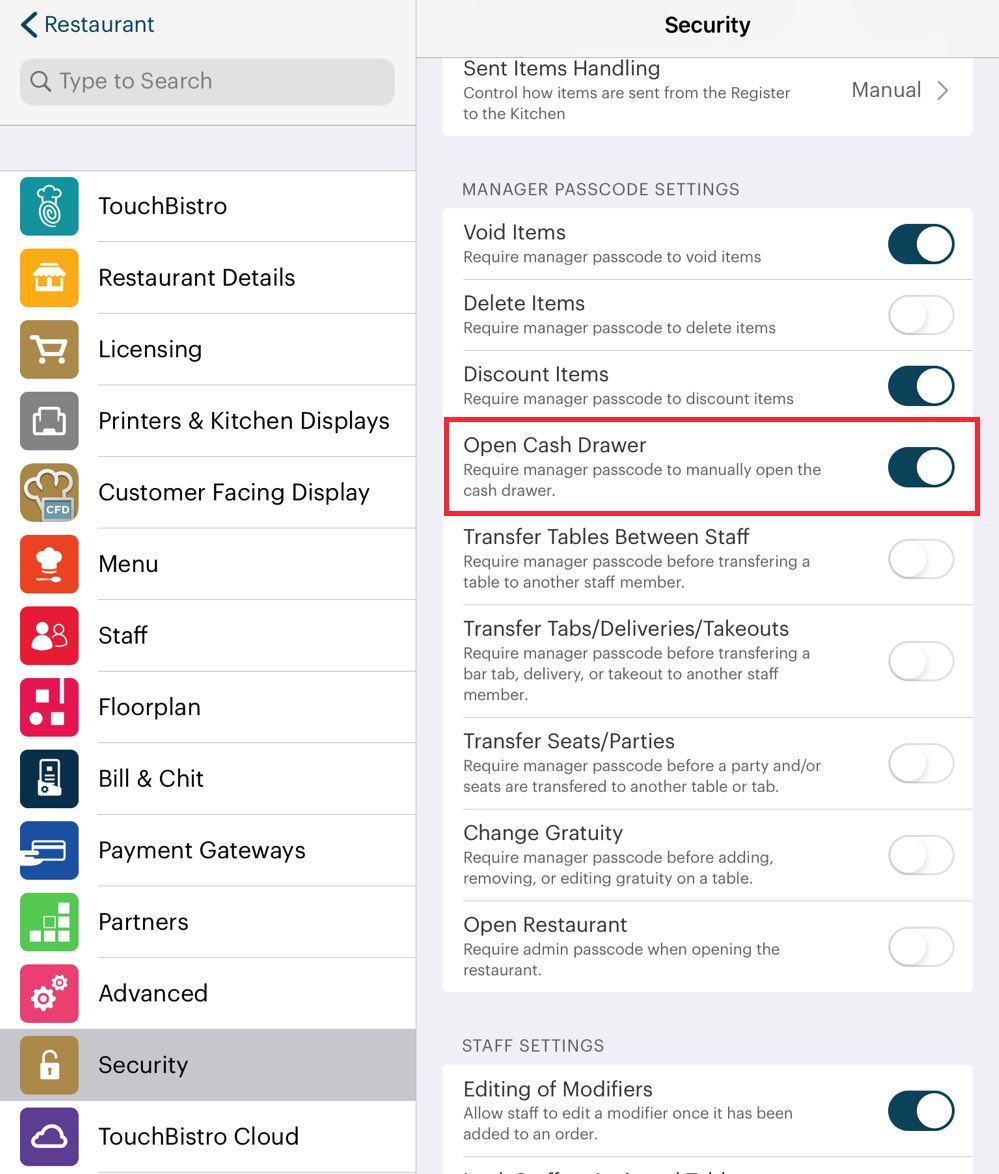
4. Tap Security. Enable Open Cash Drawer under Manager Passcode Settings.
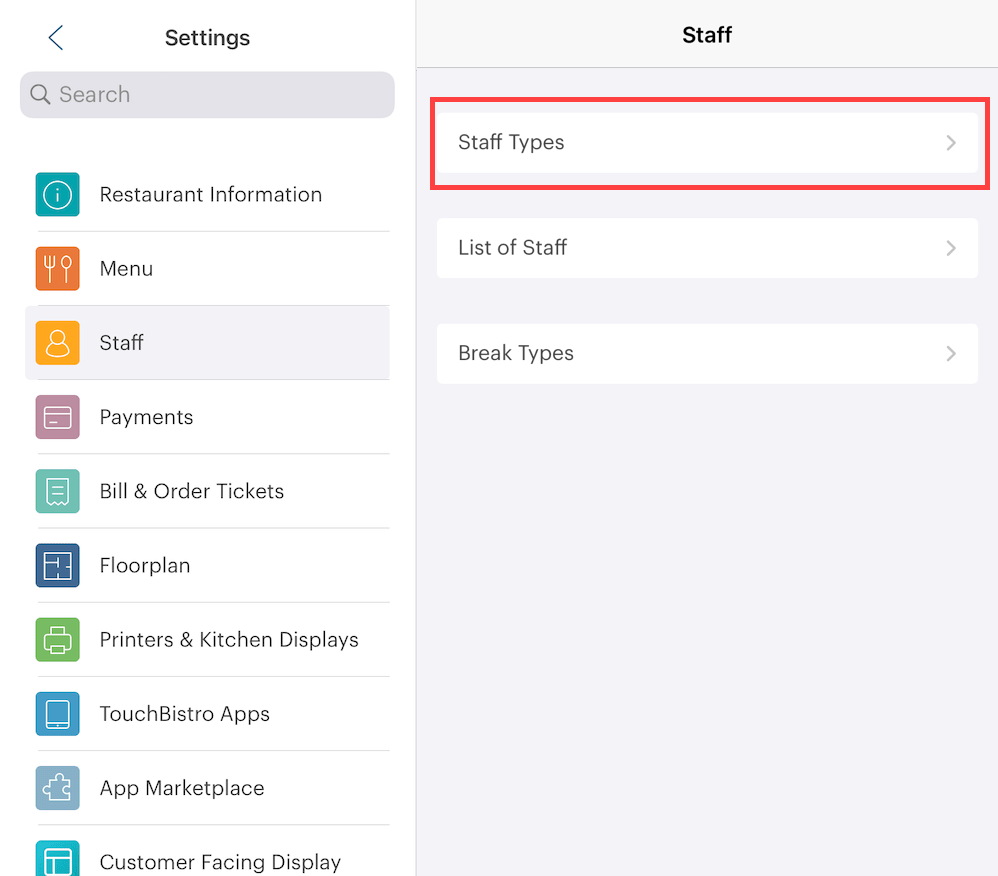
5. Tap Staff and Staff Types.
6. You might want to create at least two staff types. A Waiter and a Cashier. Anyone assigned the Waiter staff type will not have access to the cash drawer. Anyone assigned the Cashier staff type will have access to the cash drawer.

7. Open the Cashier staff type. Scroll down to the Manager Permissions section. Enable Can Open Cash Drawer. Tap Done.
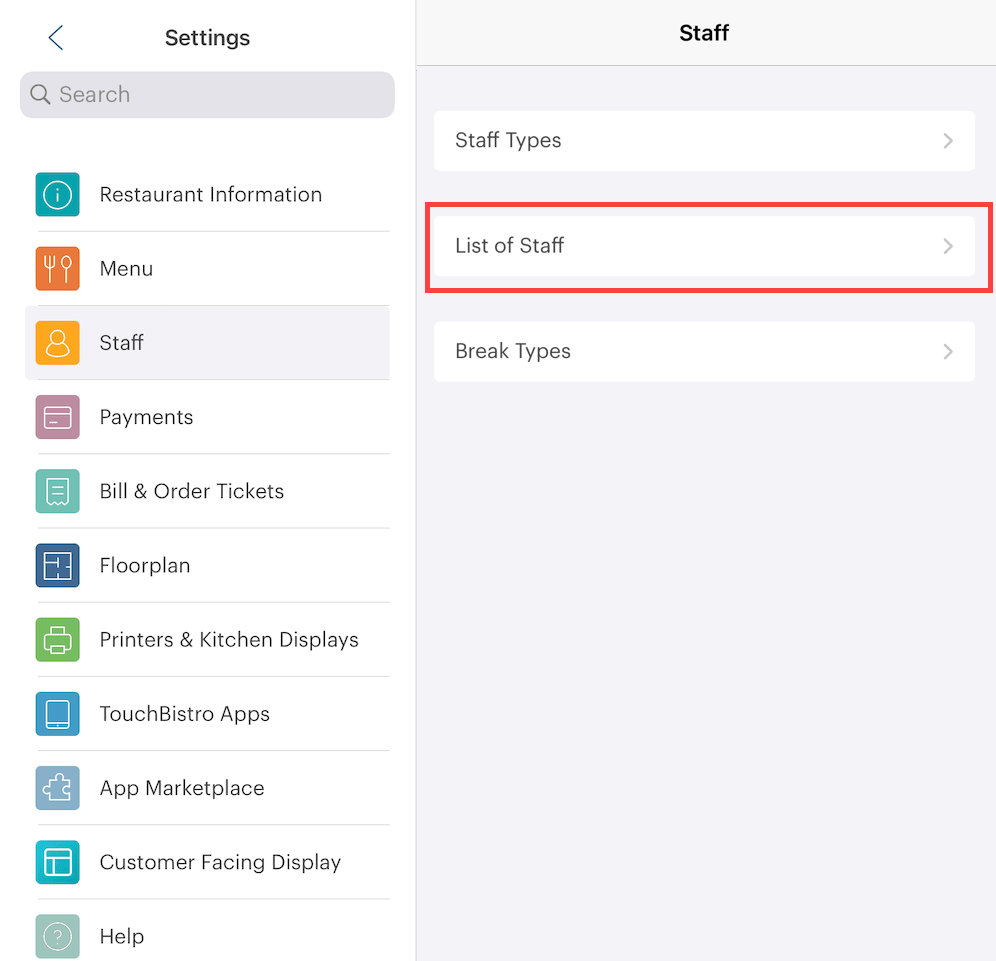
8. Tap < Staff to return to the main Staff page. Tap Staff.
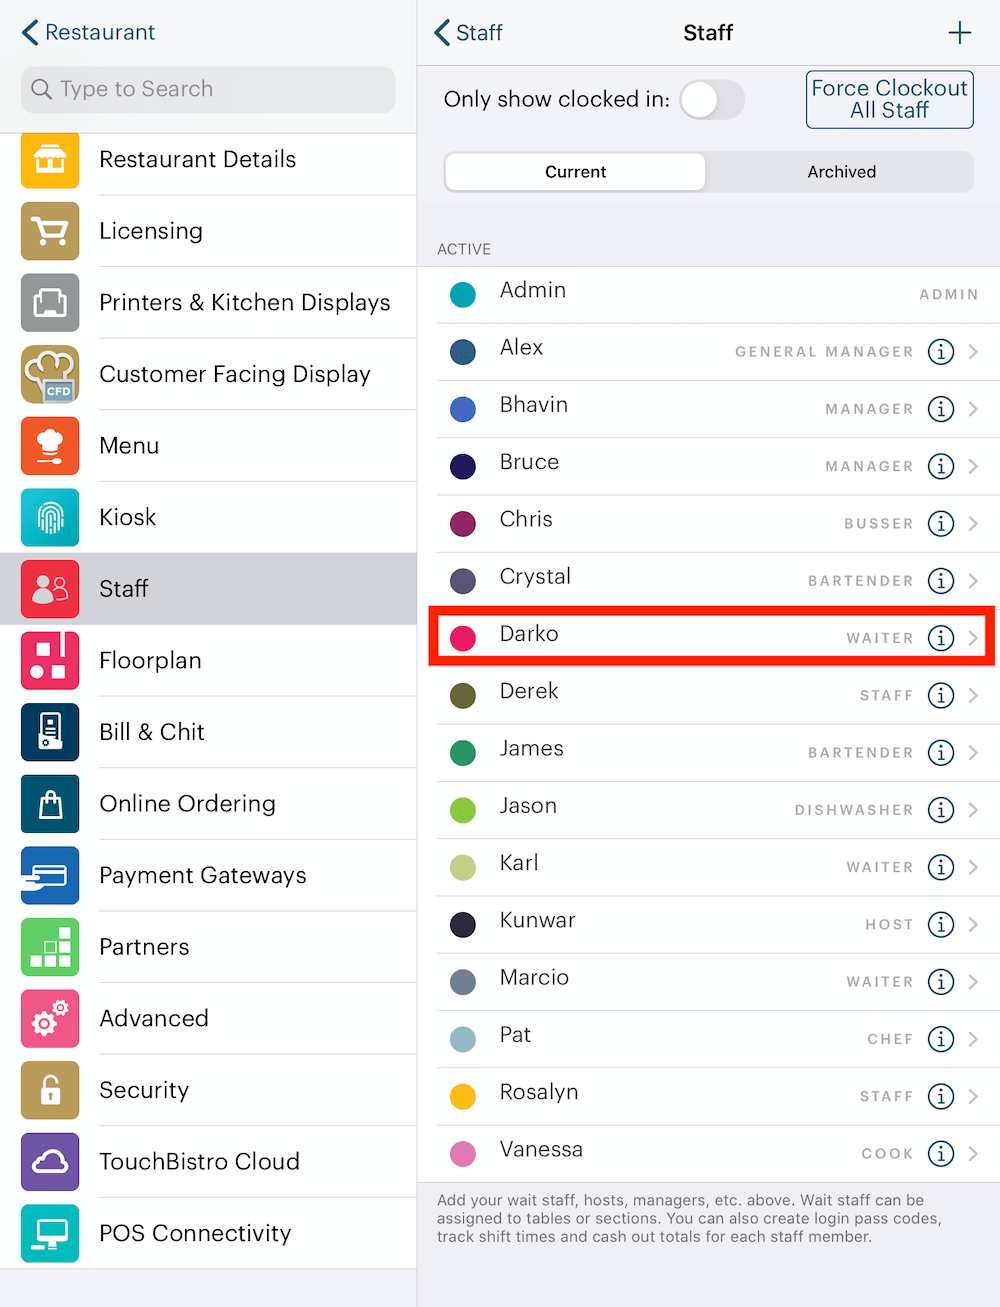
9. Tap a staff member you wish to give the Cashier role to.
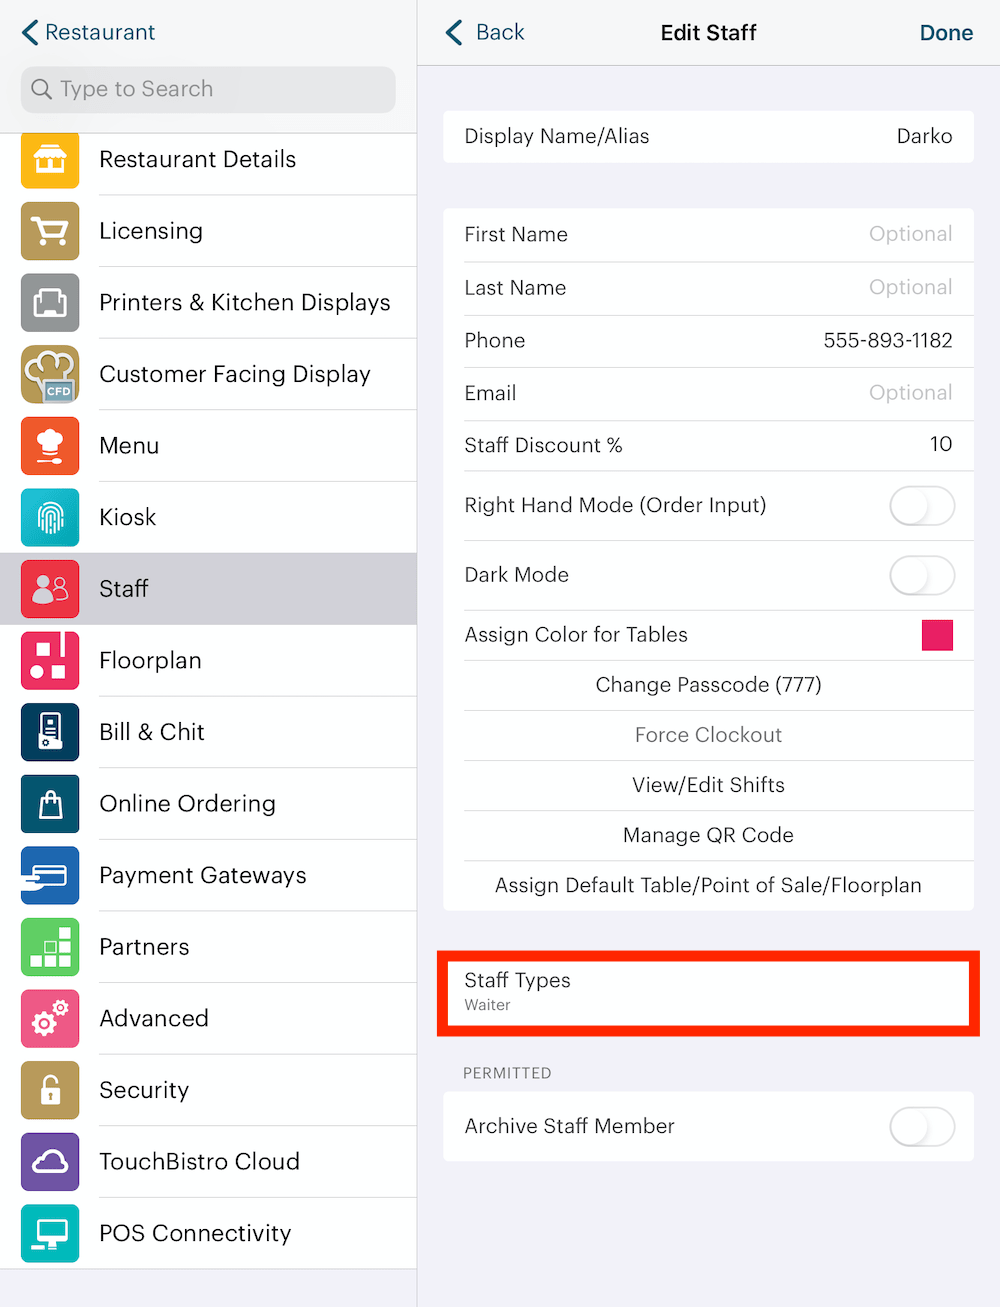
10. Tap Staff Types.
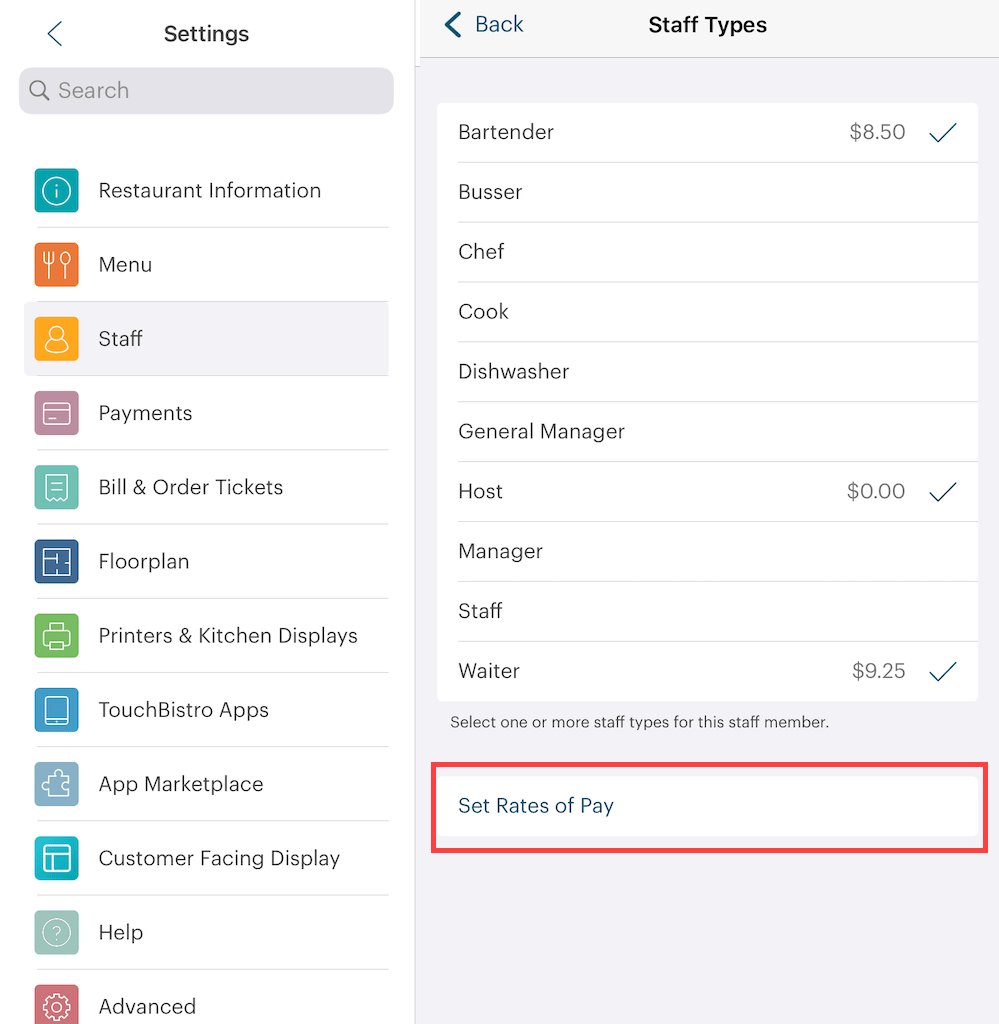
11. Tap Cashier.
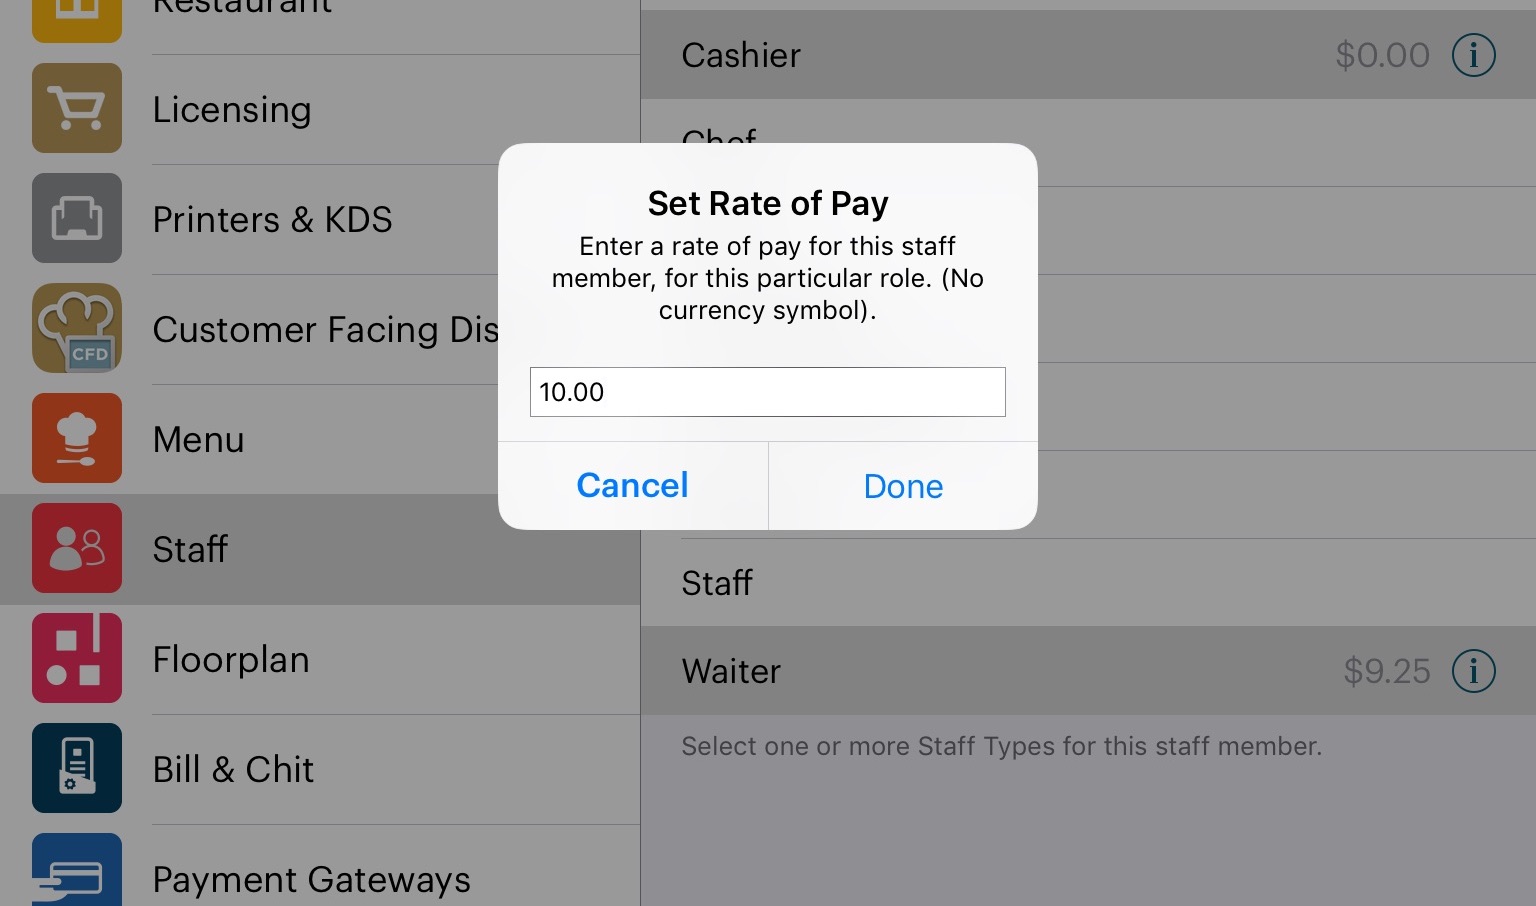
12. Tap the Information ![]() icon and give this staff member a rate of pay when they clock in as the cashier role, and tap Done.
icon and give this staff member a rate of pay when they clock in as the cashier role, and tap Done.
13. Tap < Back.

14. Tap Done.
15. Assign the Cashier staff type to any other staff member that will be on cash register duty.
Section 1. Cashing Out as a Waiter
1. Login as a server (with no cash drawer access).
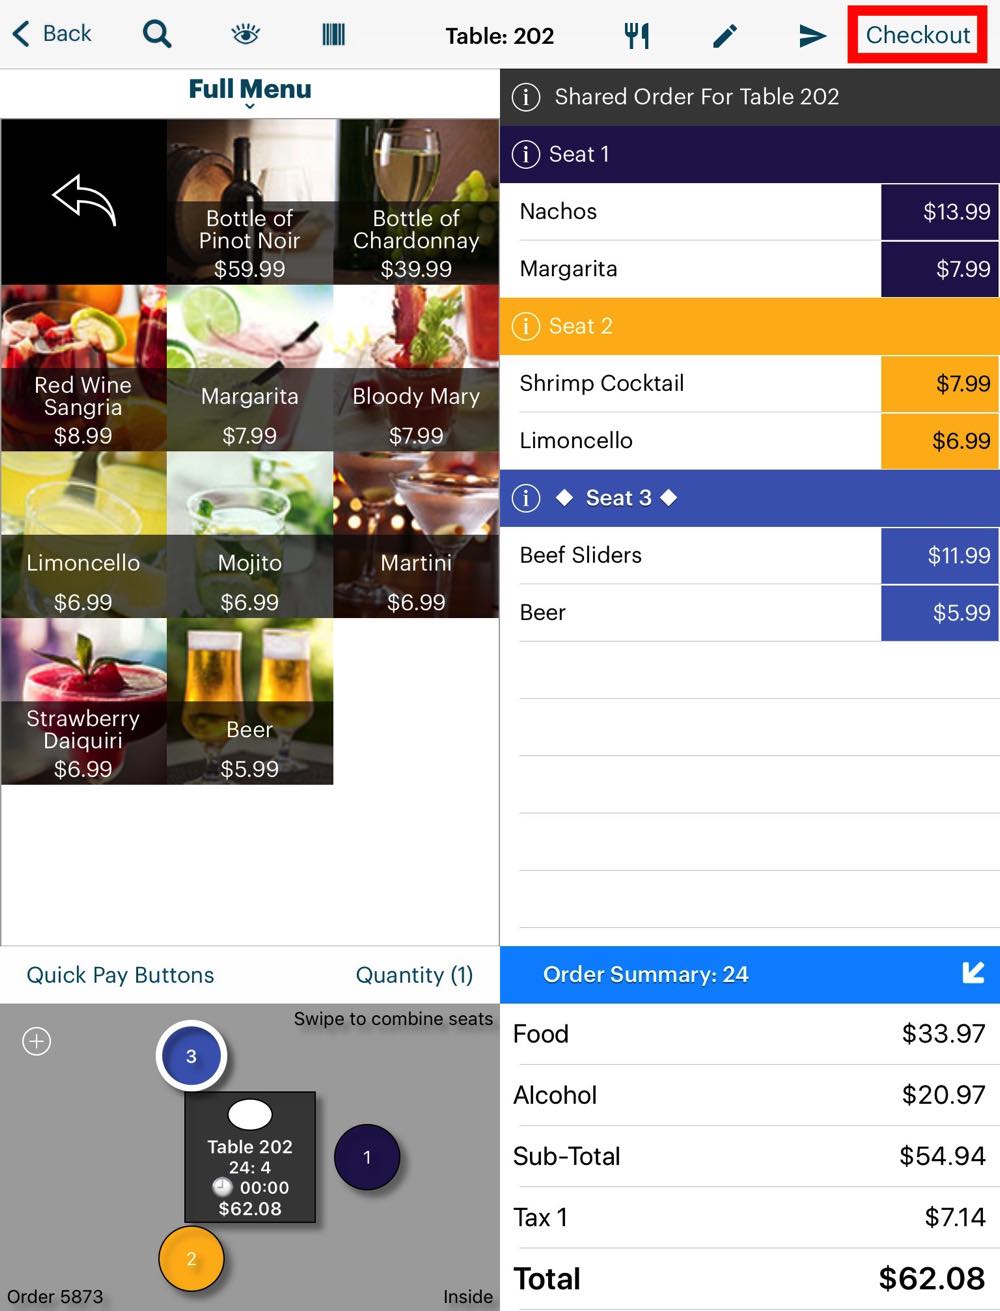
2. Create an order. Tap Checkout in the top-right corner.
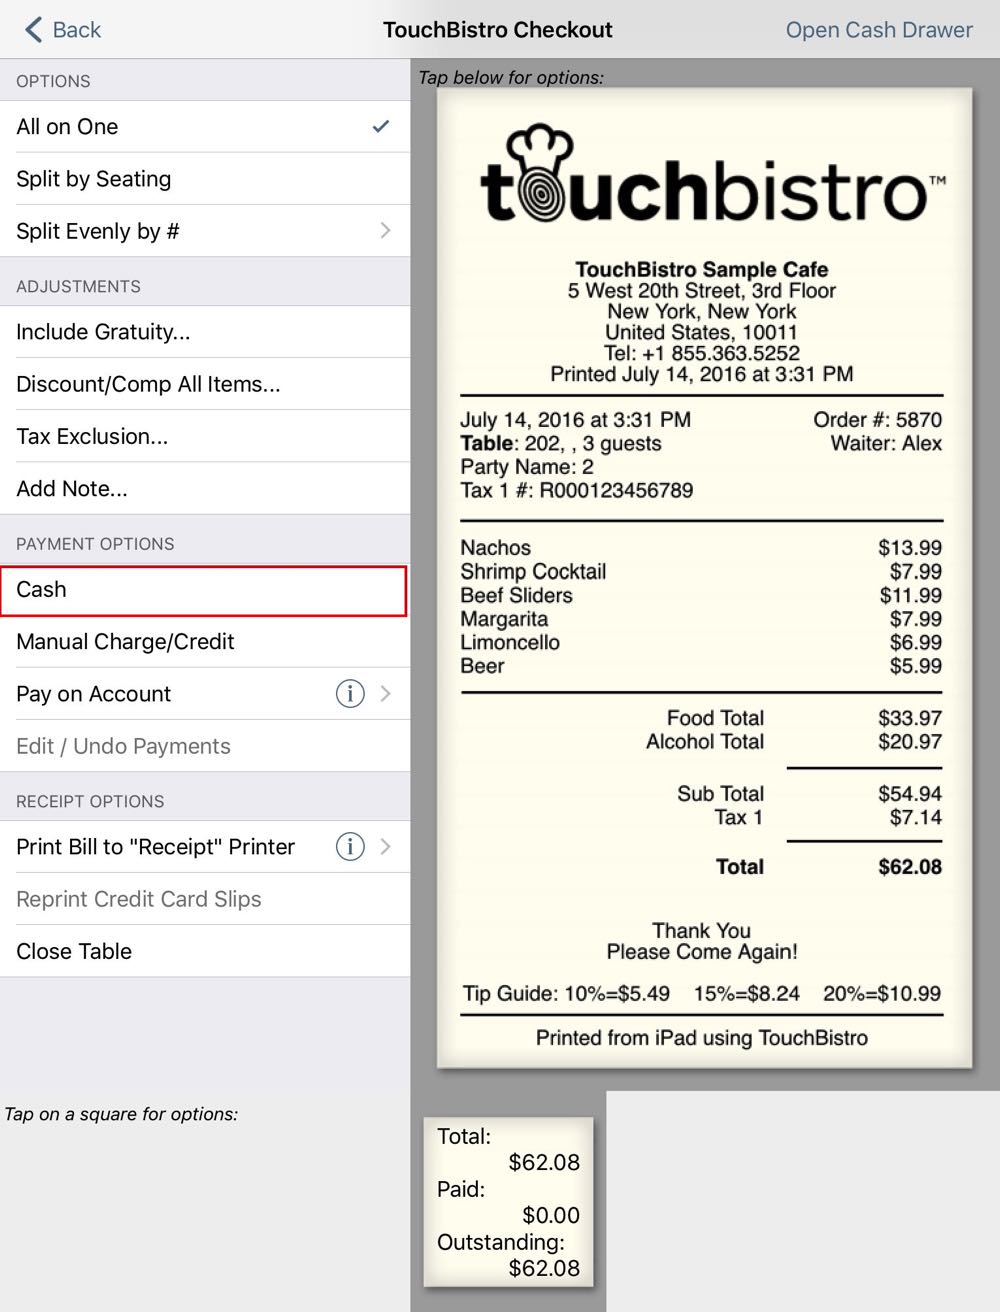
3. Tap Cash to accept a cash payment.
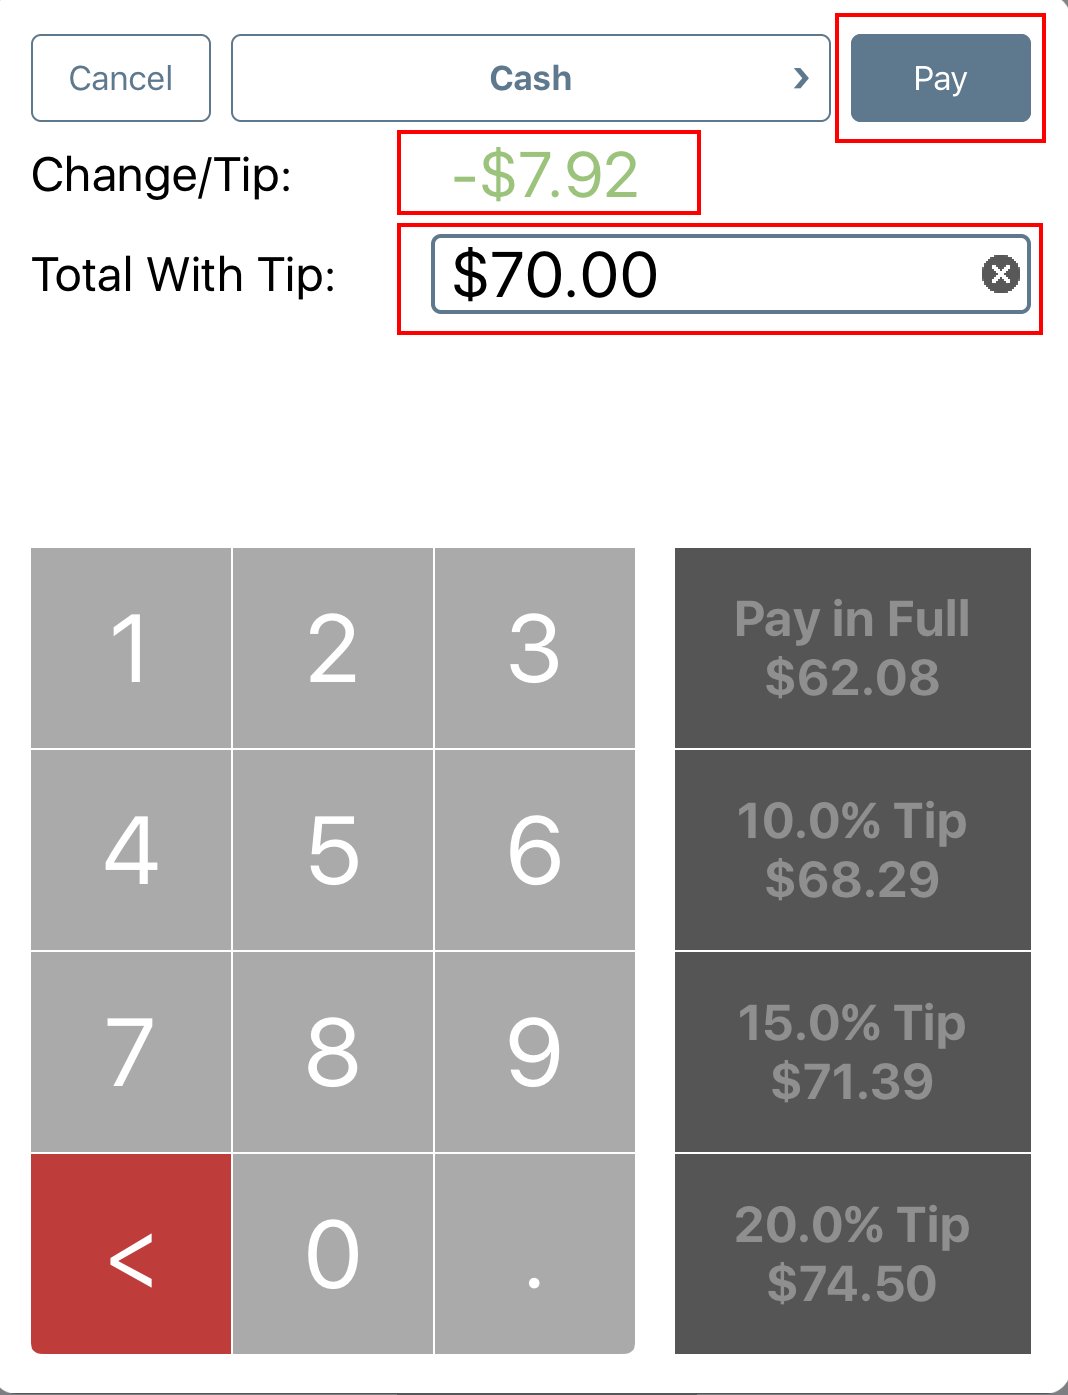
4. In the Total Payment field enter the amount of cash the customer offers to pay.
5. In the Change/Tip field, the server is prompted how much change to produce. If the server is carrying his/her own float, the server can make this amount of change.
6. Tap Pay.
7. You’re also prompted how much change to make. If proper change has been made, tap one of the receipt options to close the table.
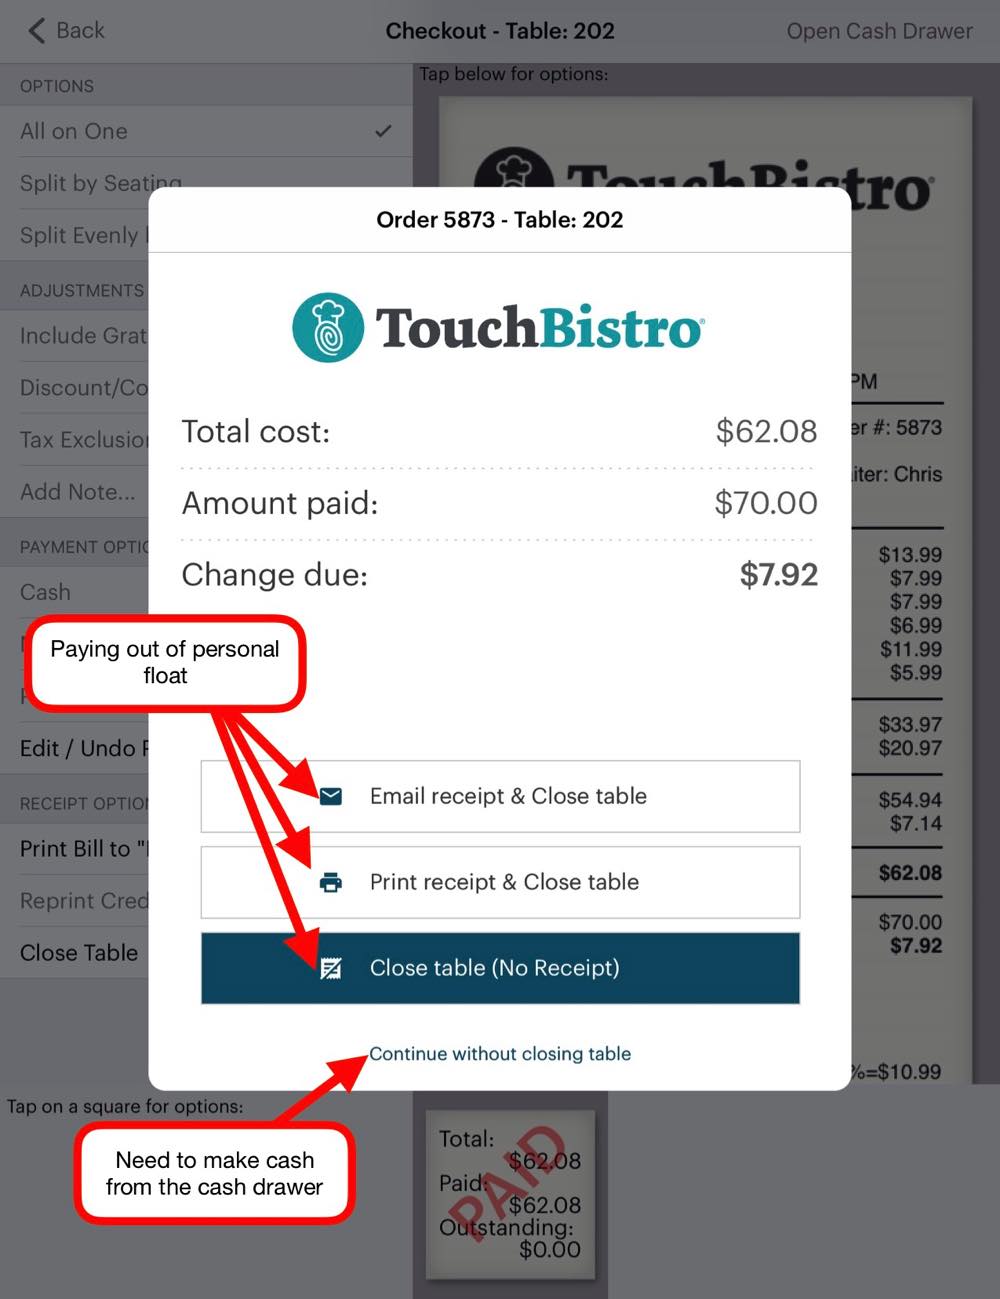
8. If the server at this point needs access to the cash drawer to make change, tap Continue Without Closing Table.
9. You’re returned to the Checkout screen.

10. Tap Open Cash Drawer. Note the amount of change you need to get is at the bottom of the receipt.

11. Get the approval passcode of the cashier of a manager. Note as well, any user with the Cashier staff type created above can also approve cash drawer access. Get the proper cash.
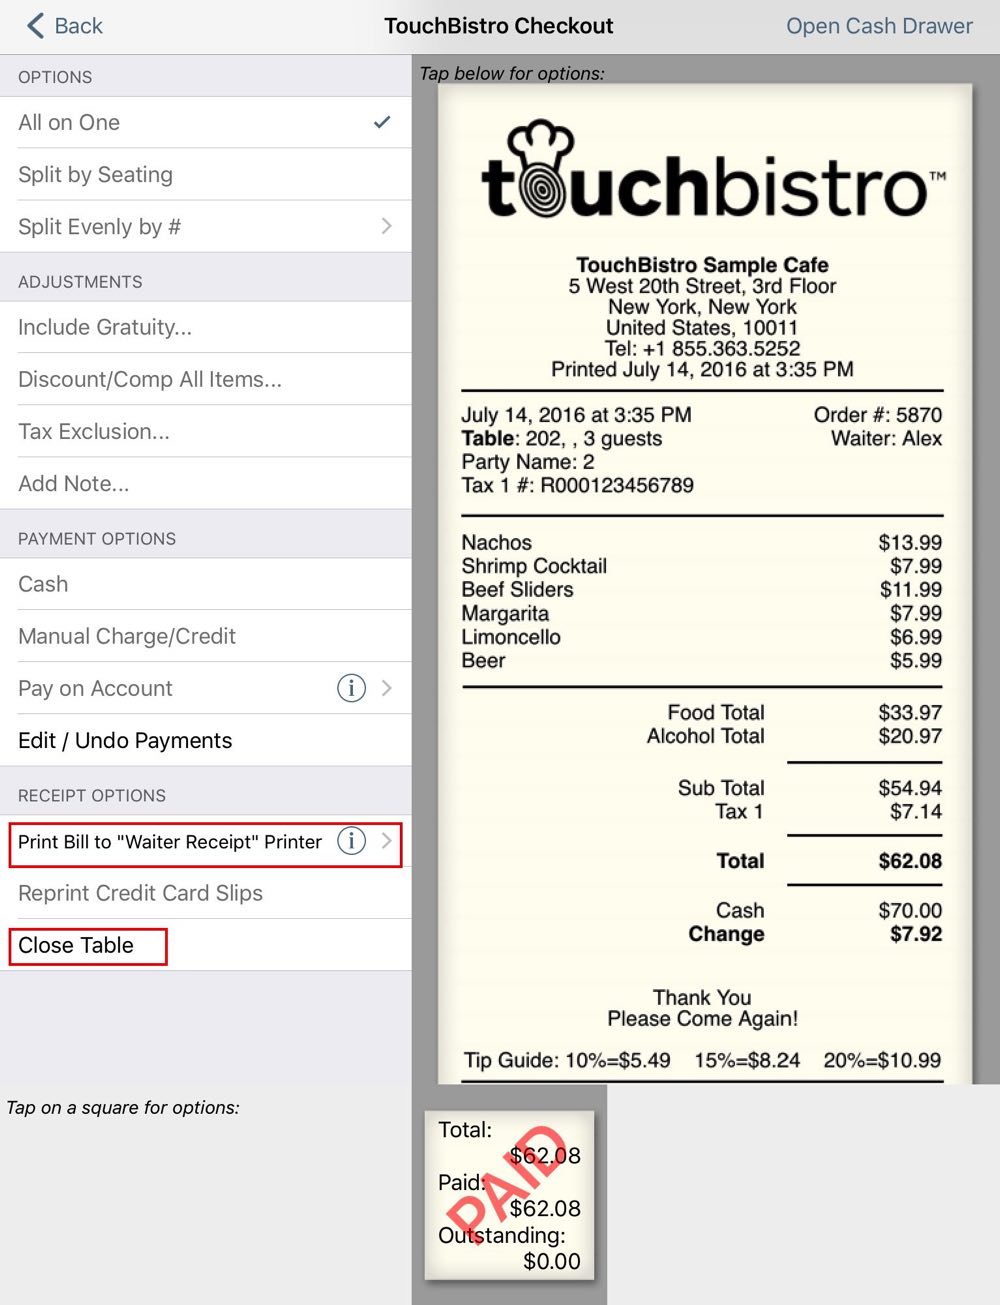
12. If you need to print a receipt at this point, tap Print Bill.
13. Tap Close Table and tap Yes.
Section 2. Using the Cash Drawer as the Cashier
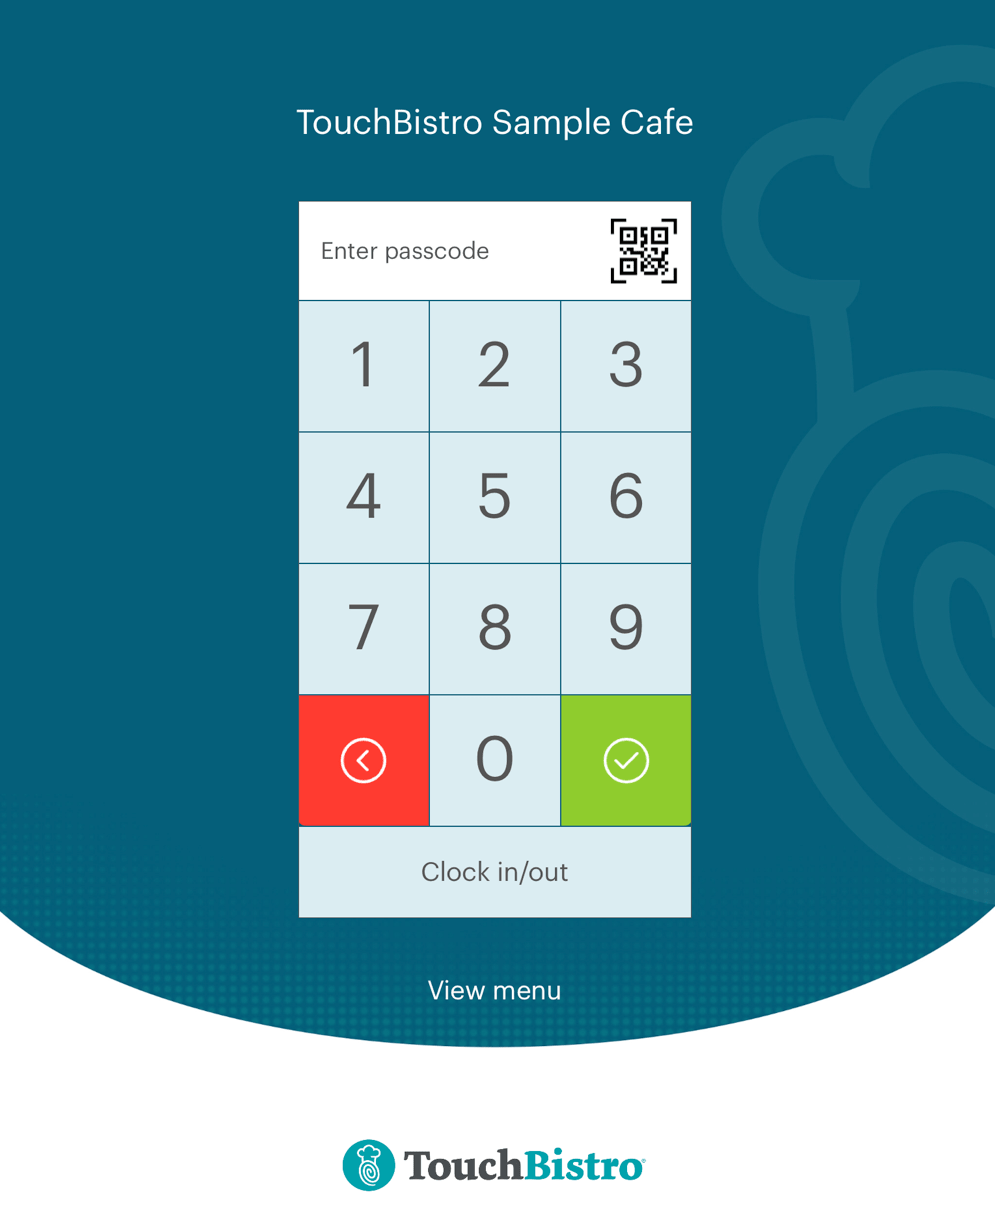
1. Login with your passcode.
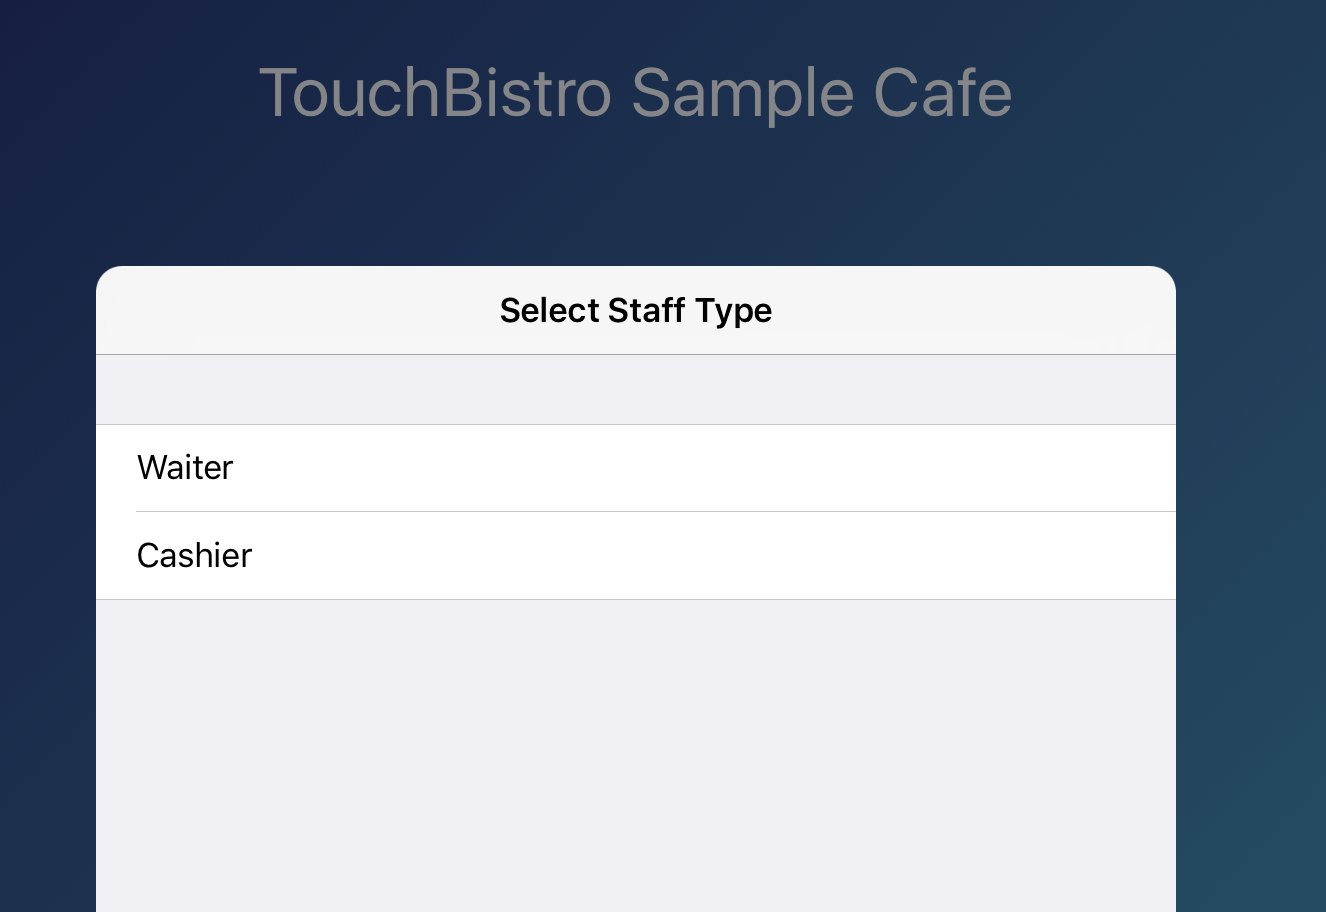
2. If you have multiple staff types assigned, tap the Cashier staff type created above.
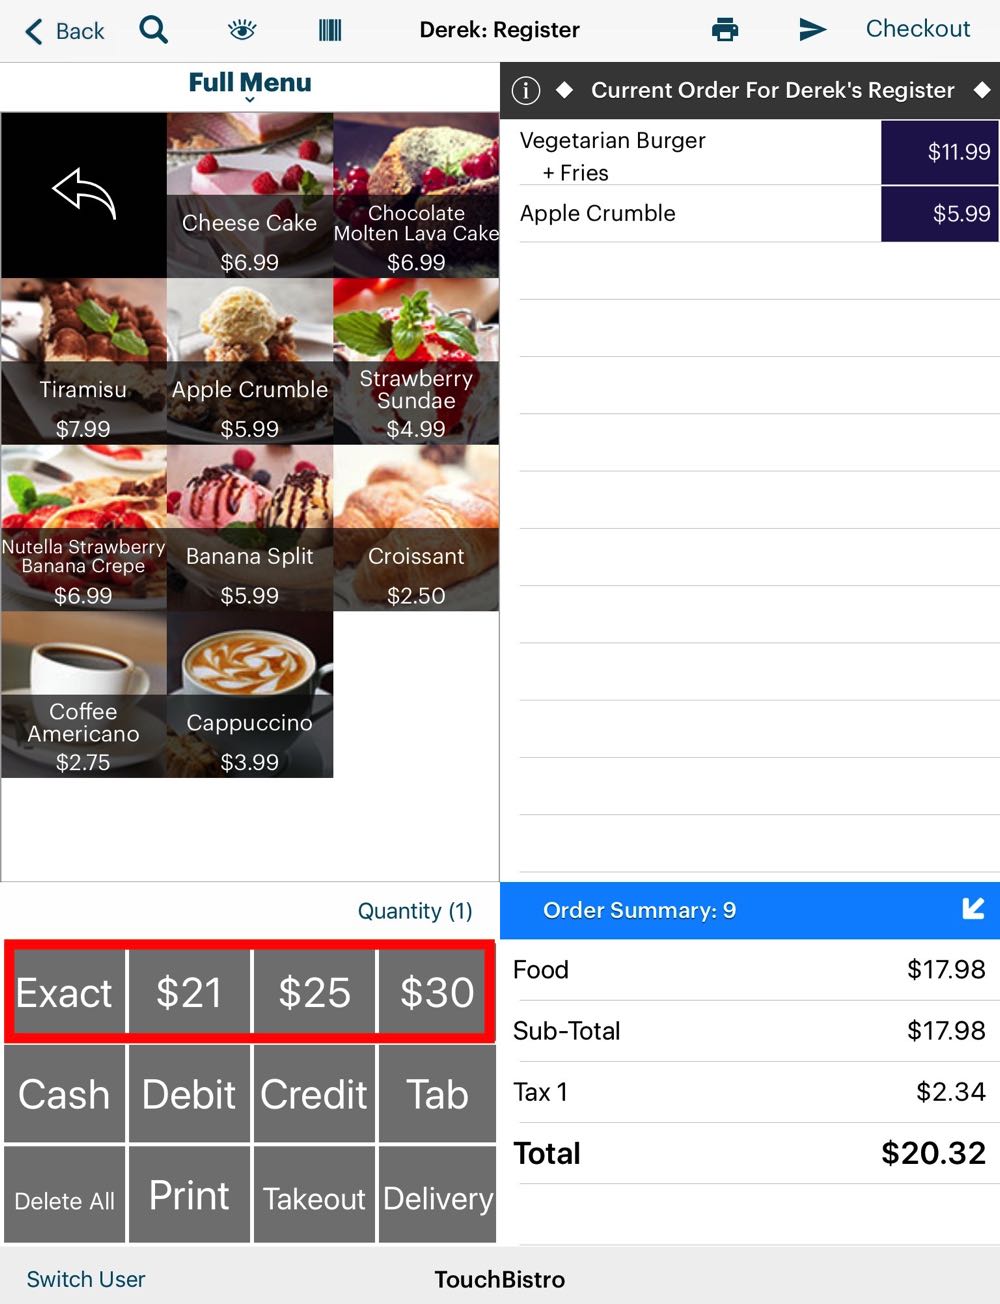
3. Create the order and tap one of the fast pay buttons.
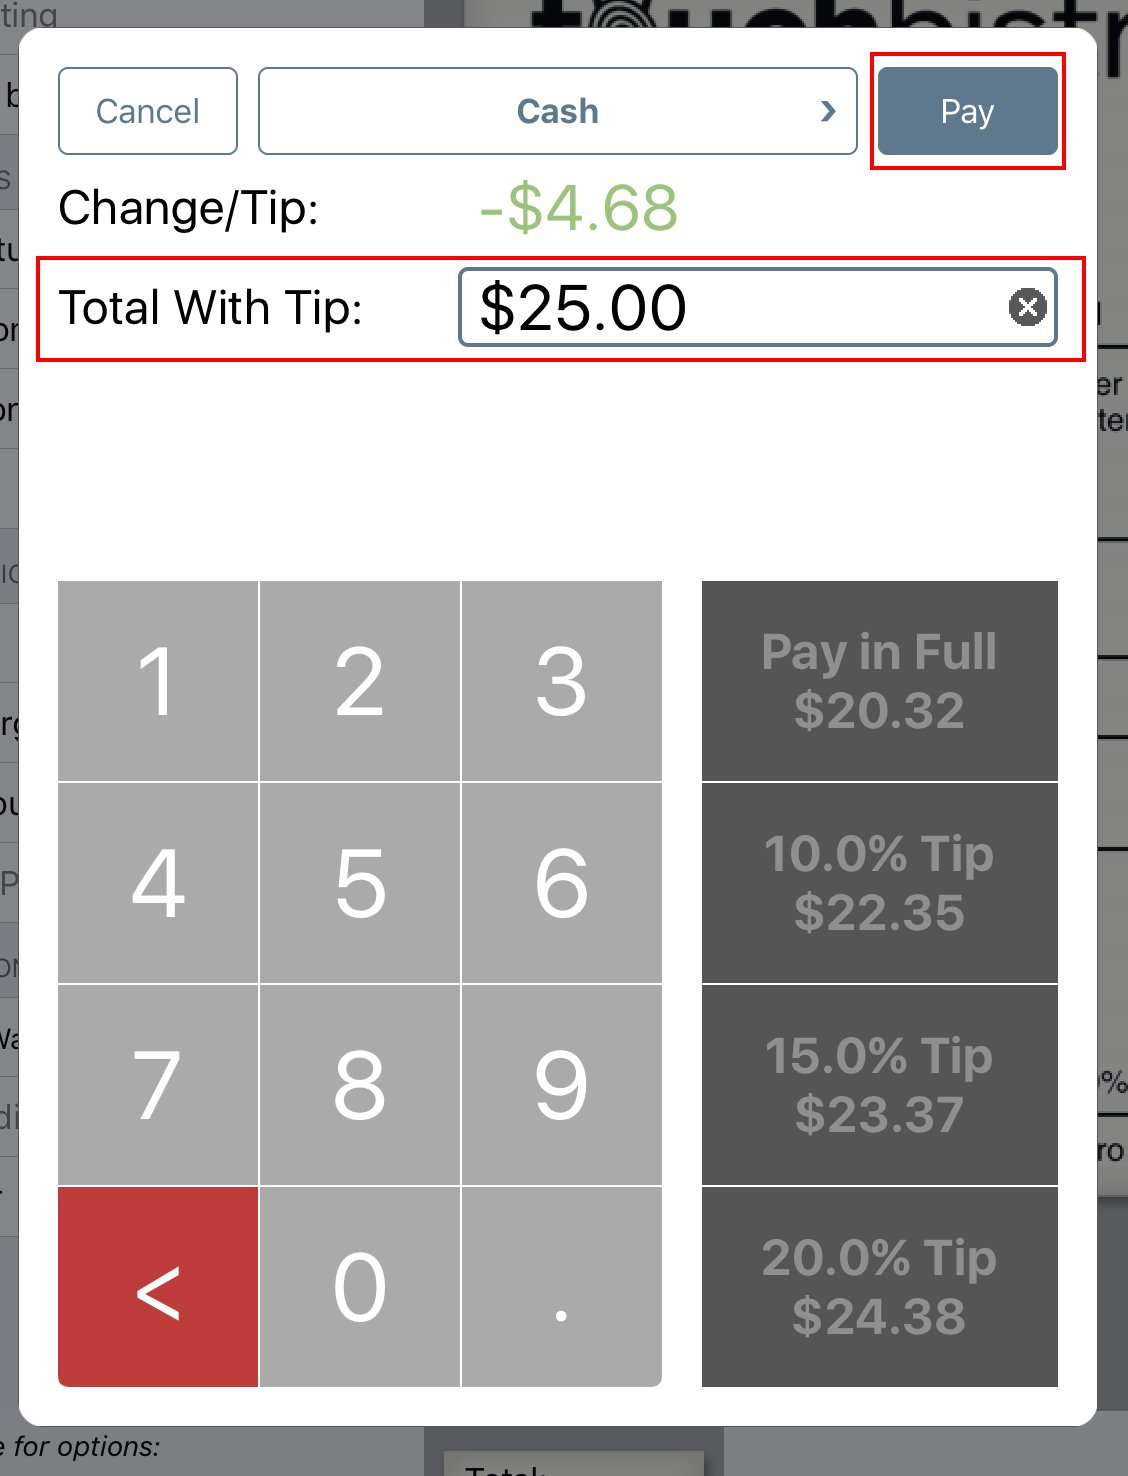
4. If you tap Cash, enter the total amount offered to settle the bill in the Total Payment field. For example, the customer has offered the cashier $25. Tap Pay.
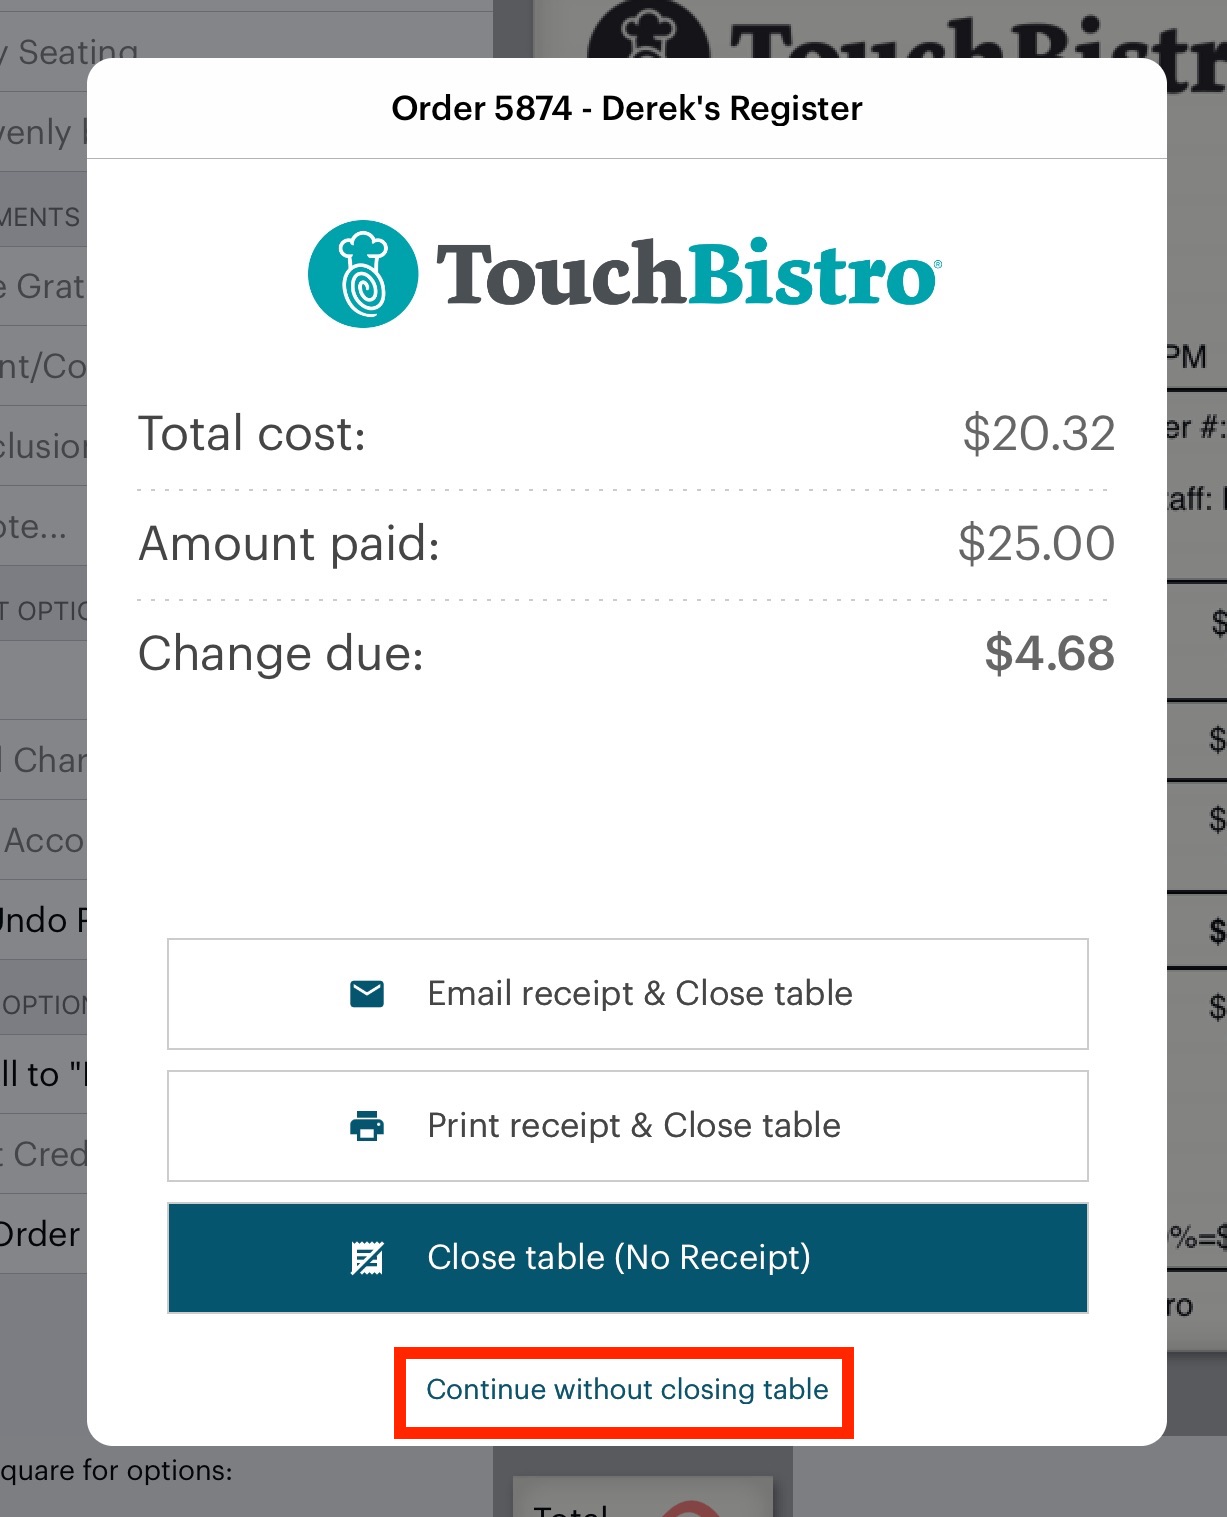
5. Tap Continue Without Closing Table.
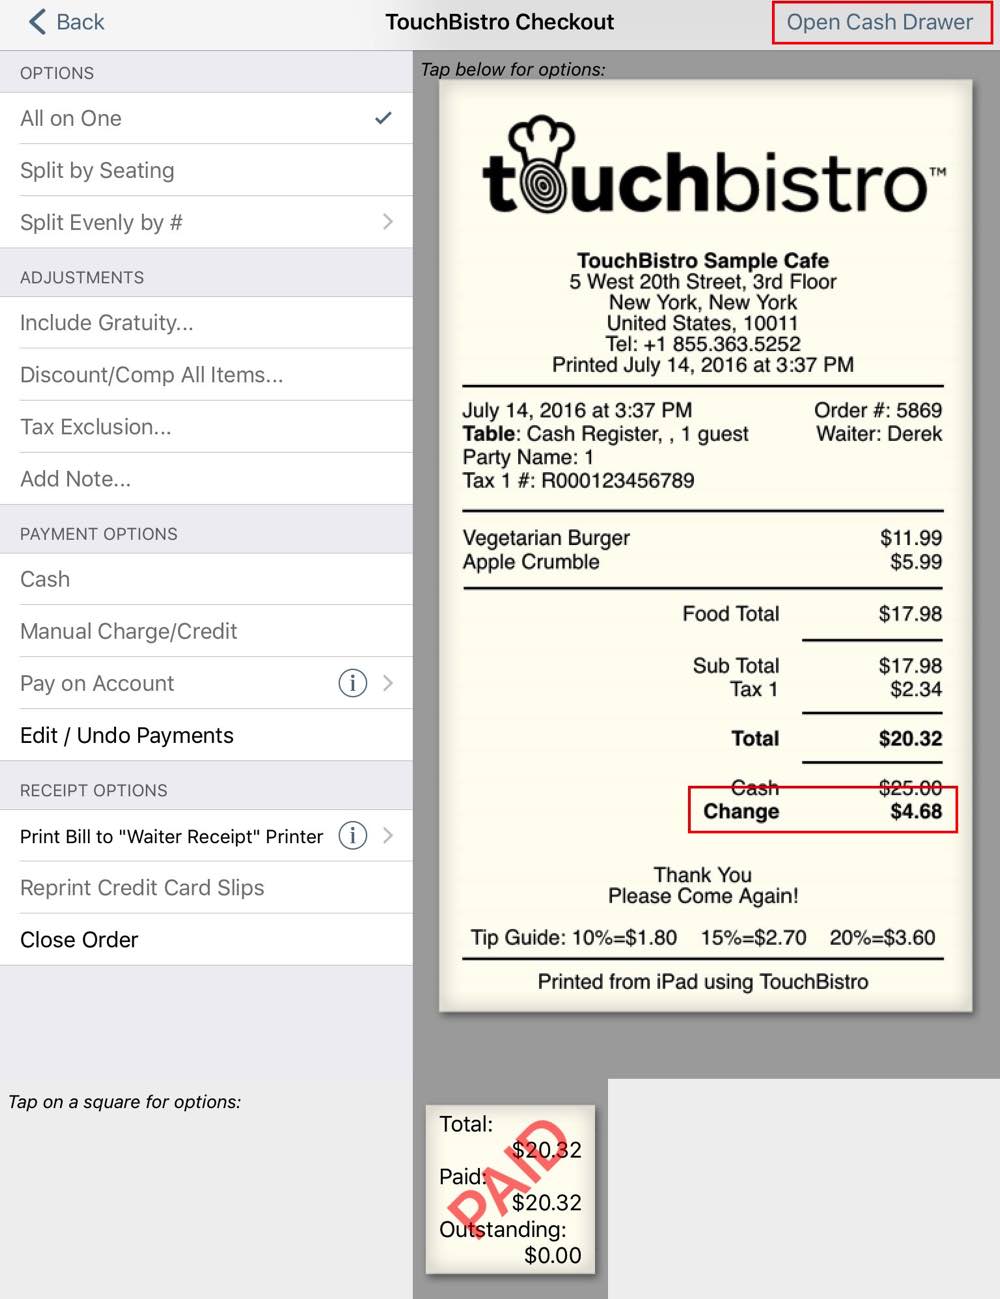
6. Tap Open Cash Drawer. Note the amount of change you need to get is at the bottom of the receipt.
7. The cash drawer will pop open without requiring a passcode. Make the change. Manually close the cash drawer.
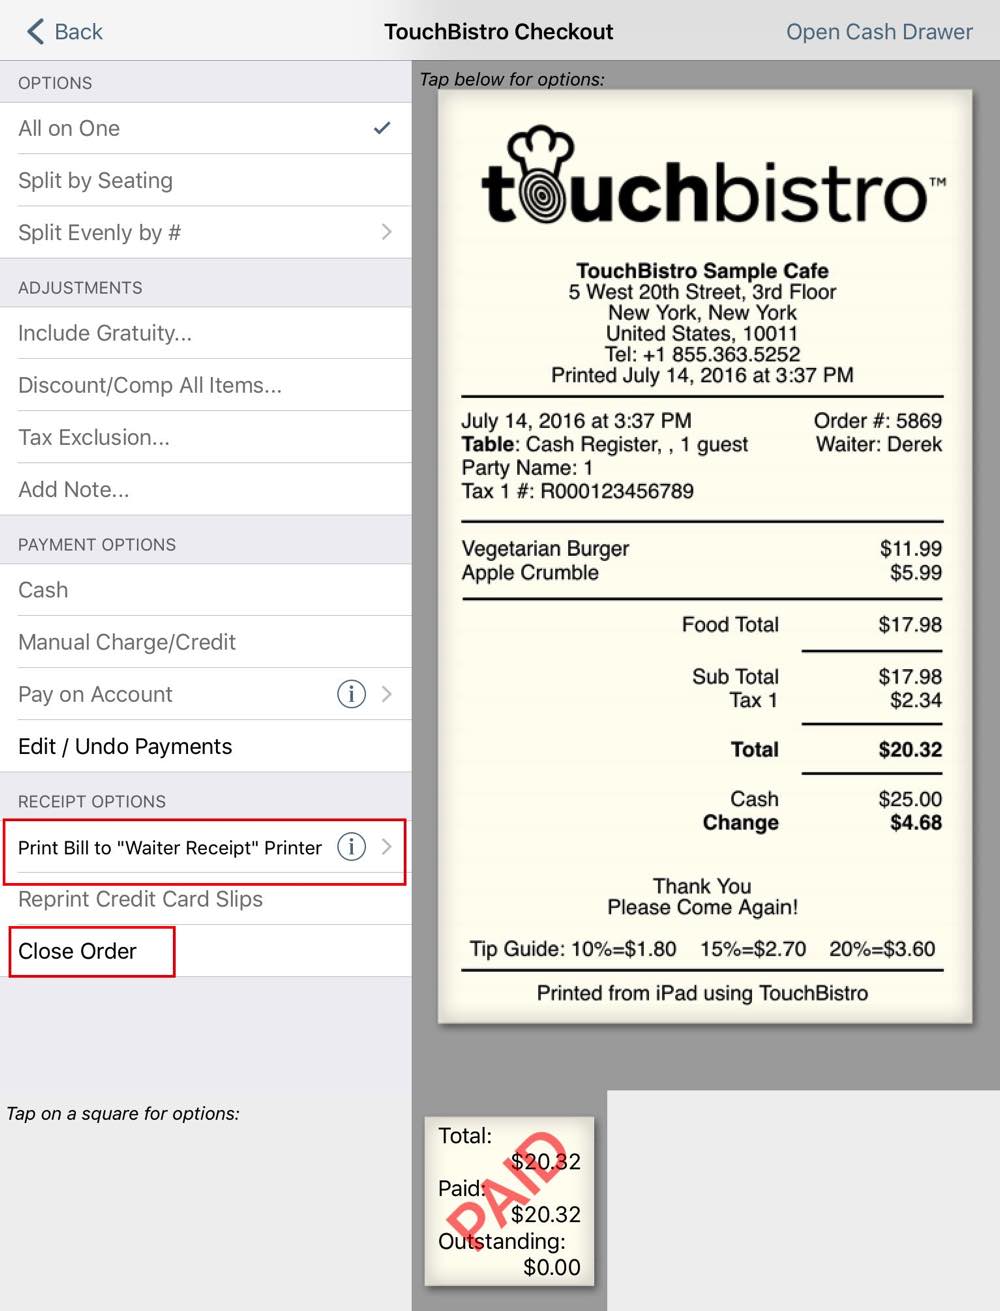
8. If you need to print a receipt at this point, tap Print Bill.
9. Tap Close Order and tap Yes.


 Email
Support
 Frequently
Asked Questions