List of Staff
Table Of Contents
Chapter 3. Adding a Staff Member
Chapter 4. Add a Manager Staff Type and Manager Staff Member
Chapter 1. Edit Staff
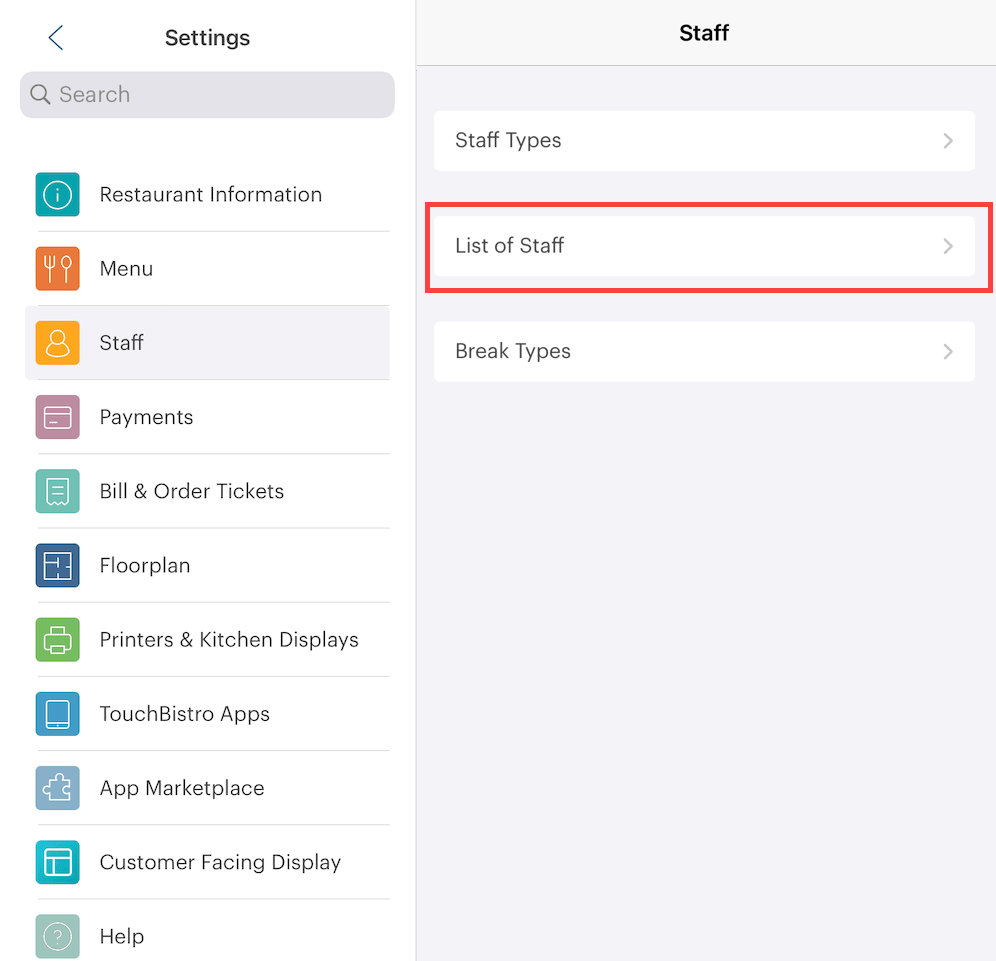
After creating your staff types (e.g., server, bartender, shift supervisor, etc.) return to the main staff screen and tap List of Staff to create and manage accounts for your staff members.
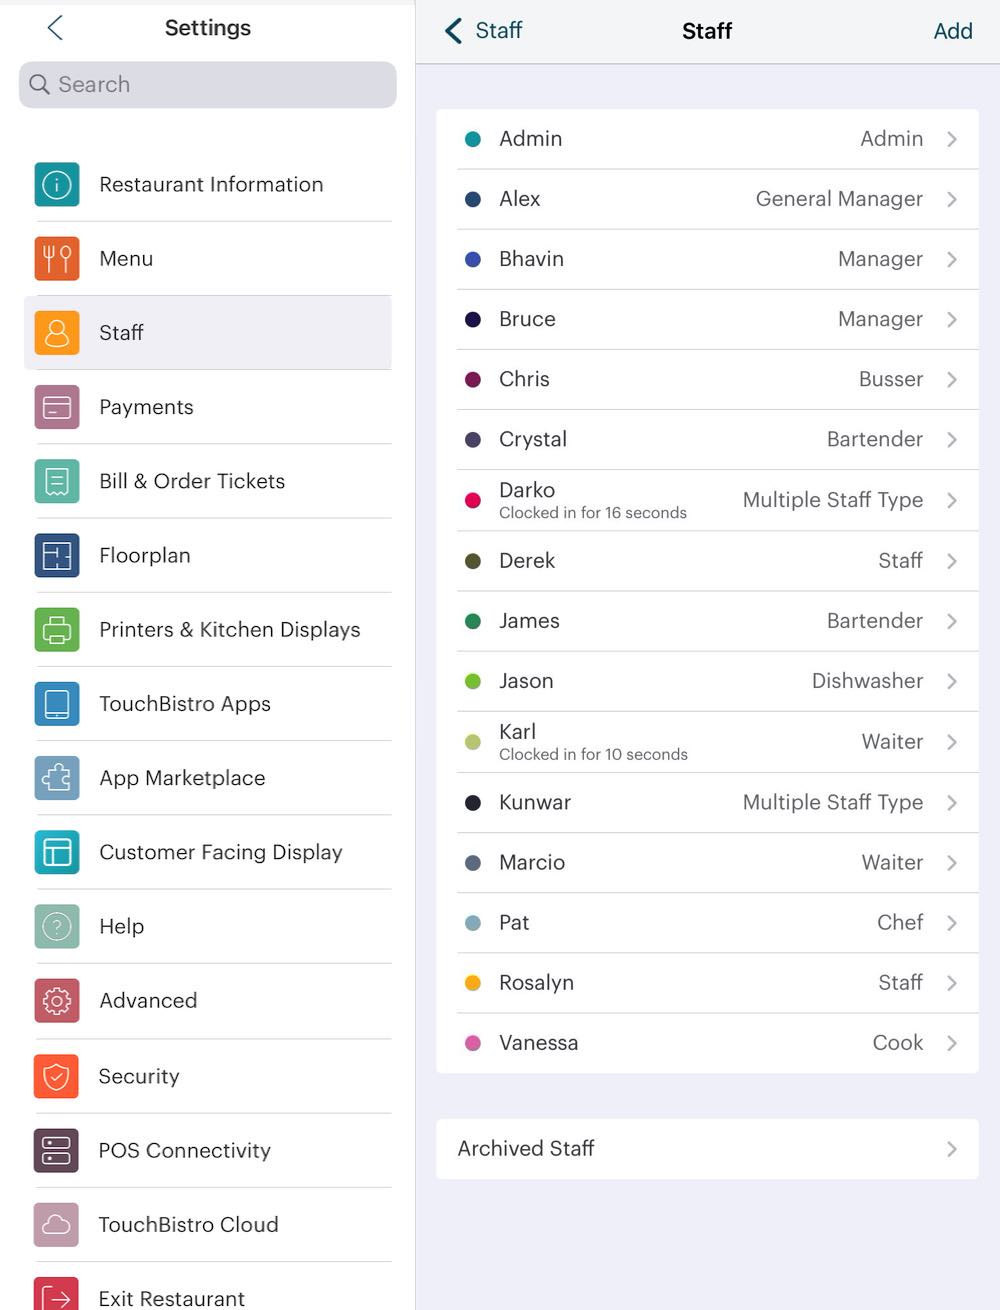
The staff page gives you a quick way of seeing who has signed into their iPad and how long they have been signed-in for.
Chapter 2. Admin Account
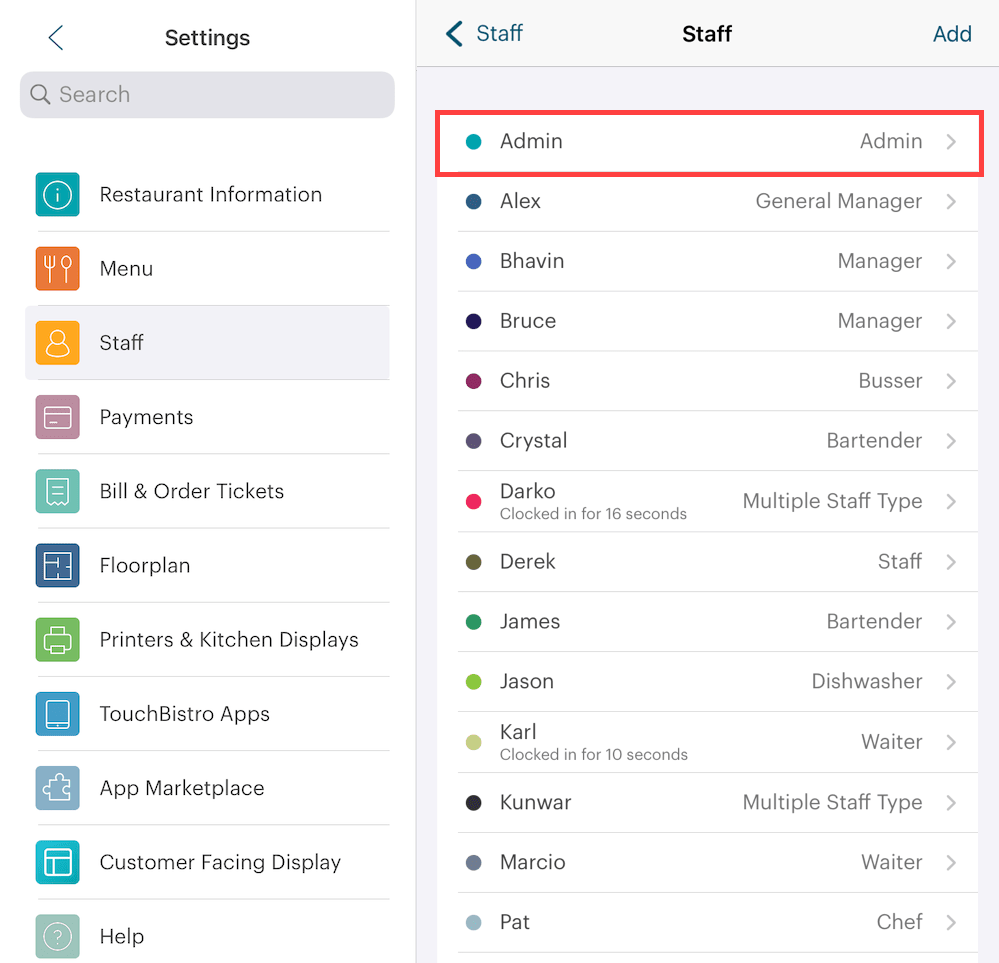
When you create your restaurant you will only have an Admin account (the one you’re using). There can only be one Admin account. It’s important not to do sales with your Admin account, as the Admin account does not generate a Shift Report and can lead to confusion about missing sales. As well, you should not use your Admin Account to make changes to your restaurant setup during service hours. Wait until you close your restaurant to make changes to menu items, prices, tax rates, and the like.
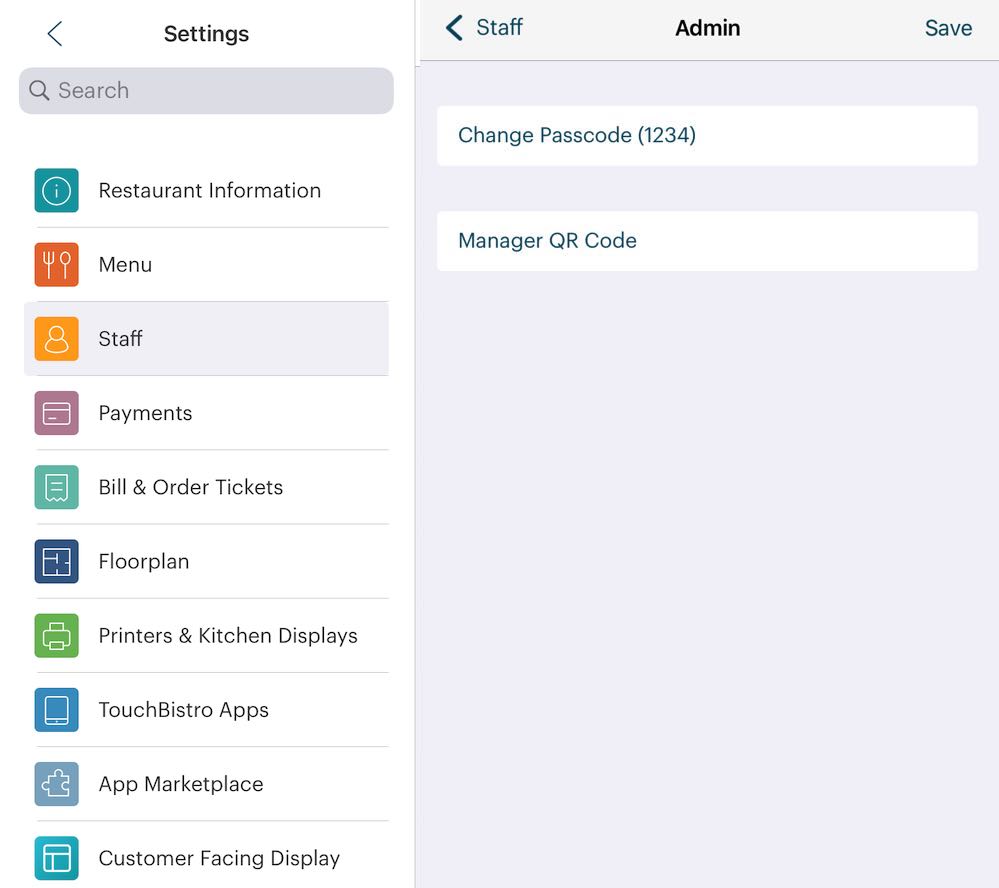
Tap the Admin account and tap Change Passcode to immediately change your passcode from the TouchBistro-supplied default to something unique. Note this new password down and keep it someplace safe. Tap Save to change your changes.
If you lose your Admin password there is no easy way to recover it. You will need to contact TouchBistro technical support. Password recovery may be a billable charge.
Chapter 3. Adding a Staff Member
Note: Once you add a staff member, you cannot delete it. However, you can archive inactive staff members using the staff member’s Archive option.
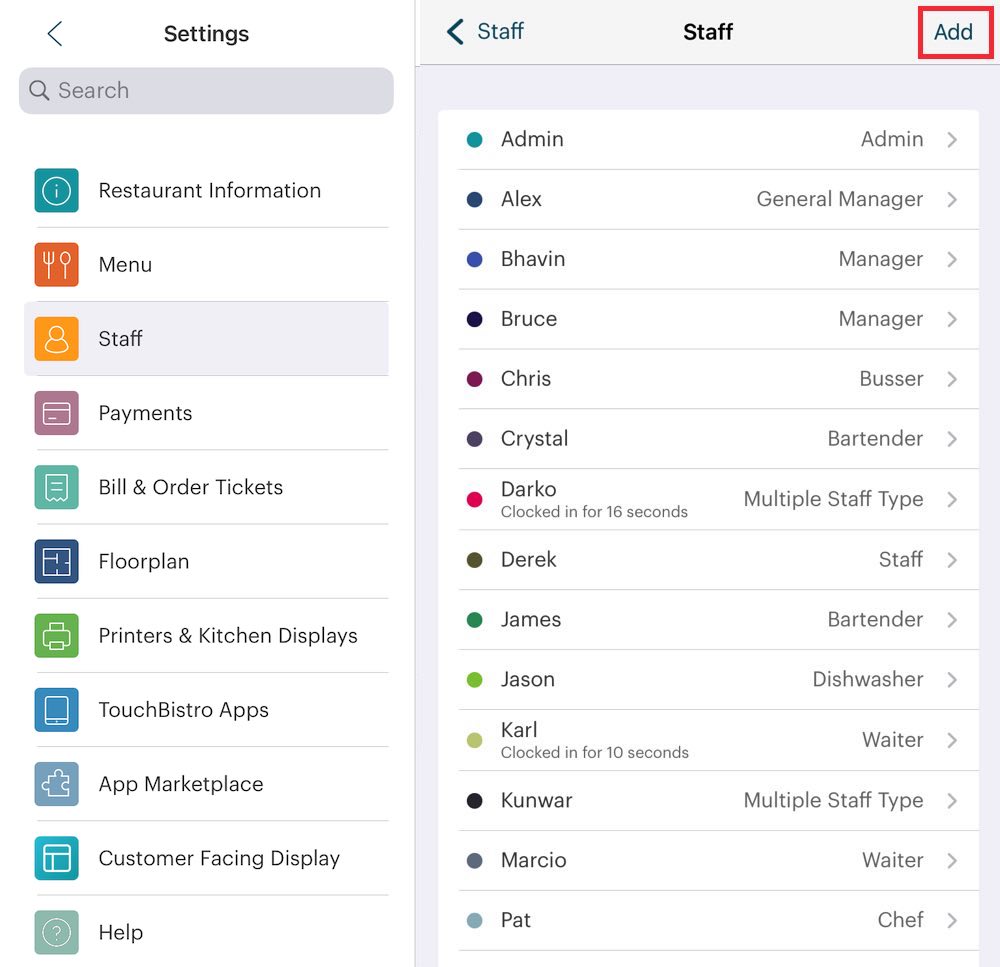
1. Tap Add on the top right to add a new staff member.

2. Complete the New Staff screen.
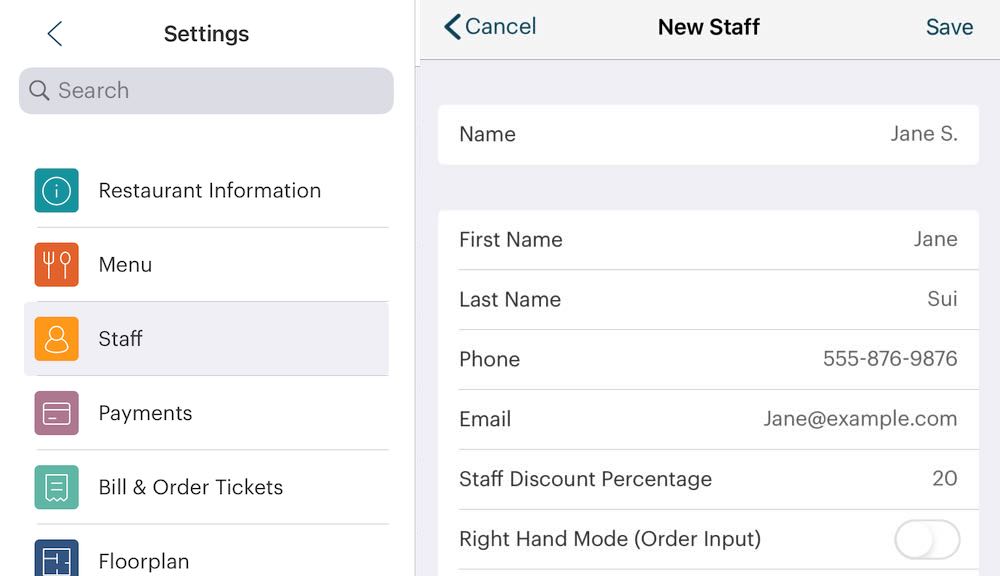
3. The Name field is used to display the server name on the guest check. We suggest only entering a first name or first name and last initial to protect the privacy of your wait staff. Name must be unique. No two staff members can share the same Name.
4. Complete the First Name and Last Name fields so you can maintain the actual name of your employee on file. The first and last names entered here are not exposed on customer-facing guest checks.
5. Phone and Email fields help Admins and Managers maintain employee contact information on the iPad.
6. If you want to give staff members a discount when they are ordering food for themselves, enter the percentage discount in the Staff Discount field.
7. If a staff member prefers to have the menu on the right side of the Order screen, you can enable Right Hand Mode.
8. Enable Dark Mode for this staff member if required. This darkens the screen elements, and may be more appropriate for darker venues, where a very bright screen might prove distracting to diners. This feature may be enabled on an individual basis, only for staff who want or need it. NOTE: This is not to be confused with Dark Mode in iPadOS, which is not supported by TouchBistro.
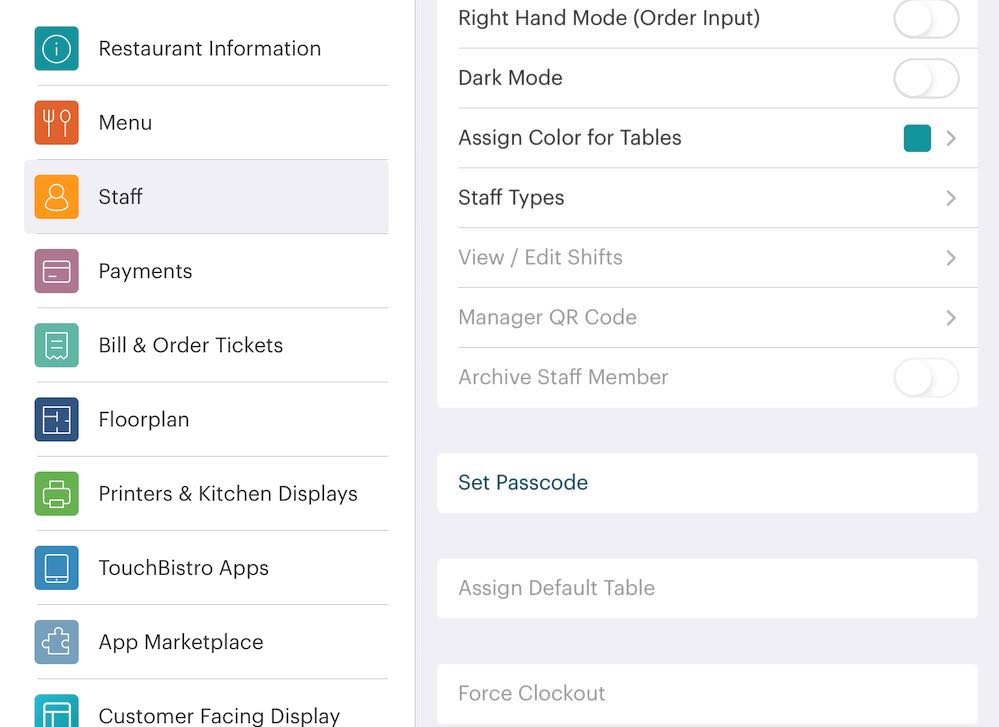
9. Tap Set Passcode to assign the staffer a passcode login. The passcode must be unique. Passcodes can be a minimum of 1 number, although for security purposes, you should create passcodes at least 4 numbers in length. Some payment integrations also require 4 number passcodes.
10. Tap View/Edit Shifts to view the staff member’s clock in/clock out times (or edit them) as well as view the staff member’s end of shift read. If you manually edit a shift, TouchBistro will indicate the shift was modified, by whom, and when.
11. Tap Manage QR Code to associate a QR code with this staff member. You can print out the QR Code and let a staff member sign into TouchBistro via the QR Code instead of entering the passcode. If you want to email the QR code, ensure this iPad has an Internet connection and you’ve set up the iPad’s own email app. See this document for a tutorial on using QR Codes.
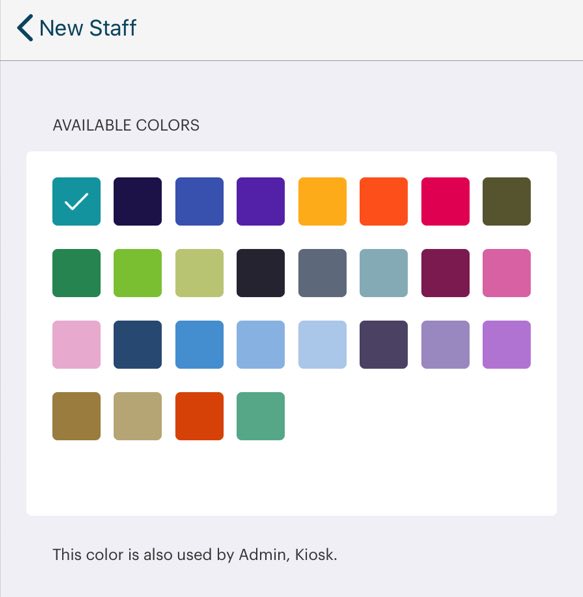
12. TouchBistro will default to a unique color to represent which tables are being served by this staffer. Staff Tap Assign Color for Tables to pick a new color. More than two staff members can share the same color although you should try to assign each a unique color.
13. Tap Assign Default Table if you want TouchBistro upon login of this staffer to immediately display a specific table, point of sale, or floor. You might have TouchBistro immediately open a table or point of sale if the staffer is logging into an iPad fixed as a terminal.
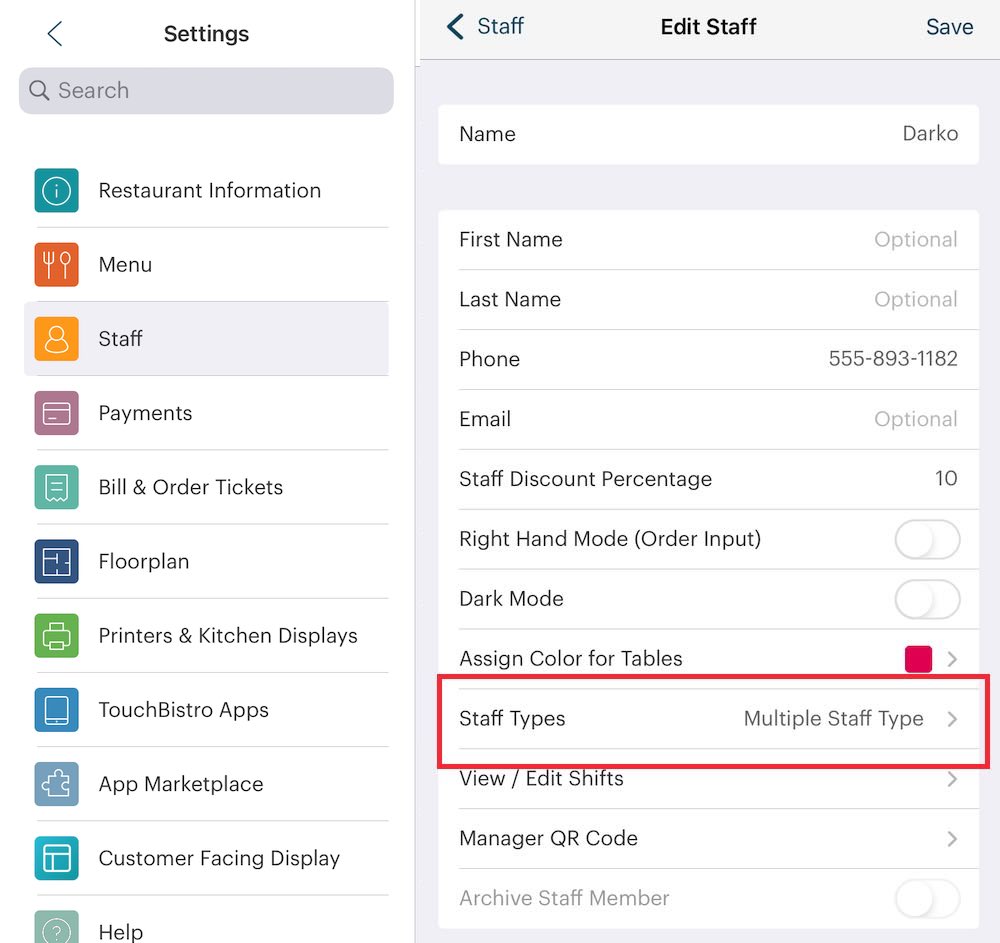
14. Tap Staff Type to set this employee’s staff type.
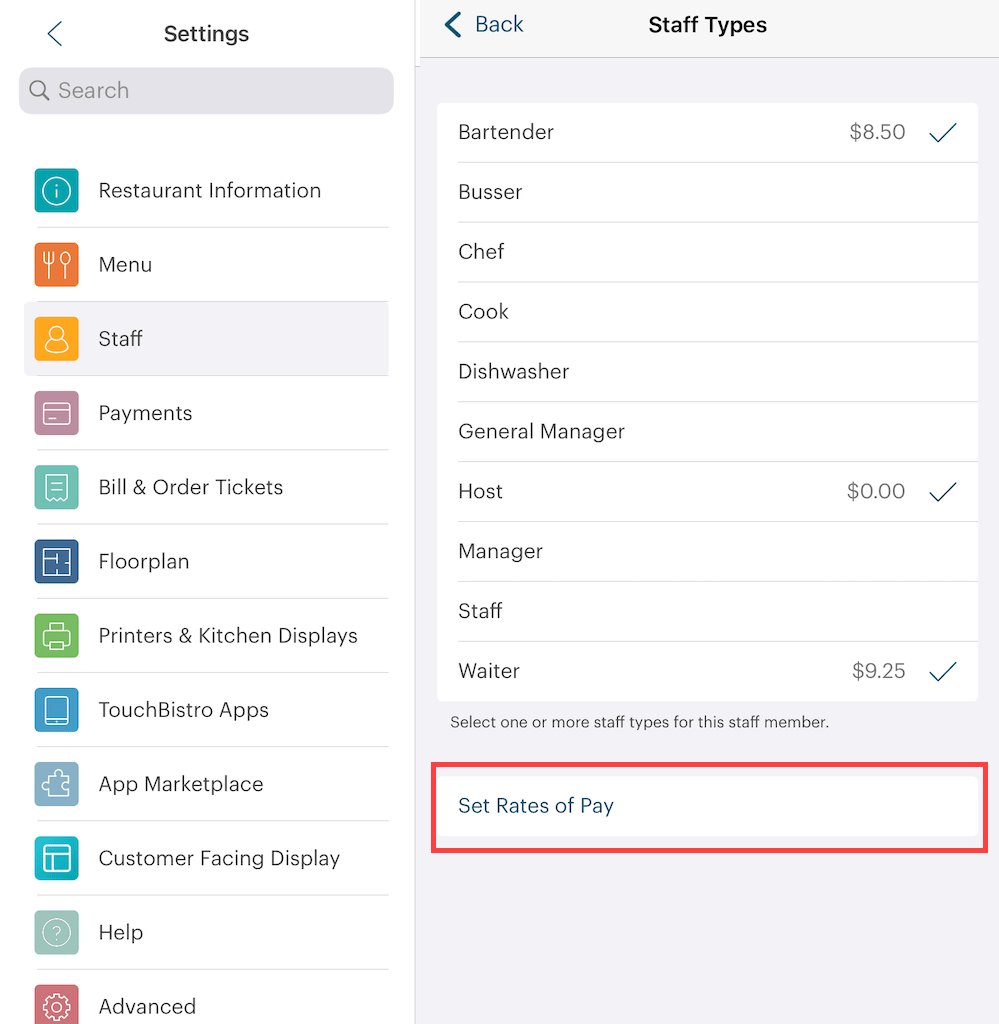
15. If you want this staff member to be able to log in under different roles, tap all appropriate Staff Types, When you set a Staff Type, TouchBistro sets the staff stype permissions based on the how they were set for the Staff Type. If the staffer is set for multiple staff types, the permissions will be set based on the Staff Type the staffer selects upon clock-in.

16. Tap Set Rates of Pay to set the staff member’s Hourly Rate of Pay when they are logged in as that staff type. Values entered here are used in labor reports. For reporting purposes, changes to the pay rate are reported on a “go forward” basis. If you later change the rate of pay, TouchBistro will not retroactively adjust pay values on previous labor reports. Pay will be calculated at the new rate the next time the staff member clocks in.
17. Enable Archive Staff Member if you need to temporarily disable the staffer’s access (for example, the staffer is on vacation or seasonal staff) or want to disable access for an ex-staffer but want to retain their data for future record keeping.
18. Finally, tap Save to return to the List of Staff screen.
Chapter 4. Add a Manager Staff Type and Manager Staff Member
It’s advisable to not use the Admin profile for day-to-day operations. So make sure you create a Staff Type for yourself and possibly for other for staff members with all or most of the Manager and Payments permissions enabled. For example, you may want to create a “Manager” Staff Type with all the Manager permissions and Payments permissions enabled and then assign that Staff Type to the staff member accounts you want to sign off on voids, run reports, and perform all end of day type duties like an admin profile.


 Email
Support
 Frequently
Asked Questions
