Moby8500 Set Up
Table Of Contents
Chapter 1. Unsupported Regions
Chapter 2. After an iPadOS Update
Chapter 5. Setting Up the Moby8500 Dock
Section 1. Adding the Dip Guide
Chapter 6. Powering Up/Turning Off Your Moby8500
Chapter 1. Unsupported Regions
Integration is not available in U.S. territories such as Puerto Rico, Guam, the U.S. Virgin Islands, American Samoa, and Nothern Mariana Islands.
Chapter 2. After an iPadOS Update
If you update your iPads to the latest iPadOS, the OS needs you to enable certain privacy settings to operate with the Moby8500. You should follow these steps:
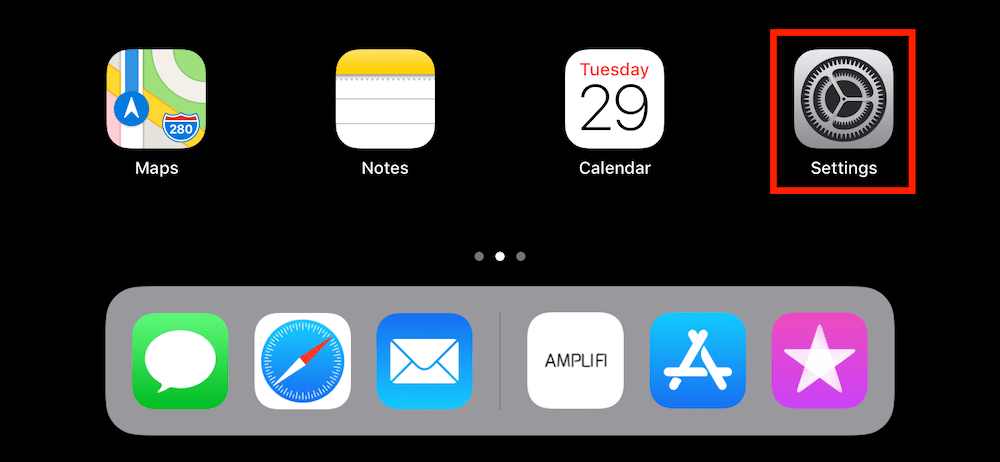
1. Tap Settings.
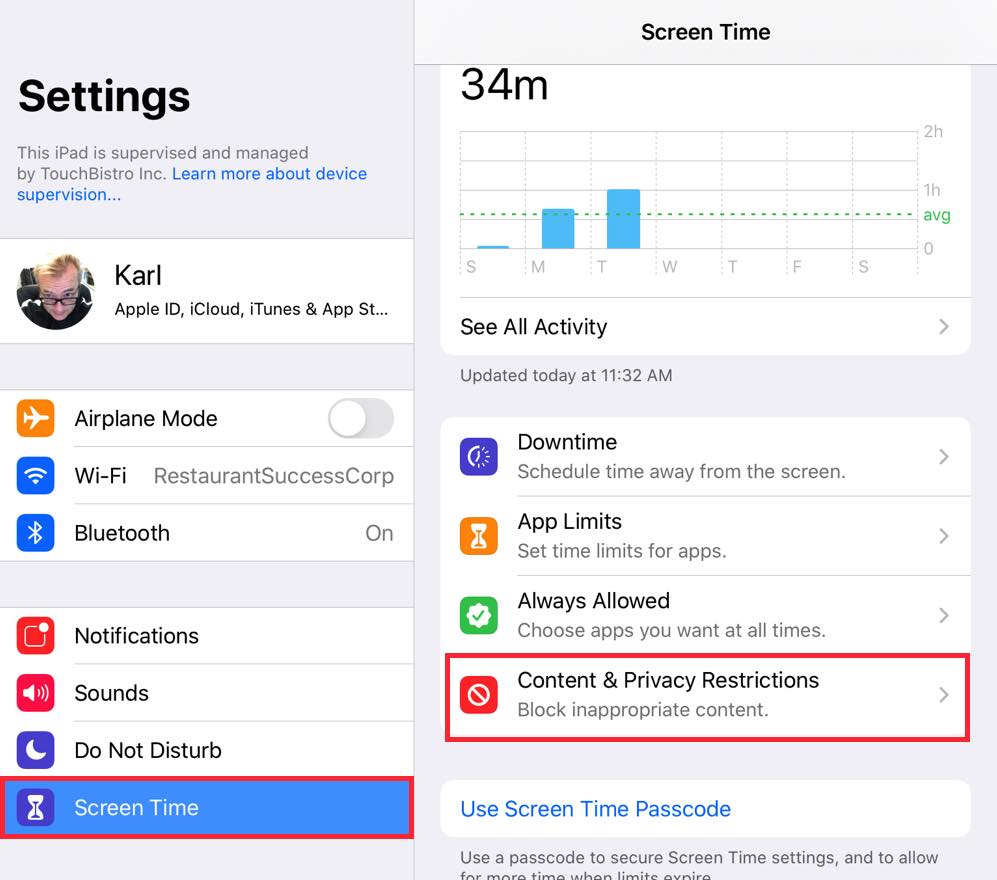
2. Tap Screen Time and then Content & Privacy Restrictions.
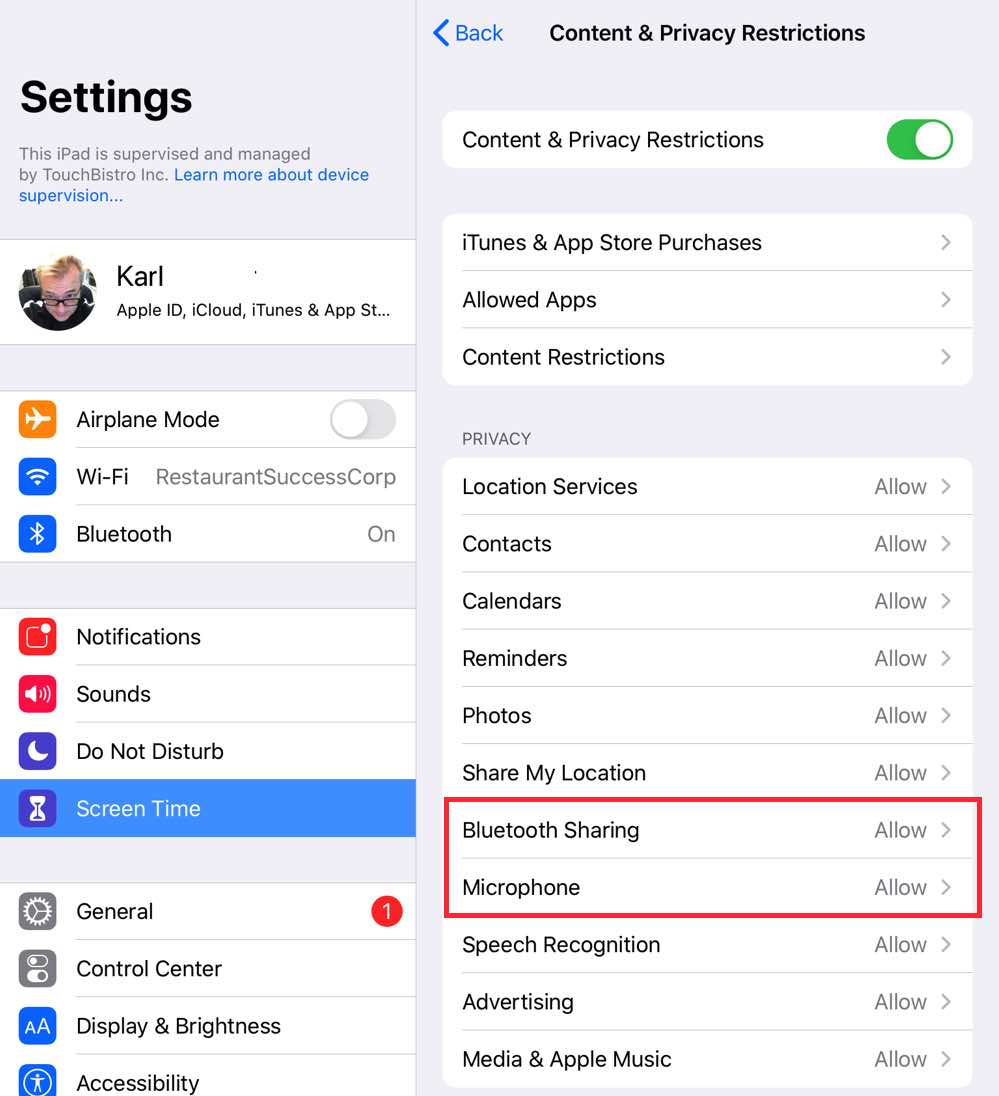
3. Enable Content & Privacy Restrictions and ensure Microphone and Bluetooth Sharing are both set to Allow Changes.
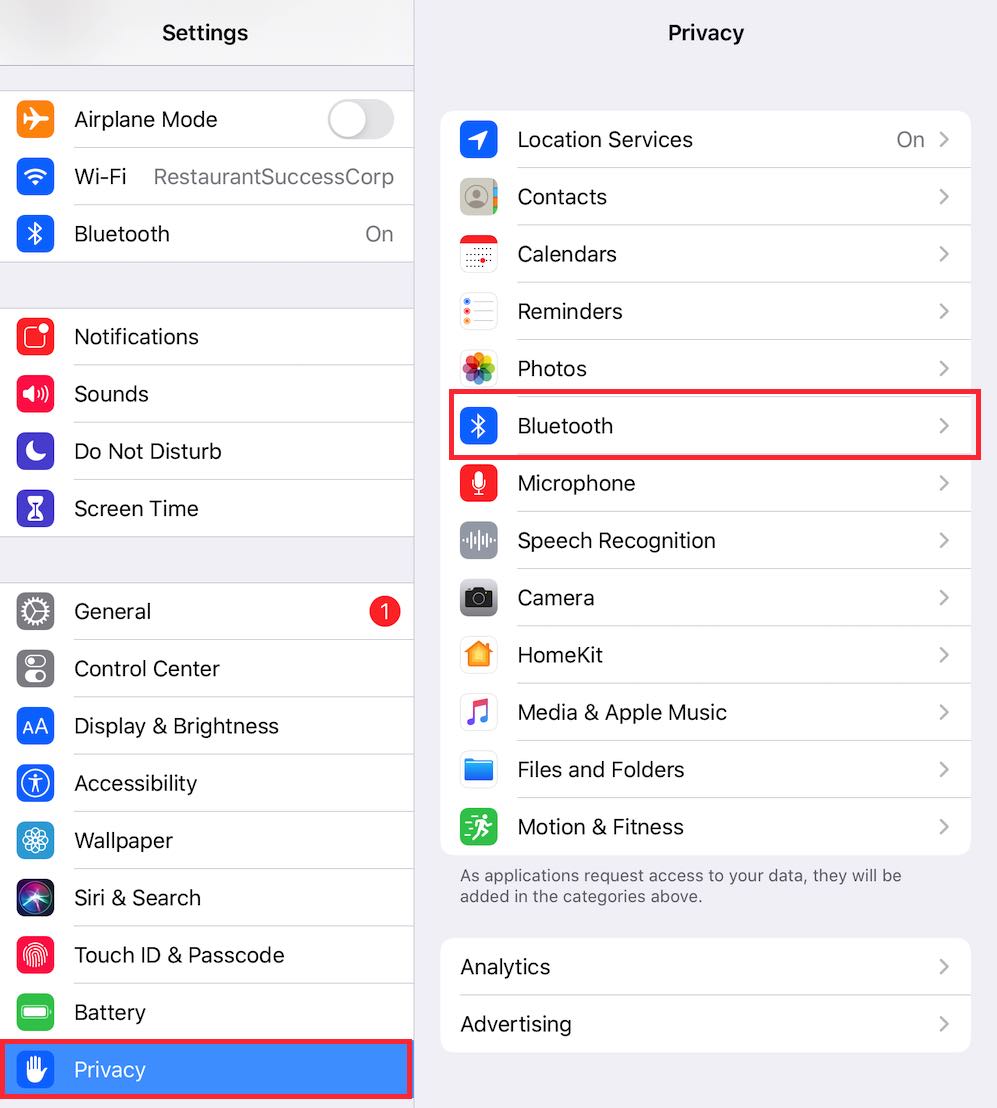
4. On the left, scroll down to Privacy and tap Bluetooth.
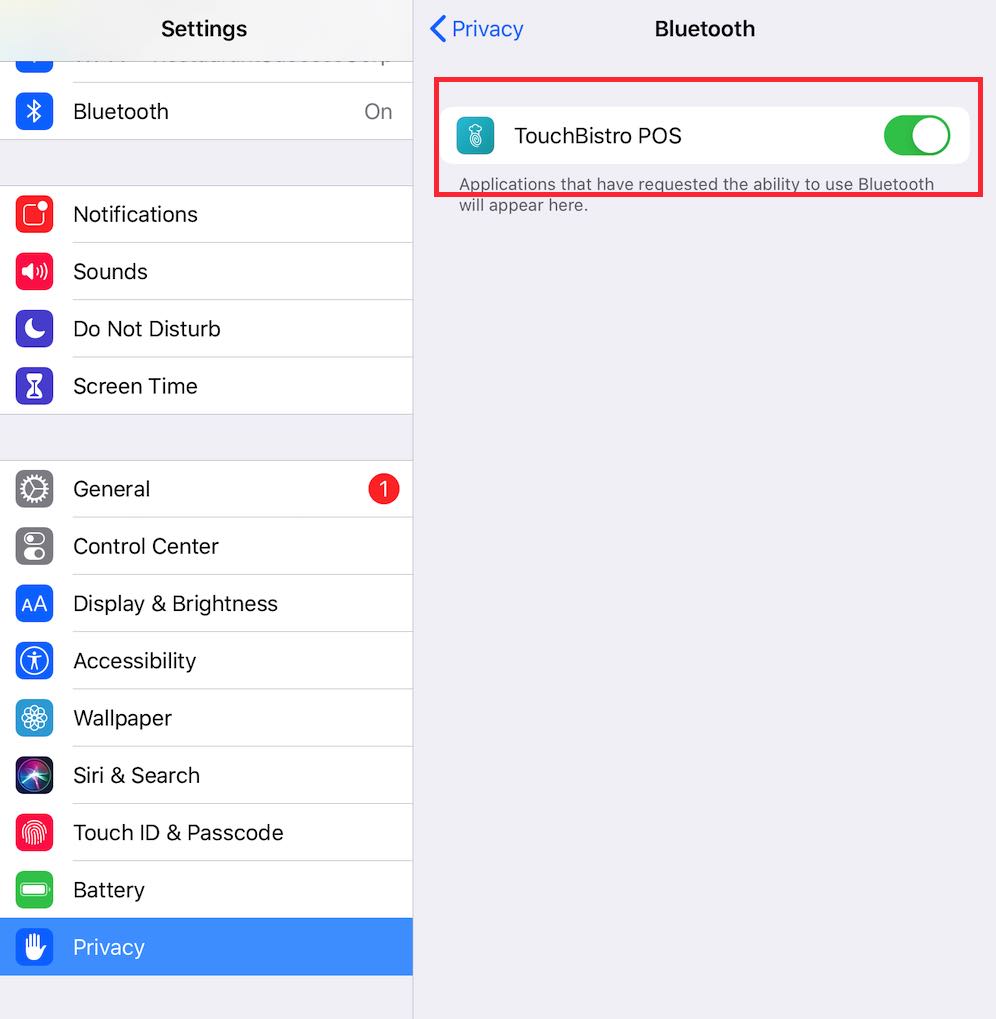
5. Ensure TouchBistro POS is enabled.
Chapter 3. Pairing
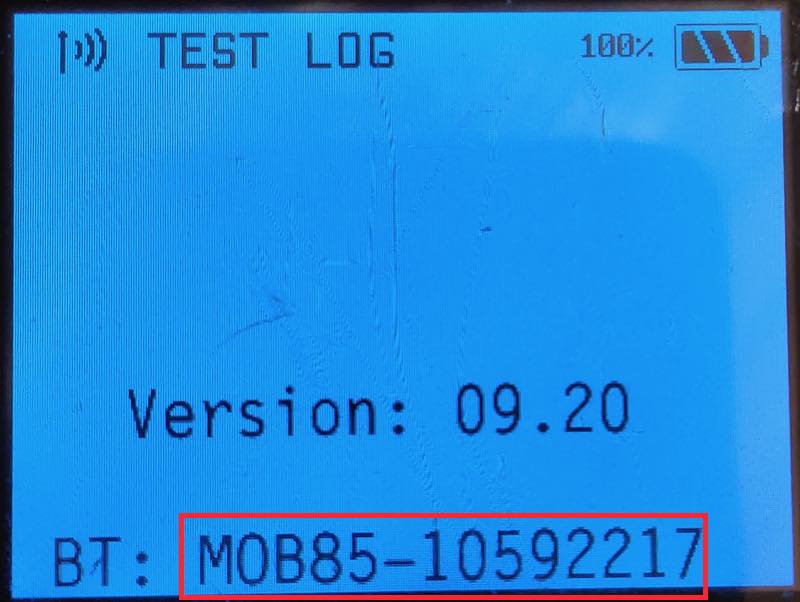
1. If you have multiple Moby devices, you might want to write down the serial number of the device you want to pair with.
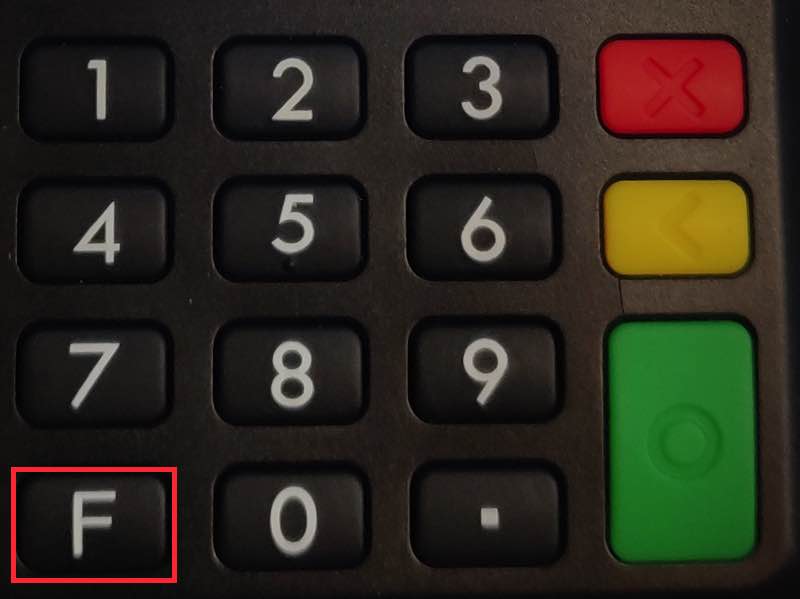
2. On the Moby8500 hold down the F button on the keypad for 3 seconds and release.
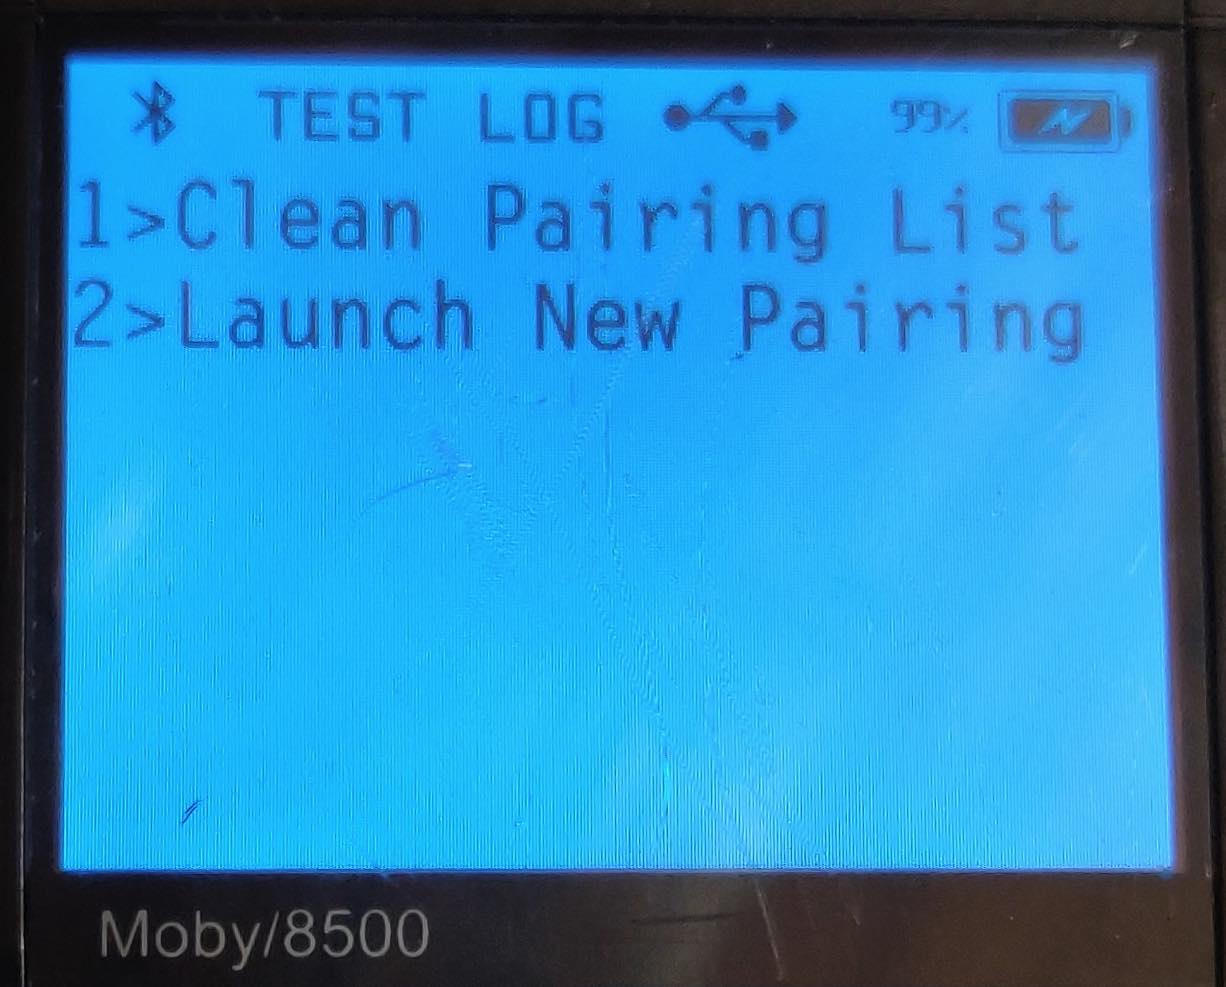
3. Press 2 on the keypad to start pairing.
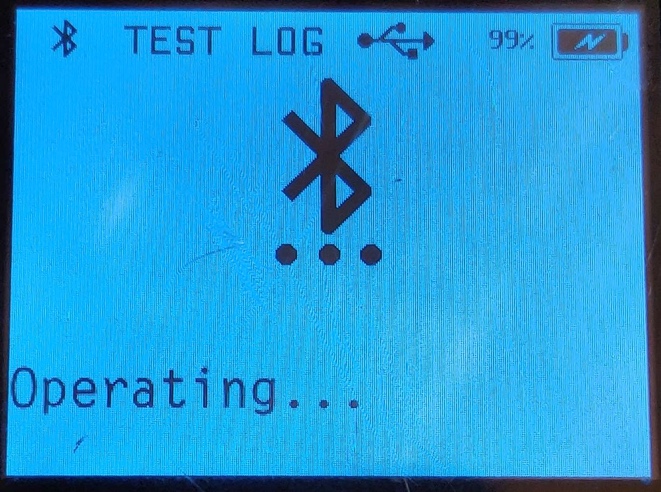
4. The Moby8500 will indicate it’s in pairing mode.
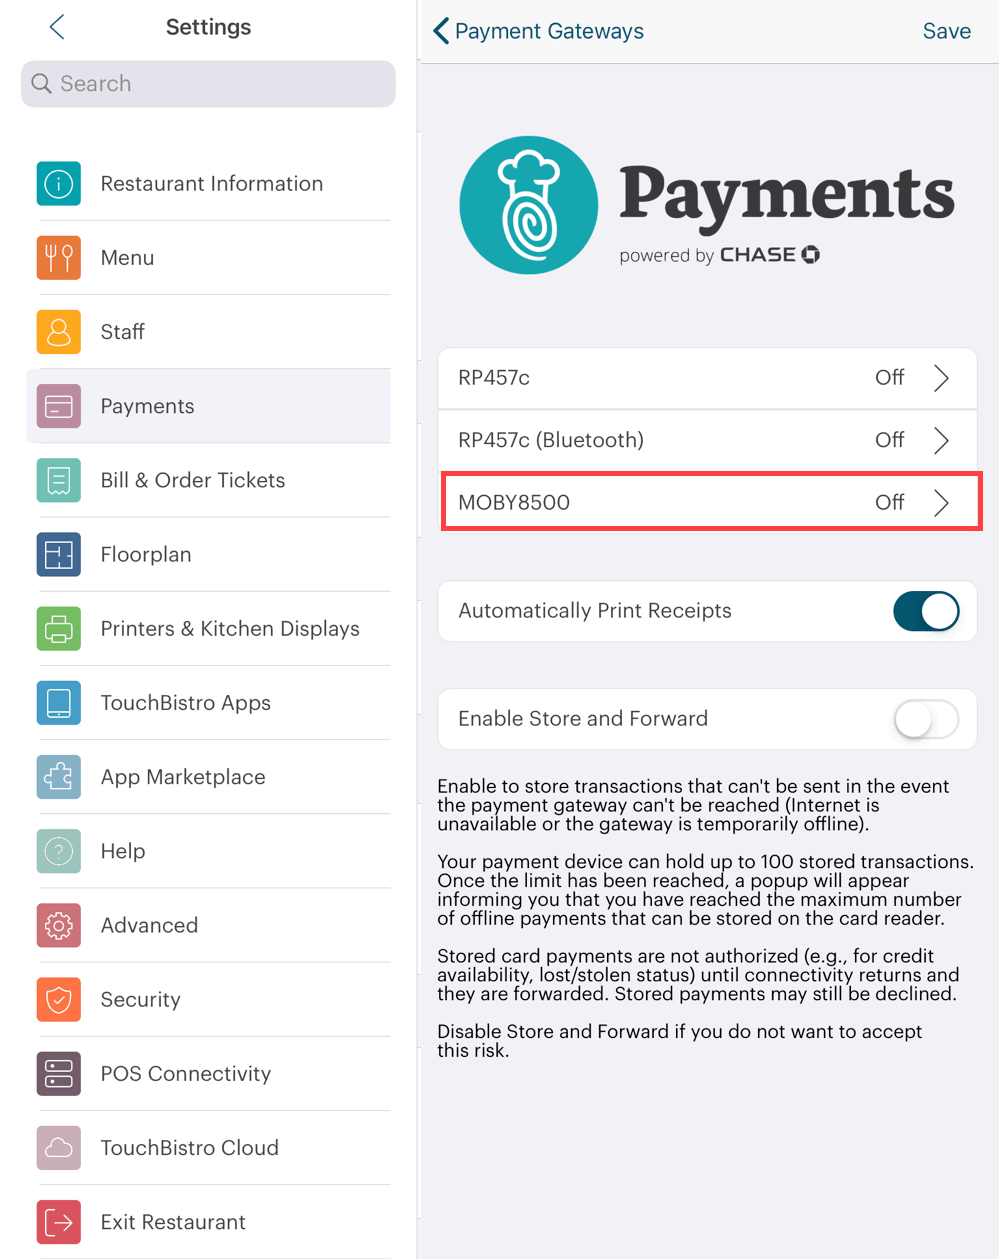
5. Tap MOBY8500.
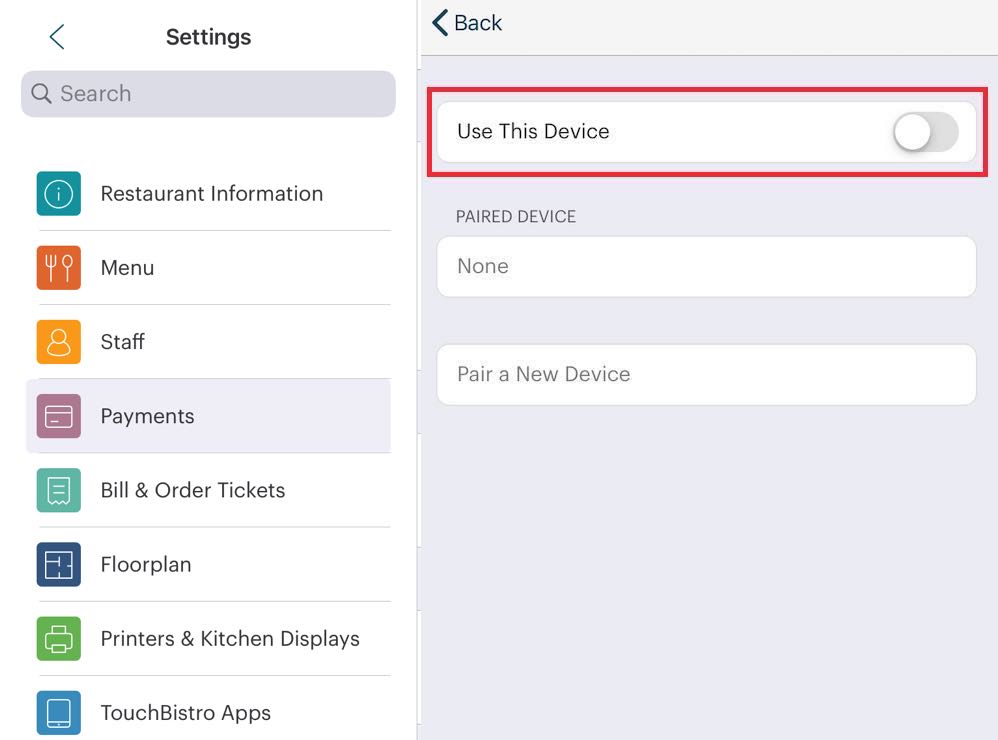
6. Enable if not already enabled.
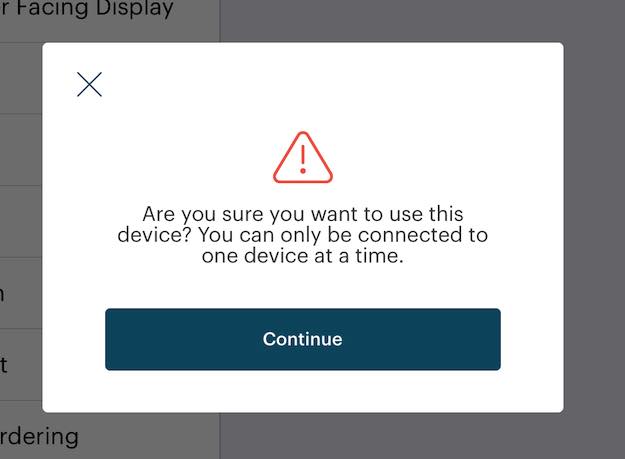
7. When enabled it will warn you about connection limitations. Tap Continue.
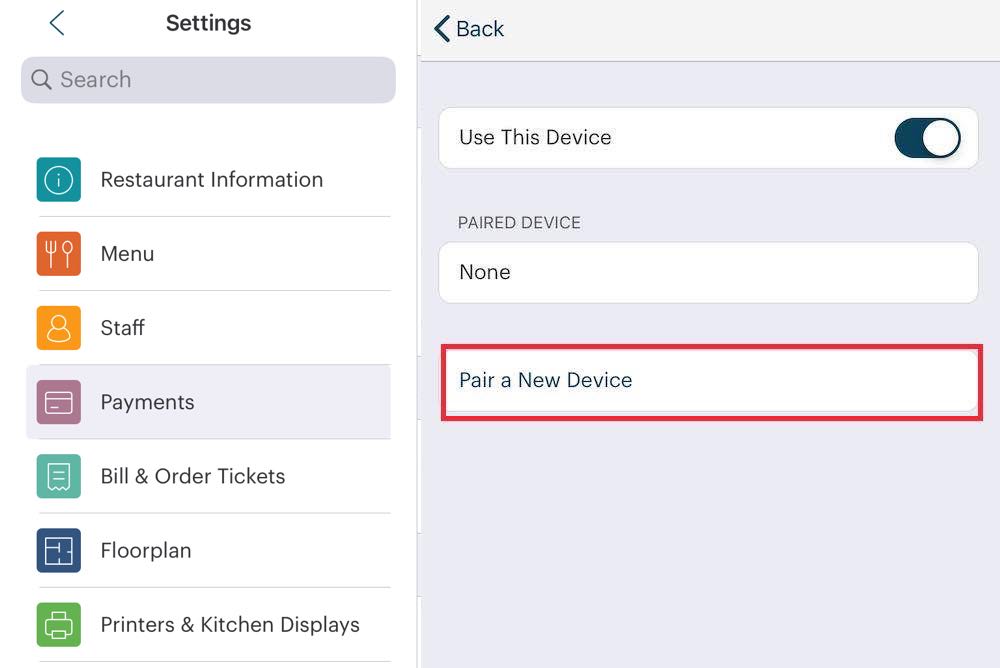
8. Tap Pair a New Device.
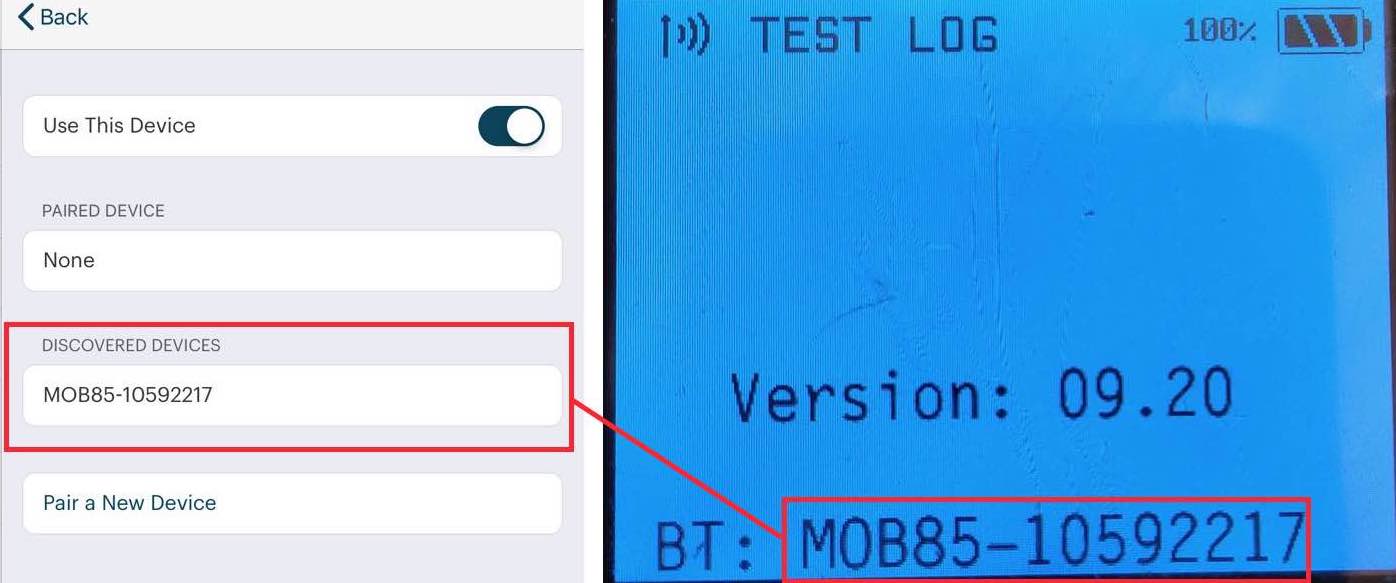
9. TouchBistro should find the device. Tap it. If you have multiple devices here, verify it’s the serial number you wrote down from step 1.
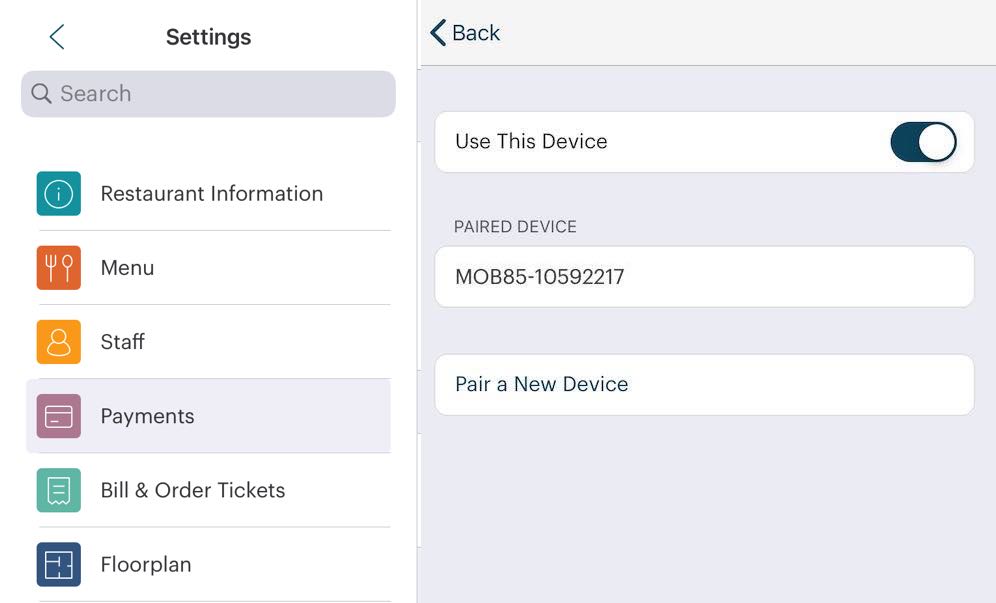
10. After successful pairing, you will see the device in the Paired Device section. It should not require re-pairing after this.
Note: If you are using Pro Server, this setting is local to each iPad.
Chapter 4. Troubleshooting
If you are having problem pairing, notably getting a Landi OpenDevice Error::-2 error, you can try the following:

1. Tap Settings.
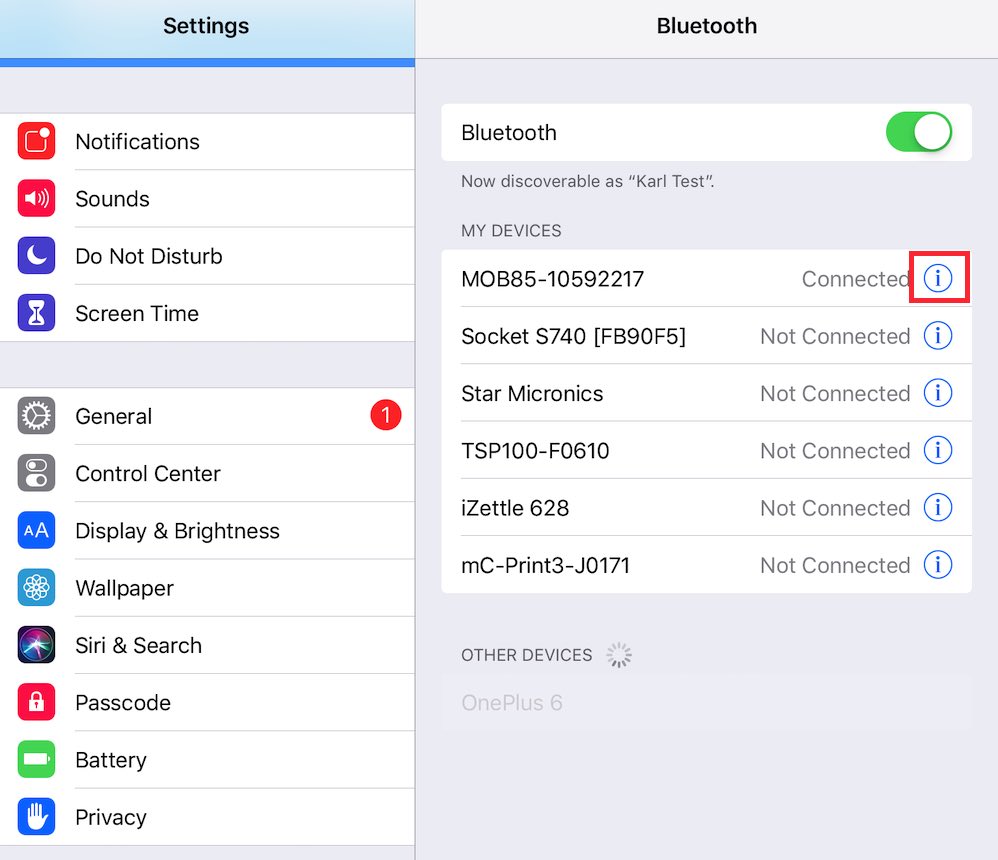
2. Open the Bluetooth settings screen and tap the Information ![]() associated with your Moby device.
associated with your Moby device.
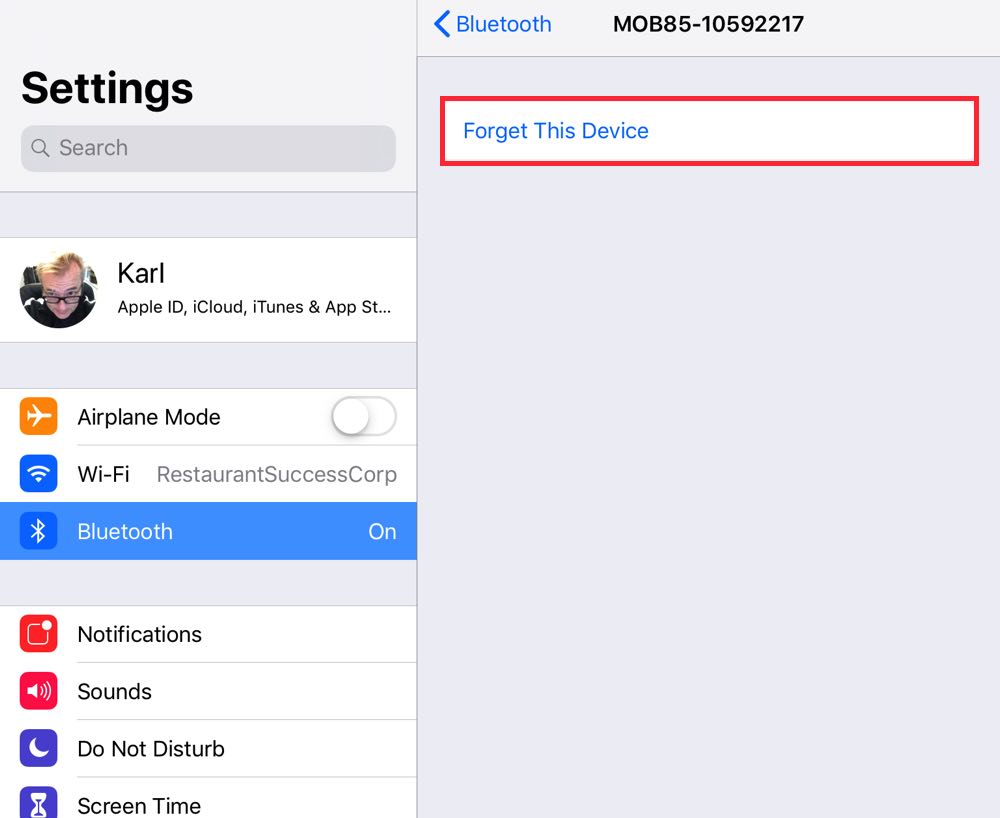
3. Tap Forget This Device.

4. On the Moby8500 device hold down the F button on the keypad for 3 seconds and release.

5. Press 1 on the keypad to clear pairings.

6. Tap Pair a New Device.
Chapter 5. Setting Up the Moby8500 Dock
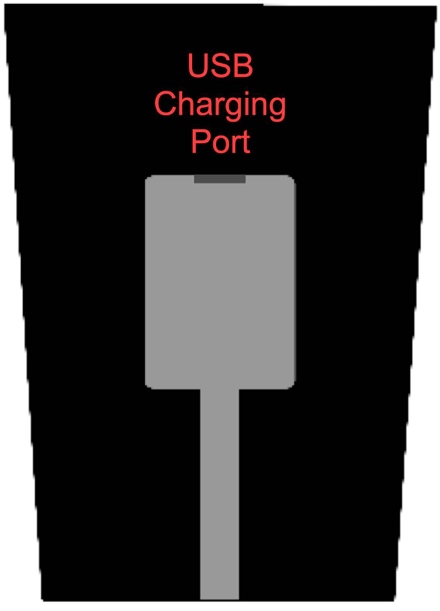
1. Flip the base over and locate the USB charging port (“female”).

2. Find your USB charging cable and locate the smaller male end.
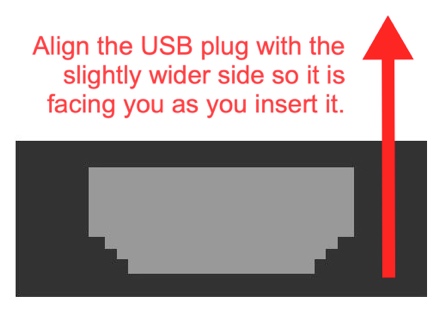
3. The smaller male end gets plugged into the female charging port on the base. Before you do that, take a close look at the male end of the USB charging cable. One side is slightly wider than the other side. Align that so it is facing you as you plug it into the charging port on the base.
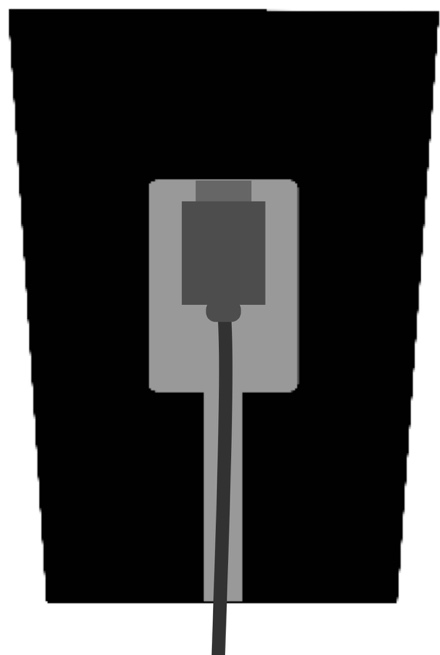
4. Plug the charging cable in. You can feed the USB cable through the base’s channel to keep the wire neat.
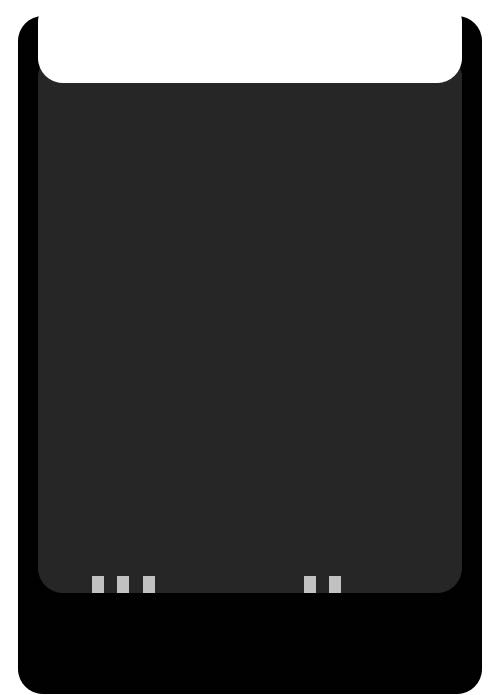
5. Flip the base back over with the cradle side facing you. You will see five contact pins. Three on the left and two on the right. These will provide constant power to the Moby8500 device.
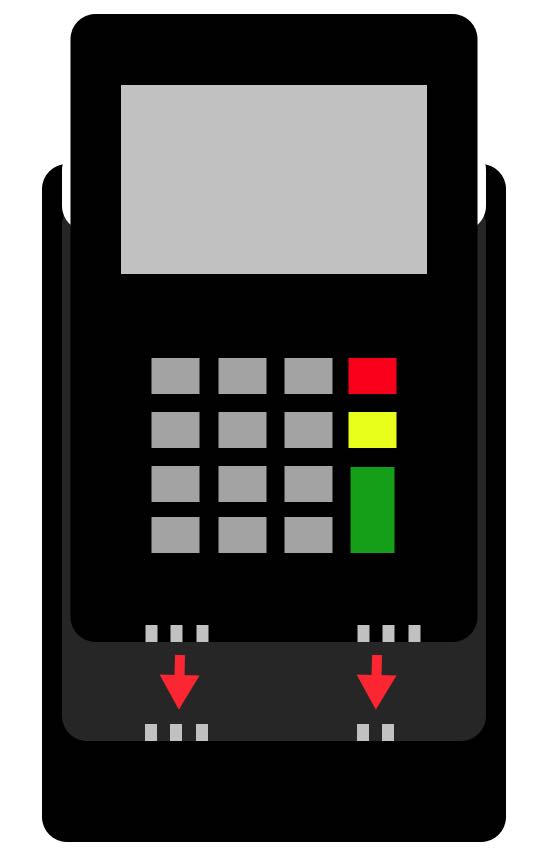
6. Slide the Moby8500 device into the cradle, aligning the device’s contacts with the cradle’s contact pins. The Moby8500 device’s third contact on right does not have a matching cradle contact pin.

7. Plug the USB charging cable into a plug adaptor and plug it into a wall socket. Alternatively, you might have a Star TSP100III printer with a free USB port that can power your base.
Section 1. Adding the Dip Guide
The dock provides a convenient way to power the Moby8500 when it is not in use tableside. However, you can also use the dock if you plan to mount your Moby8500 device at a fixed station (for example, a counter or a bar). If so, you might want to attach the dip guide to the back of your Moby8500 device.
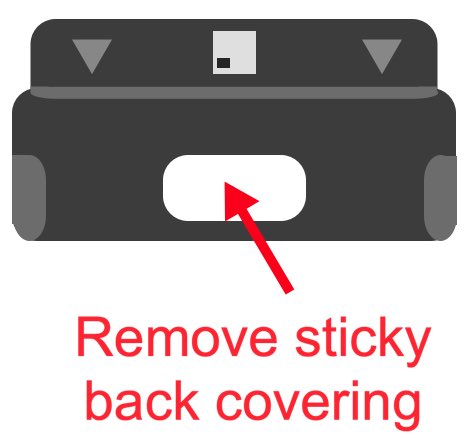
1. Your dock package comes with a plastic piece (dock guide) that can be attached to the back of your Moby8500 device. There’s some sticky tape on the inside of the dip guide that will help affix the dock guide to your Moby8500 device. You should peel this off before you affix it.
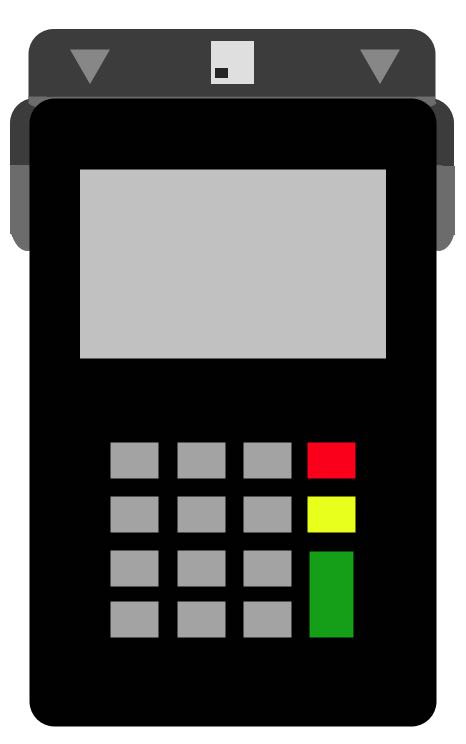
2. Snap the guide on the back of the Moby8500 device.
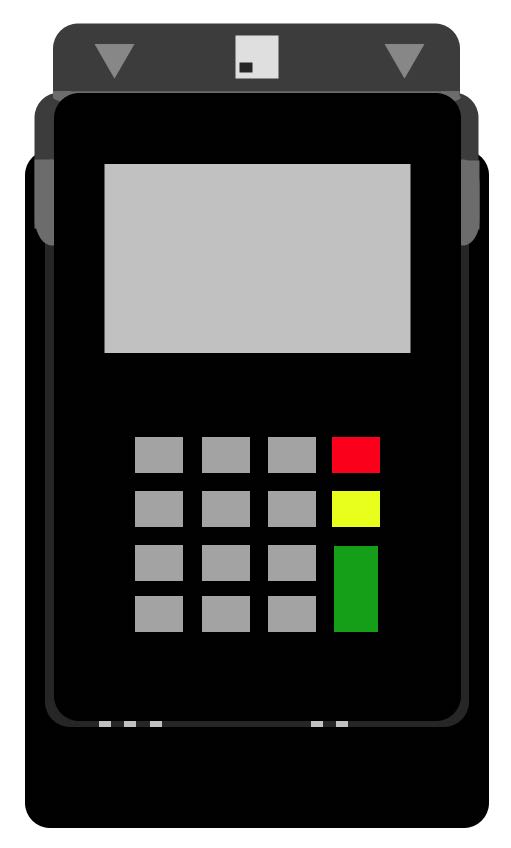
3. Slide the assembly into the dock.

4. When a customer pays with a chip card, the dock guide gives the customer a visual clue as to where to dip as well as the orientation of the chip.
Chapter 6. Powering Up/Turning Off Your Moby8500
Your Moby8500 has 3 power states:
1. Off: The device will not wake up when you attempt to process a payment.
2. Sleep: The LCD screen is off and the device is in a lower power mode. It will wake up when you send a payment. Your Moby8500 enters sleep mode after about 2 minutes of inactivity.
3. On: The LCD screen is on and ready for immediate payment.
Section 1. Powering Off
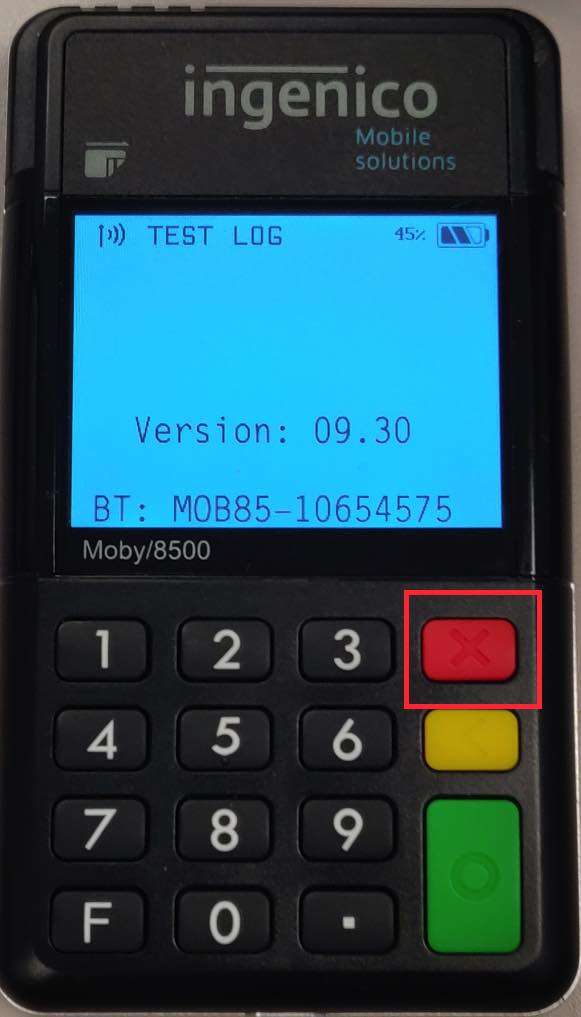
To power your Moby8500 completely off, press and hold down the red for about 6 seconds. The device will fully power off.
Section 2. Waking Up the Device
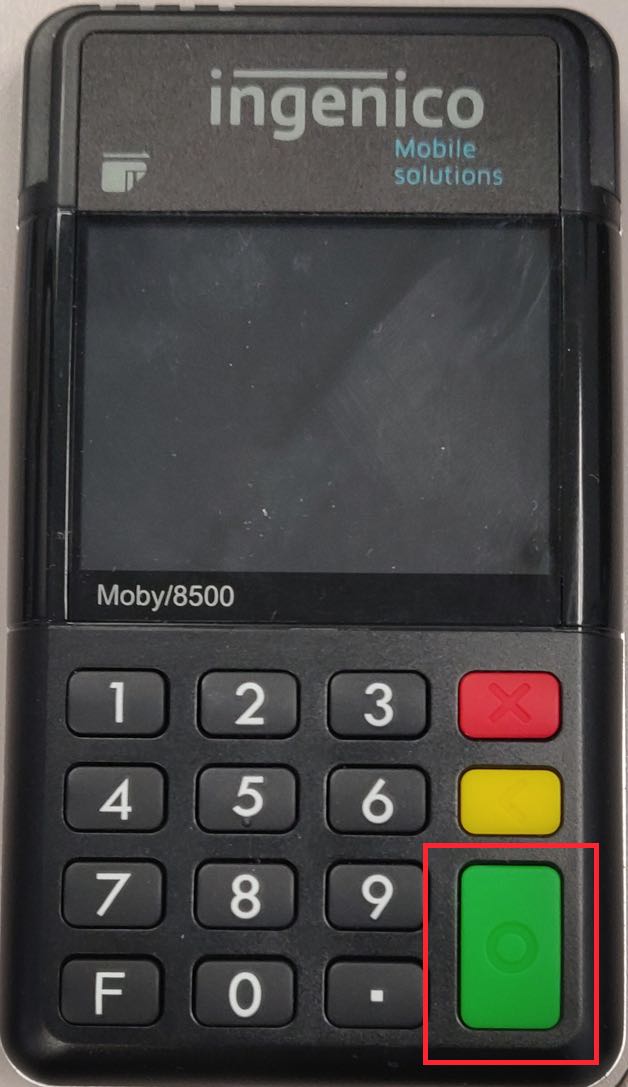
If you see a blank LCD screen, you Moby8500 could be in sleep mode. Press the green button for less than a second. The screen should come on.
Section 3. Powering On

If the LCD screen does not turn on, your Moby8500 has likely been turned off. Press and hold down the green button for about 6 seconds to power the device on.
Section 4. Device Does Not Wake Up or Power On
If your Moby8500 does not power on after more than 6 seconds of holding down the green button, it is likely the battery is dead. Plug your Moby8500 into a power source and let it charge for several minutes.
See Next


 Email
Support
 Frequently
Asked Questions
