Opening Day/Ending Day – Walk Through
Table Of Contents
Chapter 2. Pre-Opening Day Checklist
Section 1. Clear Practice Data
Chapter 3. Perform the End of Day Report
Chapter 4. Power Down Hardware
Section 1. Open Existing Restaurant
Section 1. Serving Staff Cash Out
Section 2. Non Serving Staff Clock Out
Section 3. Manager: Run the End of Day Report
Chapter 1. Introduction
This guide will give you step by step instructions how to clear your testing data, open your restaurant and then close your restaurant.
Chapter 2. Pre-Opening Day Checklist
Section 1. Clear Practice Data
1. Login as Admin.
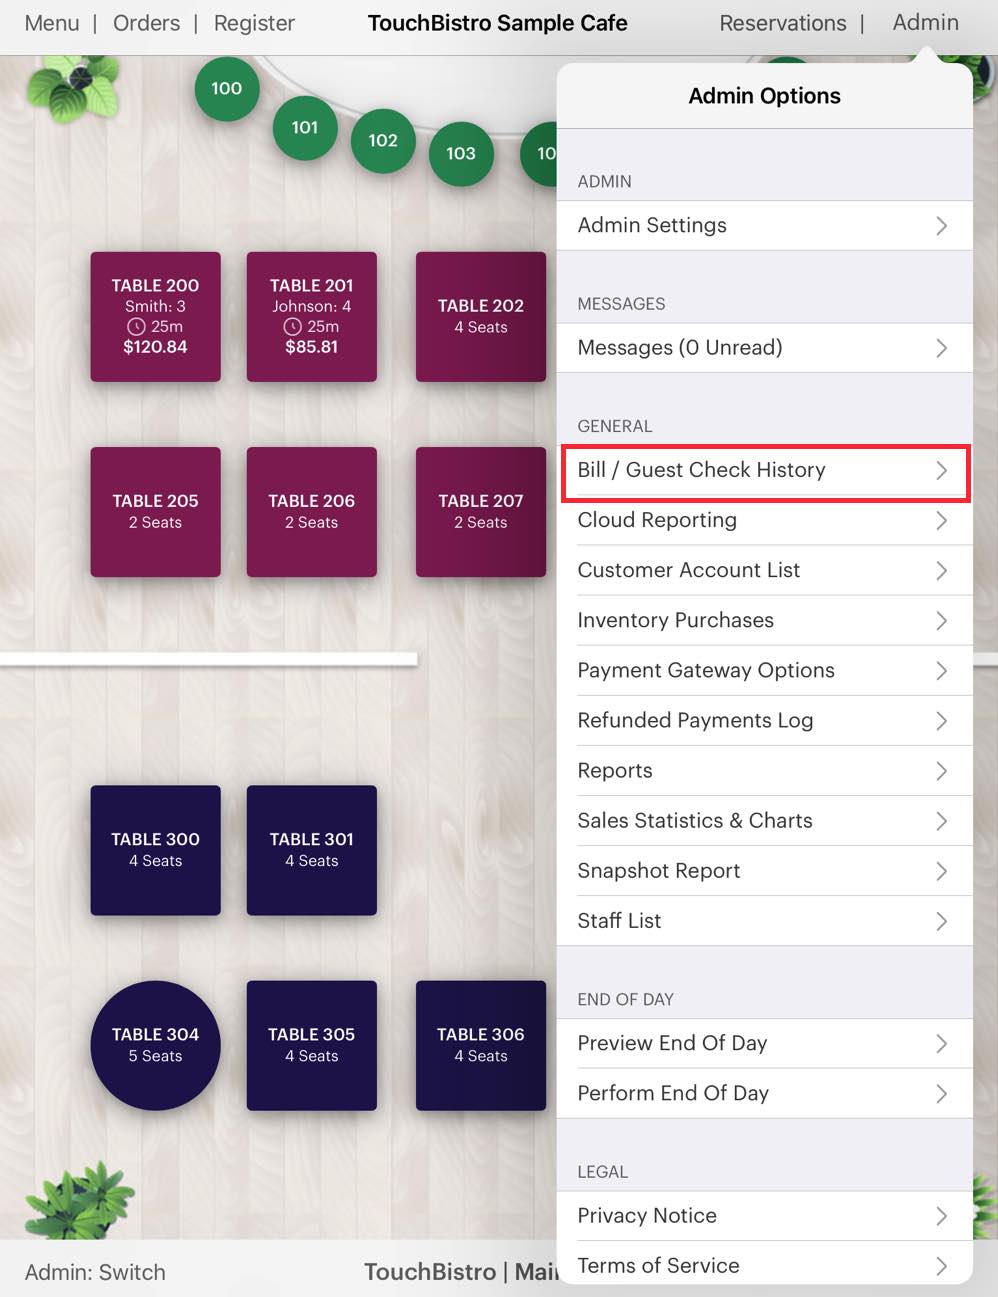
2. Tap Admin | Bill / Guest Check History in the top right hand corner.
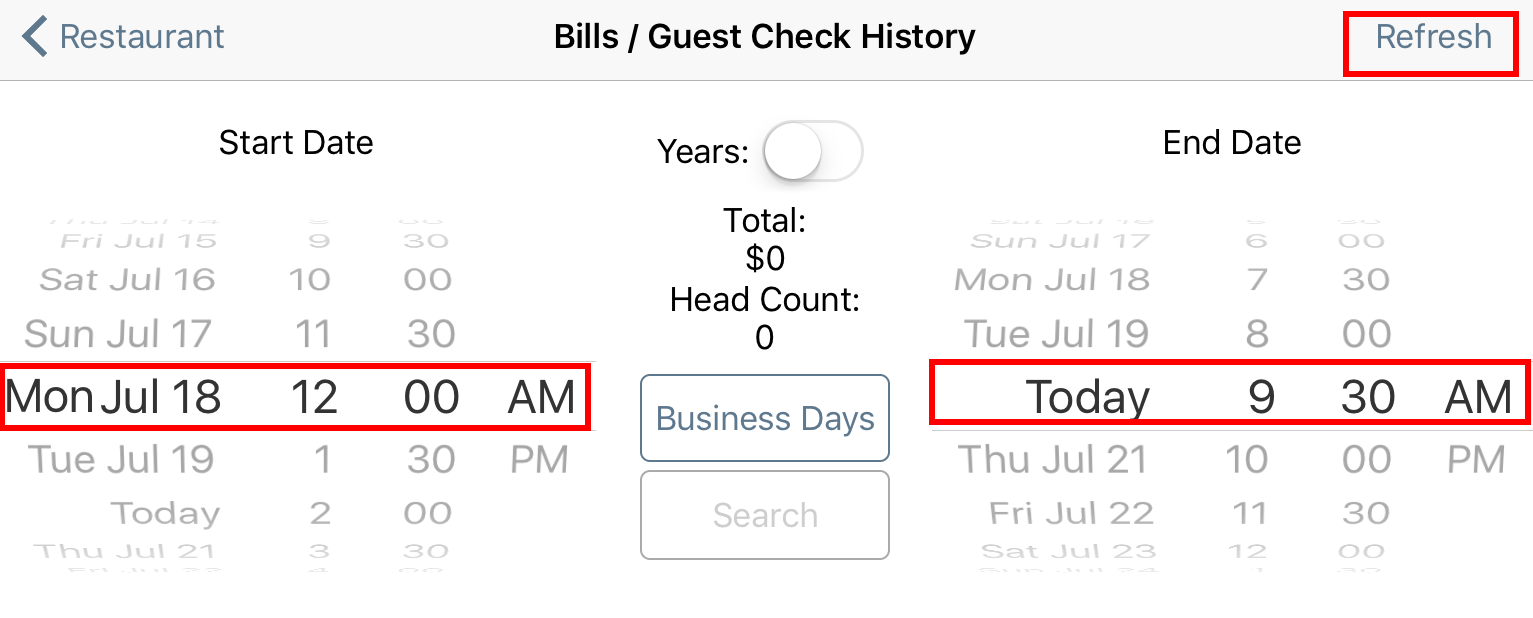
3. Select start and finish dates where all practice occurred.
4. Tap Refresh.
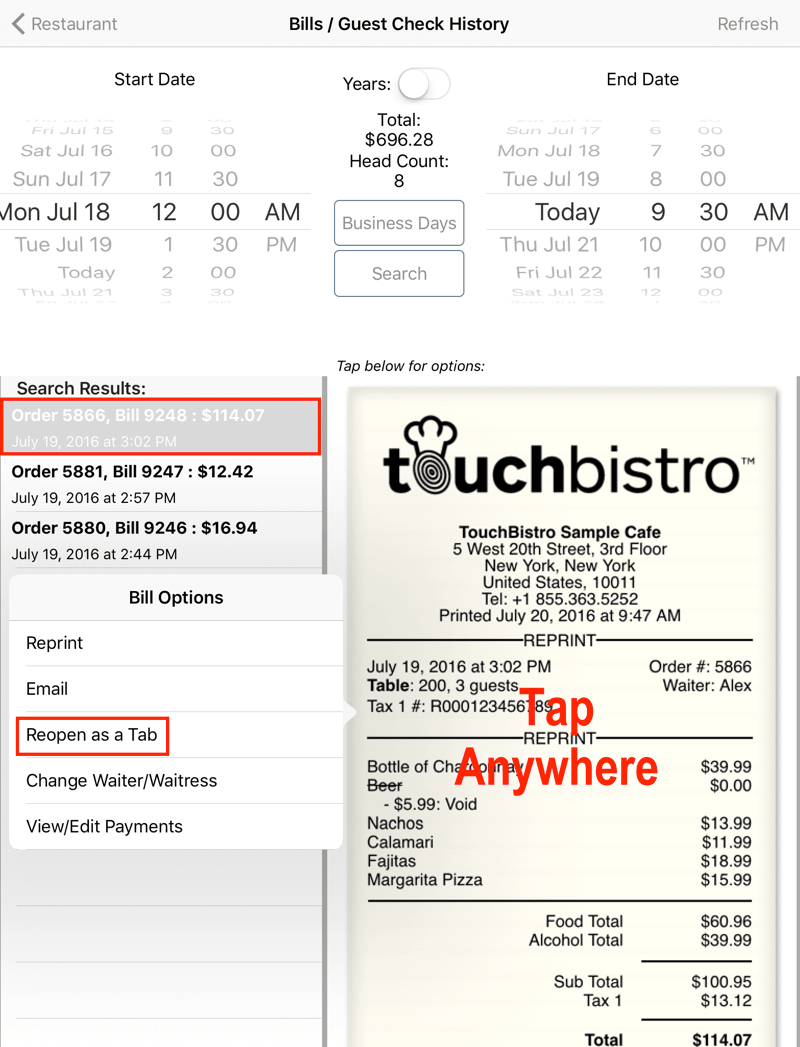
5. In the Results column tap on a receipt to be deleted.
6. Tap on the imaged receipt to display the Bill Options menu.
7. Tap Reopen as a Tab.
8. Tap Yes.
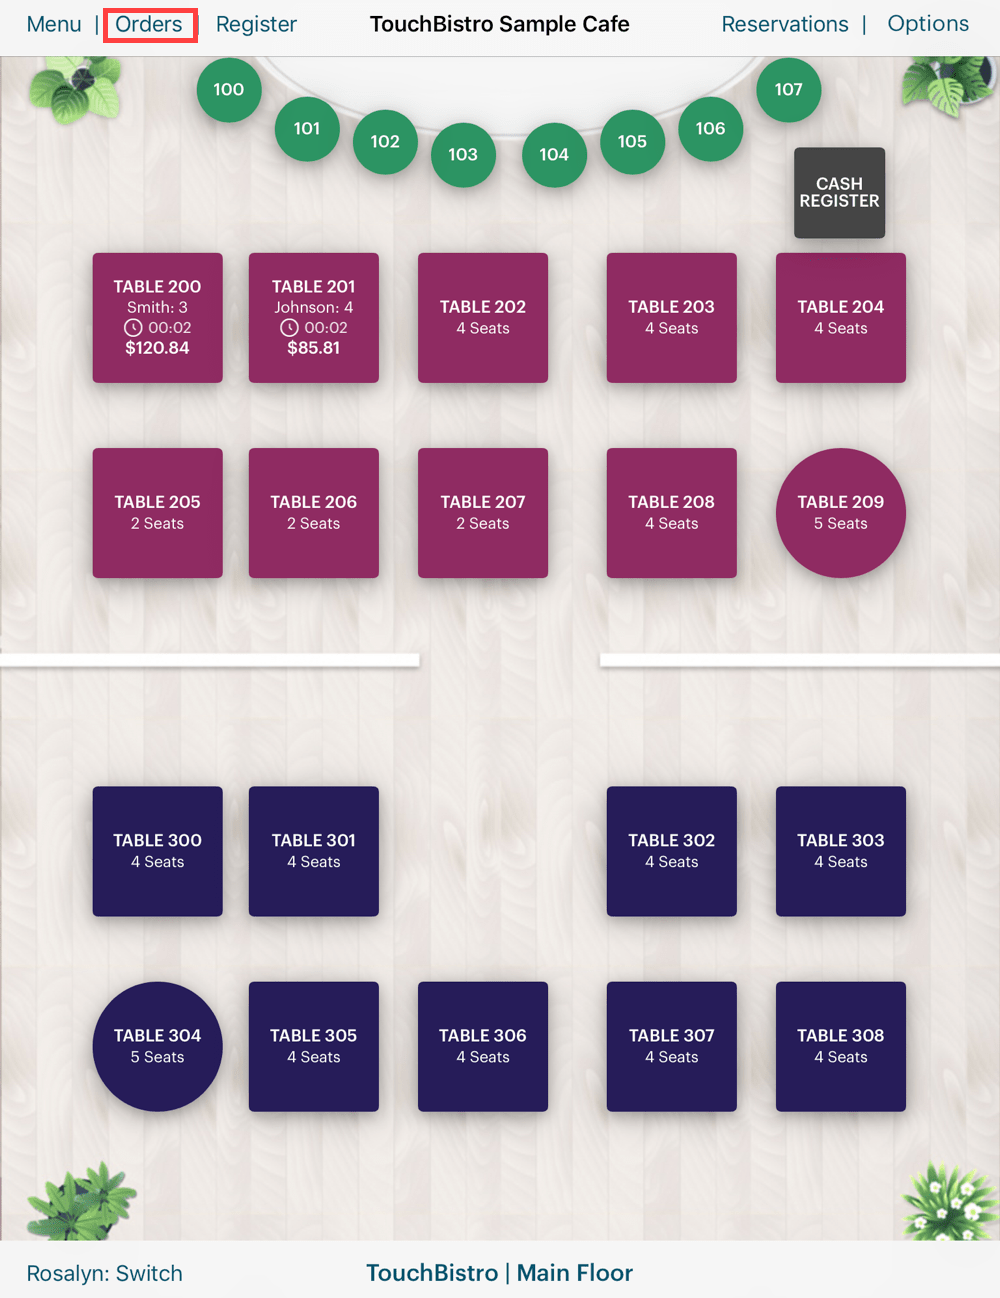
9. Tap Orders.
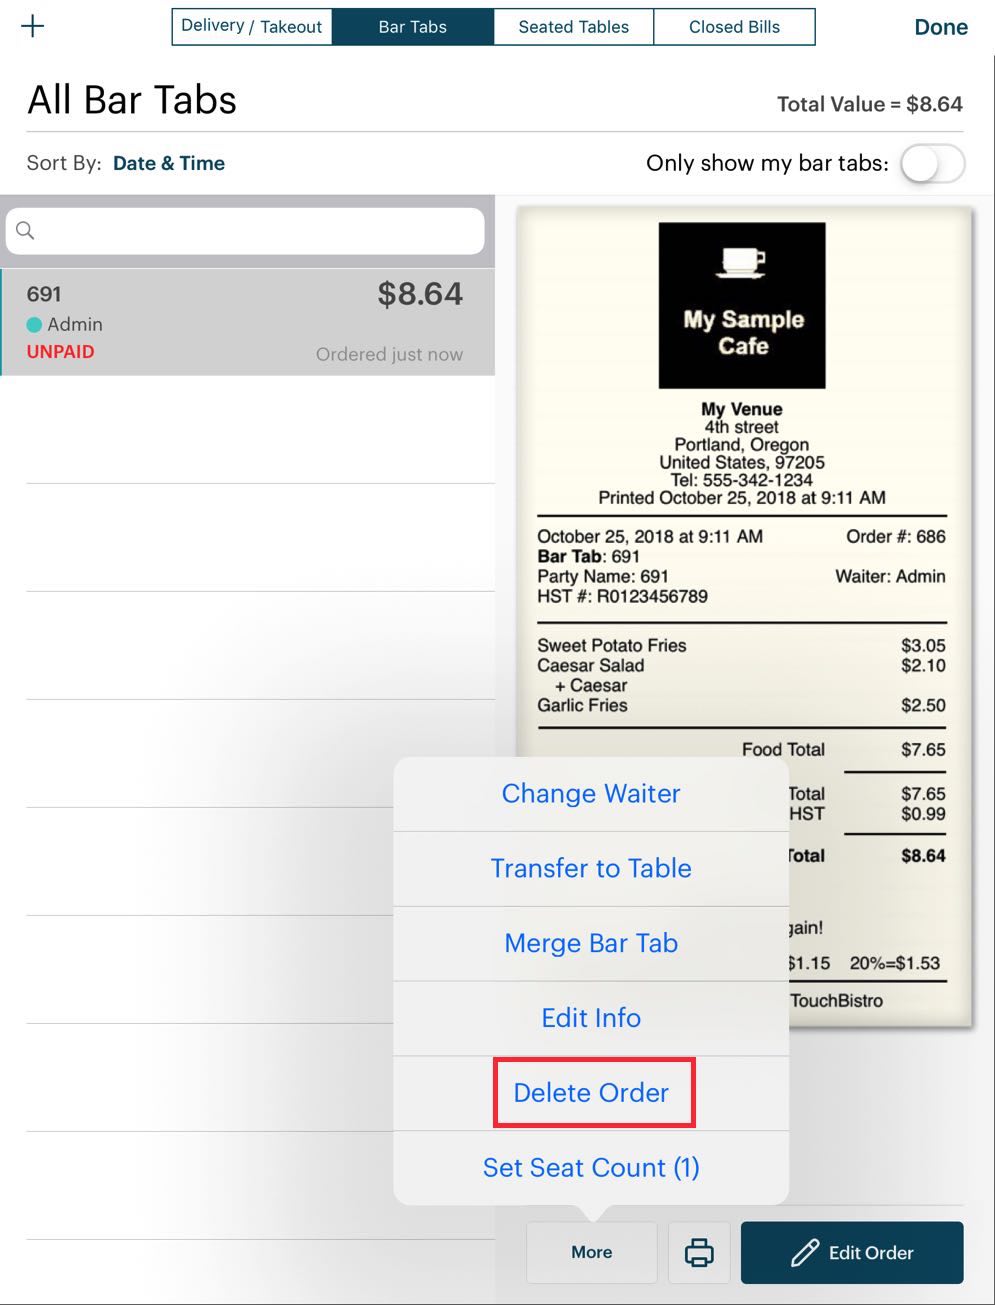
10. Tap the order and tap the More button.
11. Tap Delete Order.

12. If prompted, enter your Admin pass code.
13. Repeat the steps above for each individual practice guest check to be deleted.
Chapter 3. Perform the End of Day Report
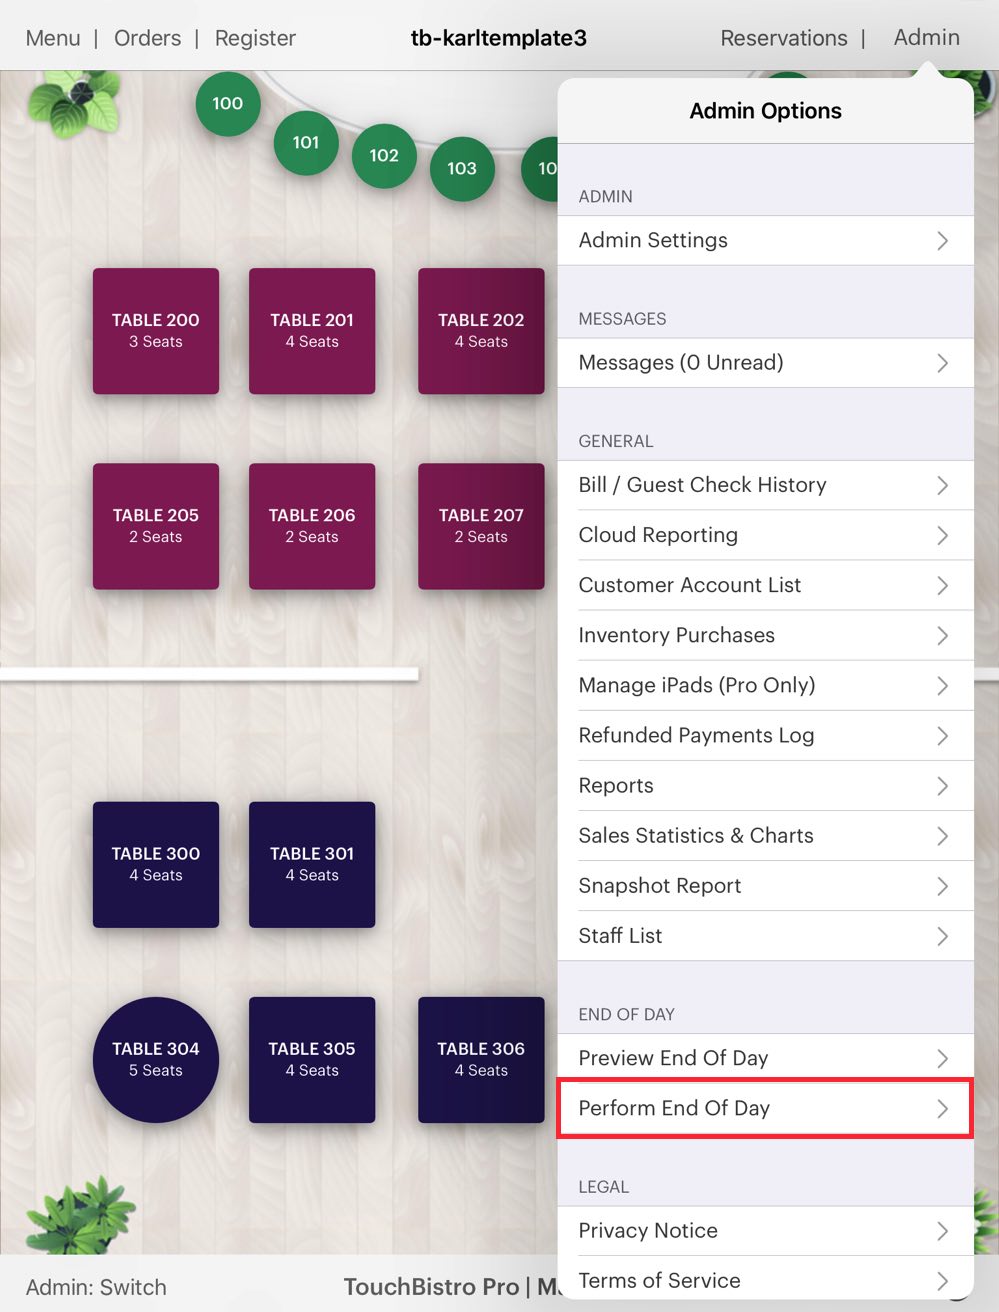
1. Tap Admin | Admin Options | Perform End of Day.
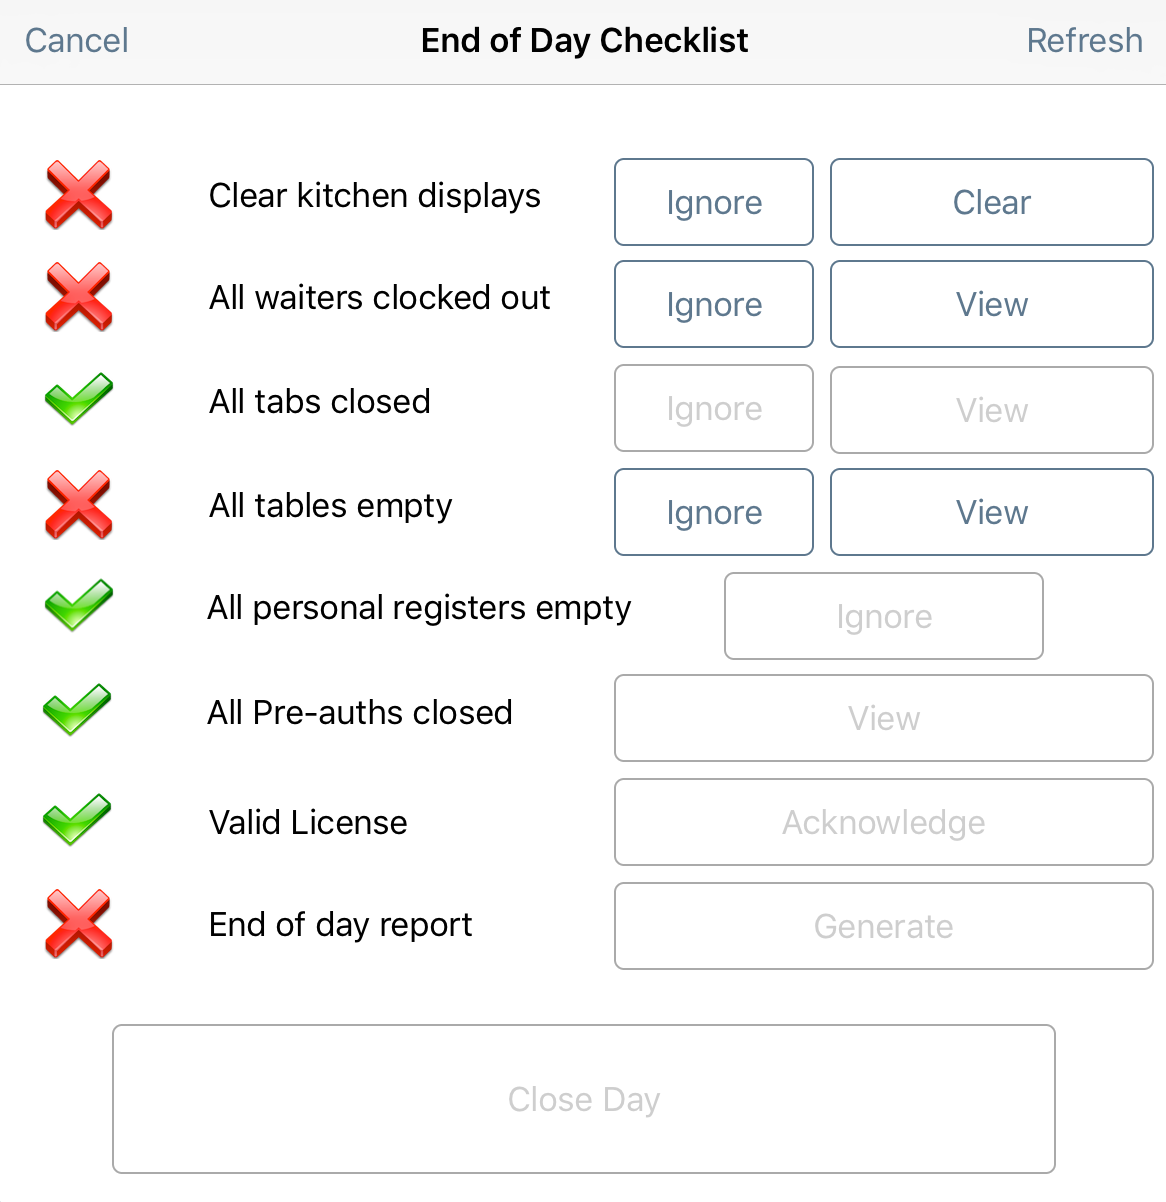
2. A checklist will appear to ensure that the day is closed.
3. Ensure each item except End of day report has a green check mark. If you see a red X, tap View next to the item. Take the appropriate corrective action taken.
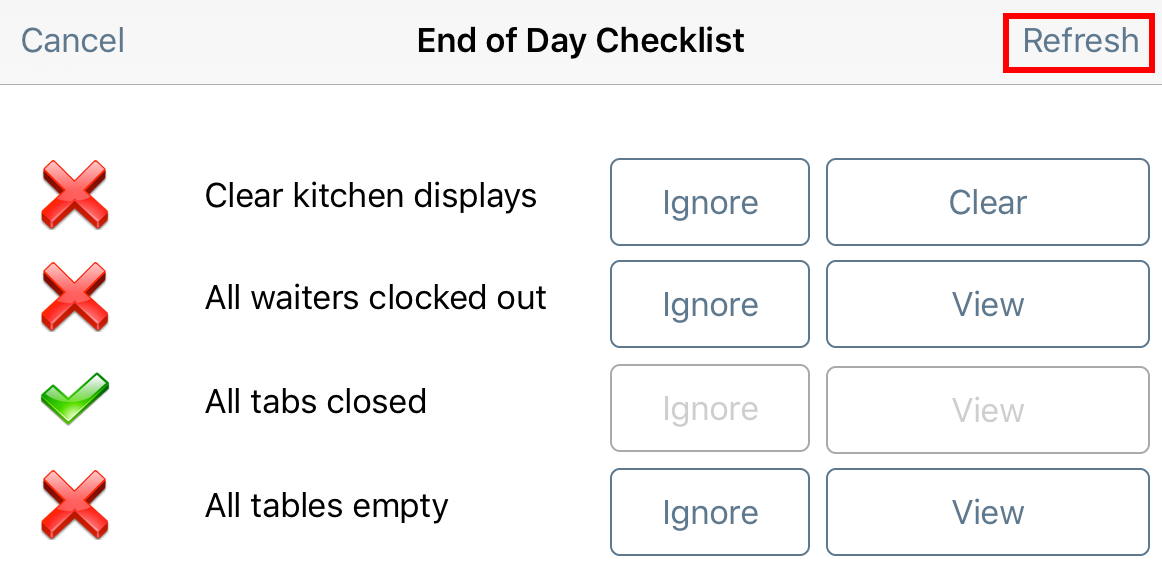
4. Return to the End of Day Checklist. If you still see a red x, tap Refresh.
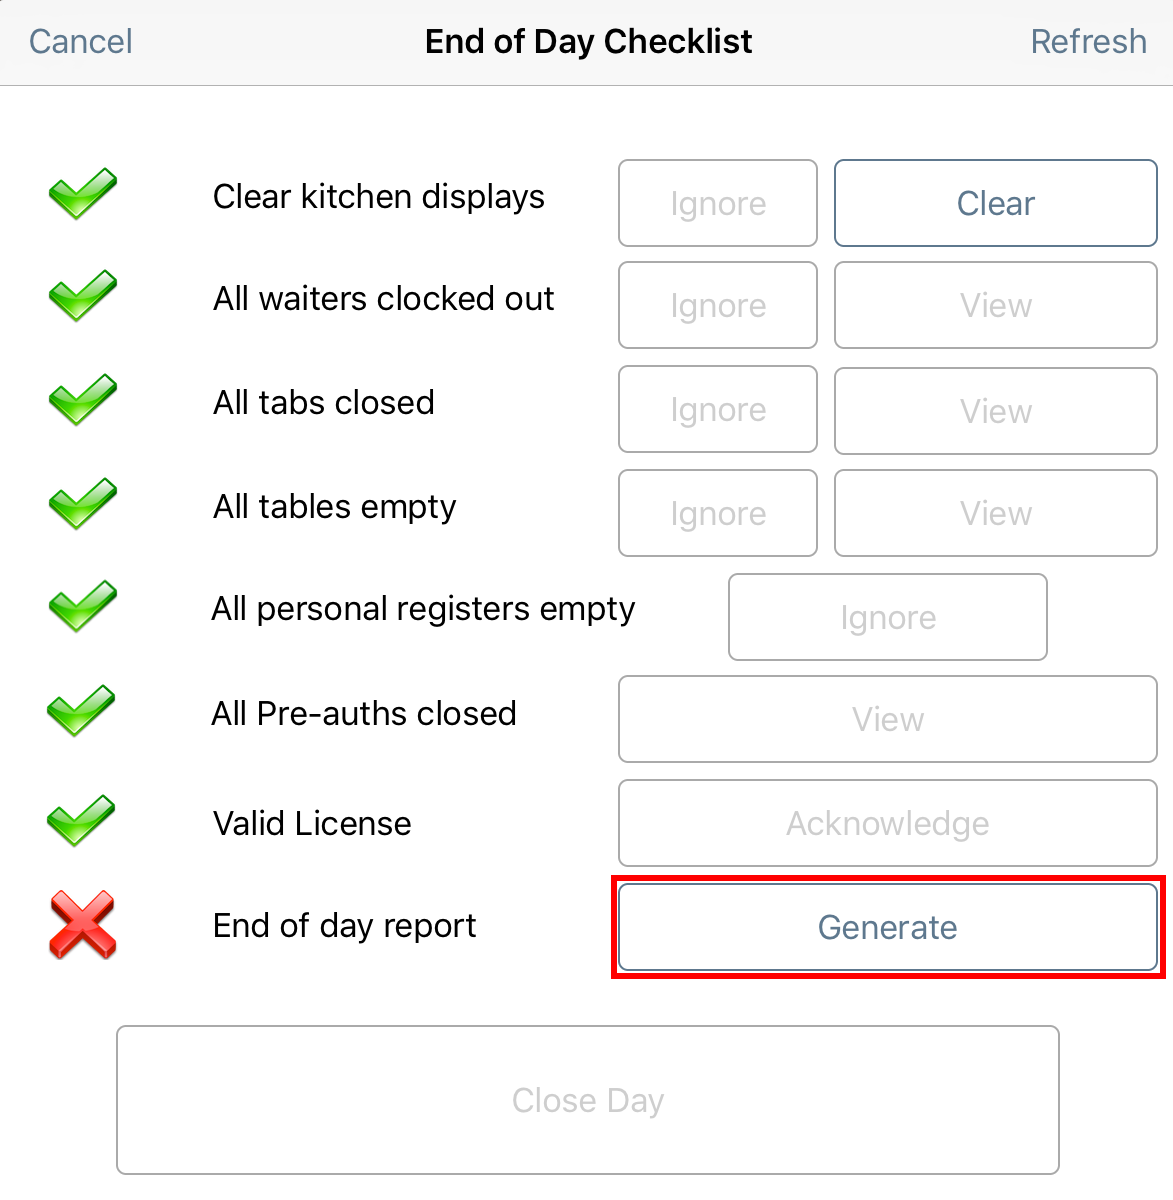
5. Tap Generate to generate the End of Day Report.
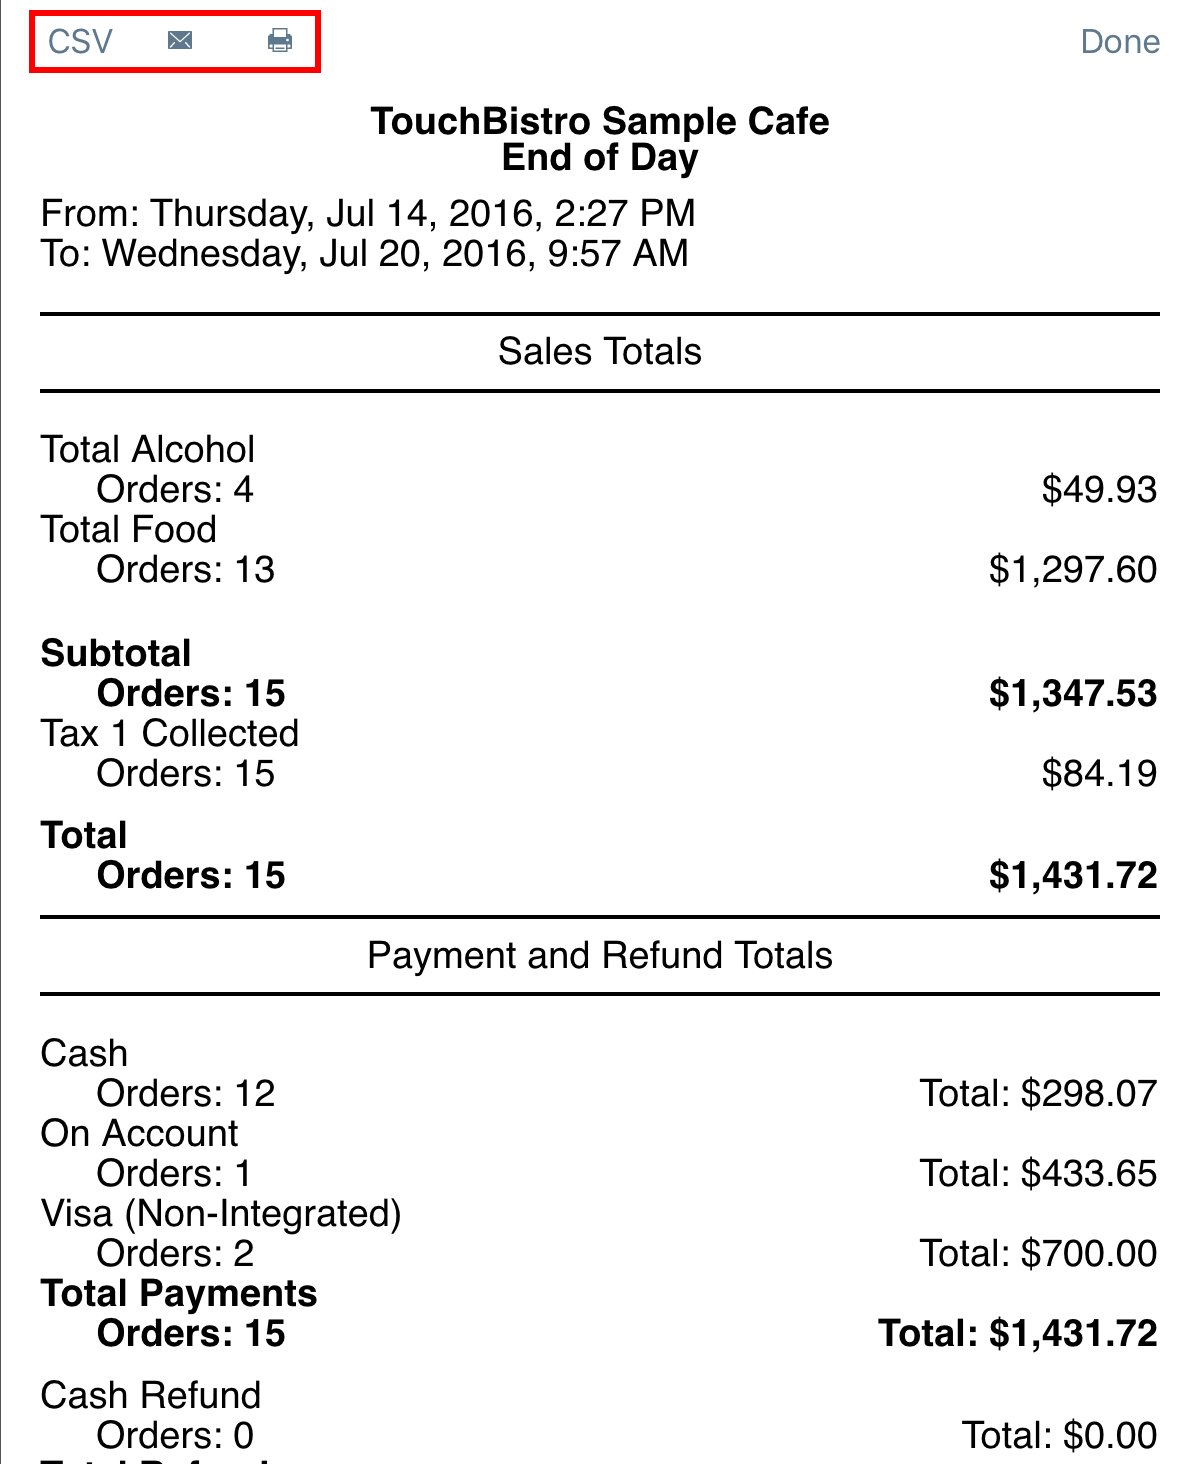
6. Print this report by tapping the print option icon. This will also verify that your printer connection and your Wi-Fi are all working.
7. Alternatively you can tap the Email icon to email it or tap CSV for importing into Excel.
8. Tap Done. You will be returned to the End of Day Checklist.
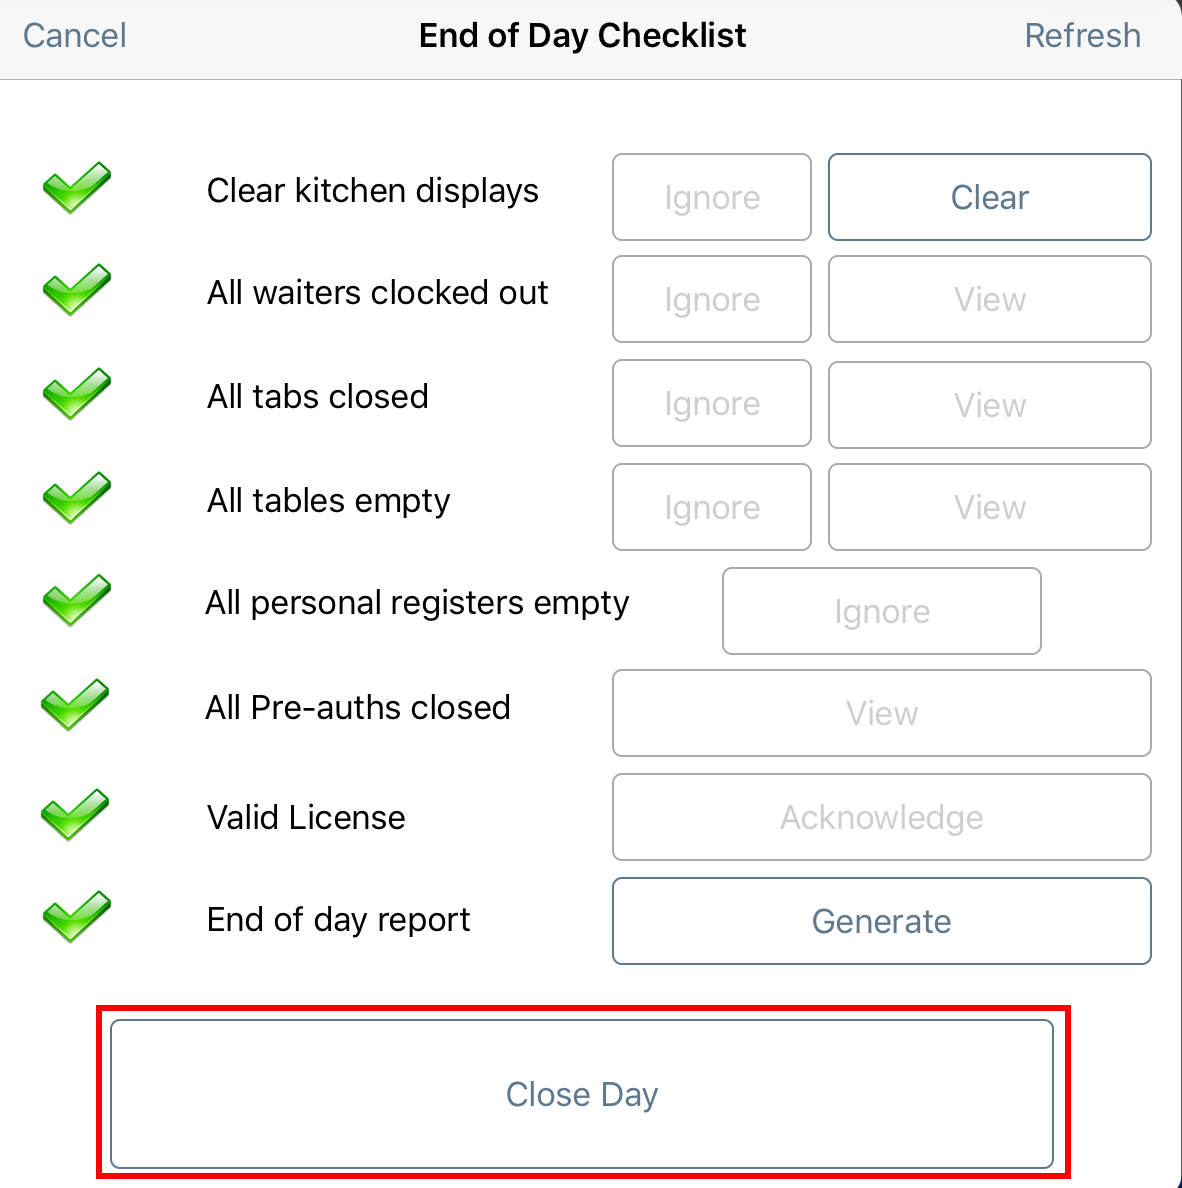
9. Tap Close Day. Tap Continue when prompted.
Performing the End of Day Report will also make sure that all your practice data will not interfere with your real data.
Chapter 4. Power Down Hardware
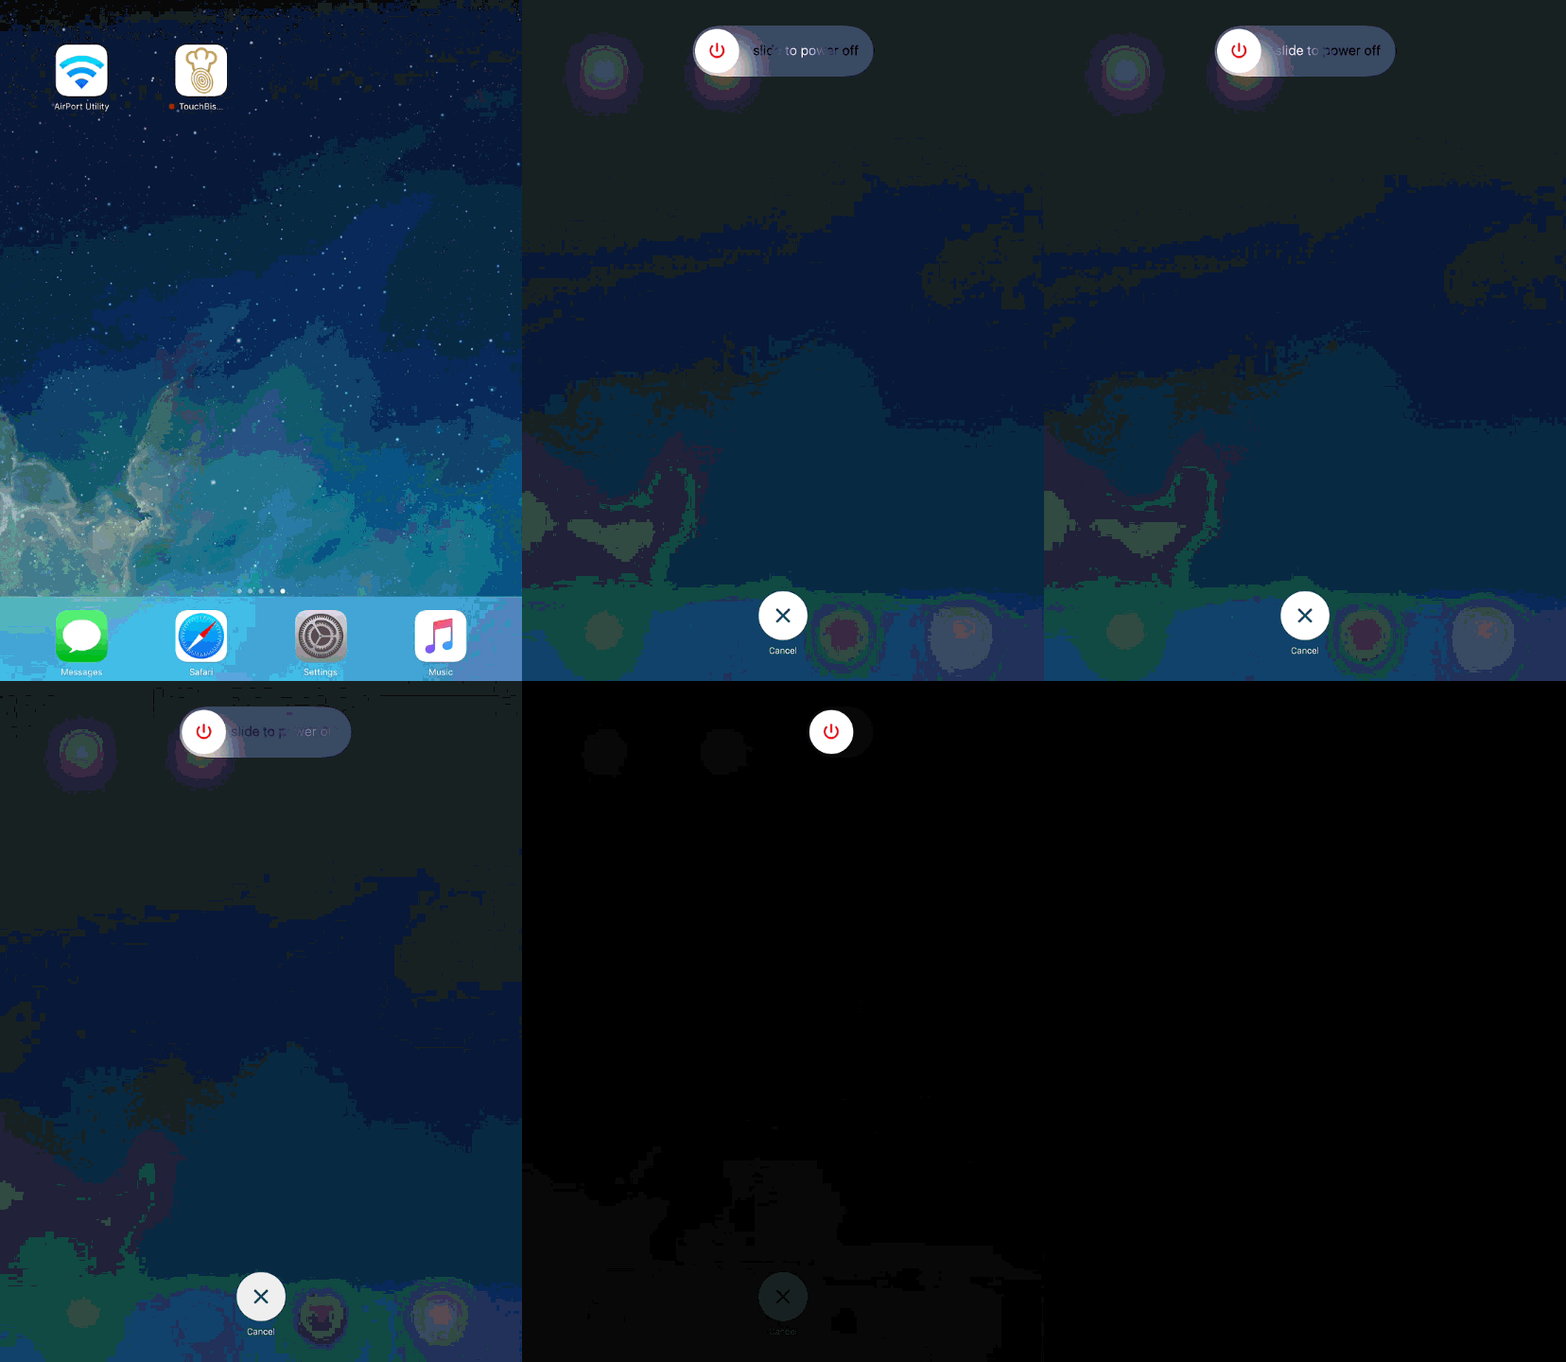
1. Power off the iPad (do not just put the iPad to sleep).
2. If you’re a Pro user power down your Mac Mini Server if it’s not been set to power down automatically.
3. Leave your router on as well as your printers.
Chapter 5. First Opening Day
If you’re a Pro user, power up your Mac Mini first and launch the Pro Server application. Power up your iPad or iPads.
Section 1. Open Existing Restaurant
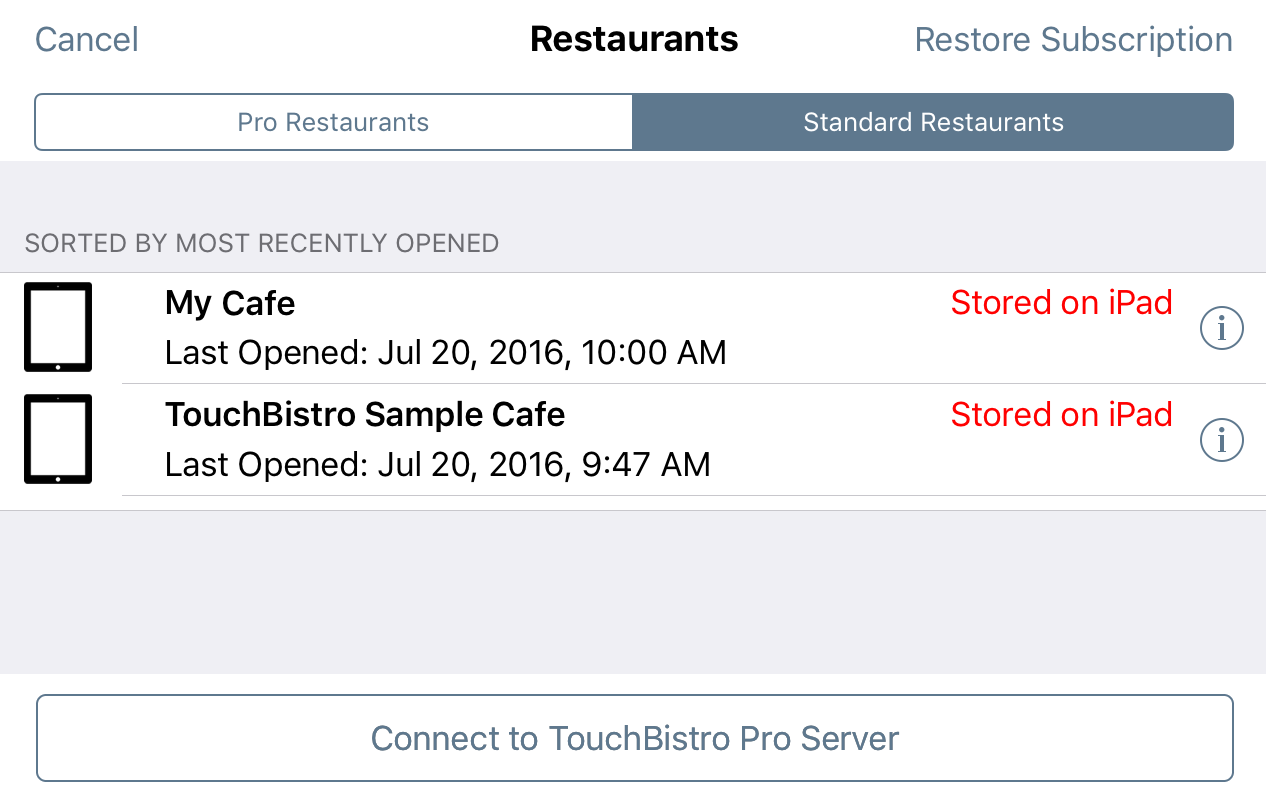
1. After launching TouchBistro, you will be presented your Pro or Standard restaurant. You may have tabs for your Pro restaurant. Locate your restaurant on this dialog box and tap it to open.
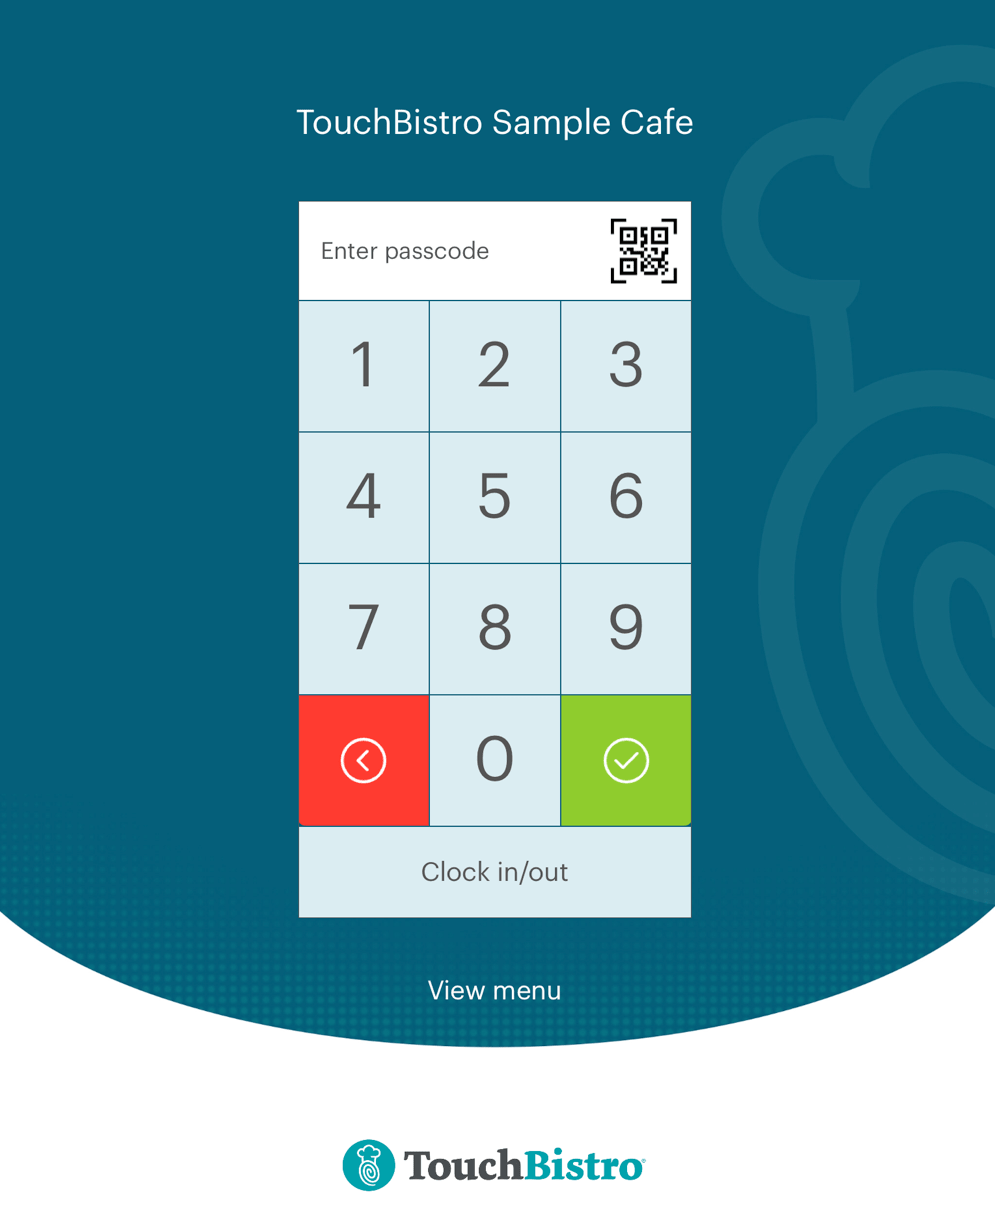
2. Enter a Manager Password or Admin pass code. You should ideally use a manager pass code for day to day operations. Using the Admin login presents risks of people gaining access to your iPad or things being accidently changed. As well, the Pro system, if it detects a live Admin login will devote computer resources to waiting for changes.
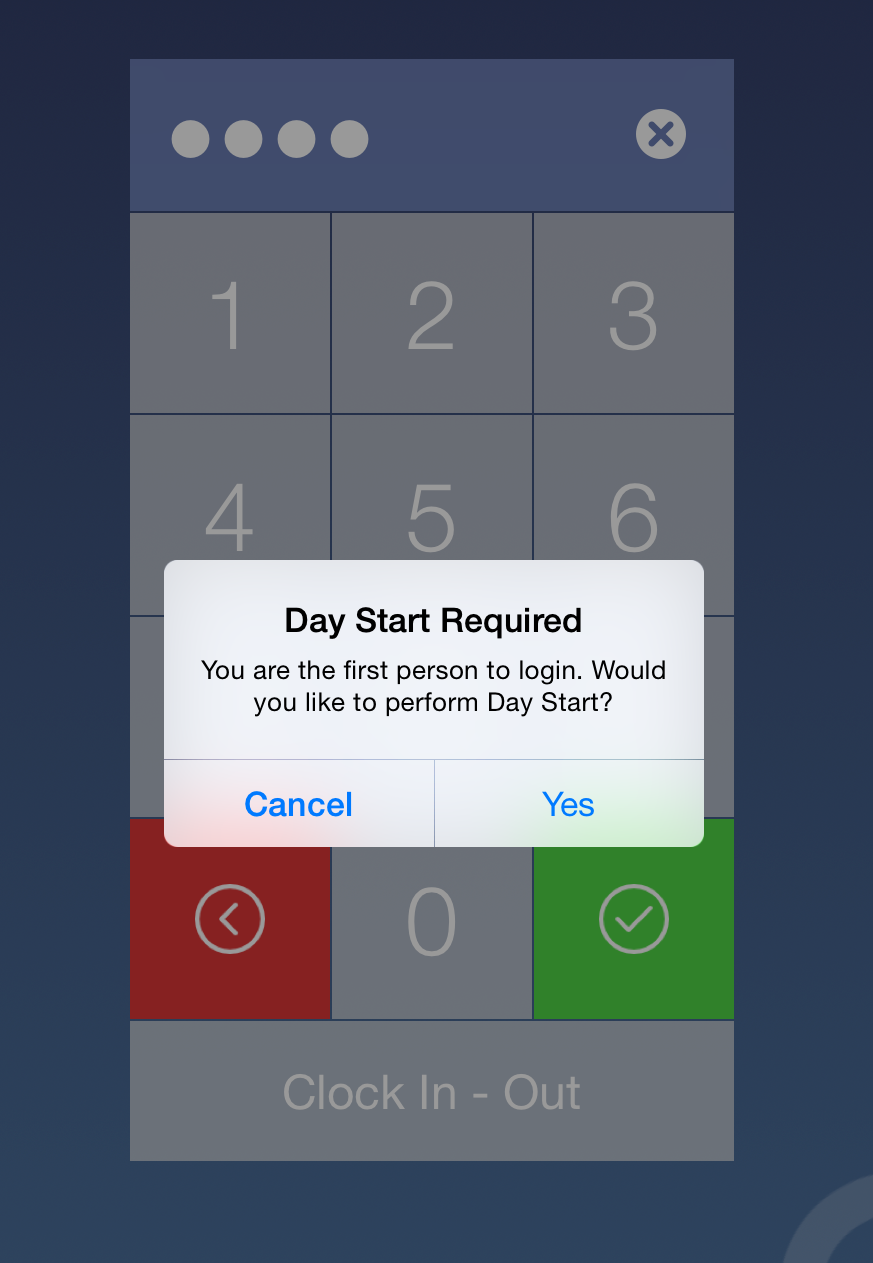
3. On the Day Start Required dialog tap Yes.
Section 2. Staff Clock In
1. If you’re a Pro user, once the Service Staff arrive, have them clock in on their iPads. They can enter their staff passcode and tap the checkmark or the Clock In/Clock Out.
2. They will get a pop up window that confirms their name and time of clocking in. Tap Yes.
3. Their name will also appear on the bottom left hand corner of the iPad.
4. If you have more staff members than iPads, you can still have staff clock into an iPad at the start of their shift for accurate record keeping of their hours. Staff members who don’t need to use an iPad as part of their job (for example they’re a cook) can be setup under their staff details for Clock In/Clock Out rights only. Once clocked in, the staff member can pass the iPad to a staff member who needs to use the iPad for POS or serving purposes for login.
5. You are now ready to start your 1st day!
Chapter 6. Closing Your Day
Section 1. Serving Staff Cash Out
Each server will generate their own read that they can use to cash out and this will also have their Start & End times on it.
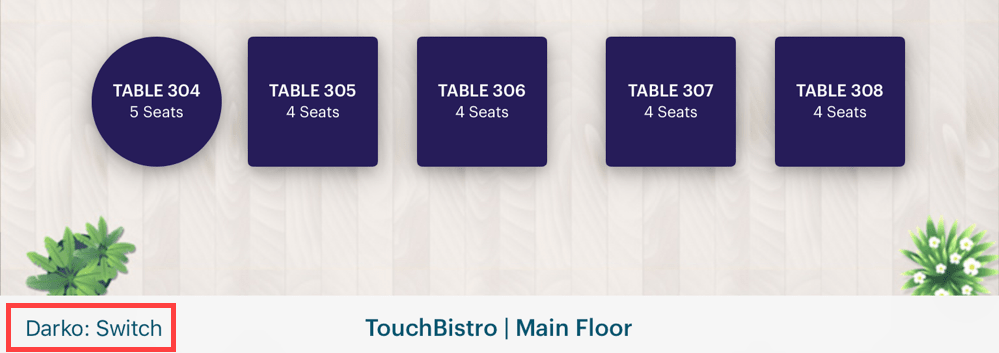
1. To clock out, the server should tap his or her name on the bottom left. If the server’s name does not appear in the bottom left, tap it anyway to access the Clock In/Out screen.
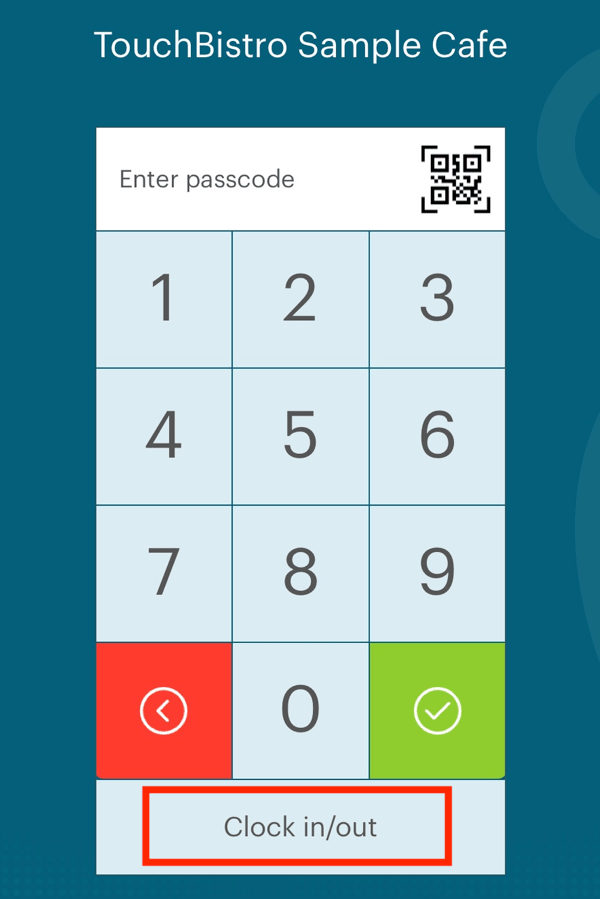
2. The server should enter his/her passcode and tap Clock In/ Clock Out to clock out.
3. Confirm the clock out.
4. Tap OK.
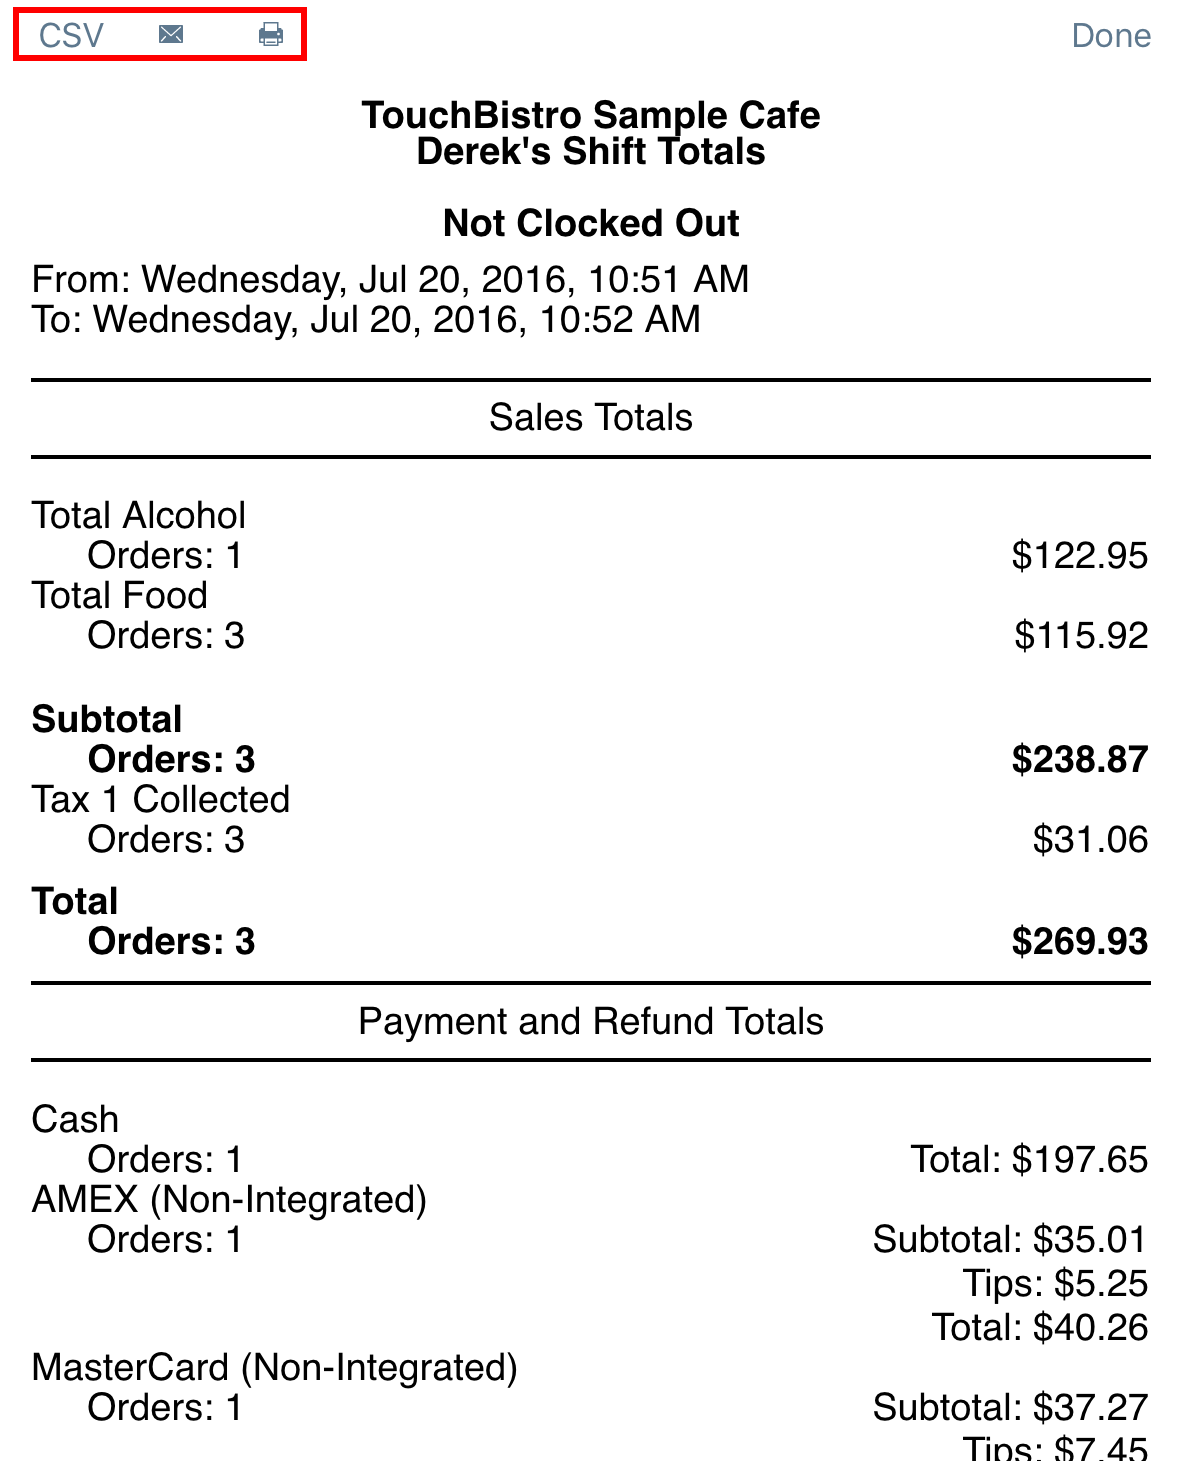
5. The server’s official shift report is displayed. The server should not close this dialog box. The shift report should be submitted by the staff member in the fashion your venue prefers. Tap, for example, the printer icon to send it to a configured printer.
6. Collect the printout and share it with the server. It will indicated the cash the server owes the house along with the cash you owe to the server for credit card tips.
7. Tap Done.
8. Help your servers understand this process by giving them this step by step guide.
Section 2. Non Serving Staff Clock Out
1. If you had non servers clock in, they need to clock out. Hand them an iPad or let them access a fixed POS iPad.
2. They enter their passcode and tap the Clock In/Clock Out button from the main screen
Section 3. Manager: Run the End of Day Report
1. Essentially you are following the same series of steps that were done in the Pre-Opening Day Checklist‘s Perform the End of Day Report section. However, your Pre-Opening Day steps were performed as an Admin. As noted you should ideally use a manager pass code to perform day to day operations such as this.
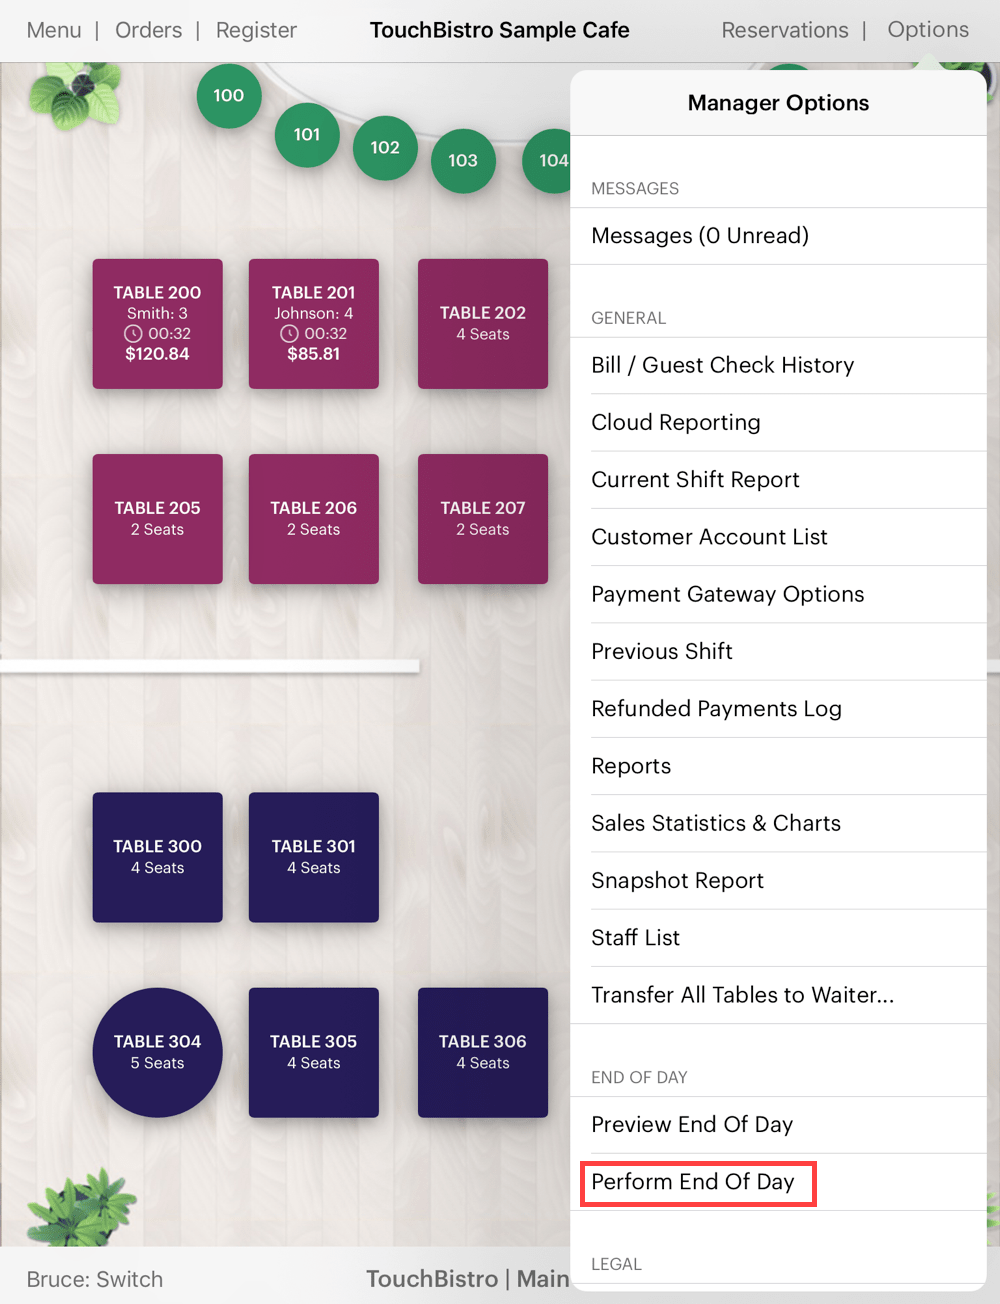
2. Tap Options.
3. Tap Perform the End of Day.
4. Follow steps 2 to 5 under Pre-Opening Day Checklist‘s Perform the End of Day Report section. Print your report and close your day.
5. It should be noted, an End of Day report generate 4 key reports:
6. Your first day of real business has been completed!
Note: Your End of Day Report treats bills closed out by paying on accounts as payments. The End of Day report does not reflect payments customers make to settle up their account balances.
Chapter 7. Customizing the End of Day Report
If you would like additional reports as part of your end of day, you can customize it under Reports.
1. Login either as a manager or Admin.
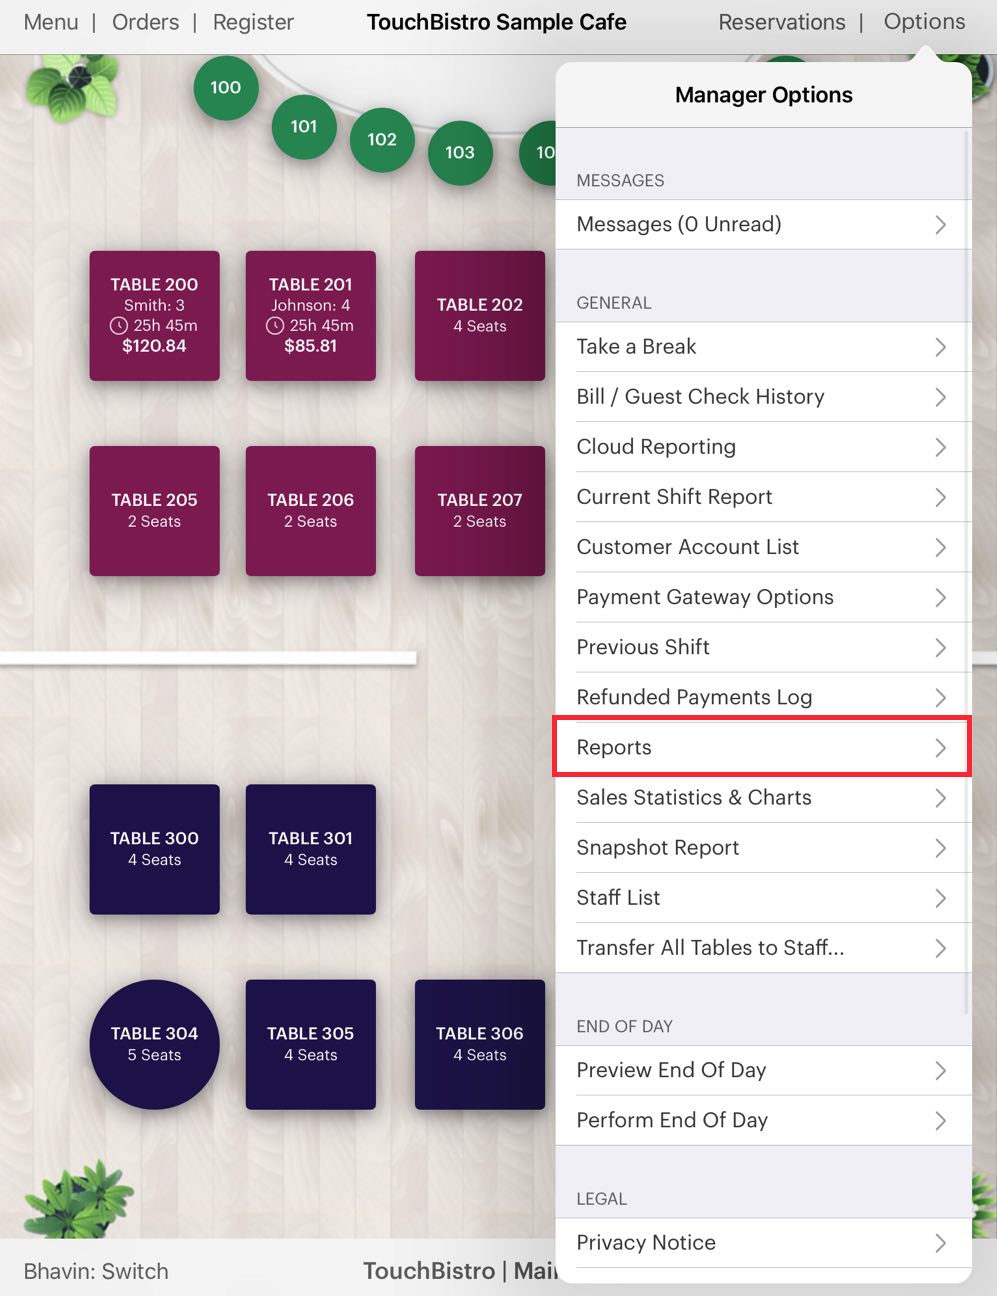
3. Tap Options | Reports (or Admin | Reports if logged in as admin).
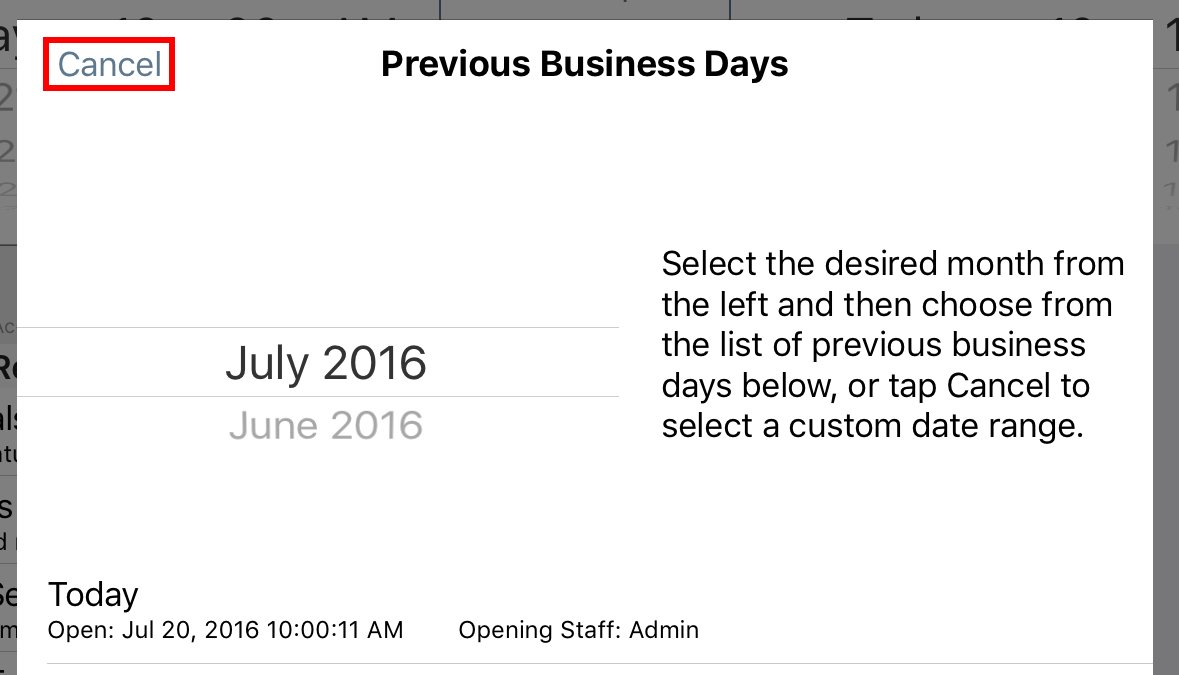
4. Tap Cancel.
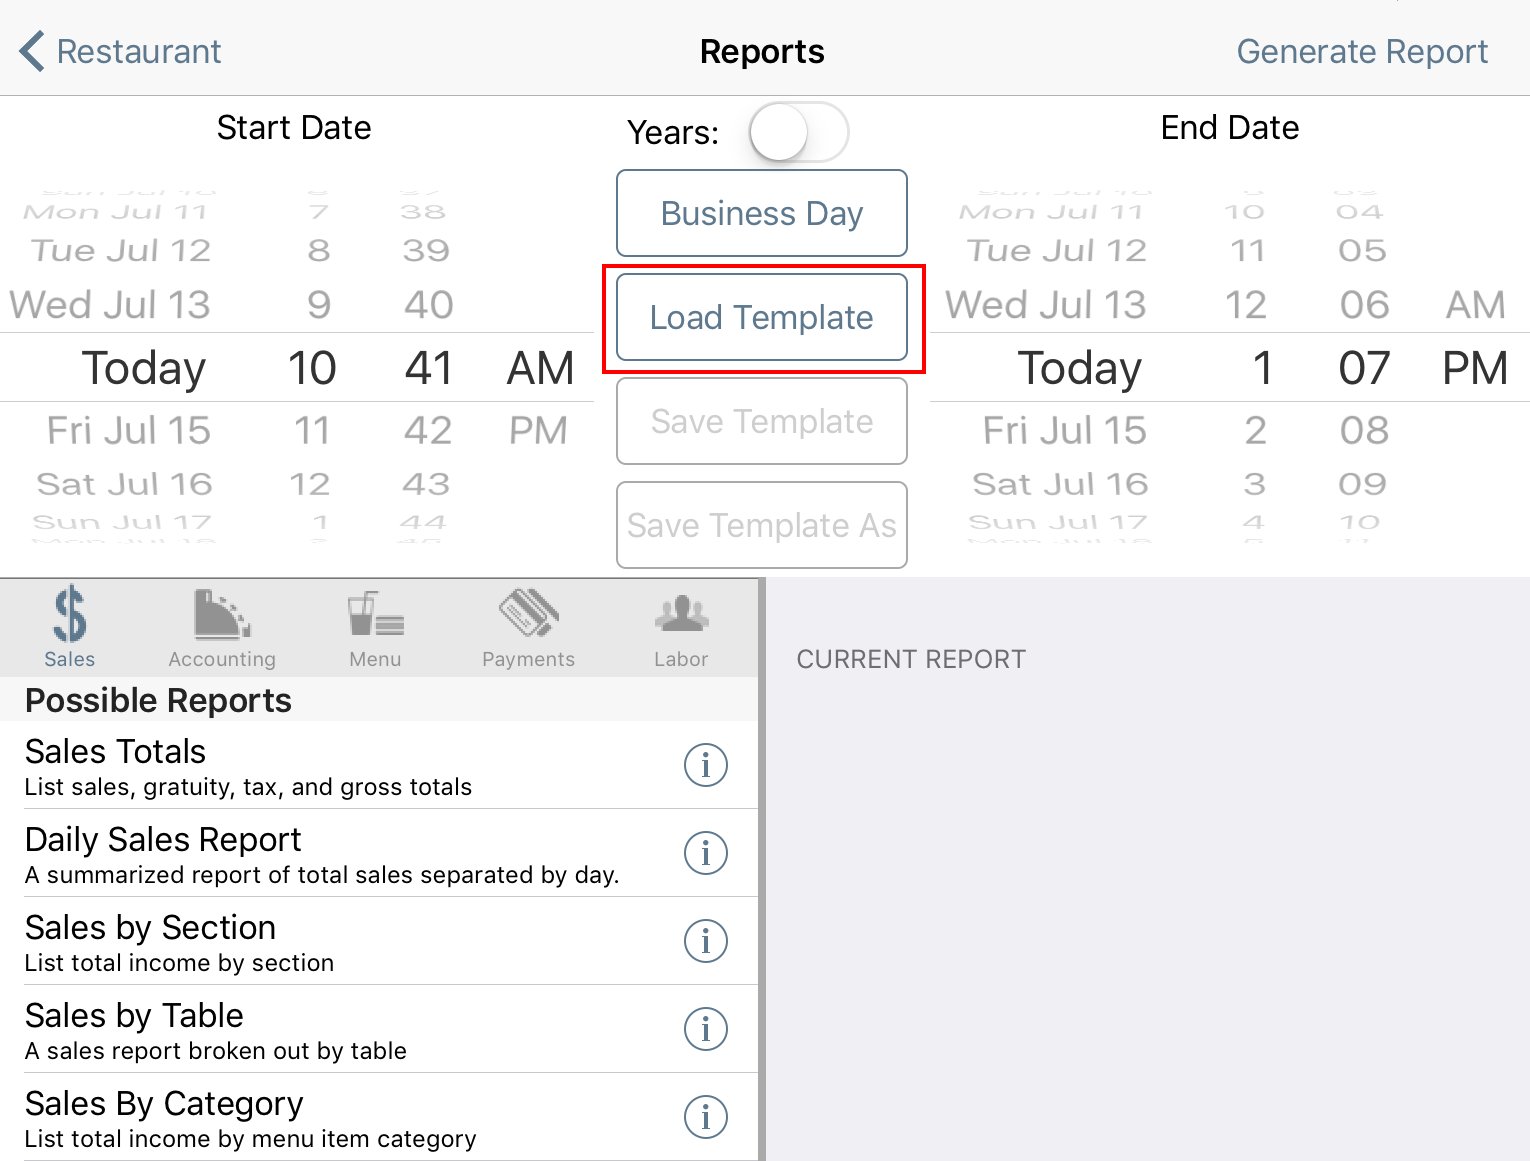
5. Tap Load Template.
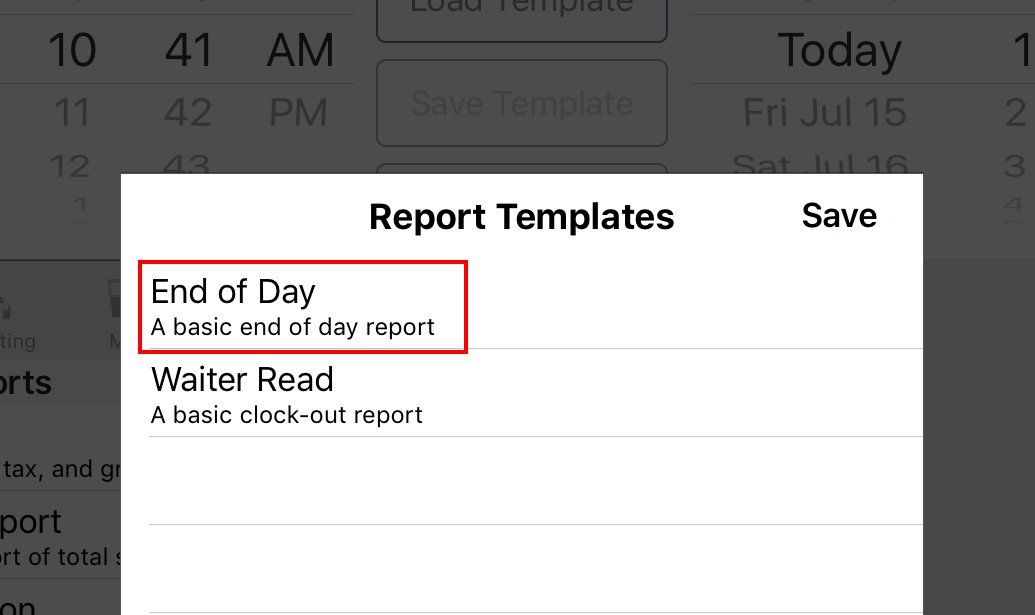
6. Tap End of Day. If you would also like to adjust a server’s end of shift report you can tap Waiter Read and re-follow these steps).
7. You will see the default reports on the right.
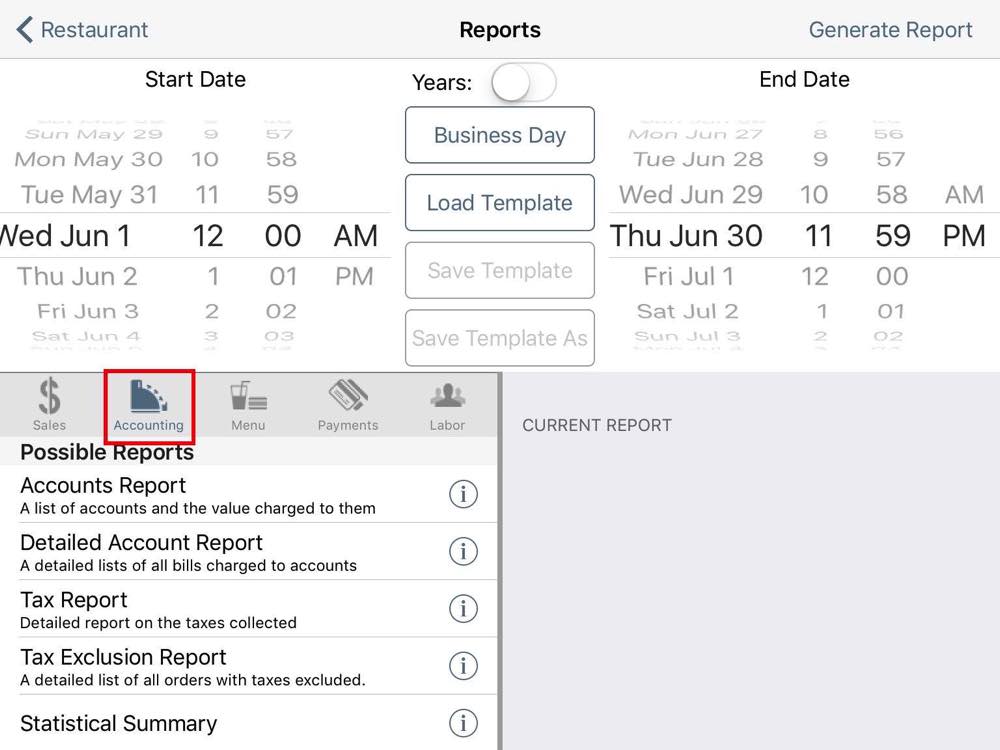
8. Tap a report type (Sales, Accounting, Menu, Payments, Labor).
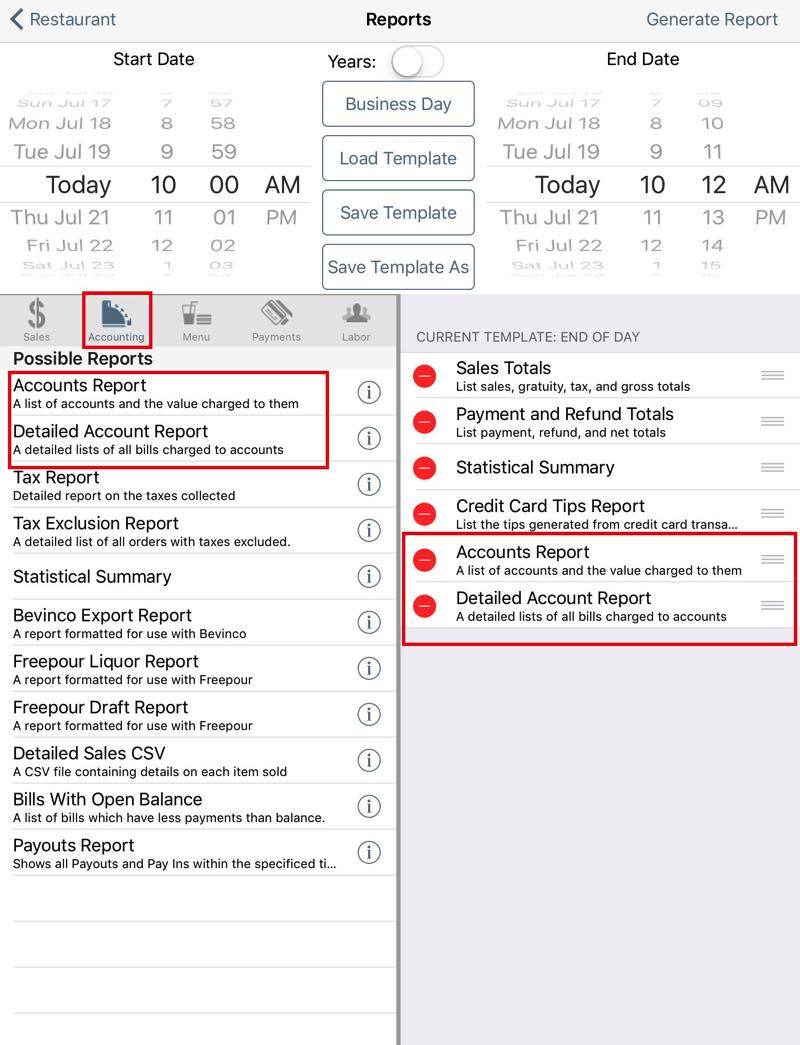
9. Tap the report to add it to the End of Day template. In this example we’re adding account reports.

10. The End of Day displays the reports in the order they appear here. If you would like the added report to appear earlier in the order, tap and hold on the report’s pick up ![]() bars and drag it to the desired location.
bars and drag it to the desired location.
11. Tap Save Template and then OK.
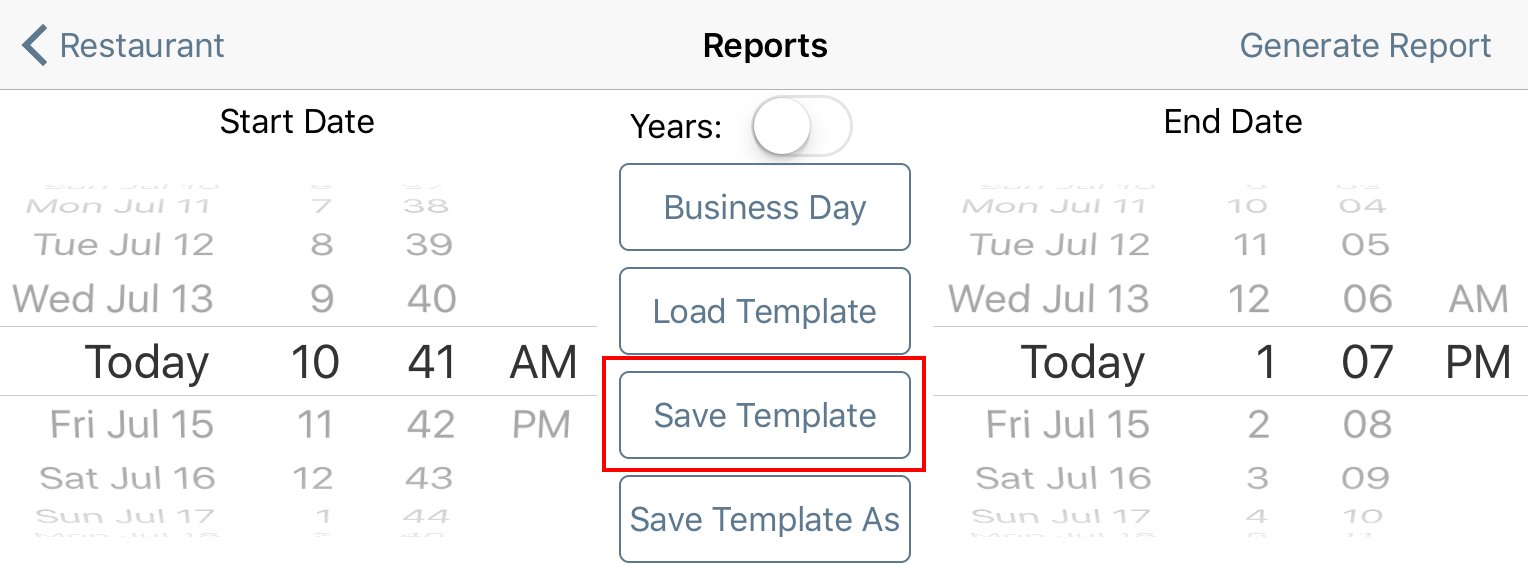
12. Tap < Restaurant to return to your floor plan.
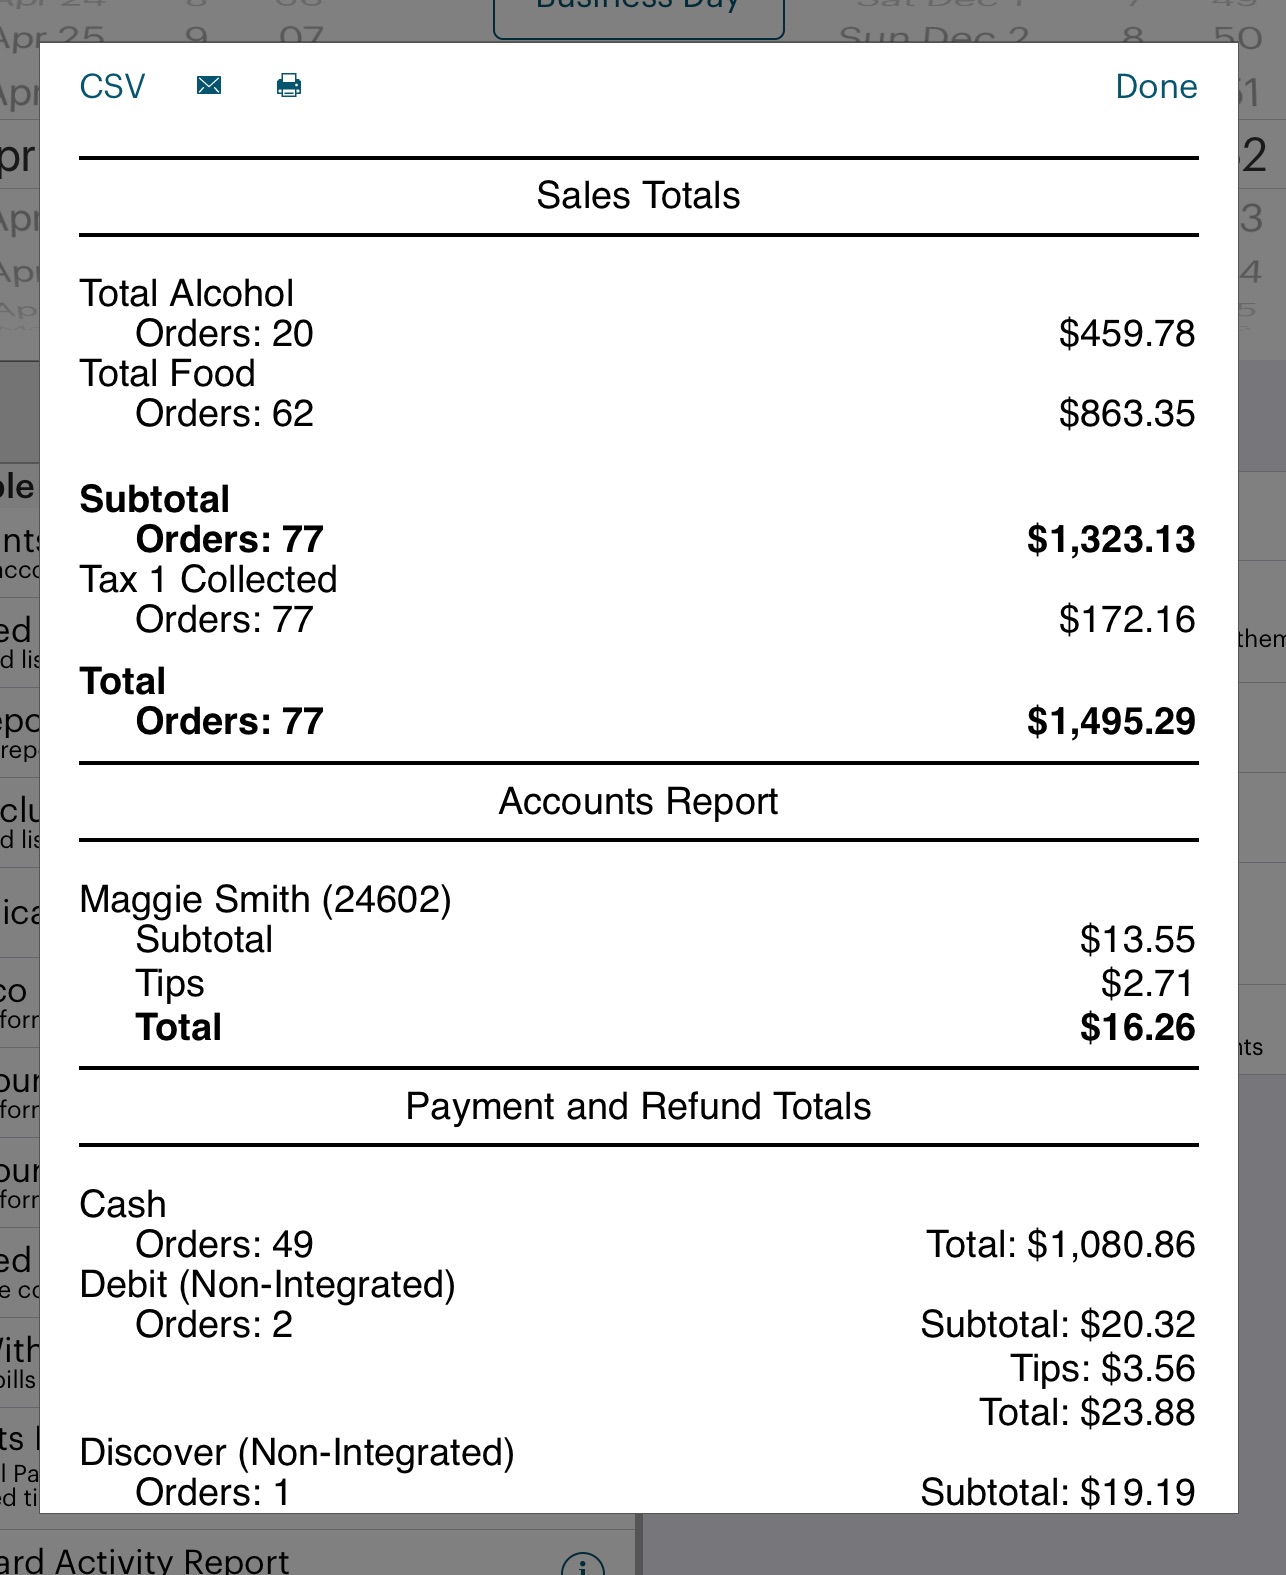
13. When you perform your End of Day, you will see your added reports.
Chapter 8. Related Articles
Ending Your Shift
How to Generate and Use QR Codes
Perform End of Day/Preview End of Day
Reprinting an End of Day Report


 Email
Support
 Frequently
Asked Questions