Payment Gateways
Table Of Contents
Section 1. Create/Open Bar Tabs by Swiping Card
Section 2. Include Tipline on Credit Card Receipt (Use Pre-auth)
Section 3. Default Card Swipe Action
Section 1. Issue or Reload Gift Card
Section 2. Processing a refund amount back onto a gift card

If you have registered with a payment gateway, tap Payment Gateways to set it up. Tap the payment gateway you’ve contracted with (e.g., Moneris). A checkmark ![]() will appear next to your selected gateway.
will appear next to your selected gateway.
Your payment gateway will have provided you with specific IDs, passwords, and codes like keys and tokens. Tap Setup to enter these. Tap Options next to your payment gateway to perform a credit card return or generate batch summaries.
TouchBistro has prepared specific documentation for fully configuring your gateway and hardware (pinpads, swipers). See Payment Gateways for documentation specific to your payment gateway.
Chapter 1. Options
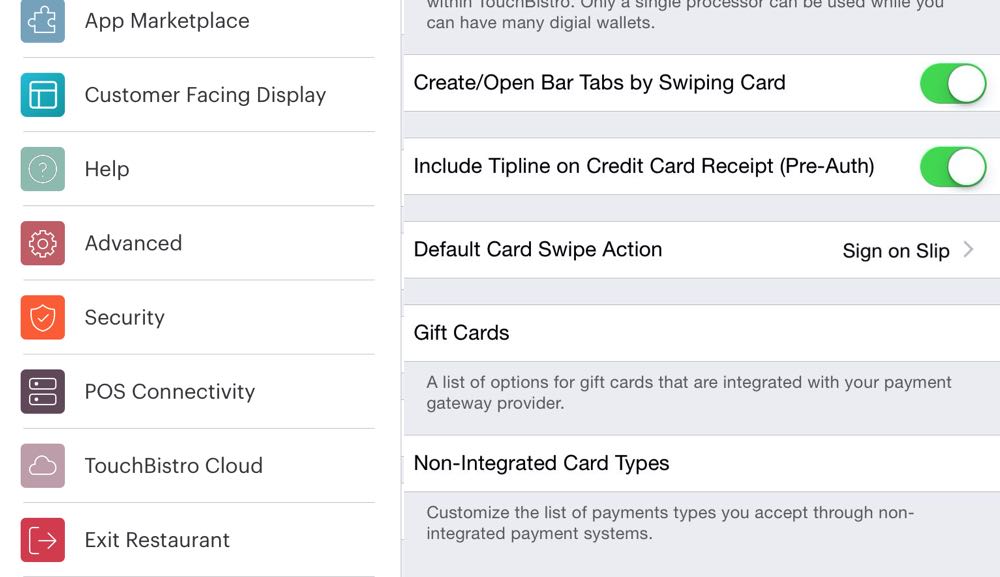
Section 1. Create/Open Bar Tabs by Swiping Card
If TouchBistro detects you’re using a swiper, it will prompt you to populate the bar tab by swiping a credit card. If you prefer not to use this method to populate bar tabs, disable Create/Open Bar Tabs by Swiping Card. If you are a pro user, this setting is local to individual iPads. If you later transfer the tab to a table, the name captured by the swipe will be carried over to the table.
Note: This feature is not supported by the Square integration.
Section 2. Include Tipline on Credit Card Receipt (Use Pre-auth)
Slide Include Tipline on Credit Card Receipt (Use Pre-auth) to the green position if you want to include a tip line on printed credit card receipts. Toggle off if a tip line is not appropriate to your business. If you are a pro user, this setting is local to individual iPads.
Section 3. Default Card Swipe Action
If you have a swiper, tap Default Card Swipe Action and tap one of the following:
|
Option
|
Description
|
|
Sign on Slip
|
After a card swipe, TouchBistro will print a receipt and the customer will sign the receipt. Click here to see a sample (this version has the tipline included).
|
|
Sign on Screen
|
After a card swipe, TouchBistro will prompt the iPad holder to hand the iPad to the customer and the customer will sign on screen.
|
If you are a pro user, this setting is local to individual iPads.
Chapter 2. Gift Cards
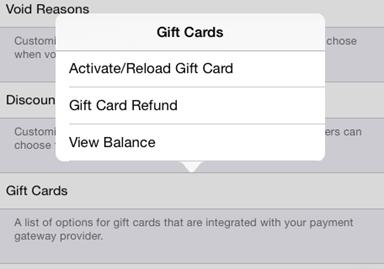
Tap Gift Cards to bring up the Gift Cards options menu.
Section 1. Issue or Reload Gift Card
1. Tap Issue or Reload Gift Card.

2. Enter in the amount the customer wants to put on the card, the card number, and CVC (found on the back).
3. Tap Activate/Reload.
Section 2. Processing a refund amount back onto a gift card
If a purchase was made with a gift card and you need to process a return and refund the purchase price back onto the gift card, follow these steps:
1. Tap Gift Card Return.
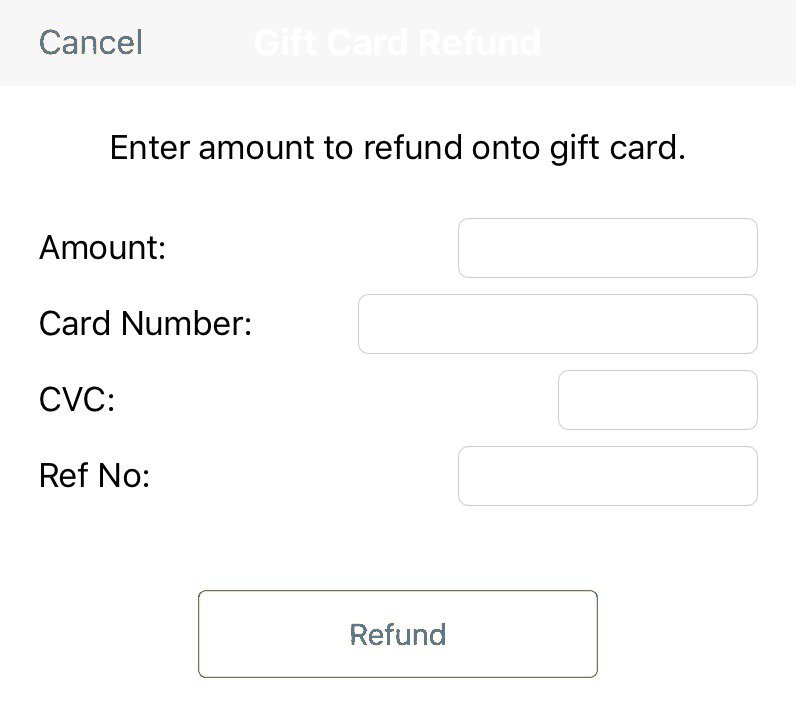
2. Enter the amount, card number, CVC, and Reference number. The reference number for the payment can be found on the receipt that was printed when paying with the gift card.
3. Tap Refund.
Section 3. View remaining balance on the gift card
If you wish to check a gift card’s balance, follow these steps:
1. Tap View Balance.
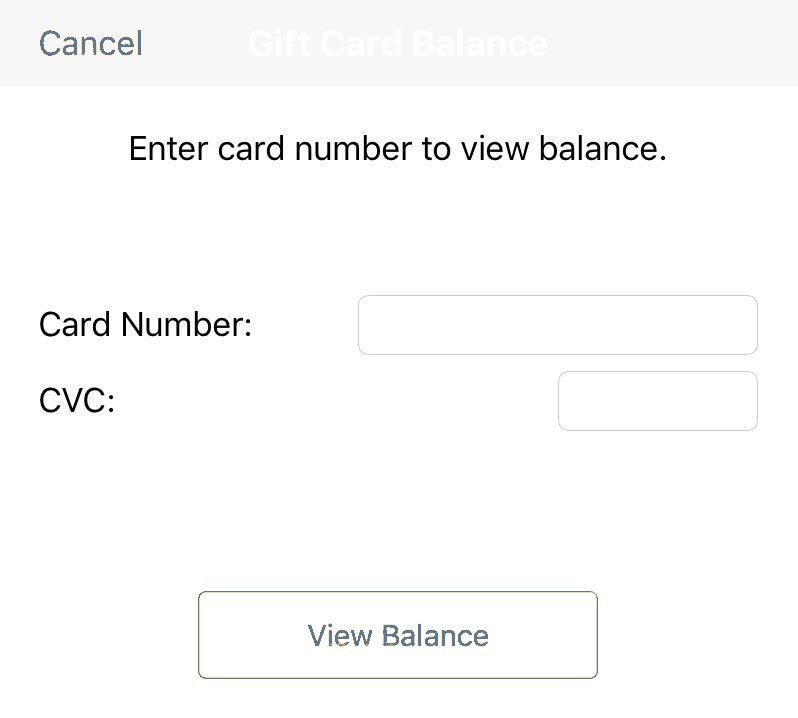
2. Enter the card number and CVC (found on the back).
3. Tap View Balance.
Chapter 3. Non-Integrated Card Types
If you use a credit card payment solution external to TouchBistro, tap Non-Integrated Card Types to review credit card types. Tap a credit card type to rename it.

1. Tap the Add ![]() icon to add a new credit card to the list.
icon to add a new credit card to the list.
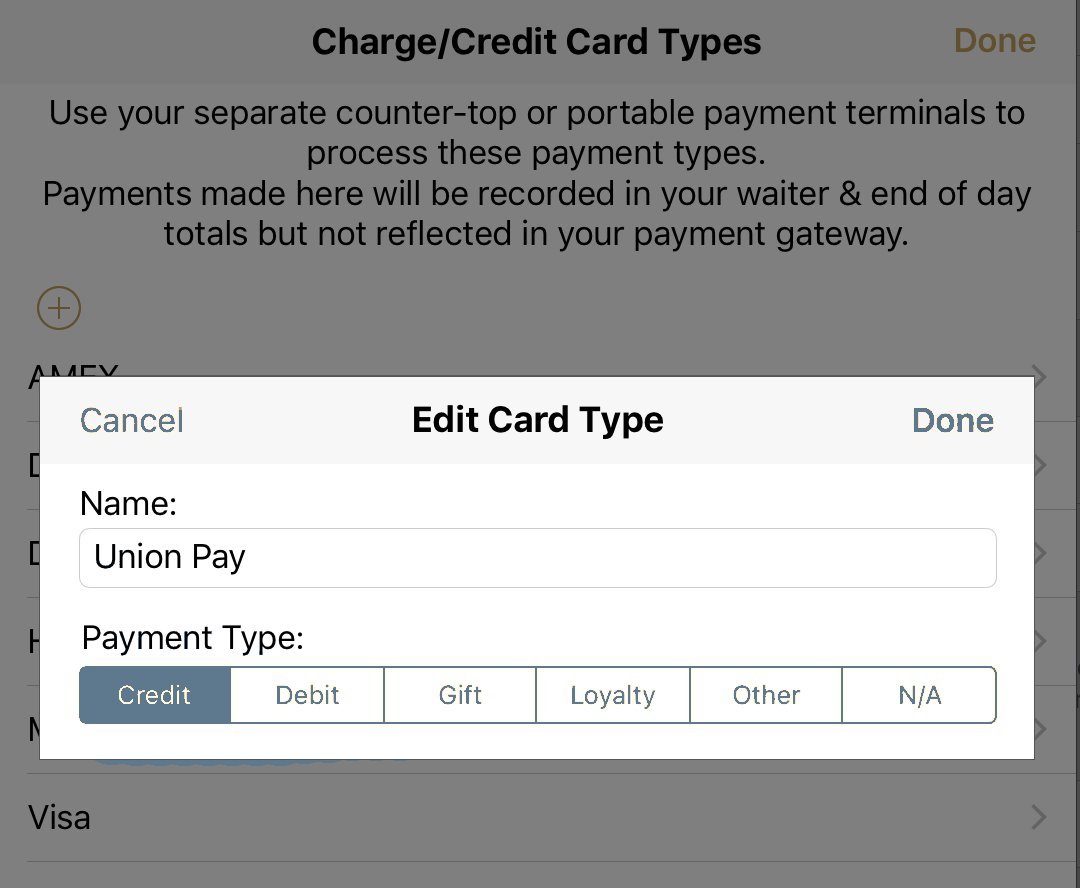
2. Tap what kind of payment type the card represents Is it a credit card? A debit card? Payment type will be used for reporting.
3. Tap Done when you’re done.
If you want to sync up authorization numbers from your external credit card report with the payment information recorded in TouchBistro, enable Require Auth # under Advanced.
See Also
Using a Non Integrated Payment Processor
Using Non Integrated Payments To Handle Check or Groupon Payments


 Email
Support
 Frequently
Asked Questions
