Adding your Star SP700 printer using Epson Mode
Table Of Contents
Chapter 3. Setting Up the Printer
Chapter 1. Introduction
The Star SP700, by default, comes set to use its native Star mode for printing. If need be, using the hardware’s dip switches, you can set it for Epson mode. You usually don’t need to set your printer for Epson mode. However, Epson mode prints tickets using a slightly darker font. It also uses about 10% more paper. If you are finding the kitchen tickets are too faint even with a fresh ribbon, you can switch your Star SP700 to Epson mode using the instructions below.
Chapter 2. Before You Begin
The Star SP700 impact printer does not come with an Ethernet cable included in the box. The printer, usually used to print your kitchen orders, is typically located some distance from the AirPort router it needs to be plugged into. Neither Star nor TouchBistro can provide a cable long enough to address all possible situations.
Before you begin setting up your kitchen printer, you will need to purchase an Ethernet CAT5 cable long enough to connect between your printer and your AirPort router. Typically, you’d measure along the floor from your AirPort router to the location for the kitchen printer. Then add an additional 12 feet (a bit less than 4 meters) to account for above floor mounting.
You can acquire a shorter cable for the initial setup procedure detailed here, however.
Remember, always have sufficient and proper paper supplies in stock before you open for service.
Chapter 3. Setting Up the Printer
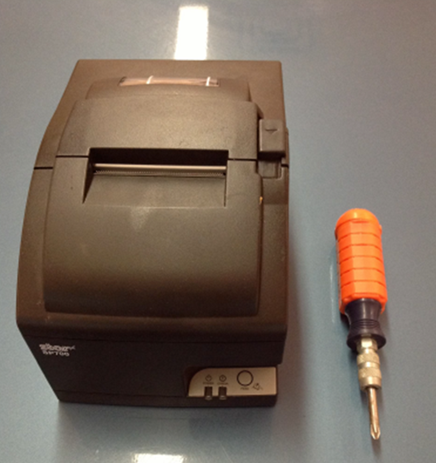
1. Turn off the power to the printer and unplug it.
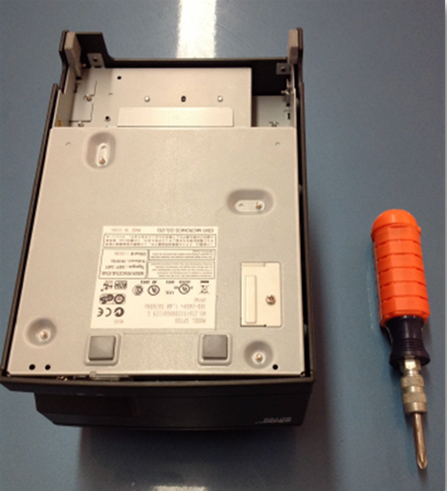
2. Flip it upside down.
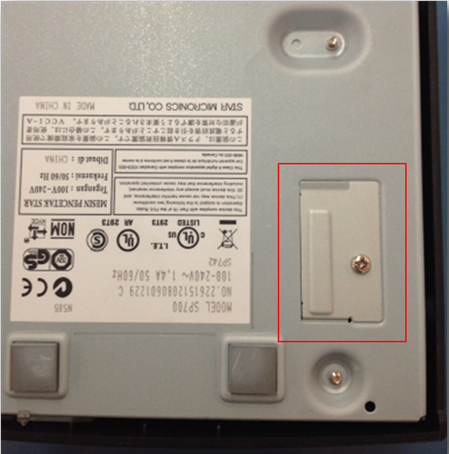
3. Unscrew the panel on the bottom. (This will require a Phillips head ![]() screwdriver.) The panel is typically screwed on very tightly by the factory and can take some effort to unscrew. It is very important you have the right sized screwdriver to prevent damaging the screw head when applying effort.
screwdriver.) The panel is typically screwed on very tightly by the factory and can take some effort to unscrew. It is very important you have the right sized screwdriver to prevent damaging the screw head when applying effort.
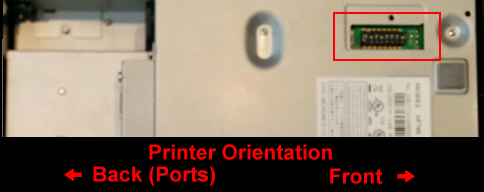
Note: the dipswitch panel is smaller than it might appear in these photos. It’s also important to orient your printer as illustrated above (the front of the printer to your right and the rear with the power/Ethernet ports to the left).
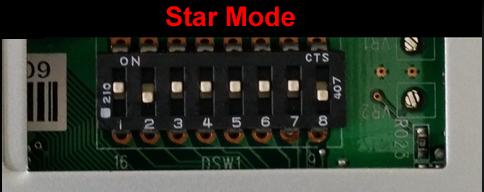
4. Your printer dip switches will initially be set for “Star Mode” (pictured above).
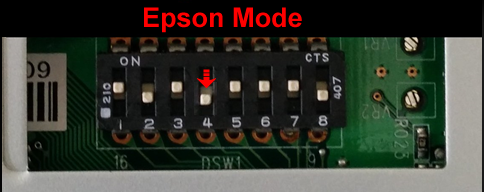
5. Push Dip Switch # 4 in the opposite position in line with #2 and #8. (Note: Dip Switch # 2, # 4, and # 8 should all be in the opposite direction of the other switches.)
6. Screw the cover back on.
7. If you unplugged the printer, plug the power cables back in. Do not turn the printer on yet.
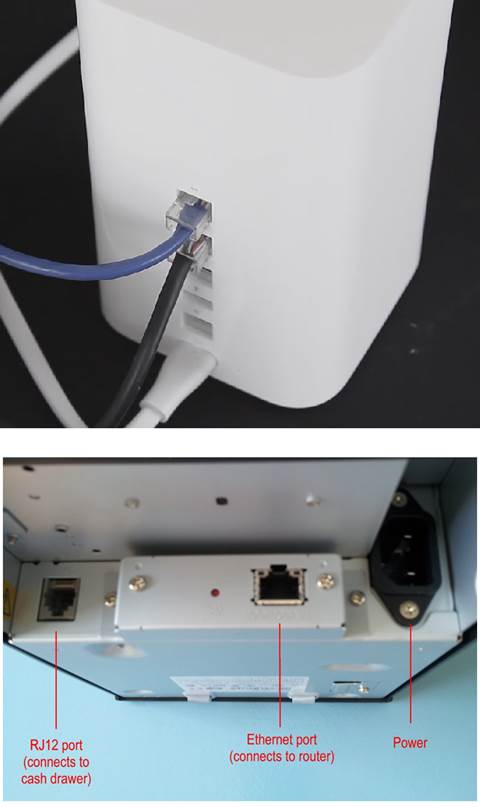
8. Connect the Ethernet cable to the back of the printer (insert it into the Ethernet port) and then plug it into one of the available Ethernet ports on your Airport Extreme. Do not plug it into the bottom WAN port.
Chapter 4. Setting Up Your SP700 Printer in TouchBistro
1. Go to the iPad.
2. Open TouchBistro on your iPad.
3. Load your restaurant.
4. Log in as Admin.
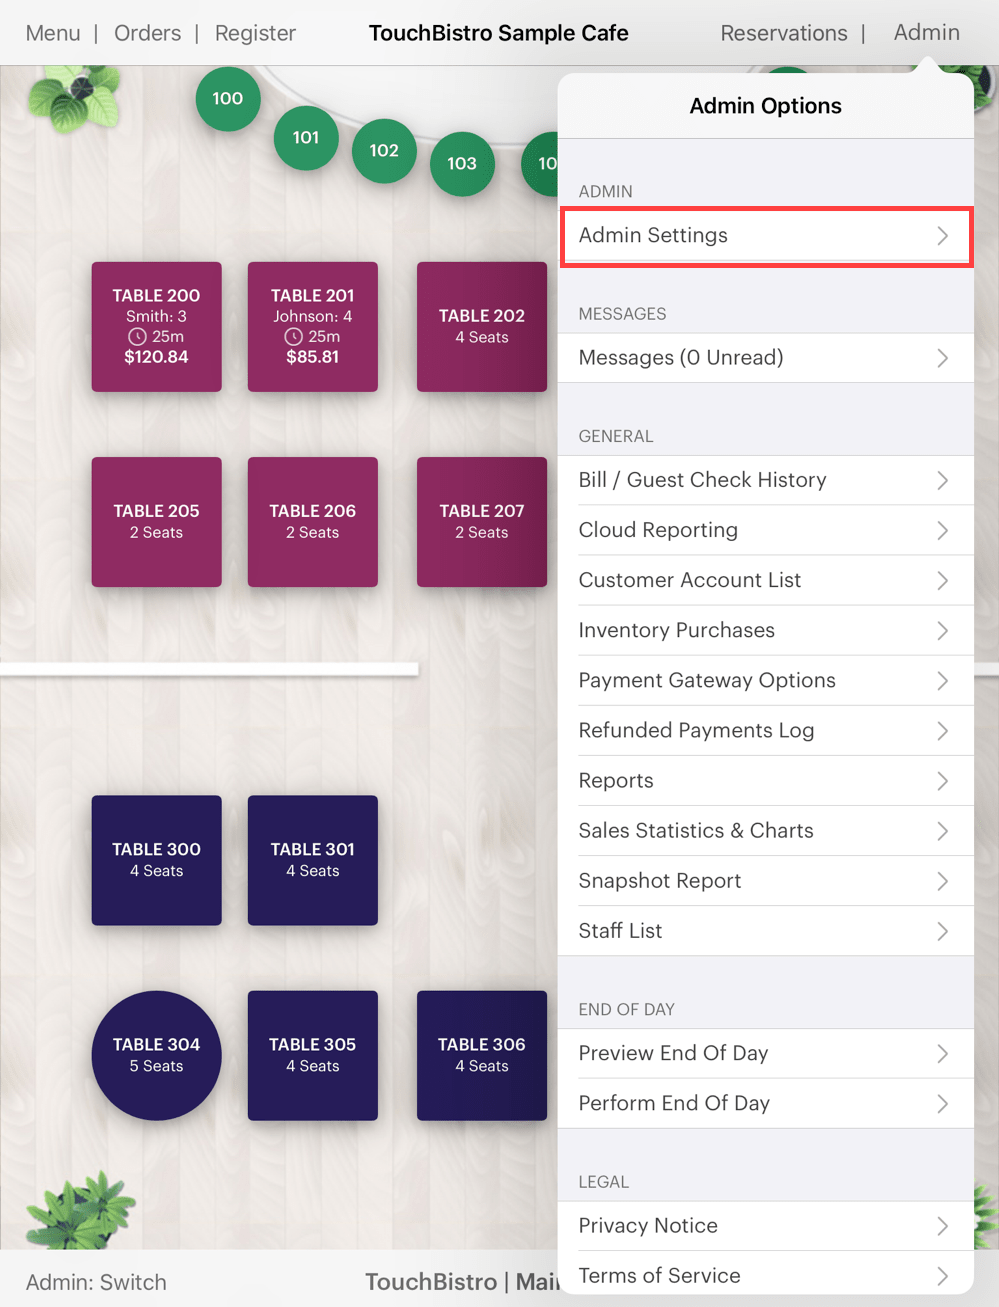
5. Tap Admin | Admin Settings in the top right hand corner.
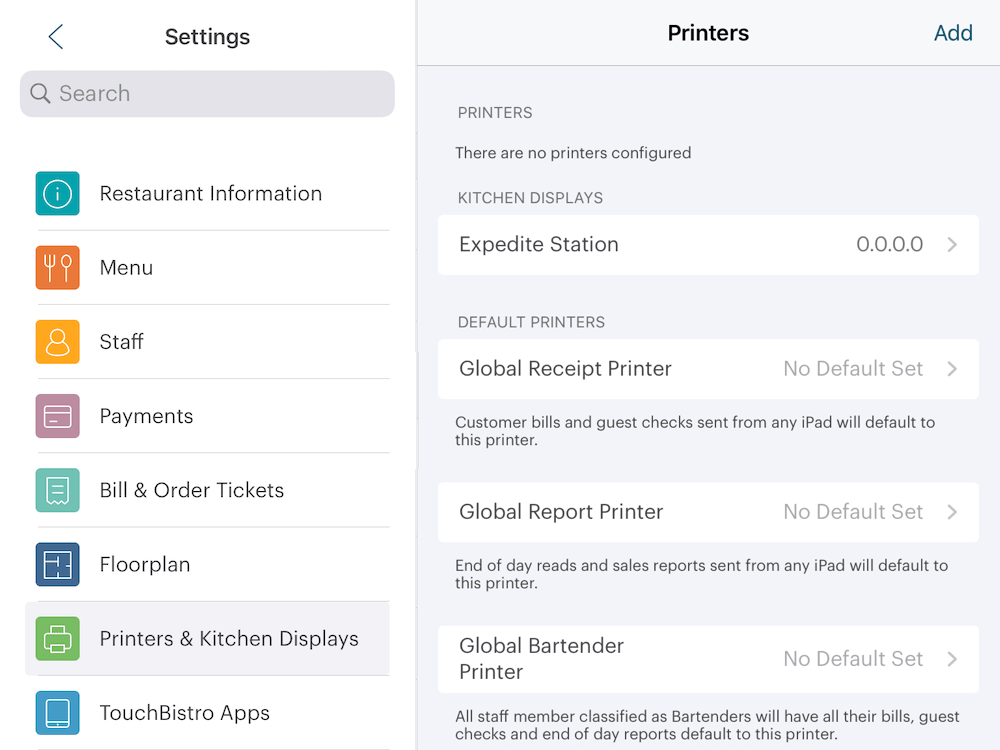
6. Tap Printers & Kitchen Displays.
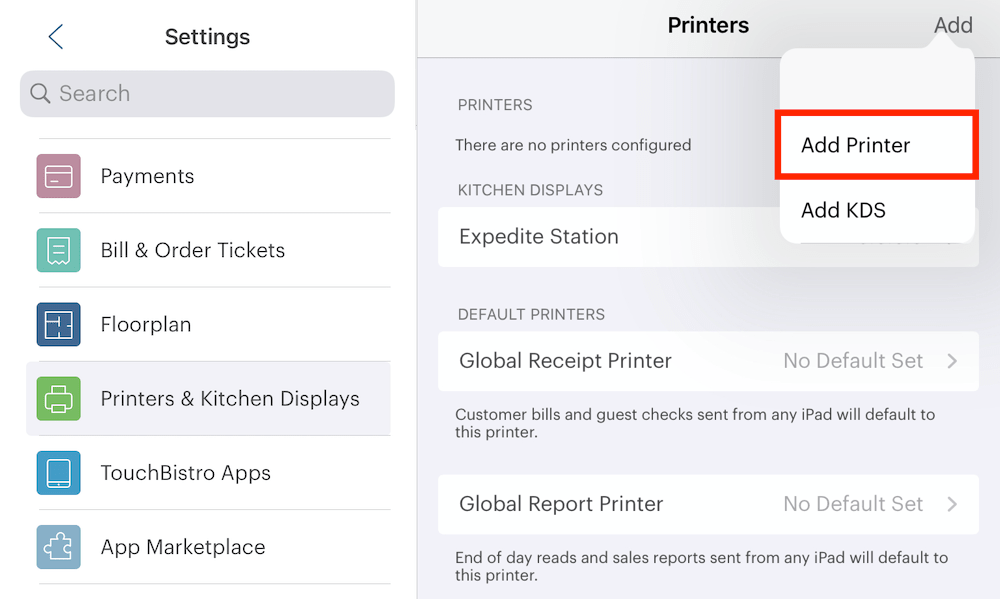
7. Tap Add in the top right-hand corner, and select Add Printer.
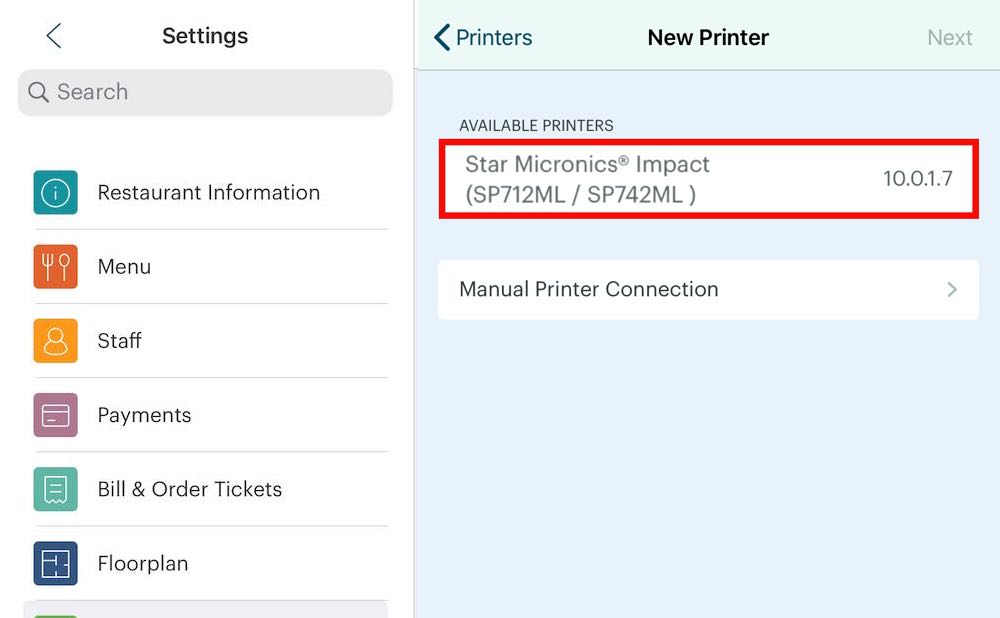
8. Wait a few moments for your printer (or printers) to appear in the New Printer screen. Tap your printer in the Available Printers list.
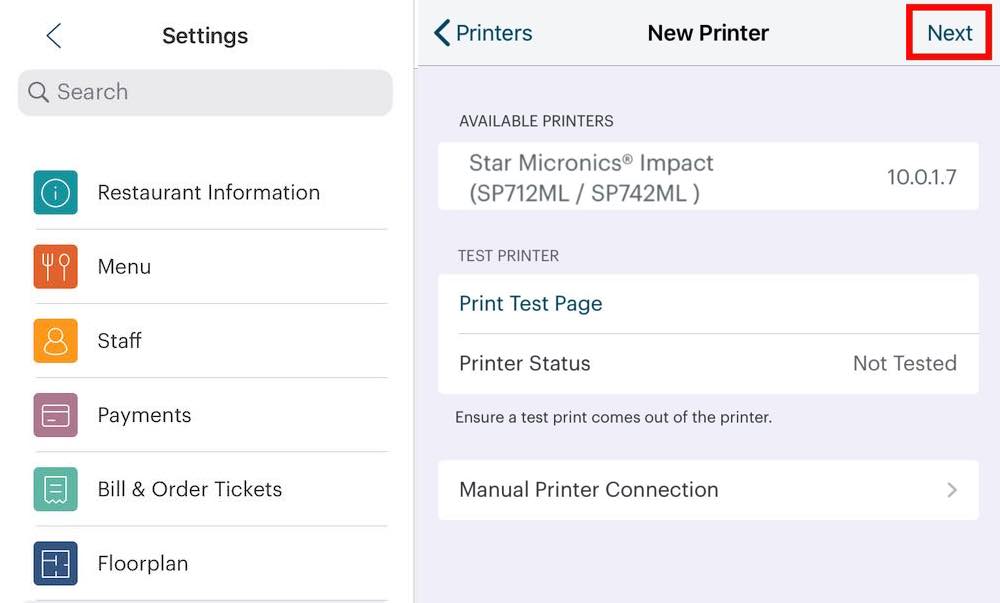
9. After selecting your printer, tap Next.

10. Tap Printer Name.
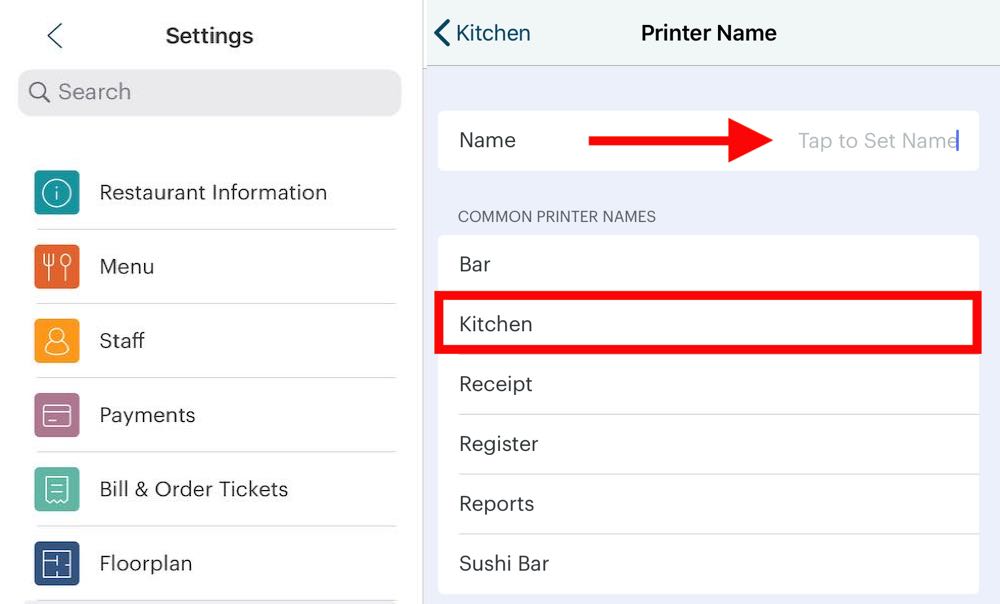
11. Either type a name for your new printer in the Name field, or make a selection from the list, for example Kitchen.
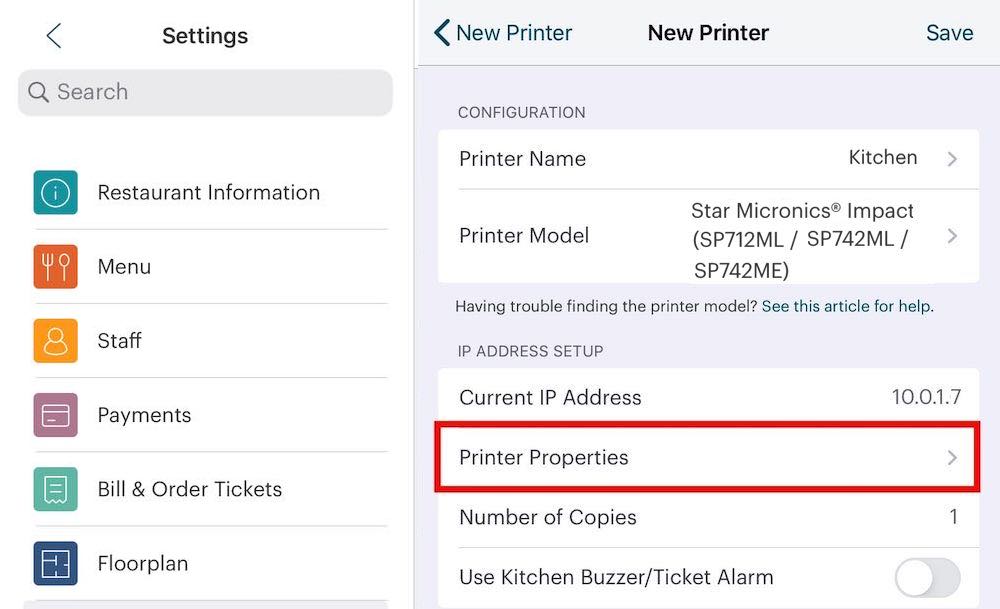
12. Tap Printer Properties.
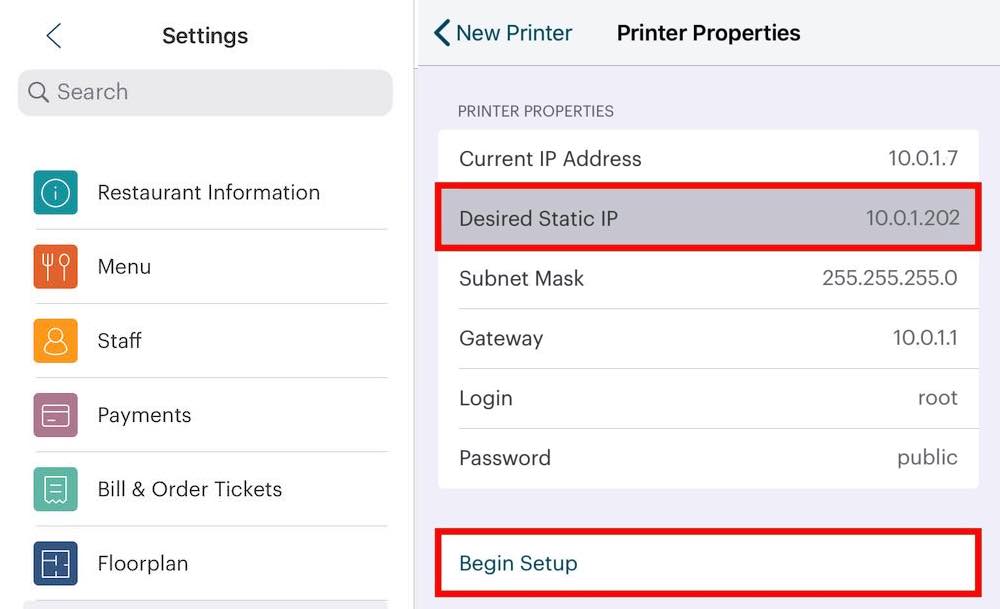
13. Enter 10.0.1.202 for the kitchen printer. If you add a third printer, say a patio printer, 10.0.1.203. It’s important to not duplicate an IP address or enter an IP address less than 201.
14. Tap Begin Setup.
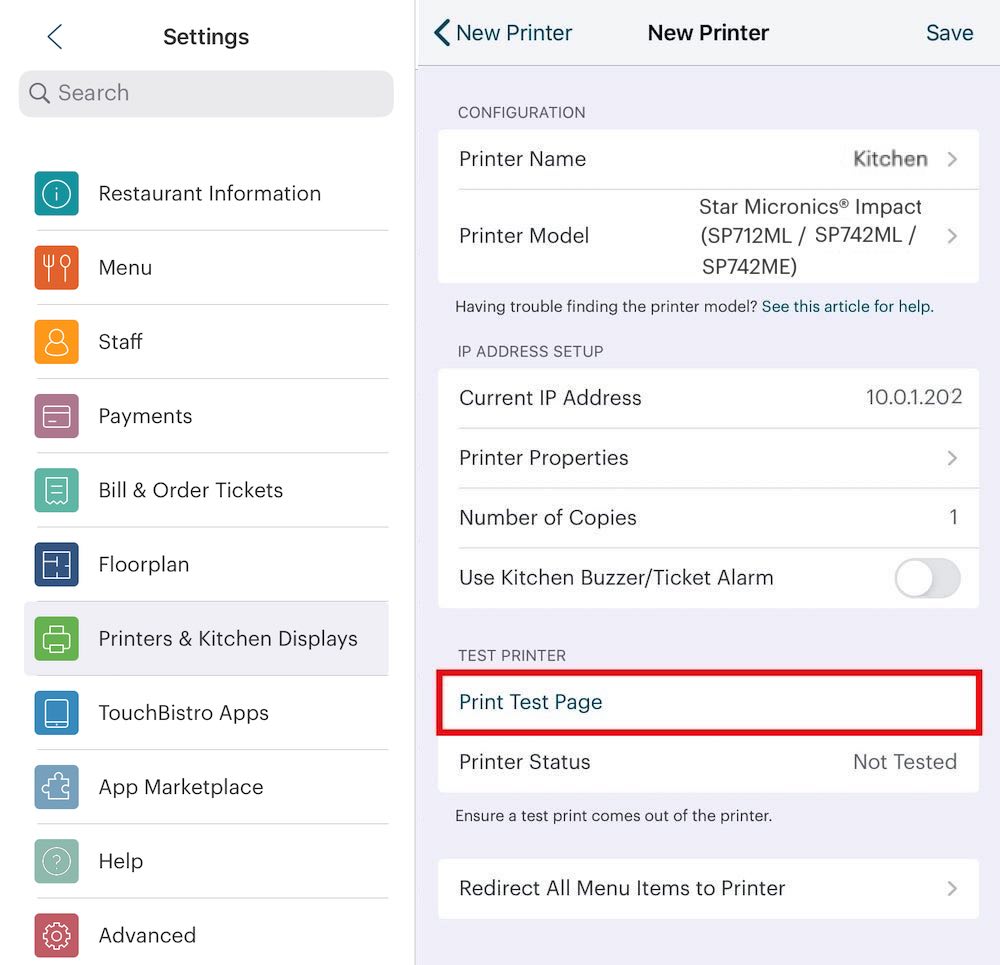
15. Tap Print Test Page.
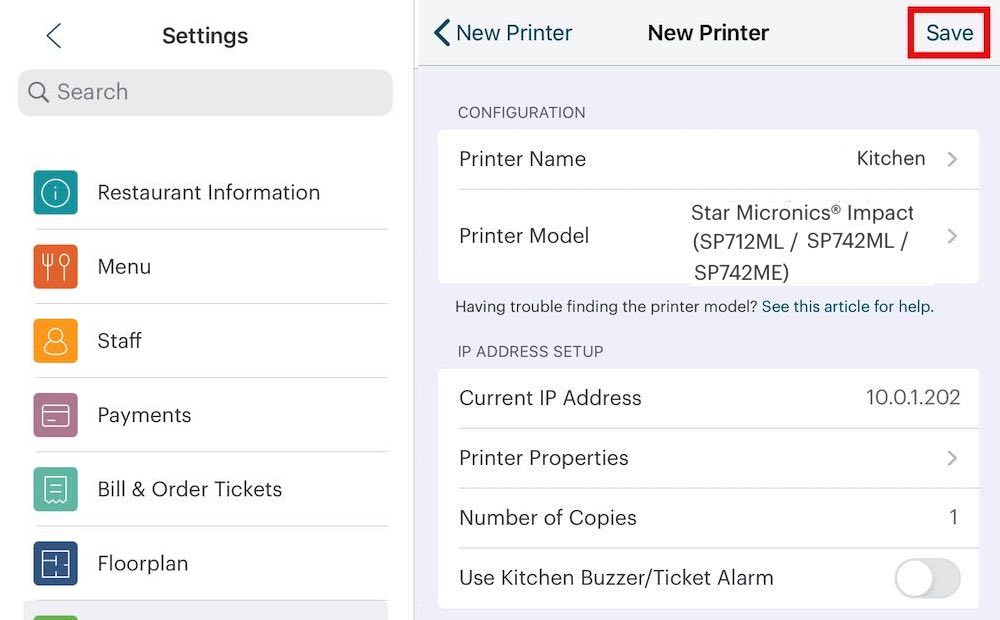
16. Tap Save.
17. You can tap Restaurant to return to your floor plan.
18. Finally, you can test the printer by sending an order to it.
If you want to see how TouchBistro will use this printer, review Setting Up Menu Categories in the Menu chapter of the Administrator’s Guide. We do not advise setting up categories immediately after setting up your printer, however. Complete your hardware setup first and then work through the Admin Guide to set up your restaurant, staff, floor plan, menu, and how TouchBistro should print categories and menu items to your kitchen printer(s).
NOTE: this must be done on all Star Micronics sp700 printers.
Chapter 5. Troubleshooting
When a printer isn’t responding, see Printer Status Messages to find out why your printer isn’t functioning properly.
See Also
HOW TO FACTORY RESET THE STAR MICRONICS SP700
LOADING AN SP700 IMPACT PRINTER
DO I HAVE THE RIGHT PRINTER?
SETTING UP MENU CATEGORIES TO PRINT TO YOUR KITCHEN PRINTER


 Email
Support
 Frequently
Asked Questions