Reservations – Creating a Social Distancing Floorplan
Table Of Contents
Chapter 2. Hiding Tables from Your Floorplan
Chapter 1. Introduction
This guide will help you amend your floorplan to accommodate social distancing rules by hiding tables and making them unavailable for reservations (both online and over the phone).
The first step is to hide tables you won’t be using on your floorplan to provide your hostess or host with an up-to-date representation of which tables are in use, and which ones aren’t. This way they won’t be inclined to accidentally seat diners at “hidden” tables.
The second step is to schedule your social distancing floorplan. This actually blocks bookings from occurring on the tables you’ve hidden.
Chapter 2. Hiding Tables from Your Floorplan

1. Click on the Gear icon at the top right and click Modify plan.

2. Click on the plus sign + to the left of the Schedule button to create a new setup called Setup #2.

3. Click once on each table to select the ones you wish to disable. In this example, we are disabling all the odd-numbered seats. Write down which tables you have selected.

4. Click on the Hide button. The selected seats will now be indicated as hidden on your floorplan.

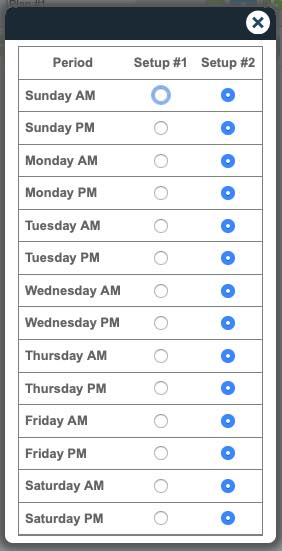
5. Click the Schedule button.
 x
x
6. Select each timeslot from the Setup #2 column thereby making it the default view.
7. Close the Schedule window.
8. Click Save in the top right-hand. Your hidden tables are no longer visible.
Chapter 3. Scheduling Your Social Distancing Floorplan
1. Click on Settings | Schedules.

2. Click on the plus Add + to the right of Configurations.
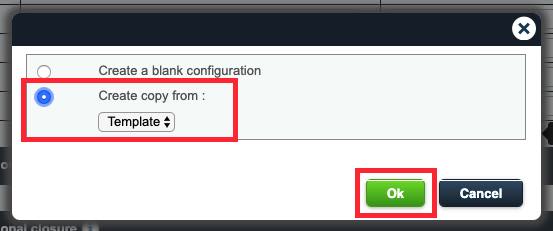
3. Select Create Copy from and choose Template from the drop-down menu.
4. Click OK.

5. In the Description field type Template – Social Distancing.
6. Tap the Availabilities Management tab at the top of the window.
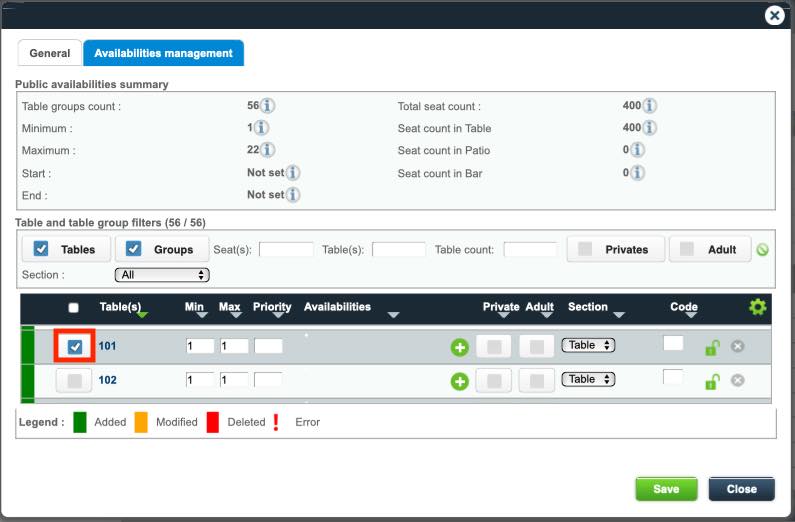
7. Select all the seats you disabled in the previous section. In this example, we are selecting all the odd-numbered seats to be disabled.
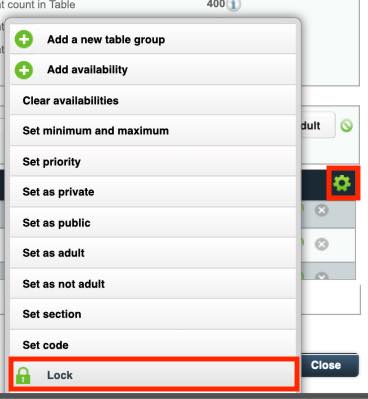
8. Click on the green Gear icon and click Lock to lock those tables.
![]()
9. In the Table and table group filters section, deselect Tables to reveal only Groups. This will reveal any table combinations without displaying individual tables.

10. Click on the checkbox at the top of the checkbox column to select all table combinations.

11. Click on the green Gear icon and click Lock to lock those table combinations.
12. Click Save and Close.

13. Click on the Add + icon to create a new AM configuration based on your social distancing template.
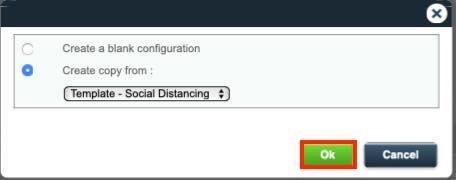
14. Select Create Copy from and choose Template – Social Distancing from the drop-down menu and press Ok.

15. In the Description field type AM 1 Social Distancing or something similar.
16. Click the Availabilities management tab at the top.

17. Click on the checkbox at the top of the checkbox column to select all tables in the list.
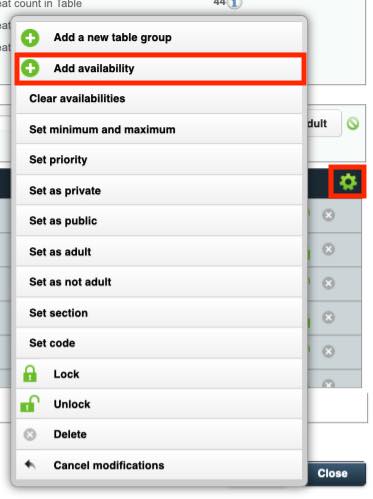
18. Click on the green Gear icon and select Add Availability.
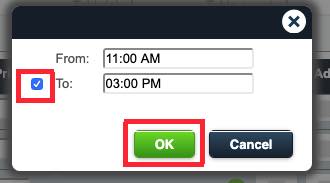
19. In the From field select your opening time, and in the To: field select when your AM period ends and click OK.
20. Click Save and Close.

21. Click on the Add + icon to create a new PM configuration based on your social distancing template.

22. Select Create Copy from and choose Template – Social Distancing from the drop-down menu.
![]()
23. In the Description field type PM 1 Social Distancing or something similar.
24. Click the Availabilities management tab at the top.

25. Click on the checkbox at the top of the checkbox column to select all tables in the list.

26. Click on the green Gear icon and click Add Availability.

27. In the From field select the time your PM period begins and in the To: field select when your PM period ends.
28. Tap Save and Close.

29. In the Default Schedule AM / PM section use the drop-down menus to select your AM – Social Distancing configuration on the left, and your PM – Social Distancing configurations on the right.
Chapter 4. Reverting Your Restaurant Back to Full Capacity

1. Click on the Gear icon in the top right-hand corner and select Modify plan.
2. Click on Setup #2.

3. Click the Remove – icon.

4. In the confirmation dialog box tap Yes.

5. Click Save in the top right-hand corner.
6. Click on Settings | Schedules.

7. In the Default Schedule AM / PM section select your original AM and PM schedules.


 Email
Support
 Frequently
Asked Questions
