Reservations – Creating Your Floorplan
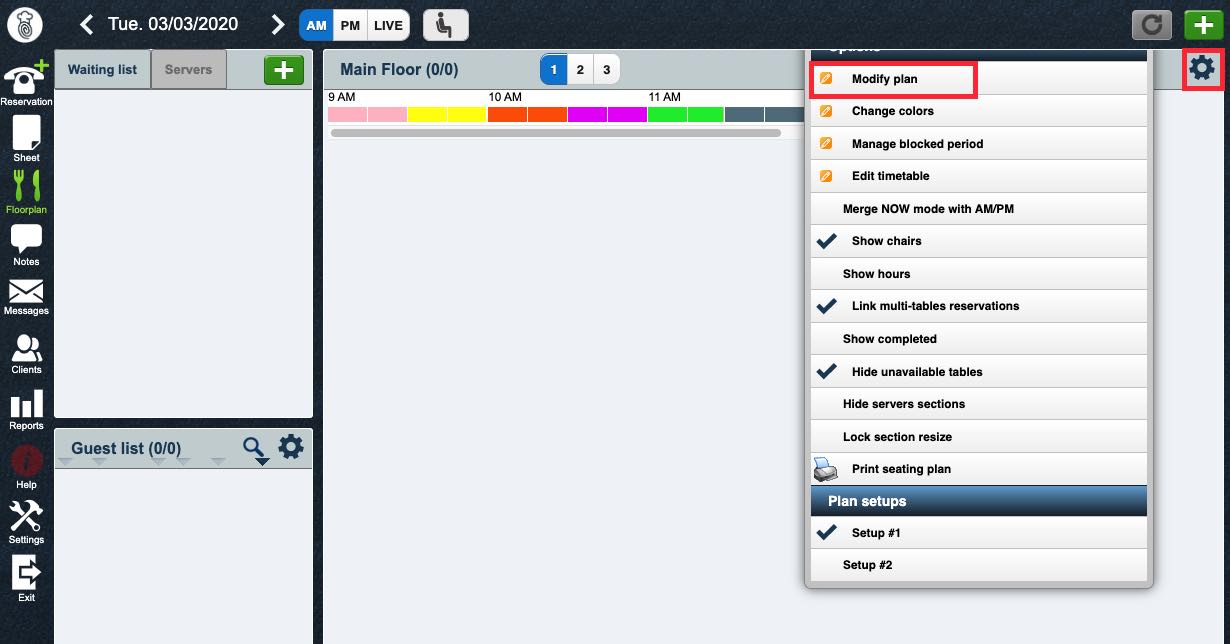
Before you can start taking reservations, you need to create a floorplan. A floorplan mirrors your venue’s tables and bar stools. To get started building your floorplan, click the ![]() on the Left toolbar.
on the Left toolbar.

1. Click the Gear icon and then click Modify Plan. If you do not see Modify Plan, it indicates you’ve selected one or more tables or other items on your floorplan. Unselect the table or item and then click the Gear icon again.

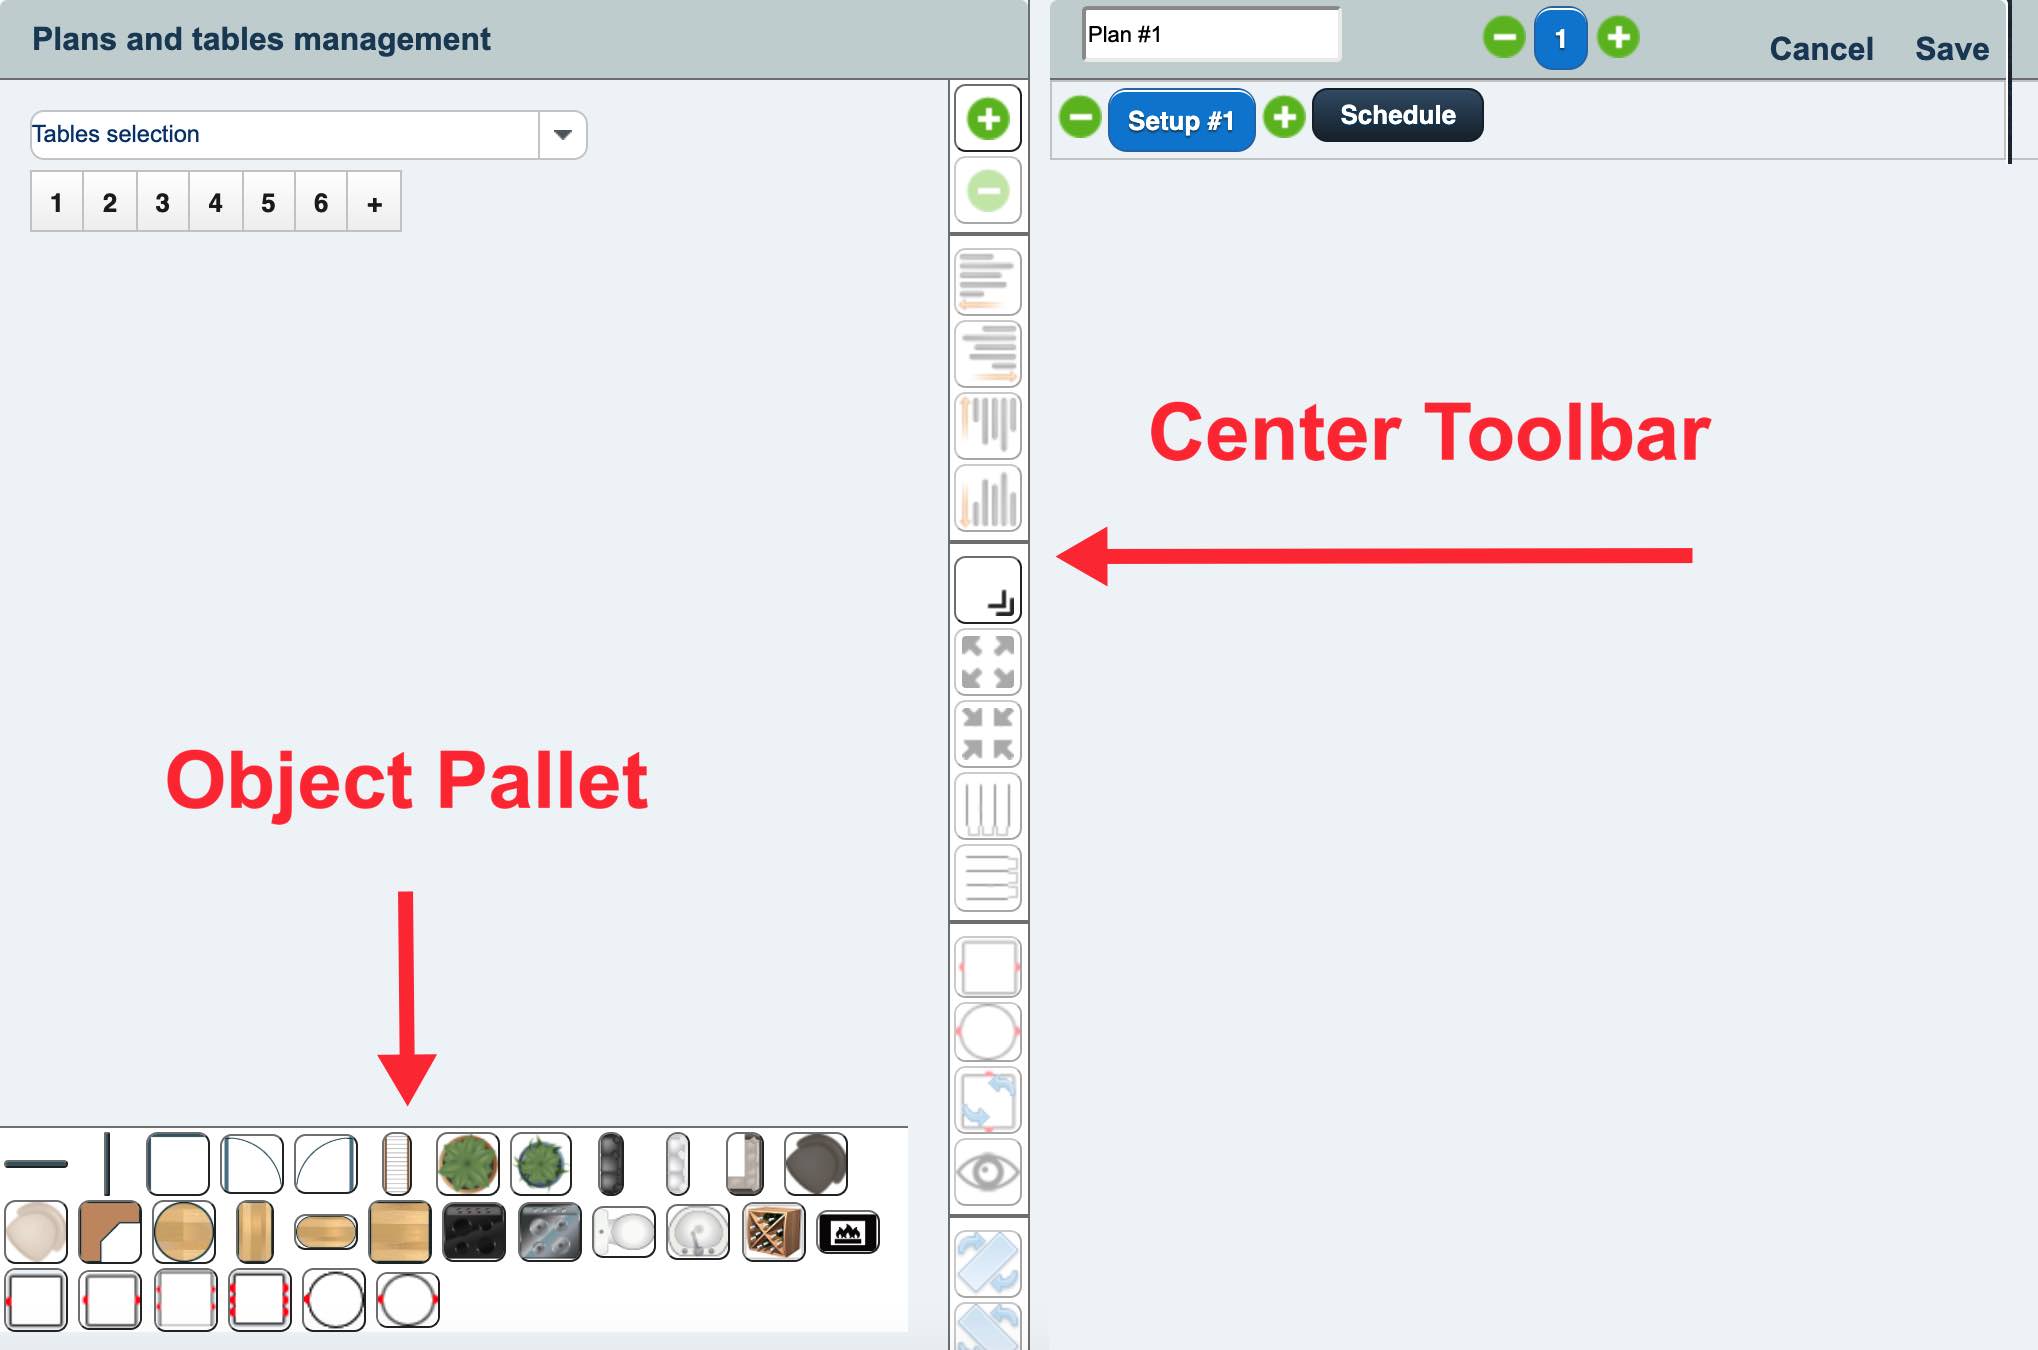
2. When you click Modify Plan, you get a Center Toolbar and a floorplan Object Pallet at the bottom of the screen.
3. The Object Pallet offers three primary objects. Tables (identified by red squares), furniture, and walls/doors:
|
Item
|
Description
|
|
|
A horizontal wall. This object can be rotated with the center toolbar Rotation
|
|
|
A vertical wall. This object can be rotated with the center toolbar Rotation
|
|
|
A right-angle wall. This object can be rotated with the center toolbar Rotation
|
|
|
Door swinging out. This object can be rotated with the center toolbar Rotation
|
|
|
Door swinging in. This object can be rotated with the center toolbar Rotation
|
|
|
Stairs. This object can be rotated with the center toolbar Rotation
|
|
|
Large plant.
|
|
|
Small plant.
|
|
|
A black couch. This object can be rotated with the center toolbar Rotation
|
|
|
A white couch. This object can be rotated with the center toolbar Rotation
|
|
|
An L-shaped couch. This object can be rotated with the center toolbar Rotation
|
|
|
A dark brown comfy chair. This object can be rotated with the center toolbar Rotation
|
|
|
A light brown comfy chair. This object can be rotated with the center toolbar Rotation
|
|
|
Corner counter. This object can be rotated with the center toolbar Rotation
|
|
|
A round hardwood object. It could be used to represent a round bar or counter which you can array reservable bar seats around. It could also represent a round dancefloor or some other kind of round wood object in your venue. This object is for decorative purposes only. This object will not let you reserve seats.
|
|
|
A rectangular hardwood object, portrait orientation. It could be used to represent a rectangular bar or counter which you can array reservable bar seats around. It could also represent a rectangular dancefloor or some other kind of rectangular wood object in your venue. This object is for decorative purposes only. This object will not let you reserve seats. This object can be rotated with the center toolbar Rotation
|
|
|
A rectangular hardwood object, landscape orientation. It could be used to represent a rectangular bar or counter which you can array reservable bar seats around. It could also represent a rectangular dancefloor or some other kind of rectangular wood object in your venue. This object is for decorative purposes only. This object will not let you reserve seats. This object can be rotated with the center toolbar Rotation
|
|
|
A square hardwood object, landscape orientation. It could be used to represent a square bar or counter which you can array reservable bar seats around. It could also represent a square dancefloor or some other kind of square wood object in your venue. This object is for decorative purposes only. This object will not let you reserve seats.
|
|
|
A black stove. This object can be rotated with the center toolbar Rotation
|
|
|
A grey stove. This object can be rotated with the center toolbar Rotation
|
|
|
An icon representing the location of a washroom. This object can be rotated with the center toolbar Rotation
|
|
|
A sink. This object can be rotated with the center toolbar Rotation
|
|
|
A wine rack. This object can be rotated with the center toolbar Rotation
|
|
|
A fireplace. This object can be rotated with the center toolbar Rotation
|
|
|
A single seat table. You can also use this as a bar seat. Seats can be rotated around the table with the center toolbar Seat Rotation icon
|
|
|
A two-seat table.
|
|
|
A four-seat table.
|
|
|
A six-seat table.
|
|
|
A single-seat round table.
|
|
|
A two-seat round table.
|
4. The Center Toolbar lets you rotate, resize, align, modify, and delete objects placed on the floorplan.
|
Item
|
Description
|
|
|
The Add icon is an alternative way of adding a table to your floorplan.
|
|
|
The Delete icon will delete any selected table or object on the floorplan. There is no undo. (If you have multiple setups, click the Delete icon will alternatively allow you to hide a table for the active setup.)
|
|
|
The Left Align icon will align tables to the left-most selected table on the floorplan. This icon will not align non-table objects.
|
|
|
The Right Align icon will align tables to the right-most selected table on the floorplan. This icon will not align non-table objects.
|
|
|
The Top Align icon will align tables to the top-most selected table on the floorplan. This icon will not align non-table objects.
|
|
|
The Bottom Align icon will align tables to the bottom-most selected table on the floorplan. This icon will not align non-table objects.
|
|
|
Enable/Disable resizing mode.
When enabled, table numbers are moved to the left side of the table. You’ll see a chevron on the right side to indicate the table can be resized.
You can then mouse over the chevron, left-click, and hold and then freely change the table’s width and height.
|
|
|
Click to resize 2 or more selected tables to the same size as the biggest table.
|
|
|
Click to resize 2 or more selected tables to the same size as the smallest table.
|
|
|
Click to even out the horizontal spacing between 2 or more selected tables.
|
|
|
Click to even out the vertical spacing between 2 or more selected tables.
|
|
|
Click to convert the selected round tables to square tables. This will not convert a rectangular table to a square table.
|
|
|
Click to convert the selected square or rectangular tables to round tables.
|
|
|
Click to rotate the red seat indicators to the opposite side of the table.
|
|
|
Click to hide or un-hide a specific table. You should normally hide tables via the scheduling process. However, this function can be used to quickly prevent an “offline” table from being reserved.
|
|
|
Click to rotate any object (tables or non-table objects) right or left.
|

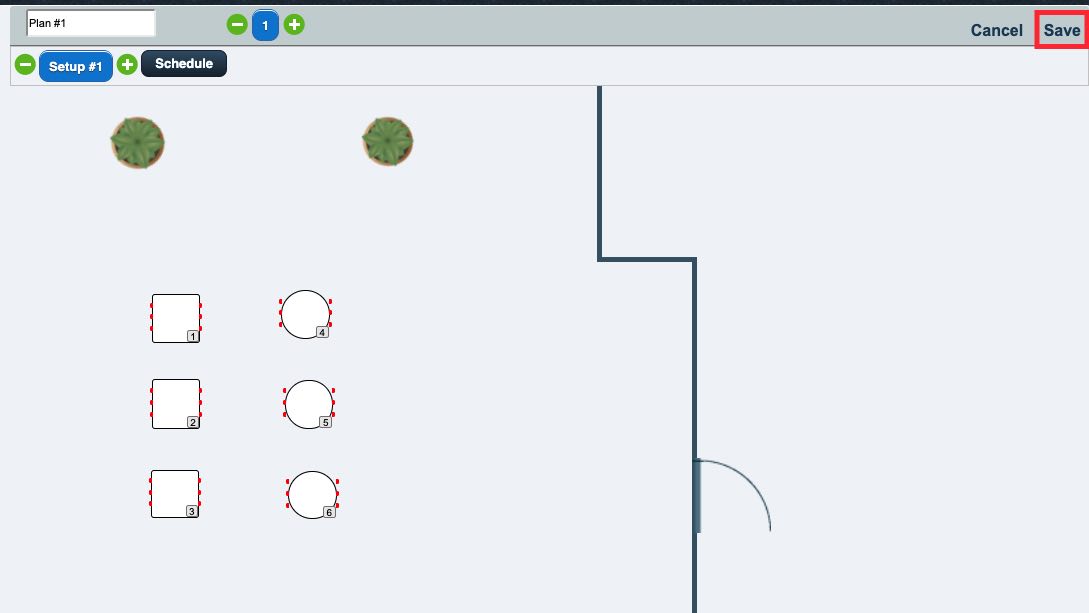
5. When you’re satisfied with your floorplan, click Save.
See Also


 Email
Support
 Frequently
Asked Questions

