Reservations – Fine Tuning Your Floorplan
Table Of Contents
Section 1. Section 1. Quickly Selecting Tables by Maximum Seating
Chapter 3. Adding Additional Floorplans
Chapter 4. Creating Alternative Setups
Section 1. Deleting Tables When You Have More Than One Setup
Chapter 1. Introduction
After you’ve created a floorplan, there are various options that let you fine-tune the tables on the floorplan as well as the floorplan itself.
Chapter 2. Fine Tuning Tables
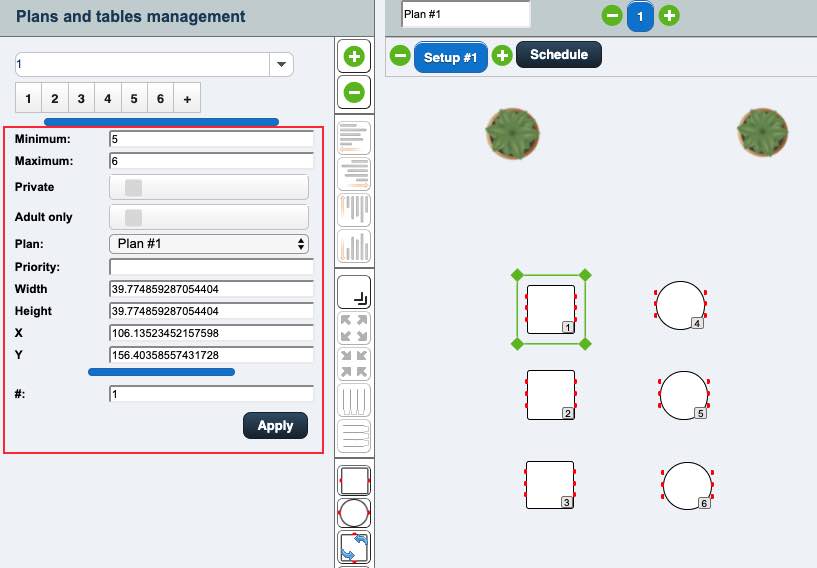
1. You can click on a table and fine tune aspects of the table.
|
Option
|
Description
|
|
Minimum
|
The minimum party size that can book this table.
|
|
Maximum
|
The maximum party size that can book this table.
|
|
Private
|
If a table is marked Private, it will not be available for online bookings by the patron.
|
|
Adults Only
|
If a table is flagged as adults only, the table will not be available if the reservation (online or manually entered) indicates there are one or more minors in the party.
|
|
Plan
|
To move the table to a different plan (e.g., a different floorplan floor), select it from the drop-down box.
|
|
Priority
|
If you prefer this table to rank higher in the tables suggested when making a reservation, give it a higher priority.
|
|
Width
|
If you want to manually specify that table’s width, you can enter a value here.
|
|
Height
|
If you want to manually specify that table’s height, you can enter a value here.
|
|
X
|
If you want to manually specify that table’s horizontal location on the floorplan, you can enter a value here.
|
|
Y
|
If you want to manually specify that table’s verticle location on the floorplan, you can enter a value here.
|
|
#
|
Table names are, by default, numbers and generated in sequence. If you want to give a table a specific name, enter it here. You can use letters as well as numbers for a table name. Just remember for the TouchBistro POS integration to work correctly, table names on your TouchBistro Reservations floorplan have to match the table names on your TouchBistro POS floorplan exactly (including case).
|
2. Click Apply when done making changes.
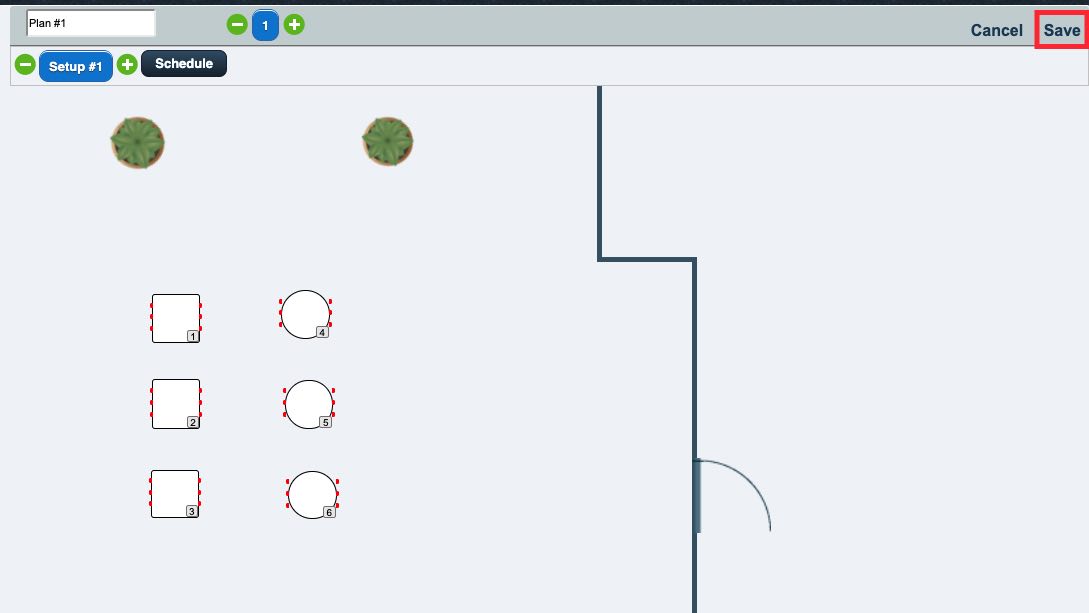
3. When you’re satisfied with your floorplan, click Save.
Section 1. Section 1. Quickly Selecting Tables by Maximum Seating
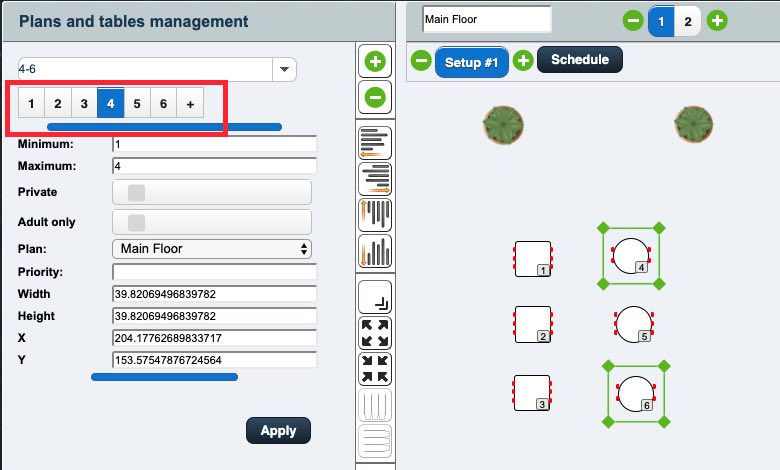
If you’re editing your floorplan and want to select a group of tables by their maximum seating setting, click the desired seat number using the Quick Select tool. In the example above, we want to select all tables that can seat a maximum of four patrons. If we click 4, tables 4 and 6 are selected. Although tables 1, 2, 3, and 5 can seat at least 4 people, TouchBistro Reservations will only select tables that have the exact maximum selected according to the Quick Select tool.
Chapter 3. Adding Additional Floorplans
If your venue has multiple floors or a patio, you can create additional floor plans.
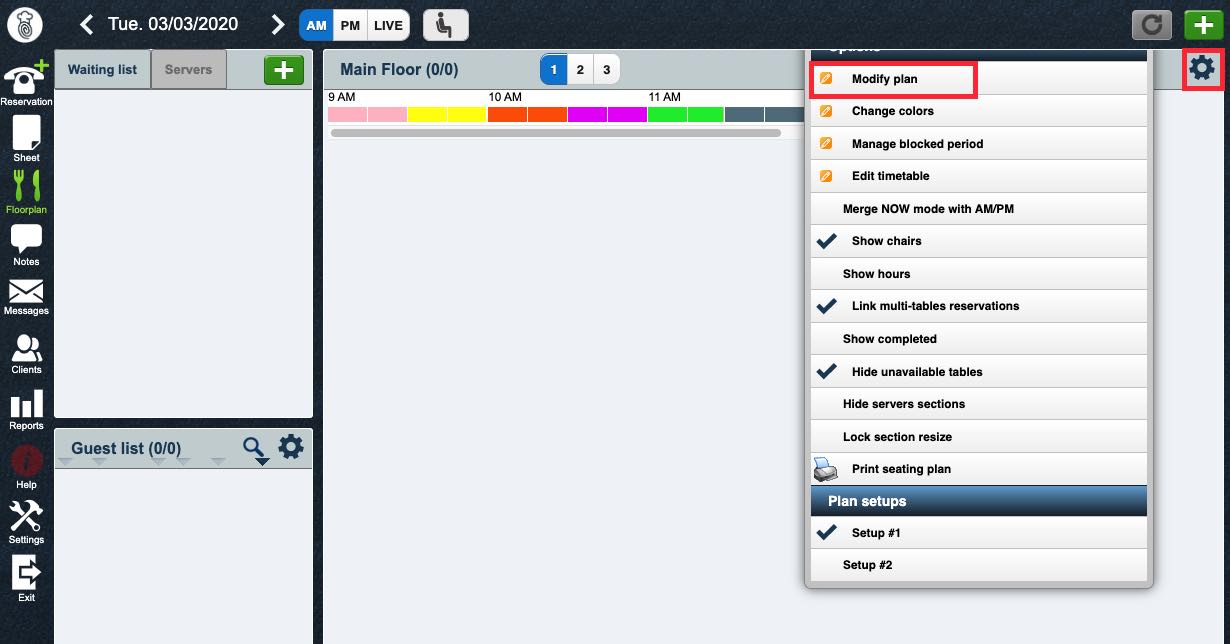
1. If you’re not in floorplan editing mode, click the Gear icon and then click Modify Plan. If you do not see Modify Plan, it indicates you’ve selected one or more tables or other items on your floorplan. Unselect the table or item and then click the Gear icon again.

2. If you’ve gone with the default Plan #1 name for your initial floorplan, you can edit the floorplan name and give it something more descriptive. In this example, we’ll call our initial floorplan the Main Floor.

3. To add another floor, click the Add + icon.

4. Click the 2 tab.

5. You can now rename this floor, if desired (e.g., Second Floor) and add tables and other objects.
6. Click Save.
Chapter 4. Creating Alternative Setups
Your floorplan can be set to vary on a schedule. For example, on Sundays you have a brunch. Because it is popular with families you add a few additional larger tables to your main floor dining room. Valentine’s day is popular with couples. So you remove your 6-person tables and replace them with several two tops. In the example below, we’ll create an additional main floor set up and add some additional tables to our main floor. This setup will be available only on Sundays.

1. Click the Gear icon and then click Modify Plan. If you do not see Modify Plan, it indicates you’ve selected one or more tables or other items on your floorplan. Unselect the table or item and then click the Gear icon again.
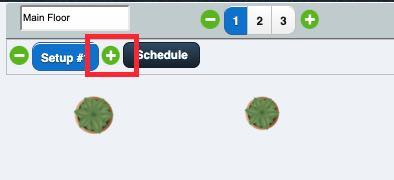
2. Ensure you’ve selected the proper floor. Click the + icon next to Setup #1.

3. You will now see your Setup #2 tab. Ensure it’s highlighted blue. You can now modify your floorplan.
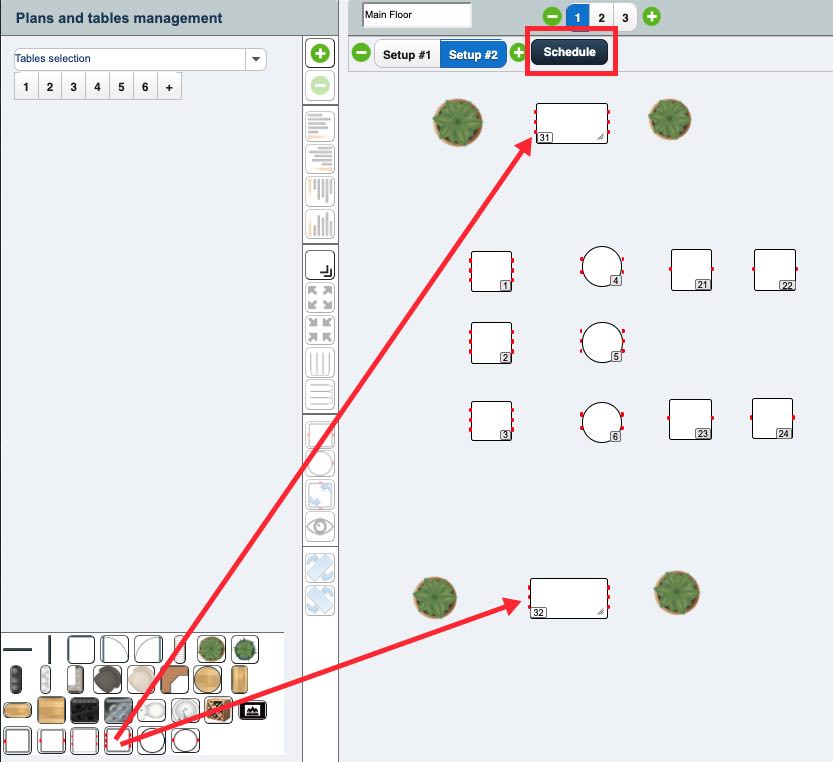
4. In this example, we’ll add two additional 6-person tables to the floorplan. Use the table pallet at the bottom and drag and drop the new tables to your floorplan.
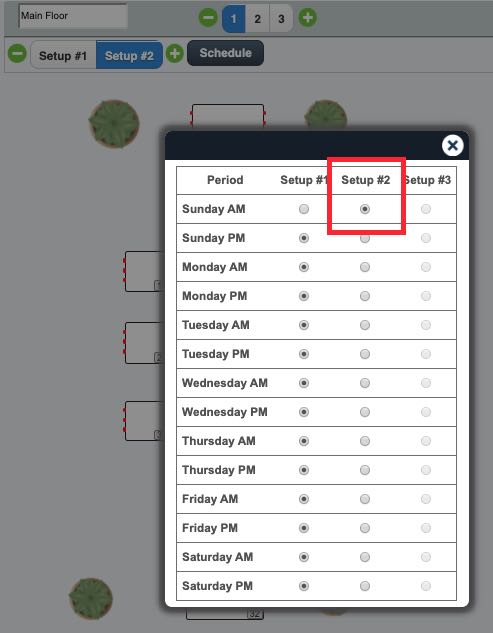
5. Click Schedule and select a day and timeslot this setup should be available for. For example, click the Sunday AM radio button under Setup #2. Click the X button to close the dialog box.
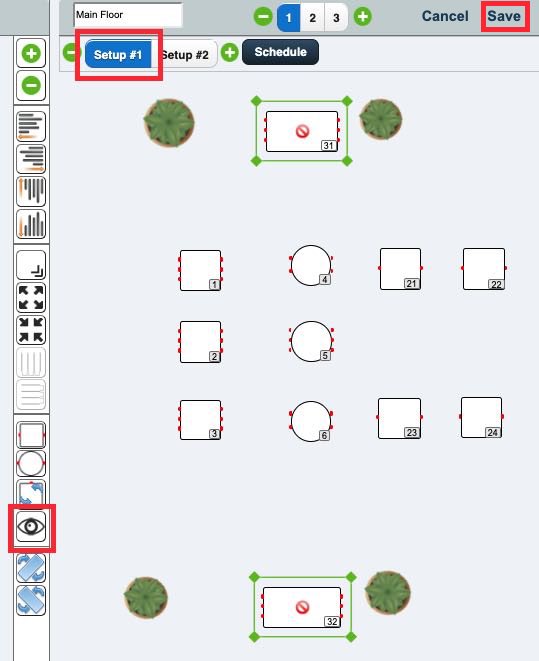
6. After adding these tables to Setup #2, you want to ensure they’re not available for use with the normal Setup #1 floorplan. Click Setup #1 and select your new tables. Click the Hide button.
7. Click Save when you’re done modifying your setup.
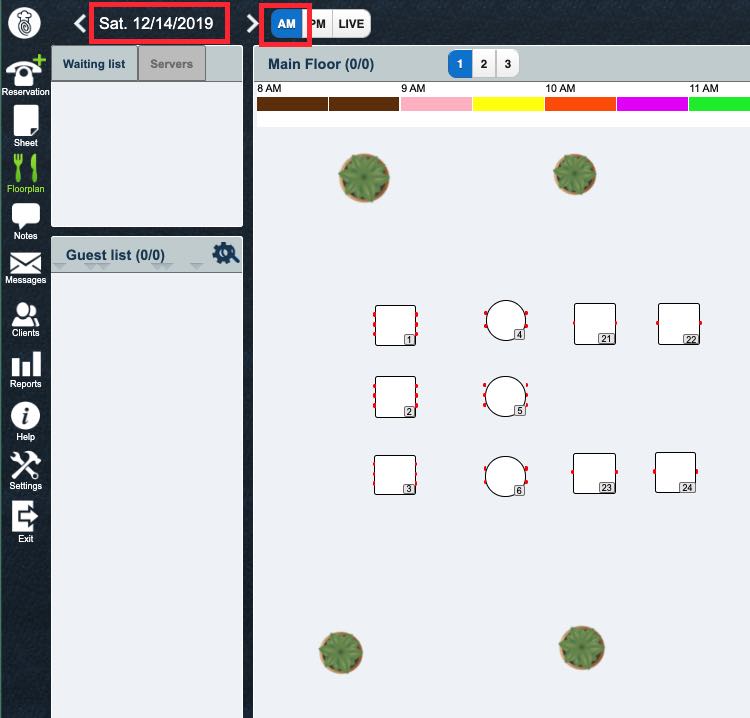
8. If we look at our floorplan, we can see the Saturday AM timeslot does not show the additional 6-person tables we added.
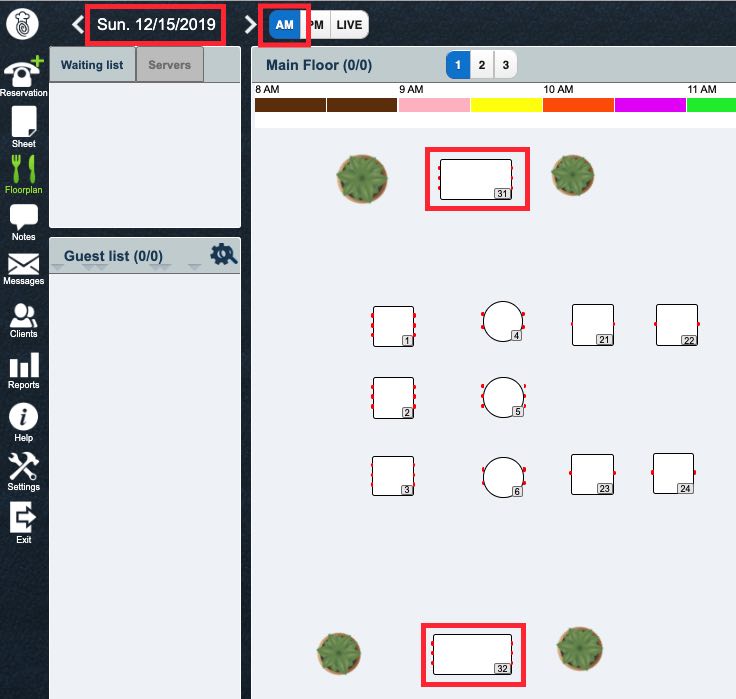
9. However, when we change the date focus to the Sunday AM timeslot we can see those tables now appear on our floorplan.
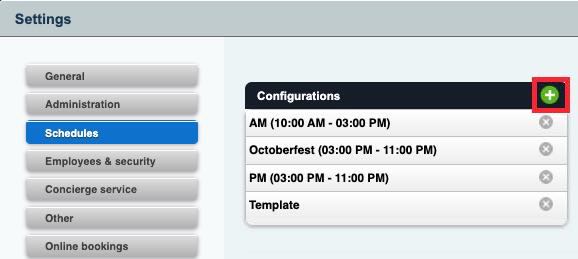
10. Next click Settings | Schedules. Click the Add + icon at the top right. We will create a Sunday brunch configuration.
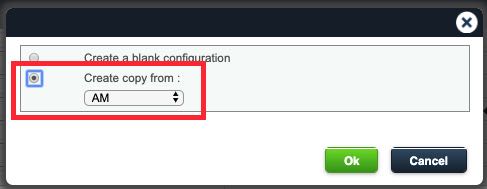
11. Create your configuration based on either your template or your AM timeslot configuration. In this case we’ll base our Brunch configuration on your AM timeslot configuration.
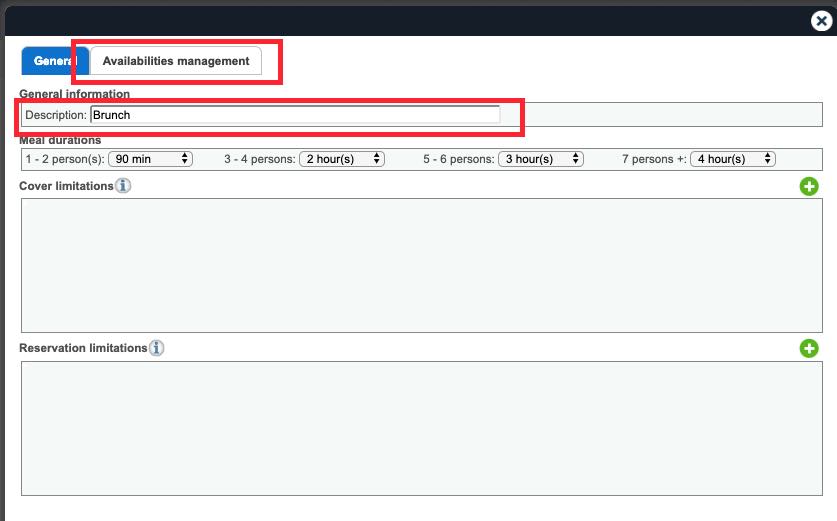
12. Give your configuration a name like Brunch. Adjust Meal durations, Cover limitations, and Reservation limitations if necessary. Click Availability management.
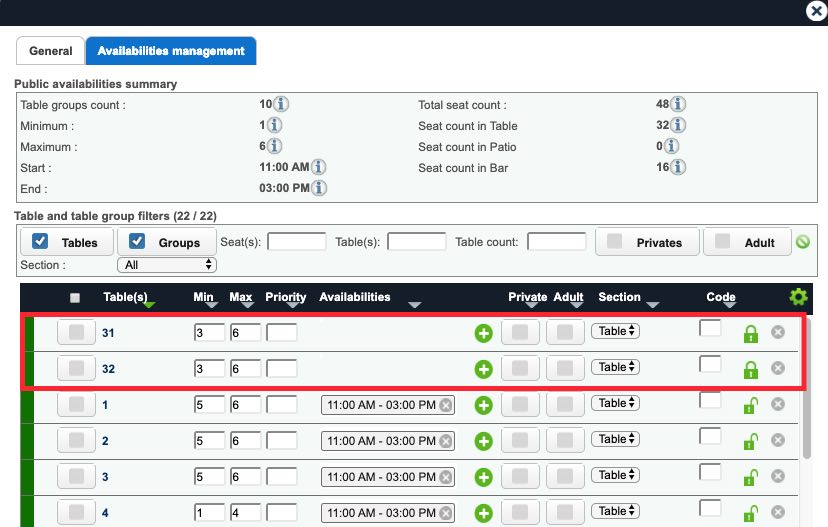
13. We added 2 new tables in the steps above. New tables are initially locked. We naturally want to leave them locked for all other configurations (AM/PM/template) as they should not be available for reservations during timeslots that use our normal AM/PM configurations.
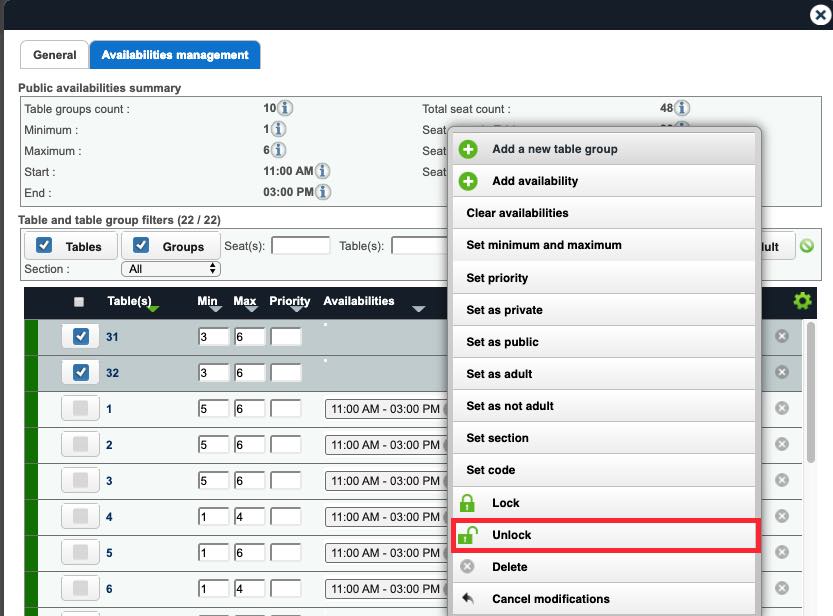
14. Check the tables you added for Setup #2 and click the Gear icon. Click Unlock.
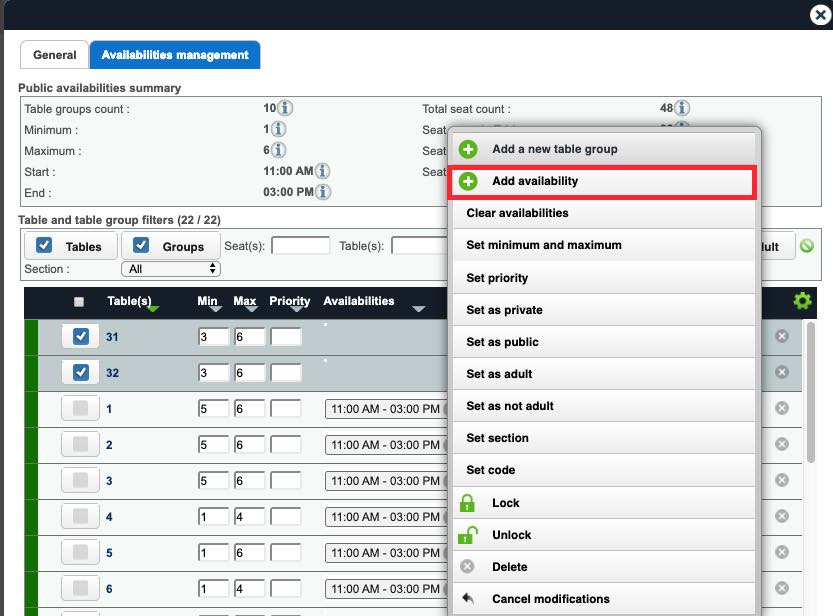
15. Check the tables you added for Setup #2 again and click the Gear icon. Click Add availability.
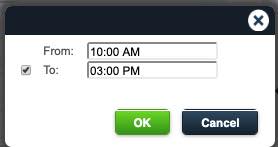
16. Add what time these tables are available for and click OK.
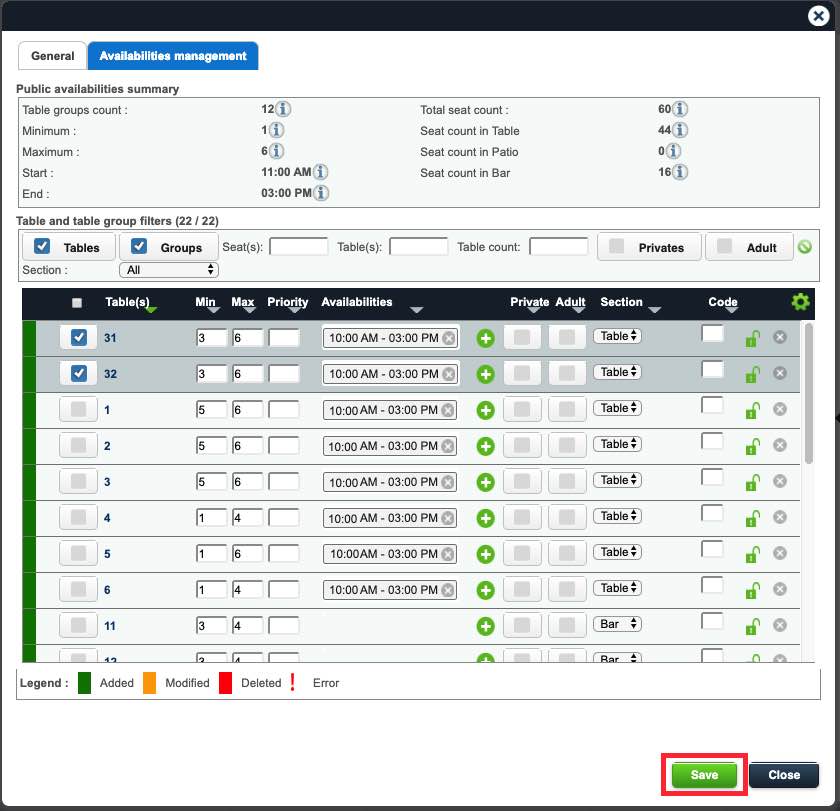
17. Click Save.

18. Finally, set your Sunday AM timeslot to the Brunch configuration.

19. If we create a reservation for Saturday 11 am, we can see our tables 31 and 32 are not available.
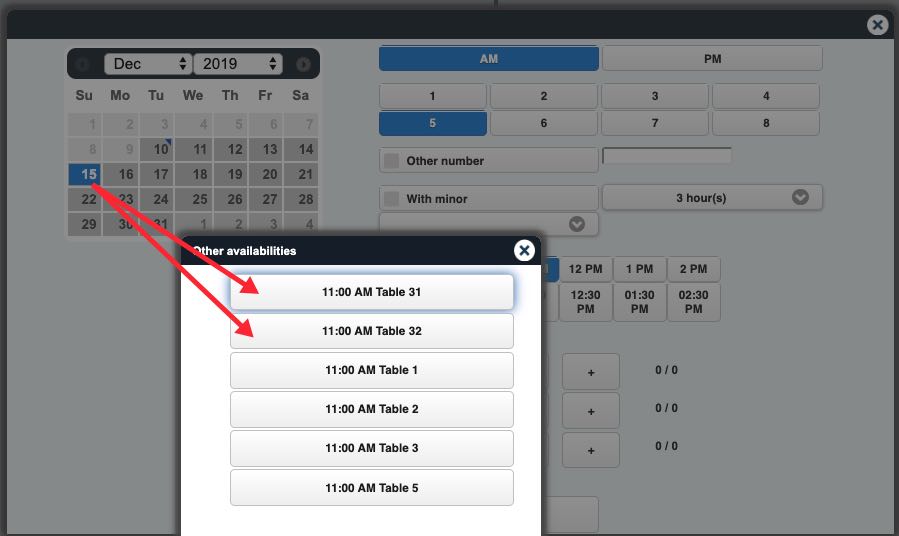
20. However, if we make a reservation for Sunday 11 am, we can see our tables 31 and 32 are now available.
Section 1. Deleting Tables When You Have More Than One Setup
Normally if you delete a table using the Delete ![]() button the toolbar, the table is simply deleted.
button the toolbar, the table is simply deleted.
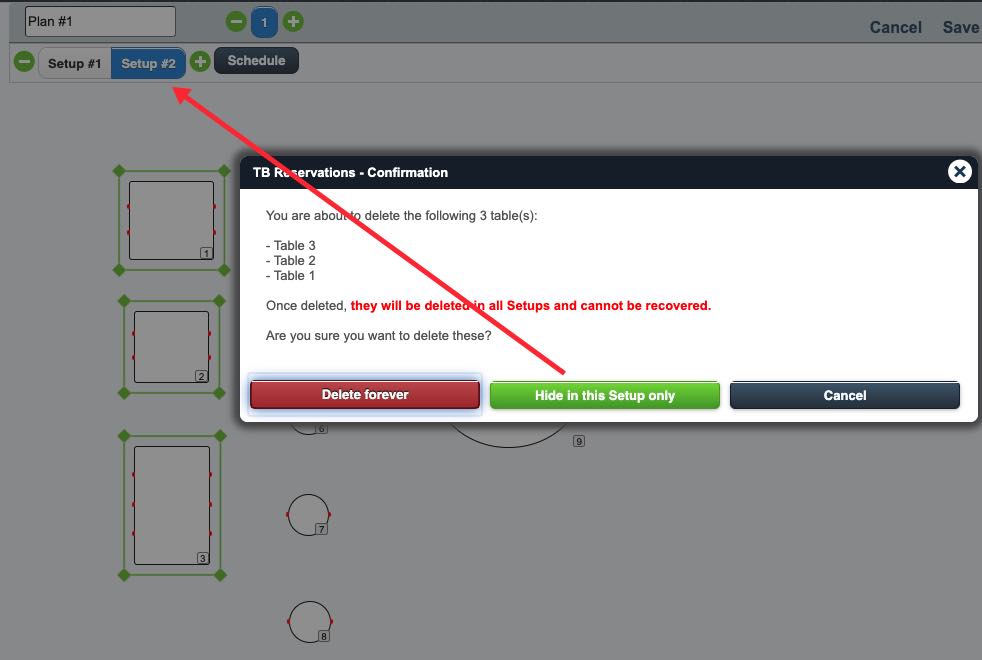
However, if you’re working with multiple setups and you click the Delete ![]() button to delete a table or tables, TouchBistro Reservations will give you the ability to simply hide the tables for the current active setup.
button to delete a table or tables, TouchBistro Reservations will give you the ability to simply hide the tables for the current active setup.
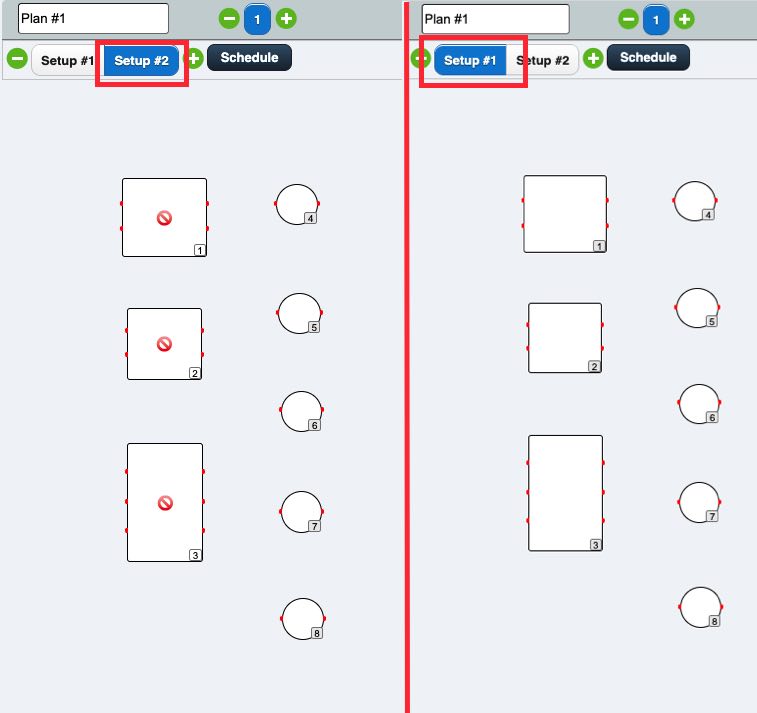
If we click Hide for this Setup only, and Setup 2 was active, we can see the selected tables were hidden on Setup 2 but not hidden on Setup 1.


 Email
Support
 Frequently
Asked Questions
