Reservations iPad App – Taking Reservations
Table Of Contents
Chapter 1. Taking a Reservation
Chapter 2. Alternative Method for Taking a Reservation
Chapter 1. Taking a Reservation
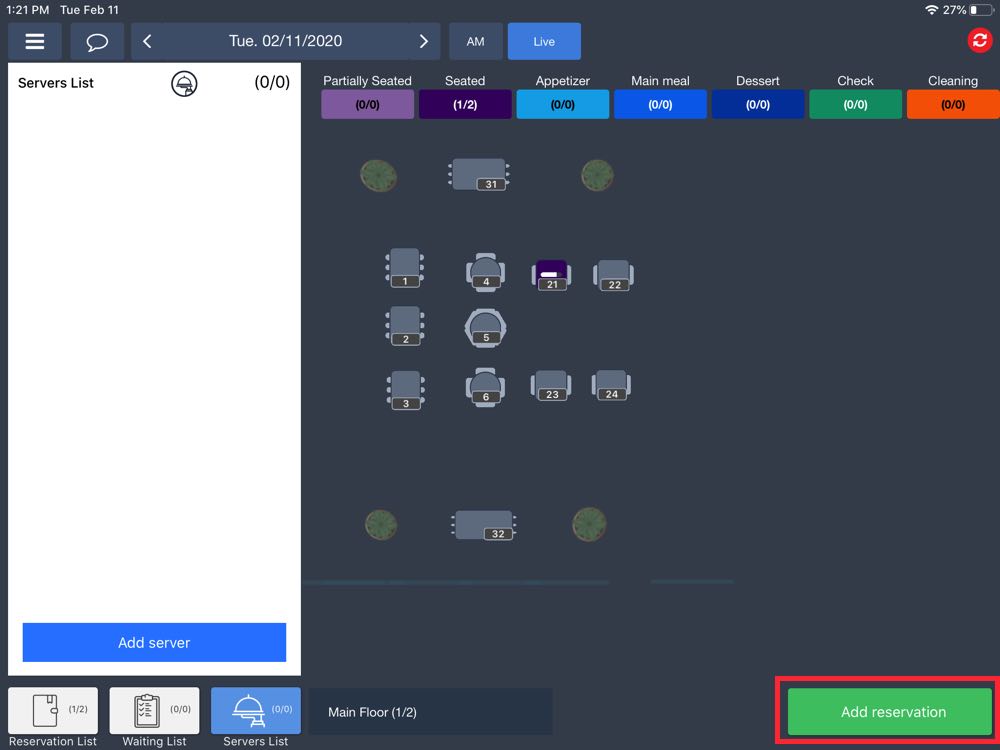
You can take a reservation by tapping the Add reservations button. This is available on other the Floor plan screen or the Sheet screen. You can access either of these screens from the Main Menu.
Typically, you would use the Add reservations button to enter a reservation taken over the phone.
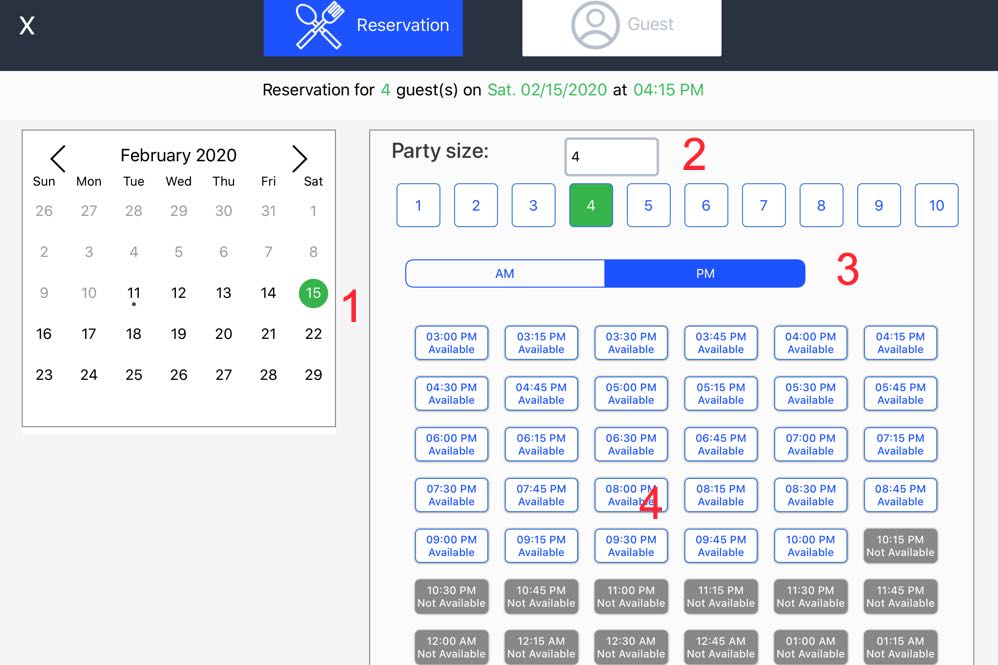
After tapping Add reservations, you will see the reservations dialog box. To complete the reservation, do the following:
1. Use the Calendar to select the month and day the reservation is requested.
2. Select the number in the party. Use one of the speed buttons or manually enter it.
3. Select either an AM or PM timeslot.
4. Select a reservation time.
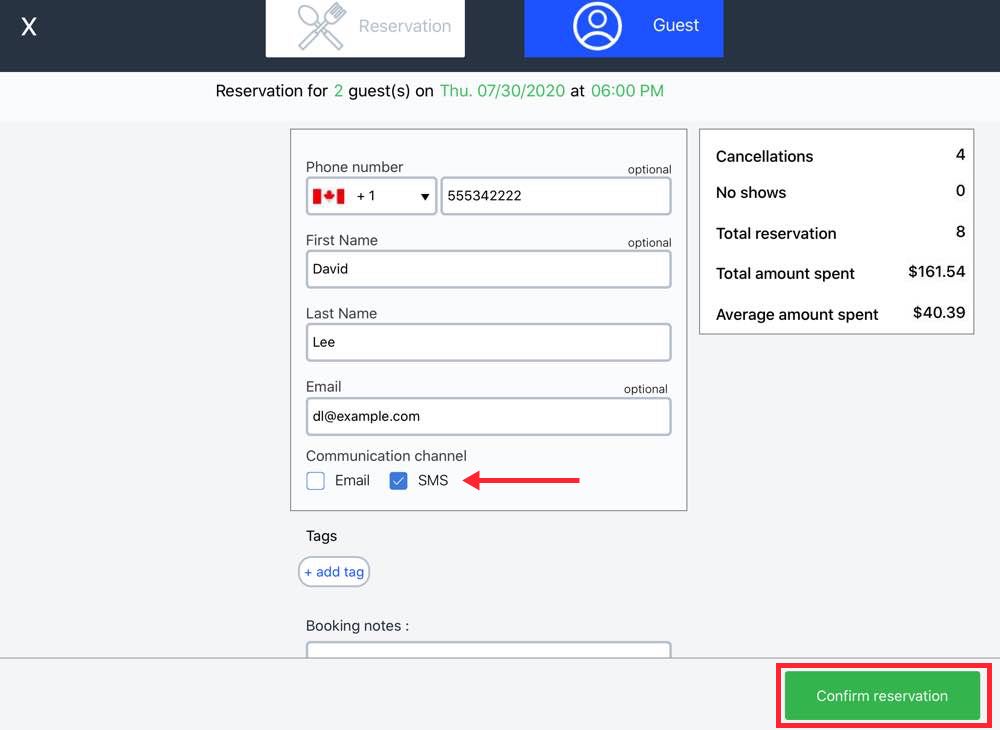
5. Enter the name and contact details of the reservation then tap Confirm reservation. If the party supplies an email and/or phone, you can also select the party’s communication preferences.
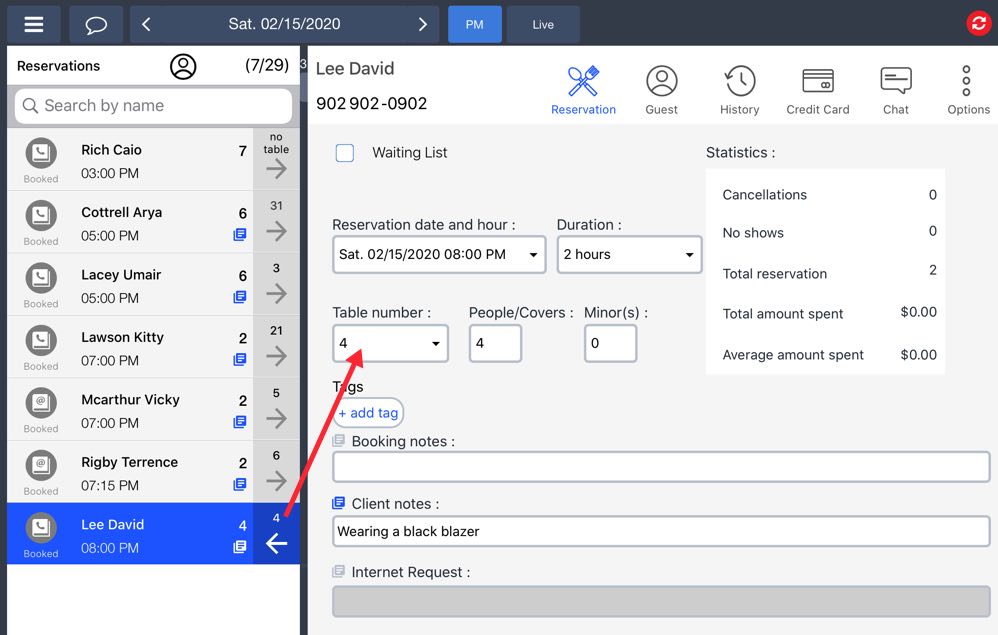
6. TouchBistro Reservations will add the reservation and automatically assign a table. You can tap the reservation and assign an alternate table if you wish. Likewise, you can add further details to this reservation:
|
Option
|
Description
|
|
Reservation Date and Hour
|
If you need to adjust the reservation date/time, tap this.
|
|
Duration
|
TouchBistro Reservations automatically determines default duration times. Tap this to increase or decrease the estimated table turn time.
|
|
Table number
|
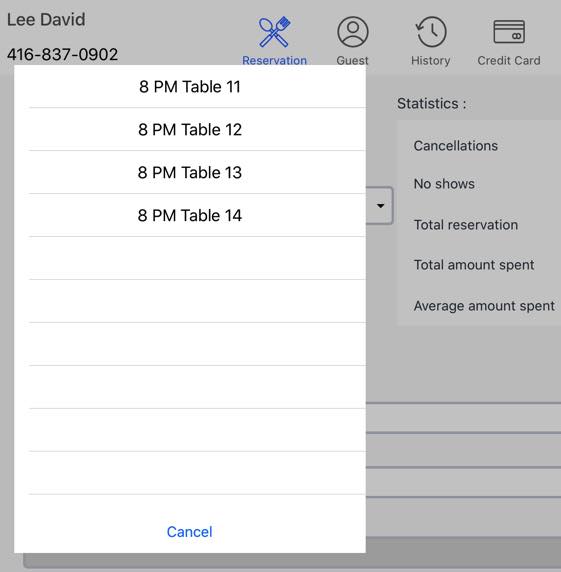
Tap to get other suggested tables.
|
|
People/Covers
|
Enter a new party size if necessary.
|
|
Minor(s)
|
It the party has one or more minors, indicate the number of minors. This does not add to the People/Covers number. If the People/Covers number is 4 and you enter 2 minors, the People/Covers number remains 4. It does not become 6.
|
|
Tags
|
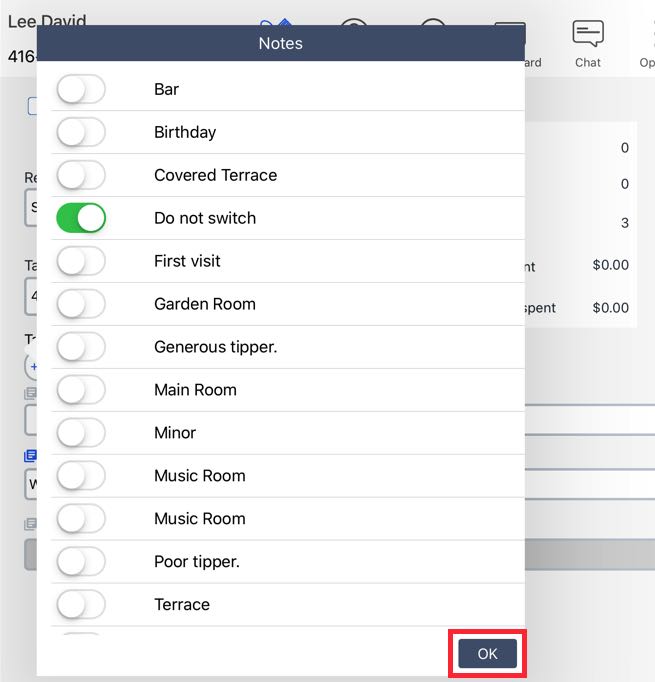
You can also tap the + add tag button to pop up a list of “canned” noted. Enable as many as desired and tap OK.
|
Chapter 2. Alternative Method for Taking a Reservation
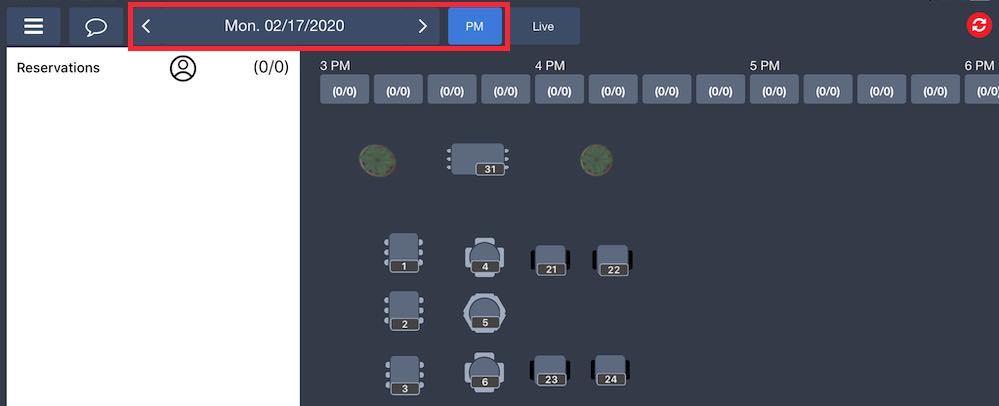
1. First use the Calendar tool and AM/PM Timeslot button to select the date for your reservation.
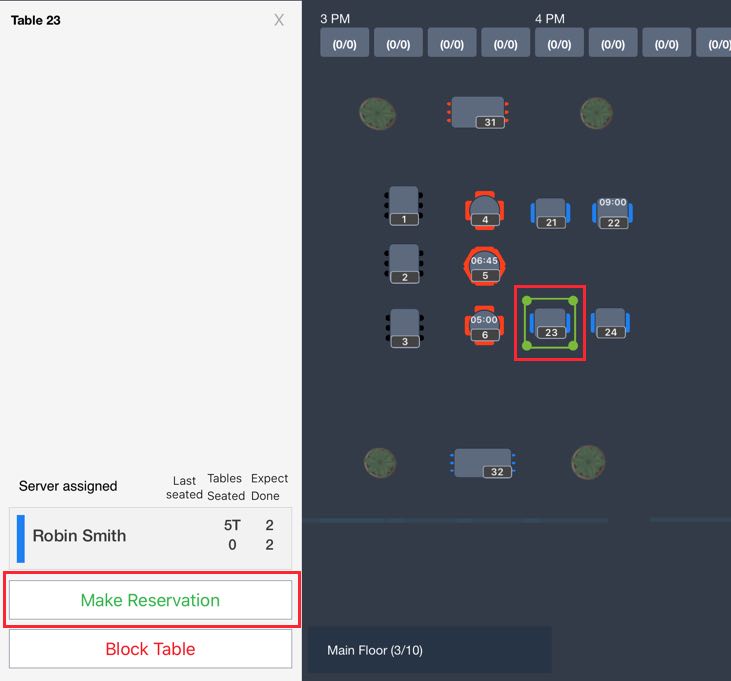
2. On the Floorplan, tap a table and tap Make Reservation. If a server has been assigned this table you will see details about the number of covers already expected. If this server seems overburdened, you might want to assign the reservation to a table in a different server’s section.
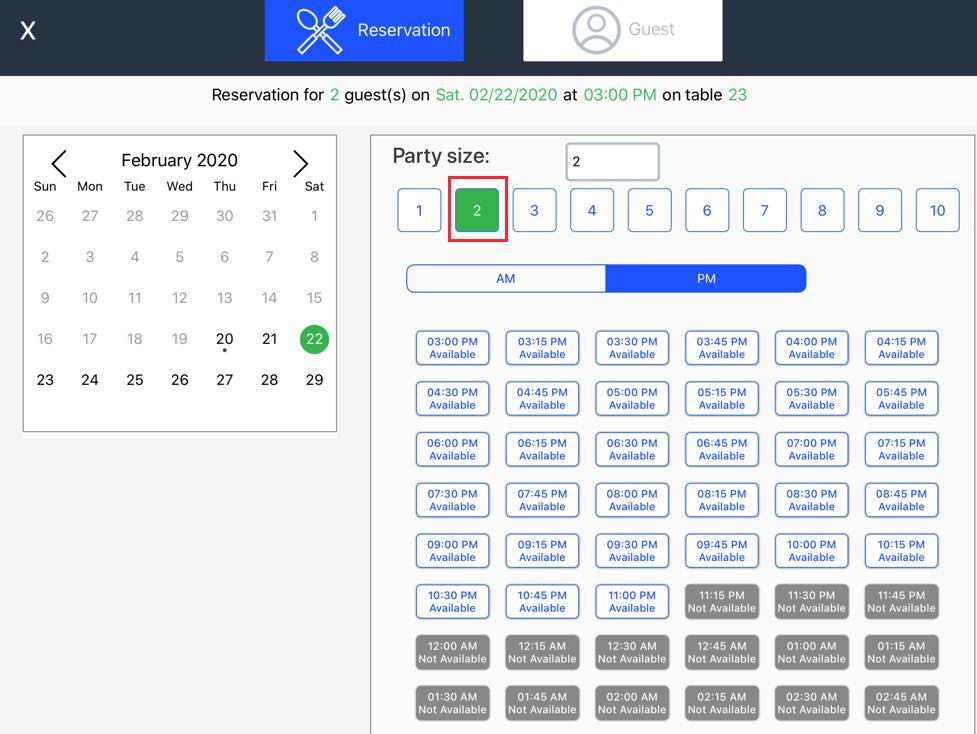
3. The calendar date will default to the date you selected via the Calendar tool. The Party size defaults to the maximum number of seats at the table. Simply select an available time and complete the rest of reservation as outlined above.
Chapter 3. Additional Reservation Options

The toolbar across the top of the reservation dialog box gives you additional options.
Section 1. Guest Tab
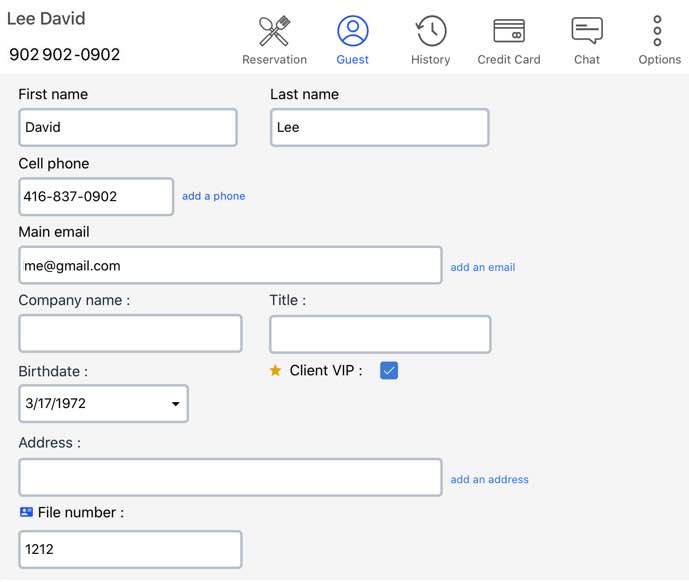
Under the Guest tab you can add additional particulars about the person:
|
Option
|
Description
|
|
Add a phone
|
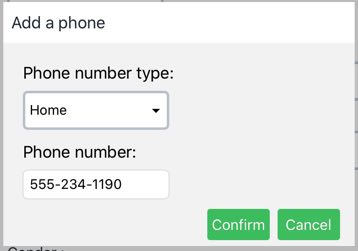
By default TouchBistro Reservations captures the guest’s cell phone. If you want to add additional phones, tap add a phone.
Uses the Phone number type drop-down box to select what type of phone it is (Home, Fax, Pager, etc.).
|
|
Client VIP
|
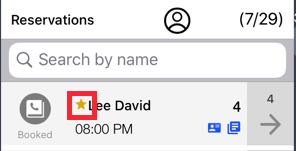
Enable if this customer is considered VIP.
Enabling VIP will place a small star next to the reservation name.
|
|
Address
|
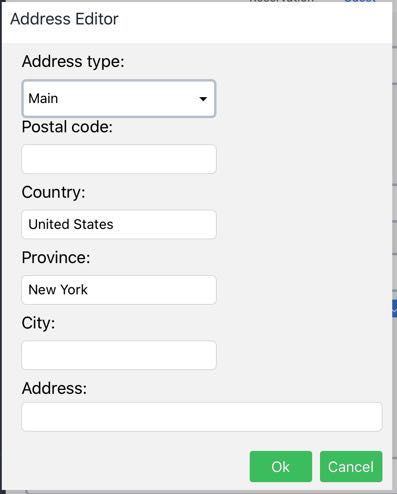
Tap the Address field to enter an address or up to two additional addresses for this guest.
|
|
File Number
|
If you assign File numbers to customers (for example, some customers have file numbers tied to charge accounts that get settled up at the end of the month), enter it here.
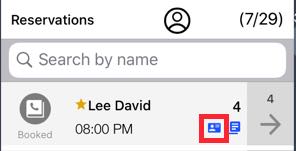
Guests with assigned file numbers will be donoted in the Reservations list with a small card file icon.
|
Section 2. History
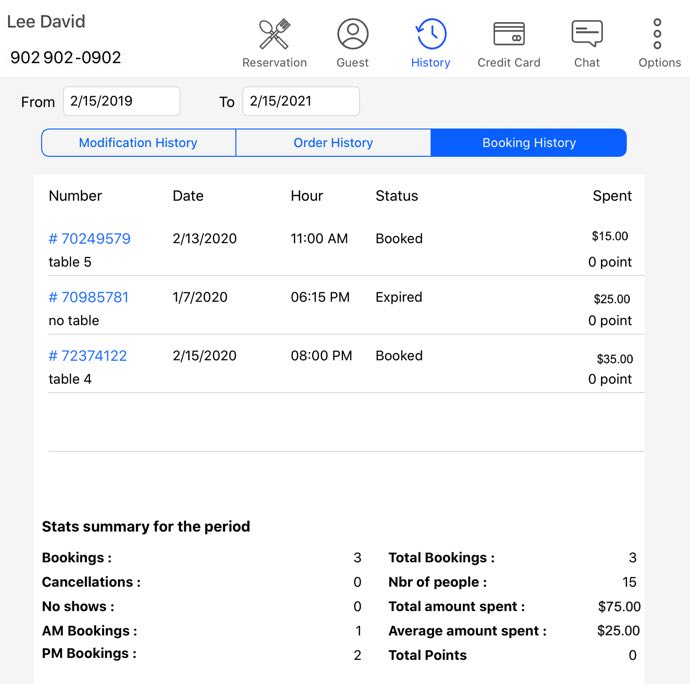
Tap the History tab to see particulars about this guest’s dining history.
Section 3. Credit Card
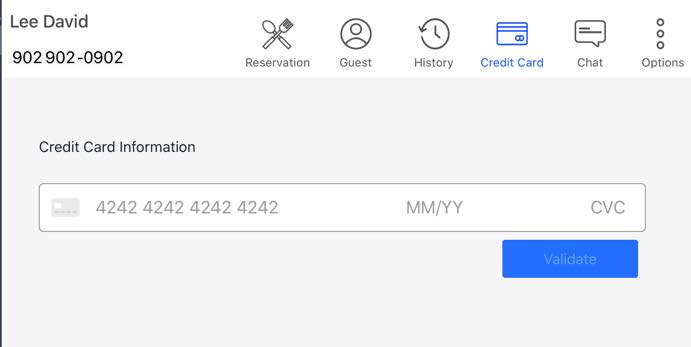
If you require a credit card to hold the reservation, you can tap Credit tab to take card details.
Section 4. Chat
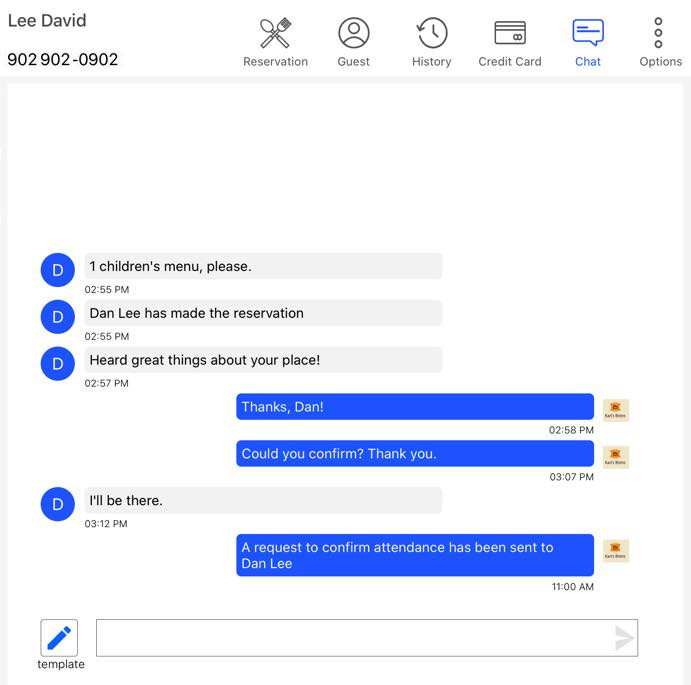
Tap the Chat tab if you want to communicate with your guest or see a history of your communications with the guest.
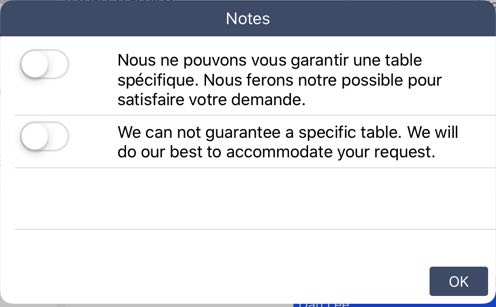
If you tap the Template ![]()  button you will get a list of canned responses.
 button you will get a list of canned responses.
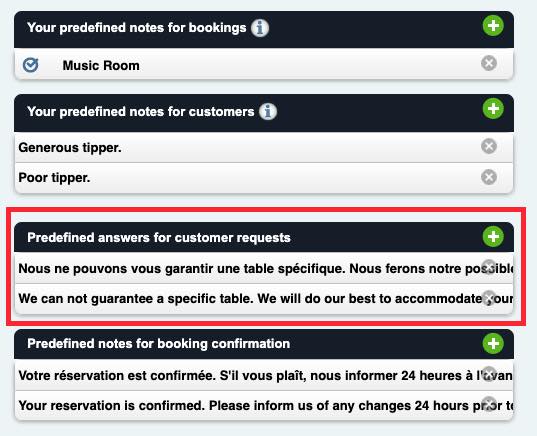
These canned responses are set up by the Administrator under Settings | Other.
Section 5. Options
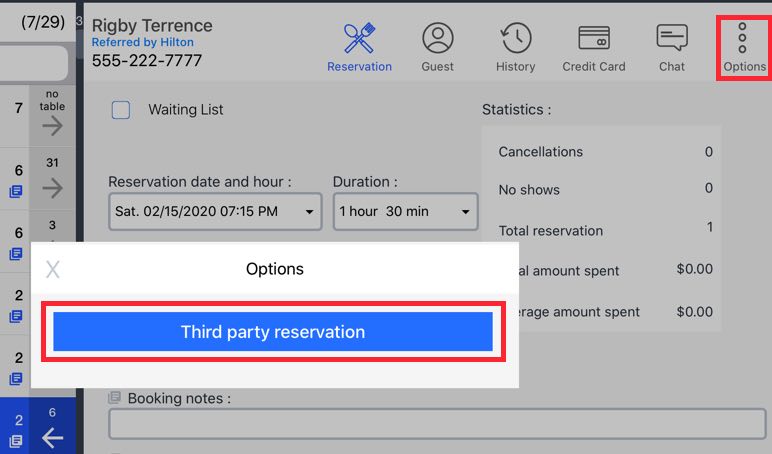
If the reservation was made by a third party (for example a hotel concierge), tap the Options tab and then tap Third party reservations.
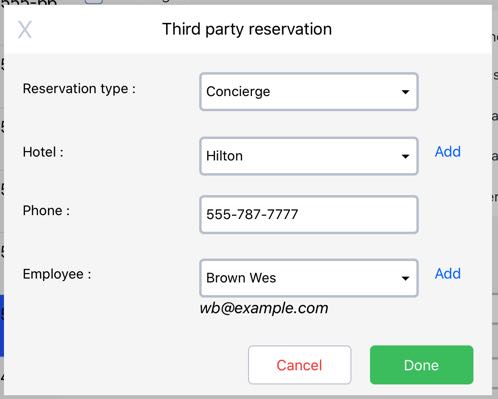
You can select Concierge, Company, or Third Party. If you select Concierge it will prompt you with hotels and other hospitality businesses that customarily refer or set up reservations for their guests. If a hotel or referring employee is not been set by your Administrator, you can tap Add and add a new hotel or employee name.
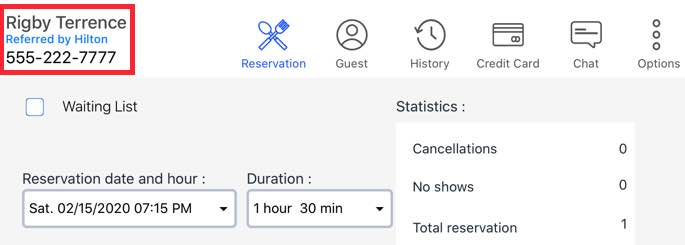
When you set up third party particulars for the reservation, the reserving third party will appear under the guest’s name on the Reservations dialog box.


 Email
Support
 Frequently
Asked Questions
