Setting Up Menu Categories using RMM
Before you being, note you can only create a maximum of 30 menu categories through Remote Menu Management.
Menu Categories should reflect how your physical menu is organized. For example, you might have categories like Appetizers, Sandwiches, Mains, Desserts, Soft Drinks, Beer, Wine. Each category gets set with some basic default settings that get applied to actual menu items added to the category. This way when you add actual menu items to a category, you don’t have to set each menu item’s course/taxes/chit printer etc.

1. Enable applicable taxes and give your Menu Category a name (e.g., Coffee).
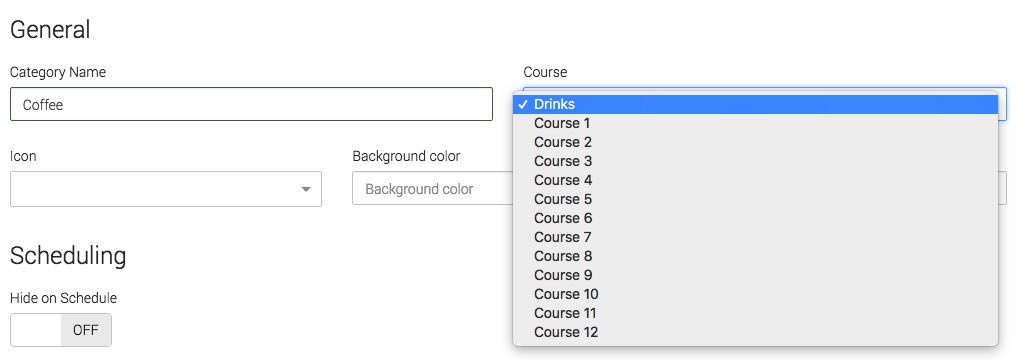
2. Your Menu Category will default to the Drinks course. If need to change this click on the Course drop-down list and select the appropriate course.
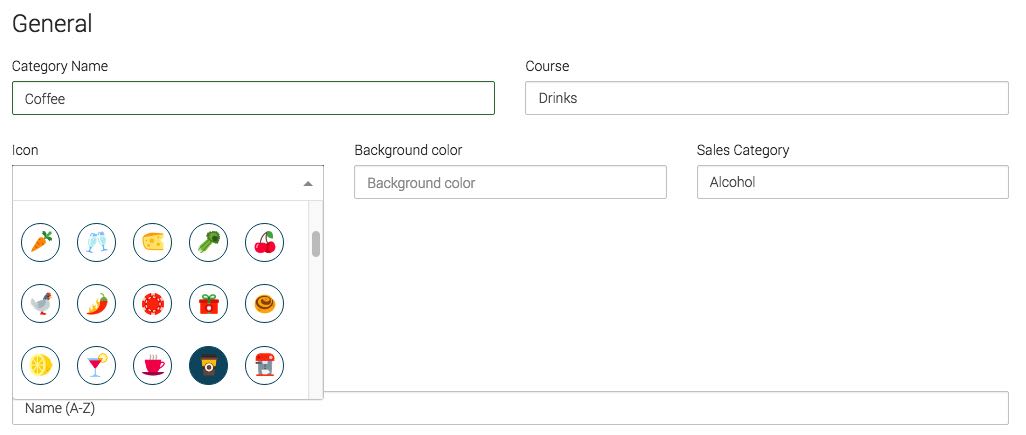
3. Click the Icon drop-down list and select an icon you would want to represent this category in the TouchBistro app.
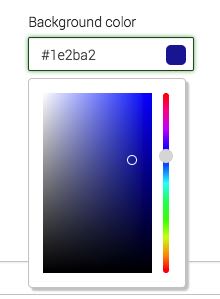
4. Click the Background Color drop-down list and select a color to represent this Menu Category for the Text view on the Order screen. Use the color picker tool to select the color.
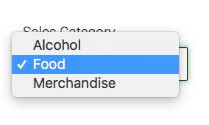
5. Click on the Sales Category drop-down list and select which Sales Category this Menu Category belongs to. For non-alcoholic drinks (coffee, soft drinks), you would typically use the Food sale category.
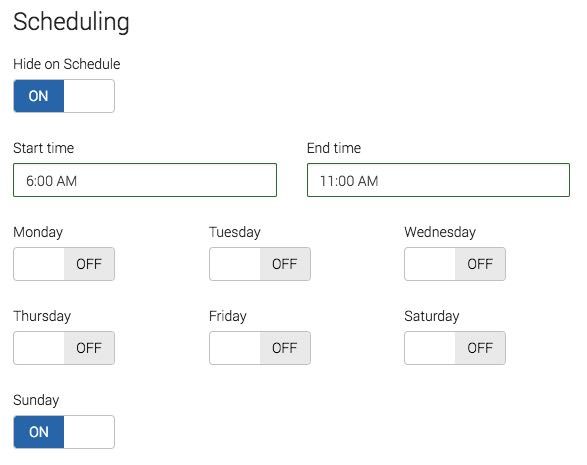
6. If you would like to temporarily hide this Menu Category (and associated menu items), set Hide on Schedule to On. If you would like to hide it on certain days and at certain times specify the time range and days it should be hidden. For example, we are required by law to prohibit alcohol sales on Sundays until after 11 am. So, we would set the time range for our opening time (8 am) until 11 am. We would then enable the days this category should be hidden during that time range. In this case, we set Sunday to On.

7. Click Sort Menu Items By drop-down list to set how you want menu items under this category to sort on the Order screen. Usually Custom (allow you to manually sort) is most appropriate.
8. Click Create.
Note: the cloud does not let you specify kitchen ticket printers. You need to complete that in the TouchBistro app after you’ve posted your changes.
See Next Step
See Previous Step


 Email
Support
 Frequently
Asked Questions
