Restaurant Setup Options in RMM
Table Of Contents
Section 1. Setting Staff Type Discount Restrictions in the App
Chapter 1. Introduction
When you enable Remote Menu Management, you can no longer access Menu screen options like Void Reasons, Gratuity Settings, Discounts, etc.
To edit these aspects, click Menu | Restaurant on the cloud.
Chapter 2. Gratuity Settings

Use this screen to set up an automatic gratuity (AutoGrat), that is a service charge automatically applied when serving larger parties.
1. To change how the AutoGrat appears on the guest check, edit the Gratuity Display Name field.
2. In the Gratuity Settings field, enter the minimum number required to trigger the gratuity addition on the Checkout screen as well as the % amount of the AutoGrat.
3. If you don’t want to charge an AutoGrat, set Minimum Party Size and Default % to 0.
4. Click Select Gratuity Calculation to determine how TouchBistro reports AutoGrats and treats them for tax purposes.
|
Option
|
Description
|
|
Include Gratuity in Tips
|
Tap if you want to treat gratuities and tips as the same.
|
|
Calculate Tax on Gratuity
|
Tap if your tax jurisdiction: Requires an automatic gratuity to be taxed (as a provided service). And Requires an automatic gratuity to be treated like regular wages paid to wait staff and you need to separate out this kind of gratuity for reporting purposes.
|
|
Separate Gratuity from Tips
|
Tap if your tax jurisdiction: Only requires automatic gratuity to be treated like regular wages paid to wait staff and you need to separate out this kind of gratuity for reporting purposes.
|
5. Click Select Gratuity Calculation to specify if the AutoGrat should be calculated on the subtotal after discounts are applied (post-discount) or before discounts are applied (pre-discount).
6. Click Update.
Chapter 3. Voids
Click Voids to customize valid reasons for a void. Voids are typically used to send corrections to the kitchen. To add a new void:
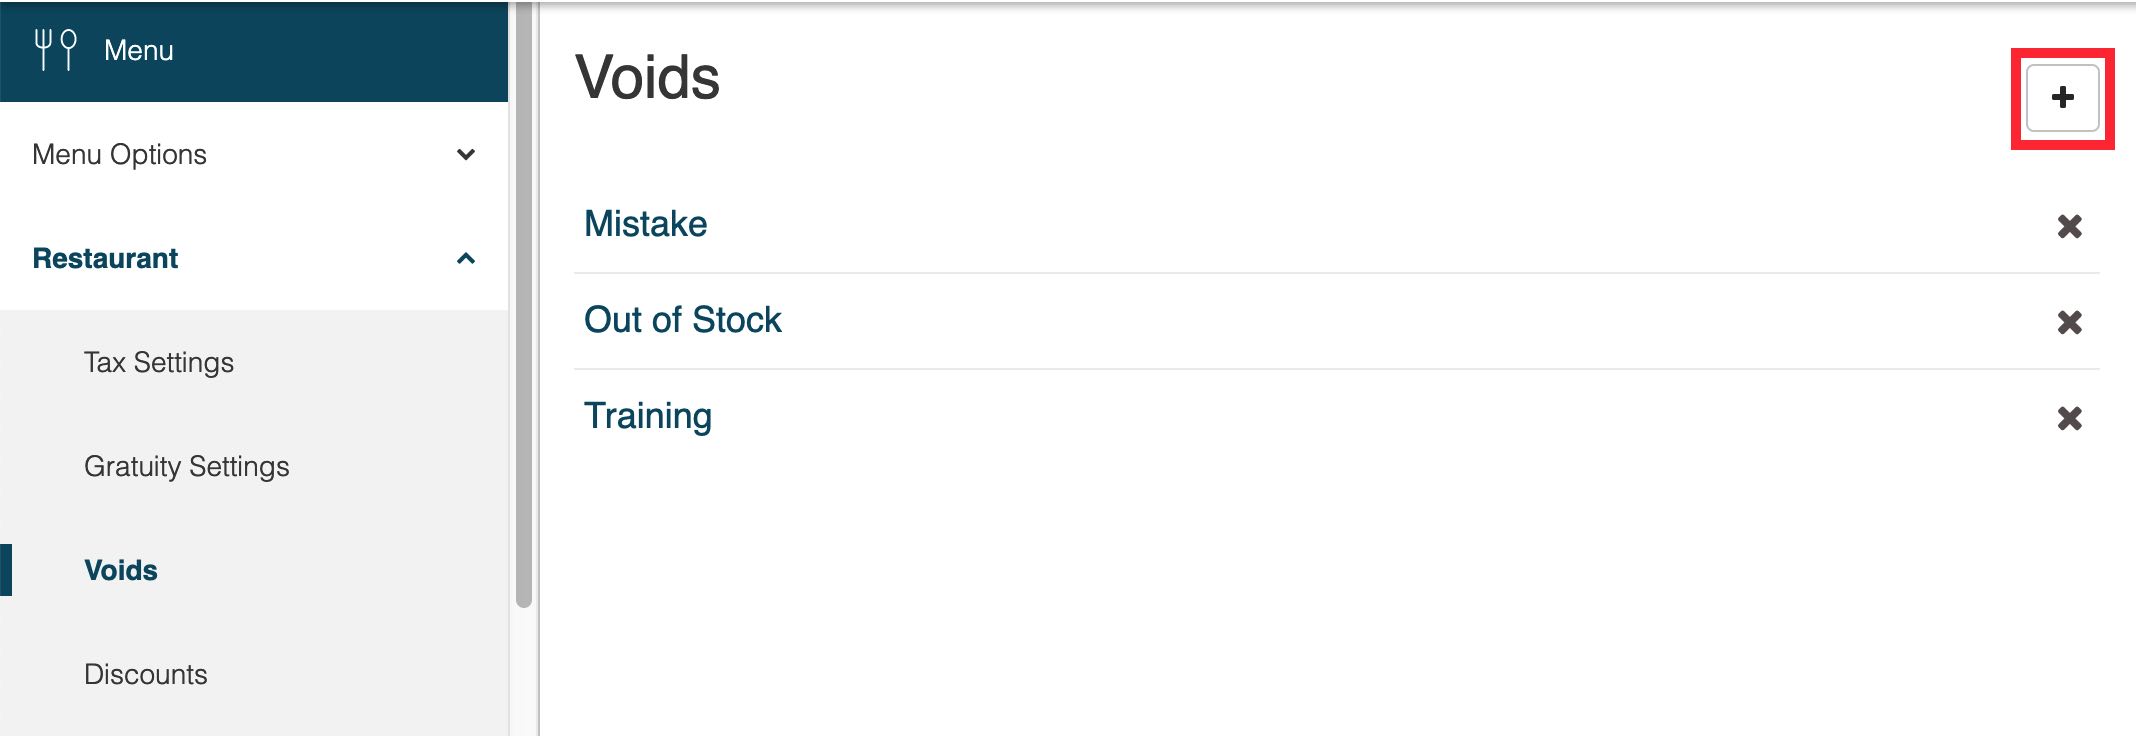
1. Click Menu | Restaurant | Voids.
2. Click the Add + icon.

3. Enter your void reason’s name in the Void Name field.
4. If you (the venue) are required to still pay tax on a voided item, enable Taxable. In some jurisdictions, the business owner may still be required to remit a tax on an item voided. For example, an alcoholic drink is served but the drink was not requested by the customer. The server voids it and the drink is poured down the sink. The customer walks away without being billed in any way for the drink. However, the tax authority still requires the business owner to pay a tax on a drink decanted. You can ensure such tax compliance by enabling Taxable. If this is enabled, no tax will appear on the Order screen. However, the Void report will indicate which voided items are taxable and the amount that was voided. You can use the Void report to calculate taxes that must be remitted for voided items.
5. You can also flag some voids to return the item to the inventory count when voided by enabling Returns Inventory. For example, a customer orders a bottle of beer. The inventory is reduced by one. The customer notes the served beer is incorrect. One can void the beer and, if the bottle has been not opened, return it to inventory.
6. Click Create.
Chapter 4. Discounts
Discounts are price reductions applied by a server to individual menu items. For example, a 100% Comp or a $2 off coupon discount. To add a Discount:
1. Click Menu | Restaurant | Discounts.
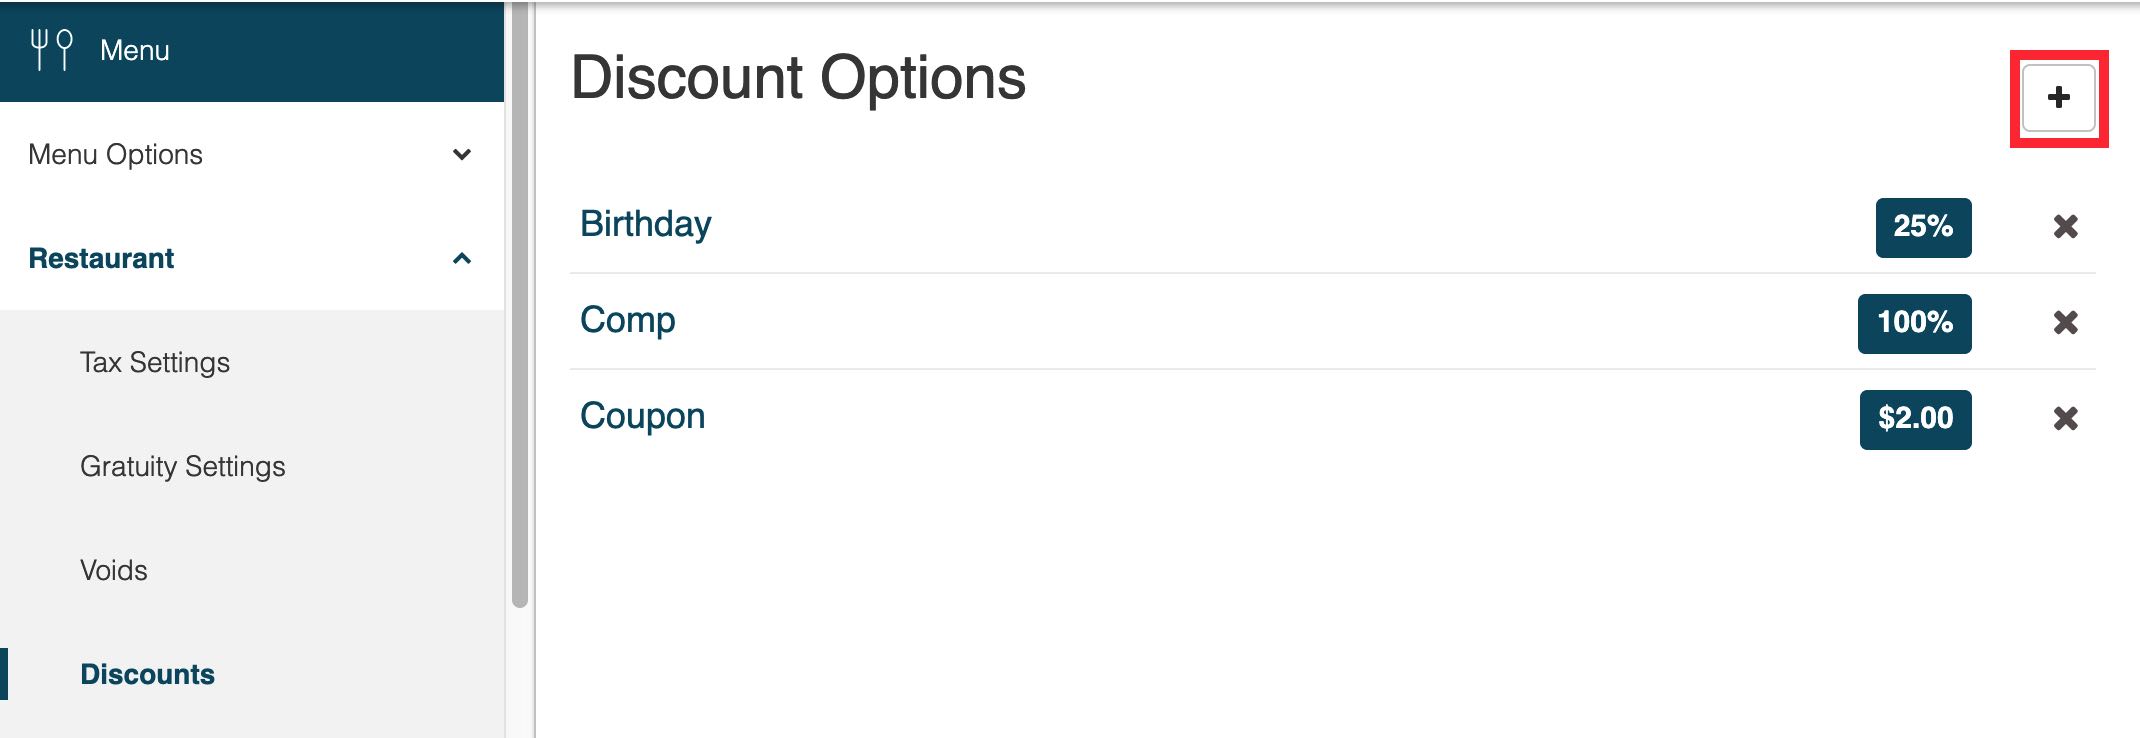
2. Click the Add + icon.
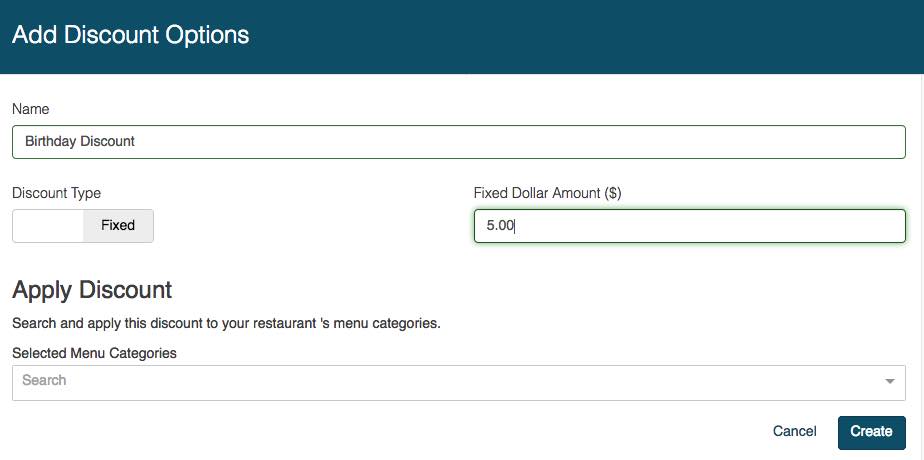
3. Enter a name for this discount. For example, Birthday Discount.
4. Click Discount Type. Set it to Fixed if you want the discount to be a fixed dollar price reduction (e.g., $5 off). Set it to Percentage if you want the discount to be a percentage reduction (30% off, 100% off).
5. If you set it to Fixed, enter how many dollars should be deducted from the menu item’s price if this discount is applied.
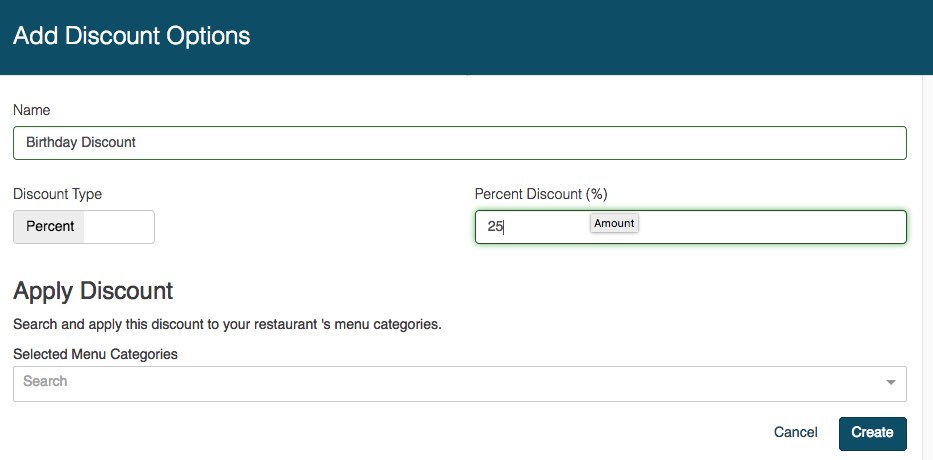
6. If you set it to Percentage, enter the percentage reduction that should be applied to the menu item’s price.
7. Click the Selected Menu Categories drop-down list to select which categories the discount can be applied to. Leave it blank if you want the discount to be available to all menu items.
8. Click Create.
Section 1. Setting Staff Type Discount Restrictions in the App
If you would like to make your discount available to only certain staff types (for example, a manager staff type), open the app after you published your discounts.
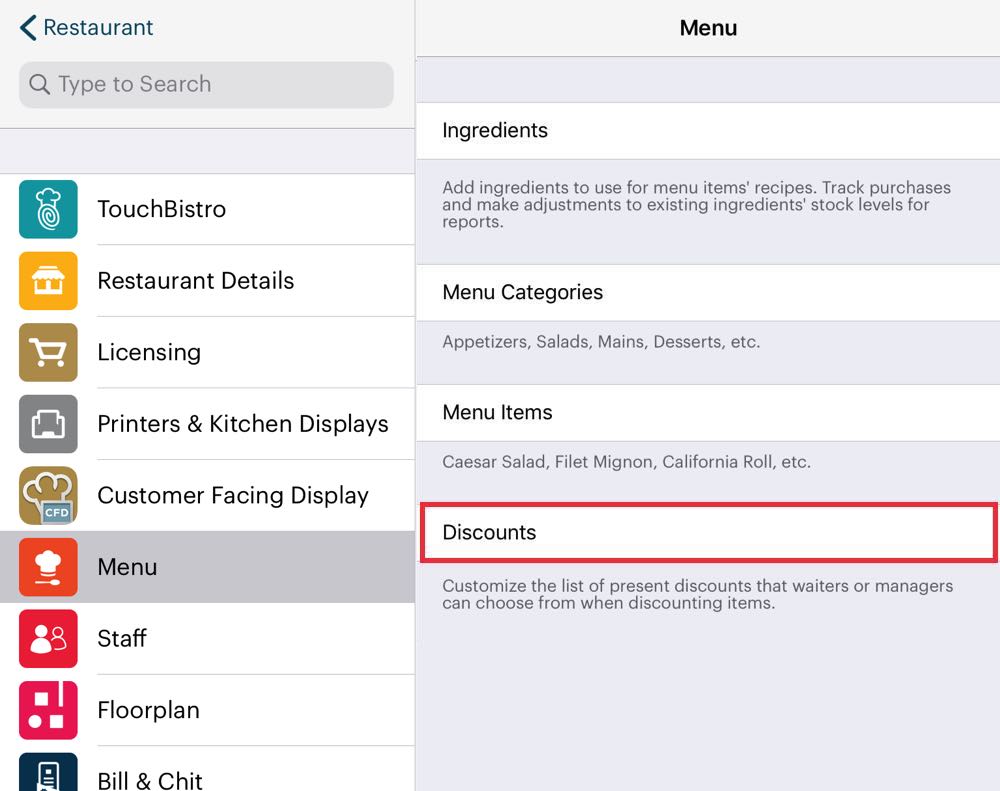
1. Tap Admin | Admin Settings | Menu | Discounts.
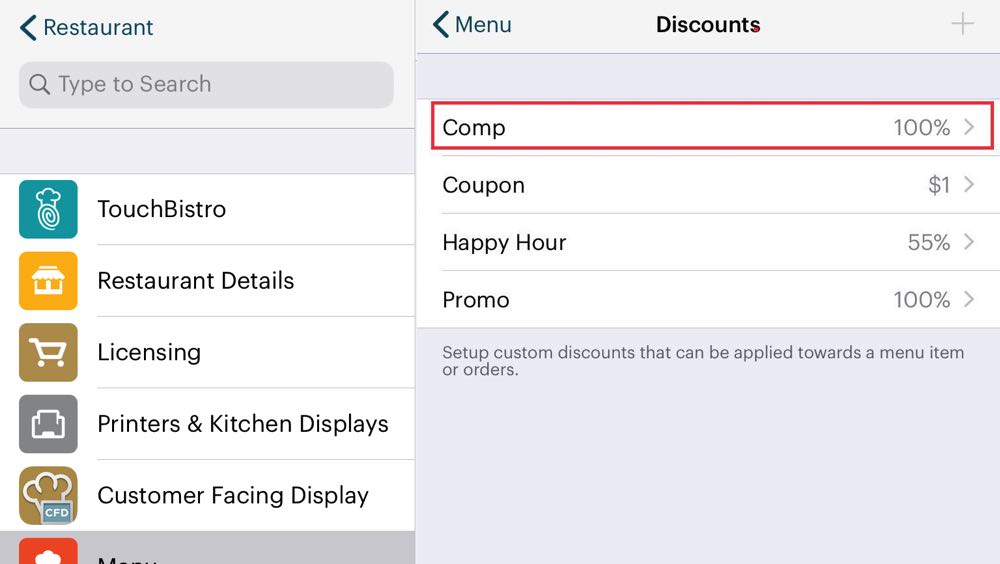
2. Tap the discount you wish to restrict. For example, a 100% comp.
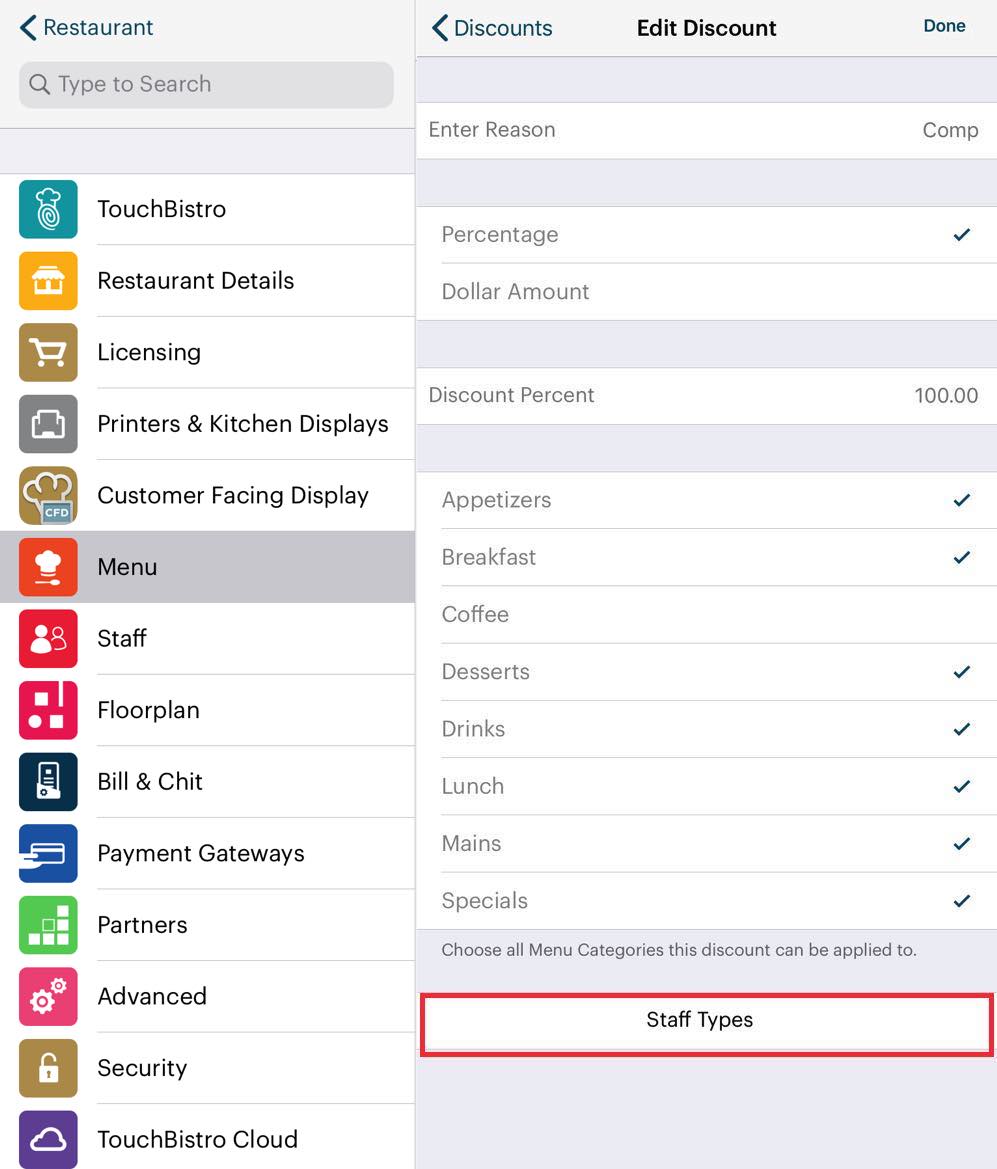
3. Tap Staff Types.

4. If there’s a checkmark next to a staff type that shouldn’t have access to this discount, tap the staff type to remove the checkmark. Repeat for any other staff types. Tap Back.
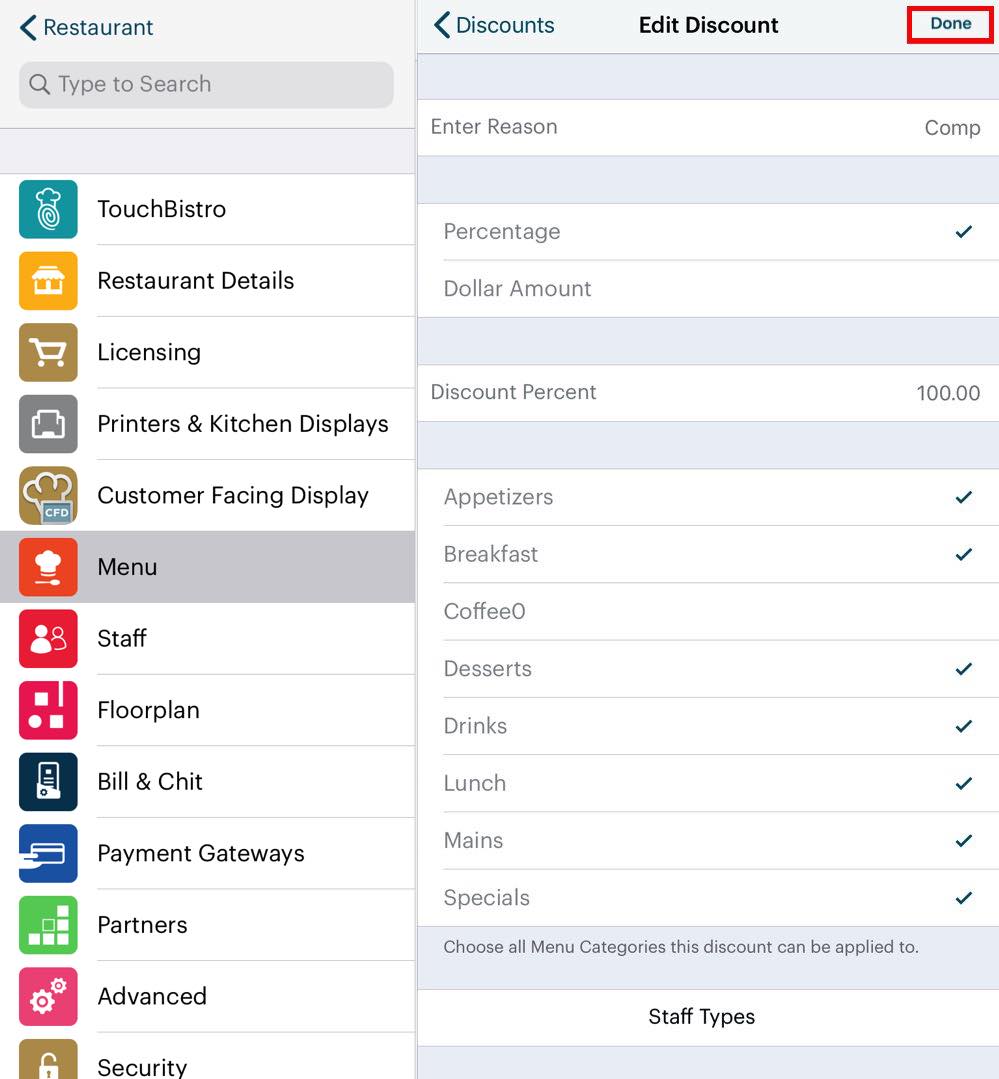
5. Tap Done.
Chapter 5. Promotions
Promotions are timed discounts. They are applied automatically when an item associated with a promotion is ordered. For example, you might have Happy Hour promotion. Apps Monday – Thursday from 4 pm to 6 pm are 30% off. In this example, we’ll set up a promotion where coffee is discounted for early bird customers.
1. Click Menu | Restaurant | Promotions.

2. Click the Add + icon.

3. Give the promotion a name (e.g., Early Bird Coffee Special).
4. Click Enabled and turn this promotion on. If you want to temporarily disable it, click Enabled to turn it off.
5. You can leave Promotion Type set to Price Adjust. If you select Hide Item, you can use this screen to hide certain Menu Categories.
Section 1. Adjust Pricing

1. You can discount items one of three ways: 1) Discount by a fixed dollar amount 2) Discount by a percentage 3) Fixed price.
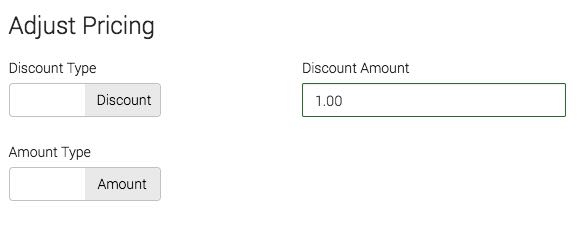
2. If Discount Type is set to Discount and Amount Type is set to Amount, enter the dollar amount you want to discount a menu item. For example, if this discount is applied to coffee, this discount drops the normal price of a coffee by $1.
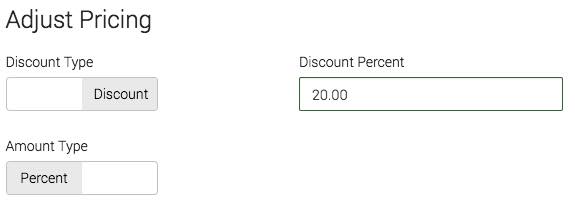
3. If Discount Type is set to Discount and Amount Type is set to Percentage, enter the percentage amount you want to discount a menu item. For example, if this discount is applied to coffee, this discount drops the normal price of a coffee by 20%.

4. If Discount Type is set to Fixed, enter the fixed price you want to charge for the associated menu items. For example, all coffees this promotion is applied to are charged out at $1.
Section 2. Scheduling
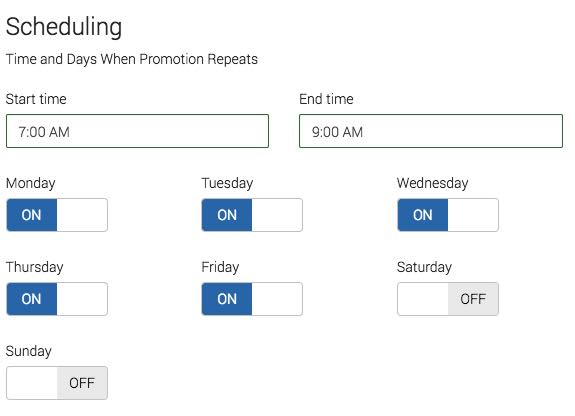
5. Use the Start/End time fields to select when this promotion should start and when it should end.
6. As well, enable which days you want this promotion to be active on. In the above example, we want our coffee promotion to automatically discount all coffees between 7-9 AM, Monday to Friday.
Section 3. Apply Promotion

7. Use the search field to locate menu items this promotion should be applied to. For example, search for and select your coffee menu items.
8. Click Create.
Chapter 6. Payout Reasons
TouchBistro allows you to set up and track cash drawer payouts (cash coming out of the cash drawer to pay for items related to your business) as well as pay ins (cash coming into your cash drawer for a reason other than a sale). Here you can set up valid reasons for a pay in/out.
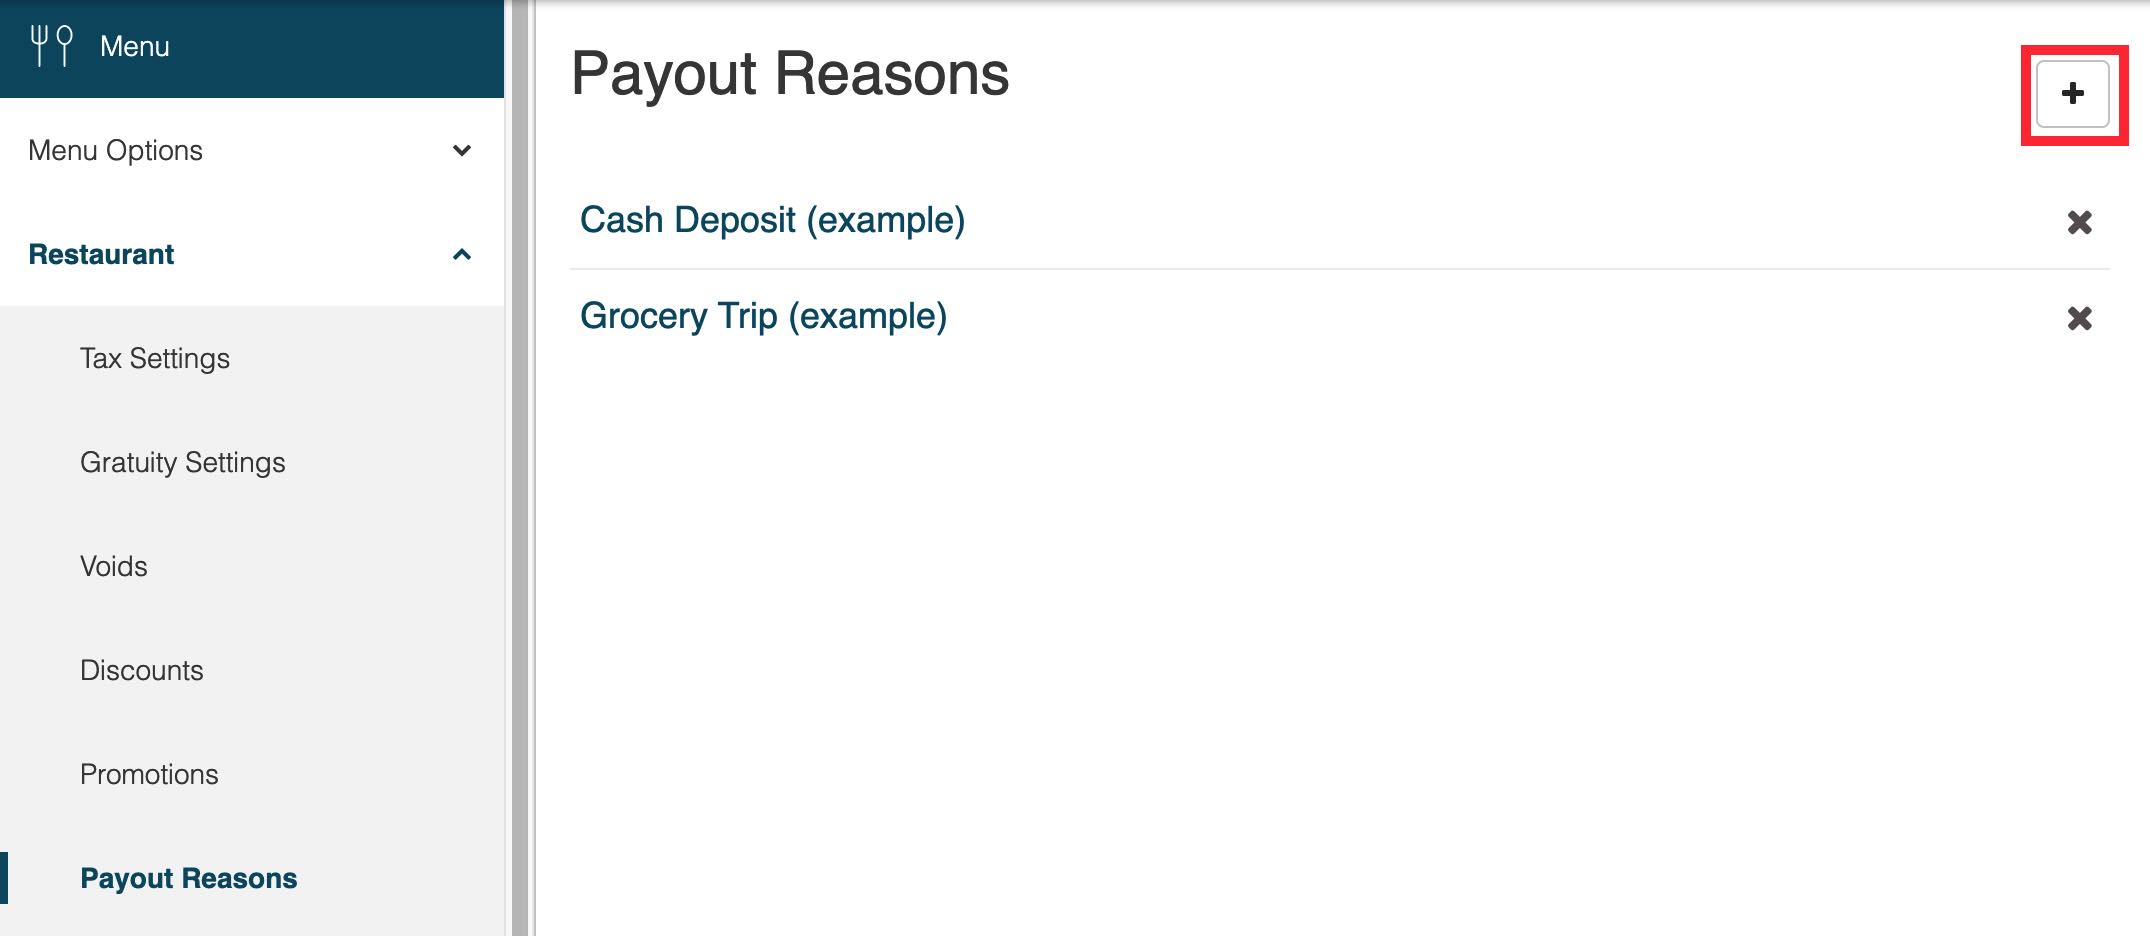
1. Click Menu | Restaurant | Payout Reasons.
2. Click the Add + icon to add a new payout or pay-in reason.

3. Give this reason a name. You don’t have to define it as a payout or pay-in on this dialog box. For example, you might add a payout reason like ‚ÄúPinball machine refund‚Äù or ‚ÄúVendor payment‚Äù. A pay-in reason might be something like “Float addition”.
4. Click Create.
Chapter 7. Takeout Types
Takeout Types lets you create custom takeout types. For example, instead of using TouchBistro’s generic “Take Out” you might create takeout ypes like Drive-Thru and Uber Eats to help with expediting the order.
1. Click Menu | Restaurant | Take Out.

2. Click the Add + icon to add a new takeout type.

3. Enter a name (e.g., Drive-thru).
4. Click Create.


 Email
Support
 Frequently
Asked Questions
