Setting up Item Modification
Table Of Contents
Chapter 1. Step by Step Instructions
Section 1. Using Menu Items as Modifiers
Chapter 1. Step by Step Instructions
You have your sales and menu categories set up and you’re probably primed to start editing your menu. But there’s one more step you want to do before entering your menu. You will probably need to set up modifiers. Modifiers are common ways patrons might want to modify a food or drink item. For example, if you serve steak you would have modifiers like rare, medium, and well done. Drinks might be ordered with or without ice, with/without a lemon. TouchBistro provides a large number of modifiers by default. Review them and add your own.
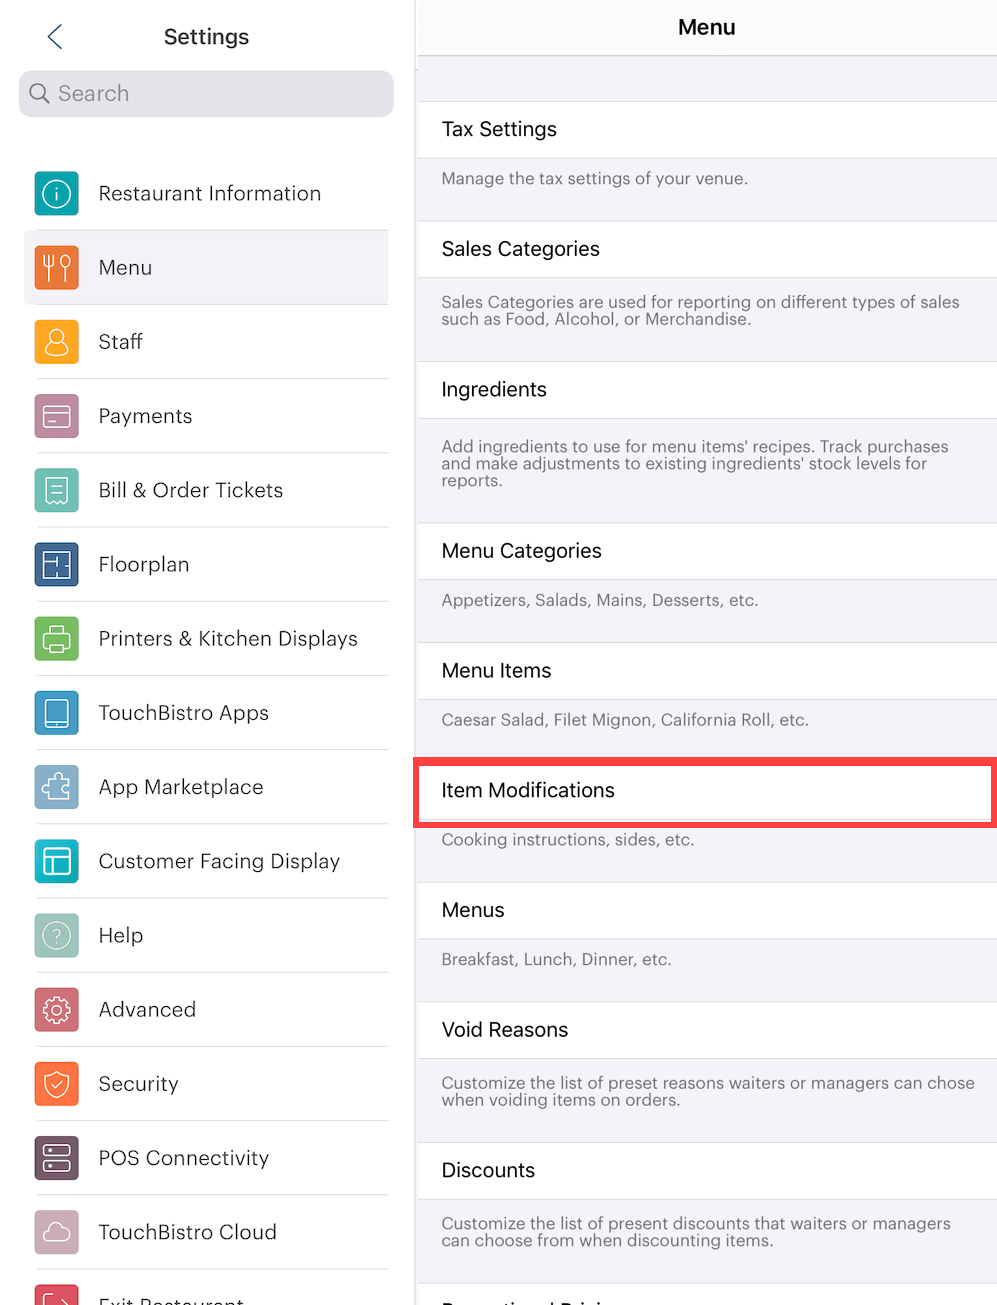
1. Tap on Item Modifications.
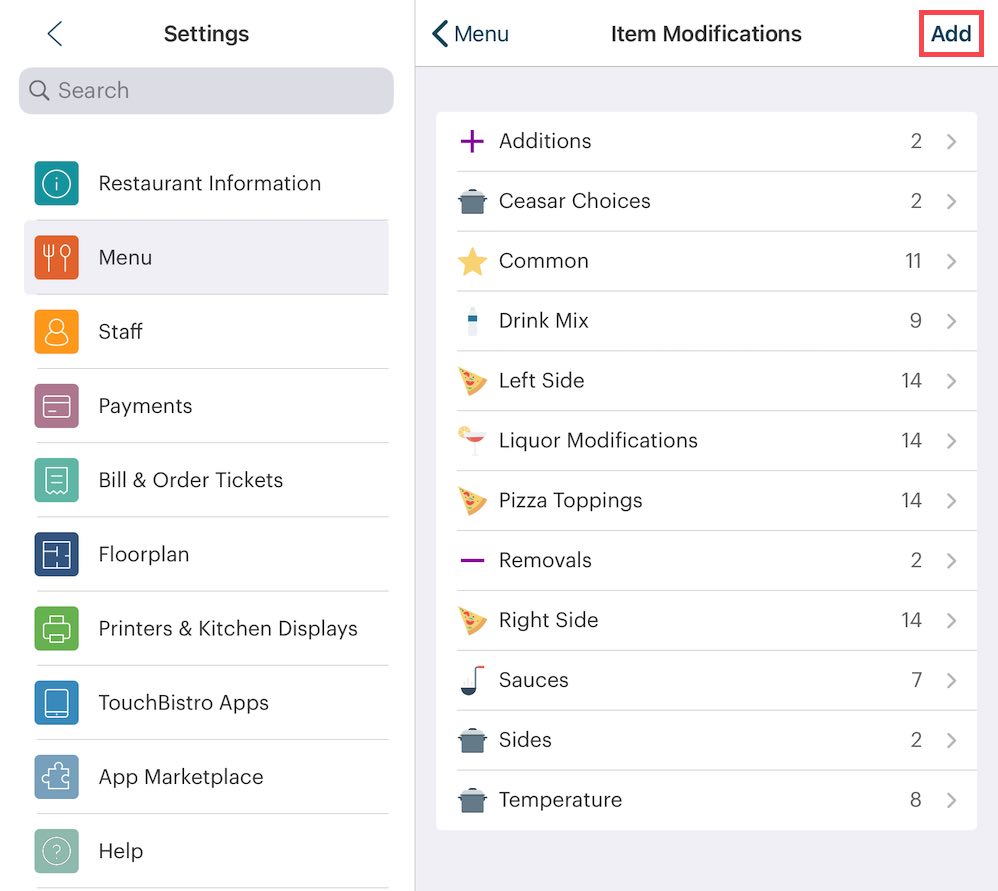
2. You will see a list of all of your current modifier groups. You can tap an existing to edit or assign it to multiple menu items. To add a new modifier group tap Add.
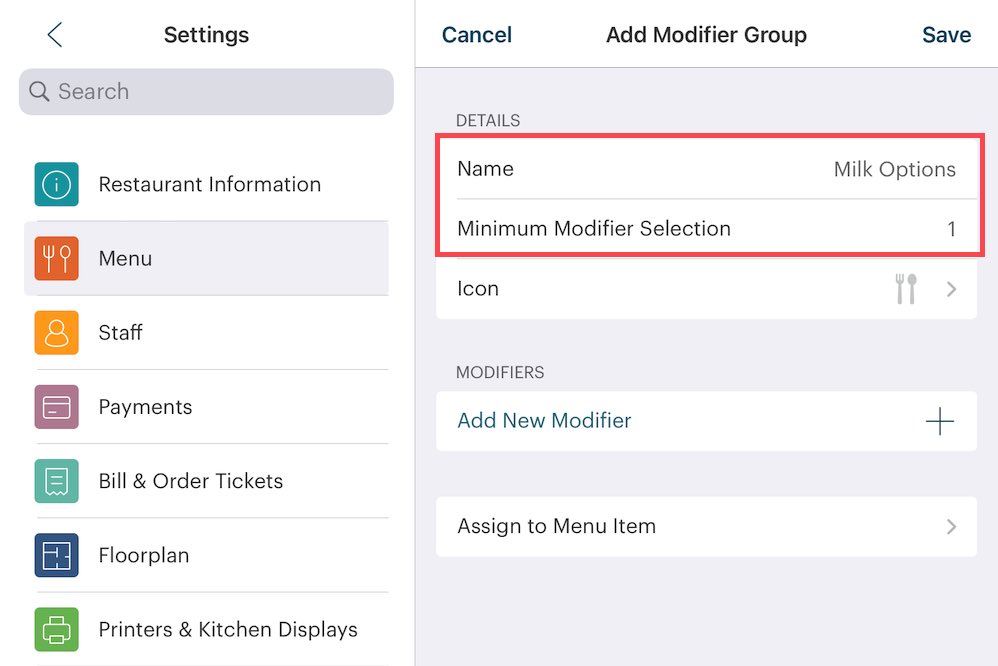
3. Name the modifier group. For example, if you serve specialty coffees like cappuccinos and lattes, you might give your customers milk options (do they want it with soy milk? Whole milk?). So in this example, we’re adding a Milk Options modifier.
4. For forced modifiers, change the minimum number of selections required per menu item to 1 (or higher, depending on how many forced options you would like). You would create a forced modifier to ensure the order taker always asks the customer how he or she wants the item. In this case, what kind of milk? If you have steak on your menu you would set the Cooking modifier to 1 to force the order taker to ask “how do you want it done” before being able to add the item to the table.
5. For optional modifiers, keep the minimum number of selections required per menu item at 0.
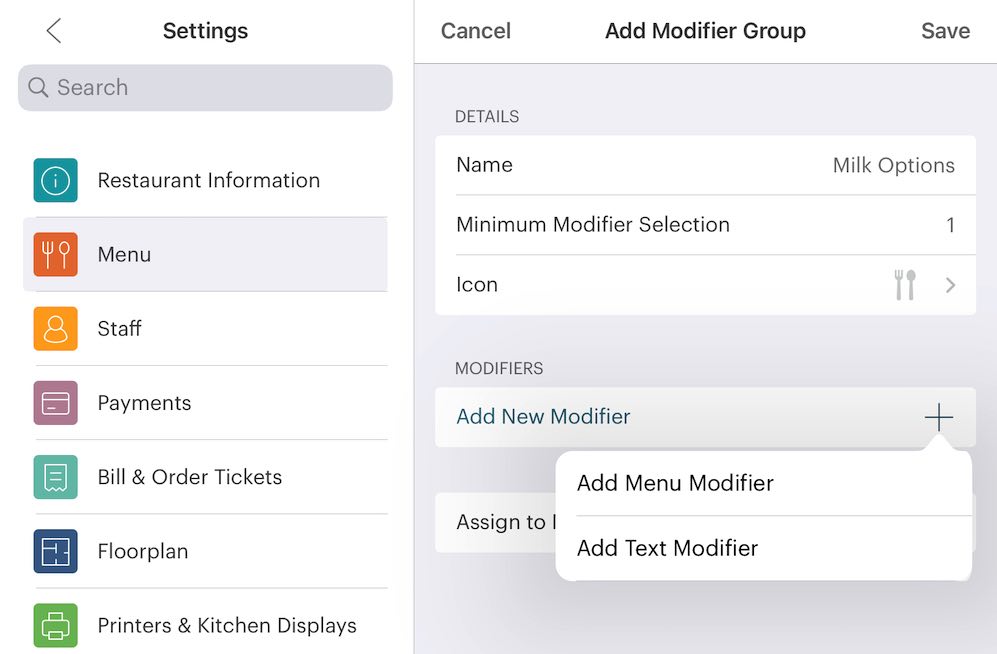
6. Tap on the Add + icon, then tap Add Text Modifier to add text-based modifiers or tap Add Menu Modifier to use existing menu items as addition options.
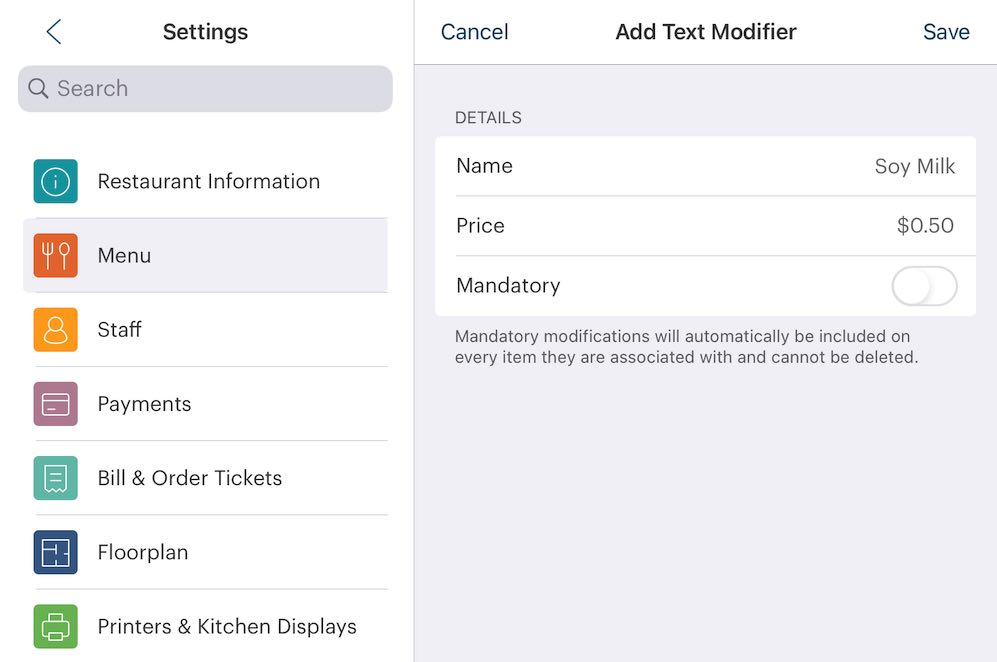
7. In this example we’re adding a Text Modifier. So name your first modifier (e.g., Soy Milk).
8. If the modification comes with an additional cost, adjust the price (i.e., how much the modification adds to the base price). If not, leave it at zero.
9. If you want this modifier to always be added whenever the menu item is ordered, slide Mandatory to the green position. For example, let’s say in your jurisdiction, selling a drink in a bottle comes with a mandatory deposit. You could add a deposit modifier that automatically adds a 10 cent deposit.
10. Tap Save.
11. Continue adding modifiers (e.g., types of milk) under the specific group (e.g., Milk Options).
![]()
12. Tap Icon to associate this Modifier Group with a representative icon.

12. If you’d like to reorder your modifier items (in the order they are presented to the server), tap Reorder.

14. Tap and hold on a pickup bar and drag and drop into the new order location. Tap Done.

15. Finally, you need to associate this modifier with one or more menu items, that is what menu items should invoke the Modifier popup. Tap Assign to Menu Item.

16. Tap a Menu Category across the top and then tap all items that should be associated with this Modifier Group. Tap Save.
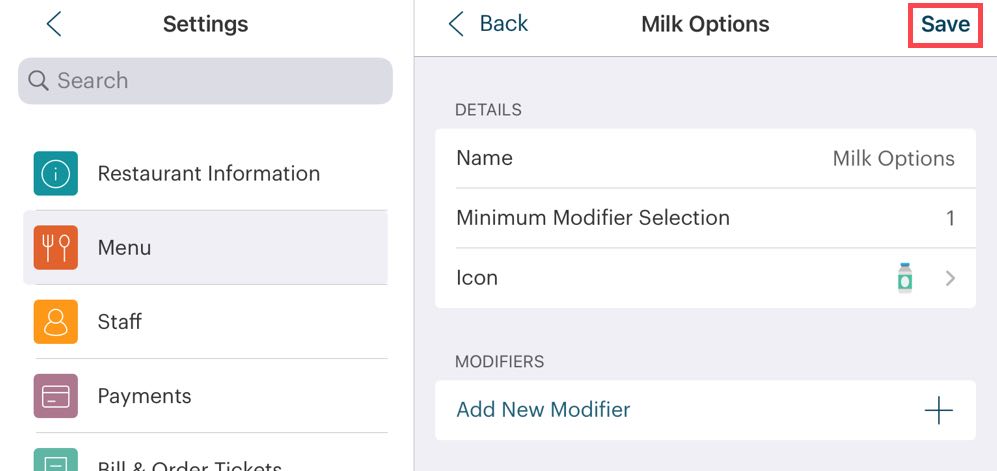
17. Tap Save when you’ve fully completed this Modifier Group.
Section 1. Using Menu Items as Modifiers
A classic example of using menu items as modifiers is using your menu items from your Sides or Appetizer category as part of a combo meal. So a Main always comes with a choice of a Side (fries, salad, soup, etc.) but you also offer those Sides for separate order under an Appetizer Menu Category. As part of a main, the side is free or comes with a small upcharge. If ordered a la carte, it’s charged at the full menu price. So, you can use Menu Item modifiers to add other menu items as sides, which are including with the main’s price or added for a small upcharge.
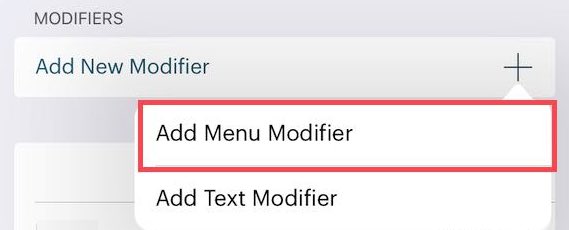
If you want to use existing Menu Items as a modifier, tap Add Menu Modifier.

After tapping Add Menu Modifier, tap the items you want to offer as Menu Item modifiers and then tap Save.
Note: If your Menu Item, used as a modifier, itself has modifiers (for example, you have a Caesar Salad with a chicken/no chicken modifier), TouchBistro will prompt for the menu item’s modifier. So for example, if a person orders a Main, TouchBistro will prompt for a side modifier.
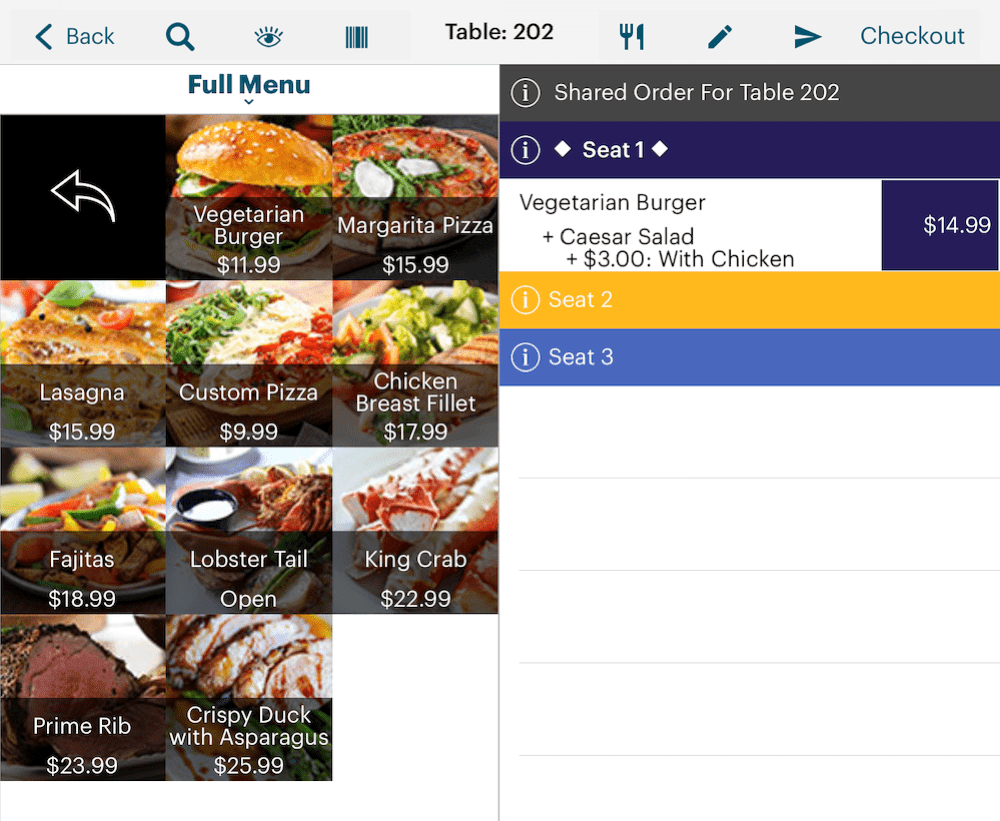
In the example above, the customer selects Caesar Salad, TouchBistro will then prompt for chicken/no chicken.
Note: If a menu item used as a modifier has an upcharge, TouchBistro will use its configured tax setting to calculate the upcharge. For example, suppose you sell olives as a menu item and they are tax-free because they are defined as a grocery product. You also use it as a menu modifier for your mains and you’re offering it as an optional side with a $1 upcharge. Since the olives have been marked tax free, TouchBistro will not tax the $1 upcharge.
For a detailed guide on using Menu Modifiers, especially if you use the inventory system and/or food cost reporting, see this guide. You may also want to create menu item modifiers that are hidden (unavailable for order) but reflect accurate inventory usage and food cost reporting. If so, see this guide.
Chapter 2. Deleting a Modifier Item
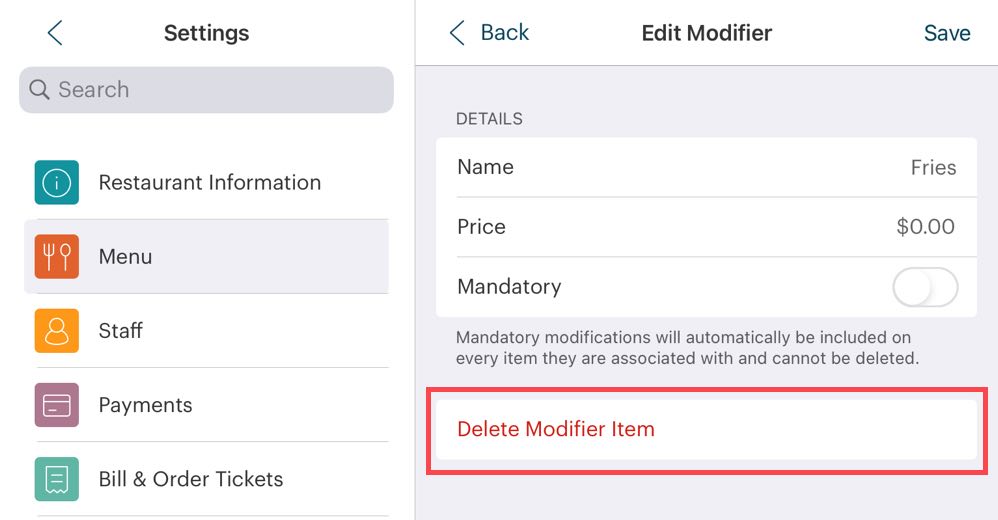
To delete a modifier, open the item under the Modifier Group and then tap Delete Modifier Item.
Chapter 3. Deleting a Modifier Group

To delete a modifier group, open the Modifier Group and tap Delete Modifier Group.


 Email
Support
 Frequently
Asked Questions
