
 Email
Support
Email
Support Frequently
Asked Questions
Frequently
Asked Questions
Setting up Menu Items
Table Of Contents
Chapter 3. Additional Details Area
Chapter 4. Deleting a Menu Item
Chapter 1. Introduction

Now that you’ve established your categories and possible ways people might request drinks or food items to be modified, it’s now time to create your own menu items.
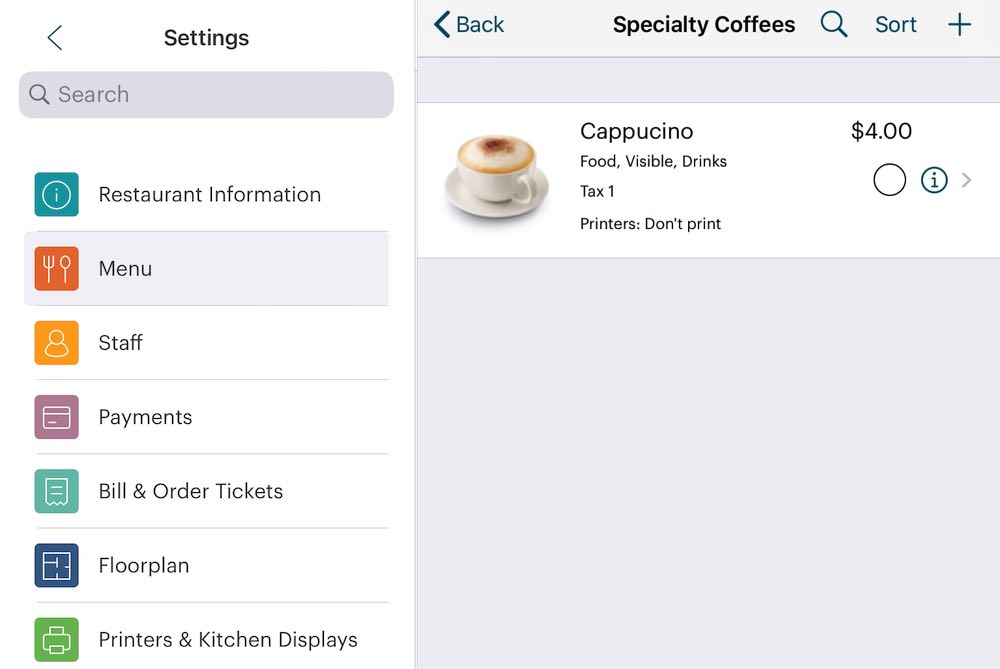
1. Tap on Menu Items.
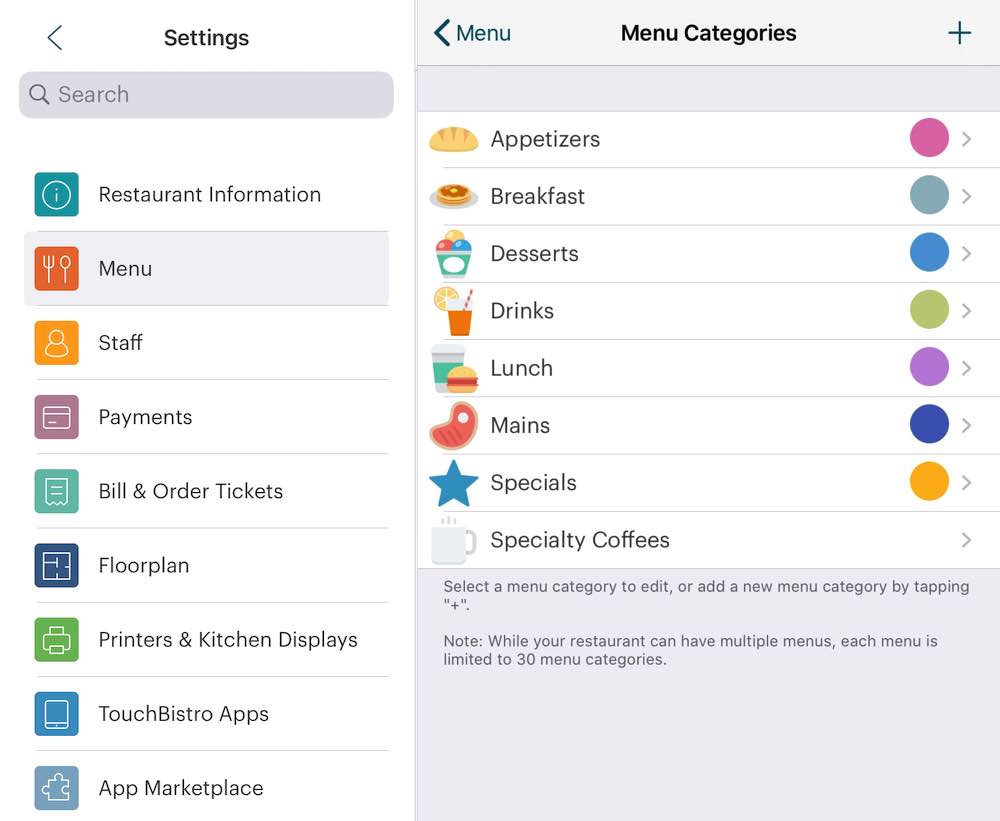
2. Tap on the category you want the menu item to fall under. In this example, we’re adding a menu item to the Specialty Coffees section of our menu. If this is the first menu item you’re adding to the category, the page will be blank.
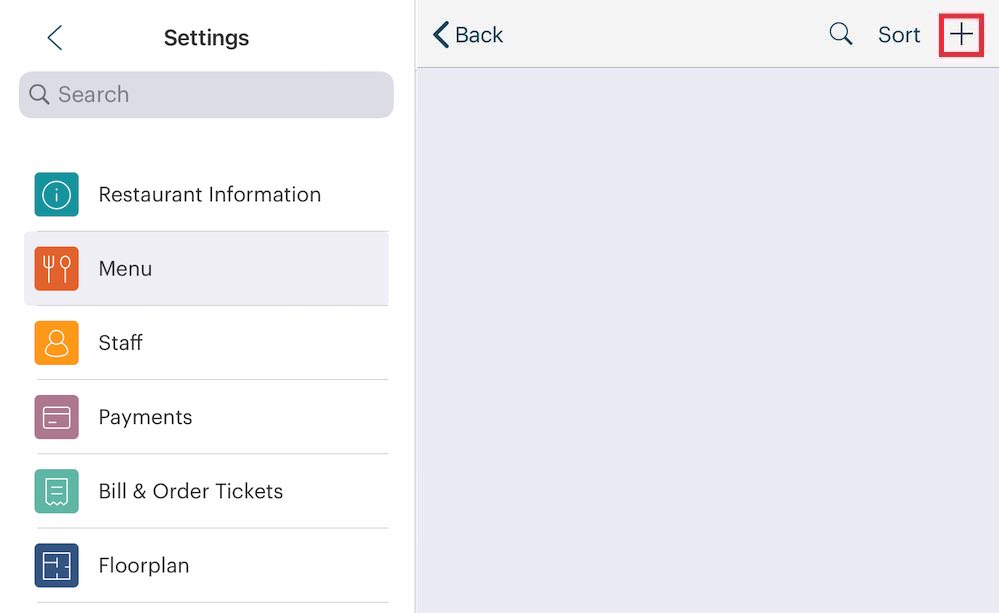
3. To add a menu item tap on the Add + icon in the top right.

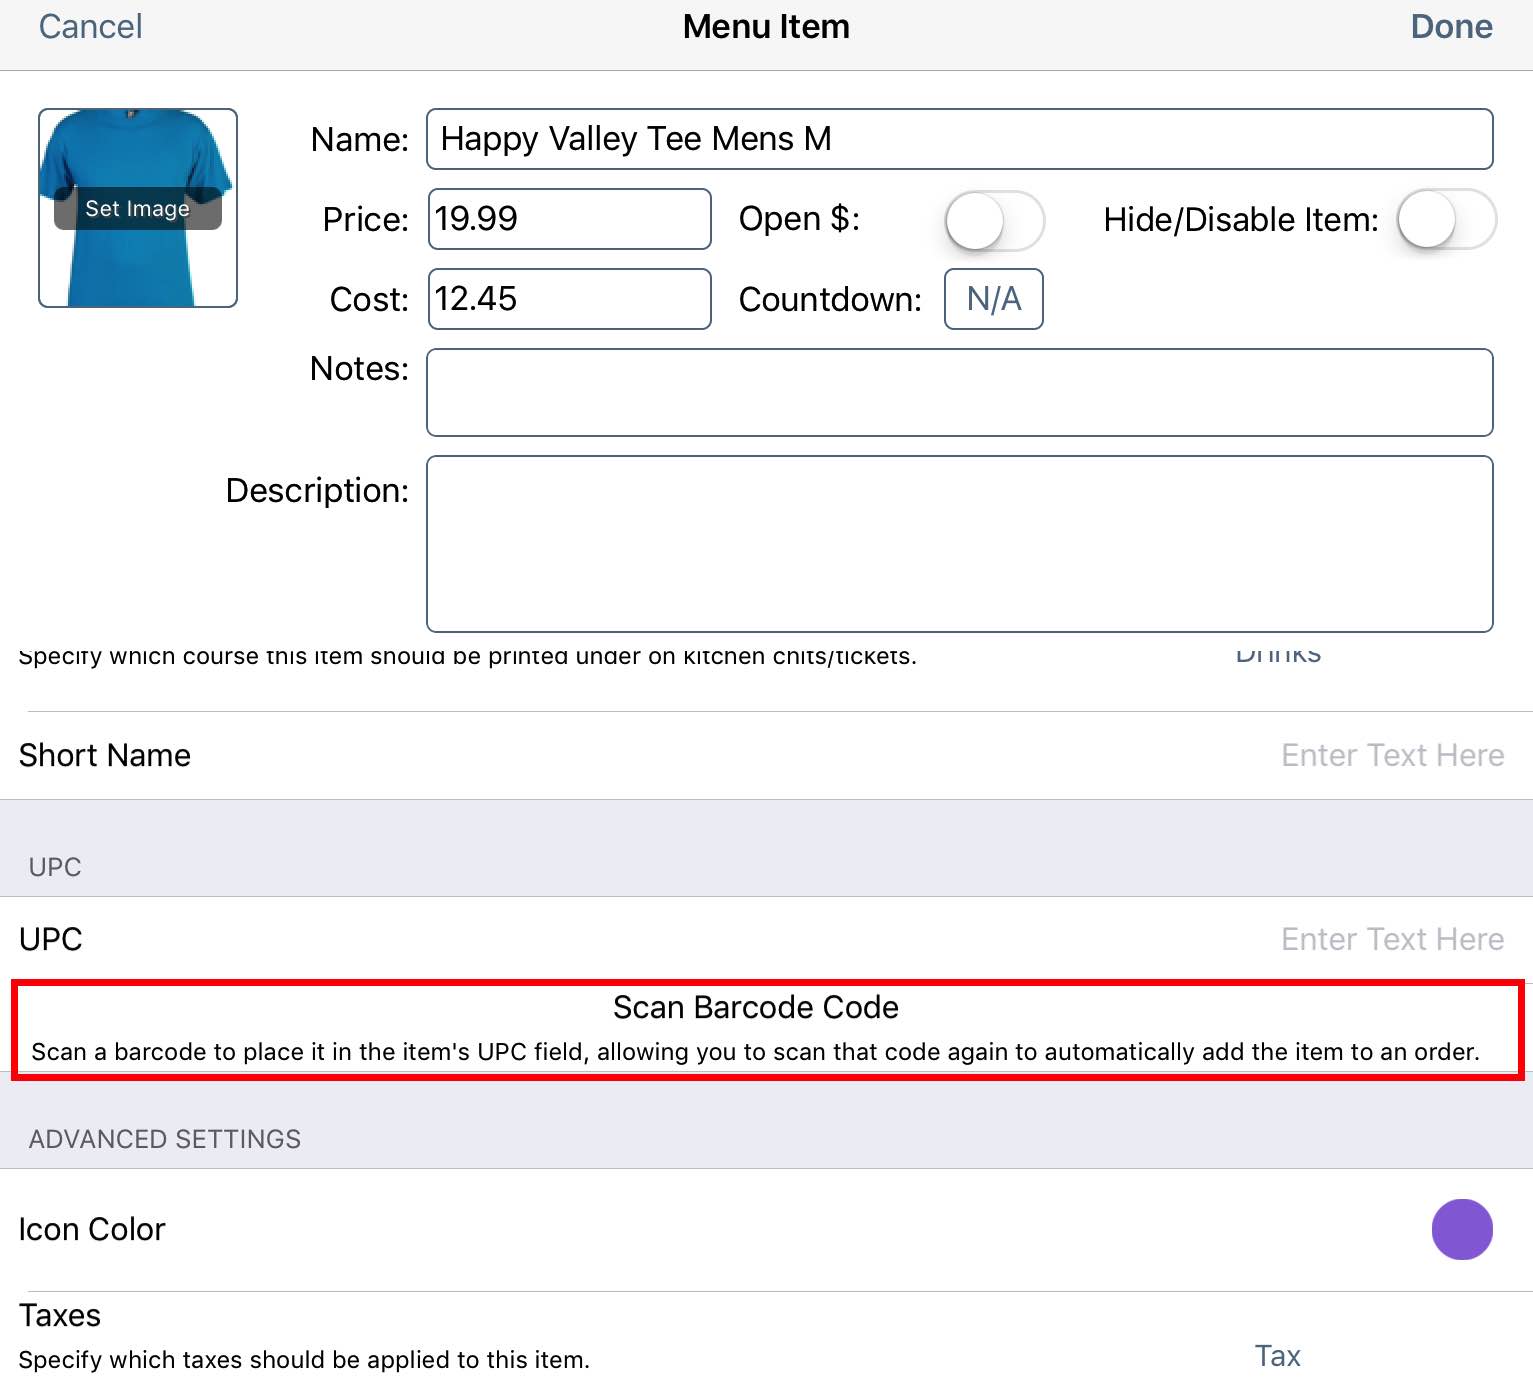
4. The Menu Item details page is in two sections. The screen itself is divided into two sections: Key Details and Additional Details. The Key Details area at the top represents menu item details not defaulted by the Menu Category and are required or optional but we suggest you complete them (for example, Inventory and menu item image).
The options in the bottom Additional Details section are largely items set by the Menu Category this menu item is related to. A few items here are not set by the Menu Category and might need your attention.
Chapter 2. Key Details Area
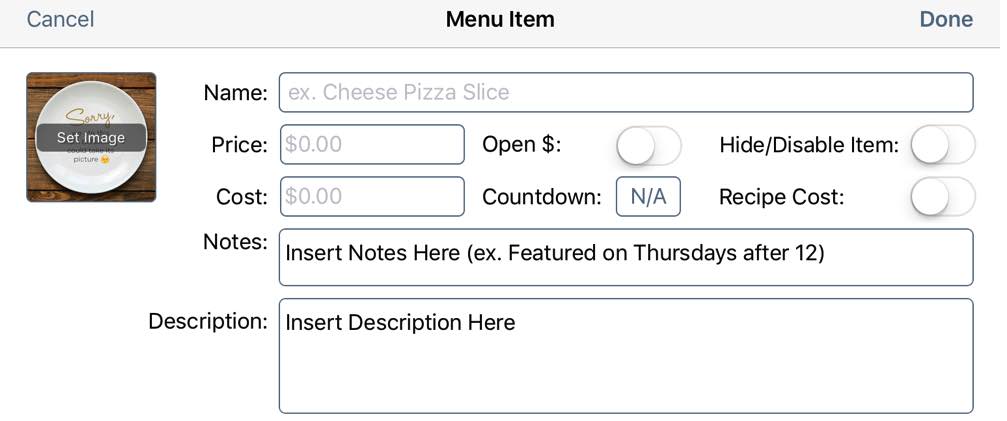
5. First, complete details at the top.
6. In the Name field, enter the name of the menu item (e.g., Cappuccino). If your menu item name is more then 30 characters (including spaces) see the Short Name option in step 22 below.
7. If the item is temporarily unavailable or a seasonable item, you can slide the Hide/Disable item to the green position. This will keep it from displaying on the menu until you toggle it off.
8. Enter a price (e.g., 4.00 for $4.00) or turn on Open $ to set a way to charge based on market price. If set to Open $, TouchBistro will prompt the server to enter a price when the customer orders the item. You can enter $0 menu items (e.g., “Glass of Water”). You can control how TouchBistro handles zero priced items on the guest checks via the Bill & Chits setting screen.
9. If this is an easily countable item (like a bottle, can, t-shirt, etc.) and you wish TouchBistro to track inventory for this item, you can use the Coundown inventory system. So tap the Countdown.
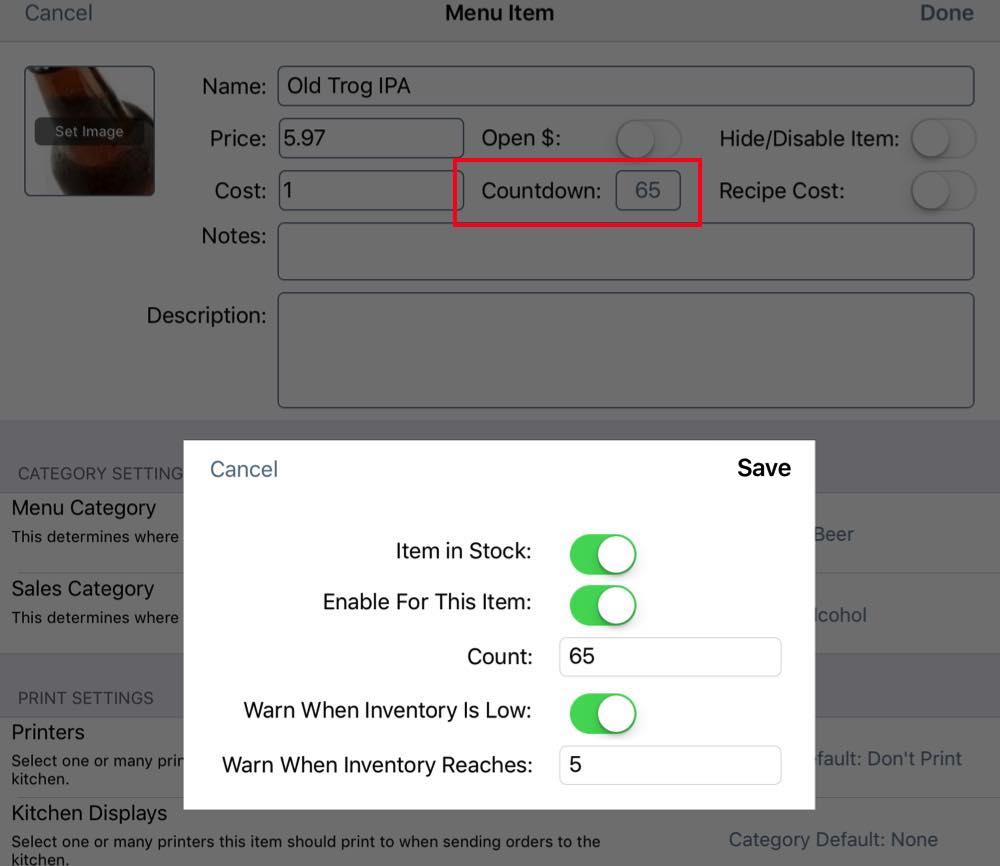
10. Slide Item in Stock to the green position to indicate it’s in stock. Slide it to the off (non green) position to manually flag it as out of inventory. If flagged out of stock, this will mark the item out of stock in the order screen. You can also use this dialog box to override if the item has been automatically flagged as out of stock but there are still items in stock.
Slide Enable For This Item to the green position. Enter how many items you currently have in inventory. Slide Warn When Inventory Is Low to the green position to set up when TouchBistro should alert the server when the inventory is low. TouchBistro will warn the server of low inventory when adding the item to a table. TouchBistro (Pro version) will warn any logged in managers when an item is out of stock (that is inventory reaches zero).
Tap Save to exit from this dialog.
11. If you want to track profits and you know your costs for the item, enter it in the Cost field. This figure will be used in the Food Cost/Alcohol Cost reports. If you later change the food cost (because your costs have increased), TouchBistro will not retroactively recalculate your food cost report based on the new food cost. Your old food cost reports will properly reflect the food cost as entered during that time period.
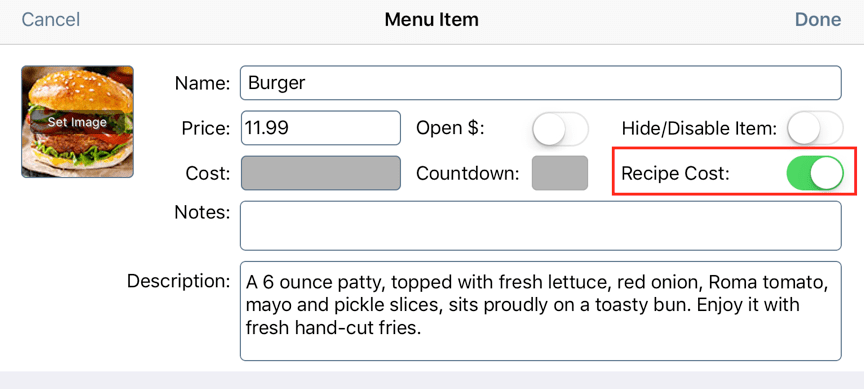
12. If you are going to be using TouchBistro’s Ingredient Inventory system and you want to use it for costing menu items, leave the Cost field blank and enable the Recipe Cost option.
13. In the Notes field, enter any setup type notes for you, the admin, about this item. Any notes you enter here won’t appear on menus, bills, chits, reports or to wait staff.
14. Enter a description for your menu item.
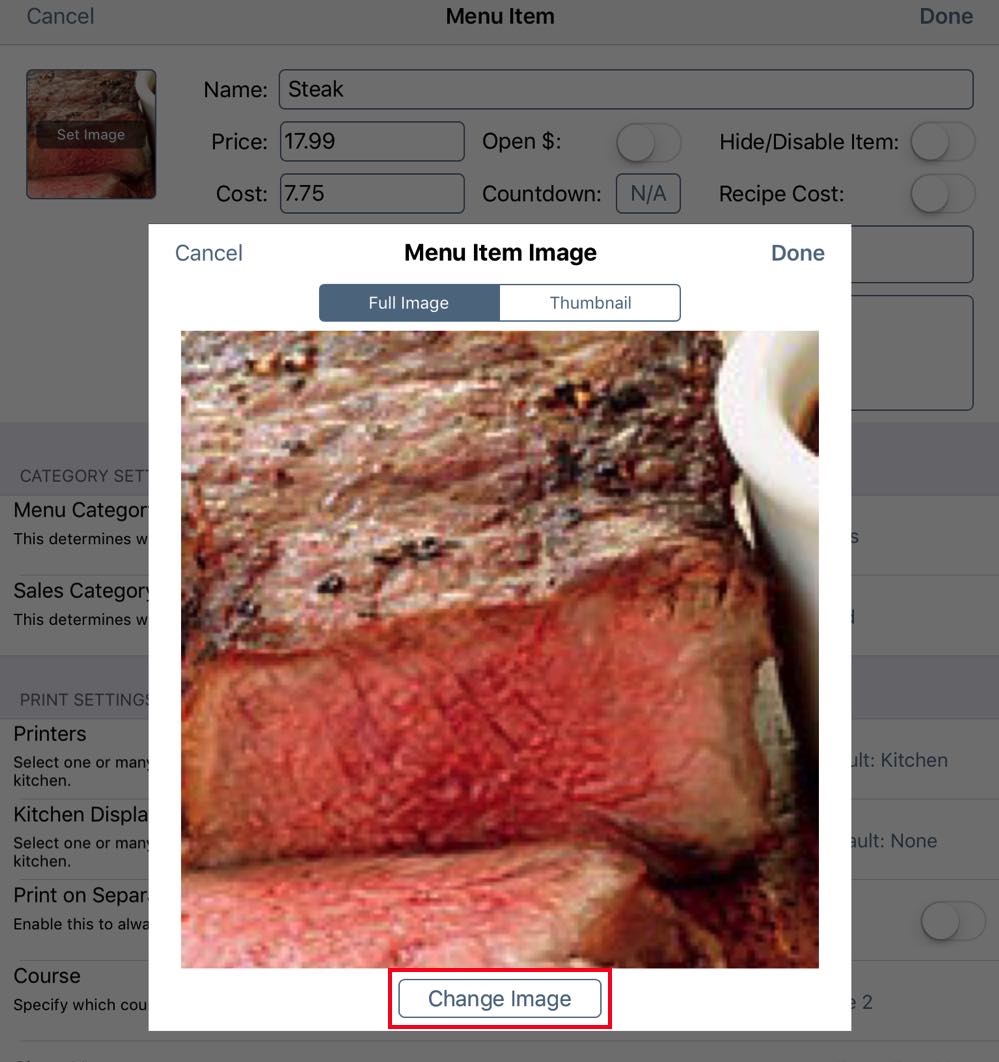
15. Tap on Set Image to add an image and select the source of the menu image. Menu images will be used for both the server order screen (as thumbnails) and the customer-facing menu (full sized). Choose how you want to associate an image with this menu item:
|
Option
|
Description
|
|
Take Photo
|
Let’s you use your iPad’s main camera to image the menu item. Note, TouchBistro needs permission to access to your iPad’s camera to use this feature.
|
|
Choose from photo library
|
If you’ve preload your iPad with images of your offerings, use this option to select an image that already exists on your iPad. Note, TouchBistro needs permission to access to your iPad’s photos to use this feature. Use two fingers to zoom in or out on the photo. Use one finger to center the image. When you’re ready, tap Use in the top right. You will be prompted to auto generate a thumbnail. If you prefer to use a different image for your menu, you can tap on the Set Thumbnail option. We recommend your menu photos be 2044 pixels wide x 2216 pixels high for best resolution on the customer-facing Menu and Kiosk. They should be either JPG or PNG format. Note: Once you choose a menu item, TouchBistro will make a copy on your iPad for its own use. If you’ve uploaded a large number of photos and wish to save space, you can delete these images after attaching them to your menu items. Just make sure you do not delete them from your computer.
|
|
Remove photo
|
If you already have an image displaying here, you can tap Remove photo to remove it.
|
Chapter 3. Additional Details Area
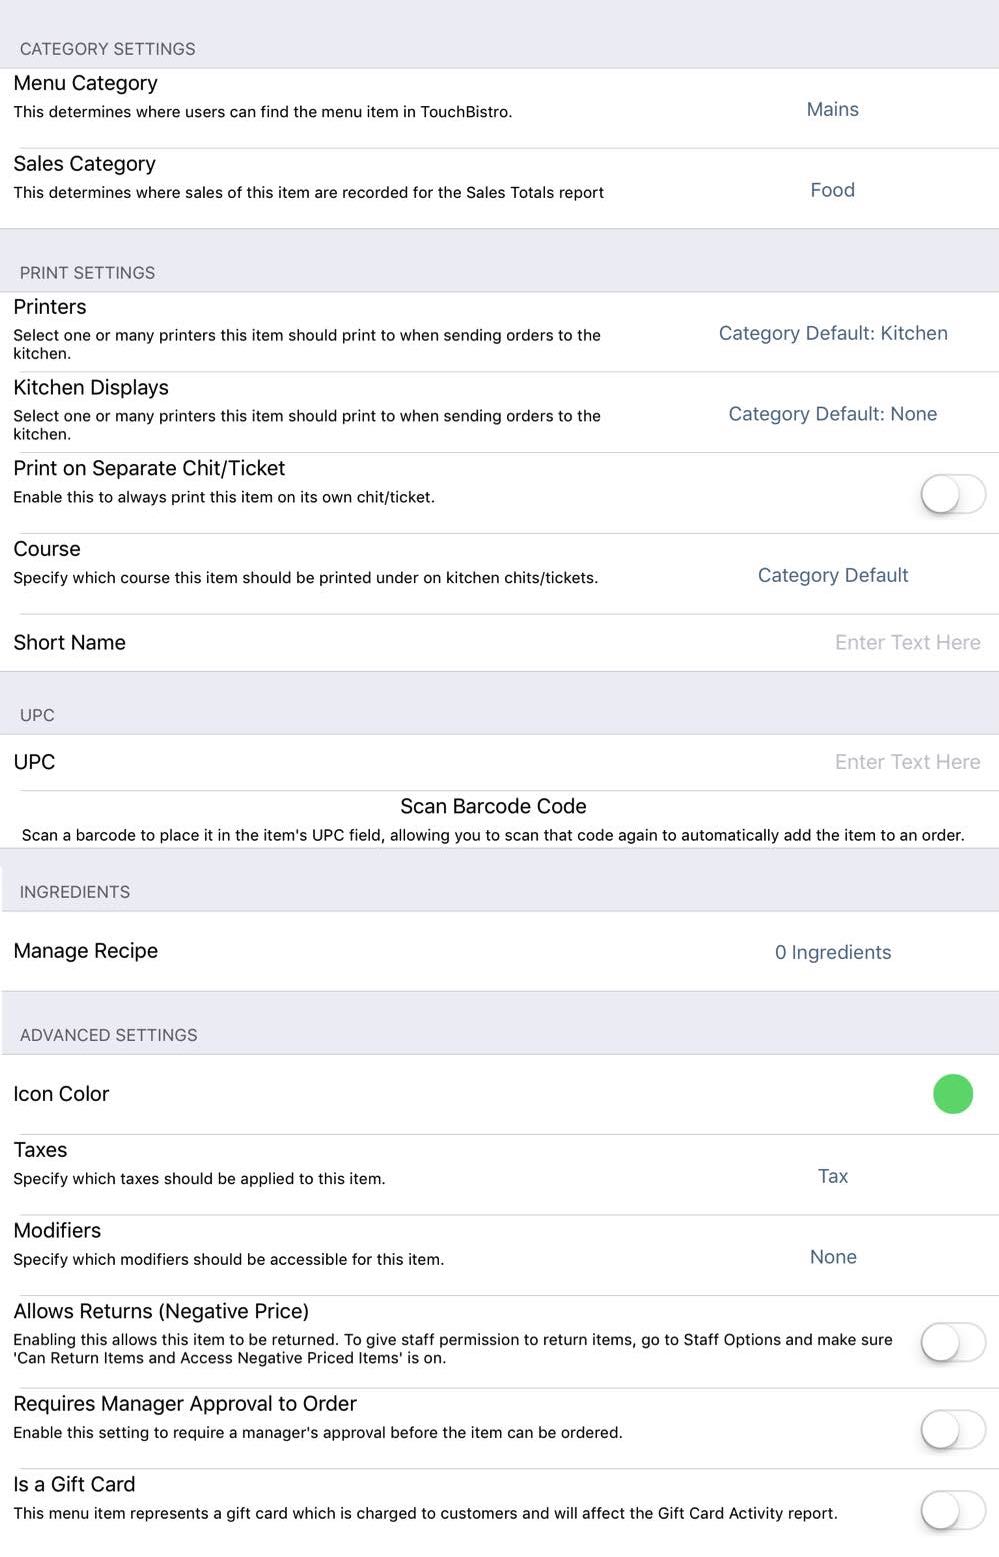
16. As noted, most of these items are defaulted by the Menu Category. However, you should review the settings. There are additional items off screen, so don’t forget to scroll up.
17. You can tap Menu Category to change the item to another category.
18. Tap Sales Category to assign this item to a new Sales Category.

19. By default, the item’s kitchen ticket will print to the printer(s) specified in the menu category setting. For example, a beer menu item under a Beer menu category will print to whatever ticket printer was assigned to the Beer menu category. If you need to specify a unique printer for this particular menu item, tap Printers and set it up here. For example, you have a sushi category and most items go to the sushi bar but a few items are cooked and need to go to the kitchen. You can also select multiple printers. For example, if an item requires some kitchen prep and some sushi bar prep.
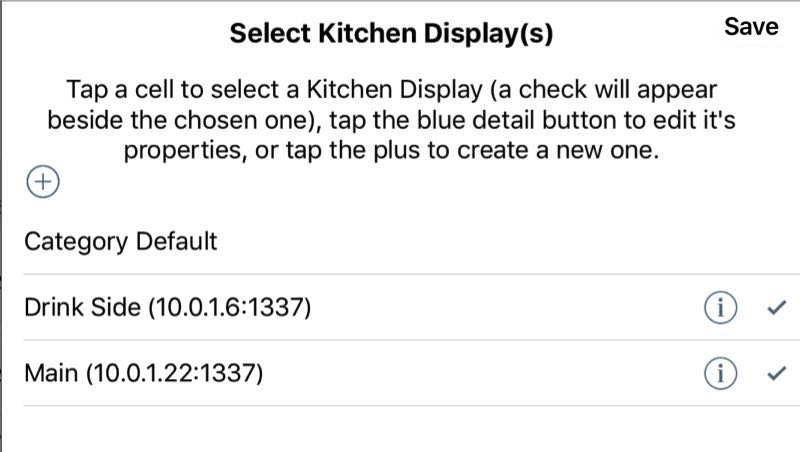
20. If you need this item to go to a Kitchen Display System (KDS) that is different from the menu category default, tap Kitchen Displays and select which configured KDS this item should go to. You can select multiple KDSs if necessary. However, the separate KDSs will not talk to each other. If you fire or close a chit on one KDS, the other KDS will not reflect the activity.
21. If you need this item to print on its own chit, slide the Print on Separate Chit/Ticket item to the green position.
22. If you prefer to identify menu items by short names for the kitchen, enter the short name in the Short Name field. Remember to enable its use under Advanced | Printing. Tap Printer Items’ Short Name. You should consider using a short name if the menu item name goes beyond 30 characters in length. If you are printing your kitchen tickets by seat, a menu item longer than 38 characters (including spaces) will wrap to the next line. If you are printing your kitchen tickets by course, a menu item longer than 30 characters (including spaces) will wrap. If you are using a menu item as a modifier (for example, you modify your mains with menu items under the side menu category), TouchBistro will use the short name for the kitchen ticket if it has been set up.
23. If you need to specify this item as a different course from the Menu Category default, tap Course.
24. If you’re exporting your sales details to a third party system (say an inventory system or an accounting system), you can use the UPC field to code your item for use with the third party system. The UPC code will export as part of the Detailed Sales CSV report.
25. Tap Scan Barcode Code to scan and enter your barcode number into the UPC field. Barcodes can be used to scan in items on the cash register. If you need to remove a barcode, simply tap in the UPC field and delete the number.
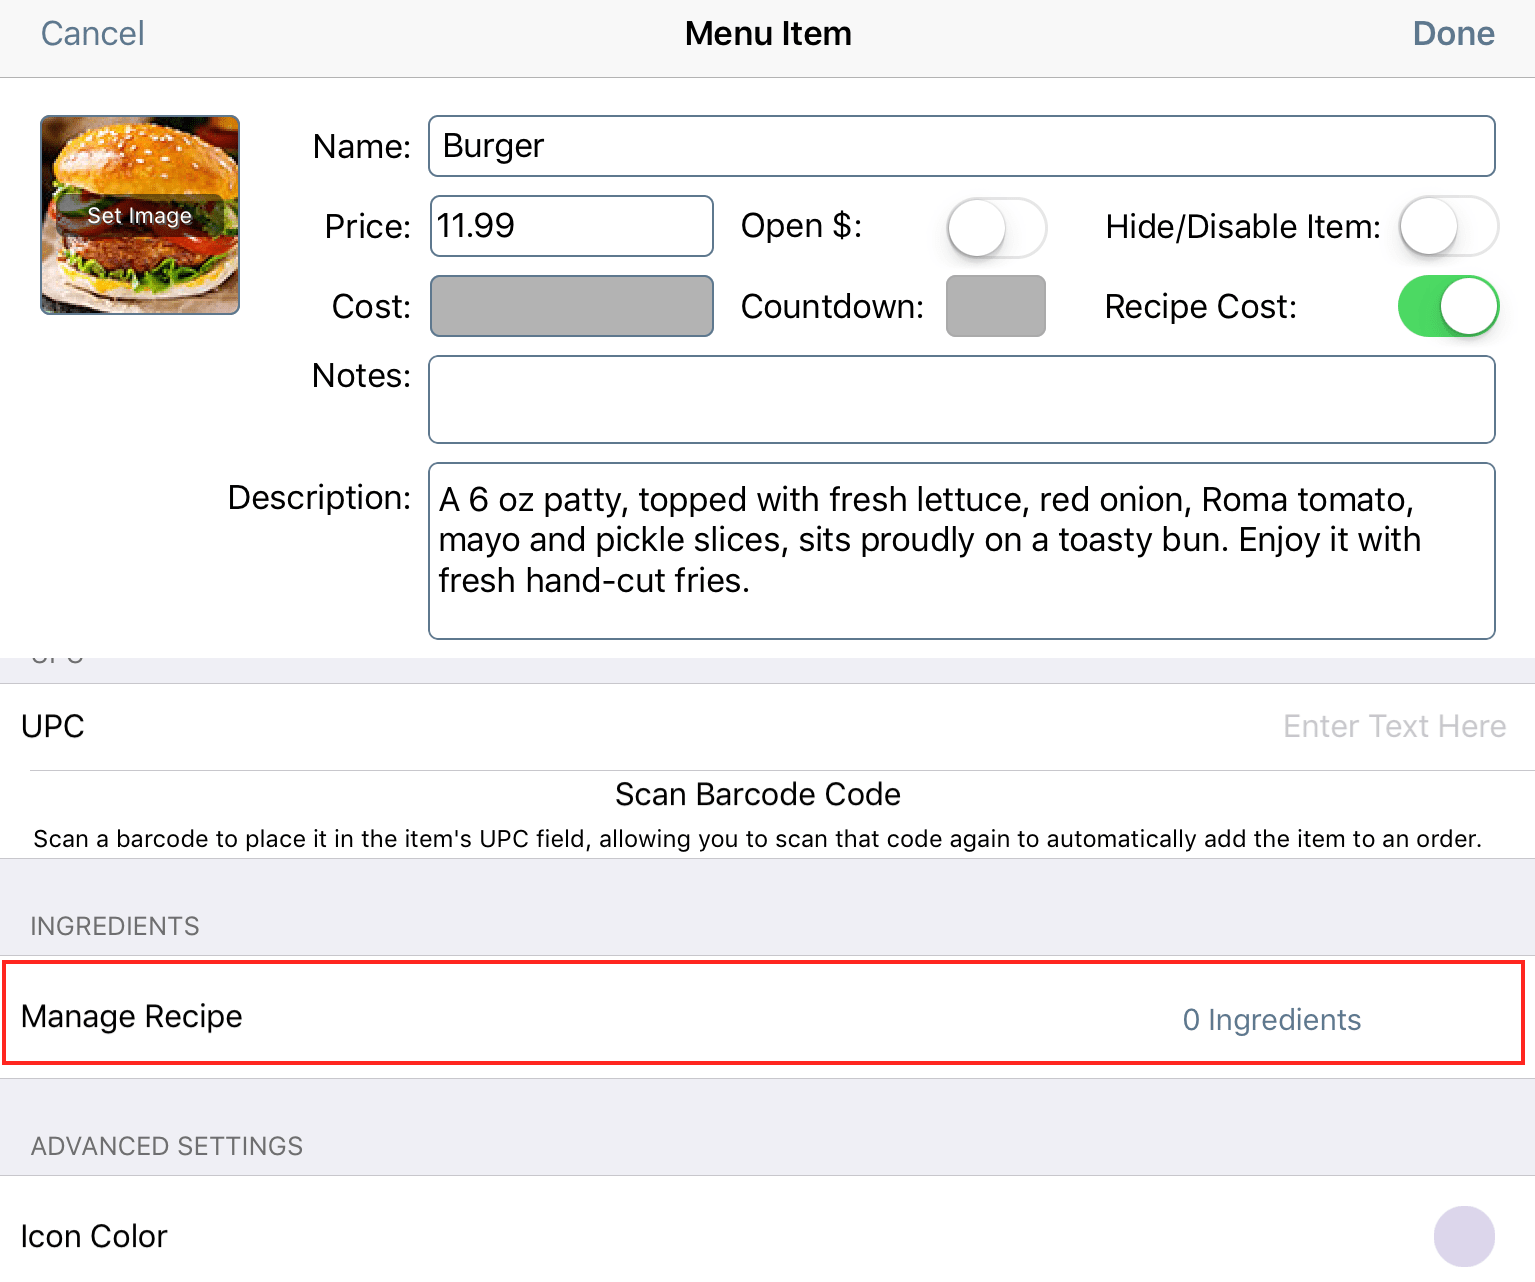
26. If you are using the Ingredient Inventory system, tap Manage Recipe to configure how much of your inventory items this menu item uses each time it is ordered.
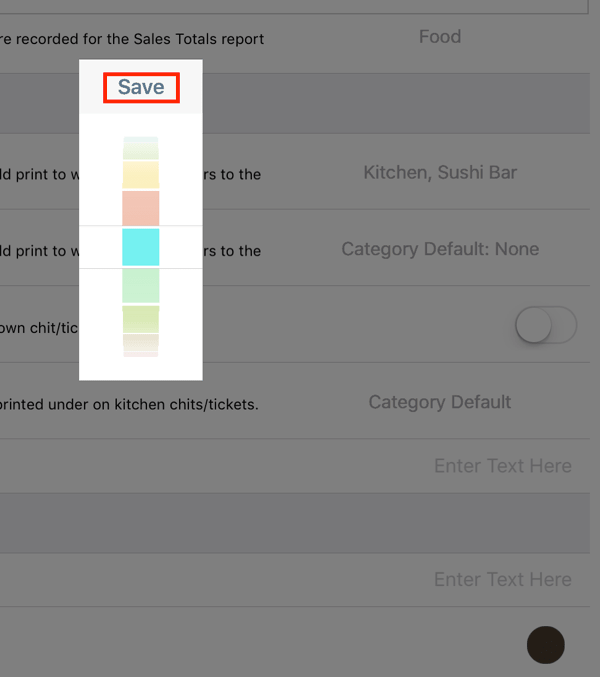
27. Tap the Icon Color to set a color for this item for use with the text button view.
28. Taxes default according to the category setting. Note: If later you change the menu category tax settings (for example you disable a tax or add a new tax to the menu category), the associated menu items will not be set for the new tax settings. Adjust this setting if the category tax setting later changes.
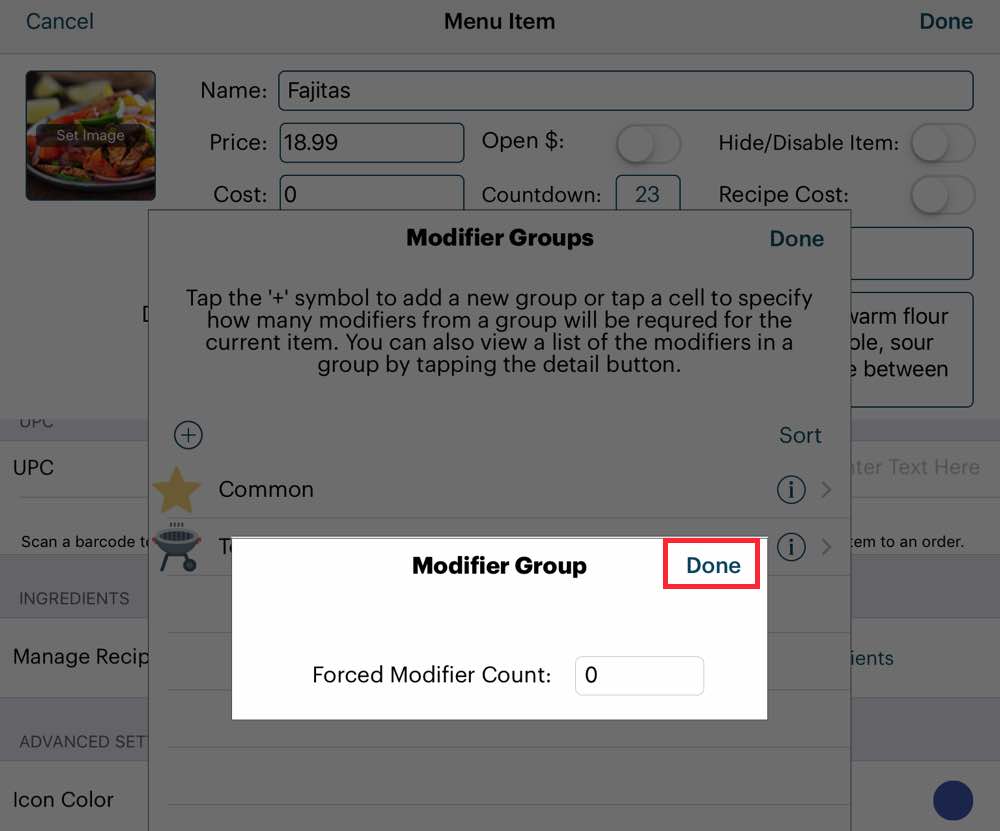
29. Tap Modifiers to override default modifiers. For example, a steak menu item you might always want to force a modifier query by your wait staff. However, a fajitas menu item you might always cook medium unless the customer makes a special request. Tap Save to return to the list of added modifiers.
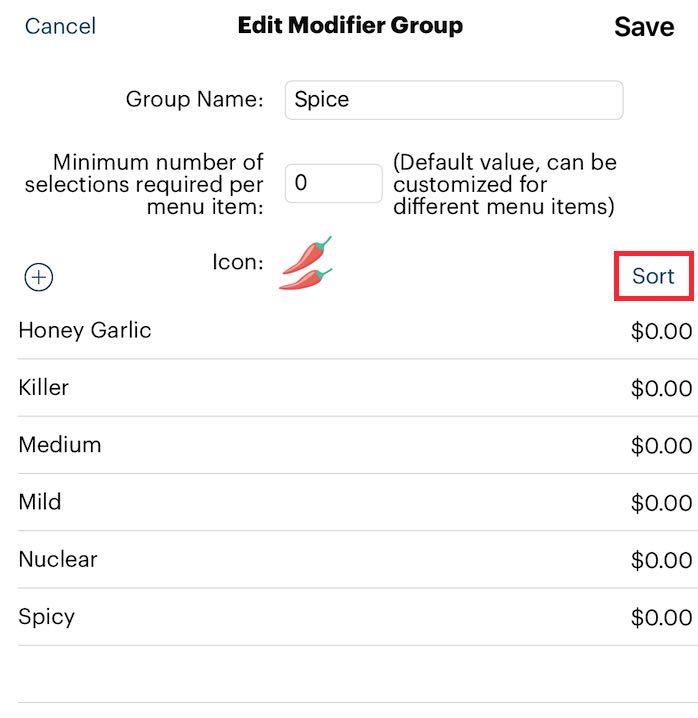
If you do not like the order of the modifiers for this menu item, you can also tap the Sort button and rearrange the modifiers as desired.
30. Slide Allow Returns (Negative Price) to the green position if this item can be physically returned. For example, you sell your own bottled hot sauce, pork rub, or branded t-shirt as merchandise. Customers might want to return them. Flagging the item as returnable ensures they can be properly accounted for when returned.
31. You can prevent a menu item from being added to an order unless there’s a manager/admin passcode approval by enabling Requires Manager Approval. You can use this, for example, to prevent wait staff from adding a particularly expensive bottle of wine to a customer order.
32. If this item is set to represent a gift card value add, enable Is a Gift Card.
33. When you are satisfied with all your menu item details, tap Done on the top right corner of the screen.
34. Your menu item will now be added.
Chapter 4. Deleting a Menu Item
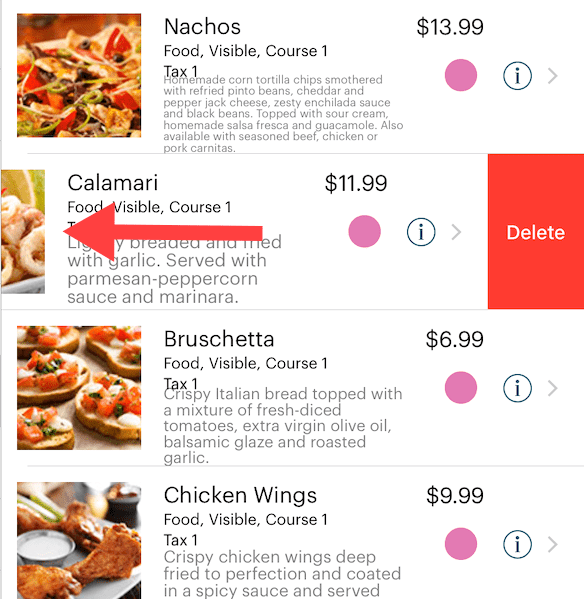
To delete a Menu Item, swipe left on the menu item and tap the Delete button.
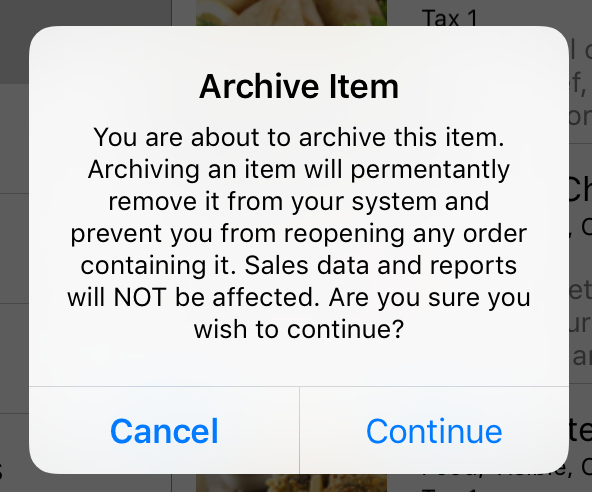
When you delete an item, TouchBistro will “archive” it for reporting purposes. You will not be able to recover the item. However, the item will still appear on past sales reports.
Chapter 5. Rearranging Menu Items
In instances wherein your customers will be able to see the menu in TouchBistro (for example, if you’re using Kiosk or Digital Menu Board) you may wish to change the order in which your Menu Items appear in the Menu Category, prioritizing important items by making them more visible.
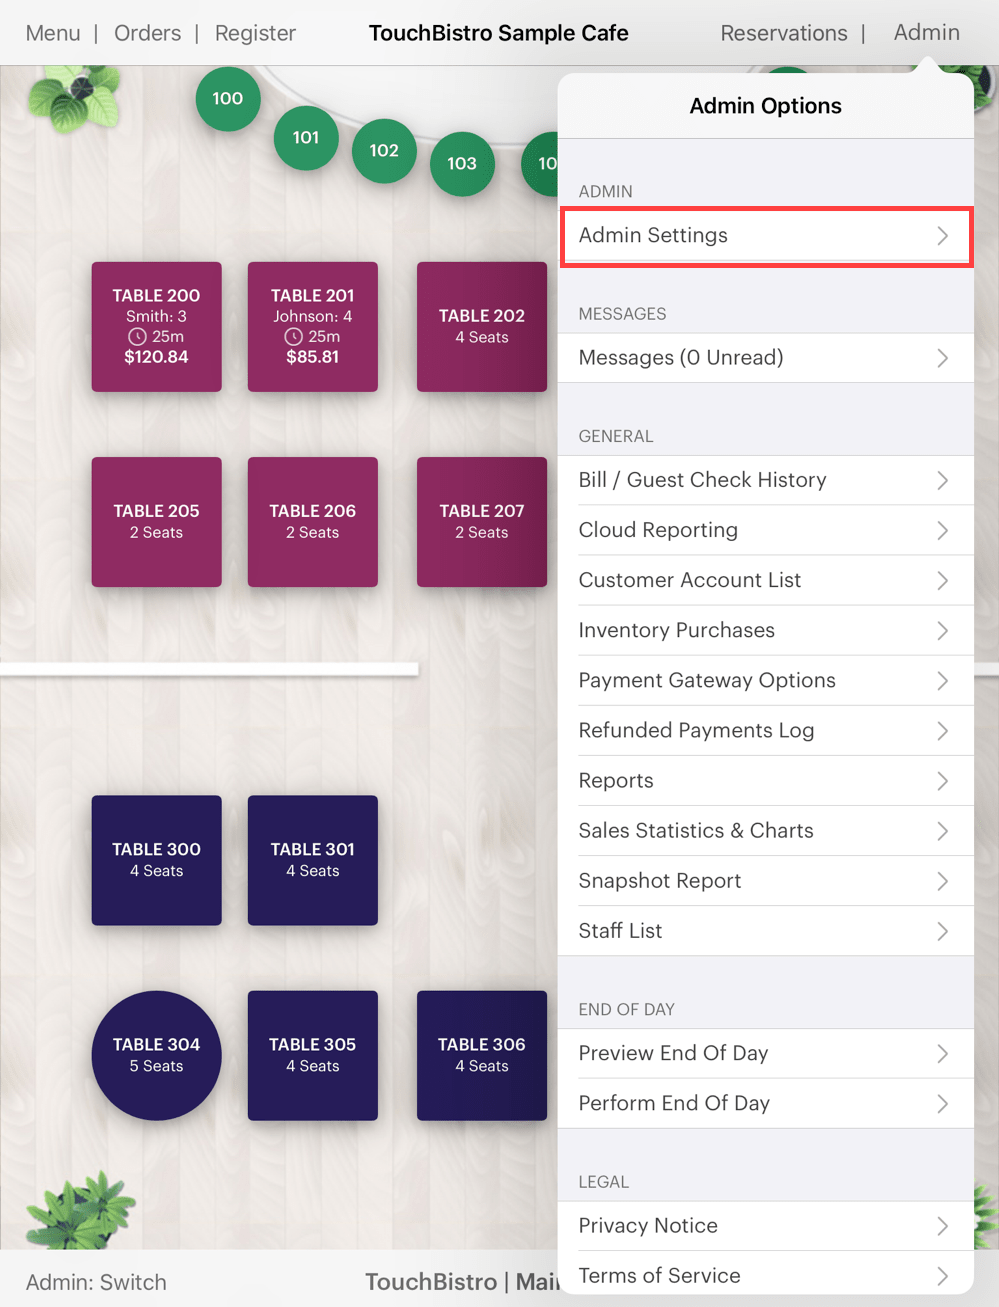
1. Tap Admin and then Admin Settings.
2. Tap Menu Items.
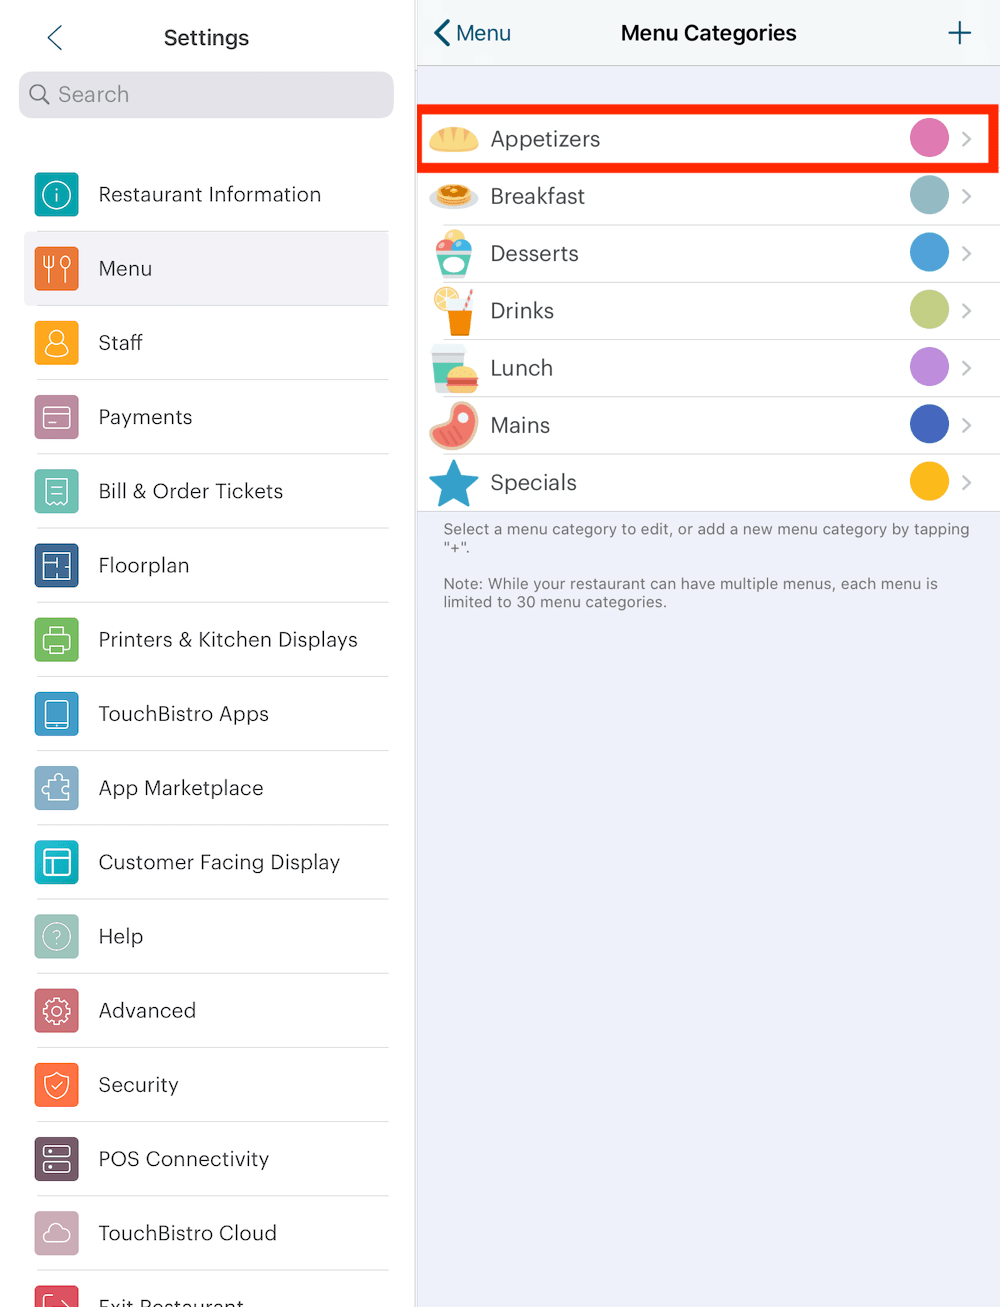
3. Tap the Menu Category containing the Menu Items that you wish to rearrange.
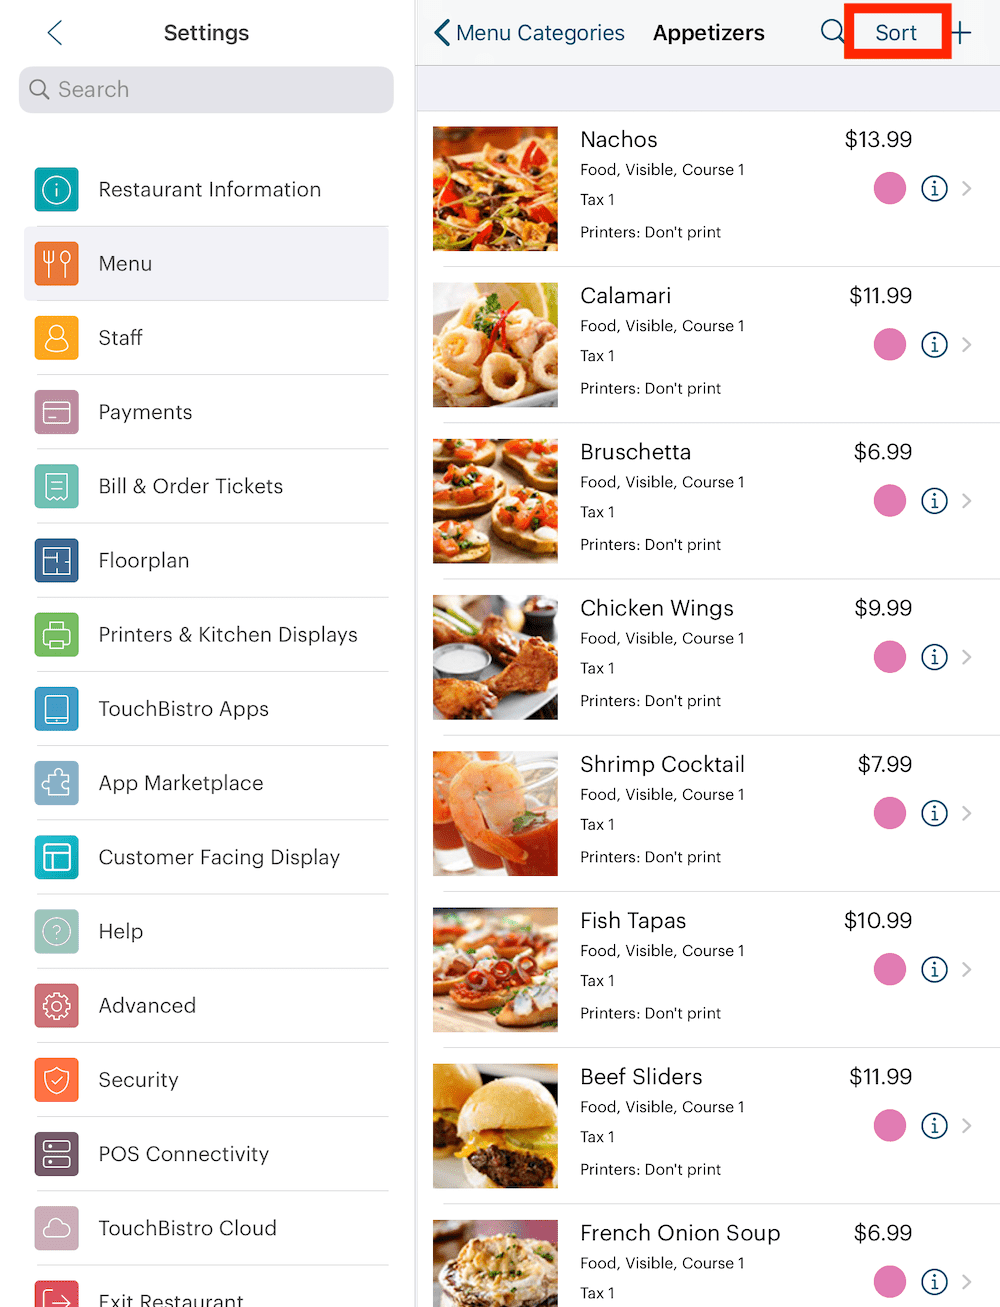
4. Tap the Sort button in the top right-hand corner.
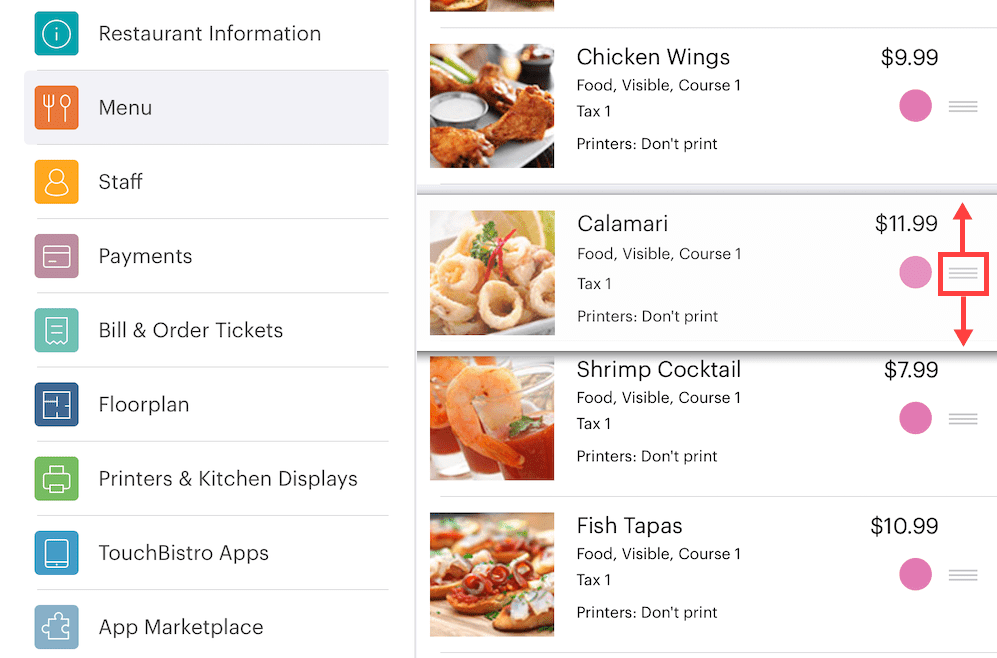
5. Use the pickup bars to the right of each Menu Item to drag them up and down, putting priority items at the top of the list for visibility.
6. Tap Done.
Chapter 6. Entering Barcodes
Note: If you intend to purchase the Socket Mobile scanner, do not scan in your barcodes with the camera. The iPad camera and the barcode scanner read barcodes in slightly different ways. If you scan in product barcodes with your iPad camera and later wish to use the Socket Mobile Barcode Scanner, you will need to re-input the UPC codes with the mobile scanner device. You will also not be able to read barcodes with the iPad camera after setting up your UPC codes via the mobile scanner device.
1. Access menu items you want to associate with barcodes.
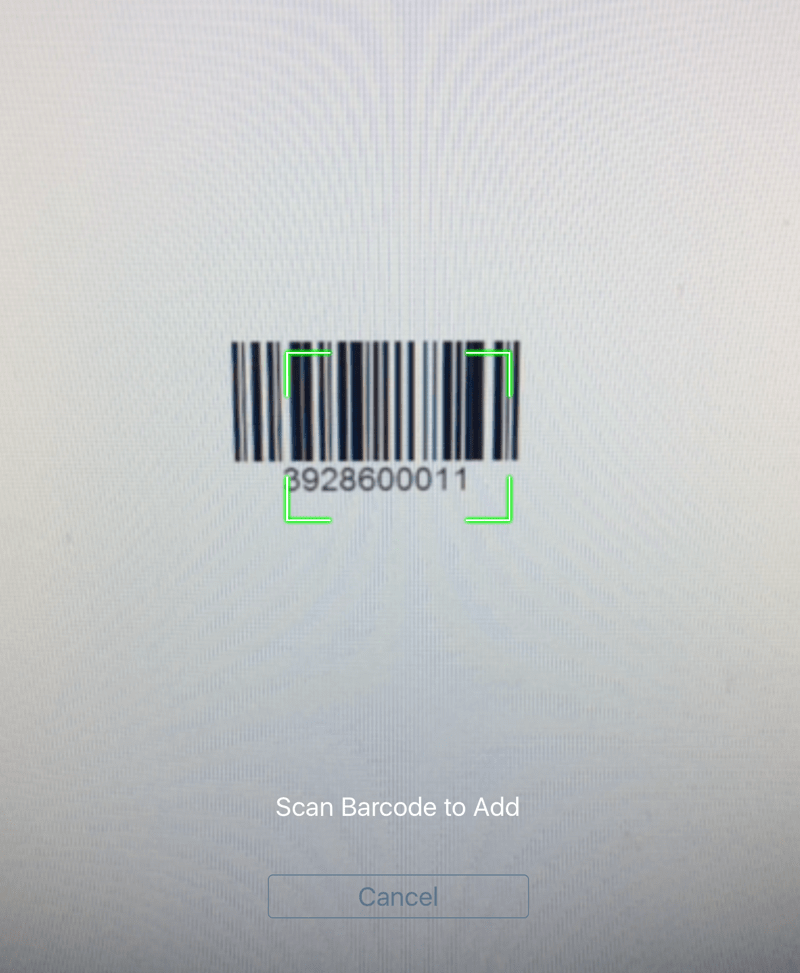
2. Tap Scan Barcode Code.
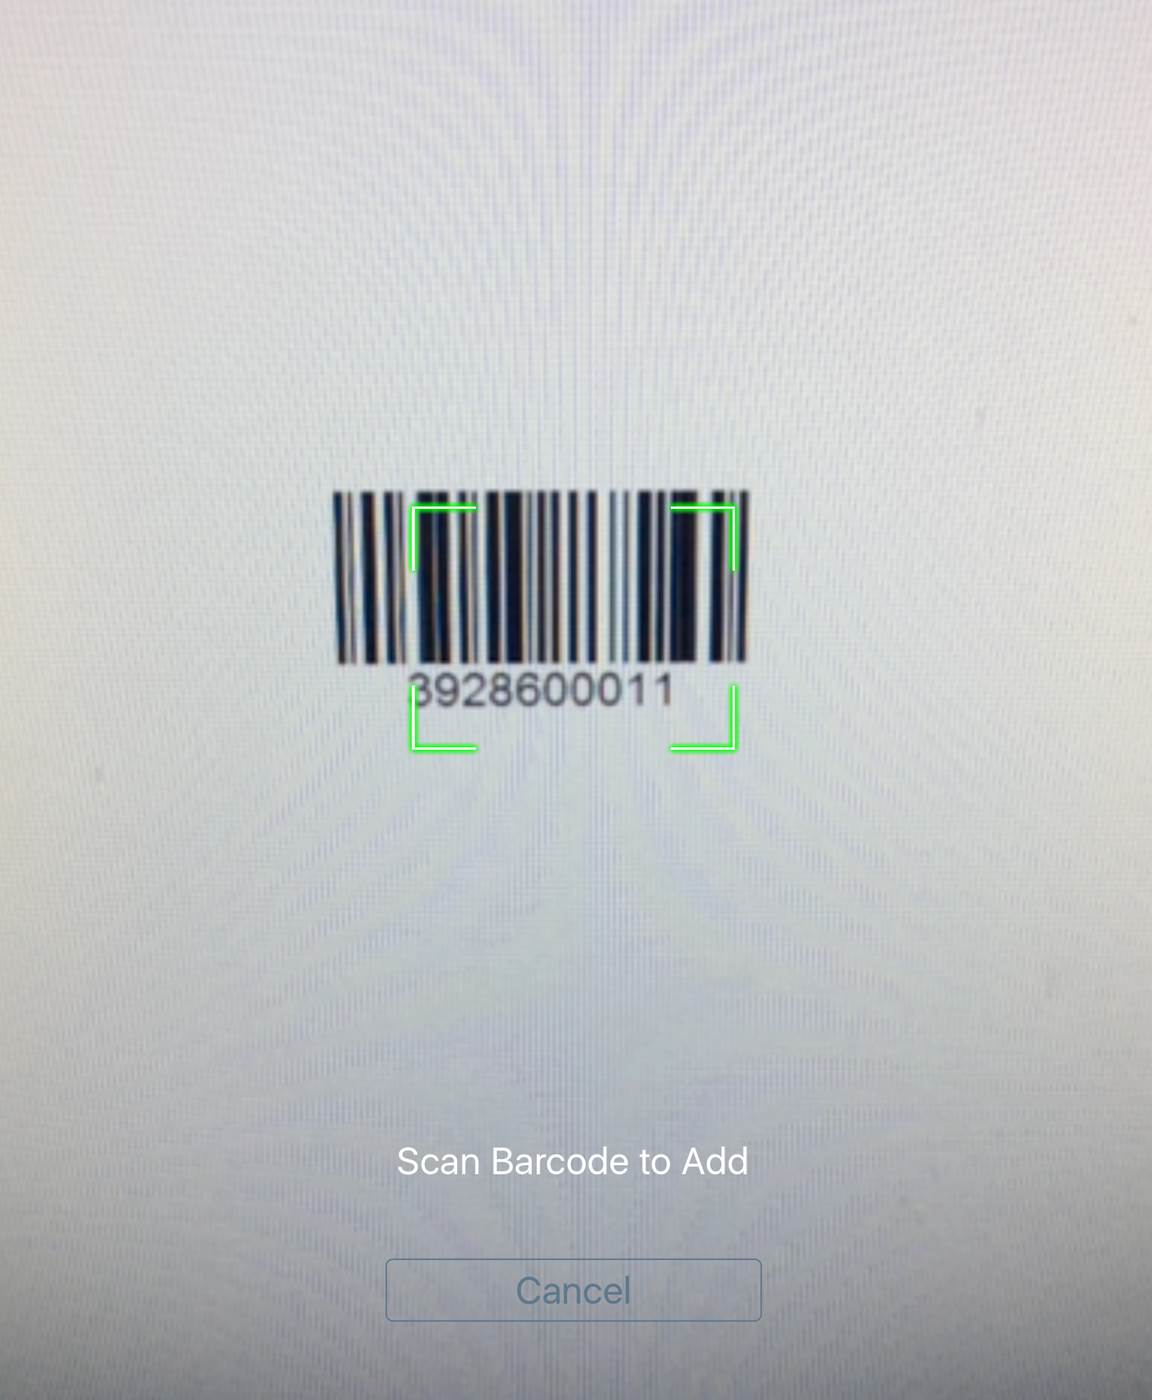
3. Using the iPad’s rear-facing camera, line up the barcode in the guides. If the barcode is not immediately recognized, pull the iPad back and then slowly bring the camera forward towards the barcode (“zooming in”) until the barcode is recognized.
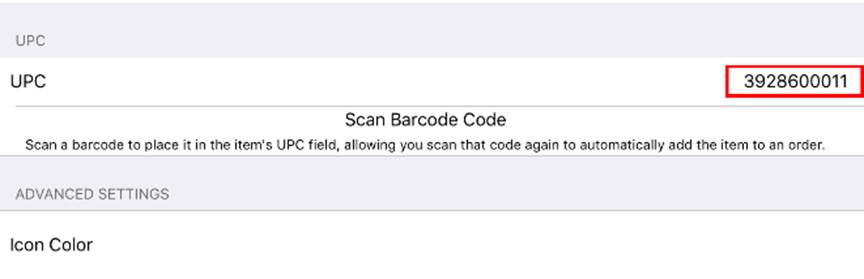
4. When recognized, TouchBistro reads the barcode’s UPC number and completes the UPC field in TouchBistro.
5. If you need to delete the barcode, simply tap on the UPC field and backspace over the UPC number to delete it. You can then rescan the item.
See Also
Chapter 7. Review Your Settings
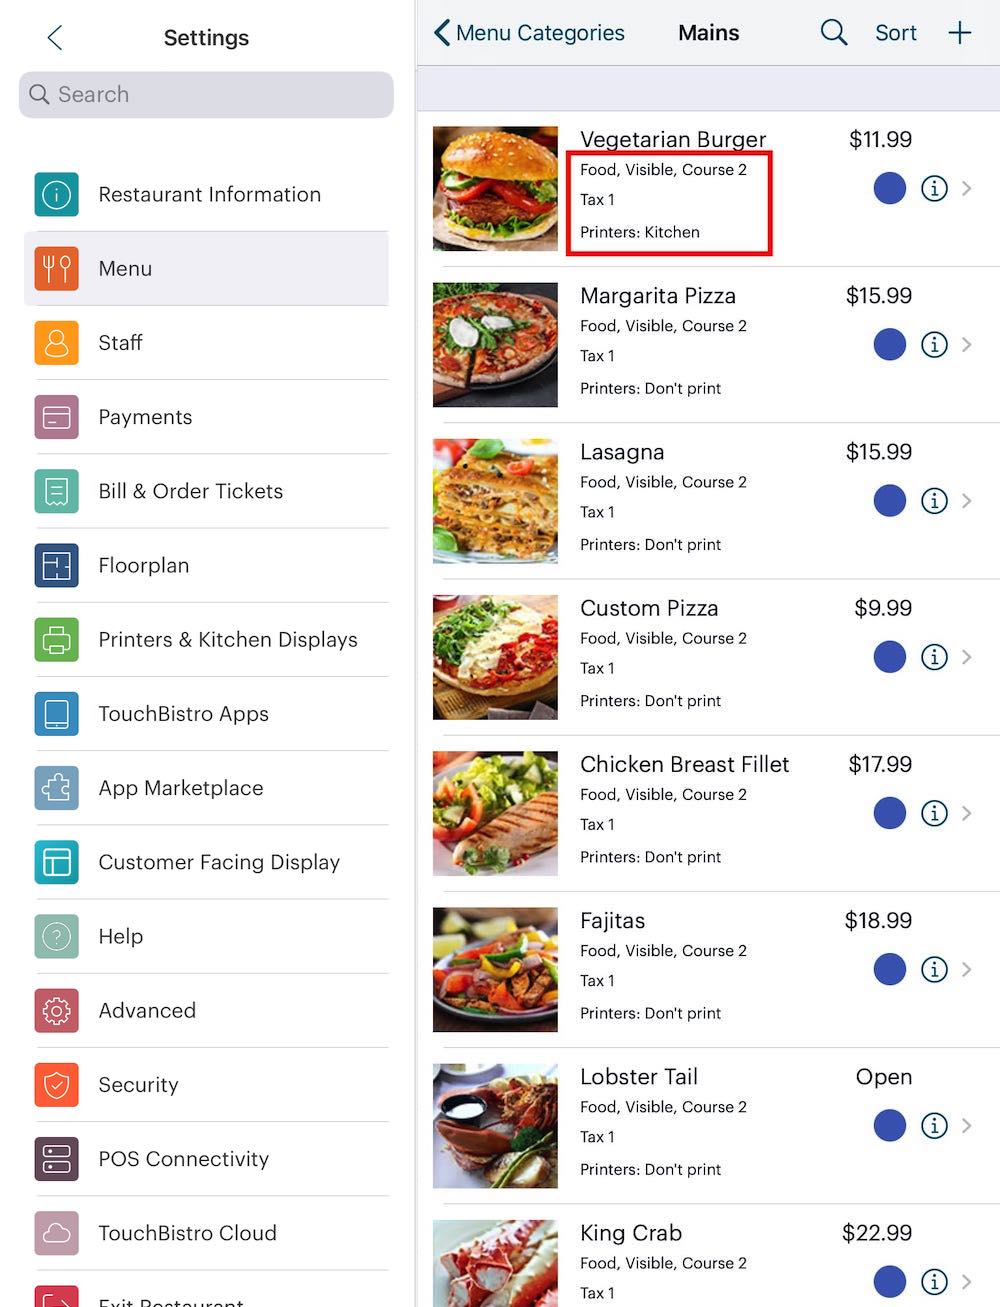
After you’ve created all your menu items, you might want to scroll down your list of menu items and review each item’s menu item name for the correct spelling. As well, below the menu name, you will see a display of the menu item’s key settings:
Line 1: Sales Category, Visible/Hidden (if Hide/Disable item was enabled), and course number.
Line 2: Tax setting.
Line 3: Kitchen printers set.
 Return to Table of Contents