Setting Up your Star TSP100 (TSP113/143/650II) Receipt Printer
Chapter 1. Setup Your Printer(s)
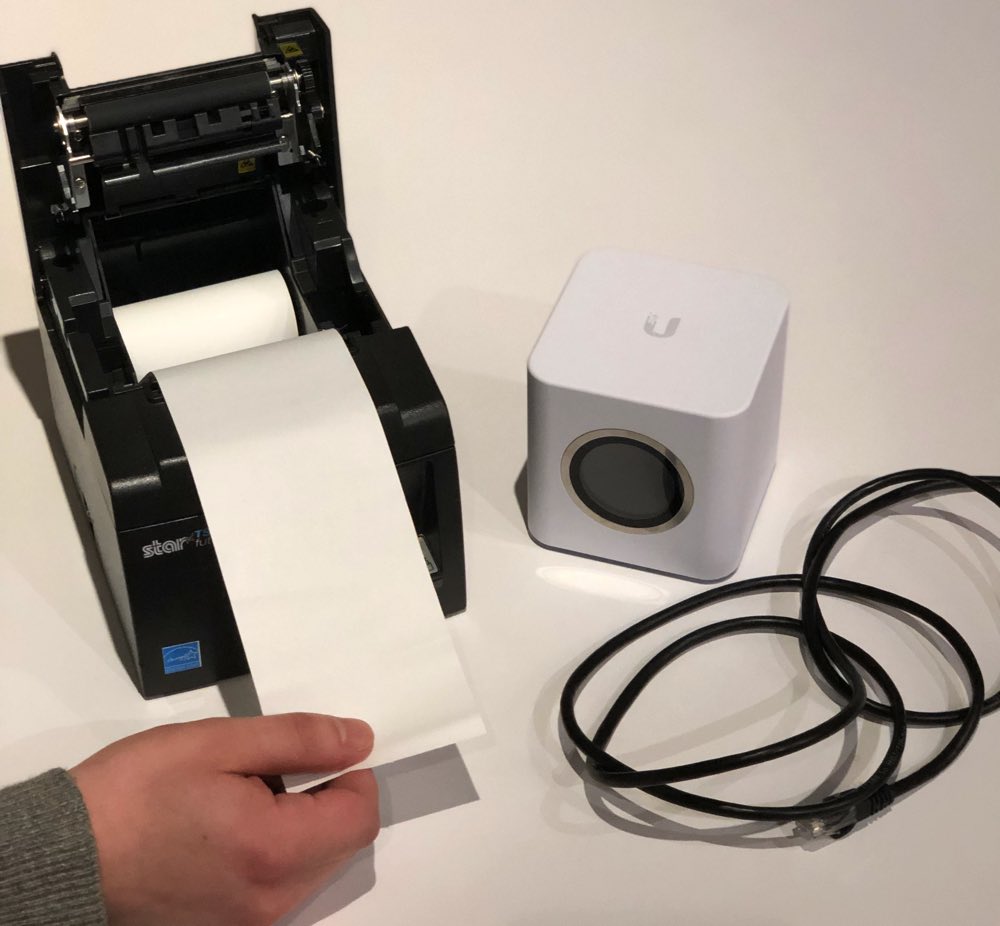
1. Load your printer with paper (don’t forget to close the lid after loading it with paper). Note: if you have both a thermal and an impact printer, make sure each is loaded with the PROPER paper. If you load paper intended for an impact printer into a thermal printer, the thermal printer will not print. Thermal printers need a special heat sensitive paper.
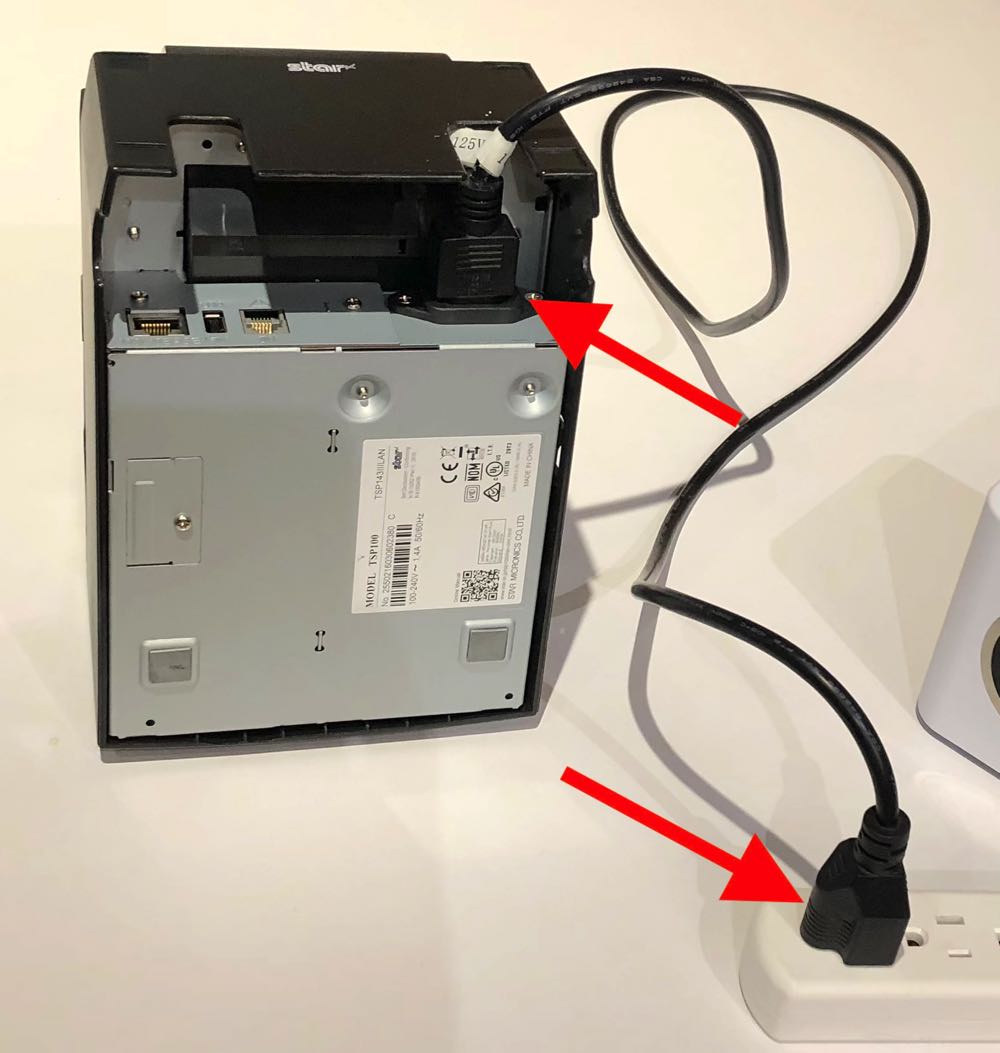
2. Plug in your printer’s power cord into the back of the printer and then into an electrical socket. Do not turn your printer on yet.
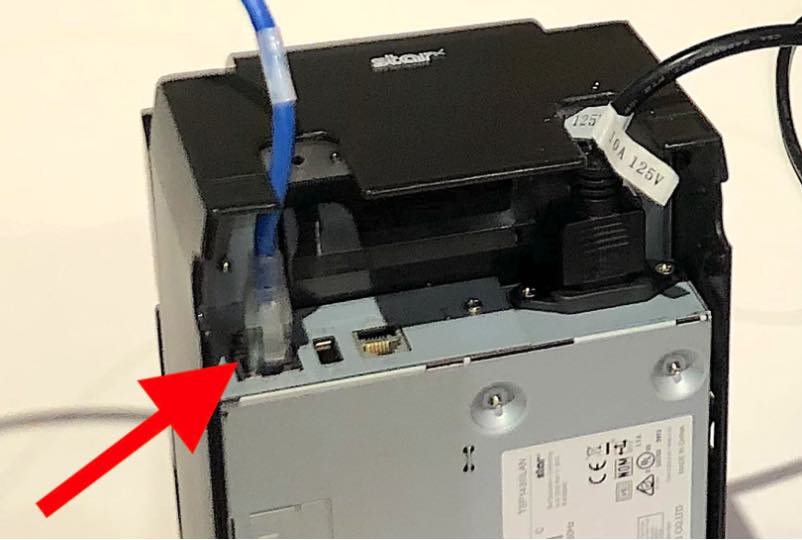
3. Plug the Ethernet cable provided with the printer into the Ethernet port on your printer.
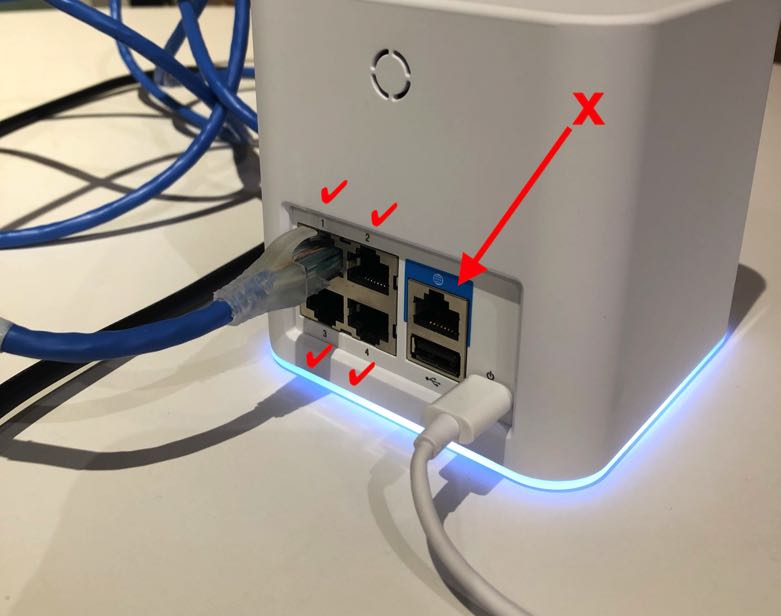
4. Plug your Ethernet cable into your router. Plug it into the port with double arrows. Do not plug it into the WAN port. That port is used to connect to your Internet modem.
Remember, always have sufficient and proper paper supplies in stock before you open for service.
Chapter 2. Set Up Your Printer in TouchBistro
1. Open TouchBistro.
2. Load the venue’s restaurant.
3. Log in as Admin.
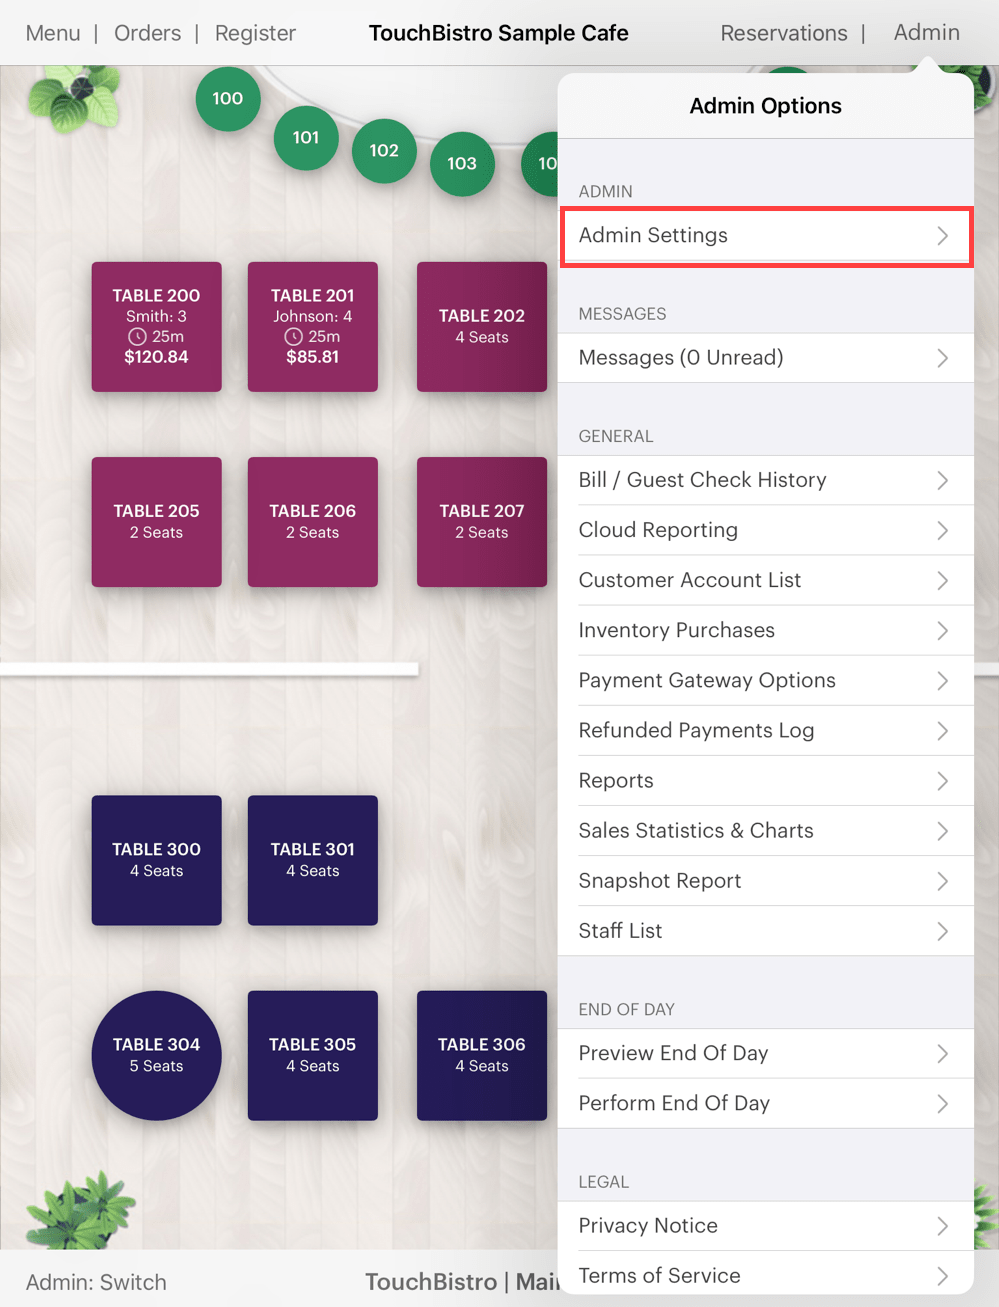
4. Tap Admin | Admin Settings.
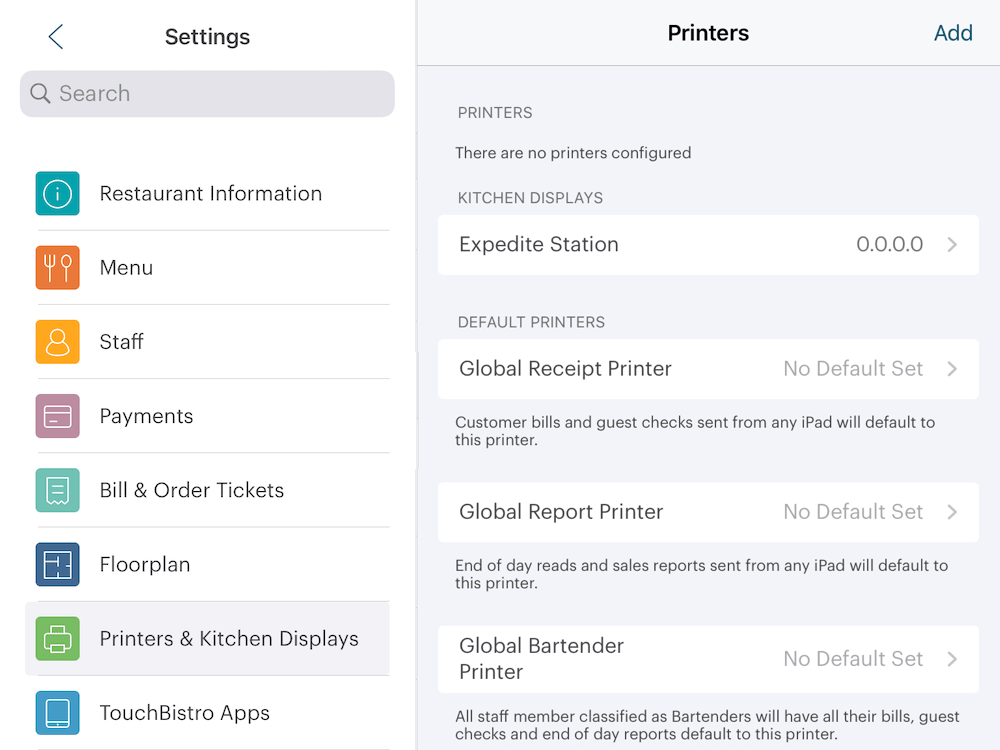
5. Tap Printers & Kitchen Displays.
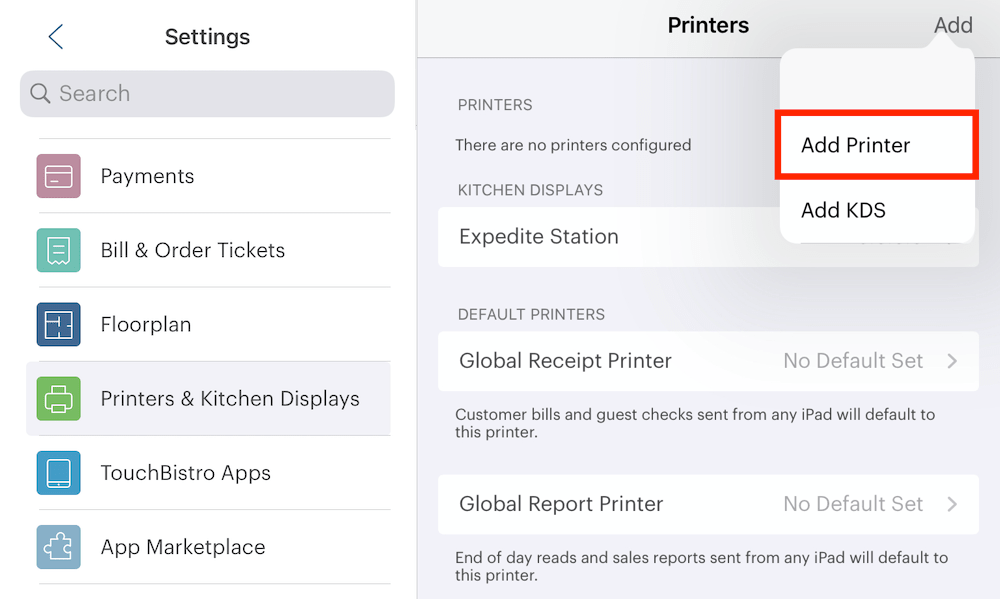
6. Tap Add in the top right-hand corner, and select Add Printer.
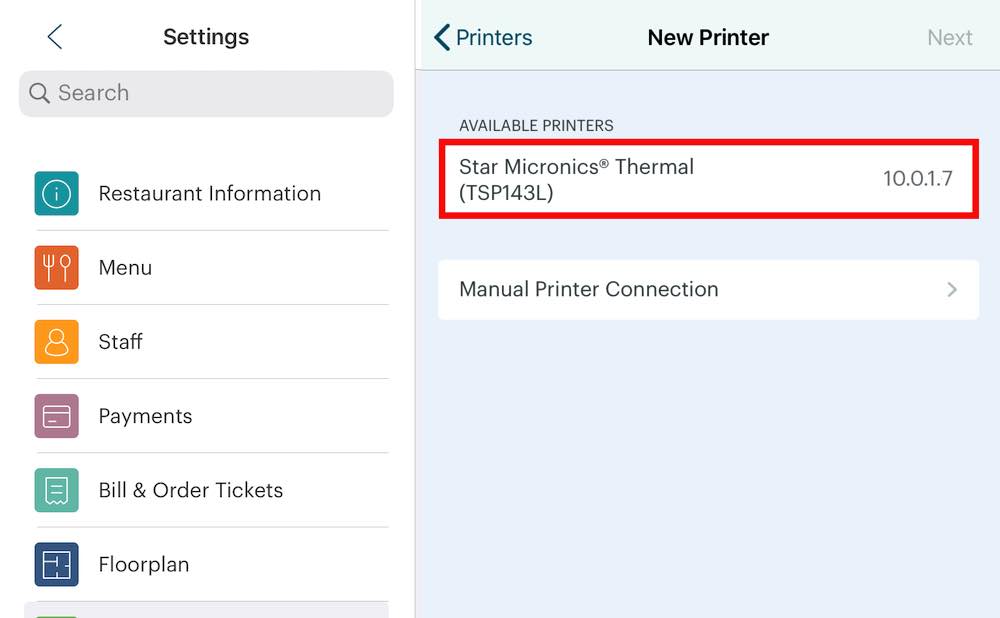
7. Wait a few moments for your printer (or printers) to appear in the New Printer screen. Tap your printer in the Available Printers list.
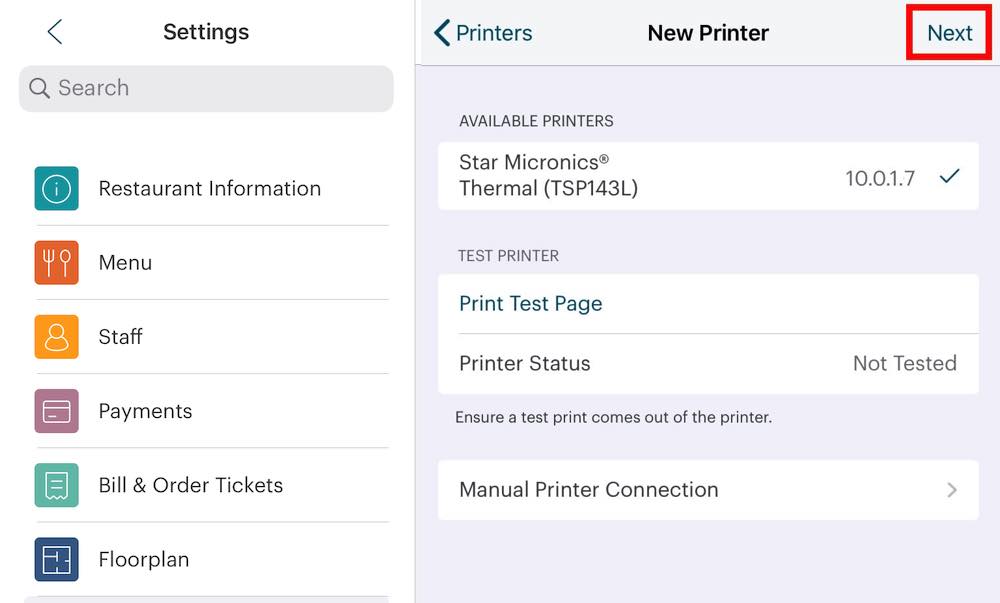
8. After selecting your printer, tap Next.

9. Tap Printer Name.
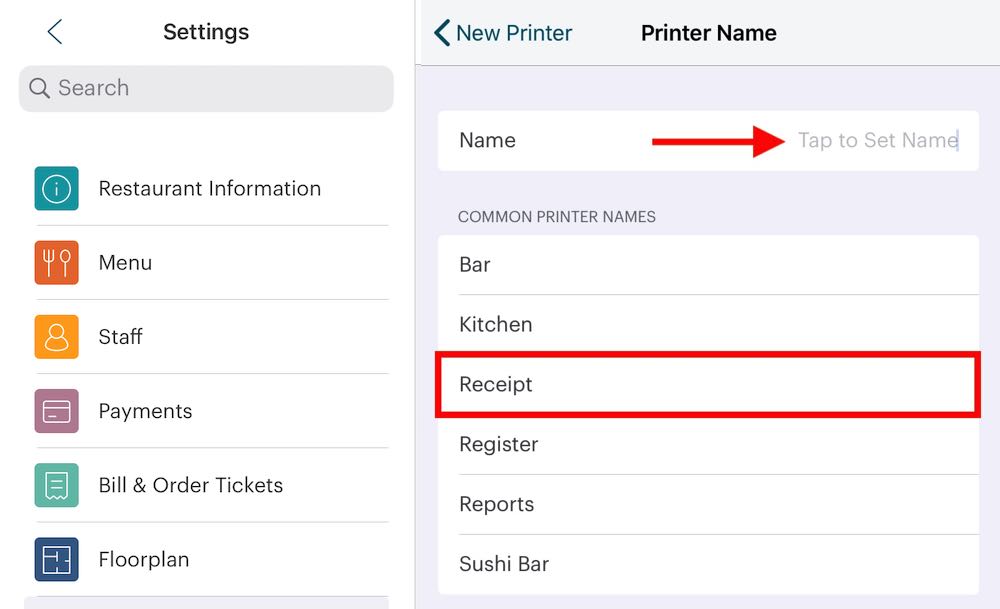
10. Either type a name for your new printer in the Name field, or make a selection from the list, for example Receipt.
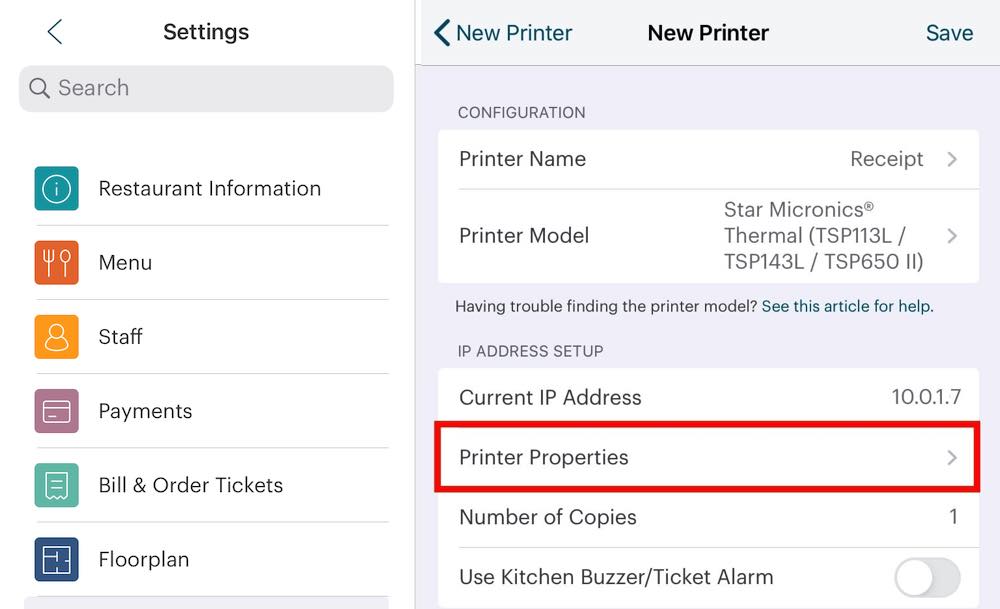
11. Tap Printer Properties.
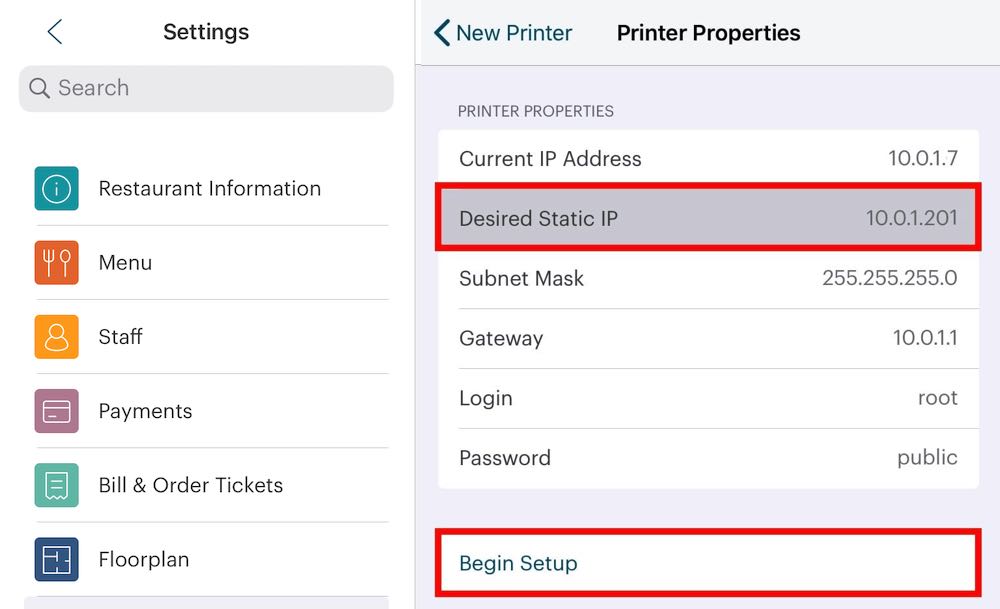
12. In the Printer IP field, enter the desired static IP, for example enter 10.0.1.201. Note: If you add an additional printer later, increment the final portion of the IP address by 1 for the new printer. For example, if later you add a kitchen printer, enter 10.0.1.202 for the kitchen printer. If you add a third printer, say a patio printer, 10.0.1.203. It’s important to not duplicate an IP address or enter an IP address less than 201.
13. Tap Begin Setup.
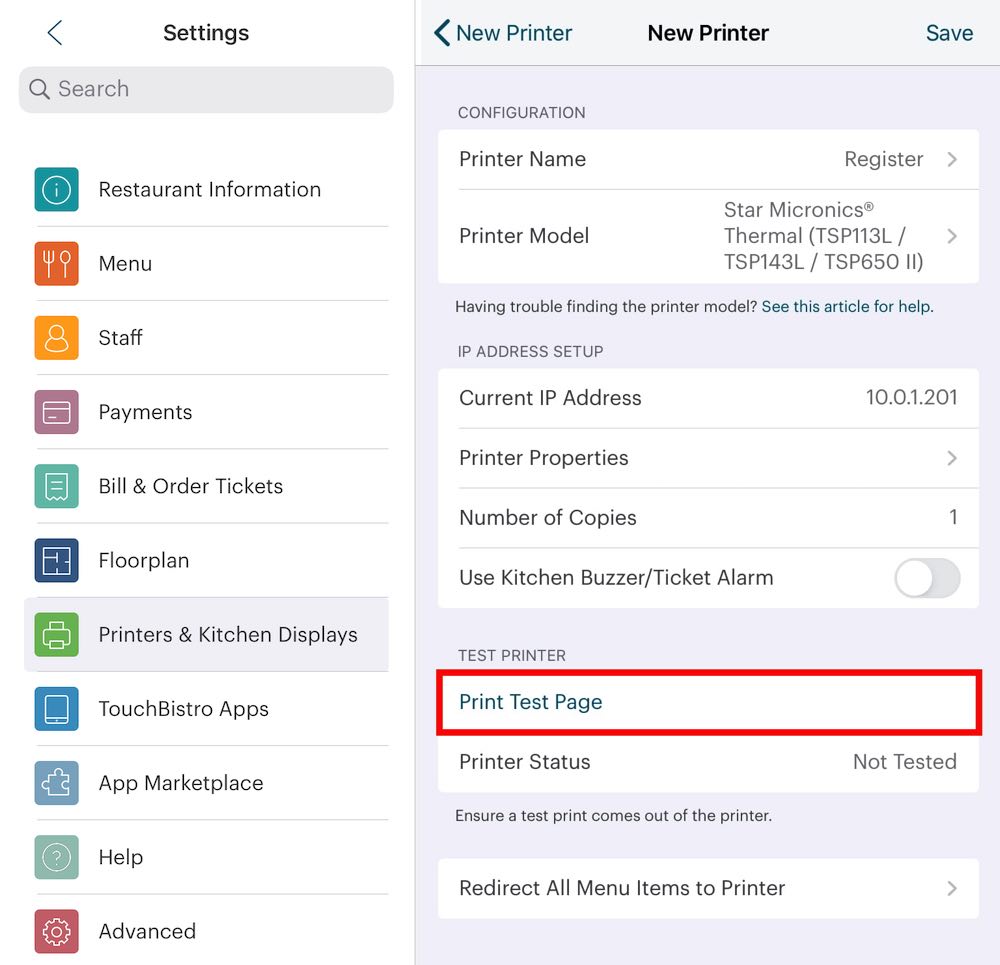
14. Tap Print Test Page.
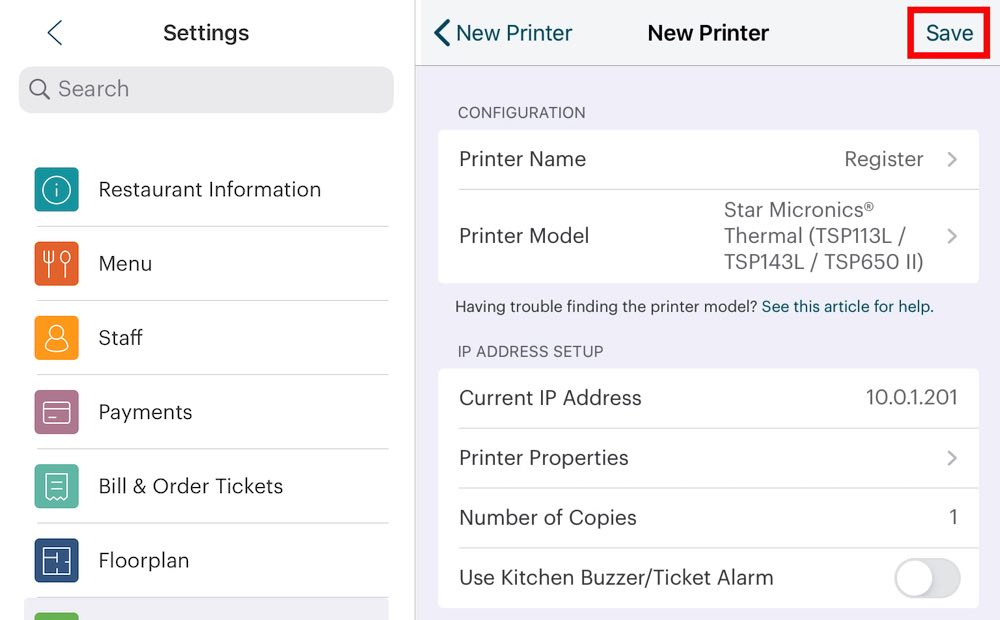
15. Tap Save.
Chapter 3. Troubleshooting
The TSP100III uses Ready and Error lights on the front of the printer to indicate various errors. This guide will provide a visual guide to diagnosing printer errors communicated via these status lights. When a printer isn’t responding, see Printer Status Messages to find out why your printer isn’t functioning properly.
See Also
DO I HAVE THE WRONG PAPER LOADED IN MY PRINTER?
RESETTING A STAR TSP100III PRINTER


 Email
Support
 Frequently
Asked Questions