Setting Up and Using TouchBistro eCard Physical Gift Cards
Table Of Contents
Chapter 1. Enable in Your Cloud Portal
Section 2. Enable eCard Physical Gift Cards under App Marketplace
Chapter 2. Setting up Your Menu
Chapter 3. Adding Value to a Card
Section 1. Adding Value to Multiple Cards
Section 2. Adding Value Using Manual Entry
Chapter 4. Using a Gift Card to Pay for an Order
Section 1. Using Multiple Gift Cards
Chapter 5. Processing a Refund
Chapter 6. Gift Card Activity Report
Chapter 1. Enable in Your Cloud Portal
Section 1. Set Your Timezone
Before you can enable TouchBistro Gift Card, you need to ensure your Cloud Portal’s timezone is set. To do this:
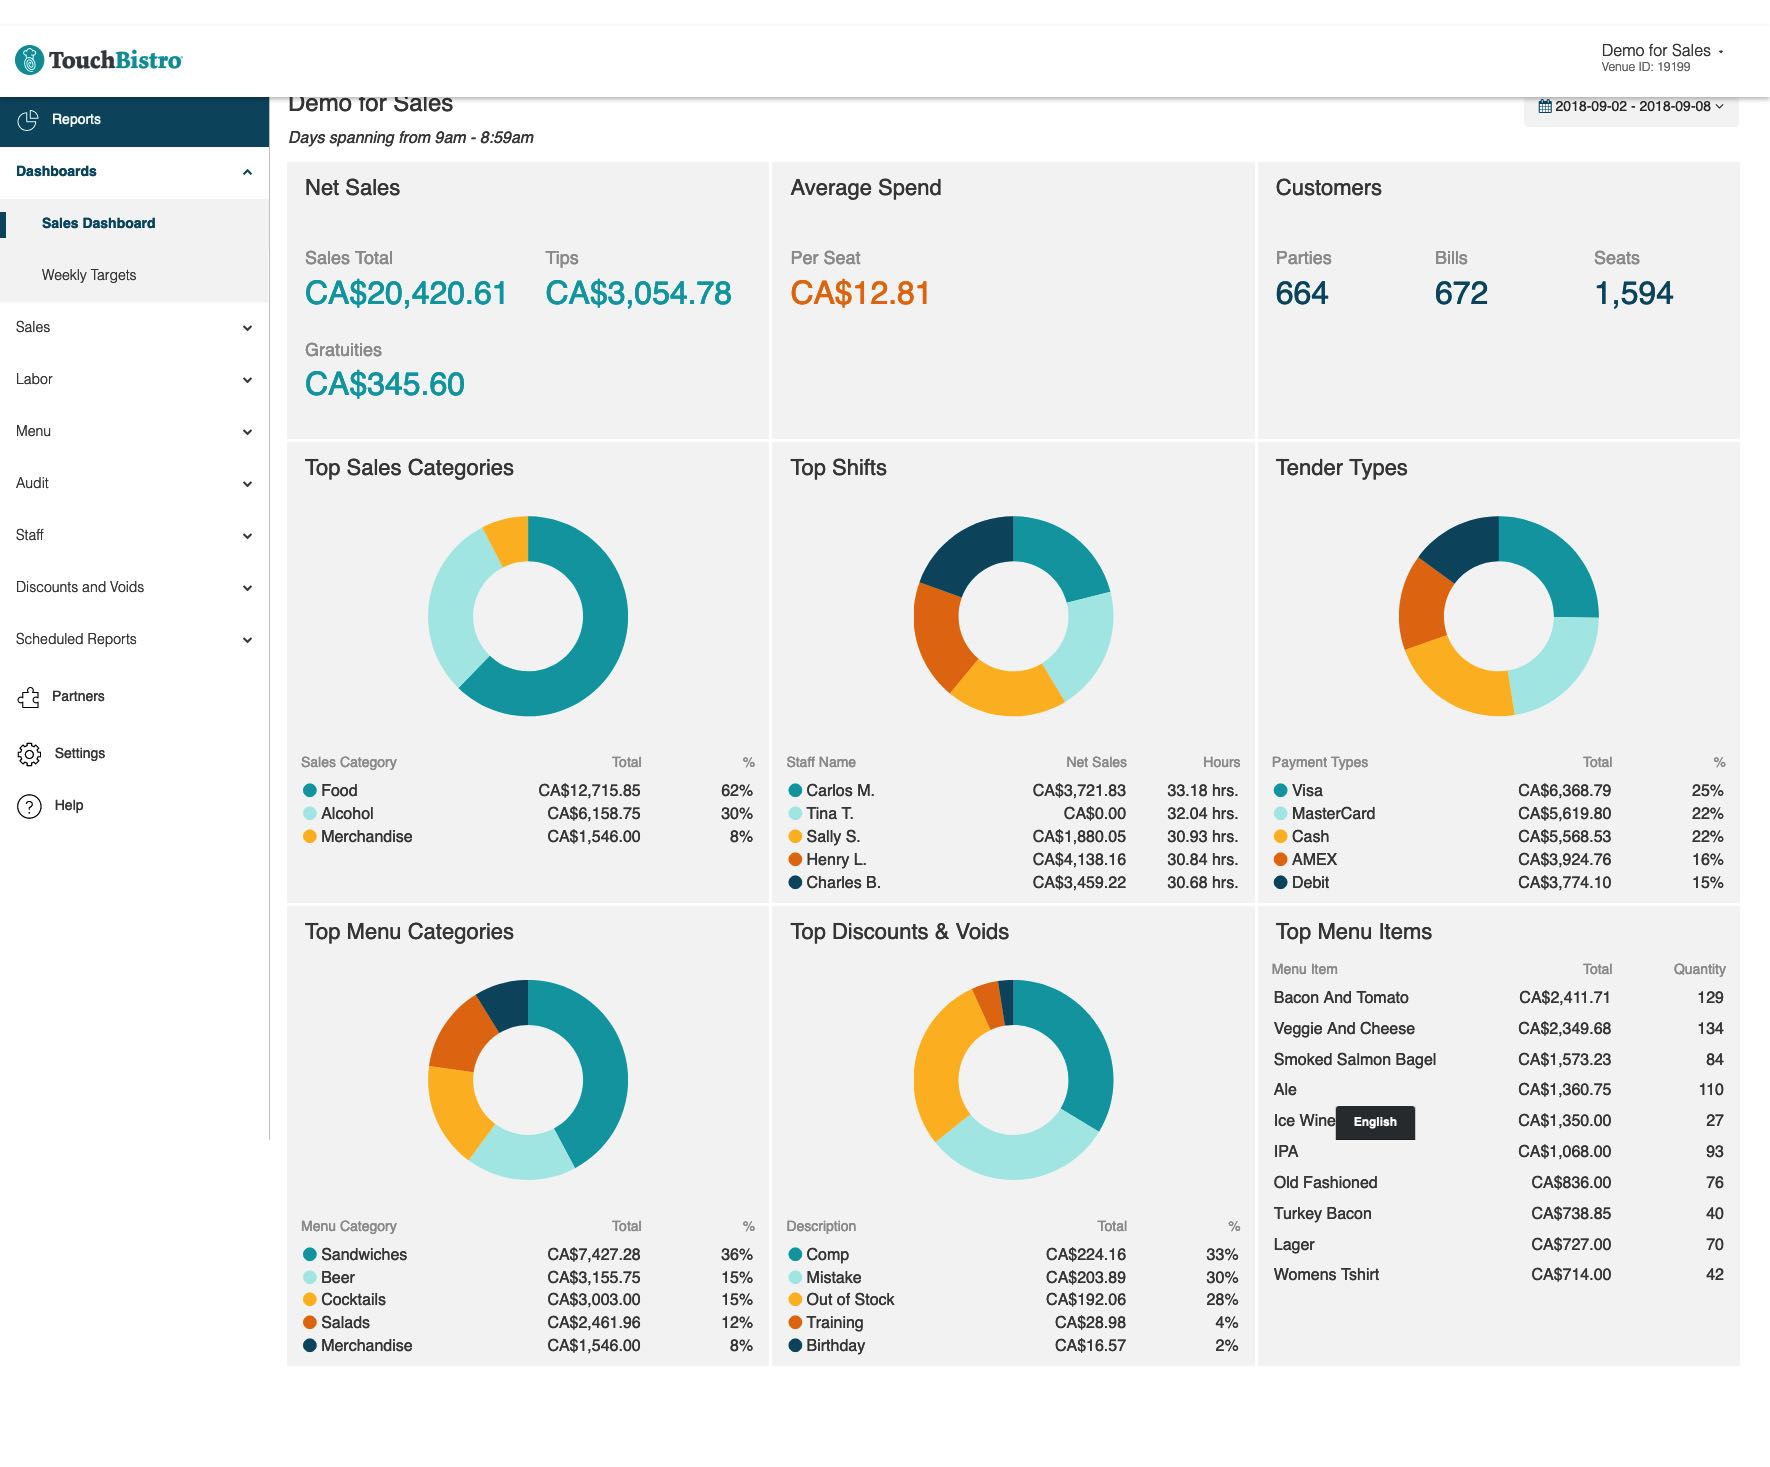
1. Log in to your TouchBistro cloud portal.
2. Click Settings.
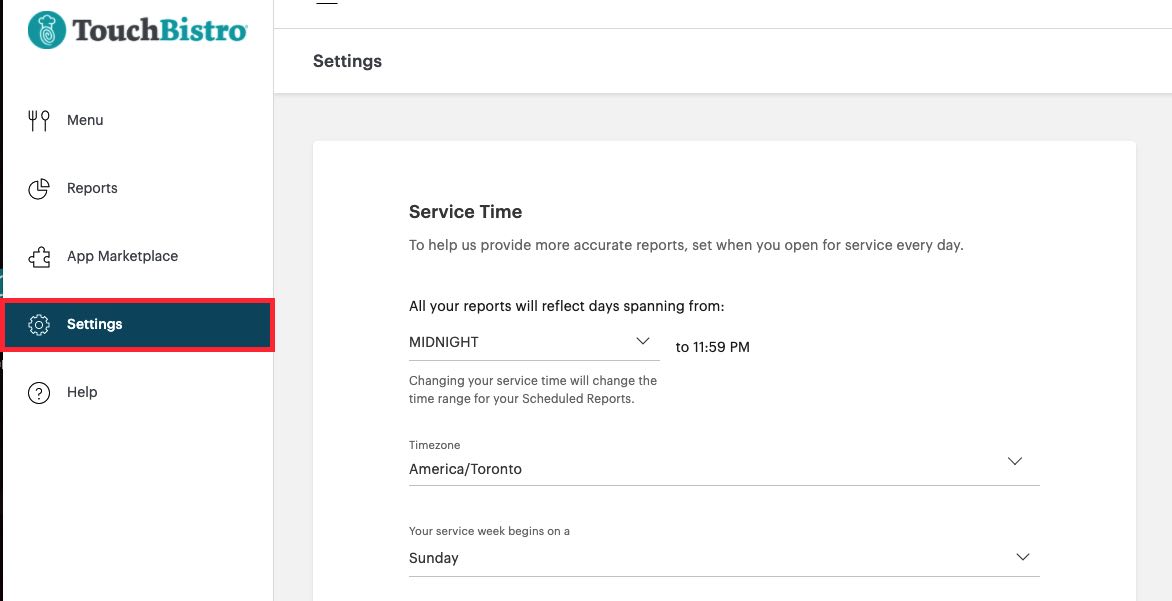
3. Verify you have a timezone set under the Service Time area.
4. If you have not, set your appropriate time zone (for example America/New York for EST).
5. Click Save.
Section 2. Enable eCard Physical Gift Cards under App Marketplace

1. Log in to your TouchBistro cloud portal.
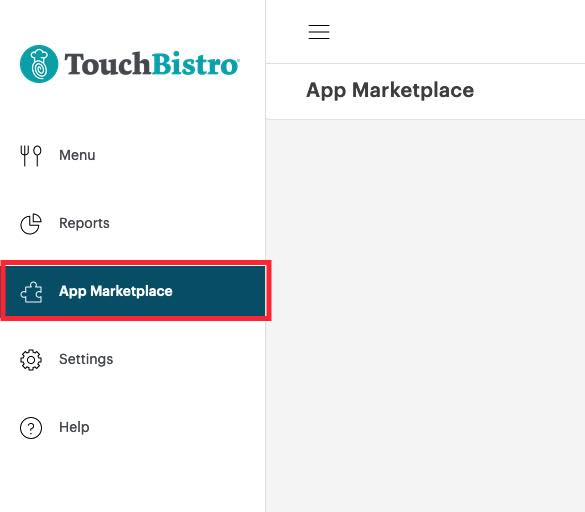
2. Click App Marketplace.
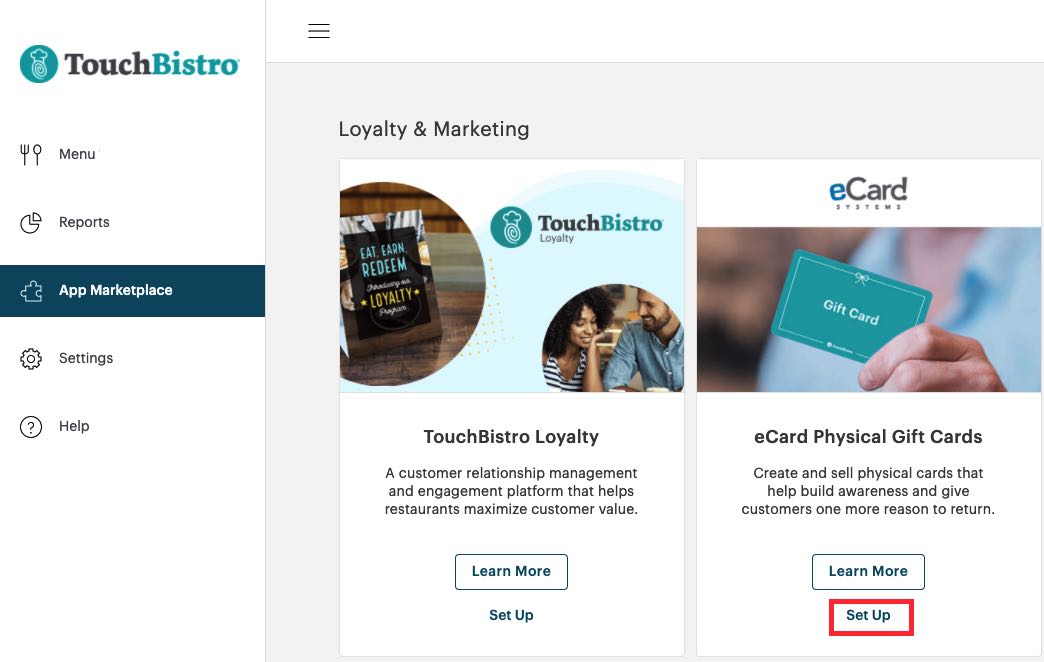
3. Locate your eCard Physical Gift Cards “chicklet” and click Set Up.
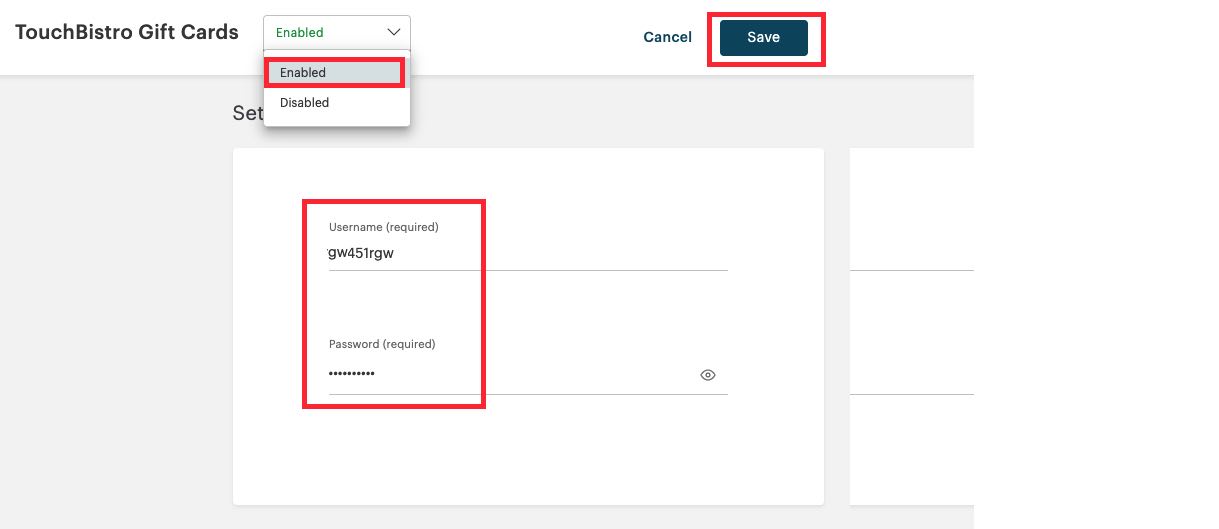
4. Select Enable, enter your Username and Password. These are supplied by eCard. Your Username and Password for enablement in your TouchBistro Cloud Portal should not be confused with the Username and Password you were supplied for access to the eCard portal. Multi venue establishments will be issued one common Username/Password set for the eCard portal and a TouchBistro Cloud Portal Username/Password unique to each physical location.
5. Click Save.
Chapter 2. Setting up Your Menu
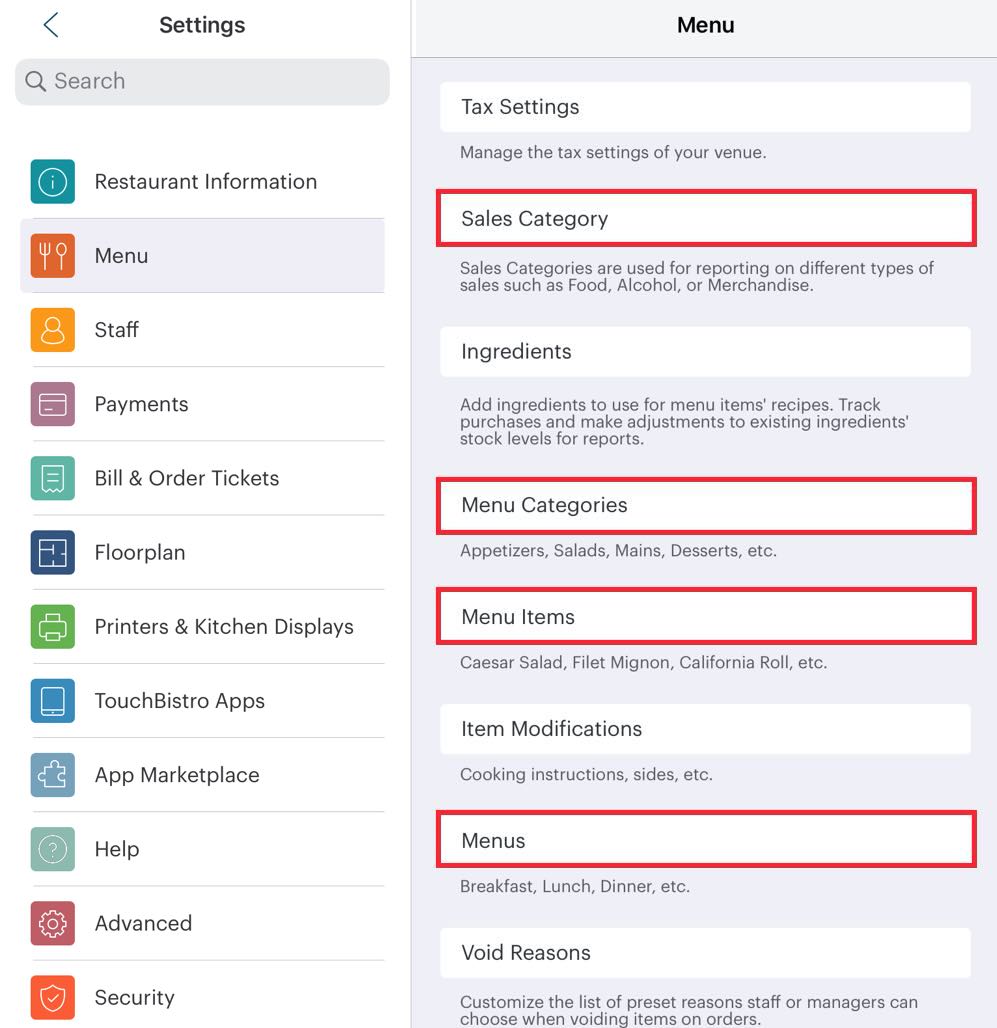
1. Access Admin | Admin Settings | Menu. You’re going to set up items under Sales Categories, Menu Categories, Menu Items, and then finally Menus.
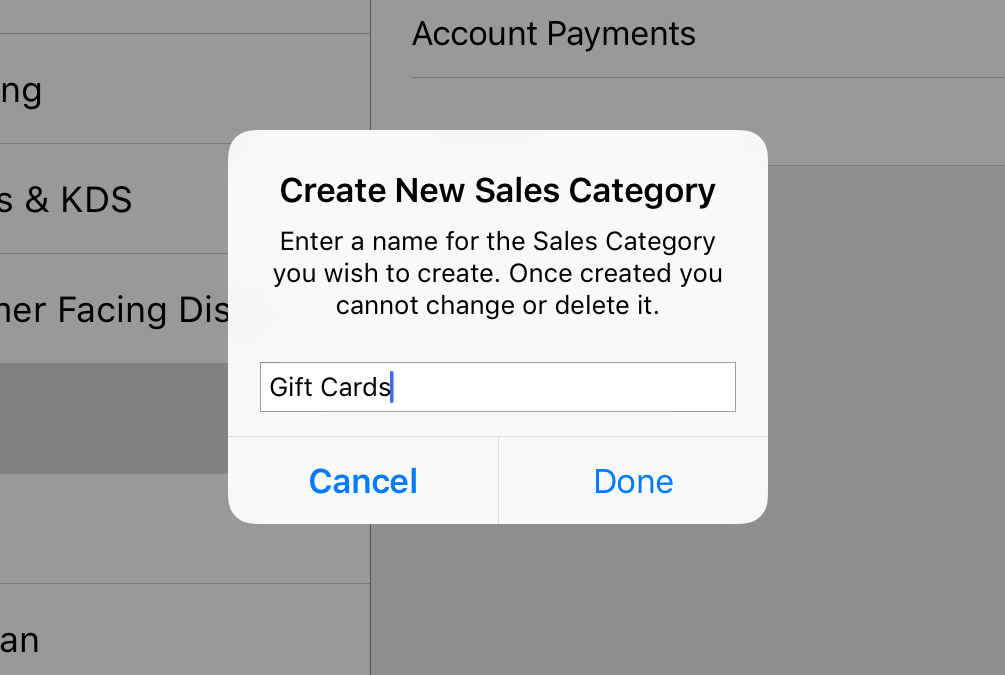
2. First, tap Sales Category. Create a Sales Category called Gift Cards or Merchandise (if you want to sell other non food/drink items).
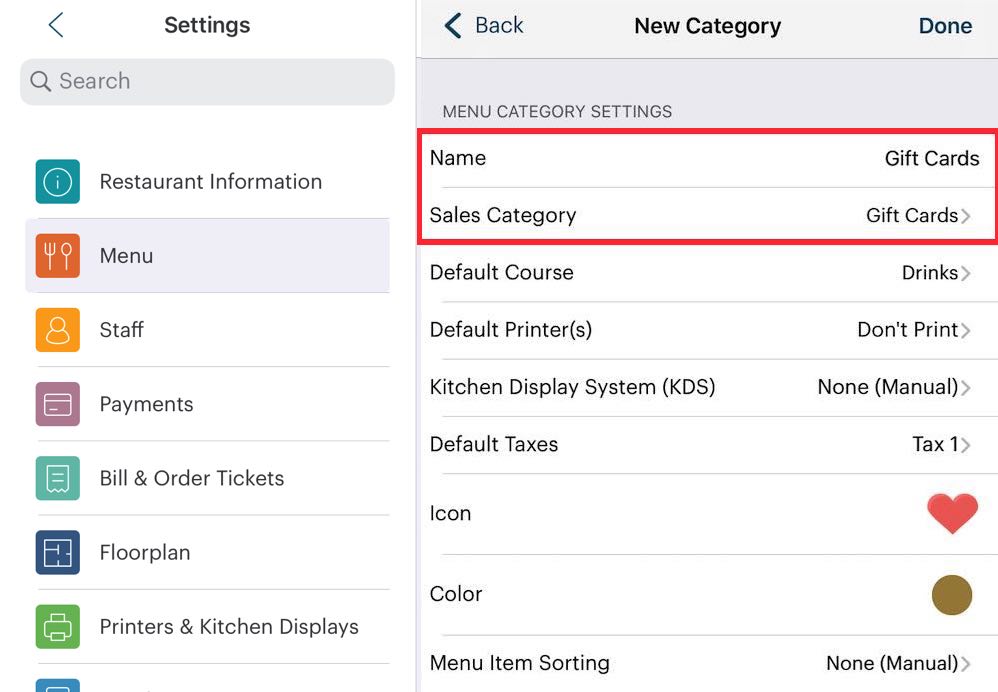
3. Create a Menu Category called Gift Cards. Set the Sales Category for Gift Cards or Merchandise (depending on what you created in step 2).
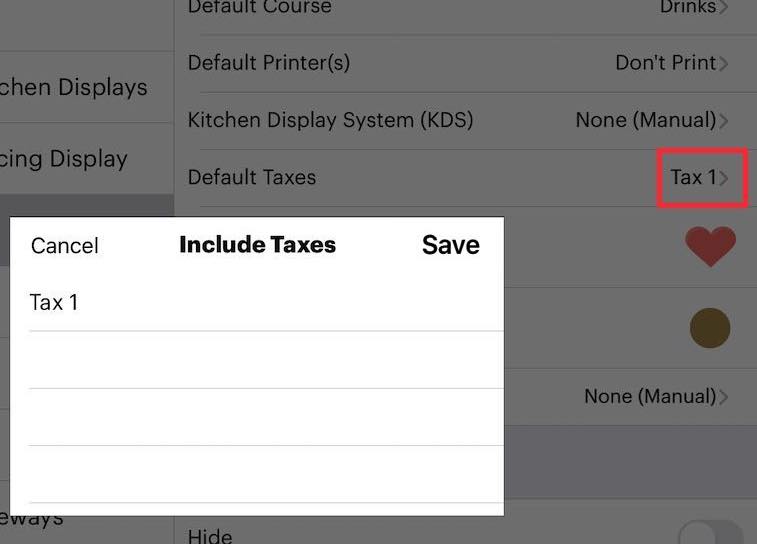
4. Ensure you disable Taxation by removing the checkmark ![]() from the included tax. Tap Save.
from the included tax. Tap Save.
![]()
5. Tap Icon and set an appropriate icon.
6. Tap Done.
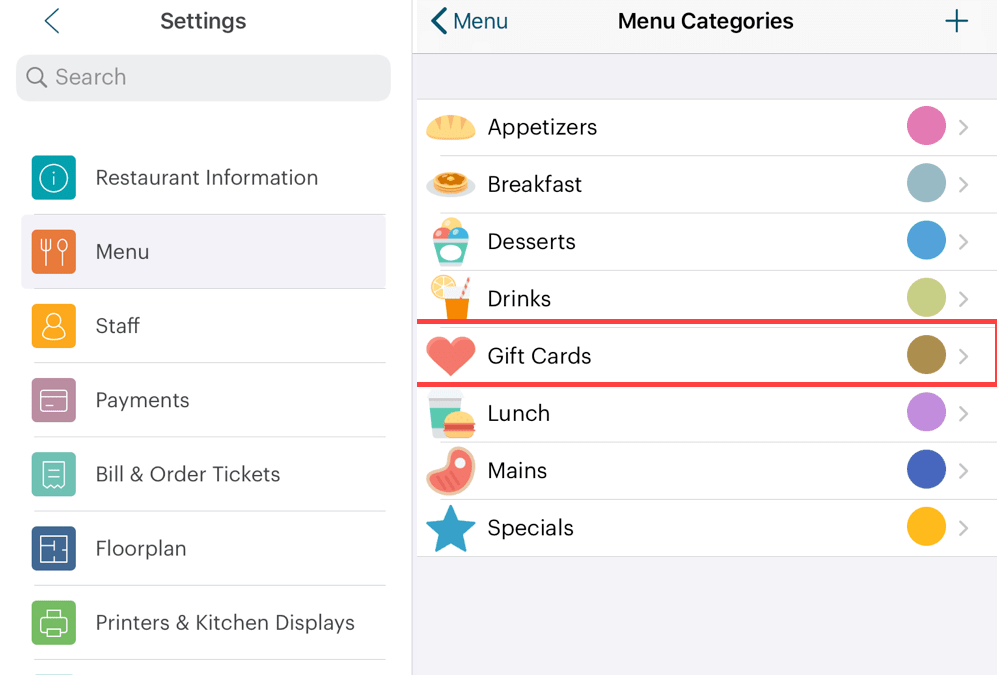
7. Access Menu Items. Tap Gift Cards.
8. Create a Gift Card Value Add menu item under the Gift Cards category.

9. Give the menu item name something like Gift Card Value Add. This will be used when a new card is purchased and value is added to it or when an existing card is topped up.
10. Set it for an Open Price.
11. Ensure Taxes is set to No Tax.
12. Enable Is a Gift Card.
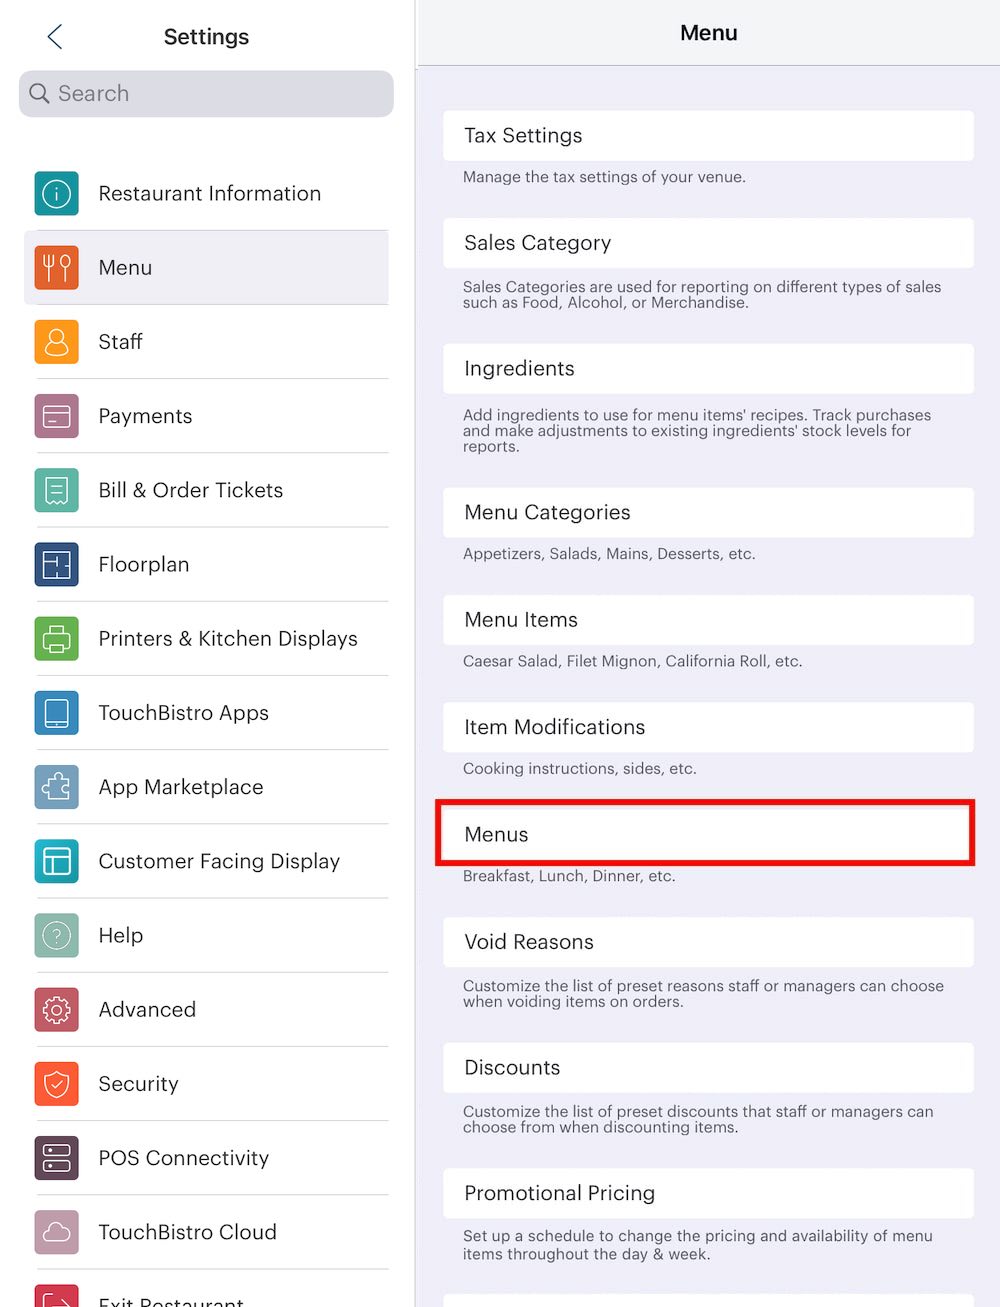
13. Return to the Menu setting screen and tap Menus.
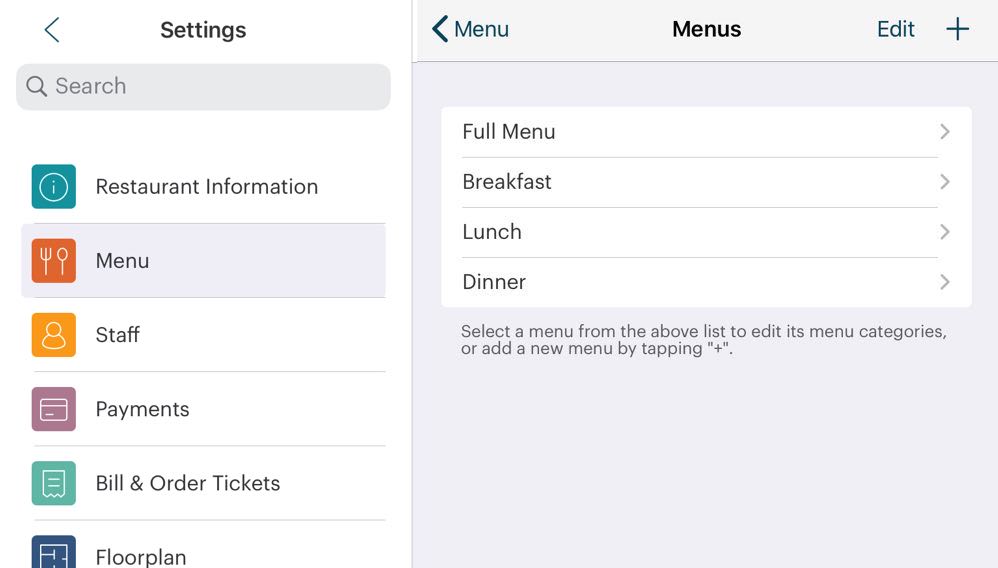
14. Tap a menu category (for example Full Menu).
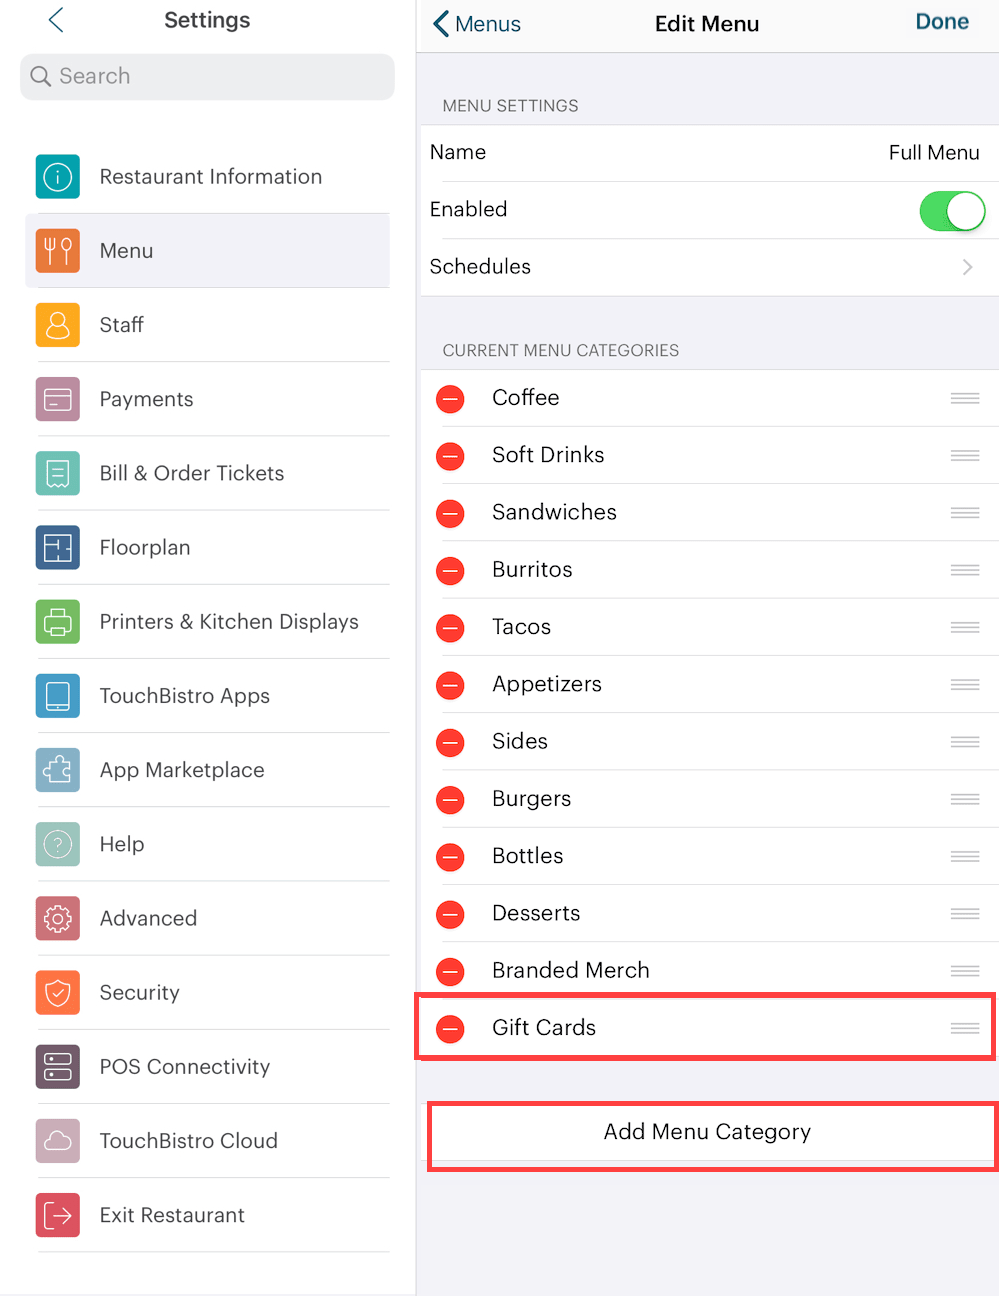
15. Tap Add Menu Category and add your Gift Cards menu category.
16. Tap Done and then add the Gift Cards menu category to additional Menus as necessary.
Chapter 3. Adding Value to a Card
After you’ve set up a gift card menu item, you’re now ready to log gift card sales/value top-ups via TouchBistro and have such sales correctly reported.
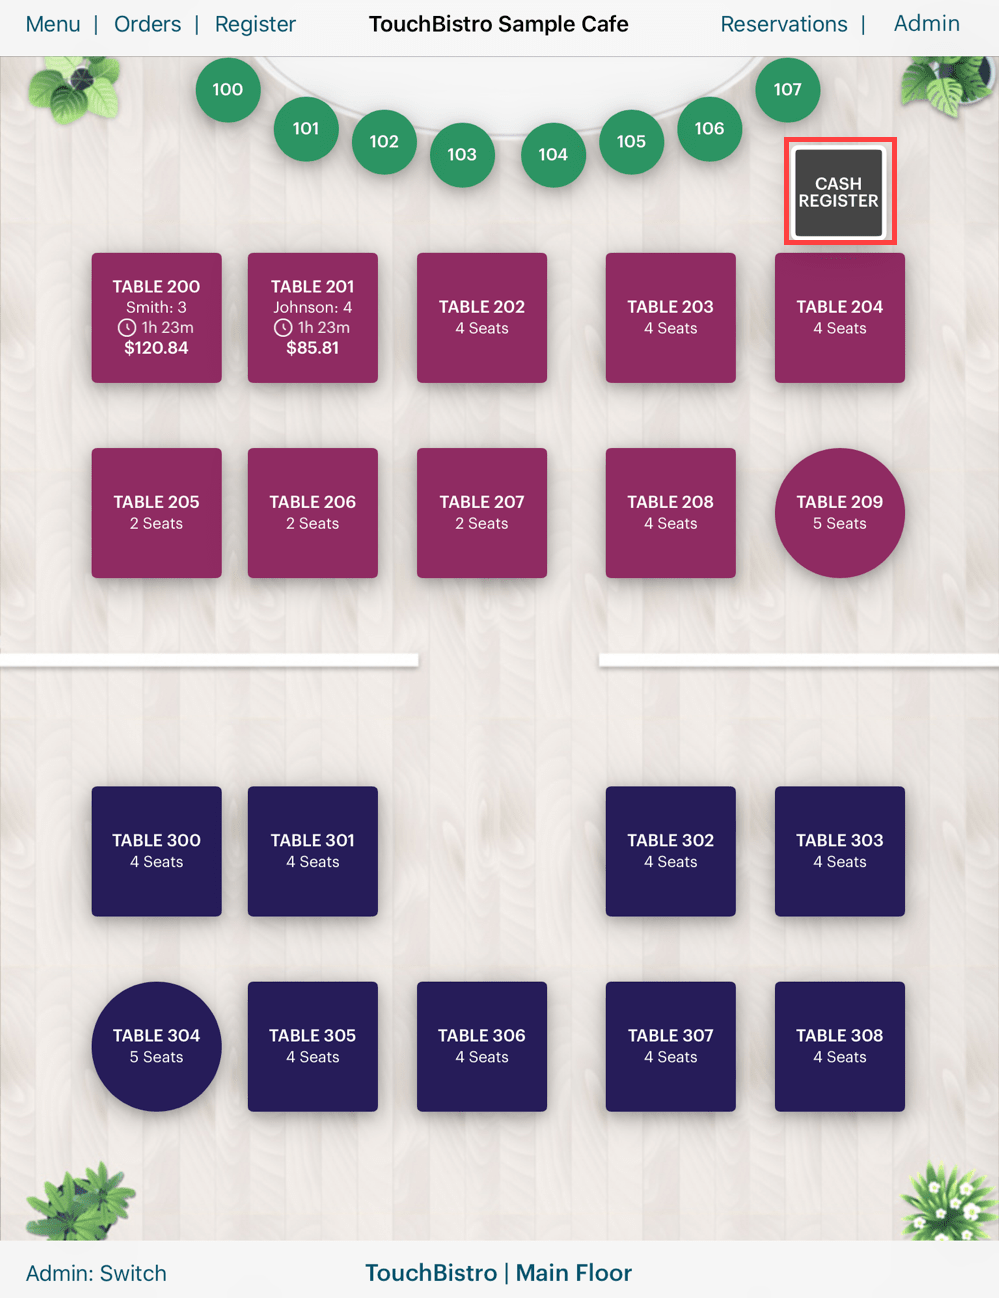
1. Open your cash register.

2. Tap your Gift Card menu category.
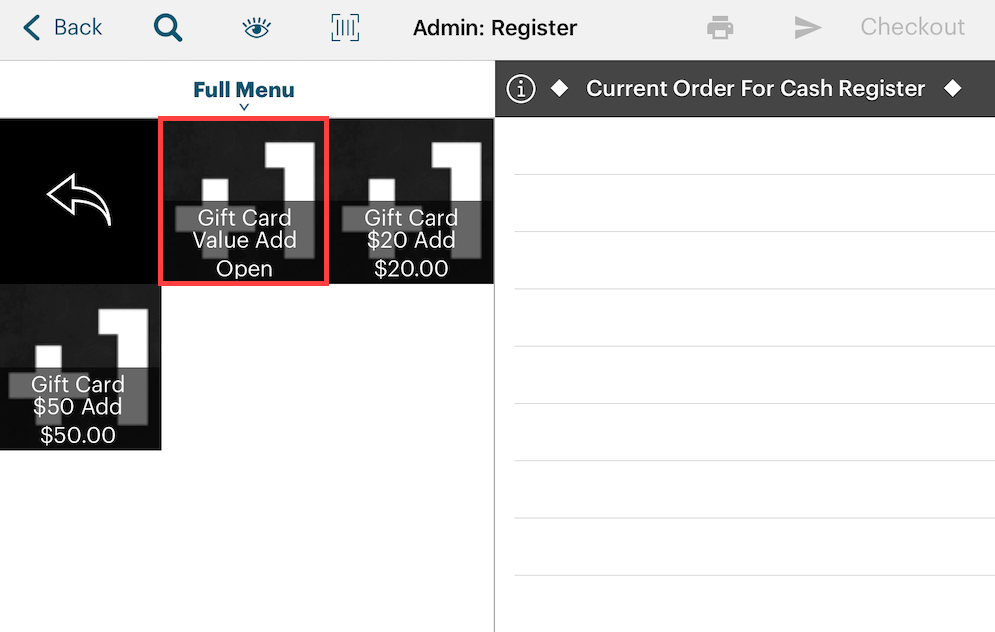
3. Tap your Gift Card Value Add menu item.
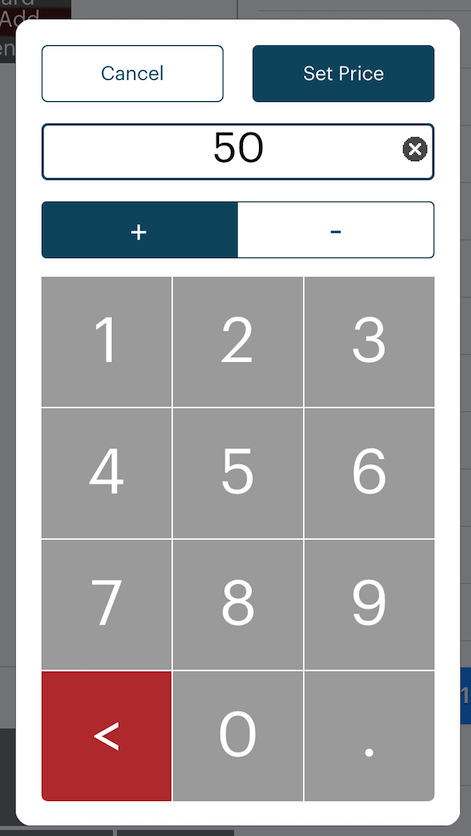
4. Enter the value you wish to add to the card and then tap Set Price.
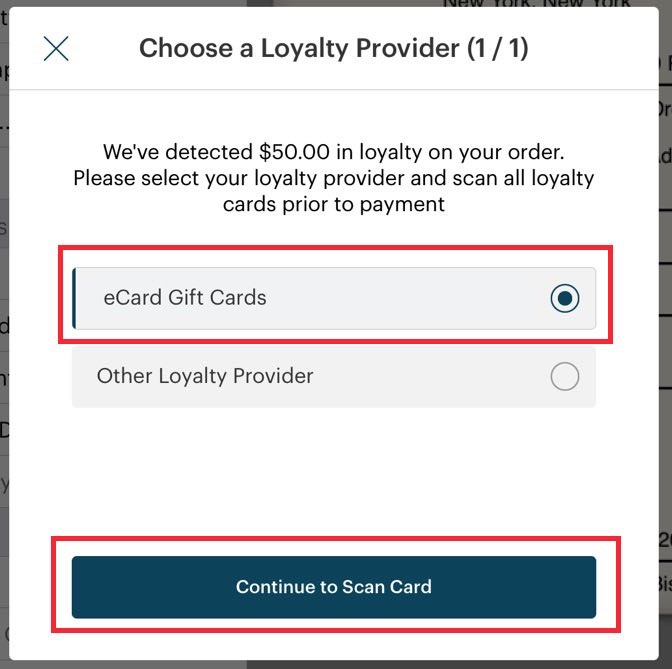
5. Tap TouchBistro Gift Cards and then Continue to Scan Card. If you have a payment integration that also supports gift cards and you’re actually trying to process a value add for your other gift card system, you can tap Other Loyalty Provider. However, in this example, we are tapping TouchBistro Gift Card.
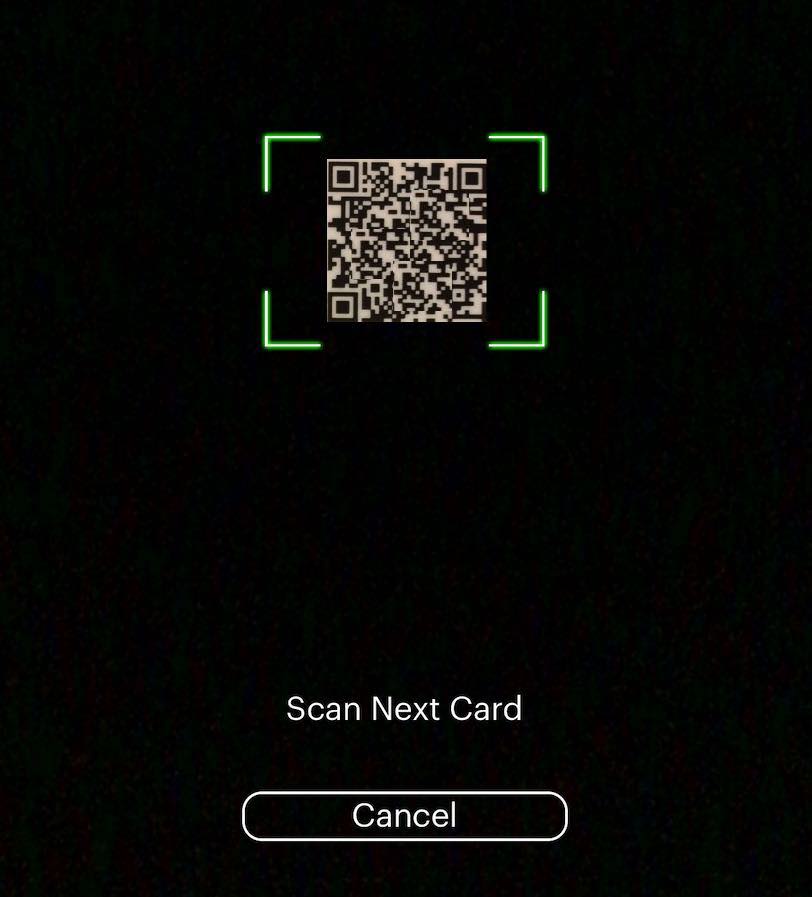
6. Scan QR code on the back of the appropriate gift card. See Switching the Camera below on how to change the camera if you prefer not to use the camera your iPad defaults to.
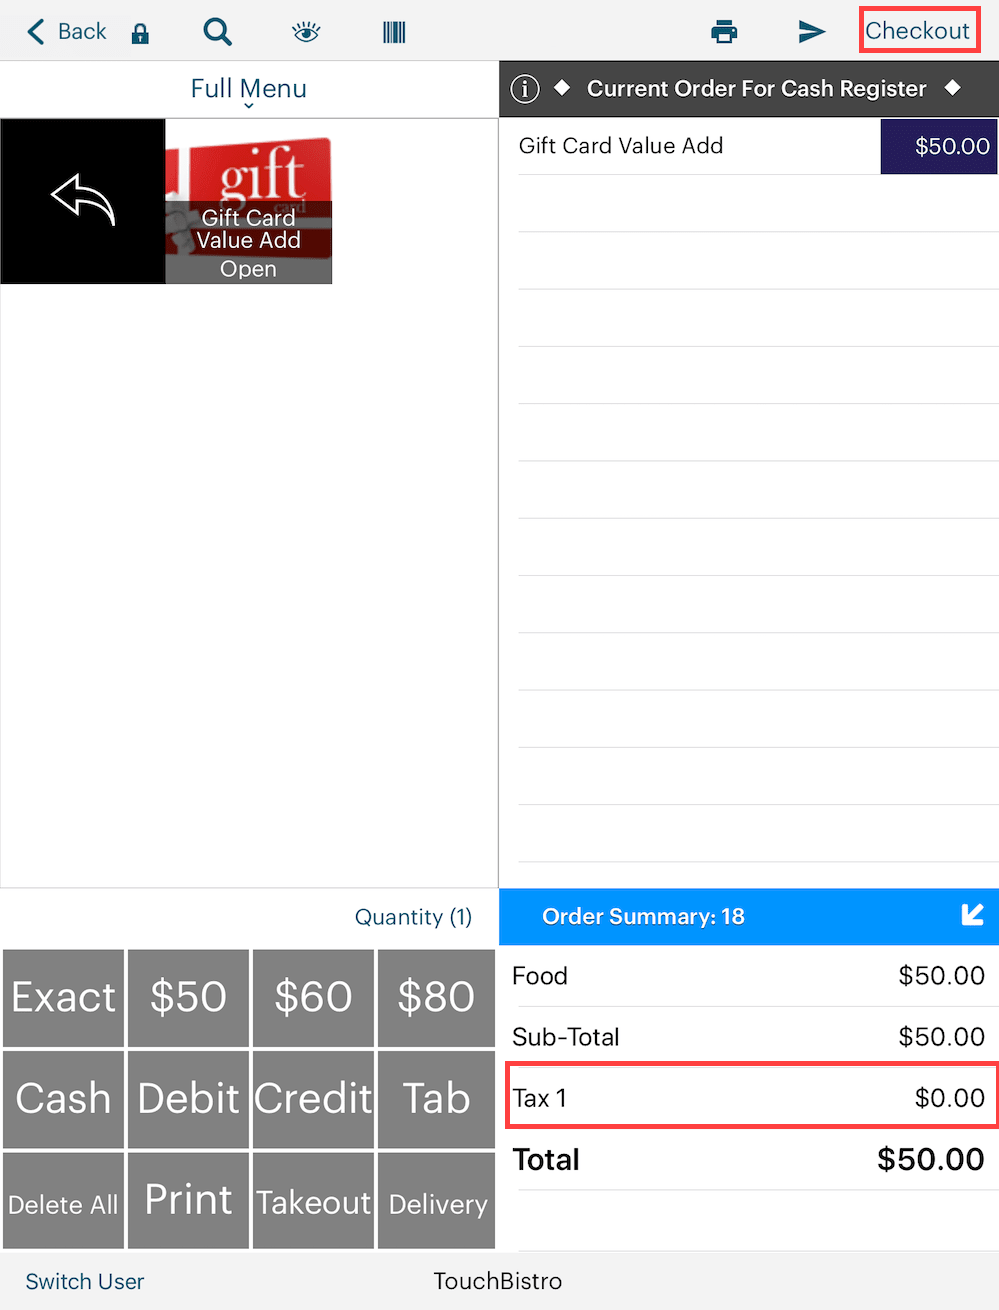
7. Double check you set this menu item up not to charge tax. In most jurisdictions, you do not charge tax on values added to a gift card, as the tax is paid when the gift card is used to pay for a good or service. Tap Checkout.
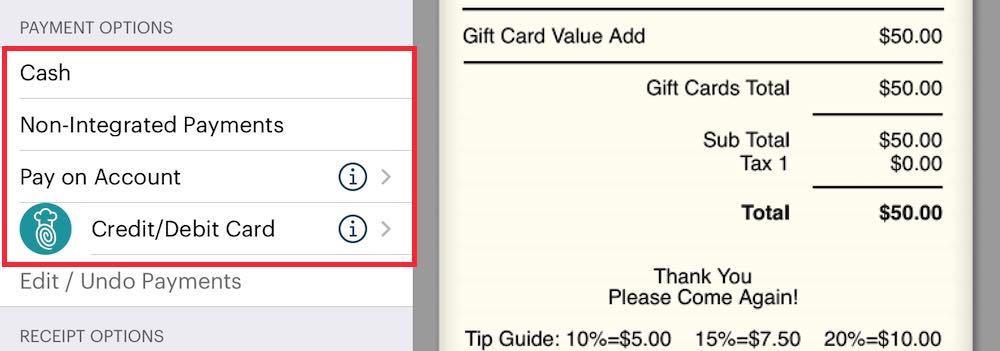
8. Tap a payment method like your integrated payment method or tap Cash. (Note: you can’t use a TouchBistro gift card to pay for a TouchBistro gift card.)
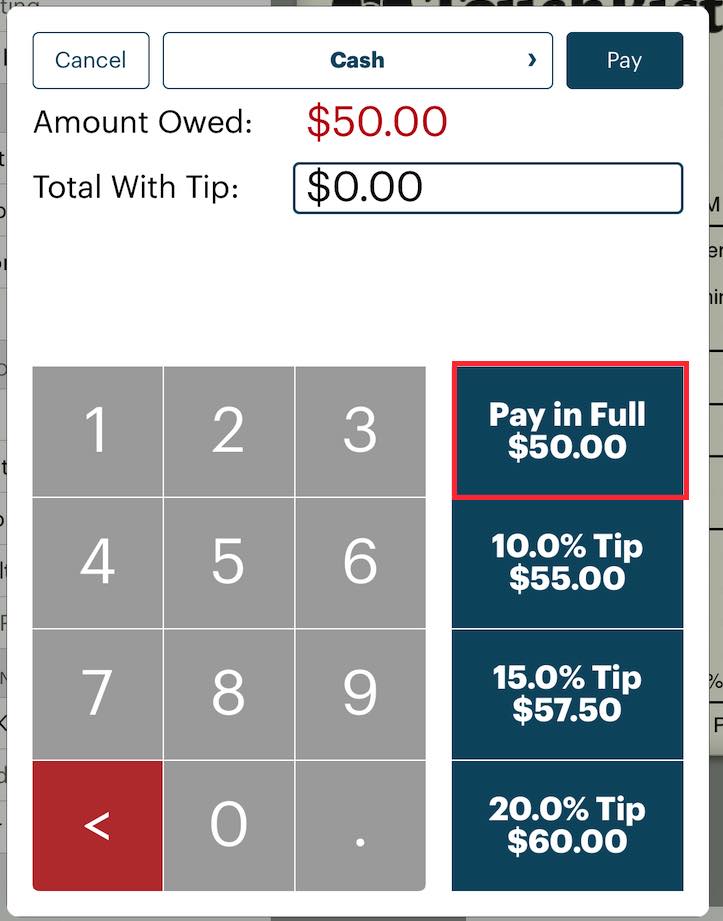
9. You will be notified of a successful value add and then prompted to take payment for the card. In this case, we are taking cash to pay for the gift card. Tap Pay in Full or select a tip option on the right.
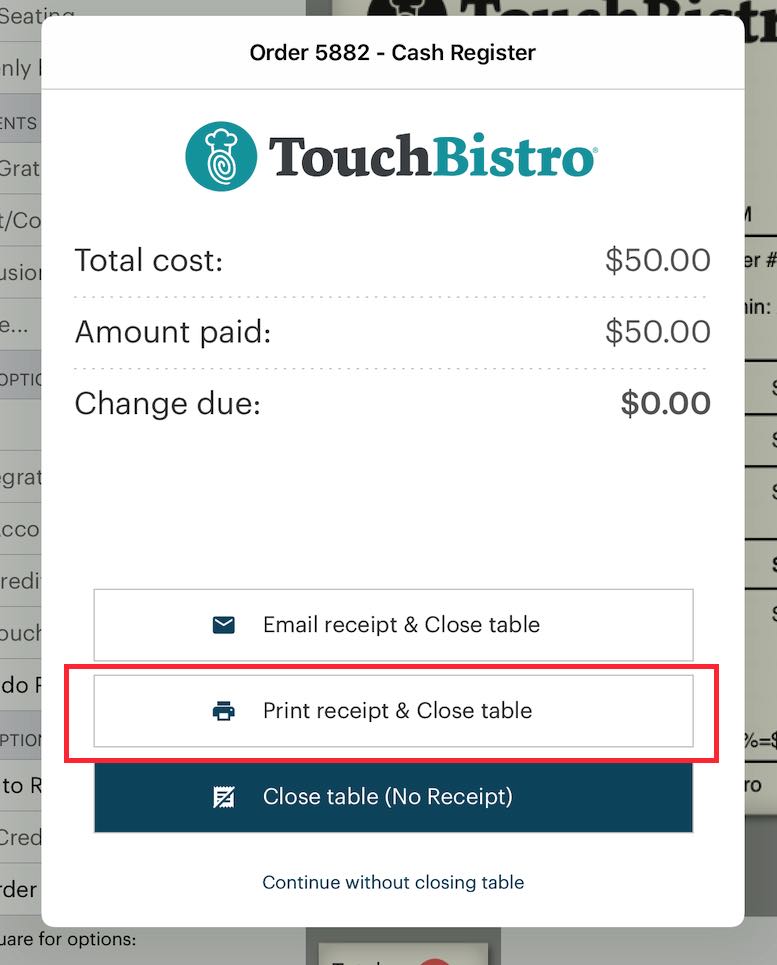
10. Tap Print a receipt & Close table.
Section 1. Adding Value to Multiple Cards
Sometimes customers may want to purchase more than one card at a time. For example, a customer wants to purchase three separate gift cards, each with a value of $50. You do not have to process each transaction separately. To do this:

1. Open your cash register.

2. Tap your Gift Card menu category.

3. Tap your Gift Card Value Add menu item.

4. Enter the value you wish to add to the card and then tap Set Price.

5. Select TouchBistro Gift Cards and tap Continue to Scan Card. Proceed to scan the card using the camera on your iPad.
6. Repeat steps 3, 4 and 5 to add additional cards. Make sure to keep track of the cards you are adding value to.
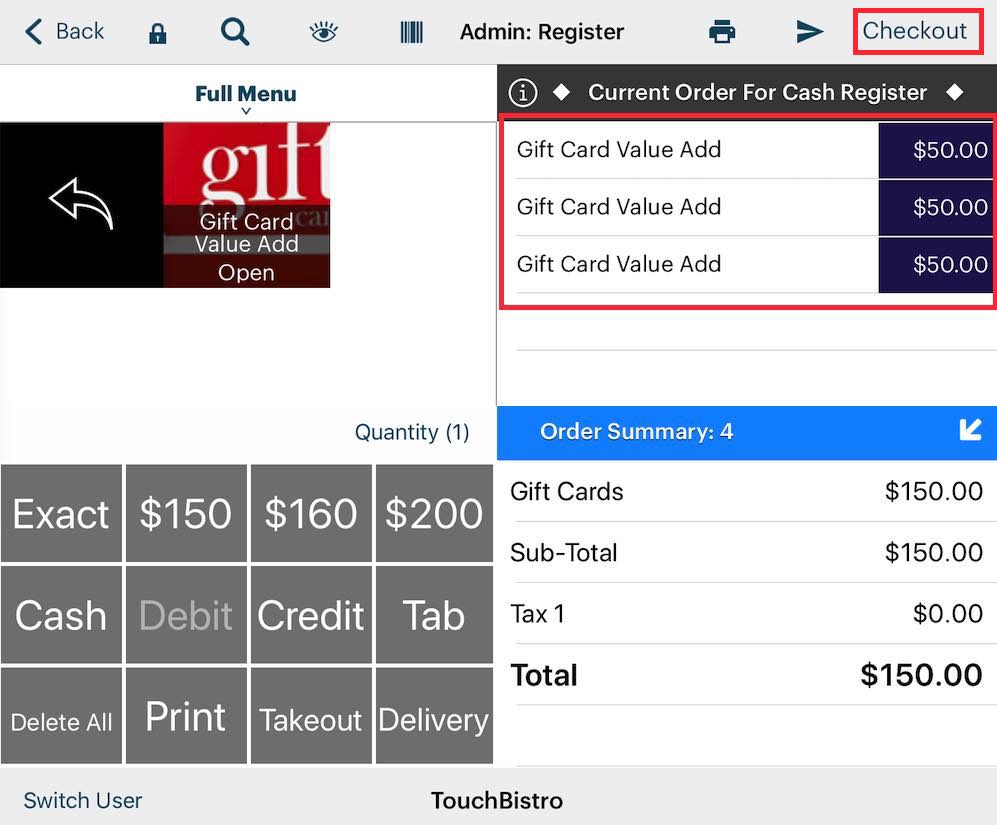
7. Add any additional value purchases and then tap Checkout.
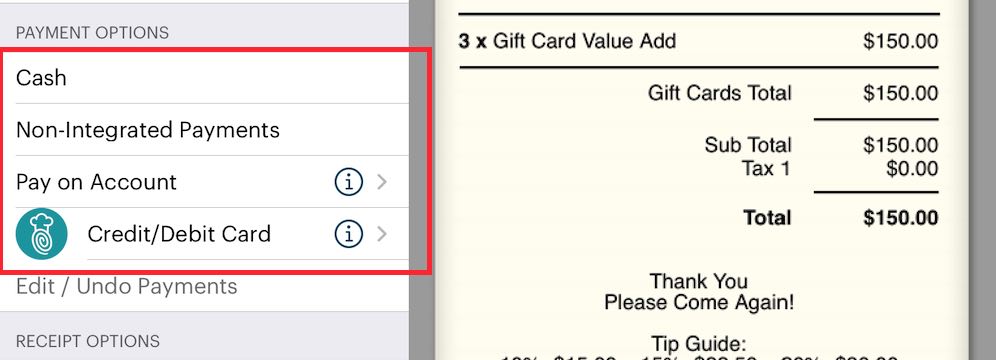
8. Tap a payment option to pay for the first card, for example Cash.
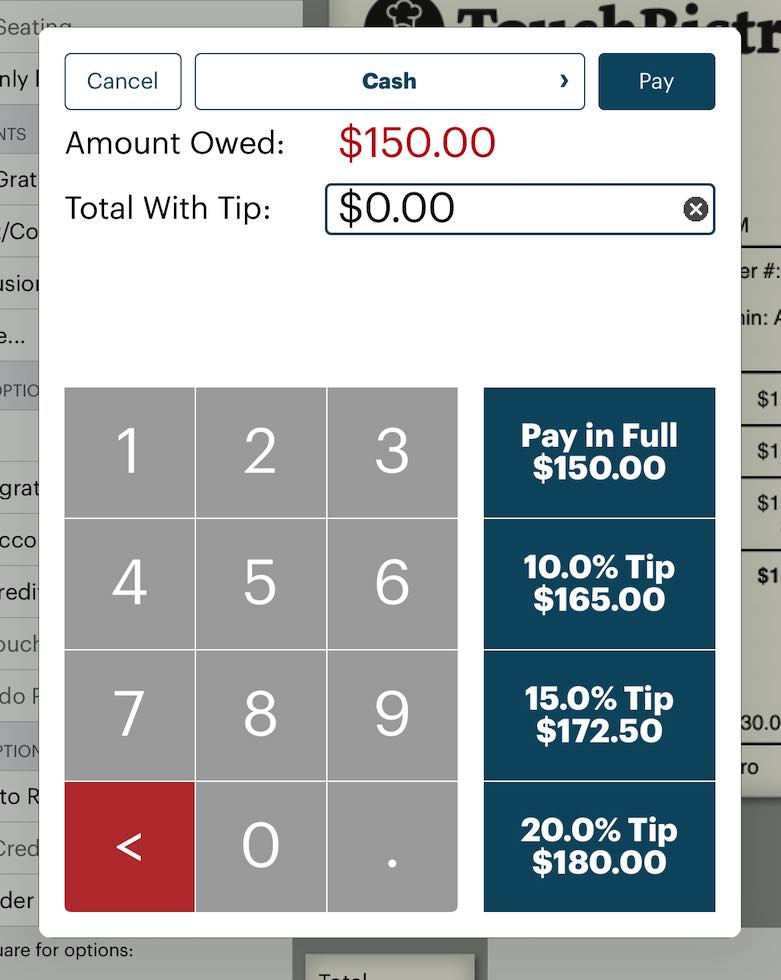
9. Take payment for all three cards and tap Pay.
Section 2. Adding Value Using Manual Entry
If the card’s QR Code is not being read (for example, the QR code image was damaged), you can add value to the card as long as the card number is readable on the back of the card. To do this:

1. Tap your Gift Card Value Add menu item.

2. Enter the value you wish to add to the card and then tap Set Price.

3. Tap TouchBistro Gift Card and then Continue to Scan Card.
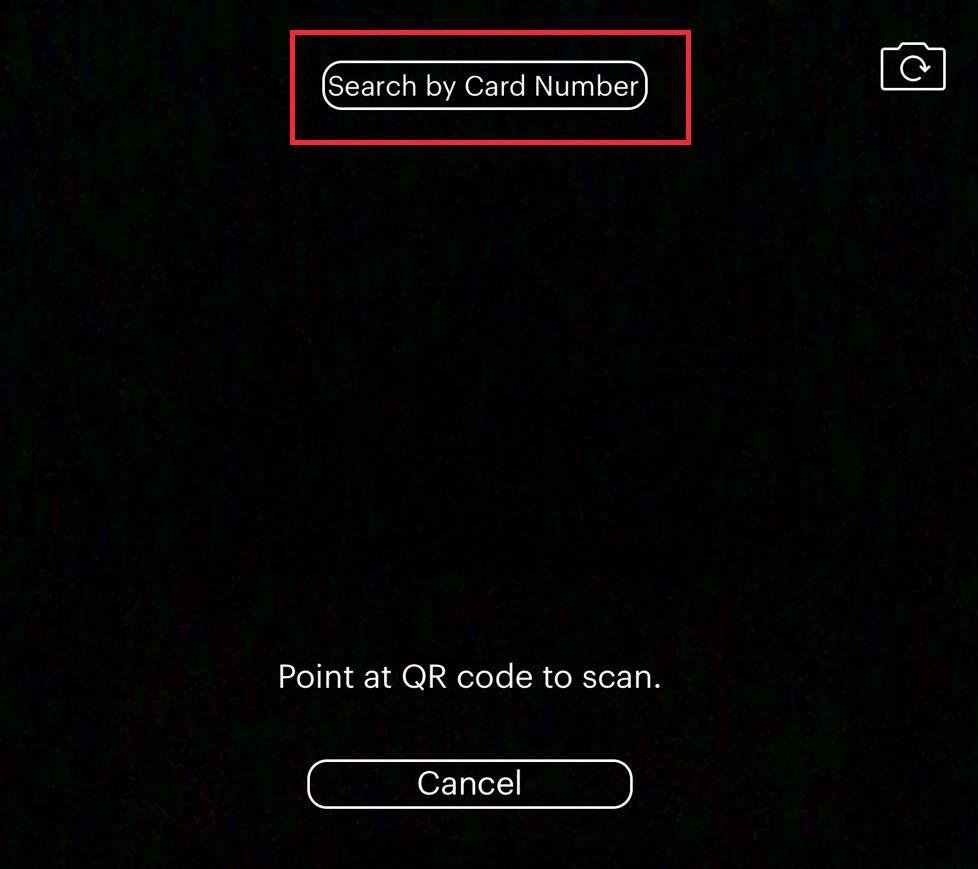
4. Tap Search by Card Number.
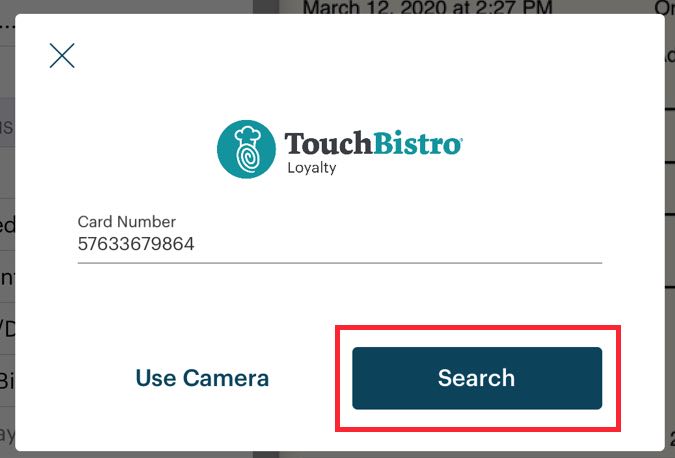
5. Enter the card number and tap Search.

6. Double check you set this menu item up not to charge tax. In most jurisdictions, you do not charge tax on values added to a gift card, as the tax is paid when the gift card is used to pay for a good or service. Tap Checkout.

7. Tap a payment method like your integrated payment method or tap Cash.

8. You will be notified of a successful value add and then prompted to take payment for the card. In this case we are taking cash to pay for the gift card. Tap Pay in Full or select a tip option on the right.

9. Tap Print a receipt & Close table.
Chapter 4. Using a Gift Card to Pay for an Order

1. When the customer is ready to pay, tap Checkout.

2. Tap eCard Gift Card.

3. Scan the gift card’s QR code, or tap Search by Card Number and type the card number in manually.
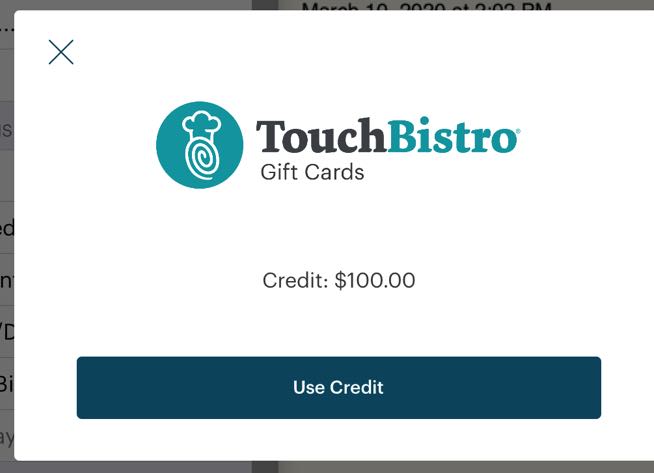
4. You will see how much is currently on the card. Tap Use Credit. If there are insufficient funds to pay for the bill, warn the patron. The patron can pay for a portion with the value on the card. If so tap Use Credit. If the customer does not want to use the card, tap the X icon to cancel out of this.
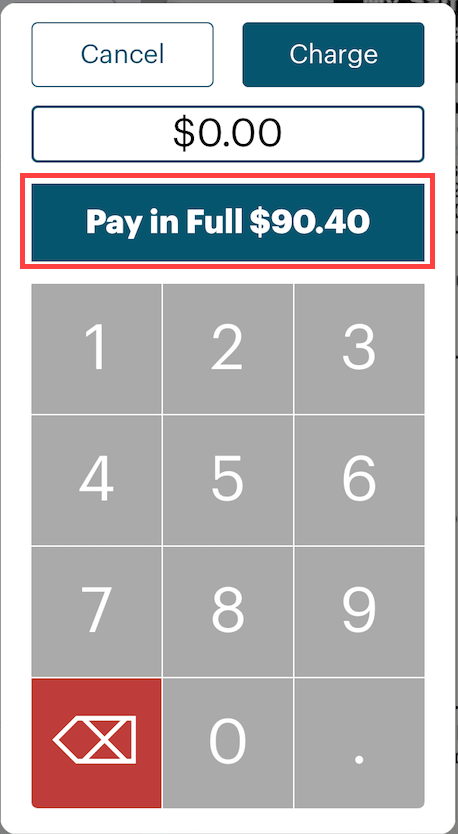
5. Tap Pay in Full (or enter an amount not exceeding what is left on the gift card). If you enter more than the full amount it will be treated like a tip. In the pictured example, if we entered $100, $9.60 would be treated as a credit card tip.
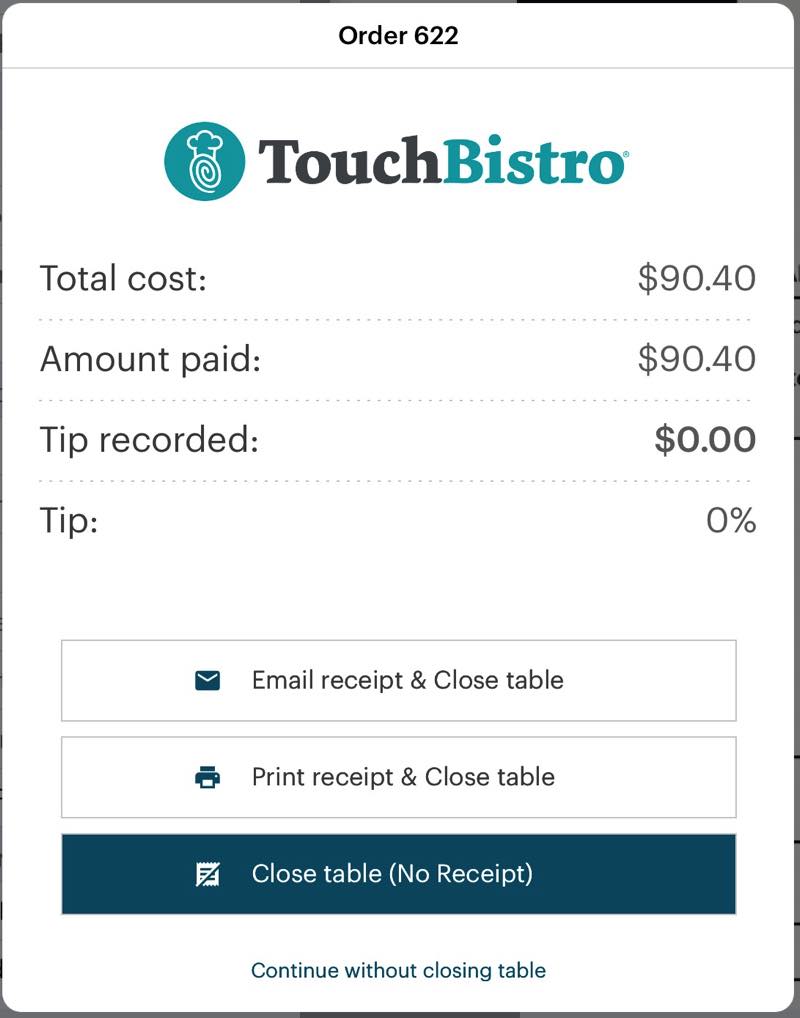
6. Close the order.
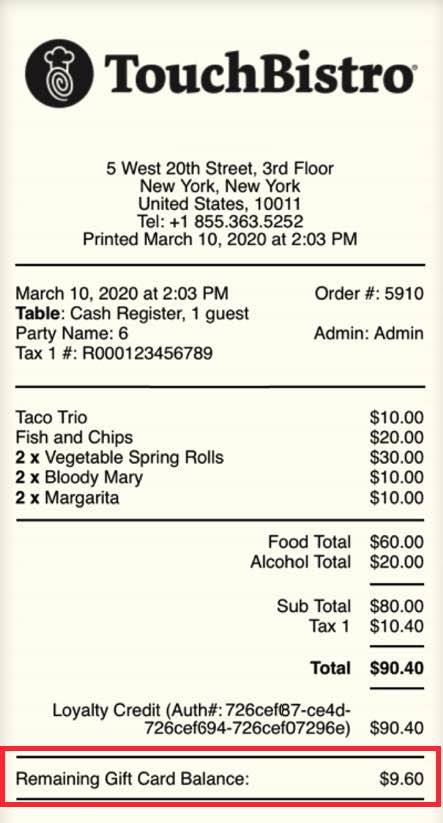
7. The remaining balance on the gift card will appear at the bottom of the guest check.
Section 1. Using Multiple Gift Cards
If a customer wants to pay with multiple gift cards (for example, one gift card doesn’t have enough to pay the full balance), do the following.

1. When the customer is ready to pay, tap Checkout.

2. Tap eCard Gift Card.

3. Scan the gift card’s QR code.
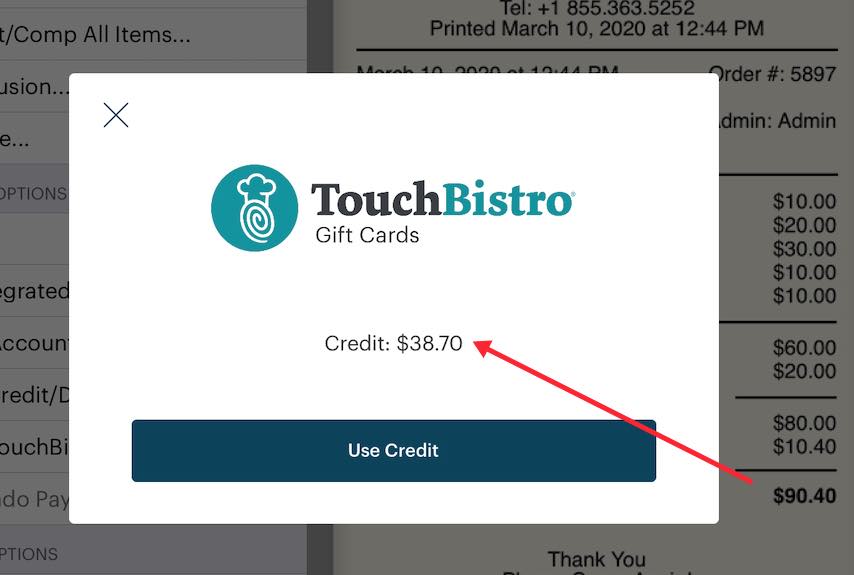
4. You will see how much is currently on the card. We can see the bill is $90.40 but only $38.70 remains on this card. Tap Use Credit.
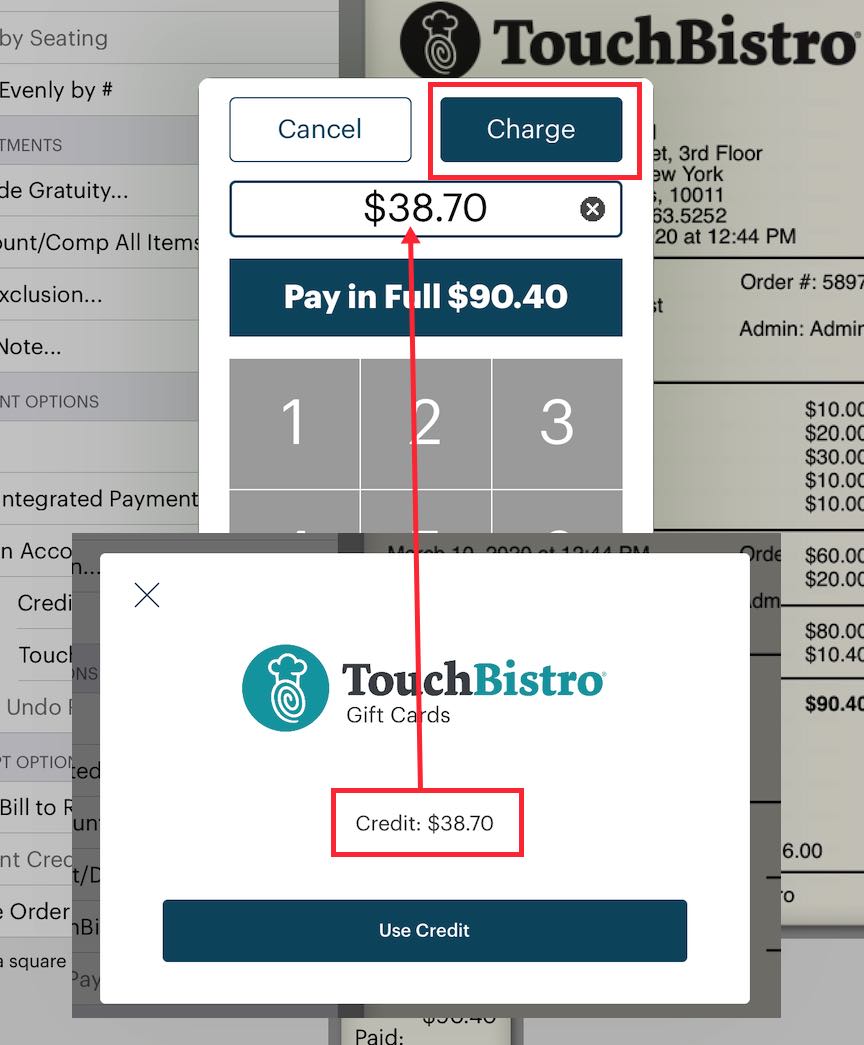
5. Enter the balance of the card ($38.70) and tap Charge.
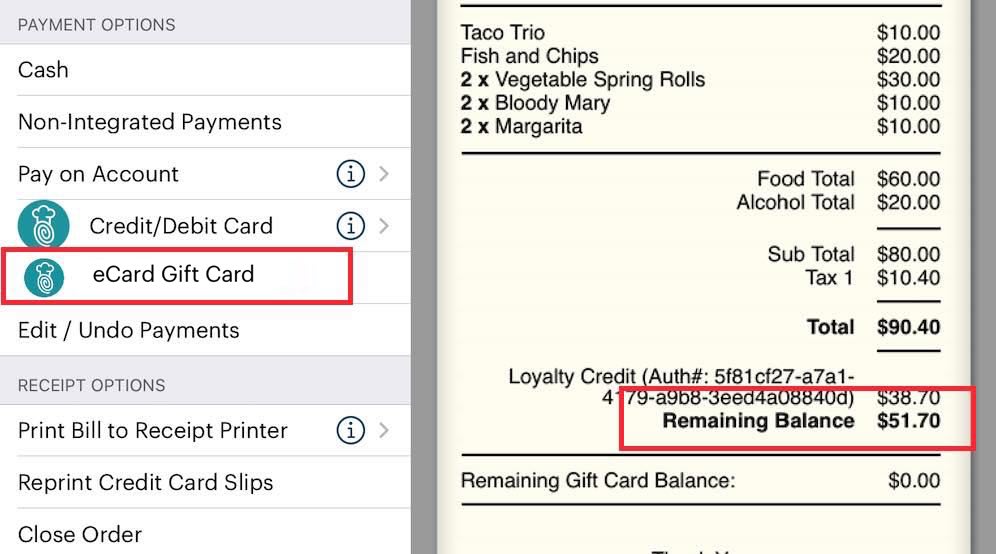
6. Tap eCard Gift Card to accept payment with the next gift card.
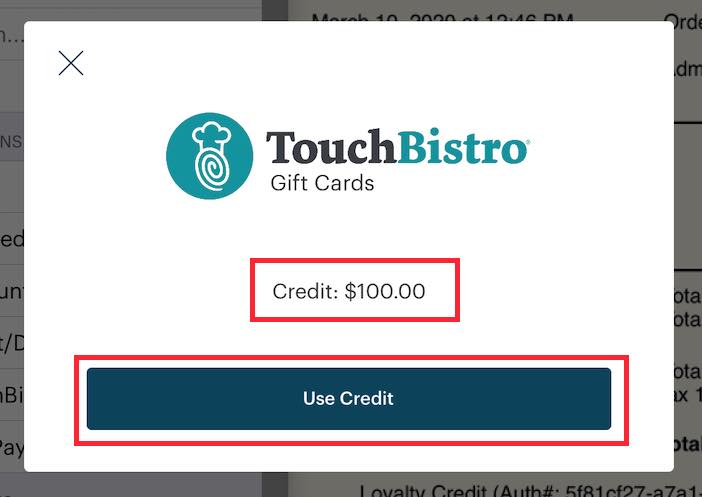
7. In this example, we can see the next gift card has more than enough to pay for the bill’s balance. Tap Use Credit.
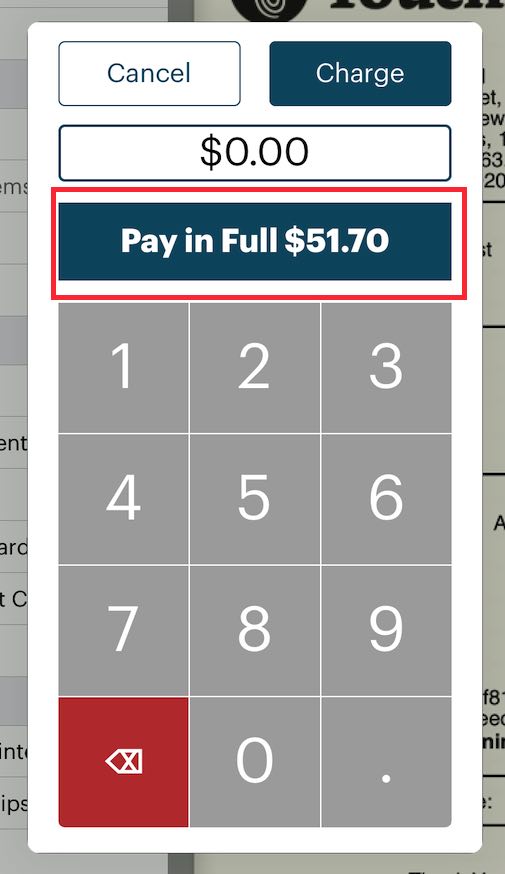
8. Tap Pay in Full to pay the full balance.

9. Close the order.
Section 2. Manual Entry
If the card’s QR Code is not being read (for example, the QR code image was damaged), you can take payment with the card as long as the card number is readable on the back of the card. To do this:

1. When the customer is ready to pay, tap Checkout.

2. Tap eCard Gift Card.

3. Tap Search by Card Number.

4. Enter the card number and tap Search.

5. If you enter the correct number, you will see how much is currently on the card. Tap Use Credit. If there are insufficient funds to pay for the bill, warn the patron. The patron can pay for a portion with the value on the card. If so tap Use Credit. If the customer does not want to use the card, tap the X icon to cancel out of this.

6. Tap Pay in Full (or enter an amount not exceeding what is left on the gift card). If you enter more than the full amount it will be treated like a tip. In the pictured example, if we entered $100, $9.60 would be treated as a credit card tip.

7. Close the order.

8. The remaining balance on the gift card will appear at the bottom of the guest check.
Section 3. Checking a Balance
Currently, the only way check a card’s balance is to process a transaction. To do this:

1. Tap Checkout.

2. Tap eCard Gift Card.

3. Scan the gift card’s QR code, or tap Search by Card Number and type the card number in manually.
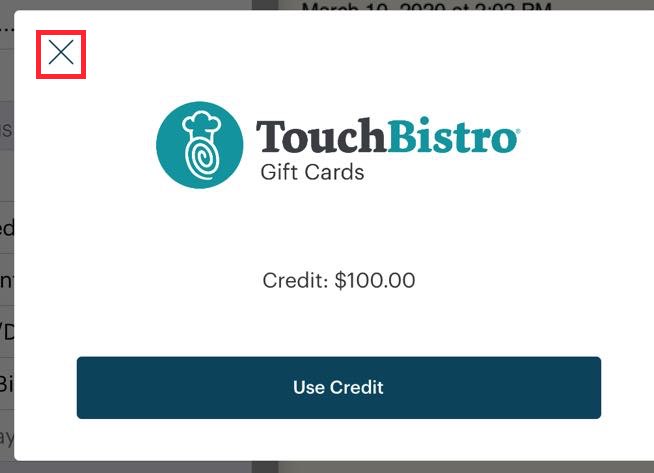
4. You will see how much is currently on the card. Inform the customer of the balance. If you only want to check the balance, tap the X icon at the top left to cancel the transaction.
Chapter 5. Processing a Refund
You can refund amounts to the card in the event a customer wishes a refund on the bill.
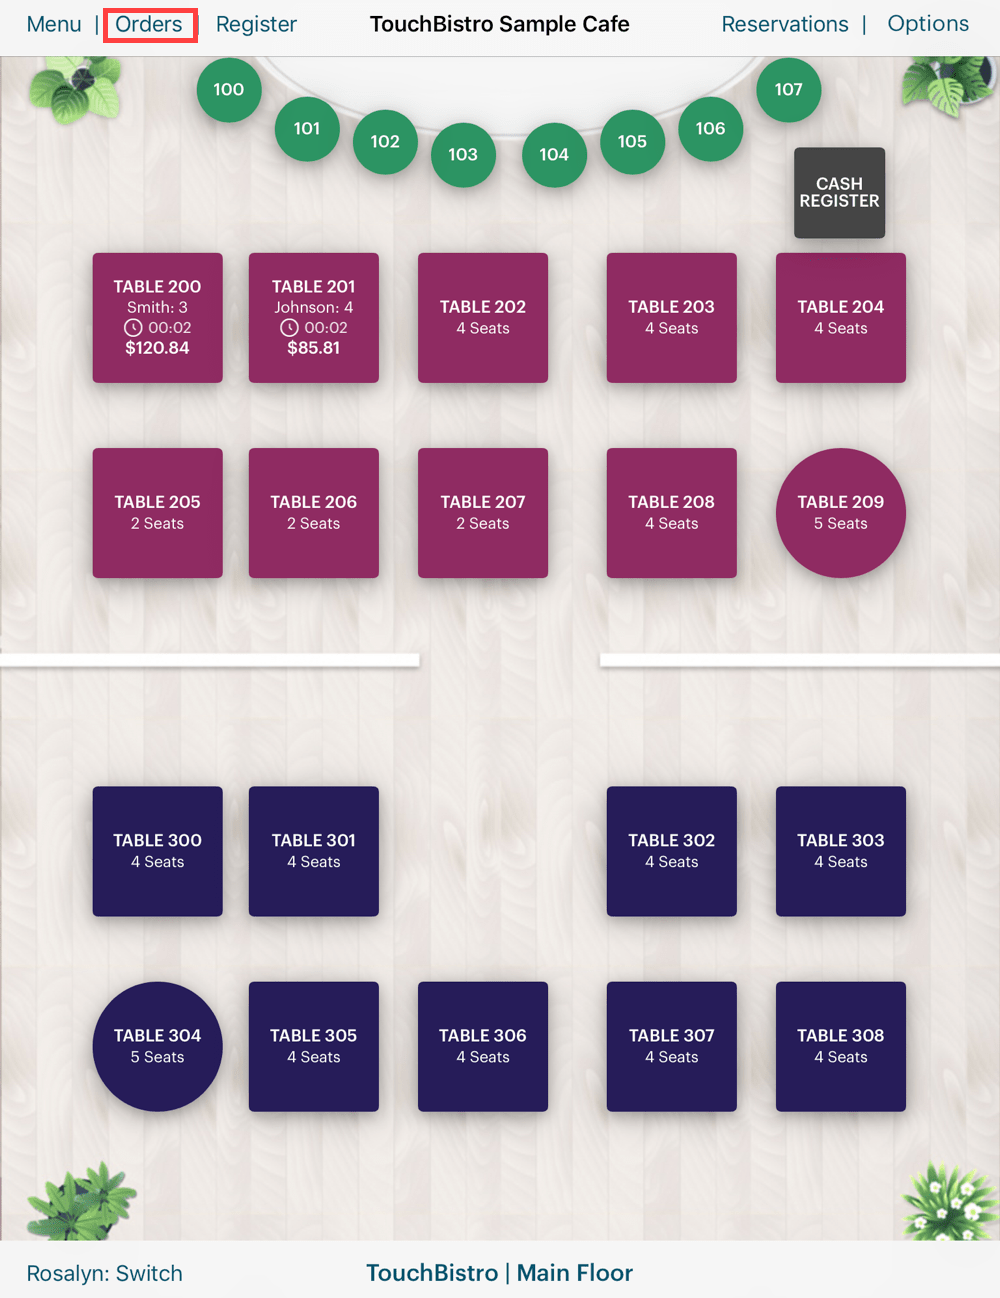
1. From your floor plan, tap Orders.
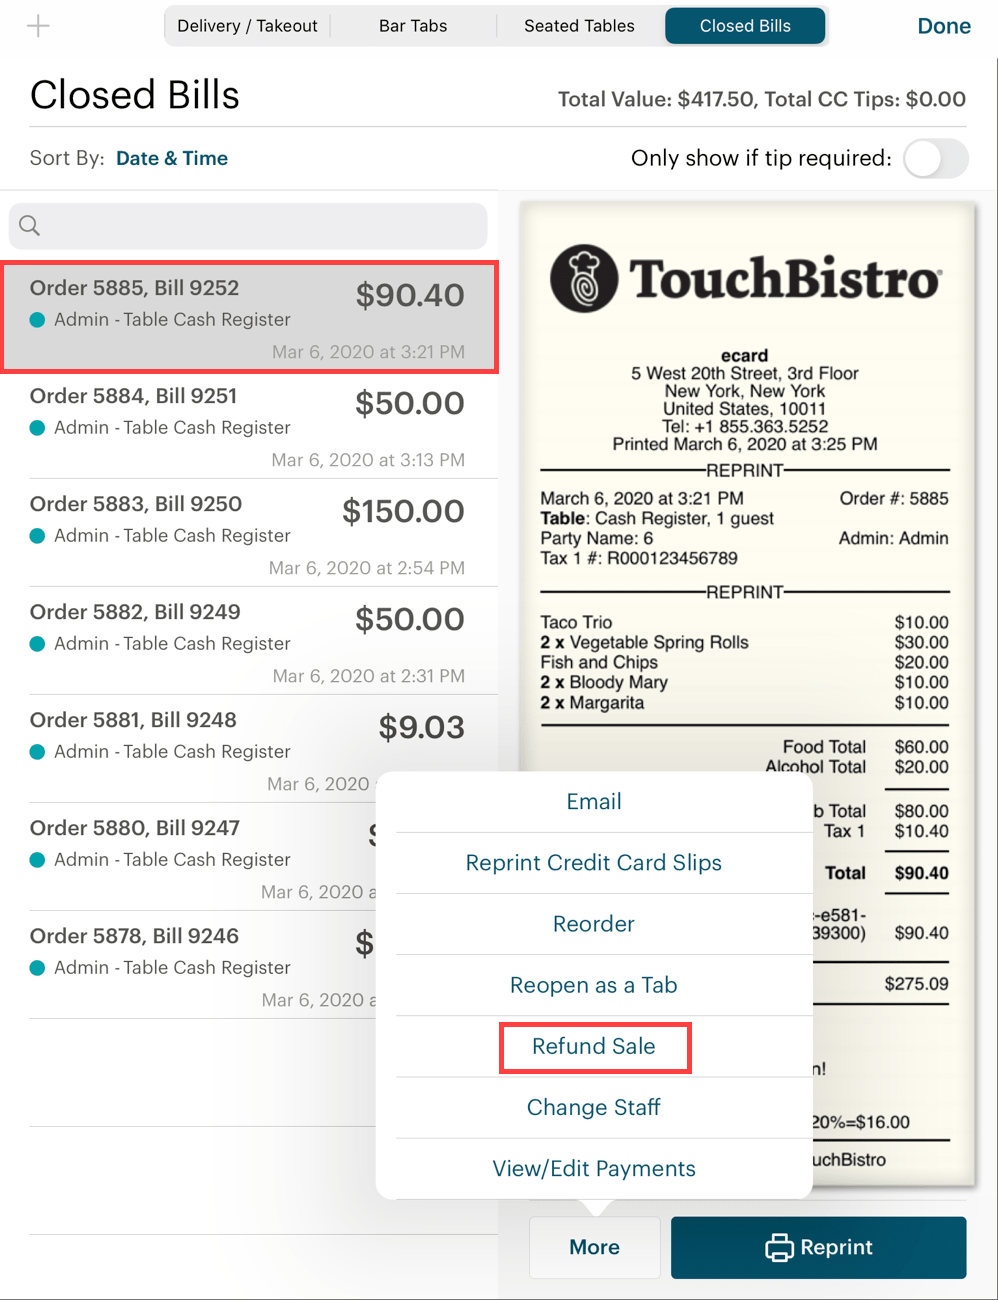
2. Tap the bill you wish to refund and tap the More button. Tap Refund Sale. Note: you can only process a full refund for TouchBistro Gift Card payments.
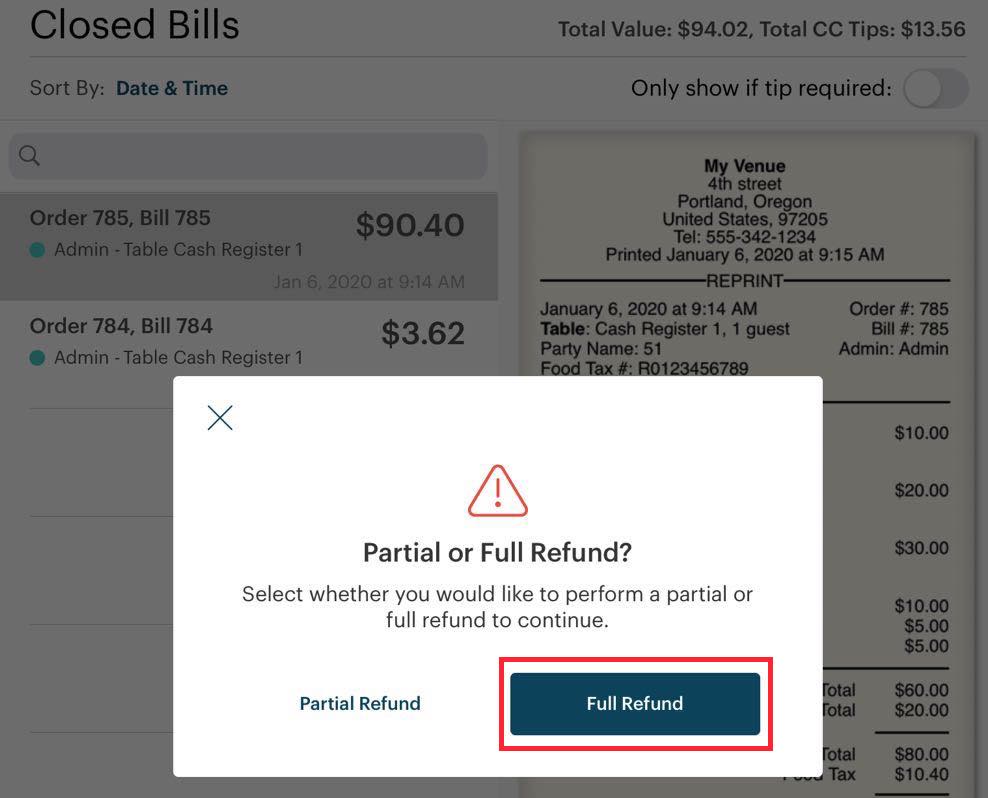
3. Tap Full Refund.
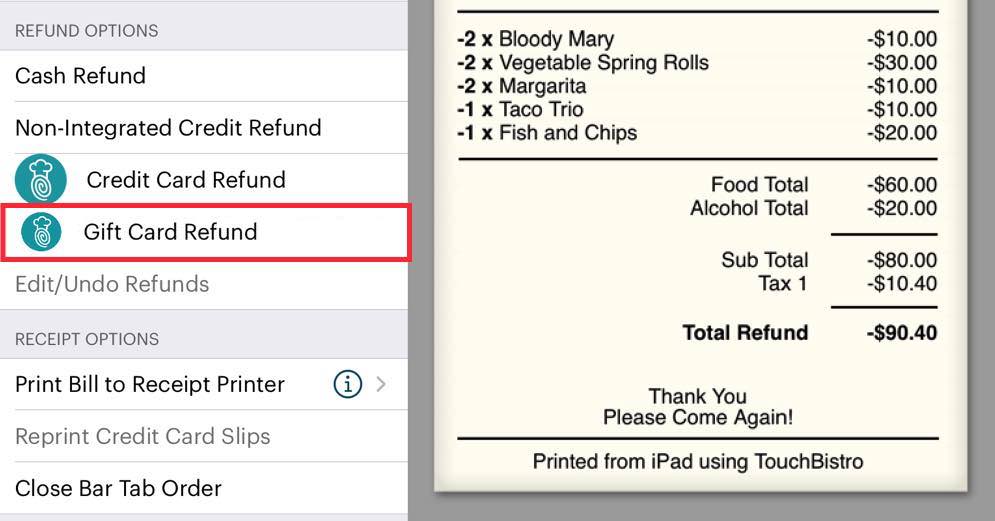
4. Tap the TouchBistro Gift Card Refund option.
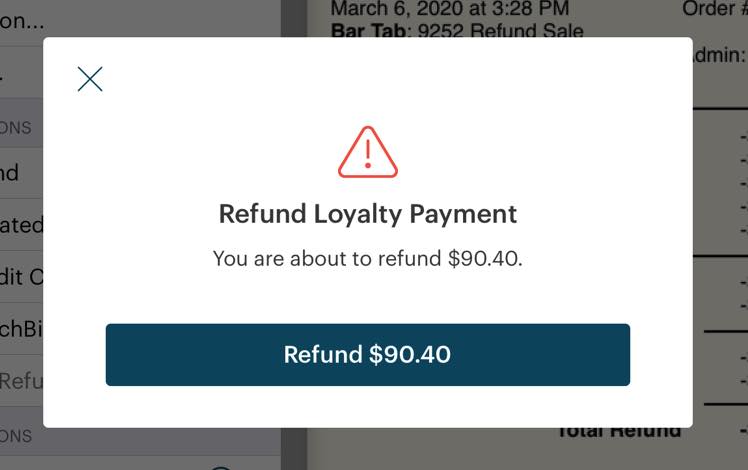
5. Confirm you want to refund the amount.
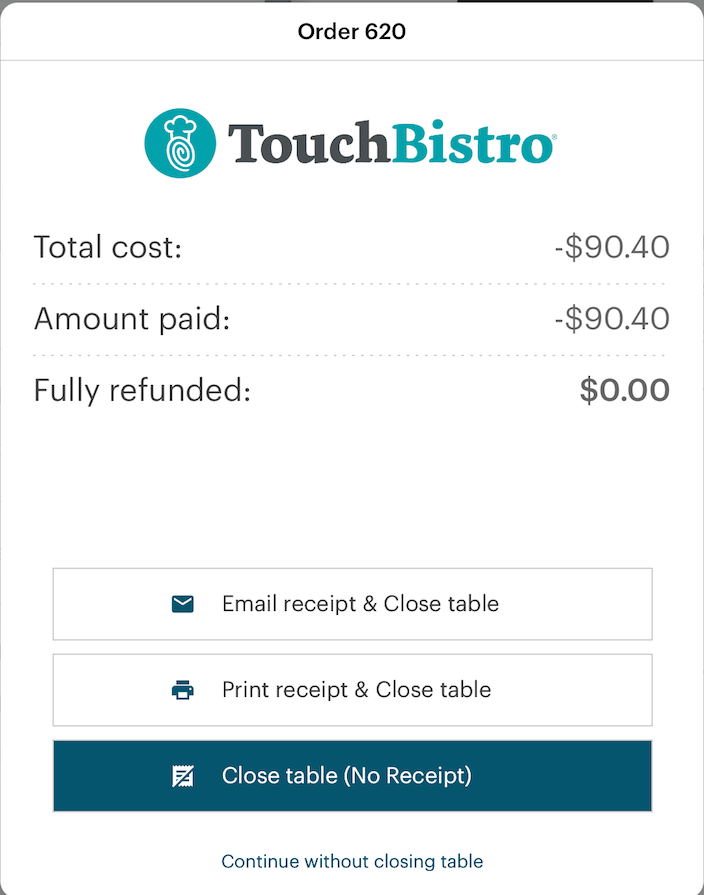
6. Close the sales refund invoice.
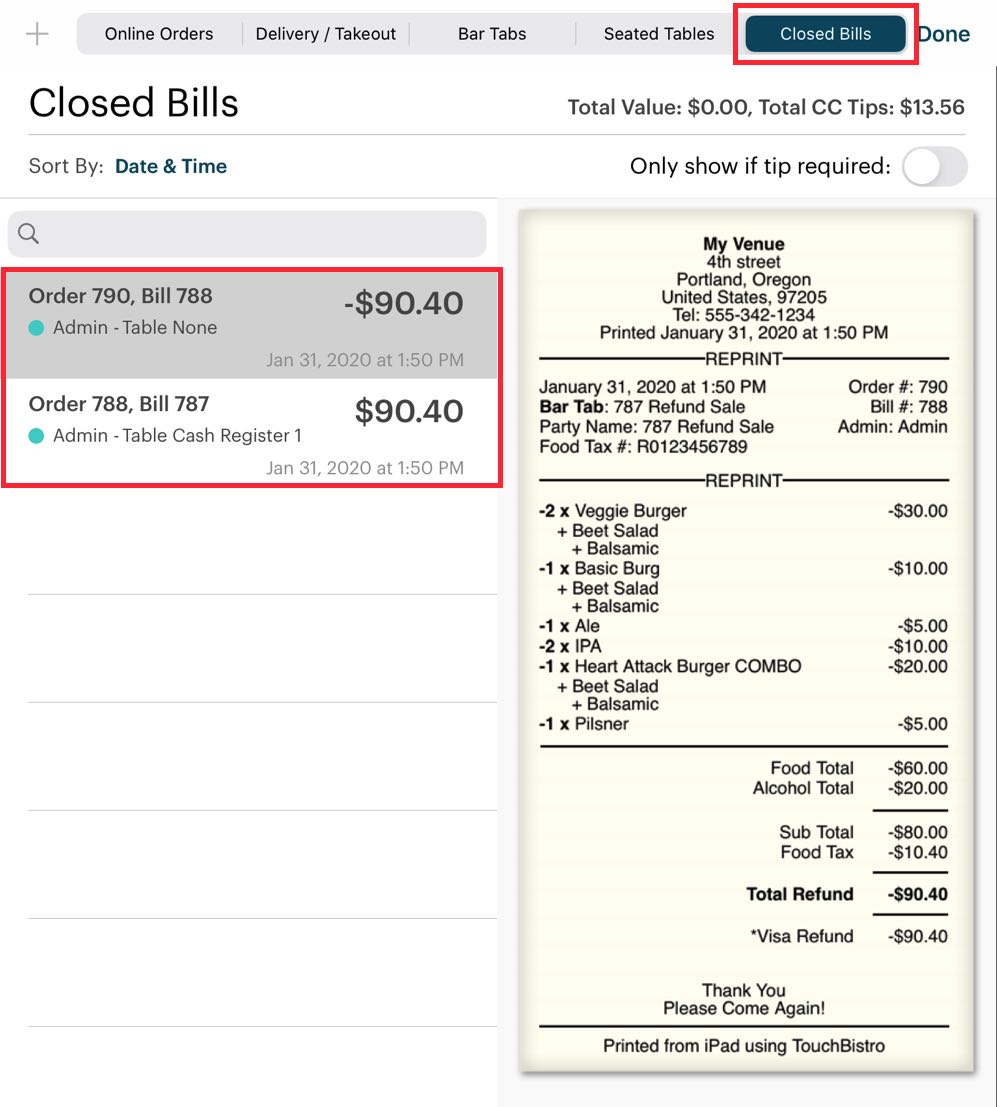
7. You are returned to the Closed Bills tab. Your refunded negative sales invoice is moved to Closed Bills.
Chapter 6. Gift Card Activity Report
You can obtain the Gift Card Activity Report right from your iPad.
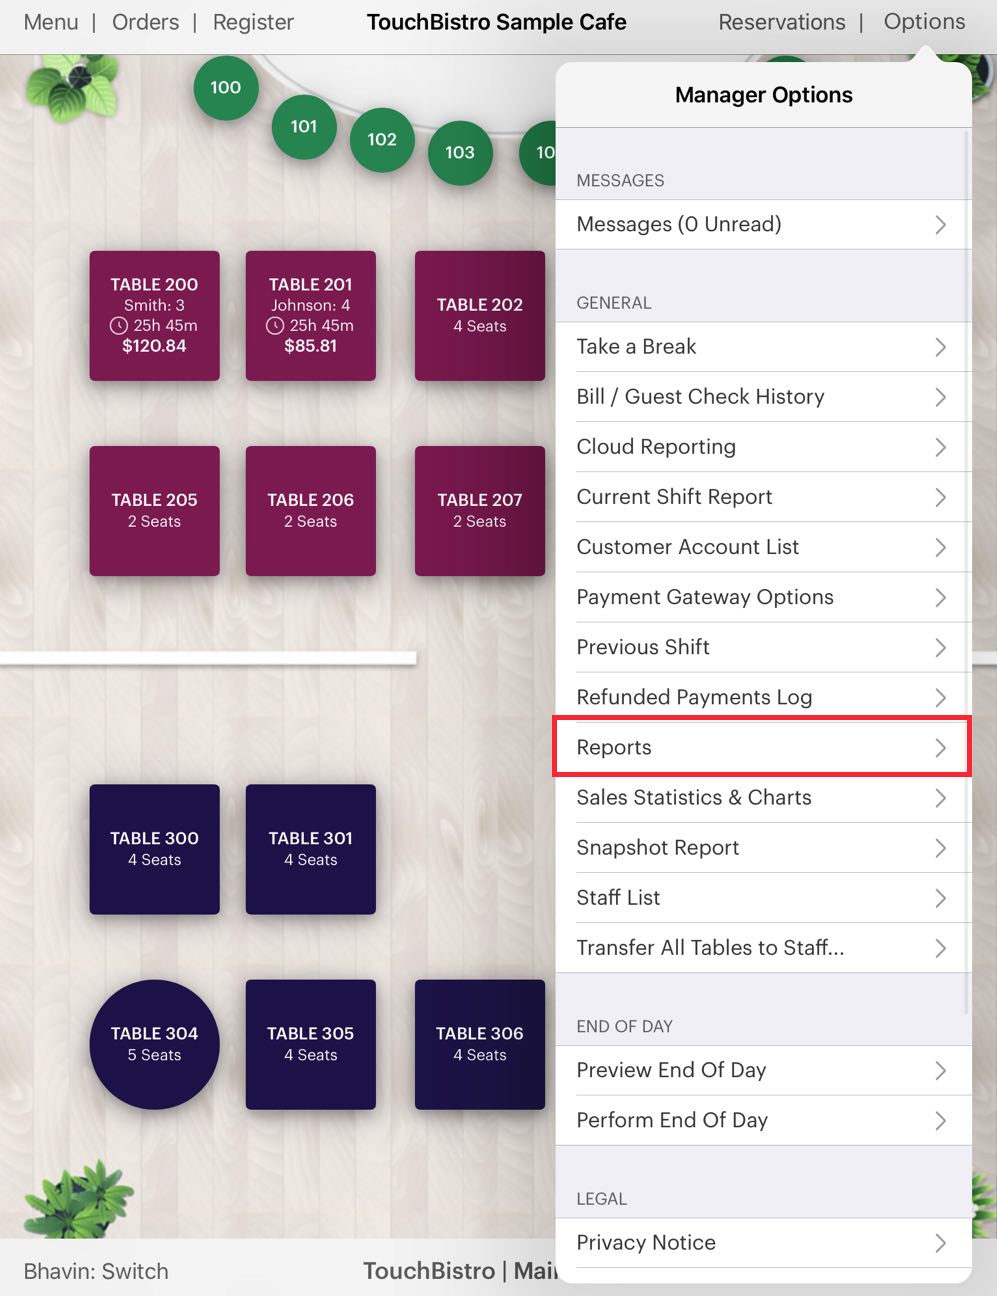
1. From your floor plan screen tap Options.
2. Tap Reports.
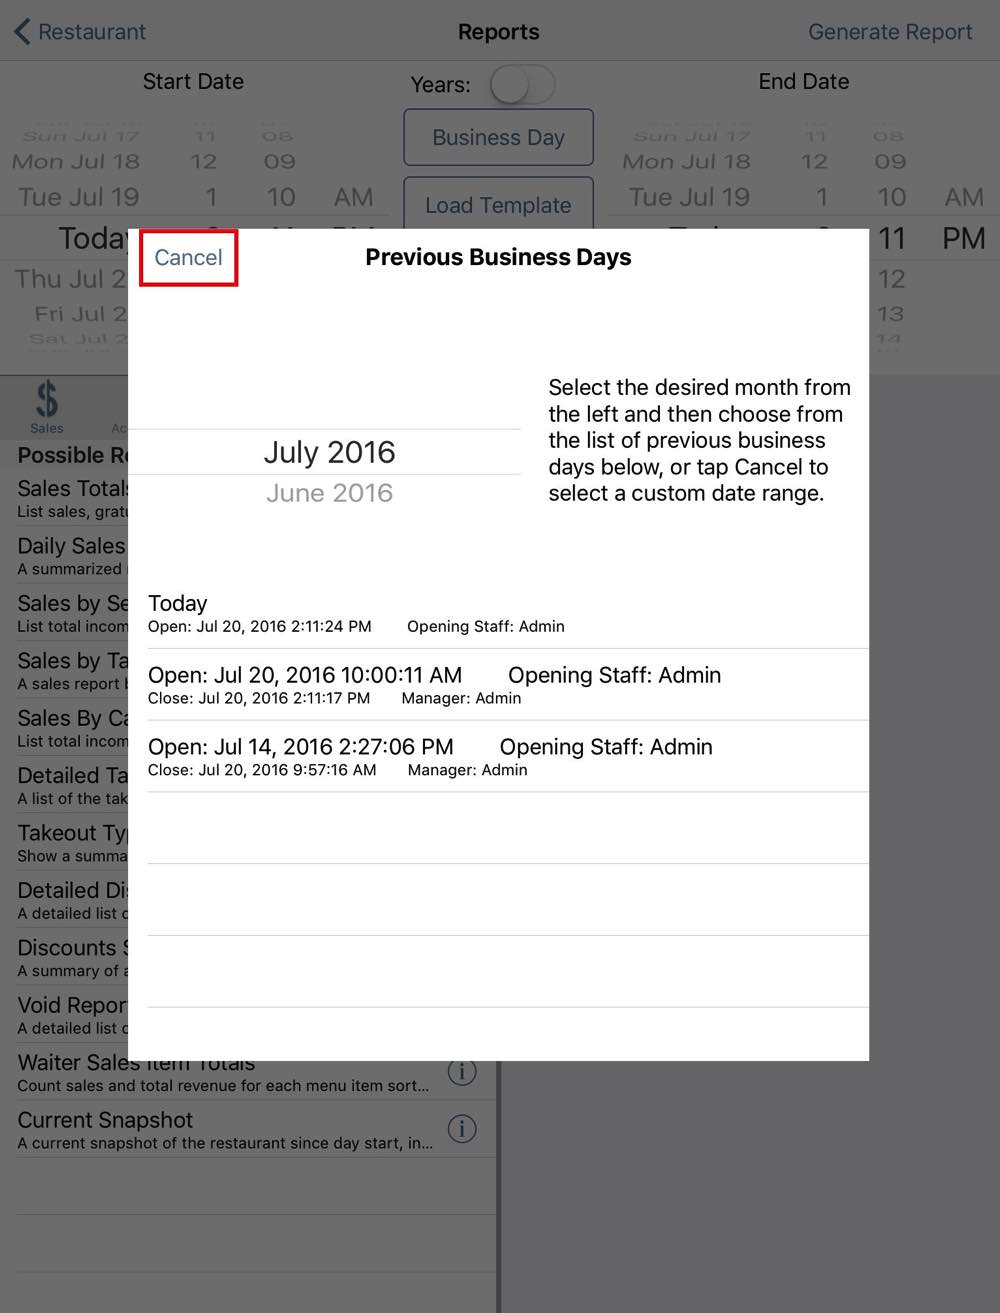
3. The Previous Business Days screen lets you quickly access individual business days (that is the block of time when you opened your venue via TouchBistro and when you closed it). Hence, a Business Day will not be 24 hours. If you opened your venue at TouchBistro at 9 am Tuesday and did your end of day and closed it Wednesday 3 am, TouchBistro will record that as a business day. In this example, we’re interested in a date range. We’ll generate a payments report for all staff for a week. Tap Cancel to set a date range.
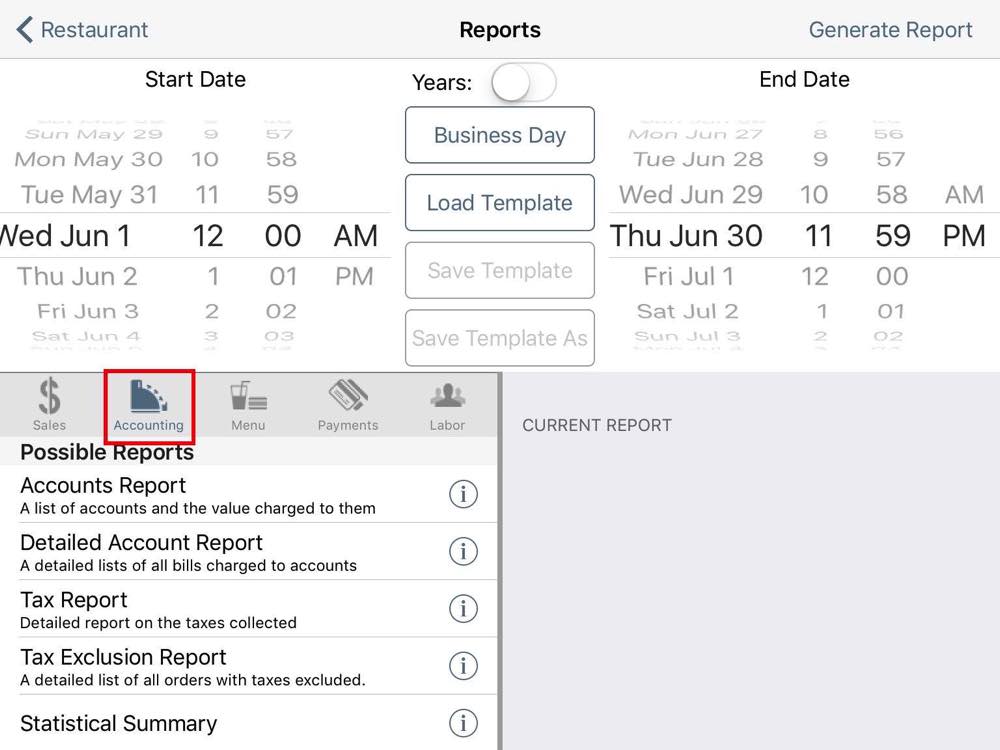
4. Use the date wheels at the top to set the start and end of the range. In this example, we’re setting the range from the very start of June 1 to the end of June 30. So, the whole month of June. TouchBistro treats 12:00 AM as the start of the day and 11:59 PM as the end of the day.
5. Tap Accounting to access reports associated with your accounts, tax, and other data.
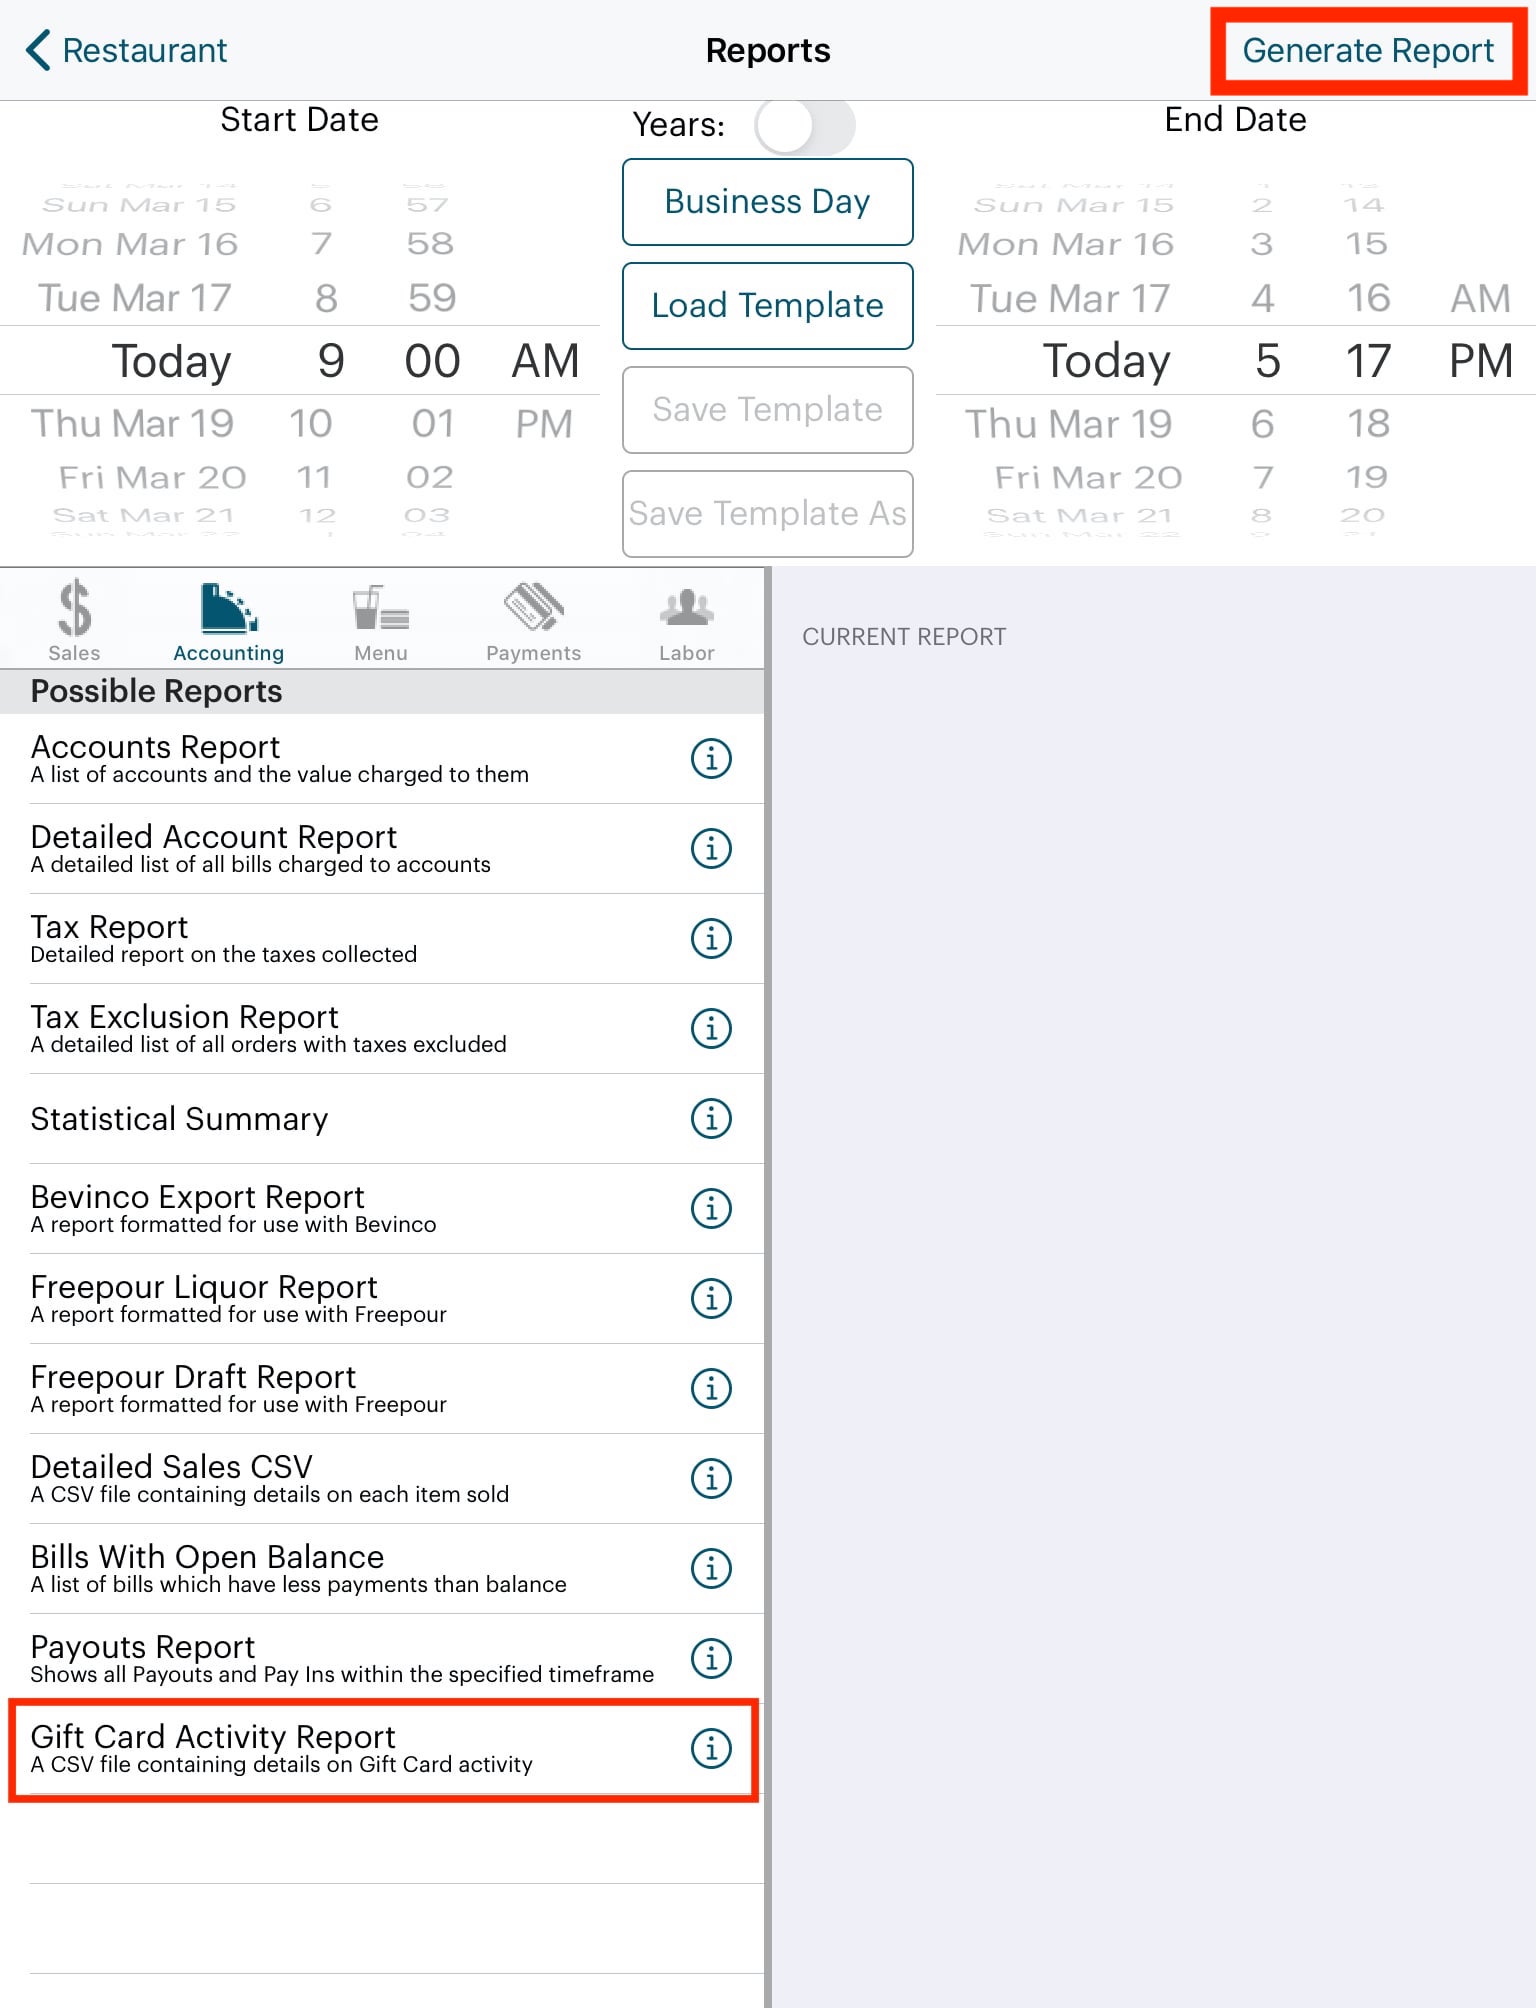
6. Tap Gift Card Activity Report.
7. Tap Generate Report.
Chapter 7. Switching the Camera
TouchBistro Gift Card may, by default, use your front-facing (“selfie”) camera. If you prefer to use your back-facing camera, the first time you take a payment you can use the switch camera option. This option is not available when you scan cards to add value. However, when you switch your camera, the add value workflow will also default to the selected camera. To do this:

1. Proceed as normal to take a payment. Tap Gift Card.
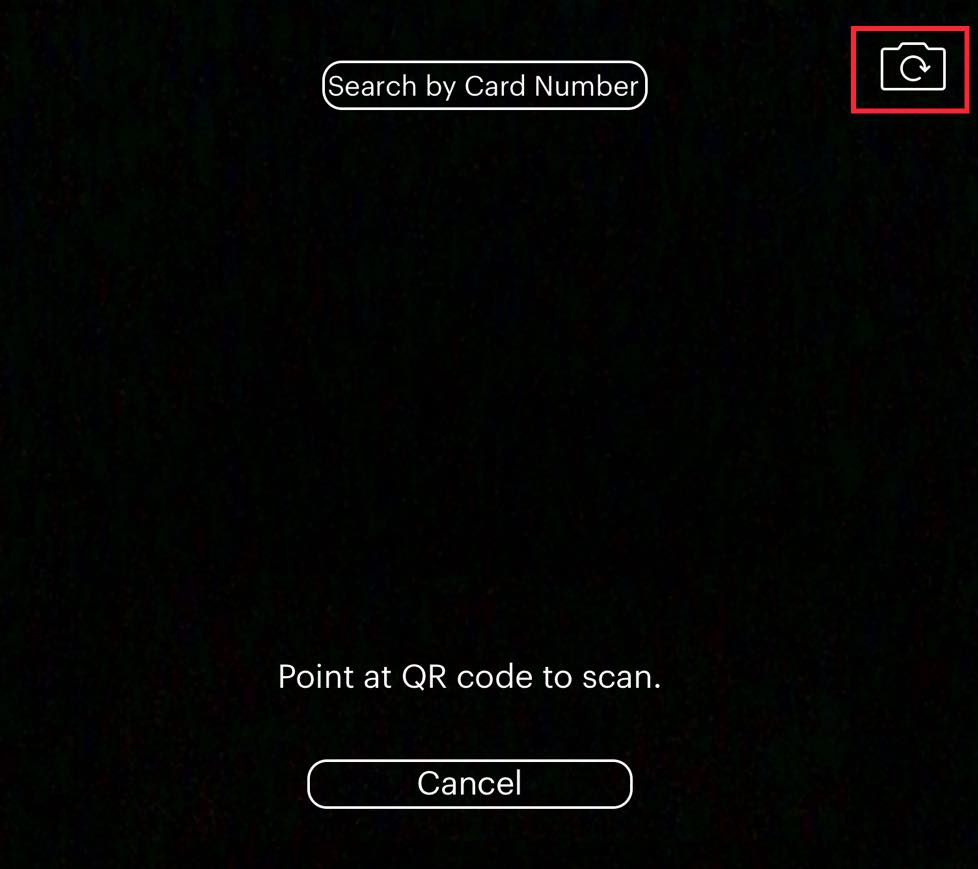
2. Tap the Camera icon to switch to the other camera.
3. Continue your usual payment workflow.
Chapter 8. Cloud Reporting
Gift Card data can also be obtained via Cloud in the Payments report. You can obtain information on how many gift cards were sold by accessing the Sales by Menu Item and Sales by Menu Category reports.
See Also


 Email
Support
 Frequently
Asked Questions