Setting Up Menus
Chapter 1. Introduction
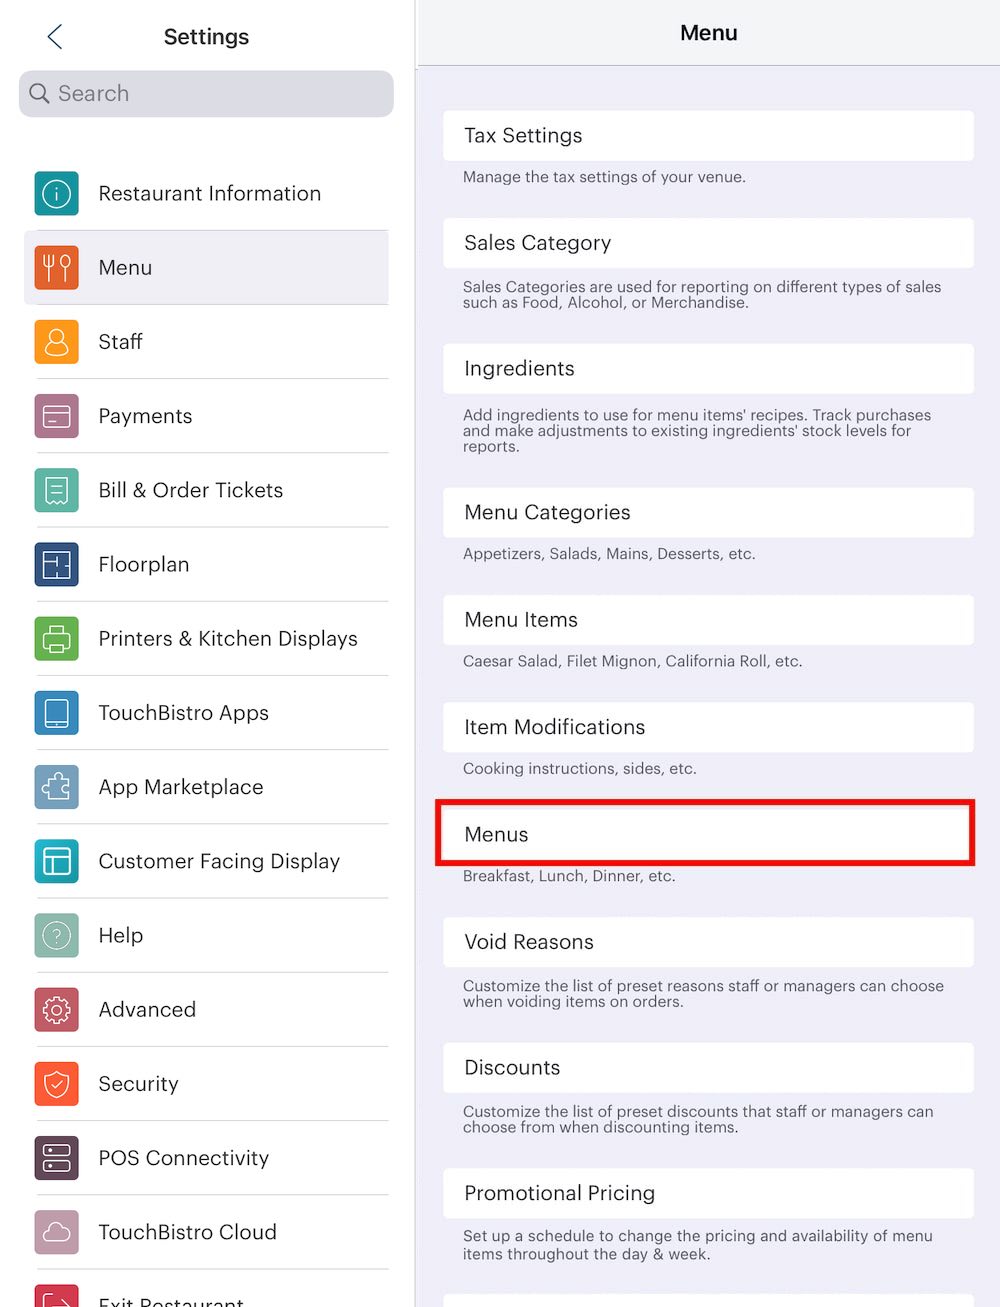
Under Menus, you can assign your Menu Categories into specific menus, such as a dinner menu, a lunch menu, a breakfast menu and so on.
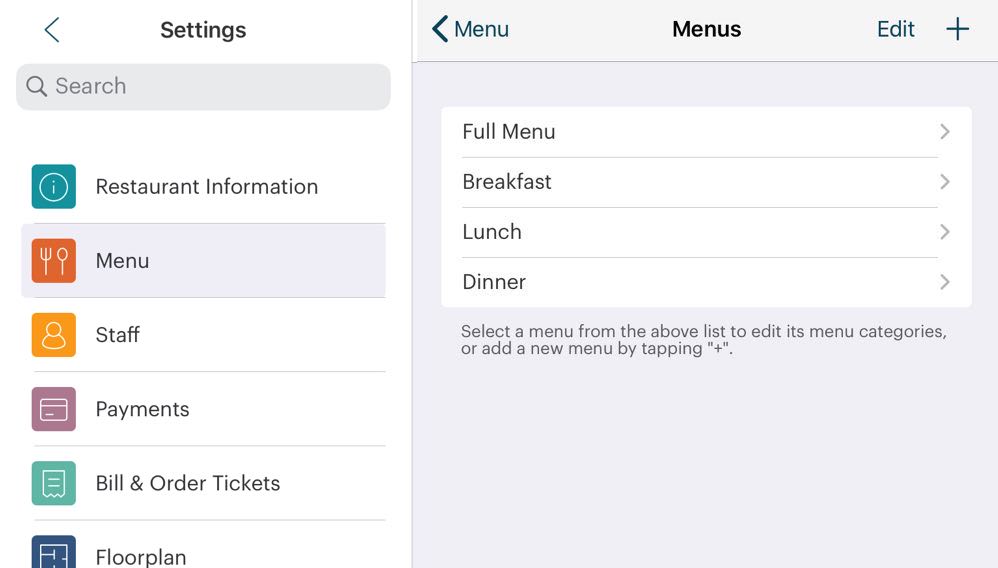
If you prefer not to subdivide your menu categories in this fashion, you can add them to the default Full Menu.
In this example, however, we’ll create a Breakfast menu for our breakfast items.
1. Tap the Add + icon.

2. Give the Menu a name via the Name field.
3. Tap Add Menu Category.
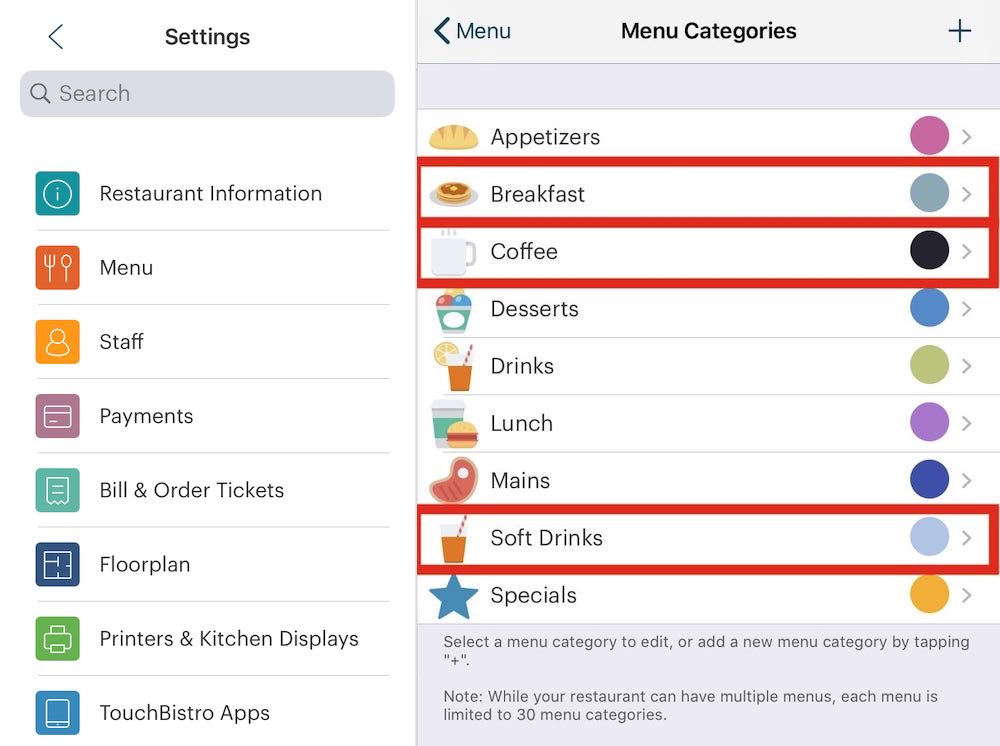
4. For example, add a Breakfast Menu Category, a Coffee category, and a drinks category. You cannot add more than 30 menu categories to a menu.

5. If you add a category by mistake, tap on its Delete  icon and then tap Delete.
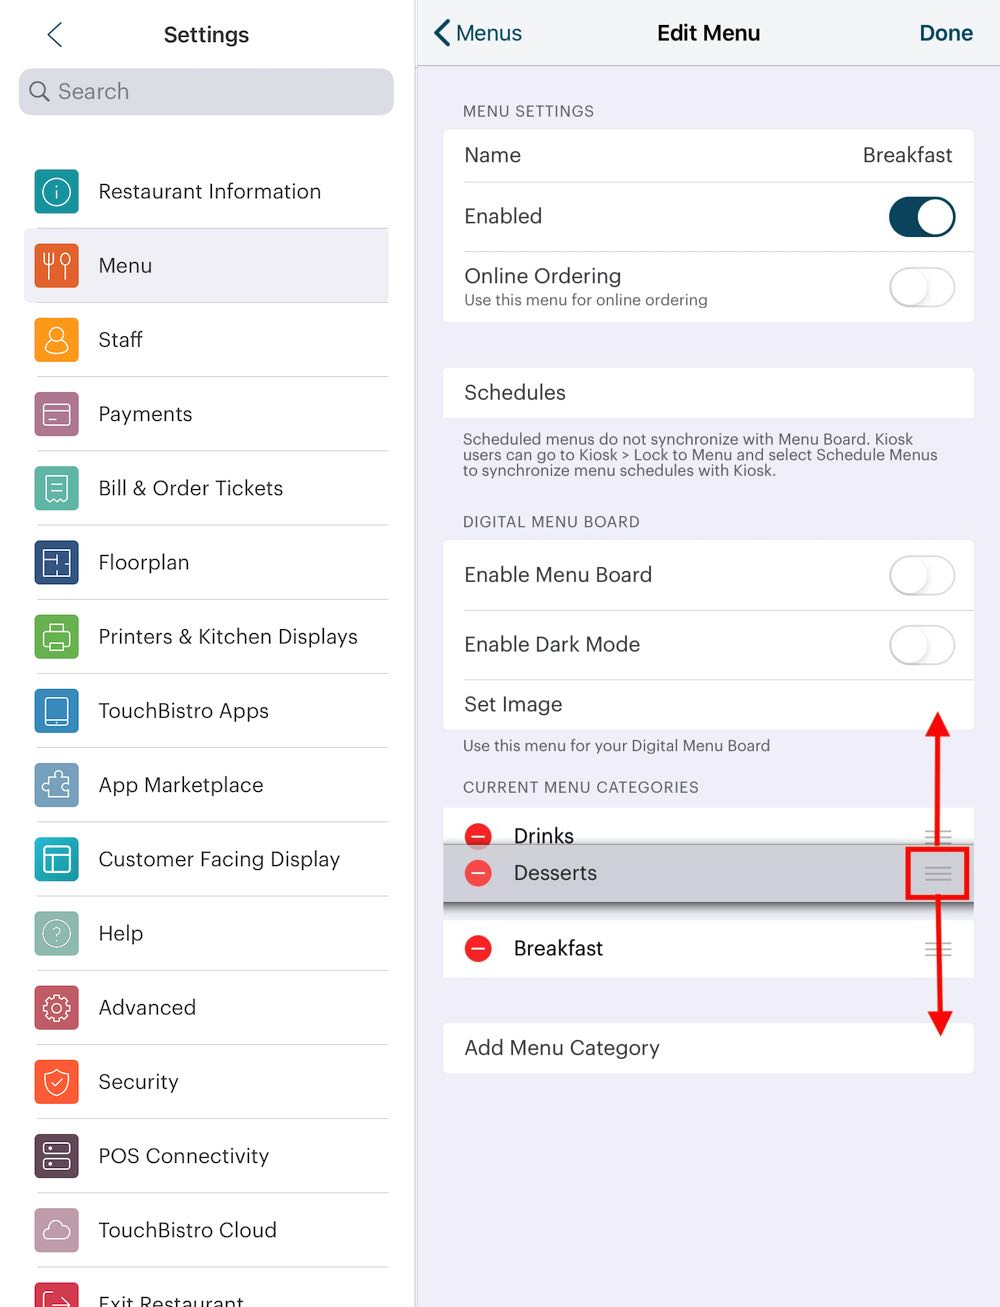
6. If you tap and hold on a menu category’s Pickup  bars, you can rearrange the order.
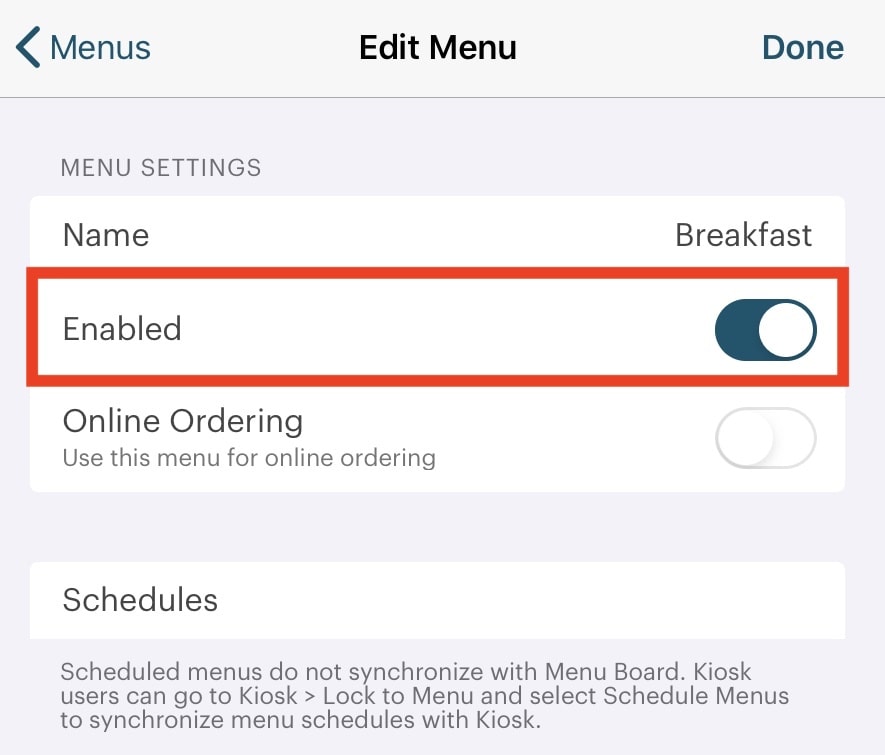
7. You can slide the Enable option to the off position if you wish to disable a menu. For example, you’ve created a seasonal or holiday menu and want to make it unavailable for a long period of time.
8. If you want the Menu to be available only on specific days and times during the week, you can use Schedules. For our breakfast menu, we only want to make it available during the morning hours.

9. Tap Schedules.

10. Tap the Add + icon.
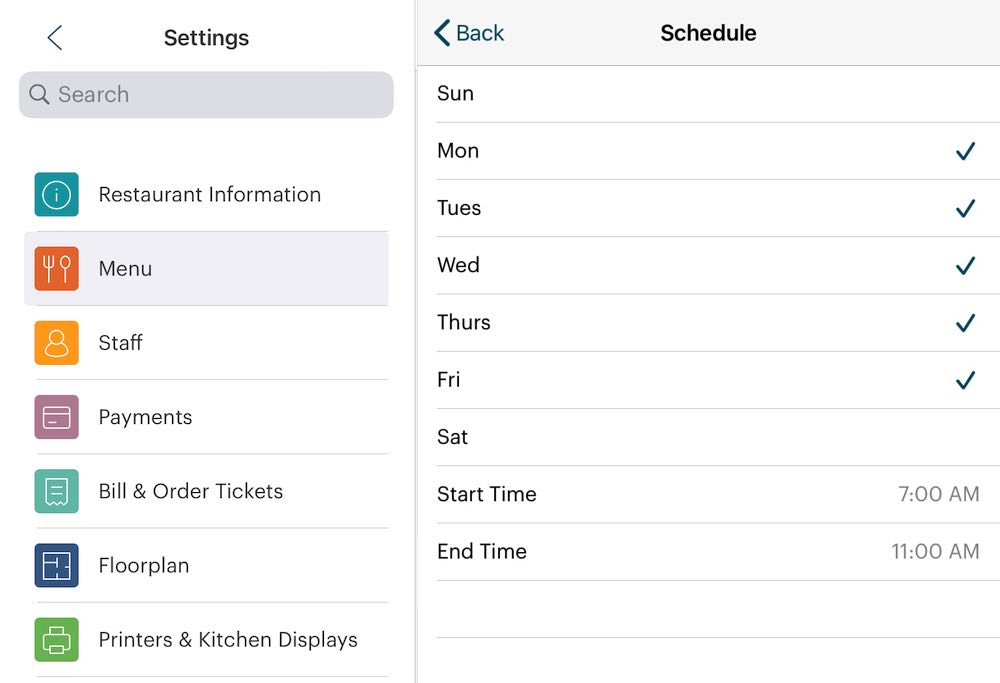
11. Set the day and time range you want this menu to be available.
12. If you want your breakfast menu to be available longer on a Sunday, you can add multiple schedules.
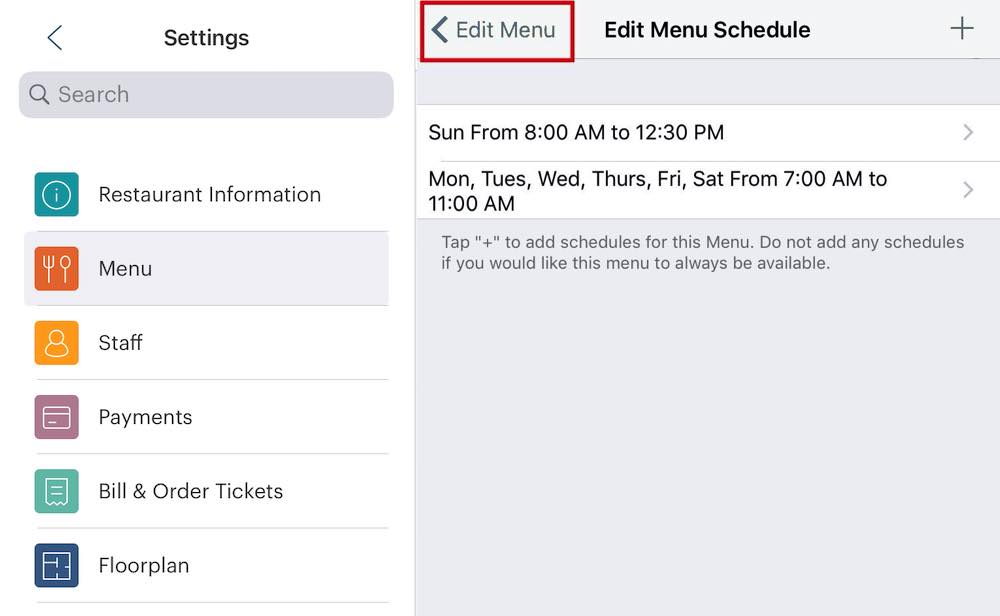
13. Tap Edit Menu to return to your Menu.

14. Tap Done.
Chapter 2. Arranging Menu Order
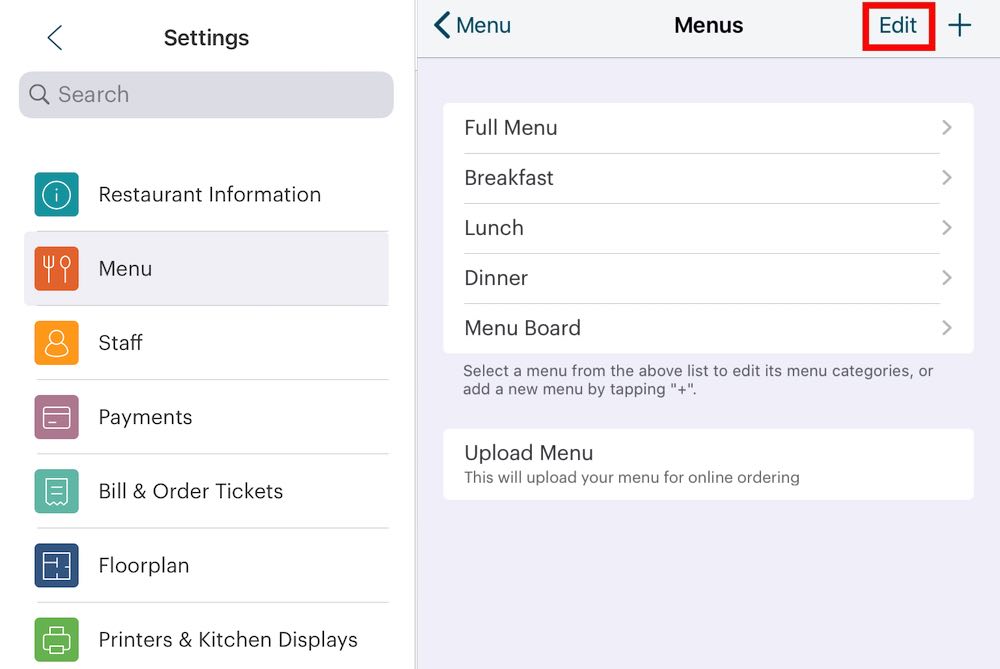
1. You can arrange the order these menus appear on the Order screen by tapping Edit.

2. Tap and hold a menu’s Pickup  bars and drag it to a new position. Tap Done when you’ve arranged the desired menu order.


 Email
Support
 Frequently
Asked Questions
