Setting Up the KDS
Table Of Contents
Chapter 3. System Requirements
Chapter 6. Getting Your iPad Ready
Section 1. iPadOS 14: Disable Private Address
Chapter 7. Reserve Your KDS iPad’s IP Address on your Supported Router
Section 1. If You’re Using an AirPort Extreme Router
Section 2. If You’re Using a Ubiquiti AmpliFi Router
Chapter 8. Setting Up the KDS on TouchBistro
Chapter 9. Setting Which Menu Categories Should Use the KDS
Chapter 10. Sending Order Tickets to Both a Printer and the KDS
Chapter 11. Amplification Using Speakers
Section 1. Amplifying the Alert Sound Using the Headphone Jack
Section 2. Amplifying the Alert Sound Using a Bluetooth Speaker
Chapter 1. Video Tutorial
Chapter 2. Introduction
The TouchBistro Kitchen Display (KDS) is a kitchen display system for use with the TouchBistro POS app. You can have kitchen tickets sent to the KDS, to be displayed on the iPad’s screen, and from the iPad they can also be displayed on an external HDMI TV, or AirPlay-compatible TV, in order to make kitchen tickets visible to the entire kitchen.
Chapter 3. System Requirements
TouchBistro KDS 2.1 requires an iPad running iOS 9.0 or later and works in conjunction with systems running TouchBistro POS 8.7 with the expectation that both applications may occasionally require simultaneous updates in order to retain interoperability. In other words, when TouchBistro POS is updated, KDS may require an update as well.
TouchBistro KDS 2.0 requires and iPad running iOS 9.0 or later and works in conjunction with systems running TouchBistro POS 8.6 and earlier.
Earlier version of TouchBistro KDS are compatible with TouchBistro 8.6 and lower, and require iOS 6.0 or later.
Chapter 4. Limitations
Section 1. KDS vs. Printers
We designed the Kitchen Display System to make your kitchen efficient and fast by displaying your open kitchen tickets on an iPad, and if you choose, a TV monitor (please see Connecting your KDS to an External Monitor for more information). The KDS eliminates unnecessary communication and crossover in your kitchen, keeping your team focussed and structured.
However, we still believe that for most venues, having a physical copy of each kitchen ticket to go back to helps with certain workflows. For that reason, we recommend that you use a LAN-based kitchen impact printer in conjunction with the KDS.
The KDS displays a limited number of tickets at one time, depending on the size and resolution of the iPad you decide to use, and the settings you choose within the KDS application itself. No screen can display an unlimited number of tickets, and there will always be natural restraints on how much can be displayed at any one given time. Conversely, printed tickets pinned to a ticket board can sometimes provide additional flexibility above and beyond what the KDS can provide by itself.
Also, if a ticket is closed accidentally on the KDS, a physical copy of the ticket is immediately available from the printer without staff having to go to the Closed Order section in the KDS to reopen it. In a fast-paced kitchen environment where every second counts, and kitchen staff can sometimes be under pressure, having a printed copy of the ticket is generally a good idea.
In a full-service environment, printed kitchen tickets indicate to the waitstaff which table they need to bring the order to. In a smaller venue this may not be required. Conversely, a KDS may be installed in the expo area where waitstaff retrieve orders from the kitchen, or other means of communication may be employed. Currently, most experienced waitstaff seem to be accustomed to working with kitchen tickets, and re-training them may or may not present additional expenses or problems, above and beyond the price of a printer, and the paper it consumes.
Wired printers also have the added advantage of being fast and reliable in the sense that they are connected directly to your POS network with an ethernet cable. They cannot be affected by any kind of radio or wi-fi interference.
However, we also understand that not all kitchens operate in exactly the same manner, and that you may not require a printer in your kitchen.
Section 2. Short Names
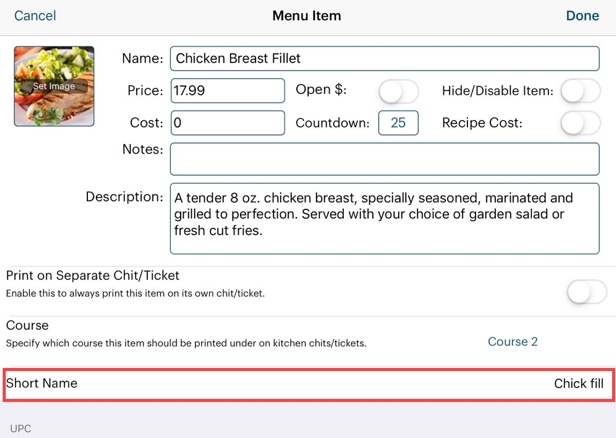
Menu items can be set to use Short Names for kitchen tickets instead of the full menu item (you also have to enabled their use in your Advanced Settings).
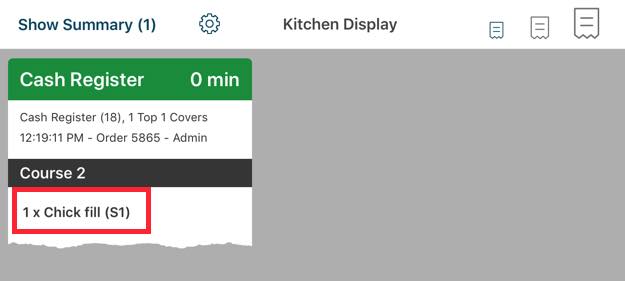
If enabled, the KDS displays them the same way that they are printed out on a kitchen printer.
However, you may wish to disable this feature for use with KDS, because proper names of the Menu Items are far more legible on-screen than they might be on printed kitchen tickets. For more information, see KDS Screen Size Comparison.
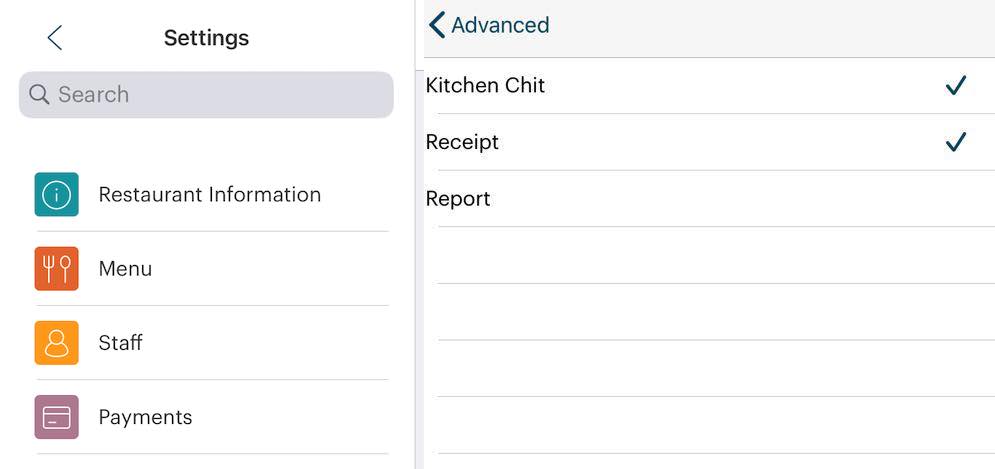
If you wish to disable Short Names displaying on both printed kitchen tickets and the KDS, go to Admin | Admin Settings | Advanced | Print Items’ Short Name and deselect Kitchen Chit.
However, bear in mind that disabling this feature for KDS will also disable this feature for printed kitchen tickets as well.
Chapter 5. Installing the KDS
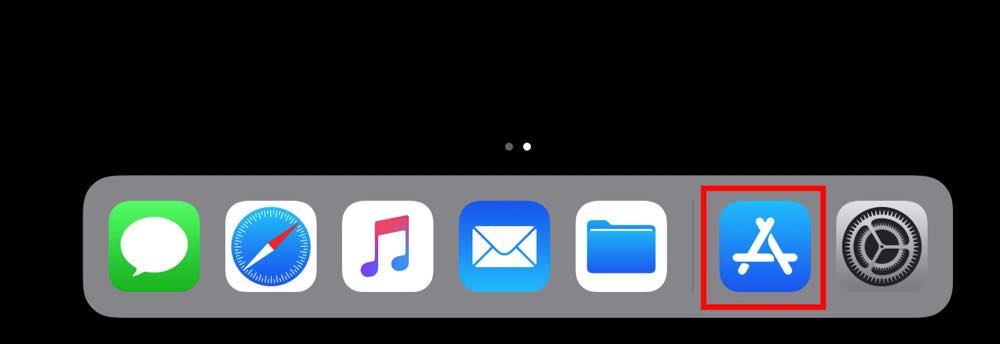
1. Tap the App Store icon on the iPad you wish to use as your kitchen display.
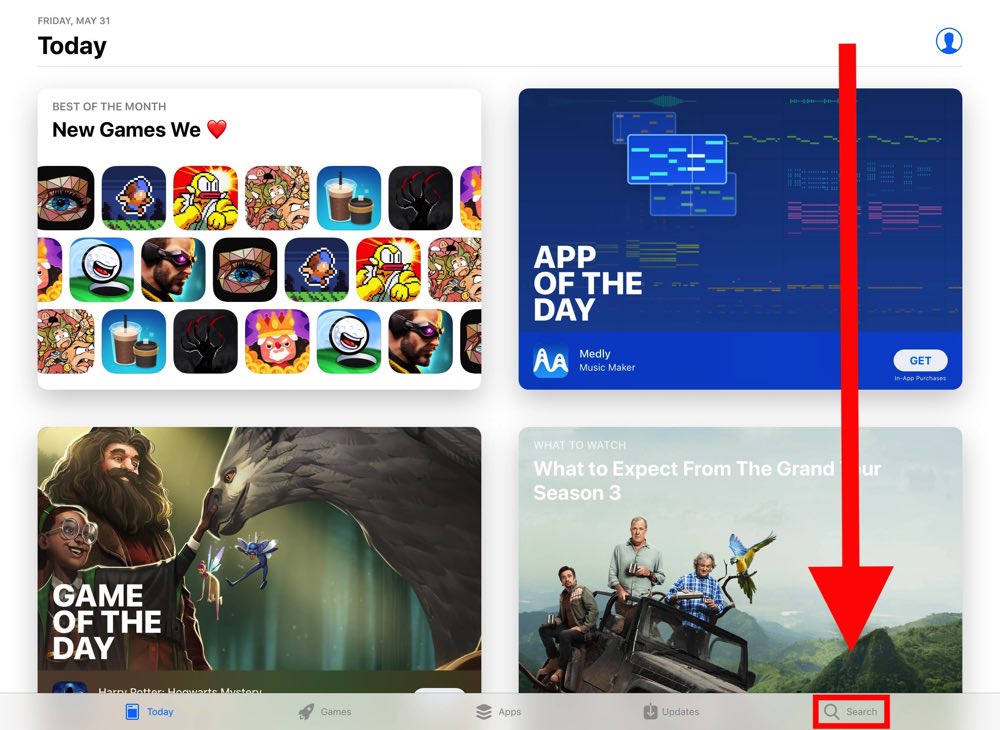
2. Tap Search in the bottom right-hand corner of the screen.
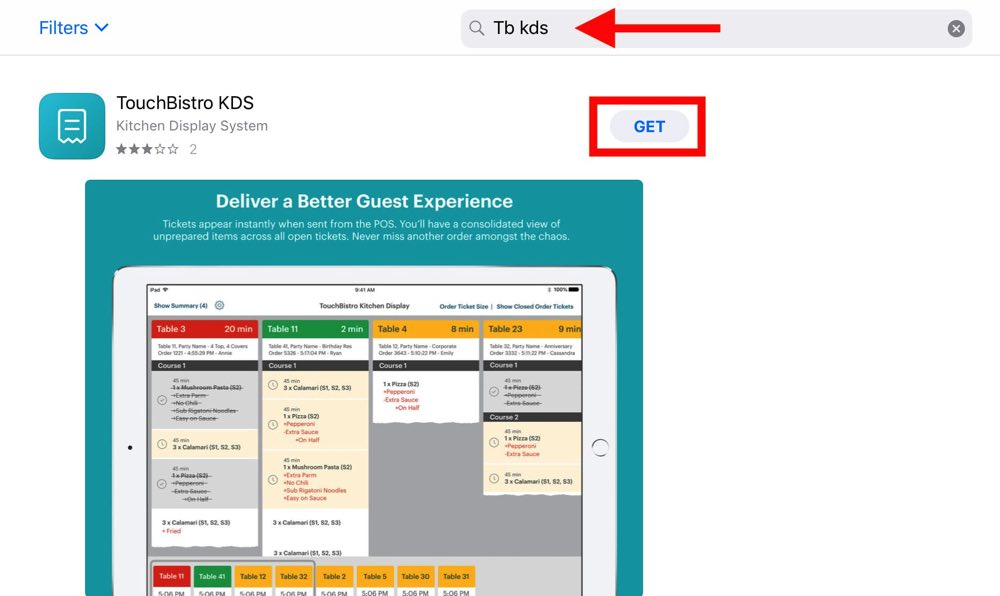
3. Type “tb kds” in the search field at the top of the screen, and tap the Get button next to TouchBistro KDS. You may be prompted to enter your Apple ID credentials before the download begins.
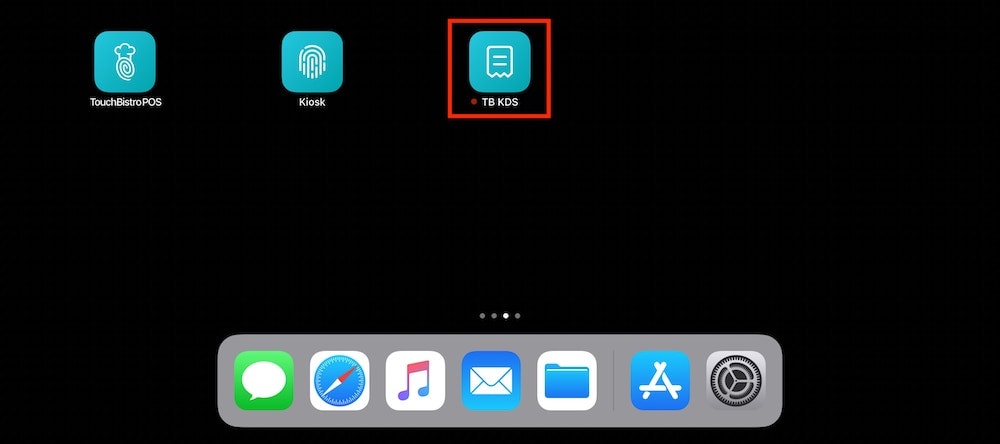
4. Tap your iPad home button and you will see the TB KDS icon on your Home Screen. This is your TouchBistro KDS application.
Chapter 6. Getting Your iPad Ready
On the iPad you’ve installed the KDS, ensure it’s connected to the same supported router as your iPad(s) running TouchBistro.
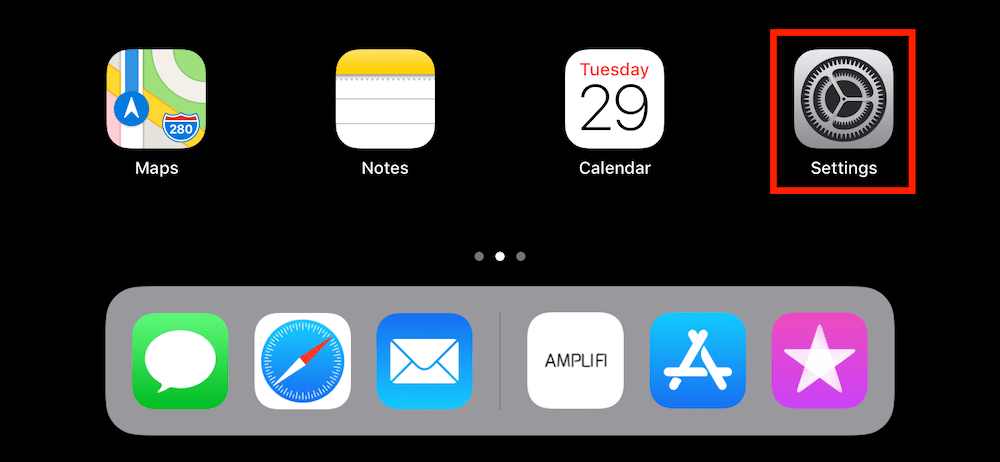
1. Tap Settings.
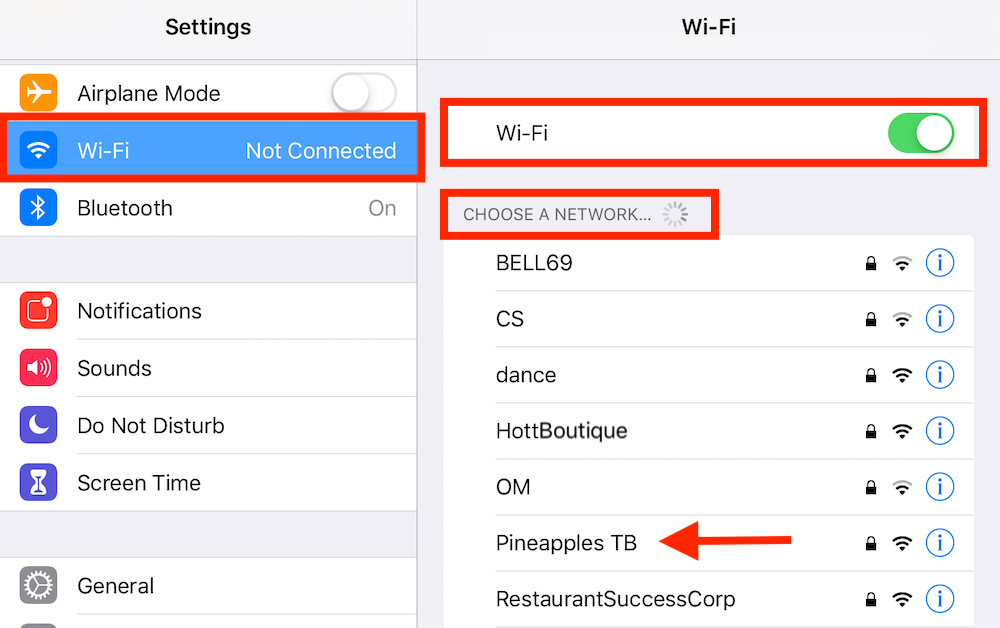
2. Tap Wi-Fi.
3. If Wi-Fi is not enabled slide Wi-Fi to the green position.
4. Under Choose A Network, locate your TouchBistro network. We recommend suffixing your TouchBistro Wi-Fi network name with the initials “TB” to make it easier to locate in the list. In our example here, we used the name Pineapples TB.
Section 1. iPadOS 14: Disable Private Address
If your iPad (or iPads) are updated to iPad OS 14, do the following:

1. Tap your Settings icon.
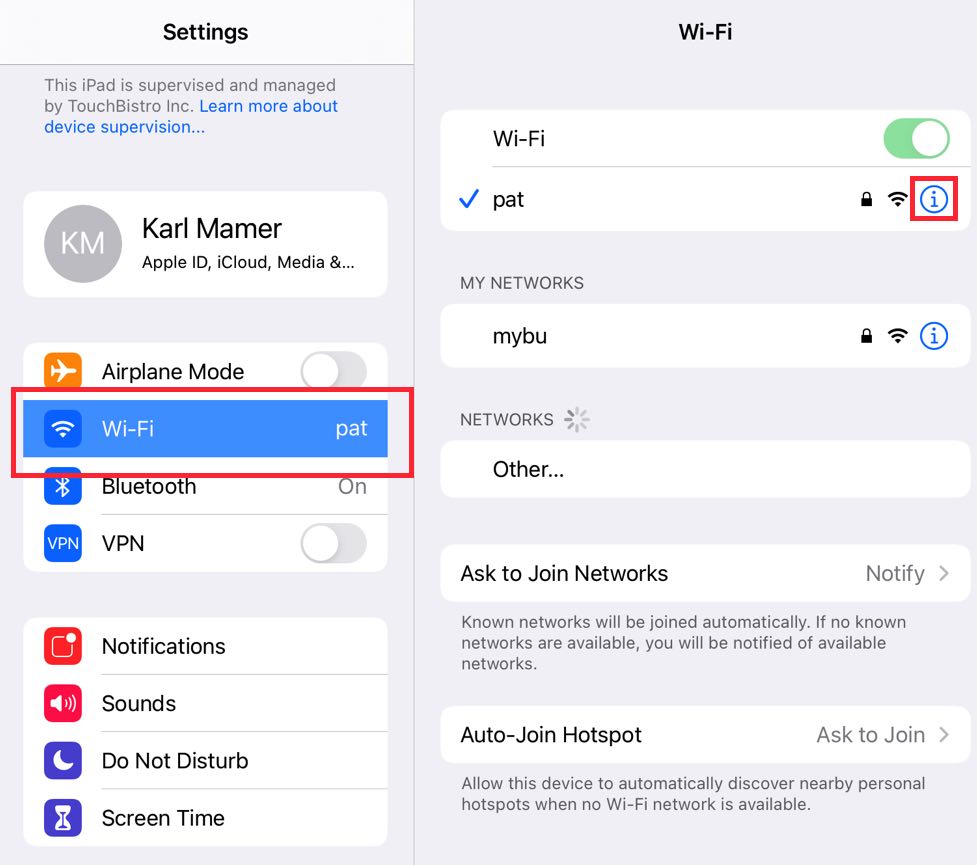
2. Tap Wi-Fi and then tap the Information ![]() icon next to your connected network.
icon next to your connected network.
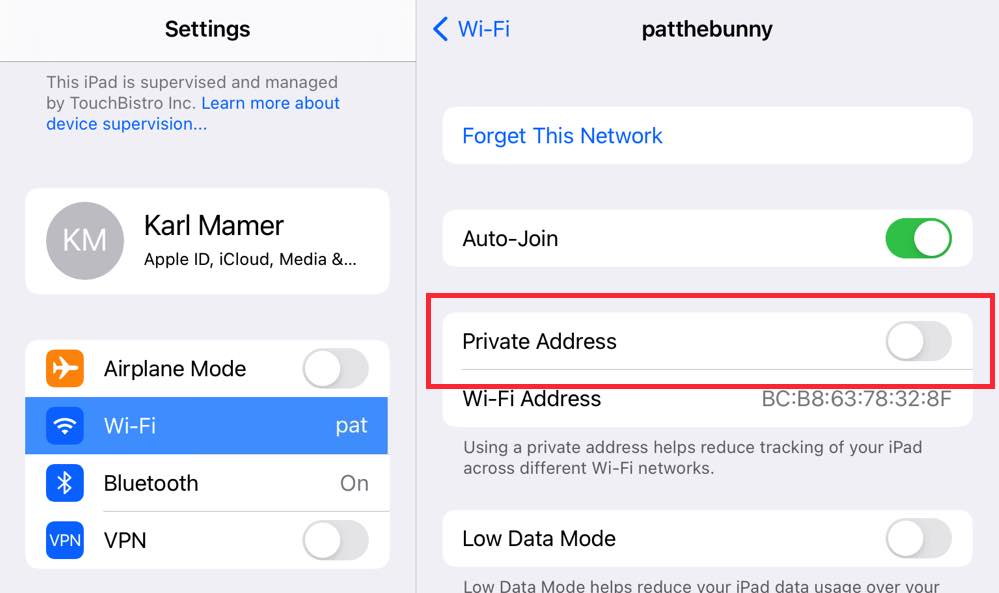
3. If Private Network is enabled, disable it.
Chapter 7. Reserve Your KDS iPad’s IP Address on your Supported Router
The iPad with TouchBistro talks to the iPad with the KDS by addressing the KDS iPad’s IP address. By default routers will randomly assign any available IP address to your devices and will change these IP addresses from time to time. Hence, you need to set a static, never changing IP for the iPad with the KDS so the iPad with TouchBistro always knows which IP address to address. To do this you reserve an IP address on your supported router for the iPad running the KDS.
Section 1. If You’re Using an AirPort Extreme Router

1. Open Settings again on the iPad with the KDS.
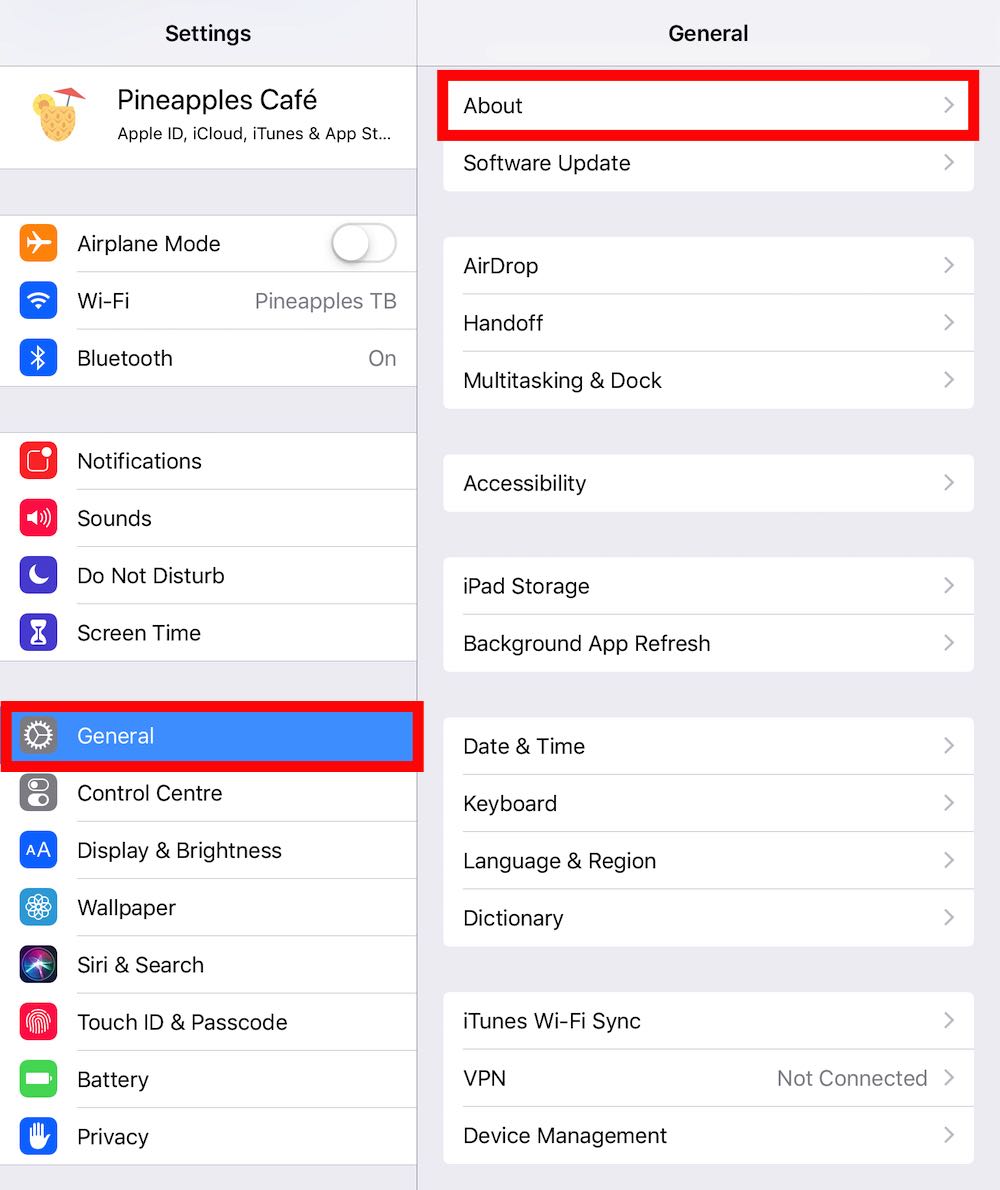
2. Tap General | About.
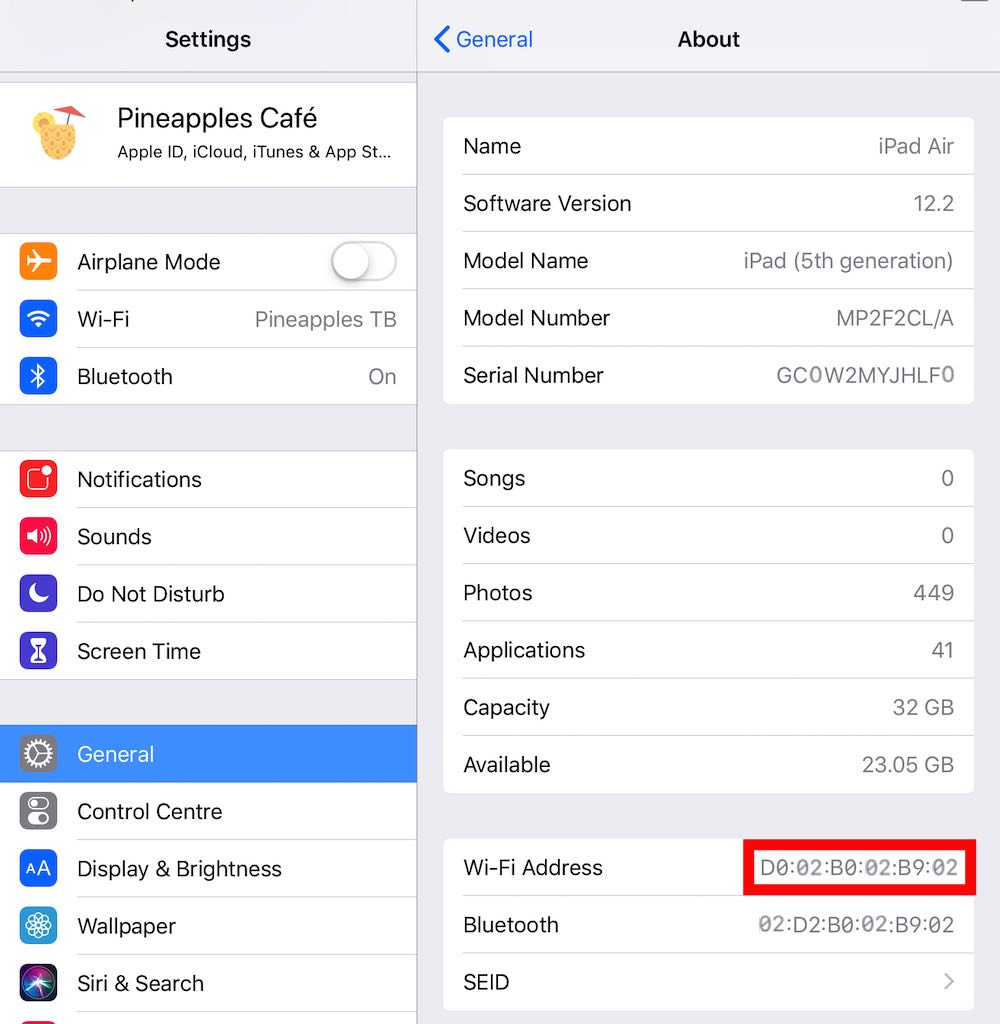
3. Write down the Wi-Fi address. This is your MAC address. It is very important to copy down the correct case (hence, write down an uppercase letter if the address letter is upper case). You will need this MAC address shortly.
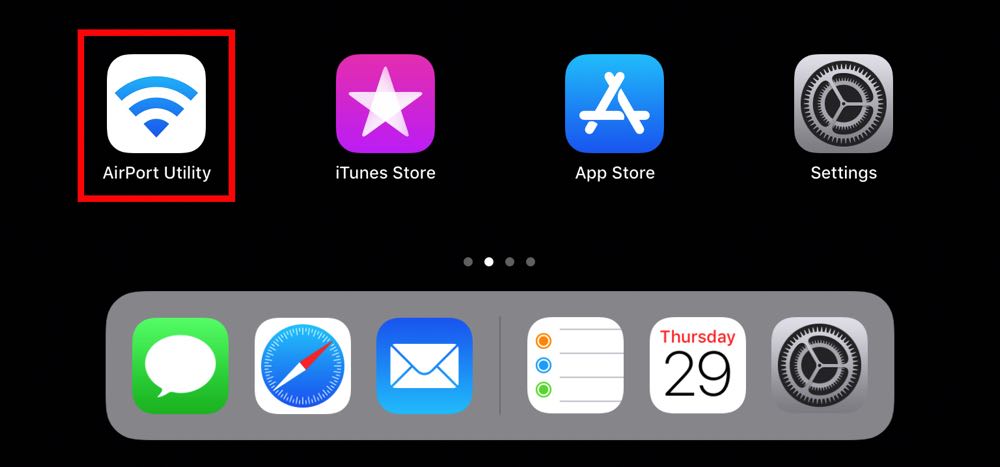
4. Launch AirPort Utility on your iPad with the KDS.
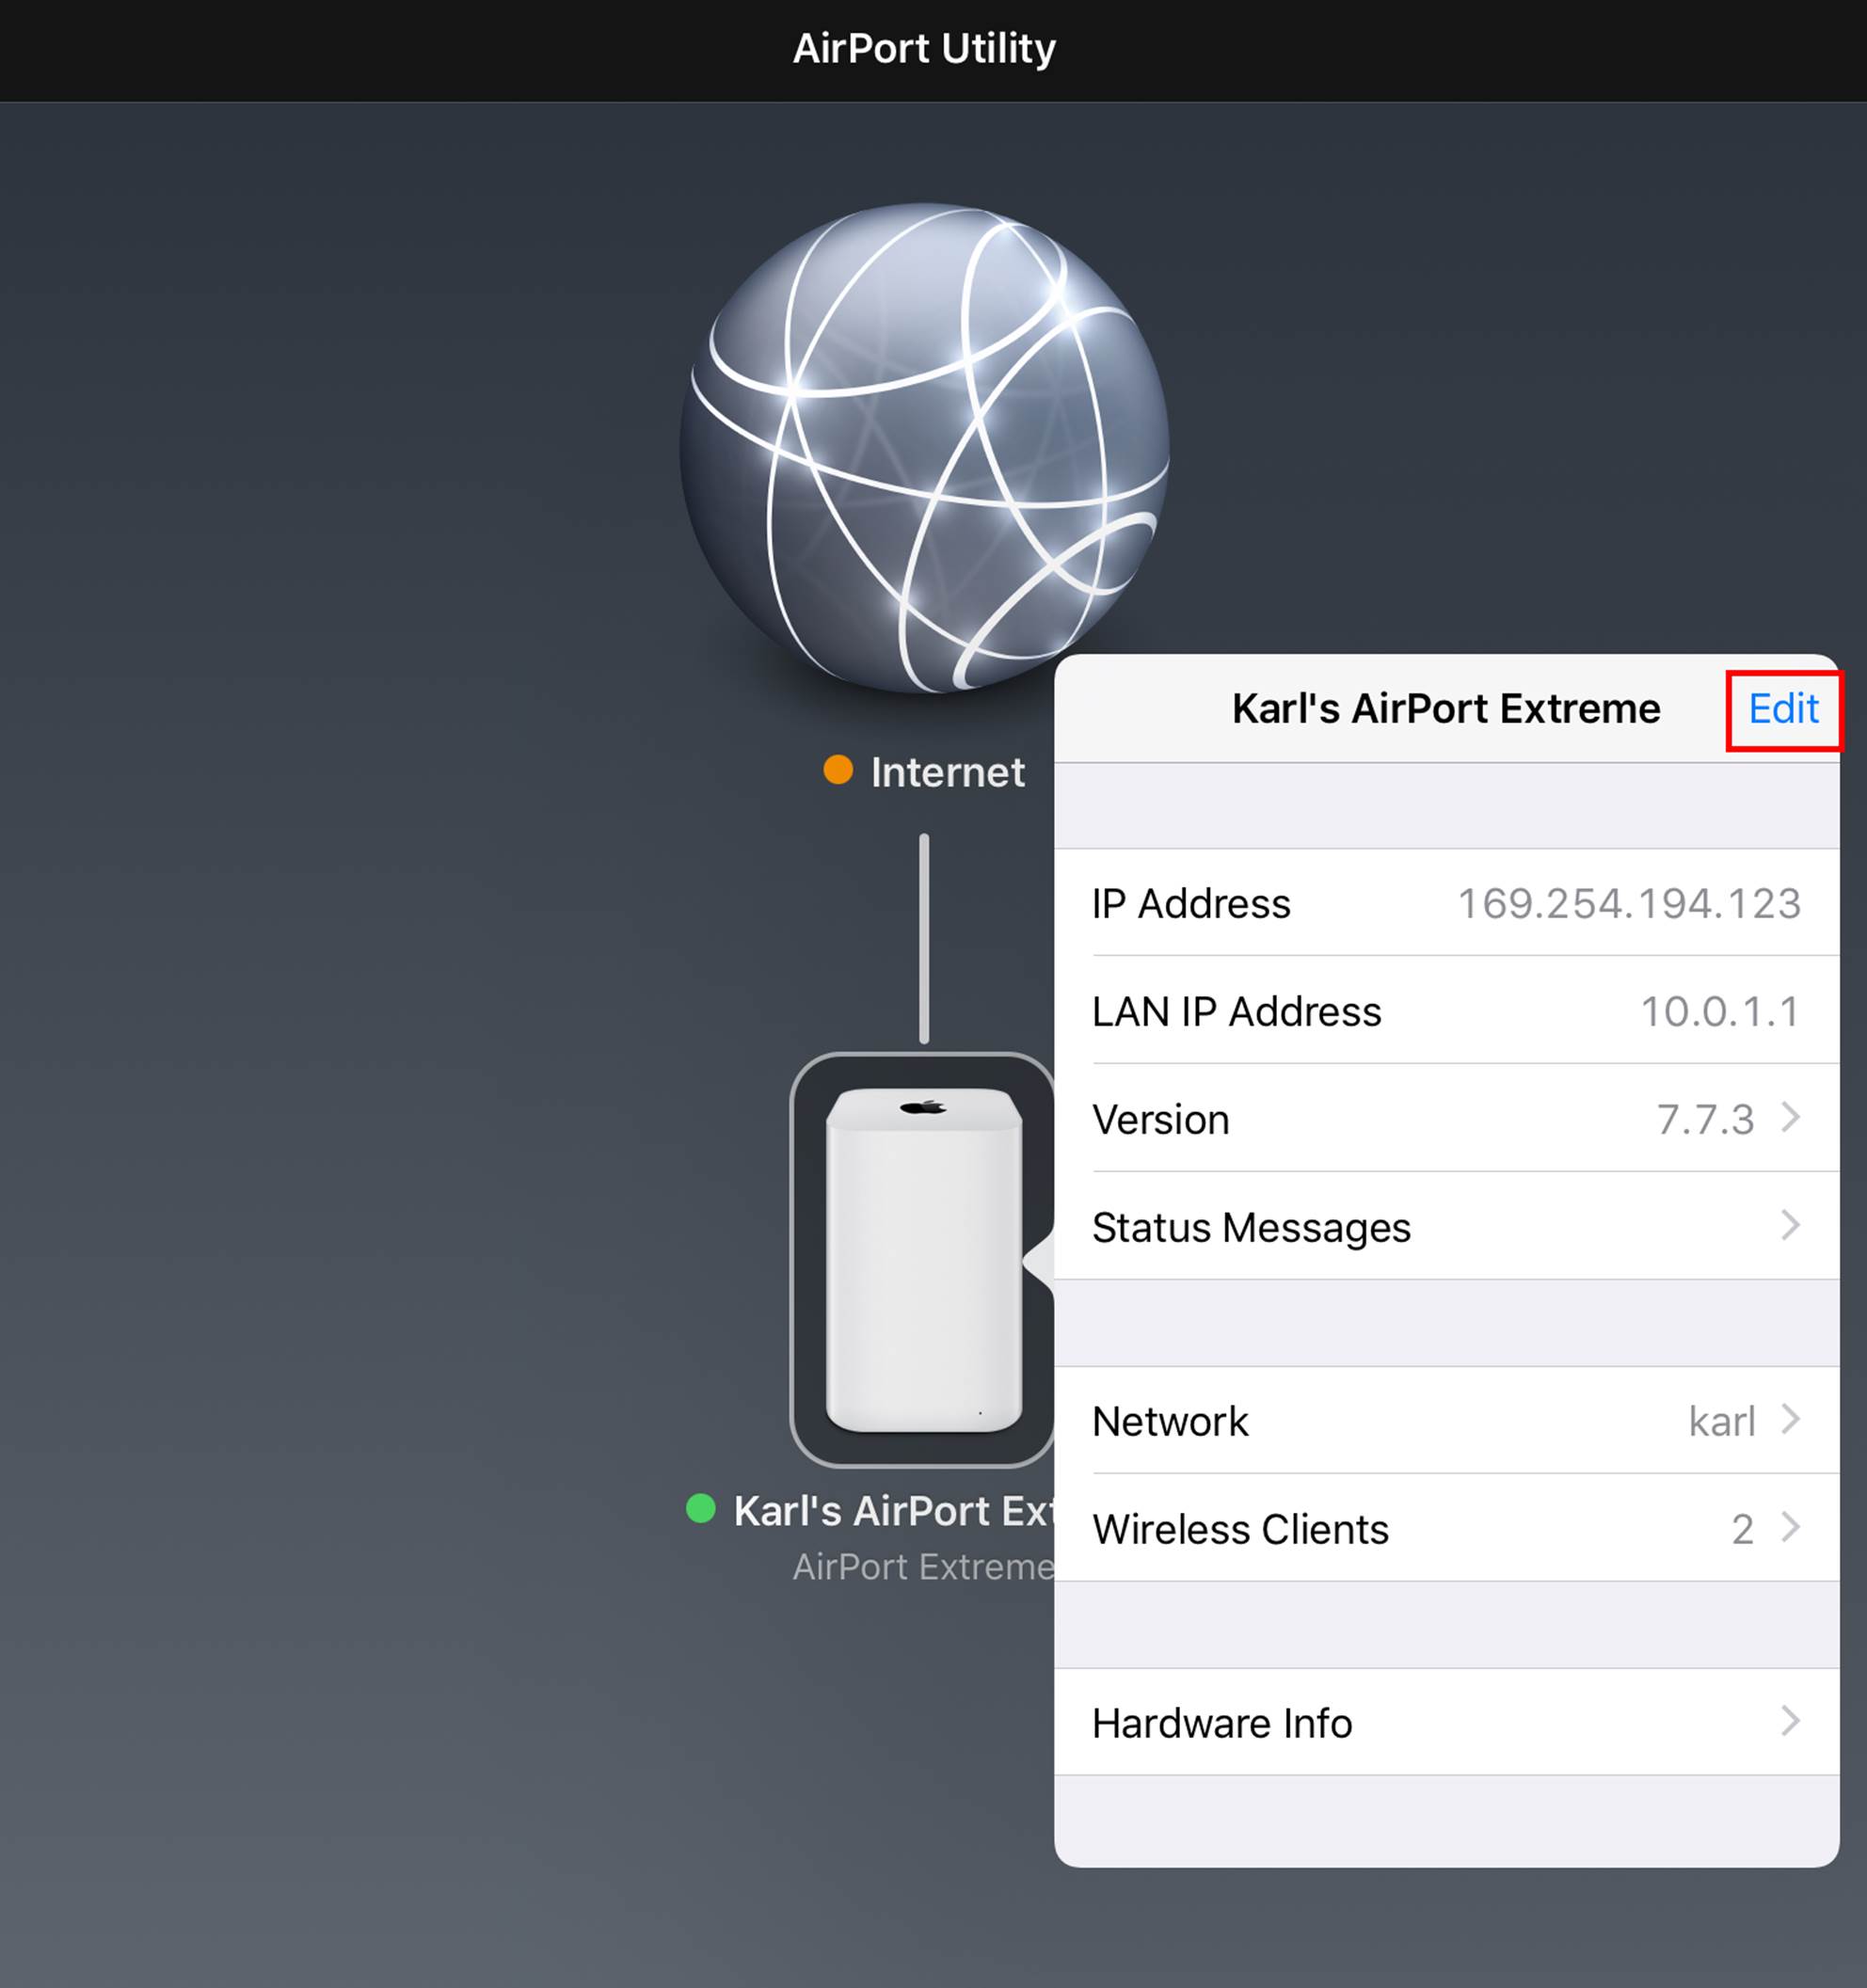
5. Tap Edit.
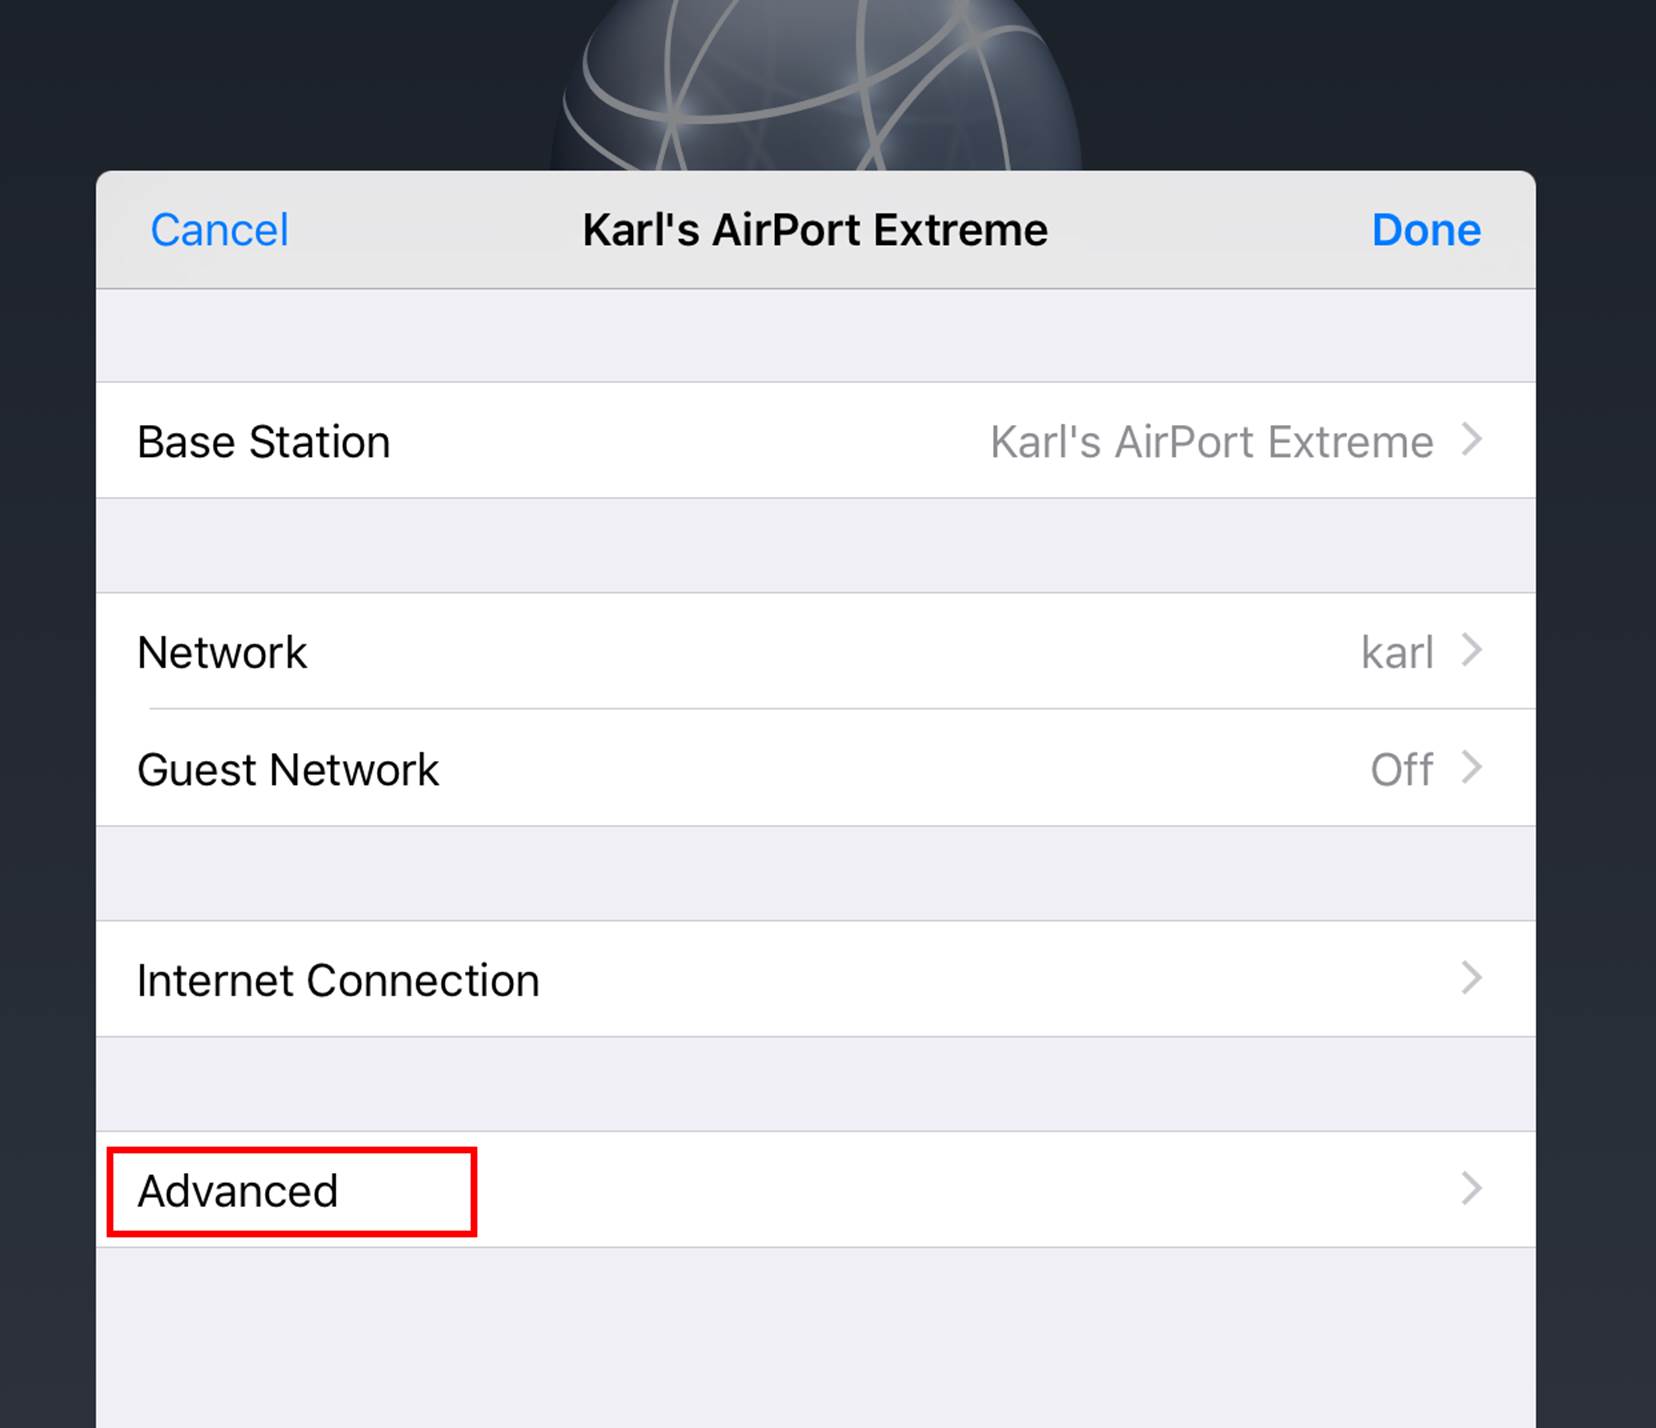
6. Tap Advanced.
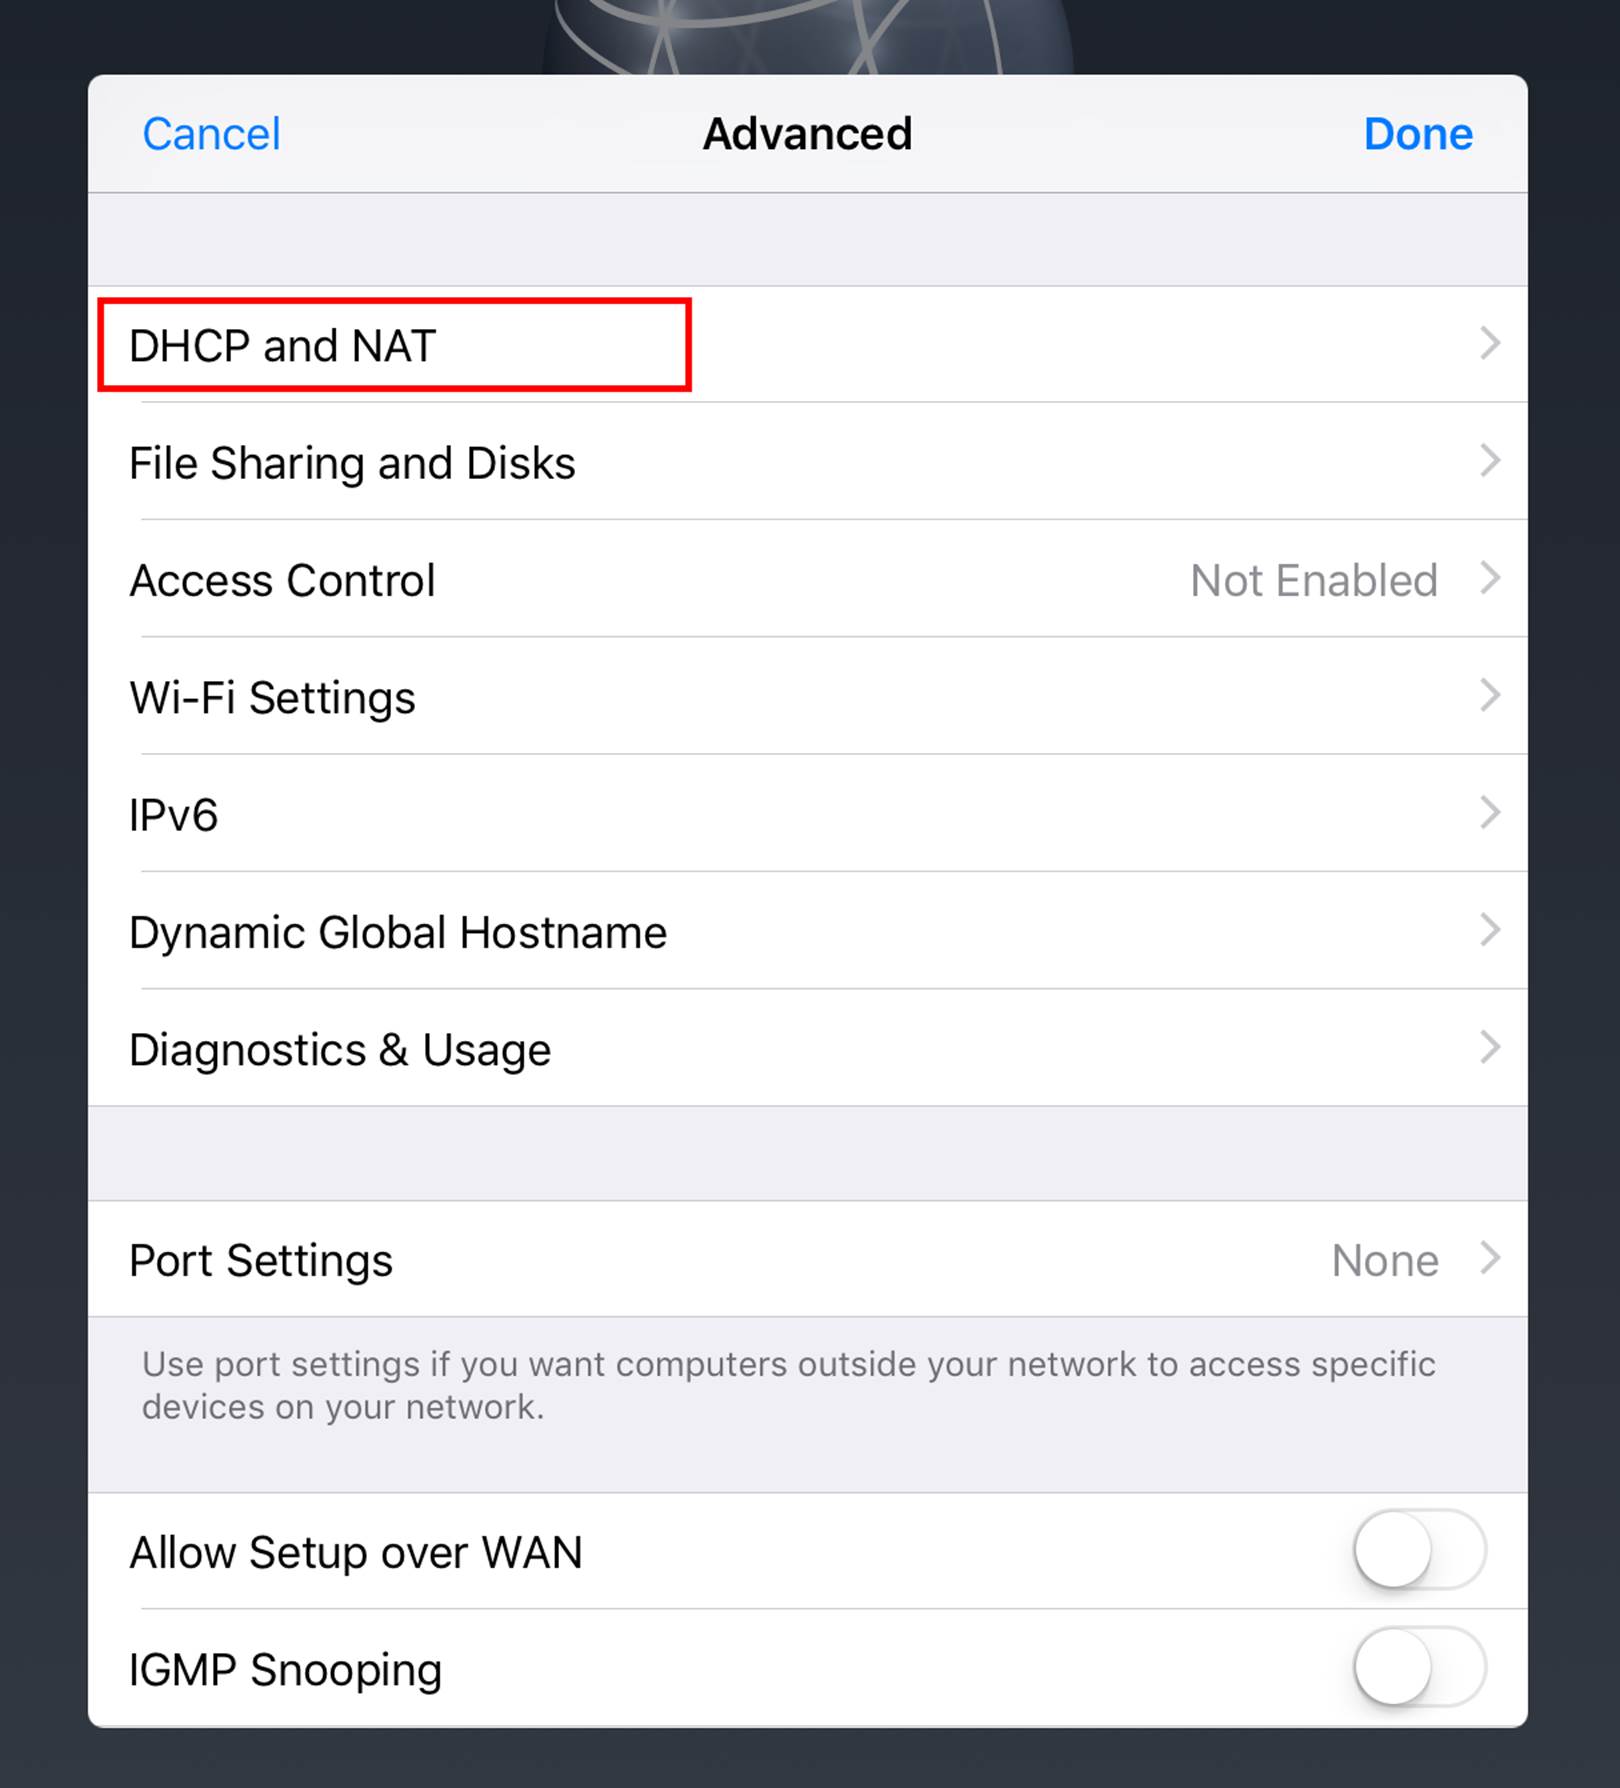
7. Tap DHCP and NAT.
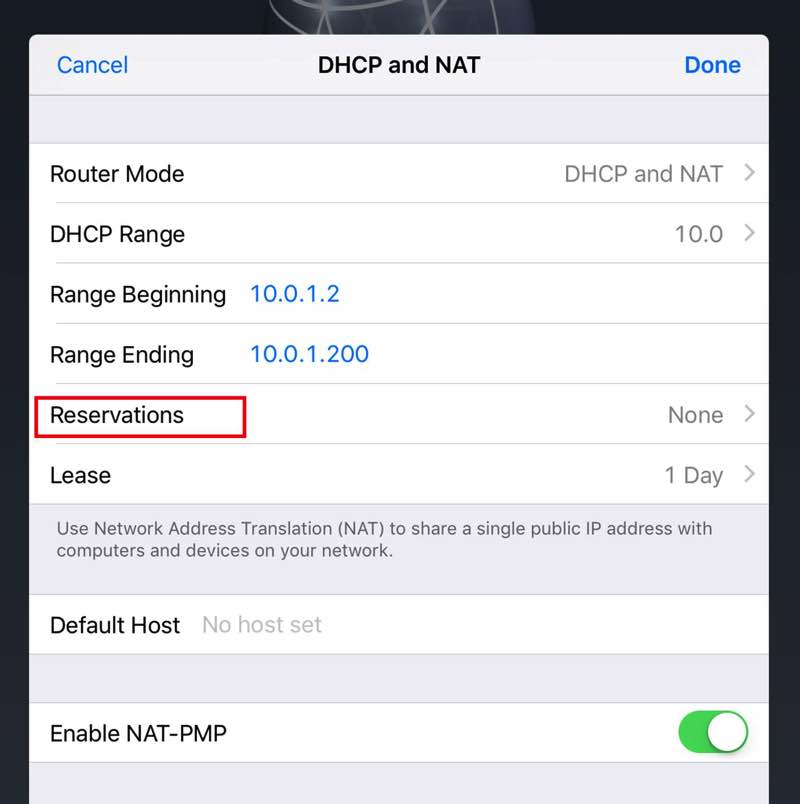
8. Tap Reservations.

9. Tap New Reservations.
10. Name the reservation KDS. Enter the MAC address you copied down in the MAC Address field.
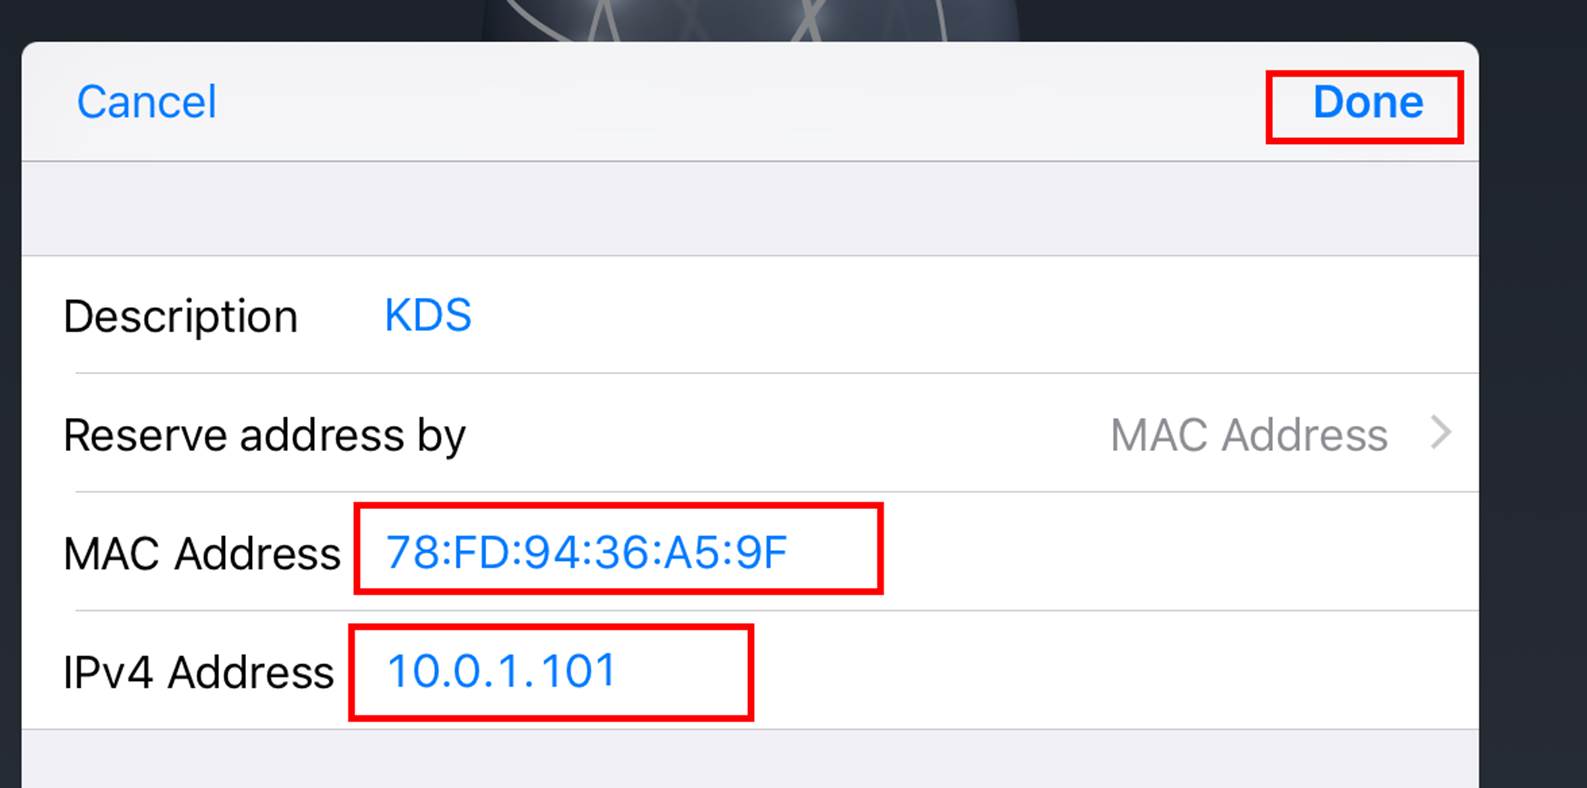
11. In the IPv4 Address field, enter an IP address where the last three numbers are greater than 100. For example, enter 10.0.1.101. If you add another KDS at a later time, increment the final three numbers by one. So a second KDS should have the IP 10.0.1.102 reserved.
12. After adding the MAC address and deciding on an IP address to reserve, tap Done several times.
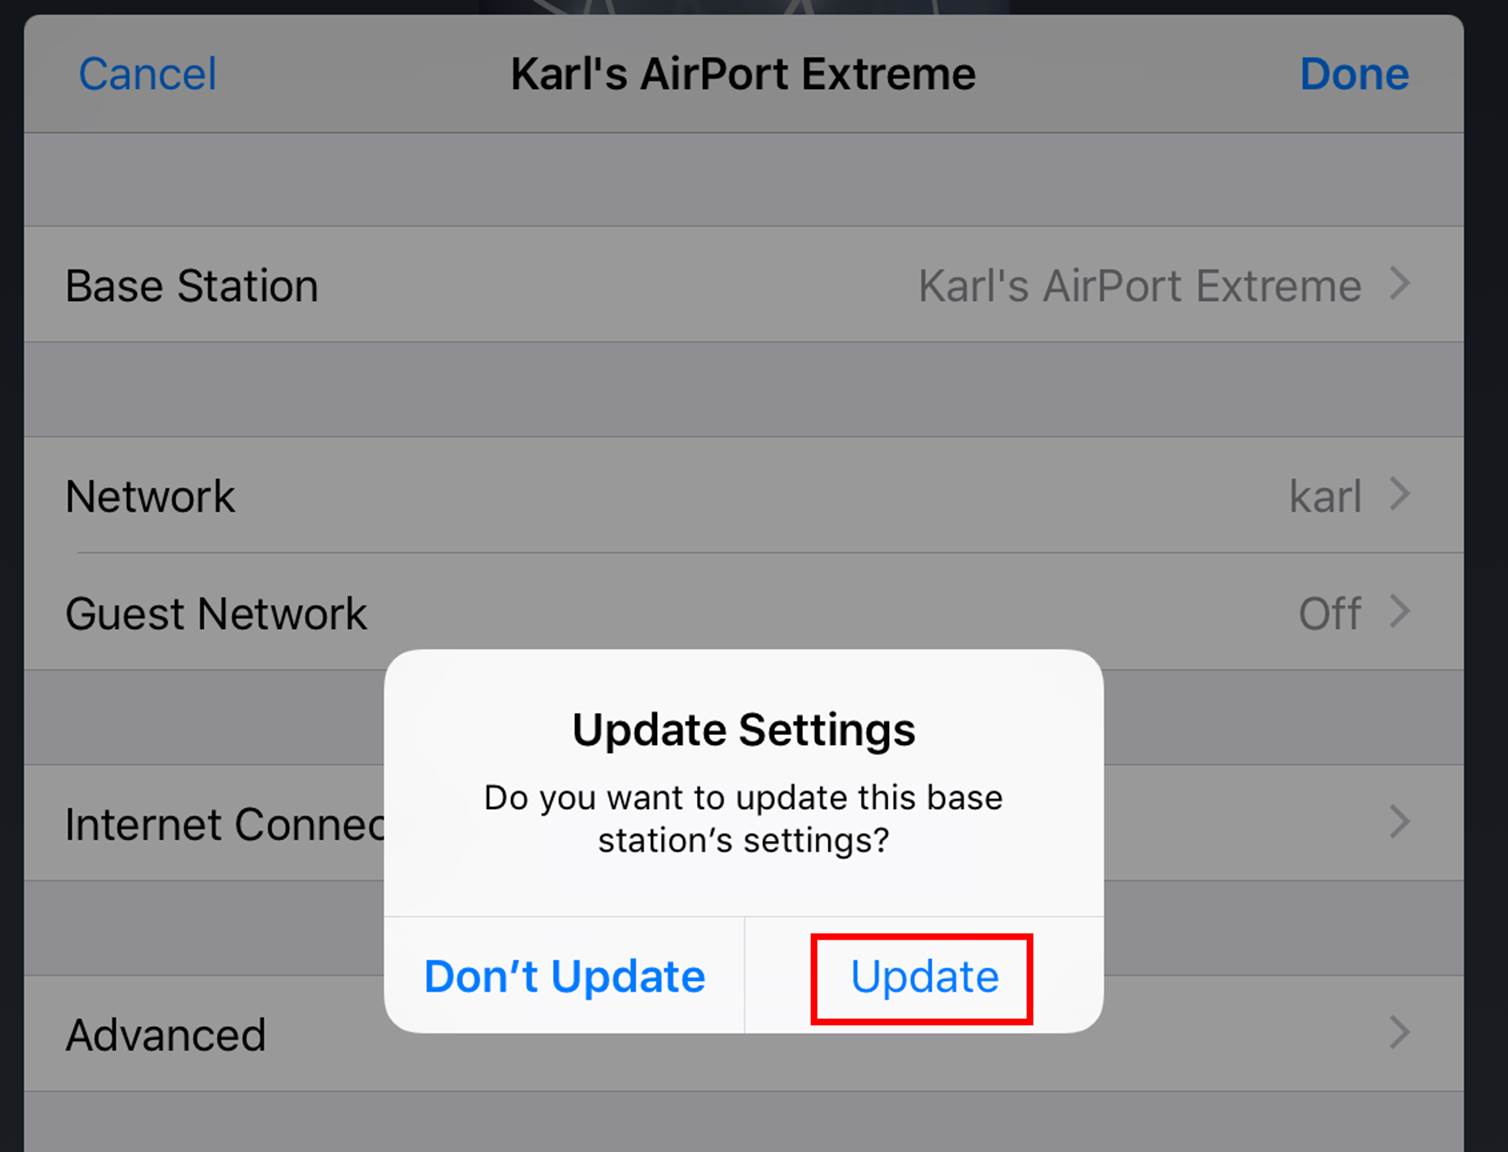
13. When you are prompted to Update your AirPort, tap Update.
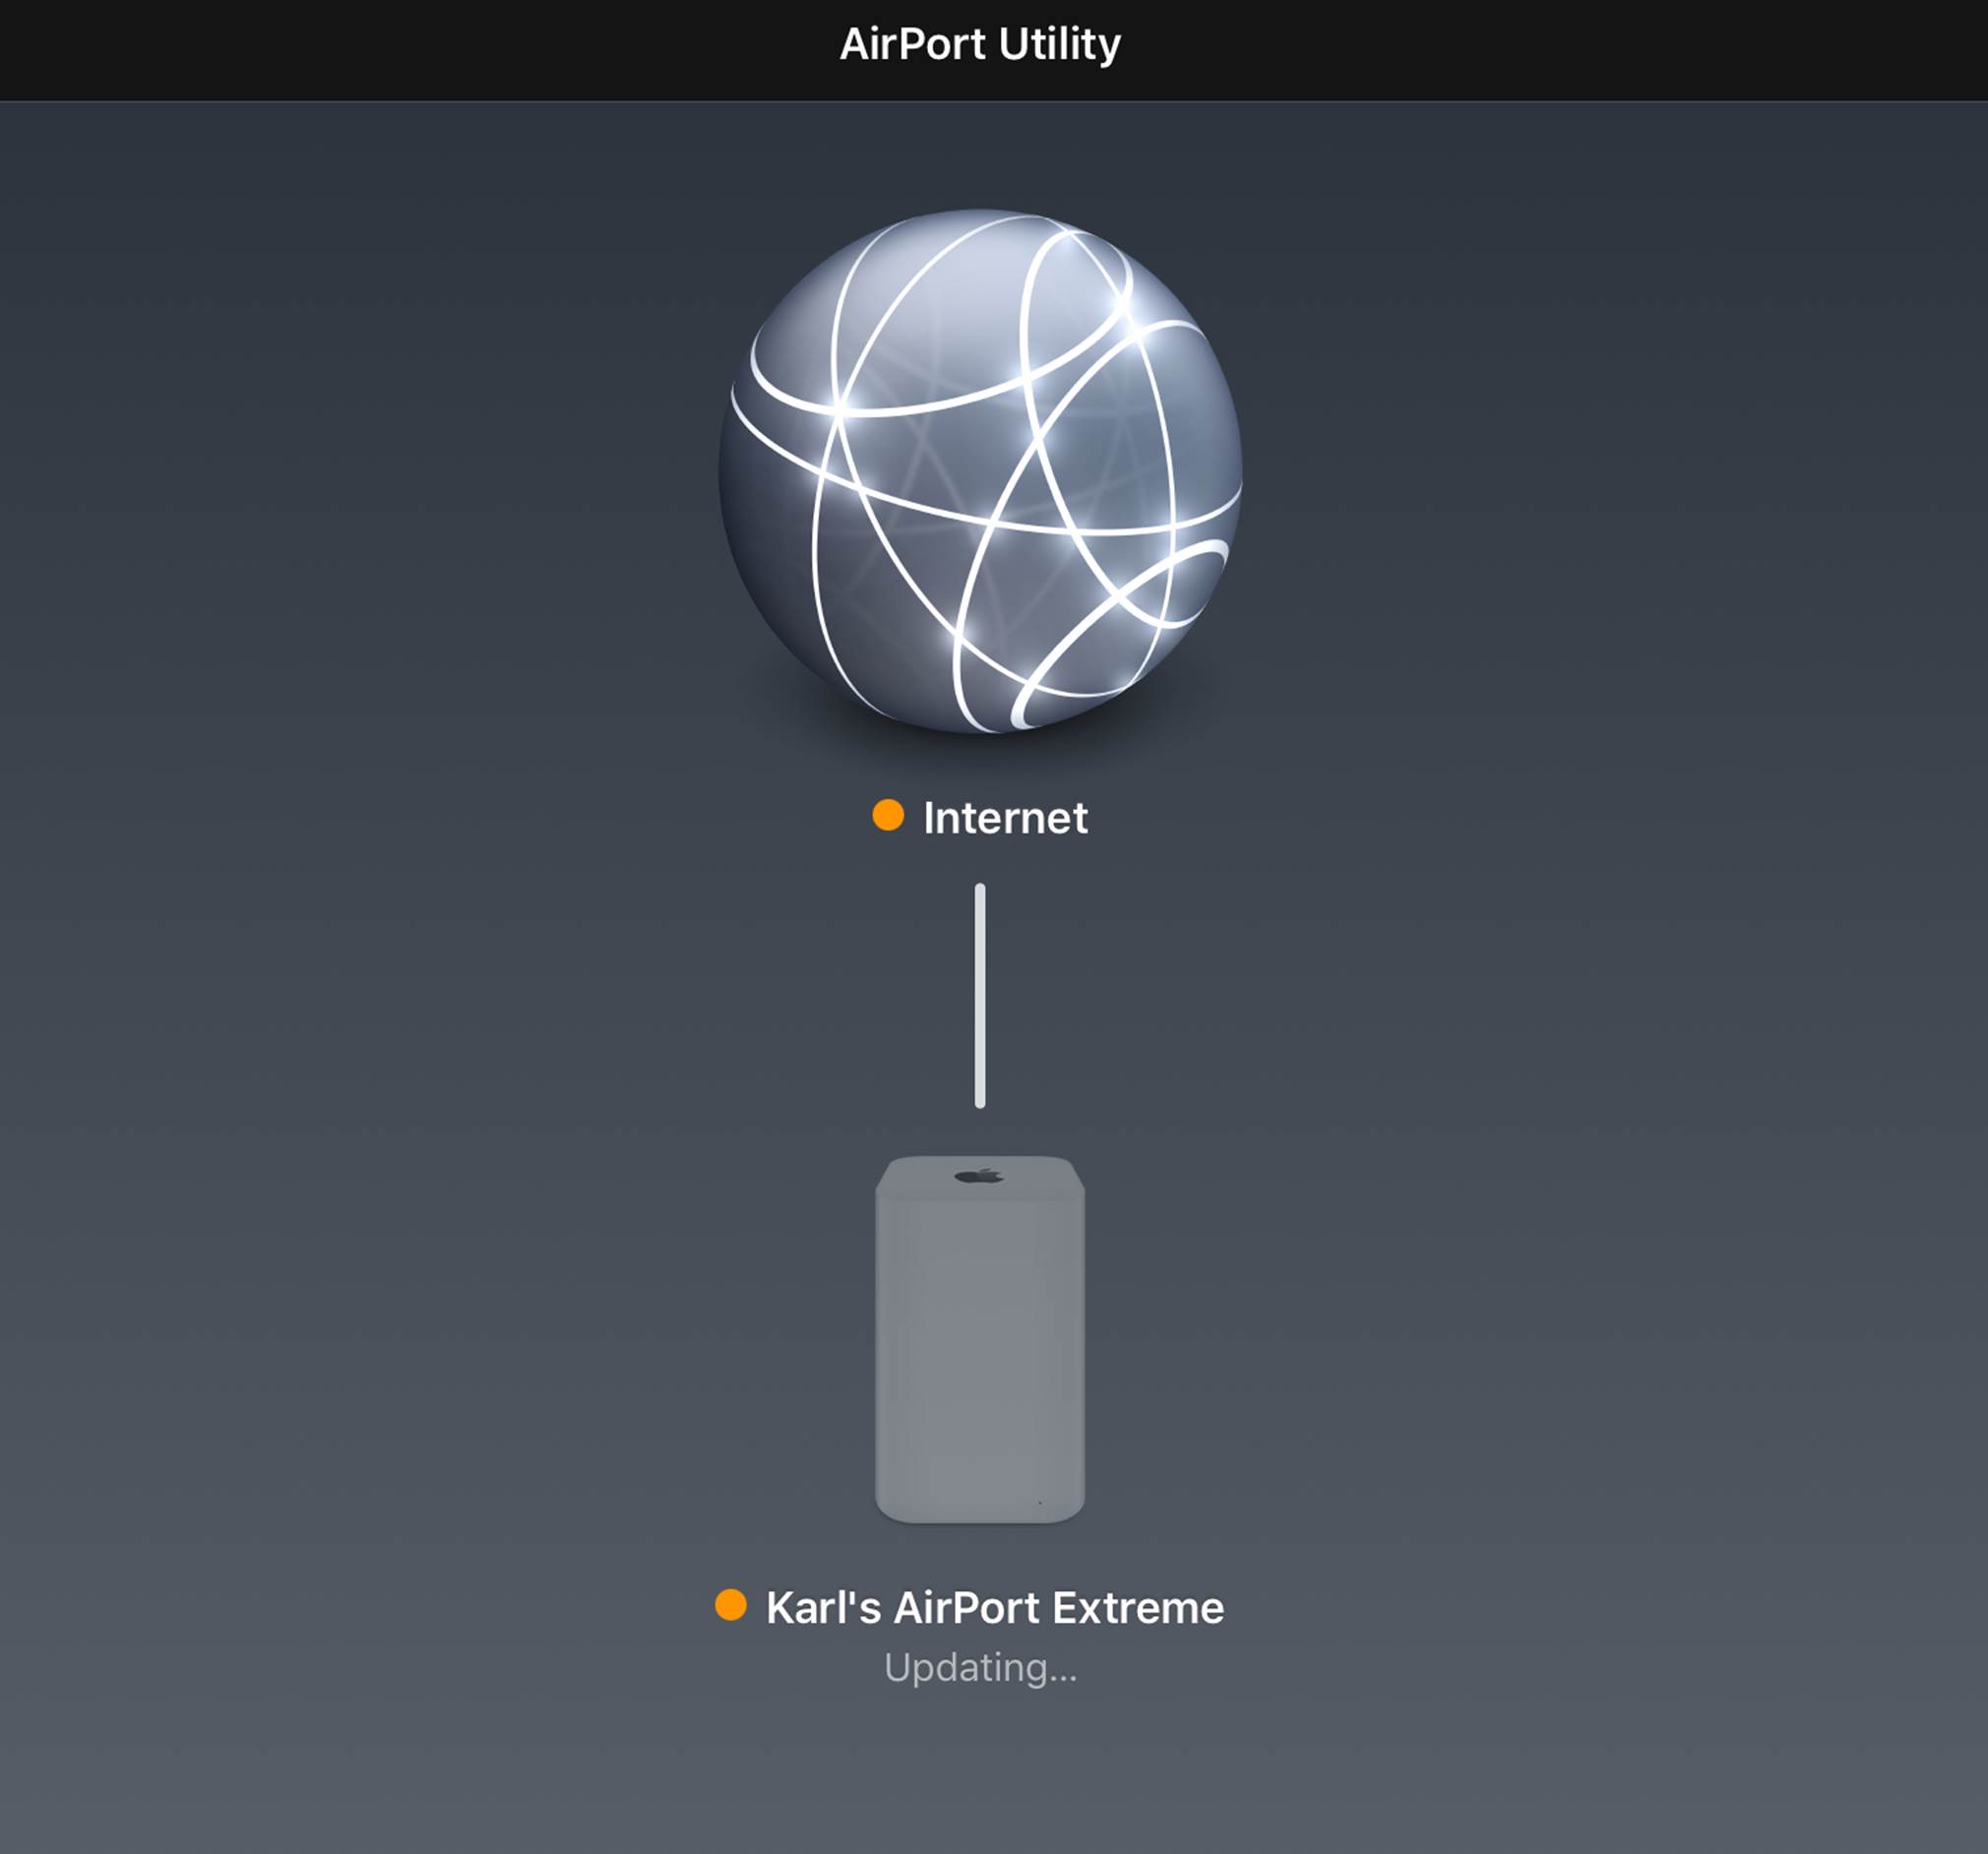
14. It will take a few minutes for router to update. Wait until the yellow indicator under the pictured AirPort changes to green.
Section 2. If You’re Using a Ubiquiti AmpliFi Router

1. Open Settings again on the iPad with the KDS.
2. Tap Wi-Fi.
3. If Wi-Fi is not enabled slide Wi-Fi to the green position.
4. Under Choose A Network, locate your TouchBistro network.

5. Tap General | About.

6. Write down the Wi-Fi address. This is your MAC address. It is very important to copy down the correct case (hence, write down an uppercase letter if the address letter is upper case). You will need this MAC address shortly.
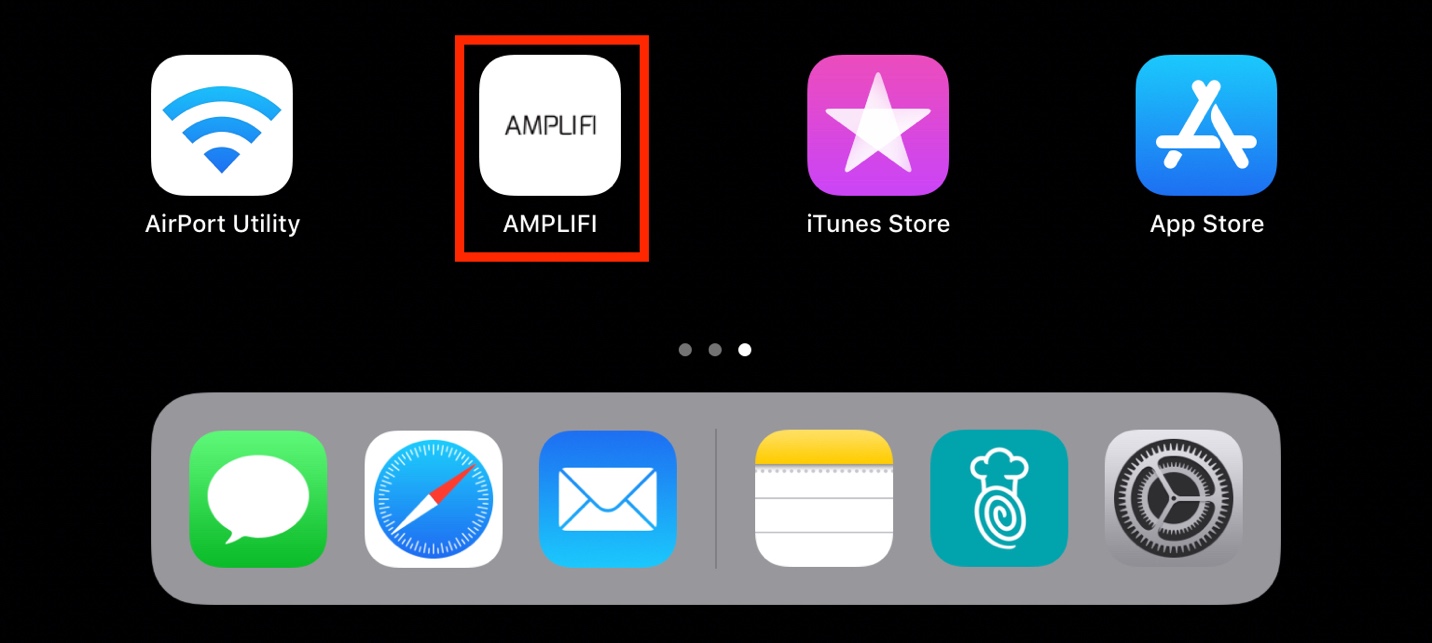
7. On your iPad, tap the AmpliFi app.
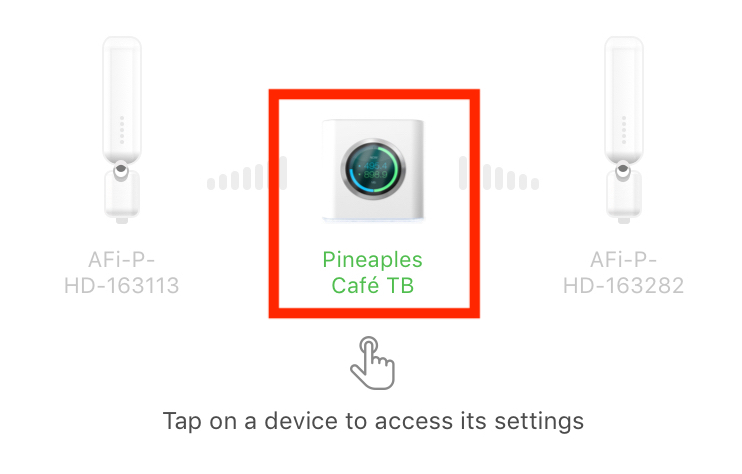
8. Tap on the picture of the AmpliFi Router in the middle of the screen.
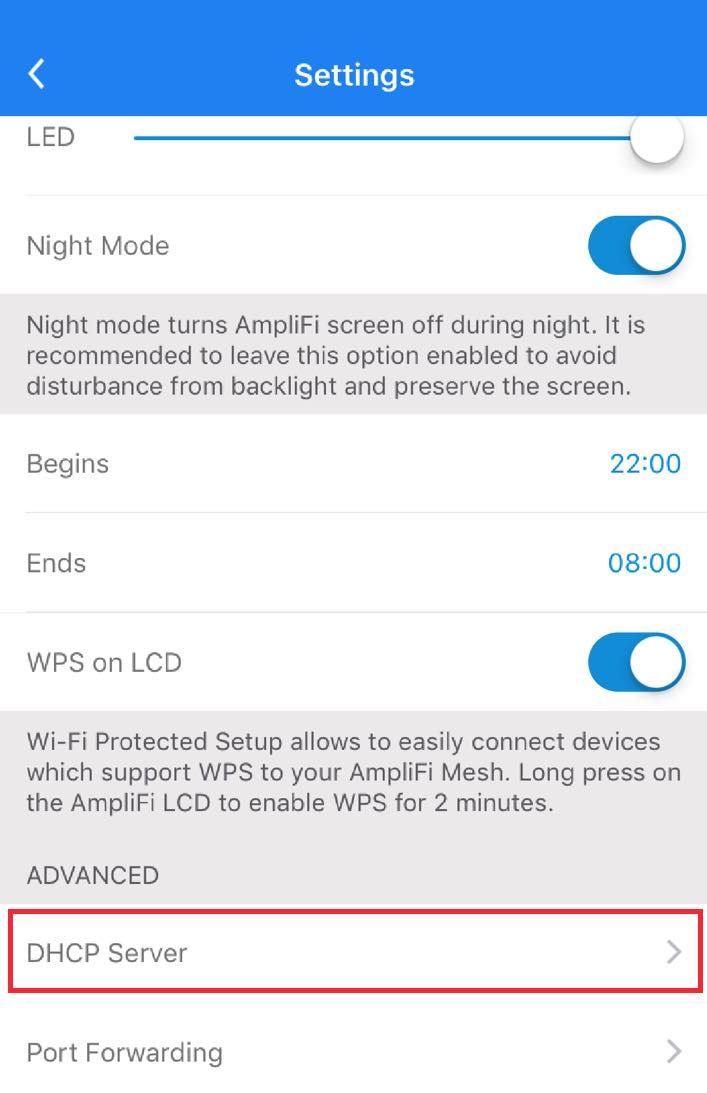
9. Scroll down to the Advanced section, and tap DHCP Server.
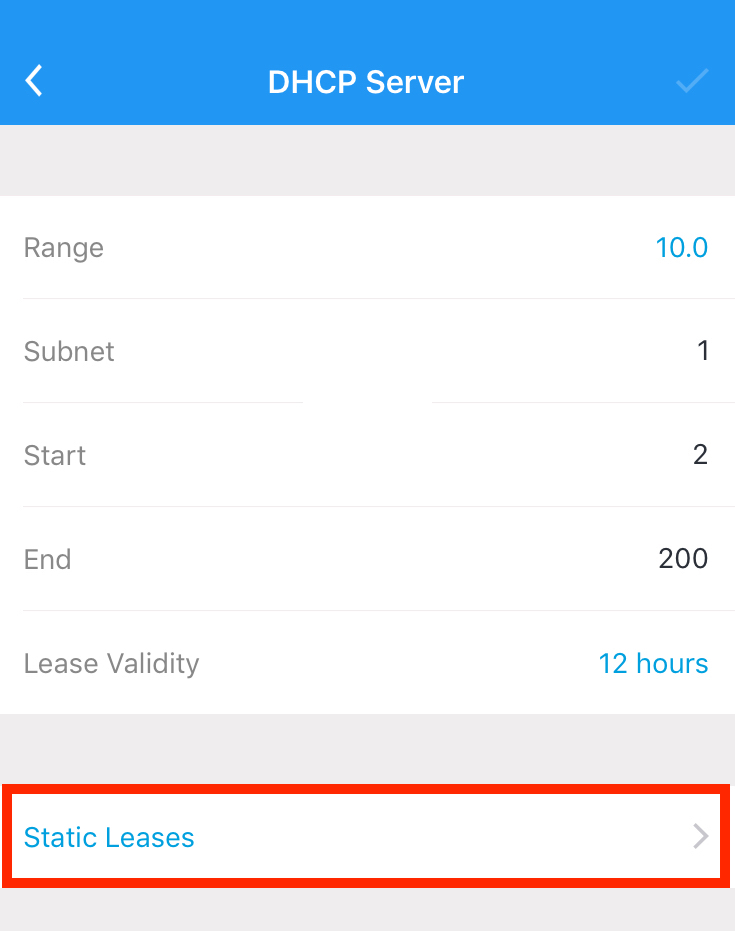
10. Tap Static Leases.

11. Tap the plus sign + in the top right-hand corner to add a new reservation.
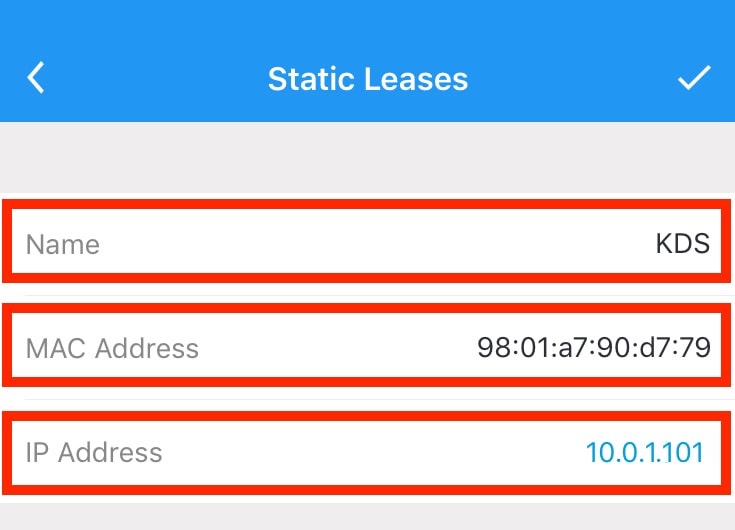
12. Complete the following three fields:
- Name – Create a unique name for this device.
- The MAC Address for the device.
- The desired IP Address you wish to reserve for the device.
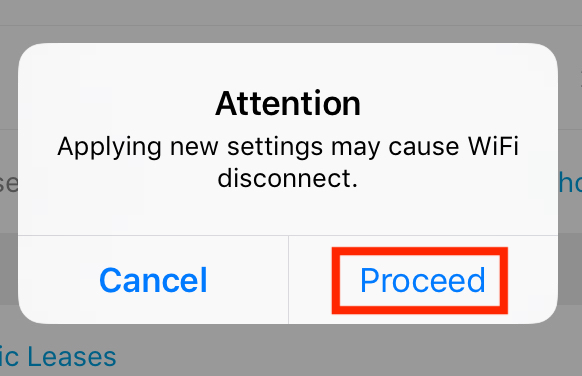
13. Tap the checkmark in the top right-hand corner, and press Proceed when the Attention dialog box appears.
Your device now has a reserved IP in your AmpliFi router.
Chapter 8. Setting Up the KDS on TouchBistro

1. Open the TB KDS app on the iPad with the KDS installed and open TouchBistro POS on another iPad.
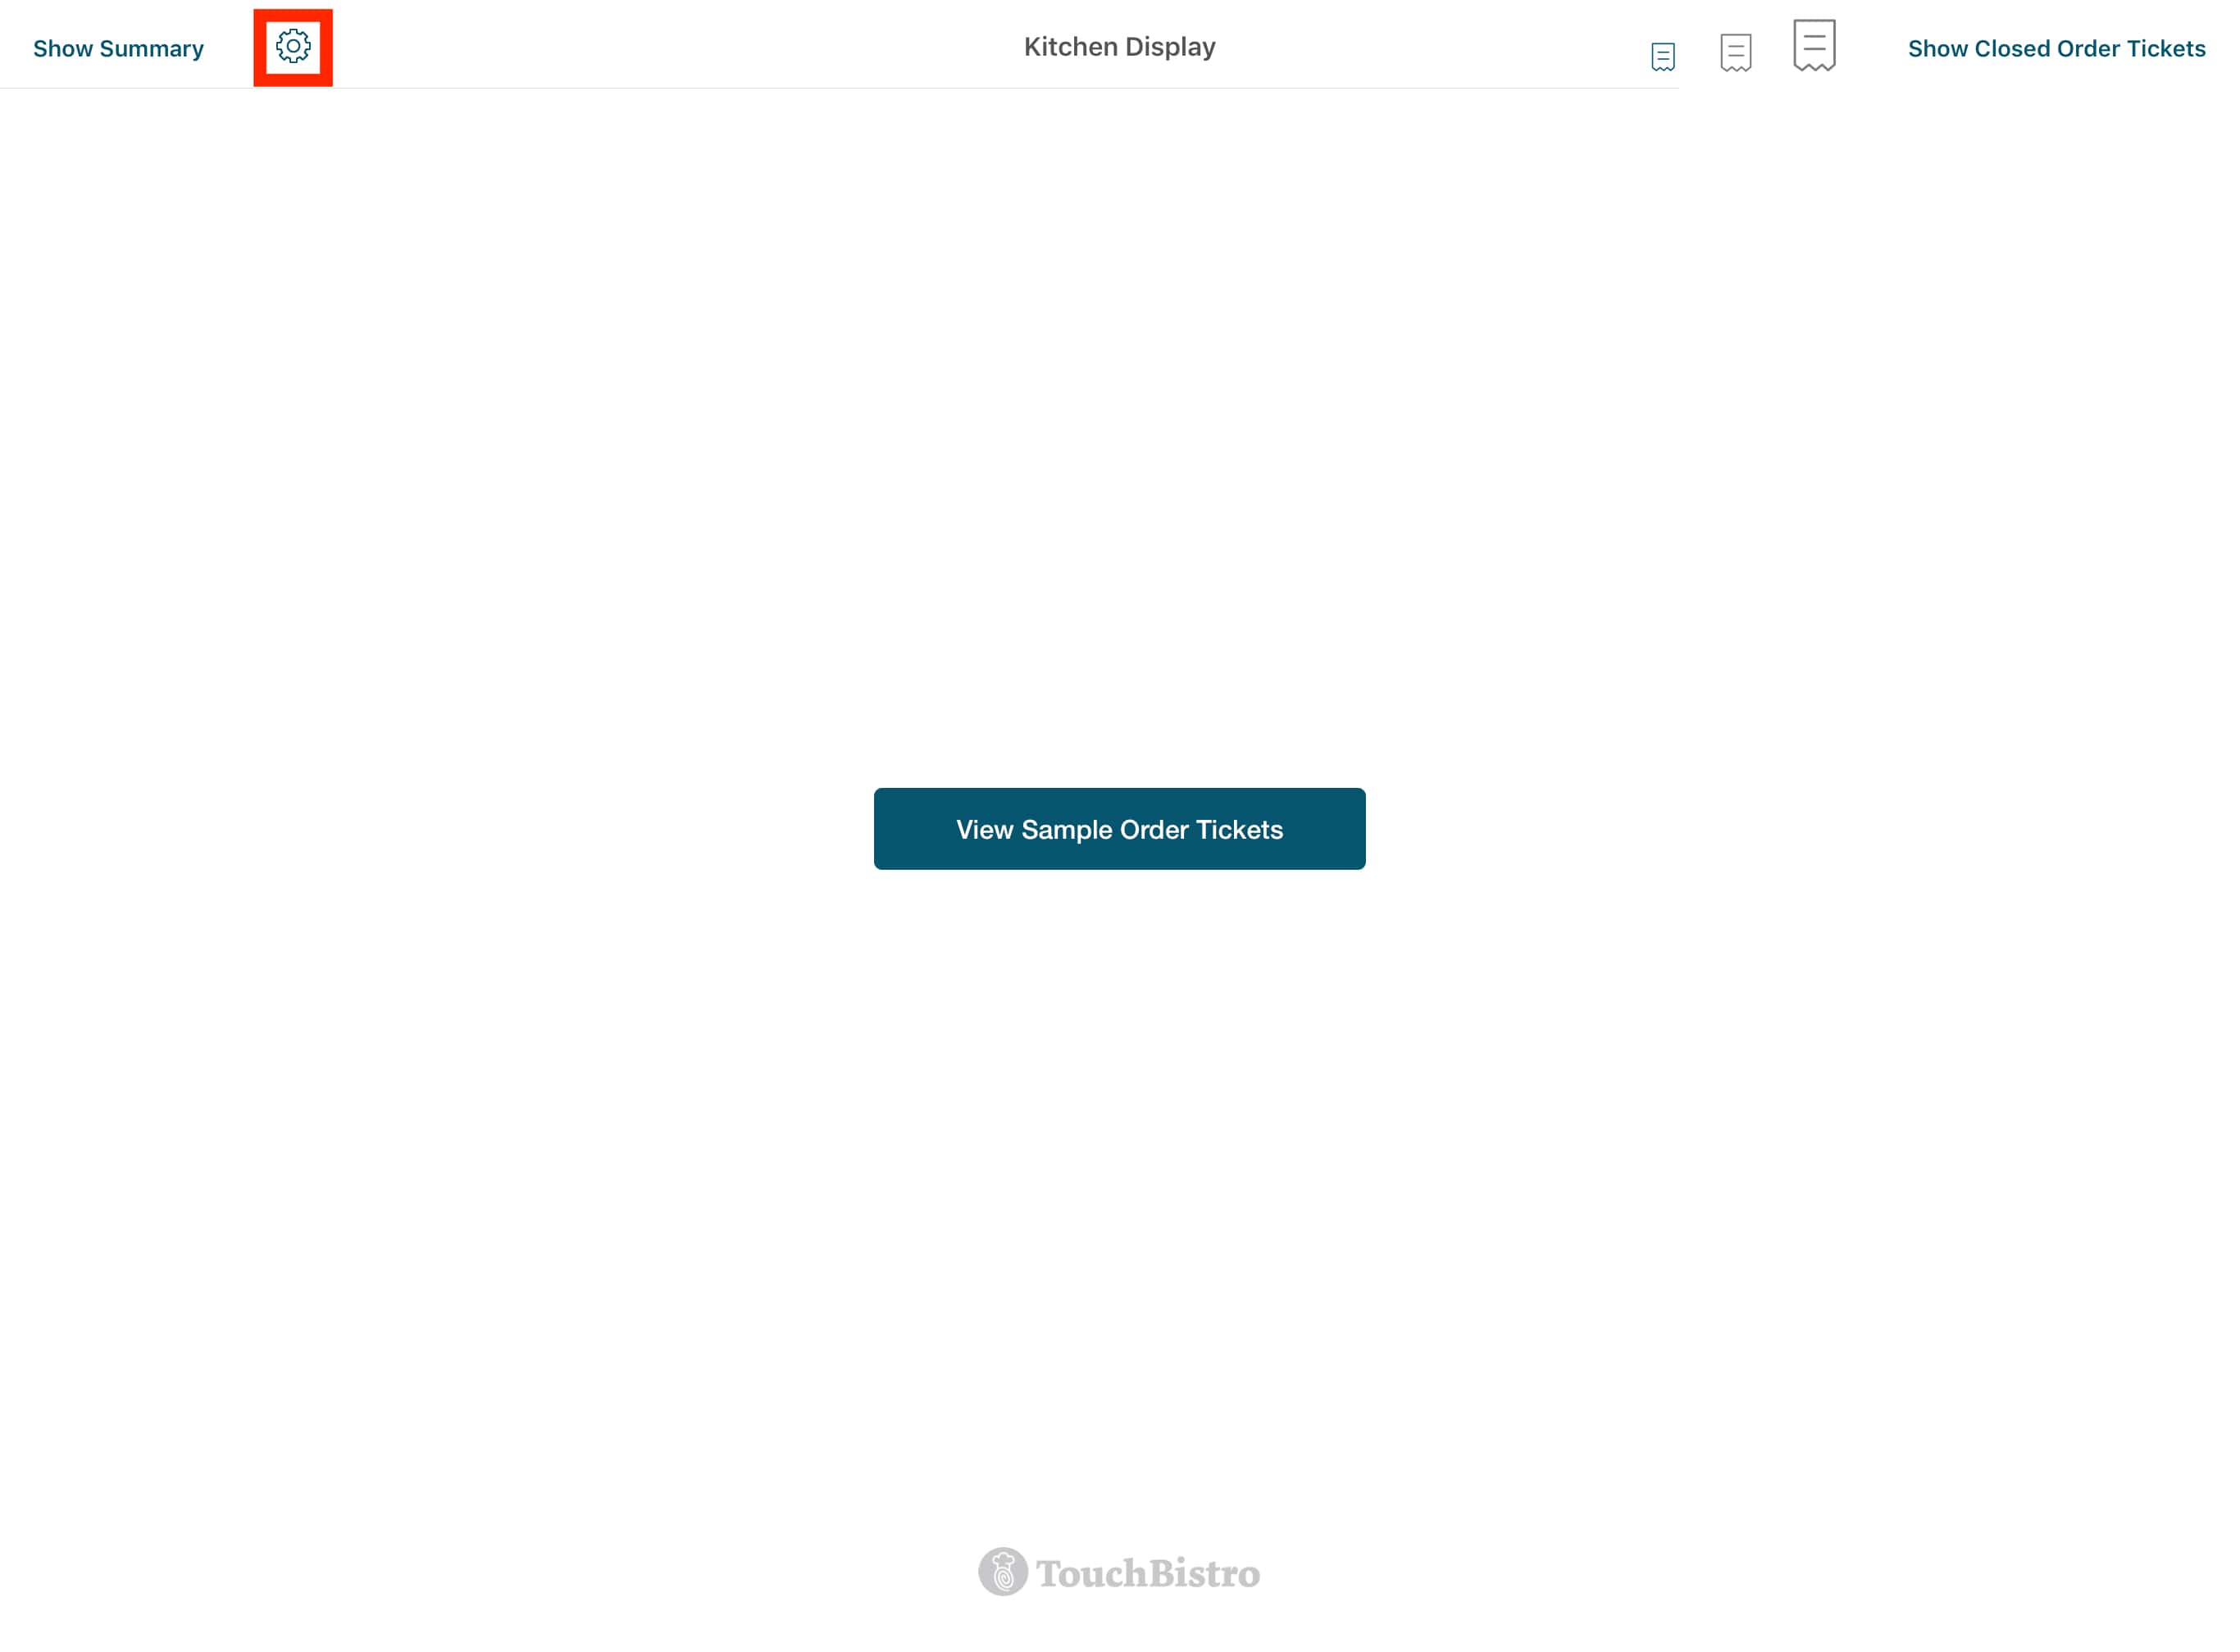
2. Tap the Setup ![]() icon on the top bar of the KDS.
icon on the top bar of the KDS.
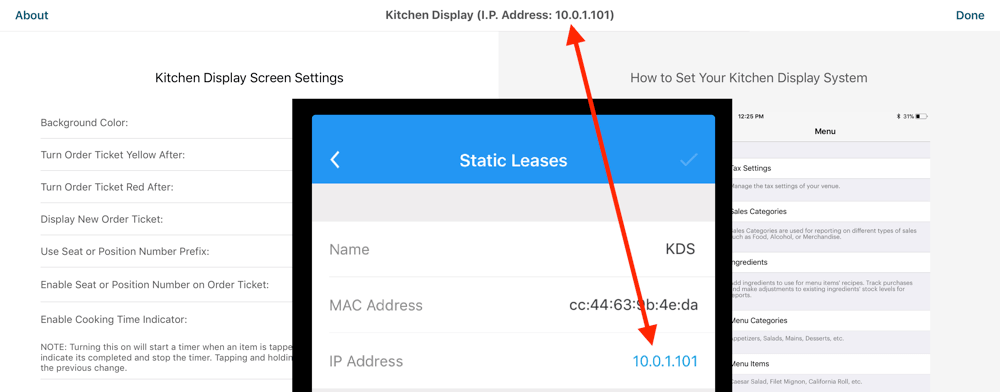
3. Verify on the top bar of the KDS your reserved IP address appears (for example 10.0.1.101). If the IP address on the top bar does not match, ensure the iPad with the KDS is still set to the TouchBistro supported router you configured.
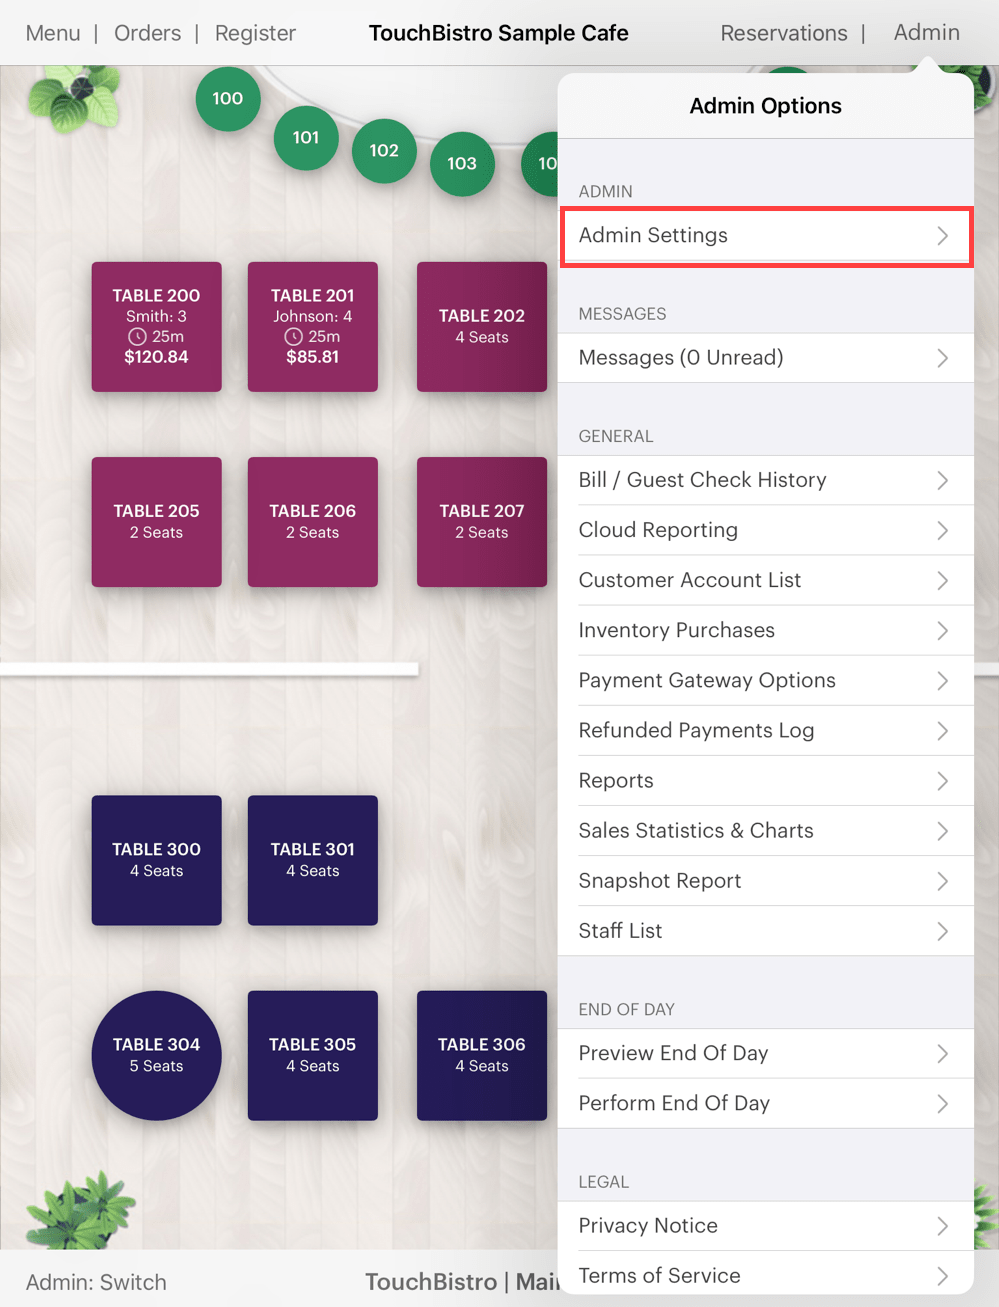
4. On the iPad that you launched TouchBistro, tap Admin | Admin Settings in the top right-hand corner.
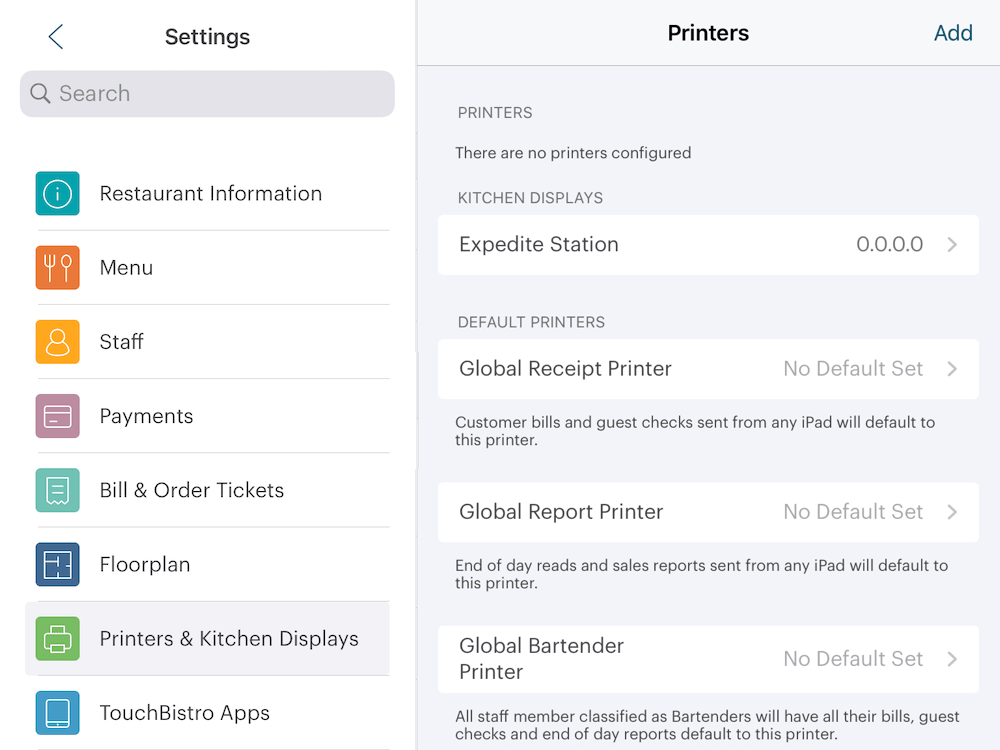
5. Tap Printers & Kitchen Displays.
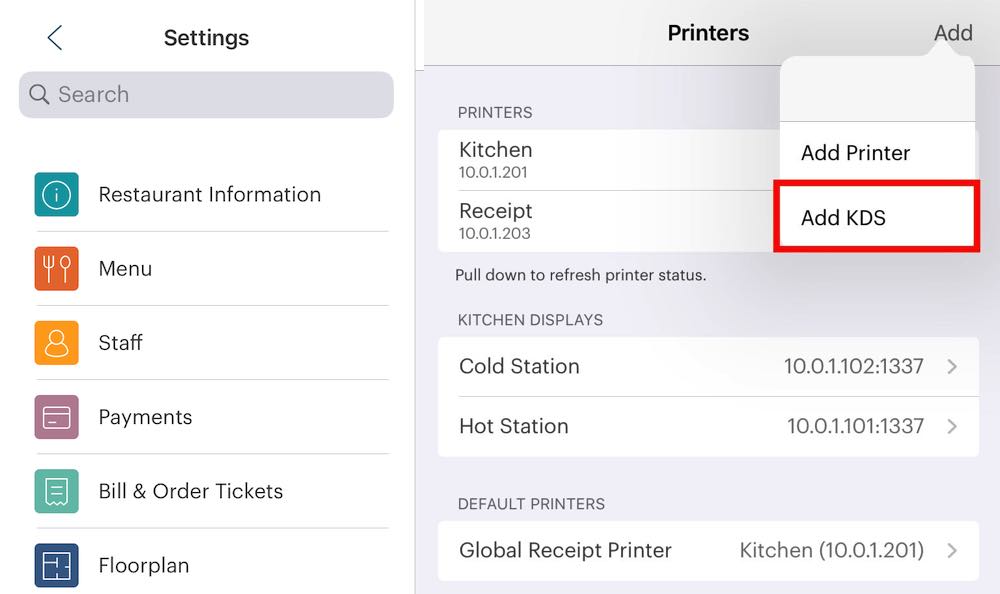
6. Tap the Add + icon. Tap Add KDS.
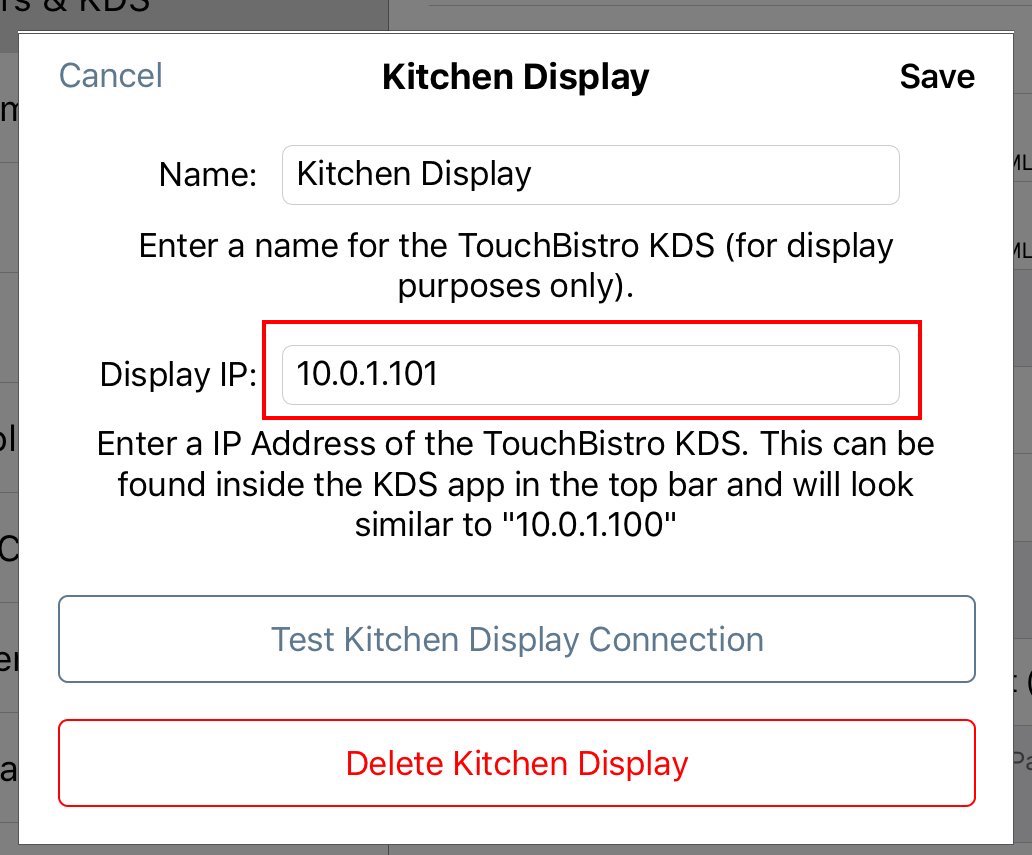
7. Enter the reserved IP in the Display IP address field.

8. Tap Test Kitchen Display. You will get a Test Successful message on both TouchBistro and the KDS.
9. Tap OK and Done.
Chapter 9. Setting Which Menu Categories Should Use the KDS
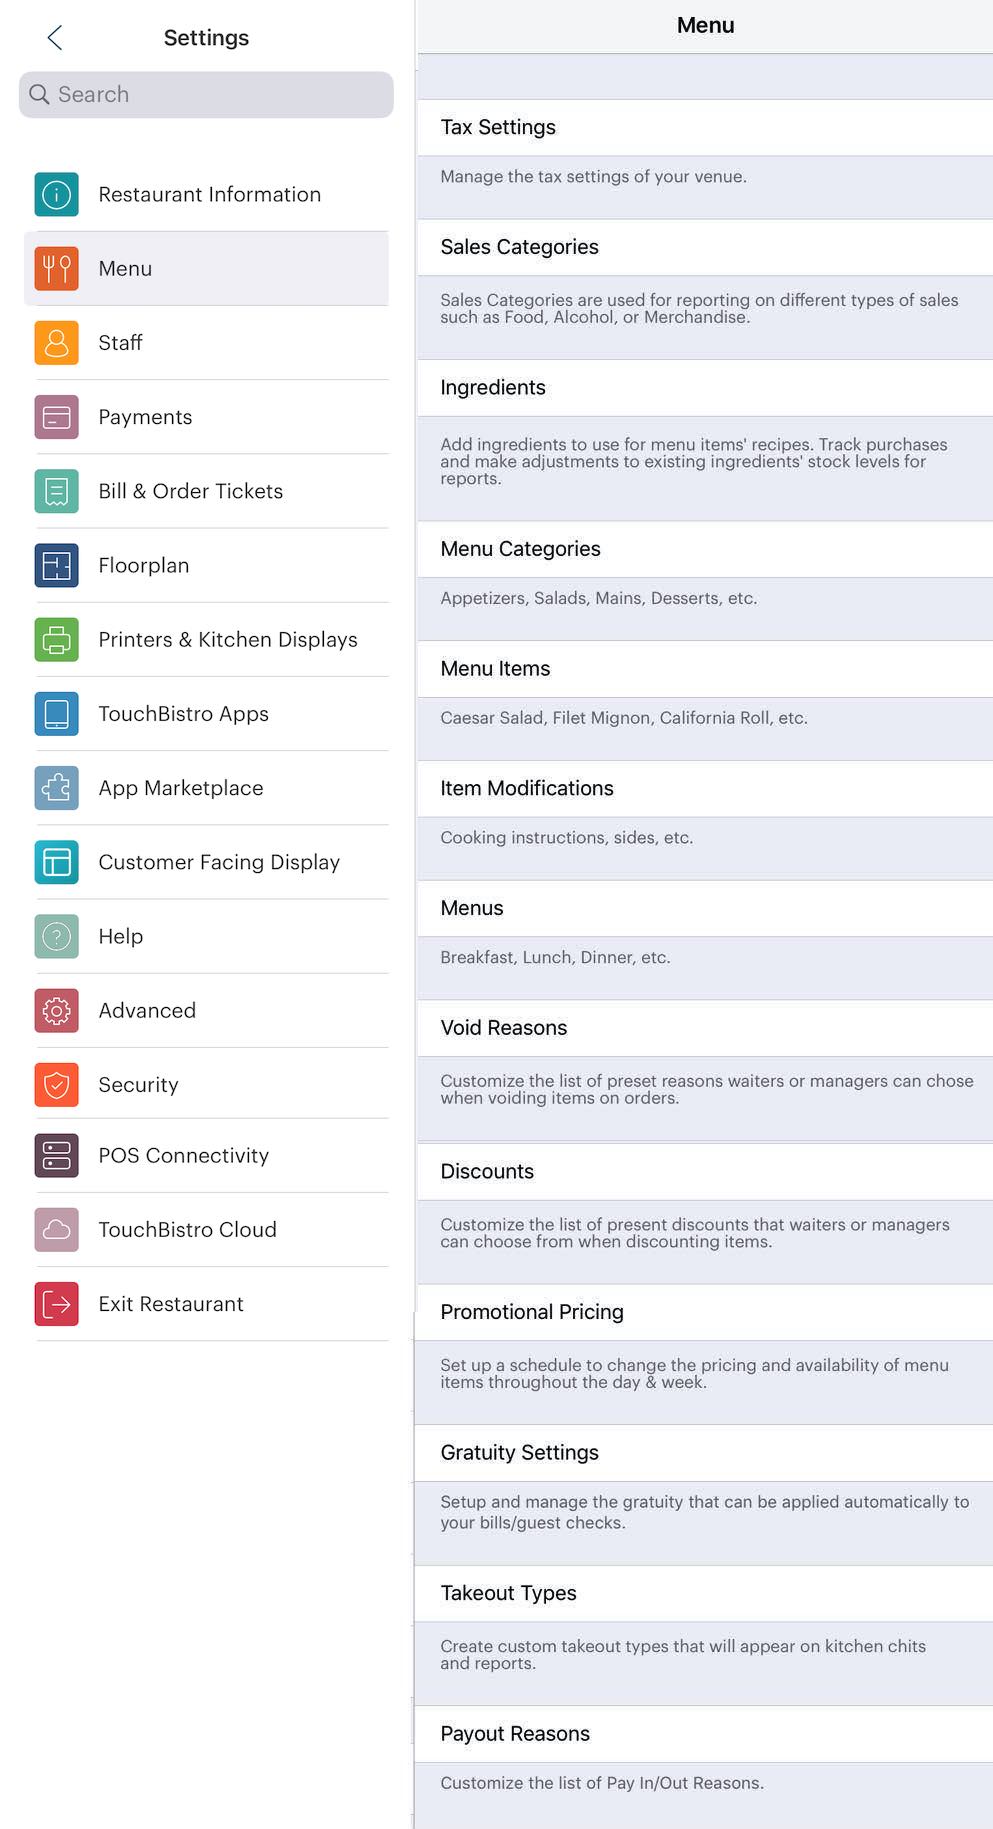
1. From the Settings page, tap Menu.
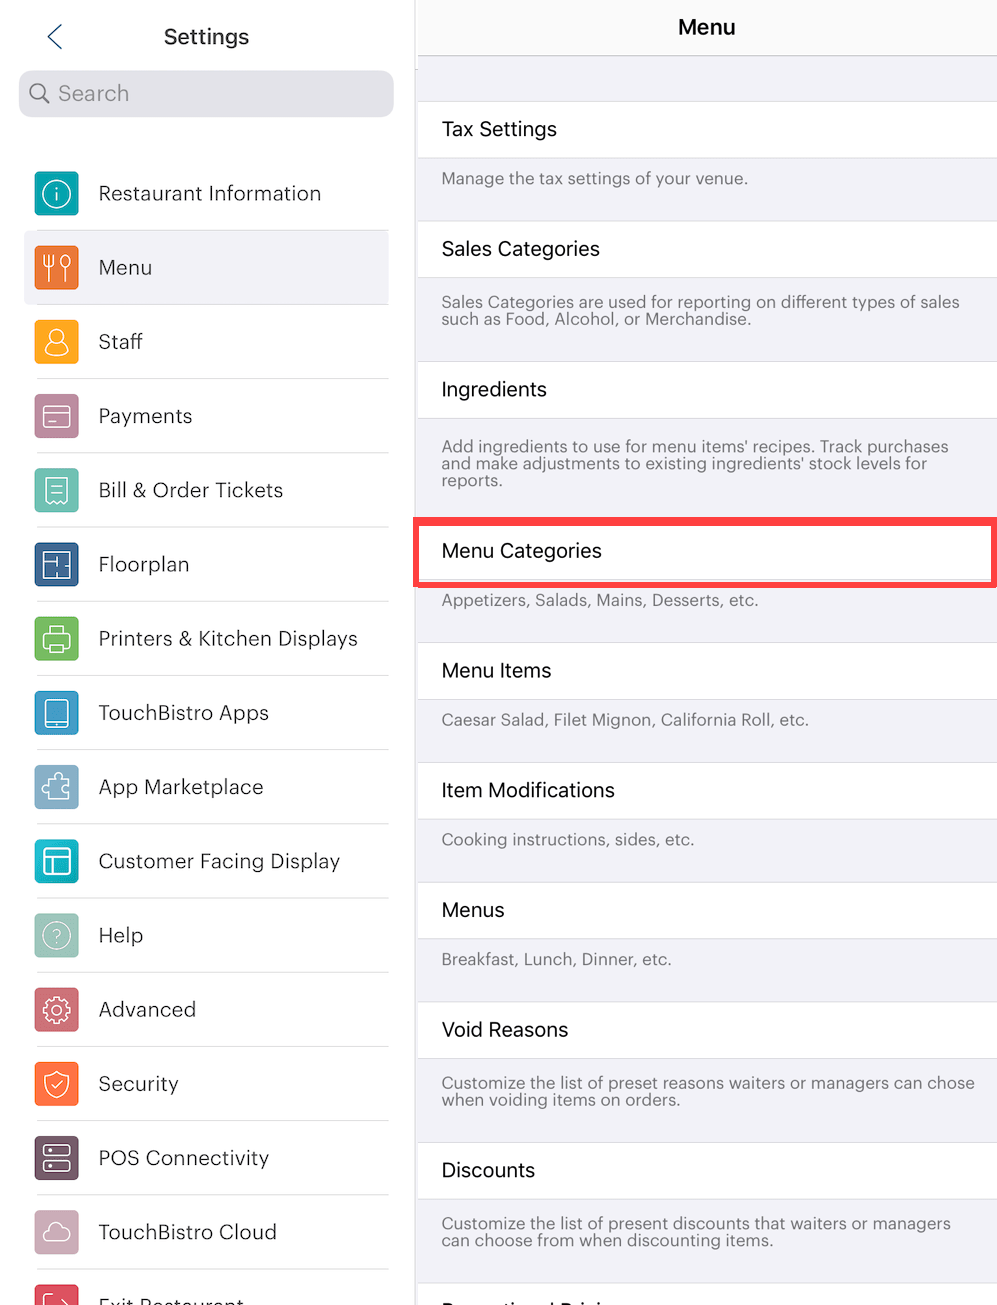
2. Tap on Menu Categories.
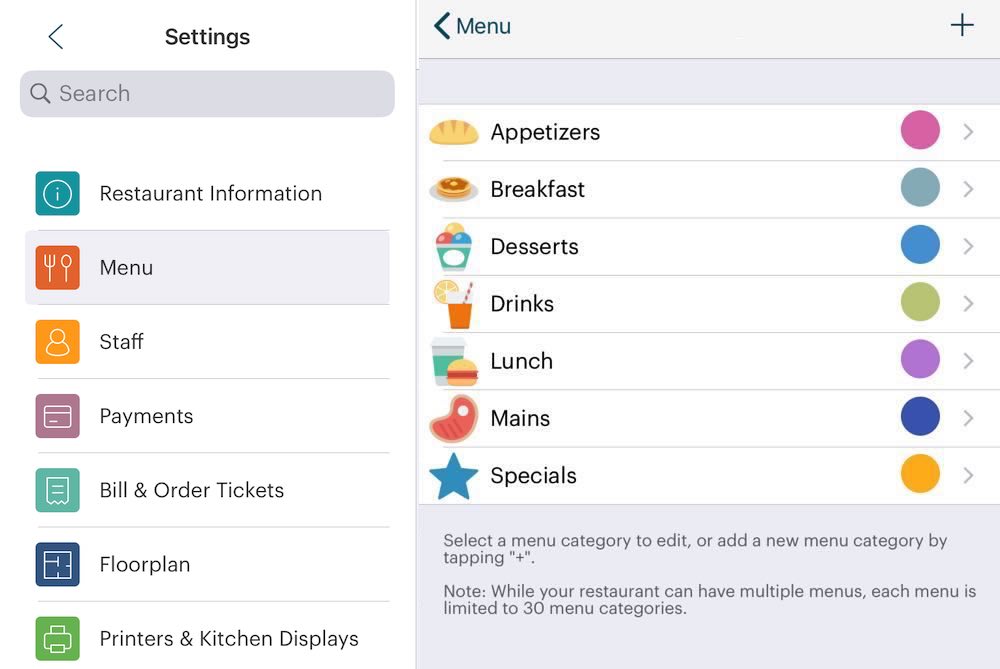
3. Select a category you wish to use the KDS instead of an order ticket printer. Alternatively, the Add ![]() icon to create a new category for menu items to be sent to the KDS.
icon to create a new category for menu items to be sent to the KDS.

4. In the Menu Category Settings area, if a printer was previously setup, set the Printer option to Don’t Print.
5. Tap the Printer setting and then slide Do not print this item to the green position.
6. Tap Done. You will be returned to the Configure Menu Categories page.

7. Tap Kitchen Display System to indicate the KDS these menu items will be going to.

8. Tap the KDS you setup under Printers & KDS. If you have multiple KDSs, you can only select more than one. Also, individual menu items can be set to send to multiple KDSs.

9. Tap Done. You can now tap on another category to configure it for the KDS.
Chapter 10. Sending Order Tickets to Both a Printer and the KDS
Some TouchBistro users prefer to still send traditional printed order tickets to the kitchen and use the KDS as a method to monitor kitchen activity and progress. If you prefer to use the KDS as an oversight tool, you can set your Menu Categories to print both to an order ticket printer and the KDS.
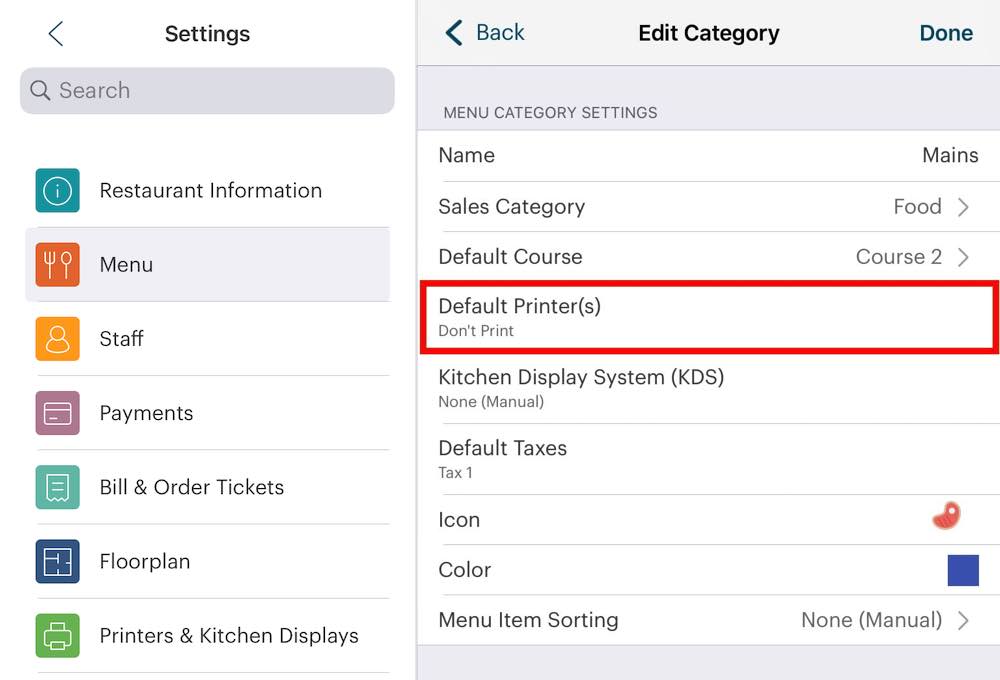
1. On the menu category, tap Printer.
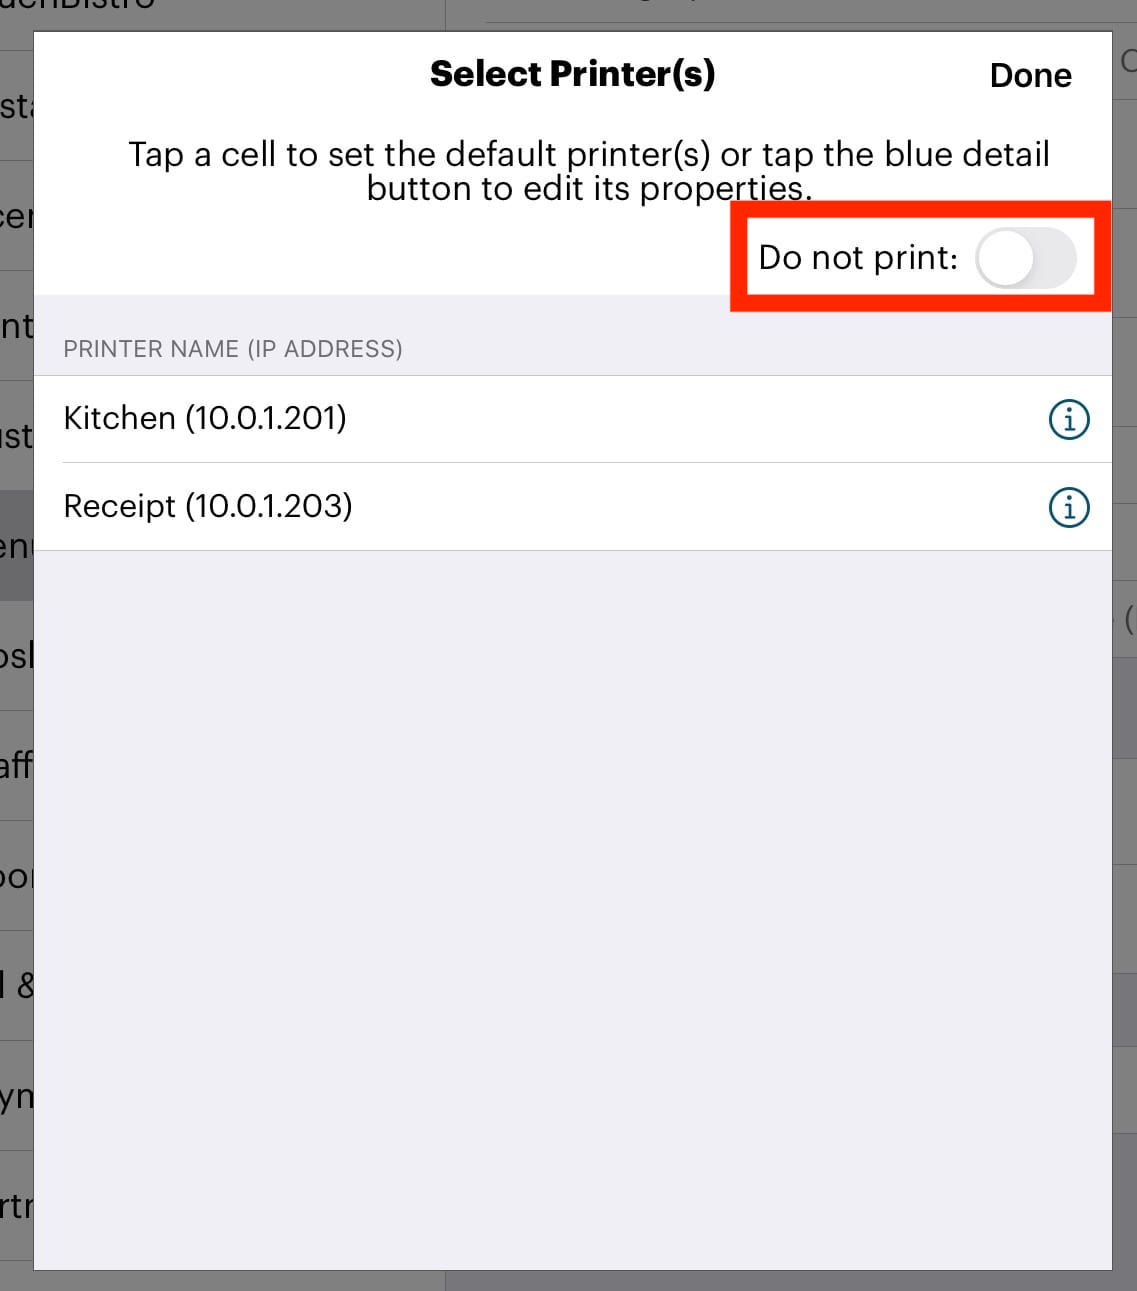
2. Slide Do not print this item to the disabled (non green) position.
3. Select your kitchen ticket printer. If you don’t already have a kitchen ticket printer set up, then set up your printer.
4. Tap Done.
Chapter 11. Amplification Using Speakers
We designed the alert sound in the KDS to sound as loud as we could make it sound. However, we also know that most kitchens are not exactly quiet places, and that some iPad models don’t exactly have the loudest speakers.
Section 1. Amplifying the Alert Sound Using the Headphone Jack
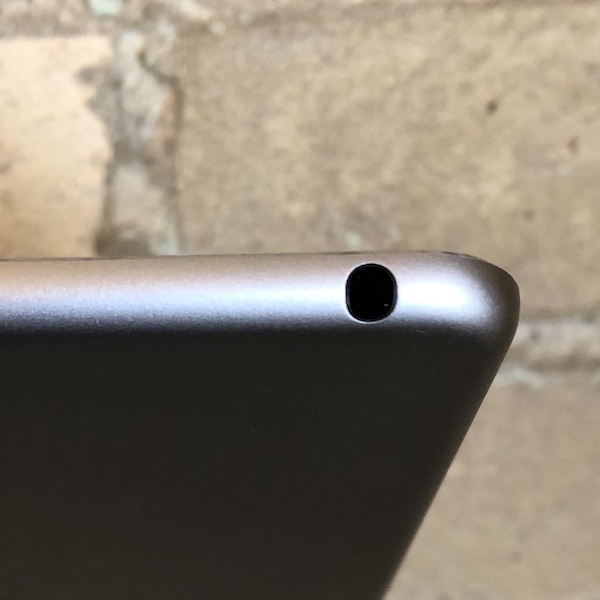
Older iPad models come with a simple headphone jack, as pictured above.
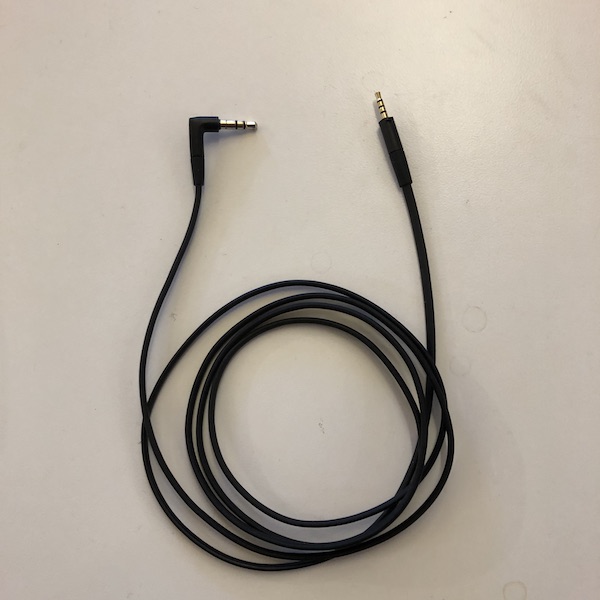
Plugging in a simple male-to-male AUX cable (available at any audio retailer) into your iPad at one end, and into a speaker system of any kind on the other will allow that system to amplify your KDS sounds to your satisfaction.
Section 2. Amplifying the Alert Sound Using a Bluetooth Speaker
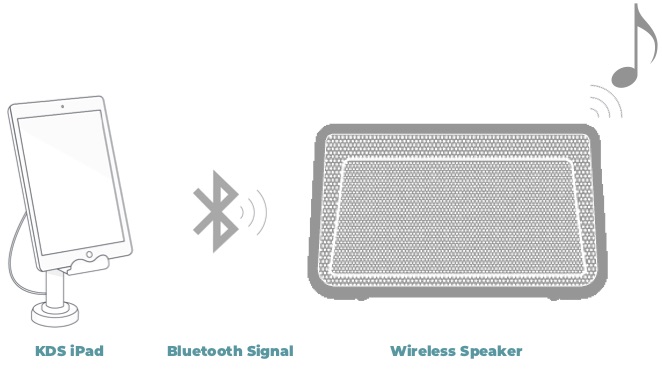
Newer iPad models do not come with a built-in headphone jack. Therefore, the best way to amplify your KDS alert sound is to use a wireless Bluetooth speaker.
Some Bluetooth speakers are portable, and battery operated. However, we recommend a wall-powered device, so that your device won’t run out of batteries and cease operating during service.
When you purchase a wireless Bluetooth speaker, the instructions are typically enclosed, and your mileage may vary with different brands and models.
See Also
Setting Up and Using the KDS tutorial video


 Email
Support
 Frequently
Asked Questions
