Setting Up the VeriFone MX 915/925 Genius Device
Table Of Contents
Chapter 2. Using Other Payment Processors with TSYS
Section 1. Supported Processors
Chapter 3. Verify Your Restaurant Name Does Not Contain an Ampersand
Chapter 4. Setting Up the VeriFone MX 915/925 TSYS PIN pad
Section 1. Verify if your TSYS Genius Device Supports EMV
Section 2. Connecting the Hardware
Section 3. Reserve Your TSYS Genius Device’s IP Address
1) Disable Private Address for Your Wi-Fi Connection
2) If you’re using an Apple AirPort Extreme Router
3) If you’re using a Ubiquiti AmpliFi Router
Chapter 1. Introduction
This document will guide you through setting up a TSYS MX 915/925 PIN pad card reader and how to process payments with a credit card or a gift card.
Chapter 2. Using Other Payment Processors with TSYS
With the TSYS Payment Gateway Services, you are able to register with TSYS and use another payment processor behind the TSYS platform. You should discuss signup and cost of using another payment processor behind TSYS’s Payment Gateway Services, directly with TSYS.
Section 1. Supported Processors
- Chase Merchant Services
- Elavon
- FirstData (Supports ApplePay/AndroidPay / Supports US Virgin Islands)
- GlobalPayments (does not support EMV)
- Heartland (does not support EMV)
- TSYS (Supports ApplePay/AndroidPay)
- WorldPay/Vantiv (Supports ApplePay/AndroidPay)
Chapter 3. Verify Your Restaurant Name Does Not Contain an Ampersand

Note: TSYS uses your Restaurant Profile information to process payments. If your restaurant profile name has an ampersand (&) this will result in a processing error. Visit the Restaurant screen and edit the name of your venue in the Name field and change & to “and”.
Chapter 4. Setting Up the VeriFone MX 915/925 TSYS PIN pad
Section 1. Verify if your TSYS Genius Device Supports EMV
Before you begin, you may want to confirm with TSYS that the Genius device sent you supports EMV (“chip and PIN”) transactions. Some Genius devices are not pre-set to support EMV. It would be best before you start to install your hardware that you double check TSYS has sent you the proper device.
Section 2. Connecting the Hardware
Ensure you plug the Genius device into a power source and the unit fully boots up.
1) To Your Router
If you have a free LAN port on your supported router you can connect your Genius device in this manner (Apple AirPort router pictured):

1. Ensure you have a CAT5 Ethernet cable in the WAN ![]() port connecting to your Internet modem.
port connecting to your Internet modem.
2. Run a CAT5 Ethernet cable between the TSYS Genius device’s left most Ethernet port (i.e., the port closest to the power port) and a free LAN ![]() port on the router.
port on the router.
2) To a Switch
It is probably more typical your has no more free LAN ports and you require an Ethernet switch:

1. Ensure you have a CAT5 Ethernet cable in the WAN ![]() port connecting to your Internet modem.
port connecting to your Internet modem.
2. Run a CAT5 Ethernet cable between the TSYS Genius device’s Ethernet port and any free LAN port on the switch.
3. Run a CAT5 Ethernet cable from any free LAN ![]() port on your router to any free LAN port on your switch (all ports on your switch are LAN ports).
port on your router to any free LAN port on your switch (all ports on your switch are LAN ports).
Section 3. Reserve Your TSYS Genius Device’s IP Address
By default your router will randomly assign any available IP address to your TSYS Genius devices and will change these IP addresses from time to time. Hence, you need to set your router to always assign your Genius Device a static, never changing IP address.
1) Disable Private Address for Your Wi-Fi Connection
If your iPad (or iPads) are updated to iPad OS 14, do the following:
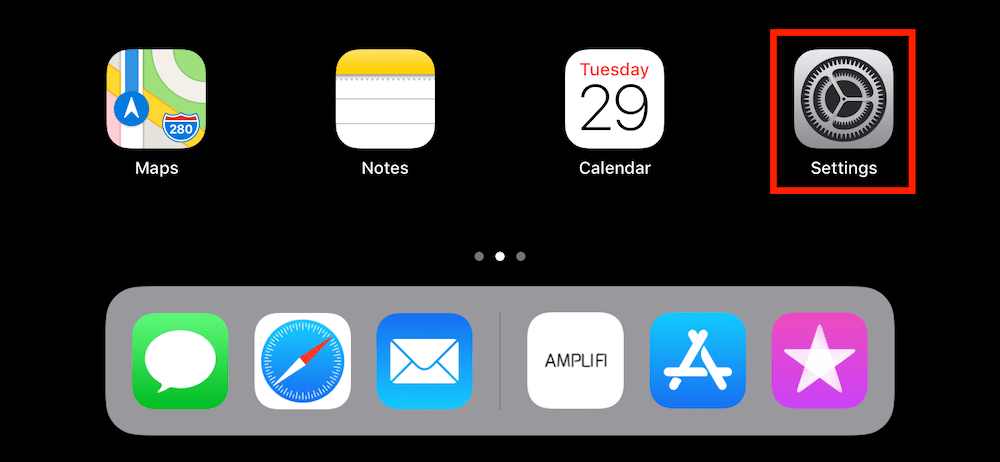
1. Tap your Settings icon.
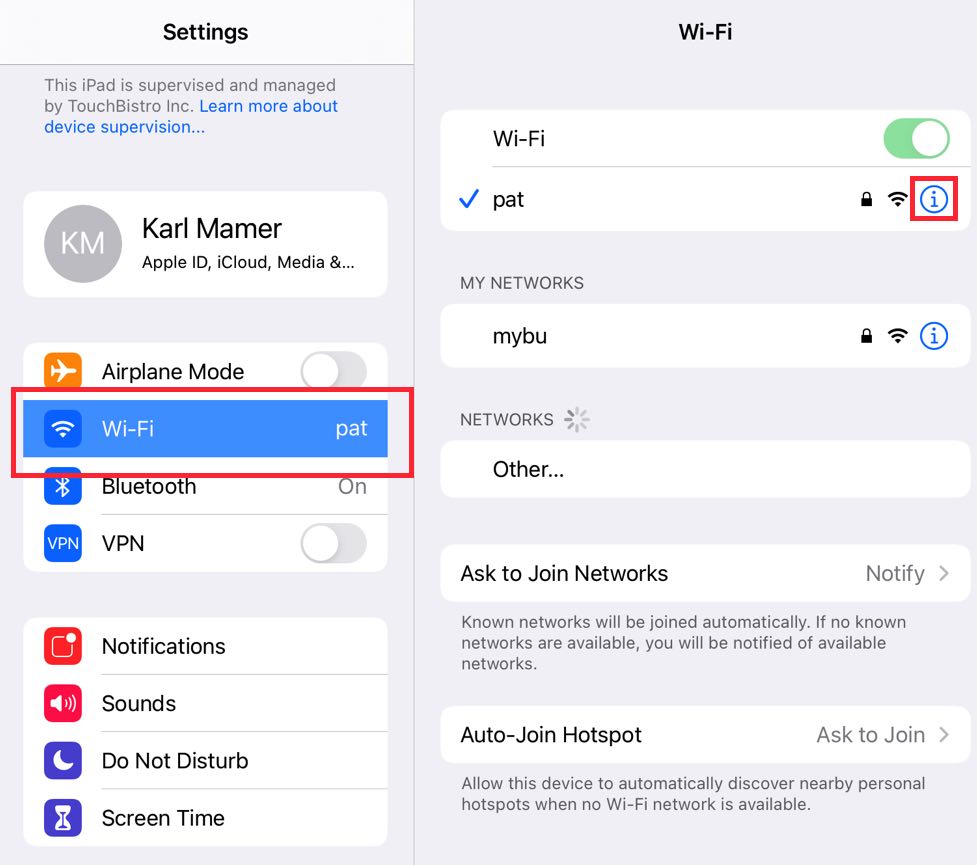
2. Tap Wi-Fi and then tap the Information ![]() icon next to your connected network.
icon next to your connected network.
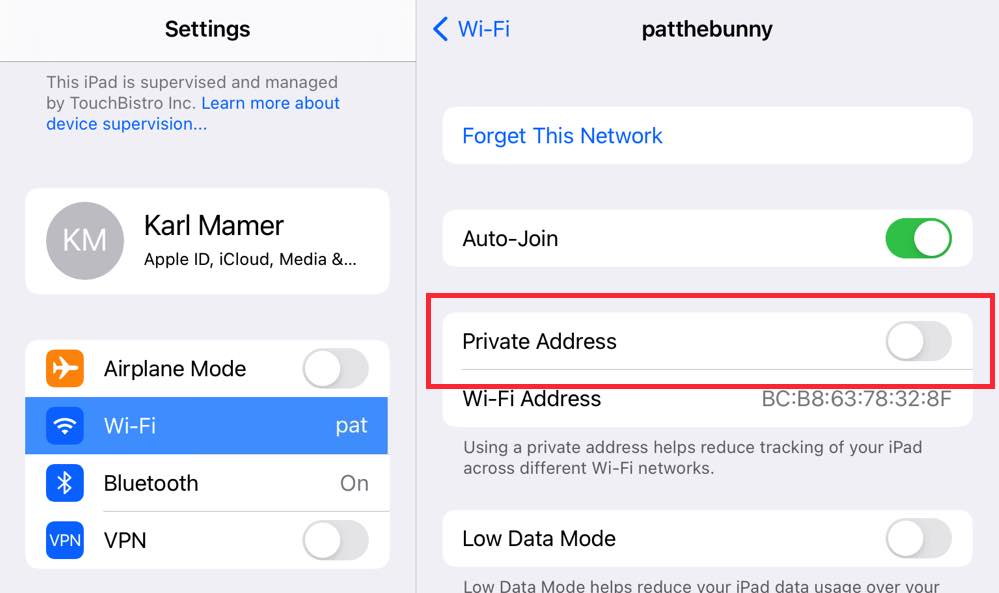
3. If Private Network is enabled, disable it.
2) If you’re using an Apple AirPort Extreme Router
If you’re using a Ubiquiti AmpliFi router, please skip to the next section.
1. On the TSYS Genius device you need to get the device’s current IP address. This is the address we will reserve on the router for this device.
2. Ensure the Genius device is powered on, connected via an Ethernet cable, and at the Genius by TSYS screen.
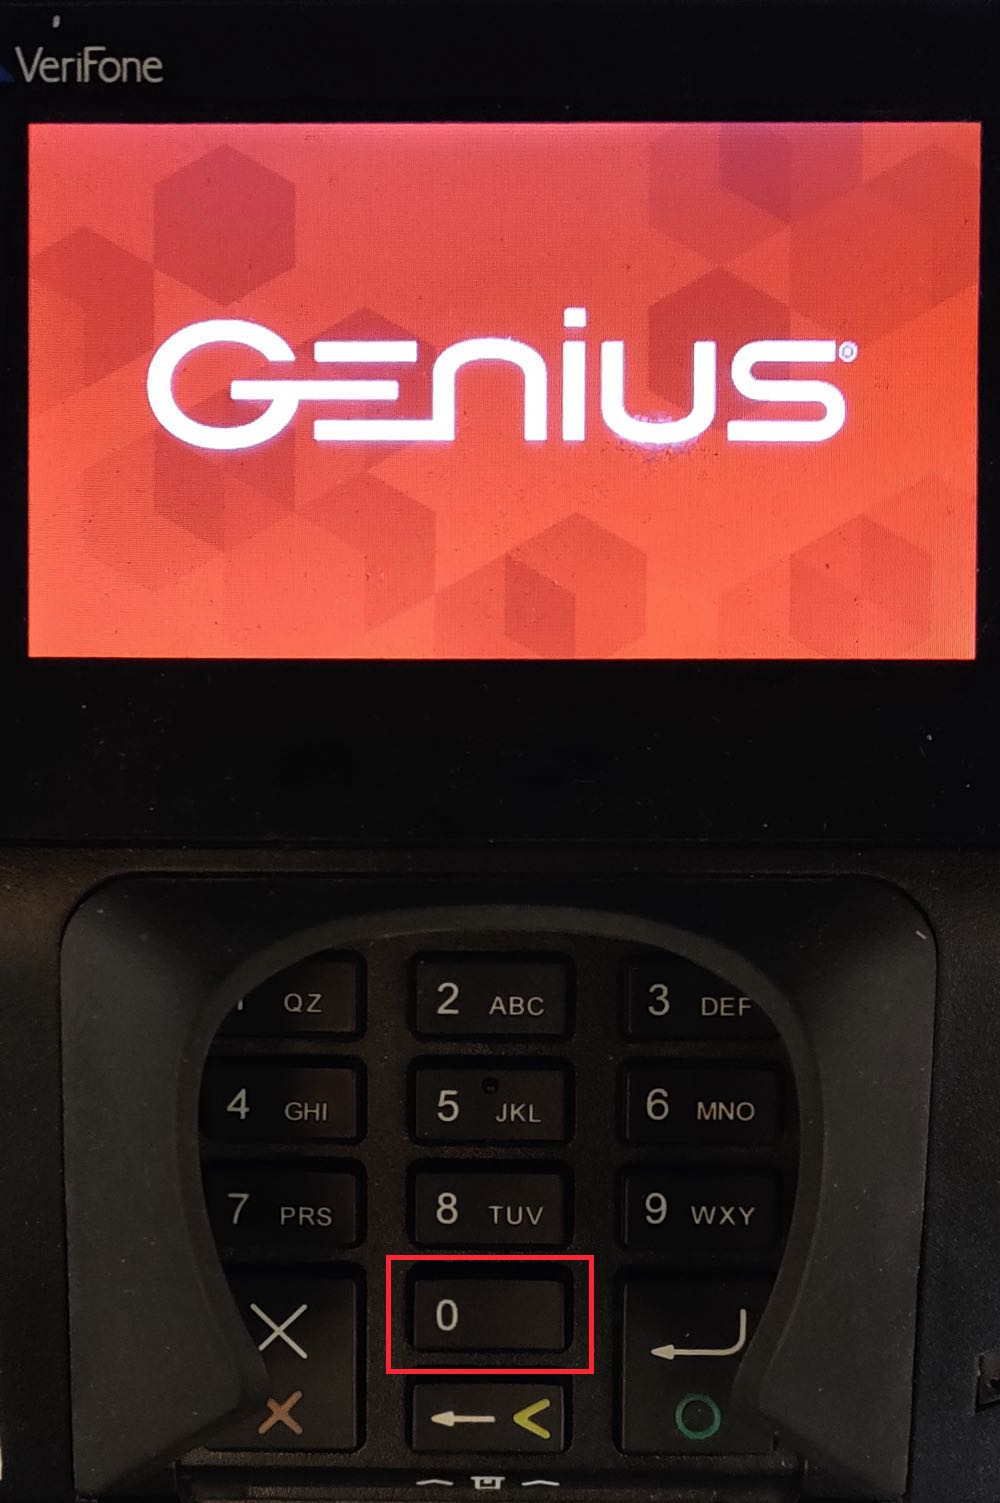
3. Press the 0 button three times.
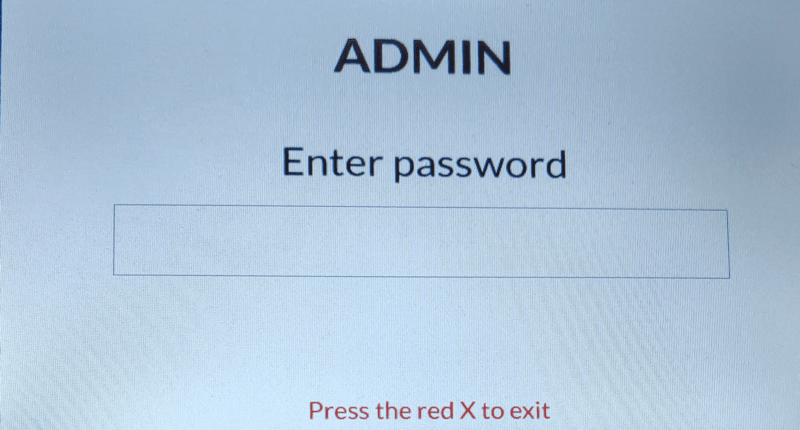
4. Enter your PIN Pad’s password on the Admin screen. Normally the default password is 9416557. However, consult your TSYS documentation for the password.
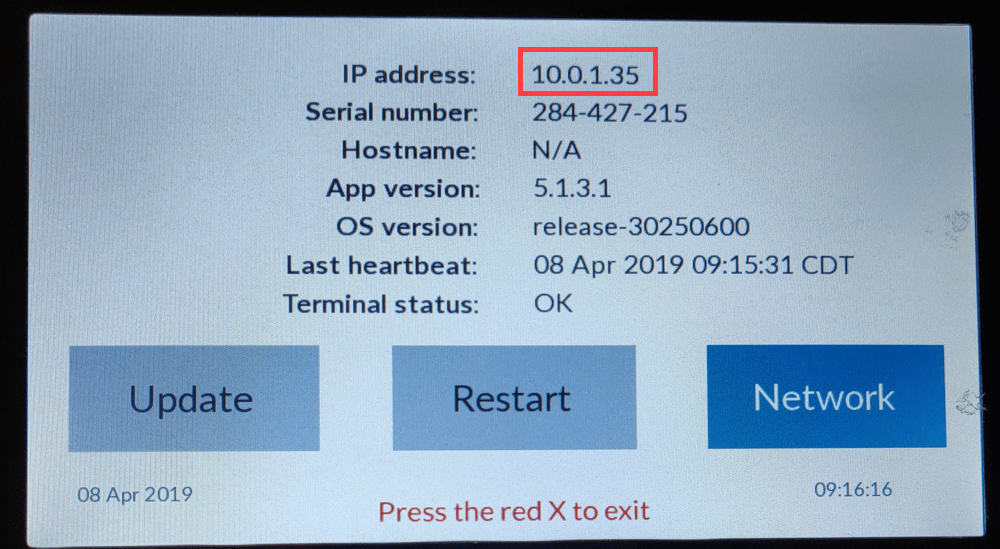
5. Write the IP address found at the top of the screen on a piece of paper. You will need it later.
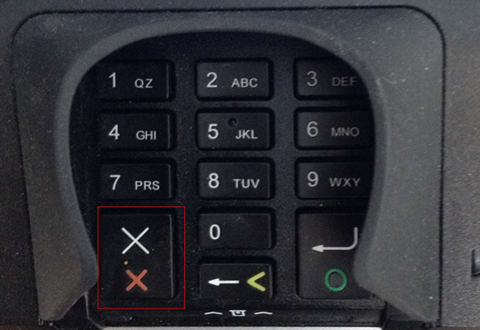
6. Press the X button to return to the normal operation of your PIN Pad.
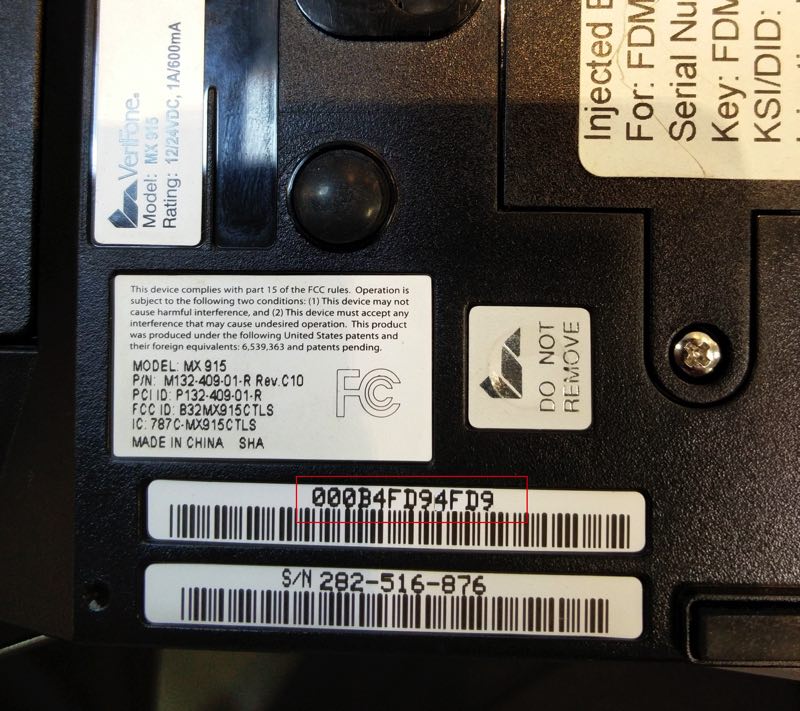
7. Turn the device over and look for a 12 digit letter and number combination. This is the MAC address of this machine. It is unique to this machine and is the address the router uses to recognize a device on the network. Copy this MAC address on a piece of paper. You will need it later.
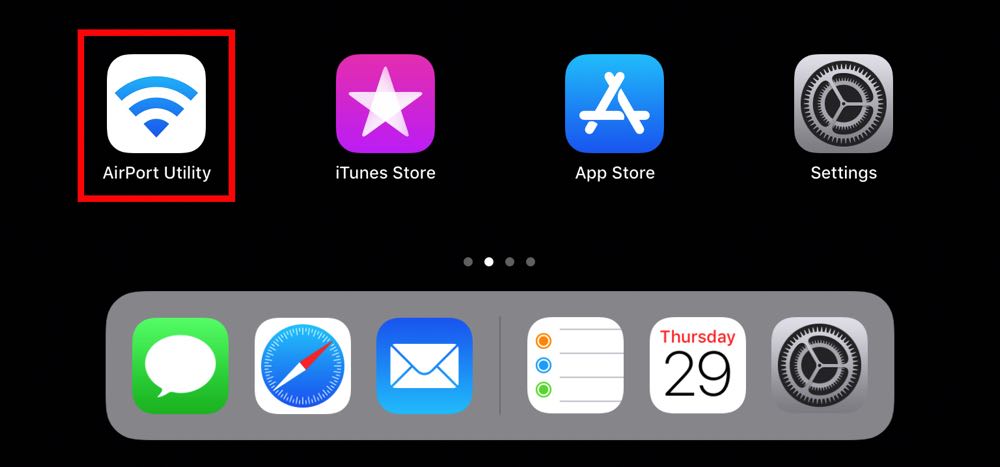
8. On one of your iPads, launch Airport Utility.
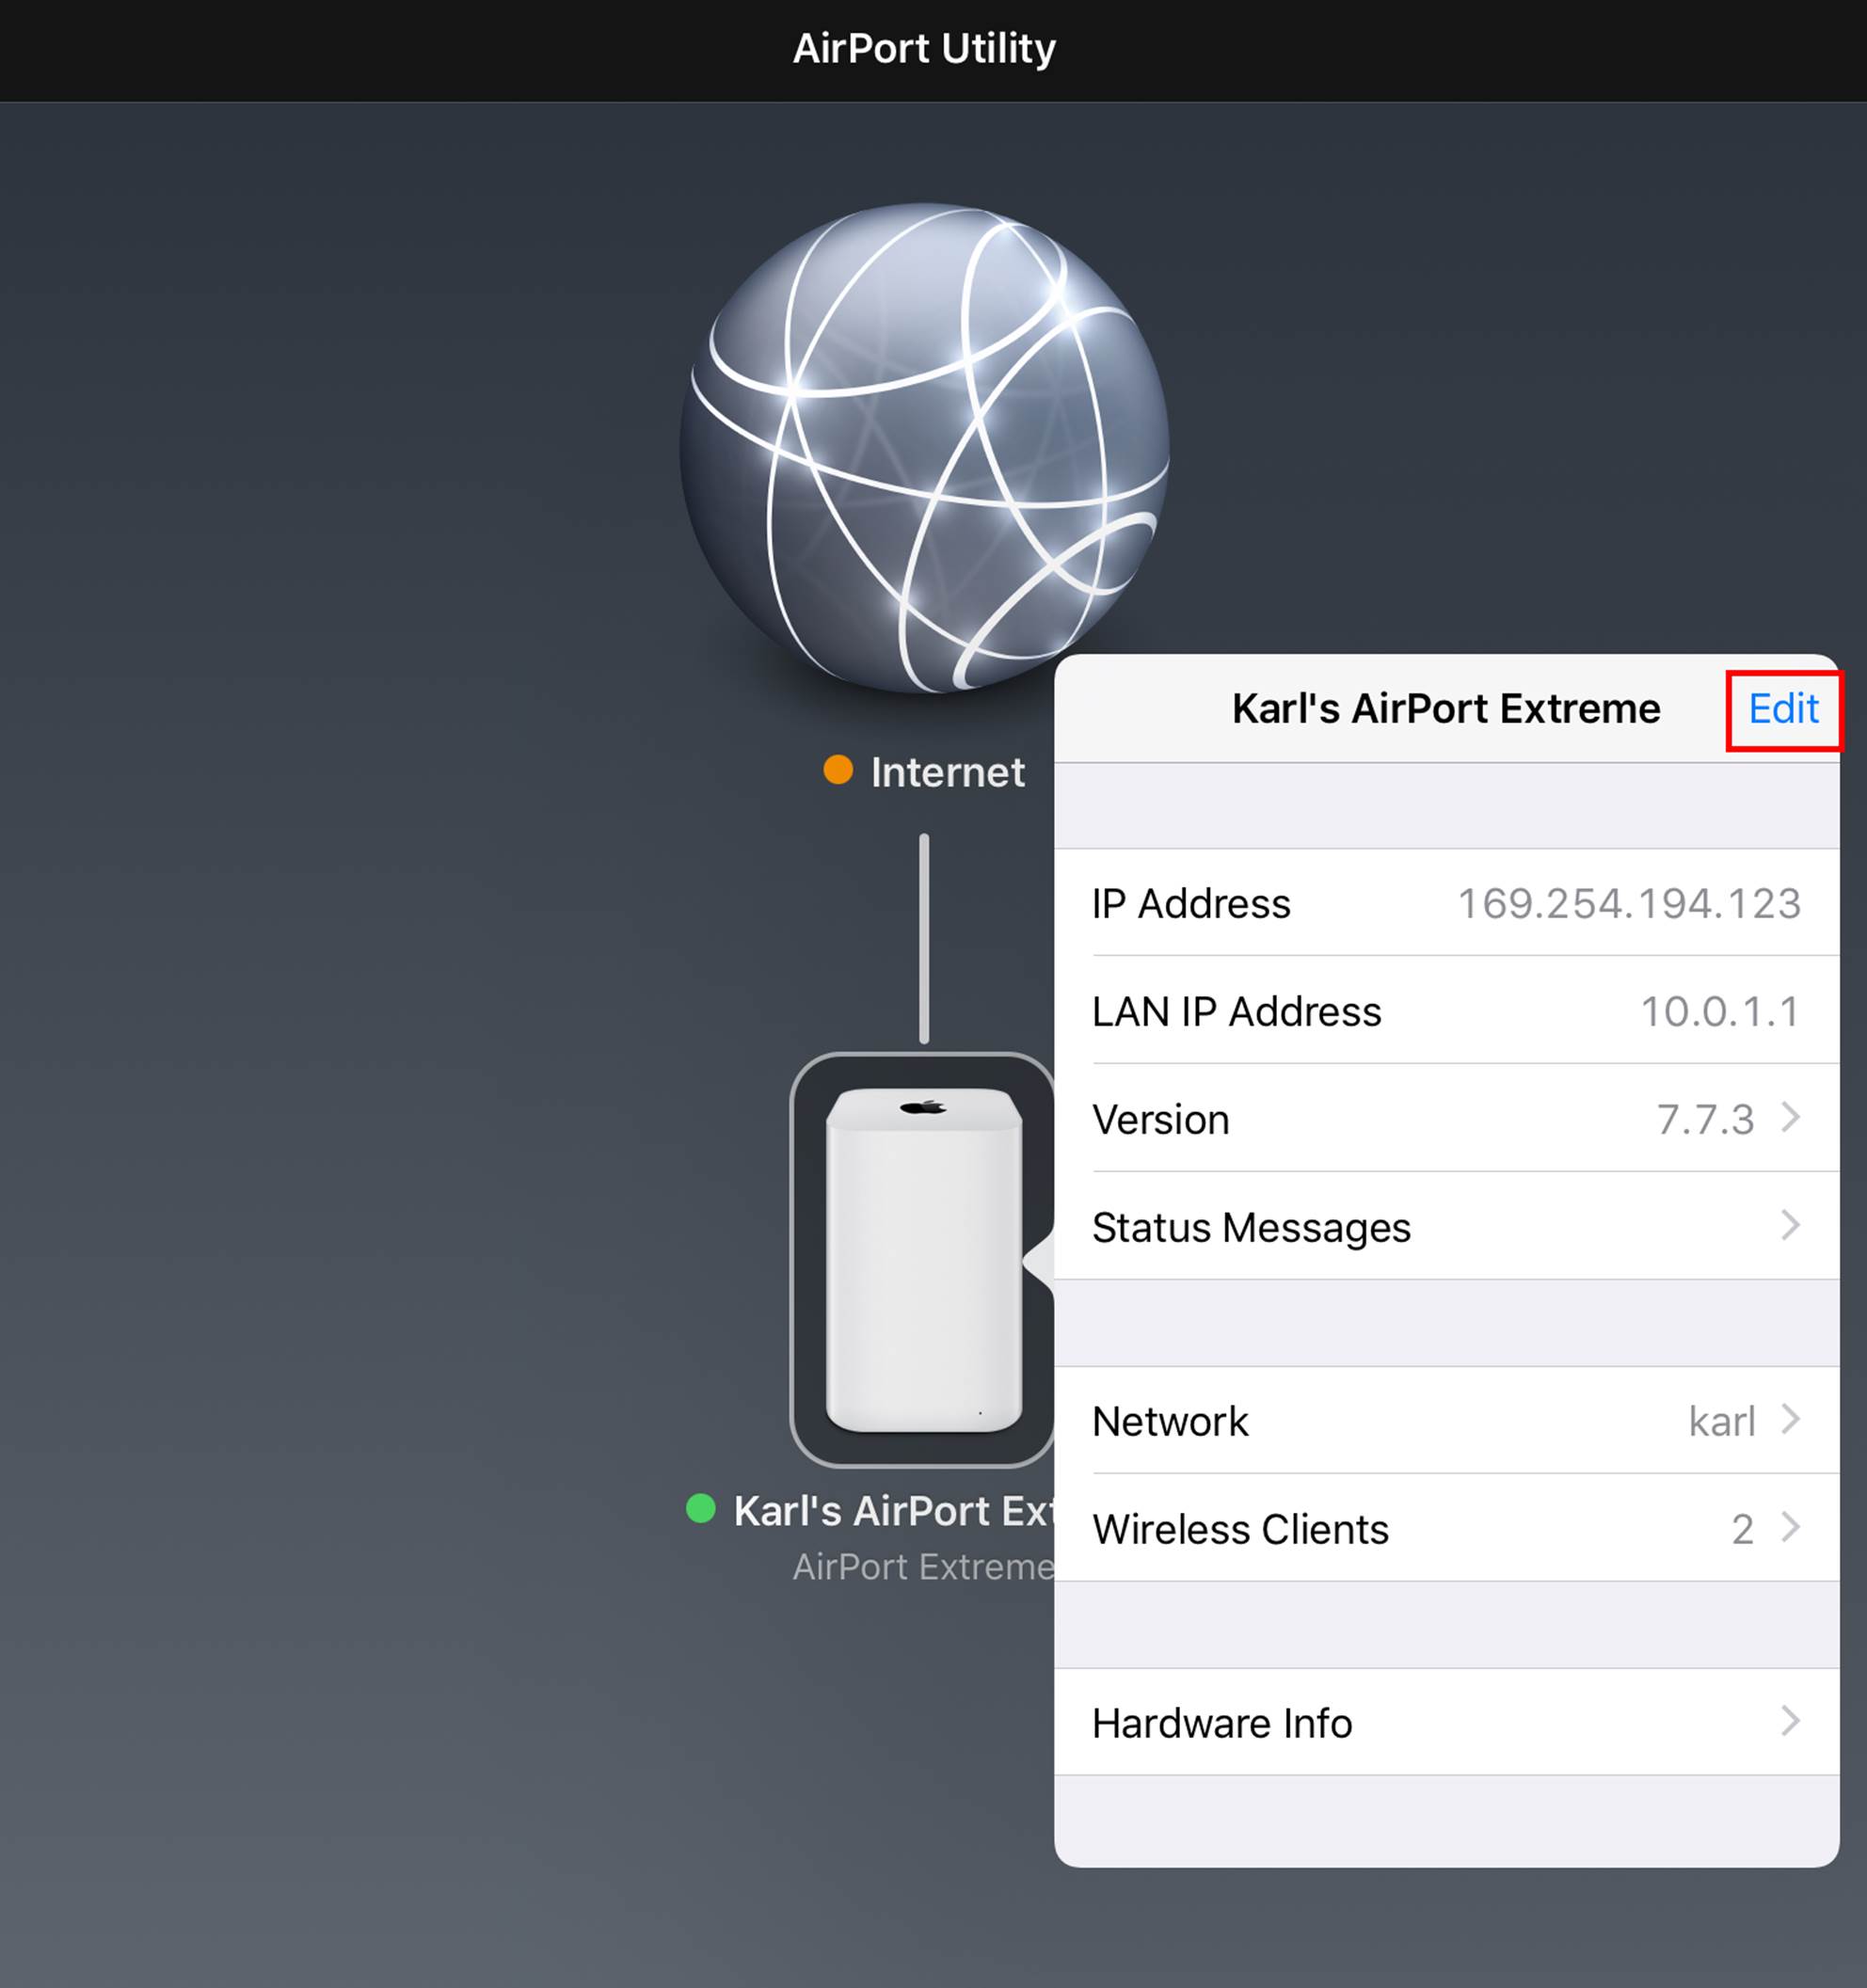
9. Tap on your router image. You may be prompted for a password. If so enter it and tap Edit.
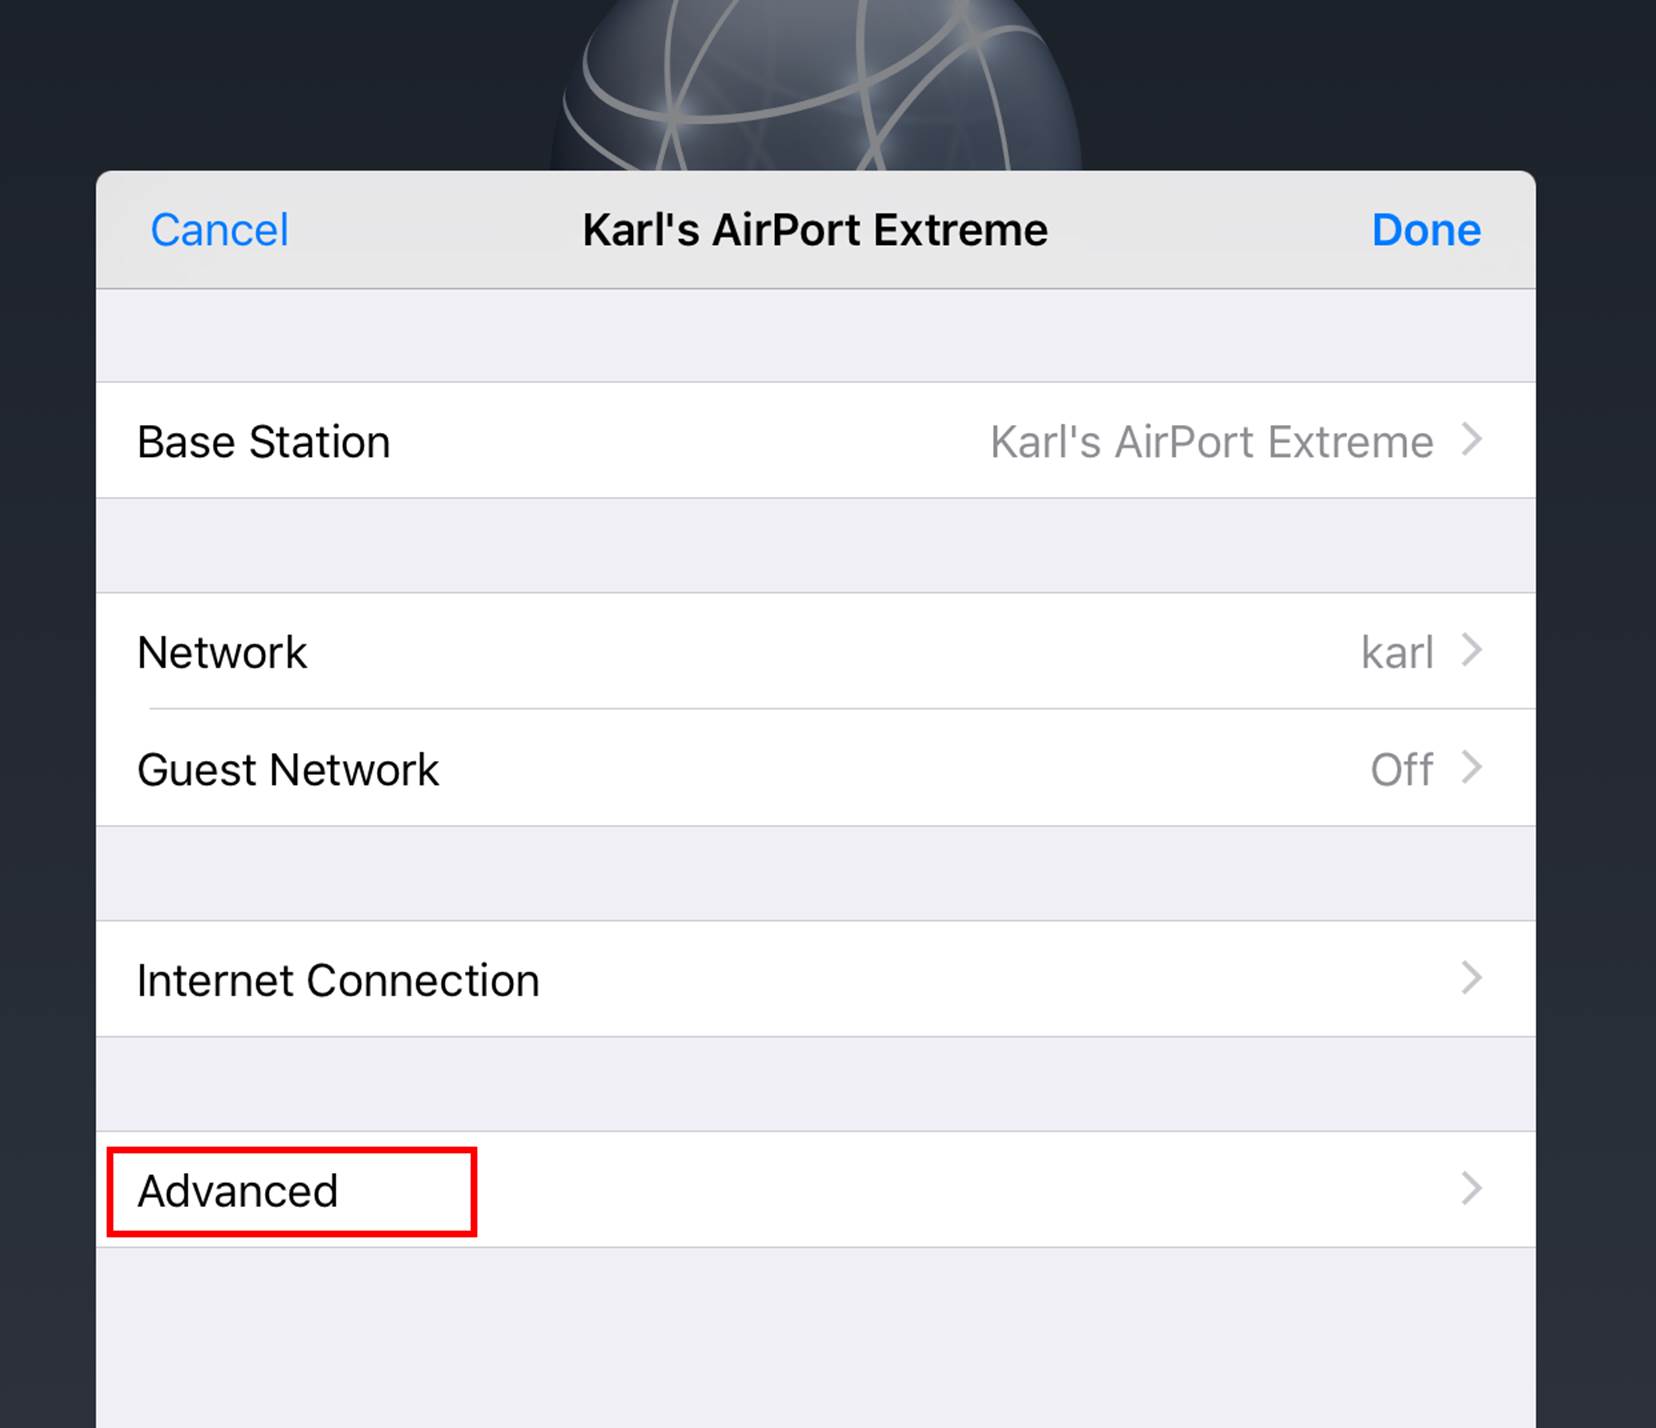
10. Tap Advanced.
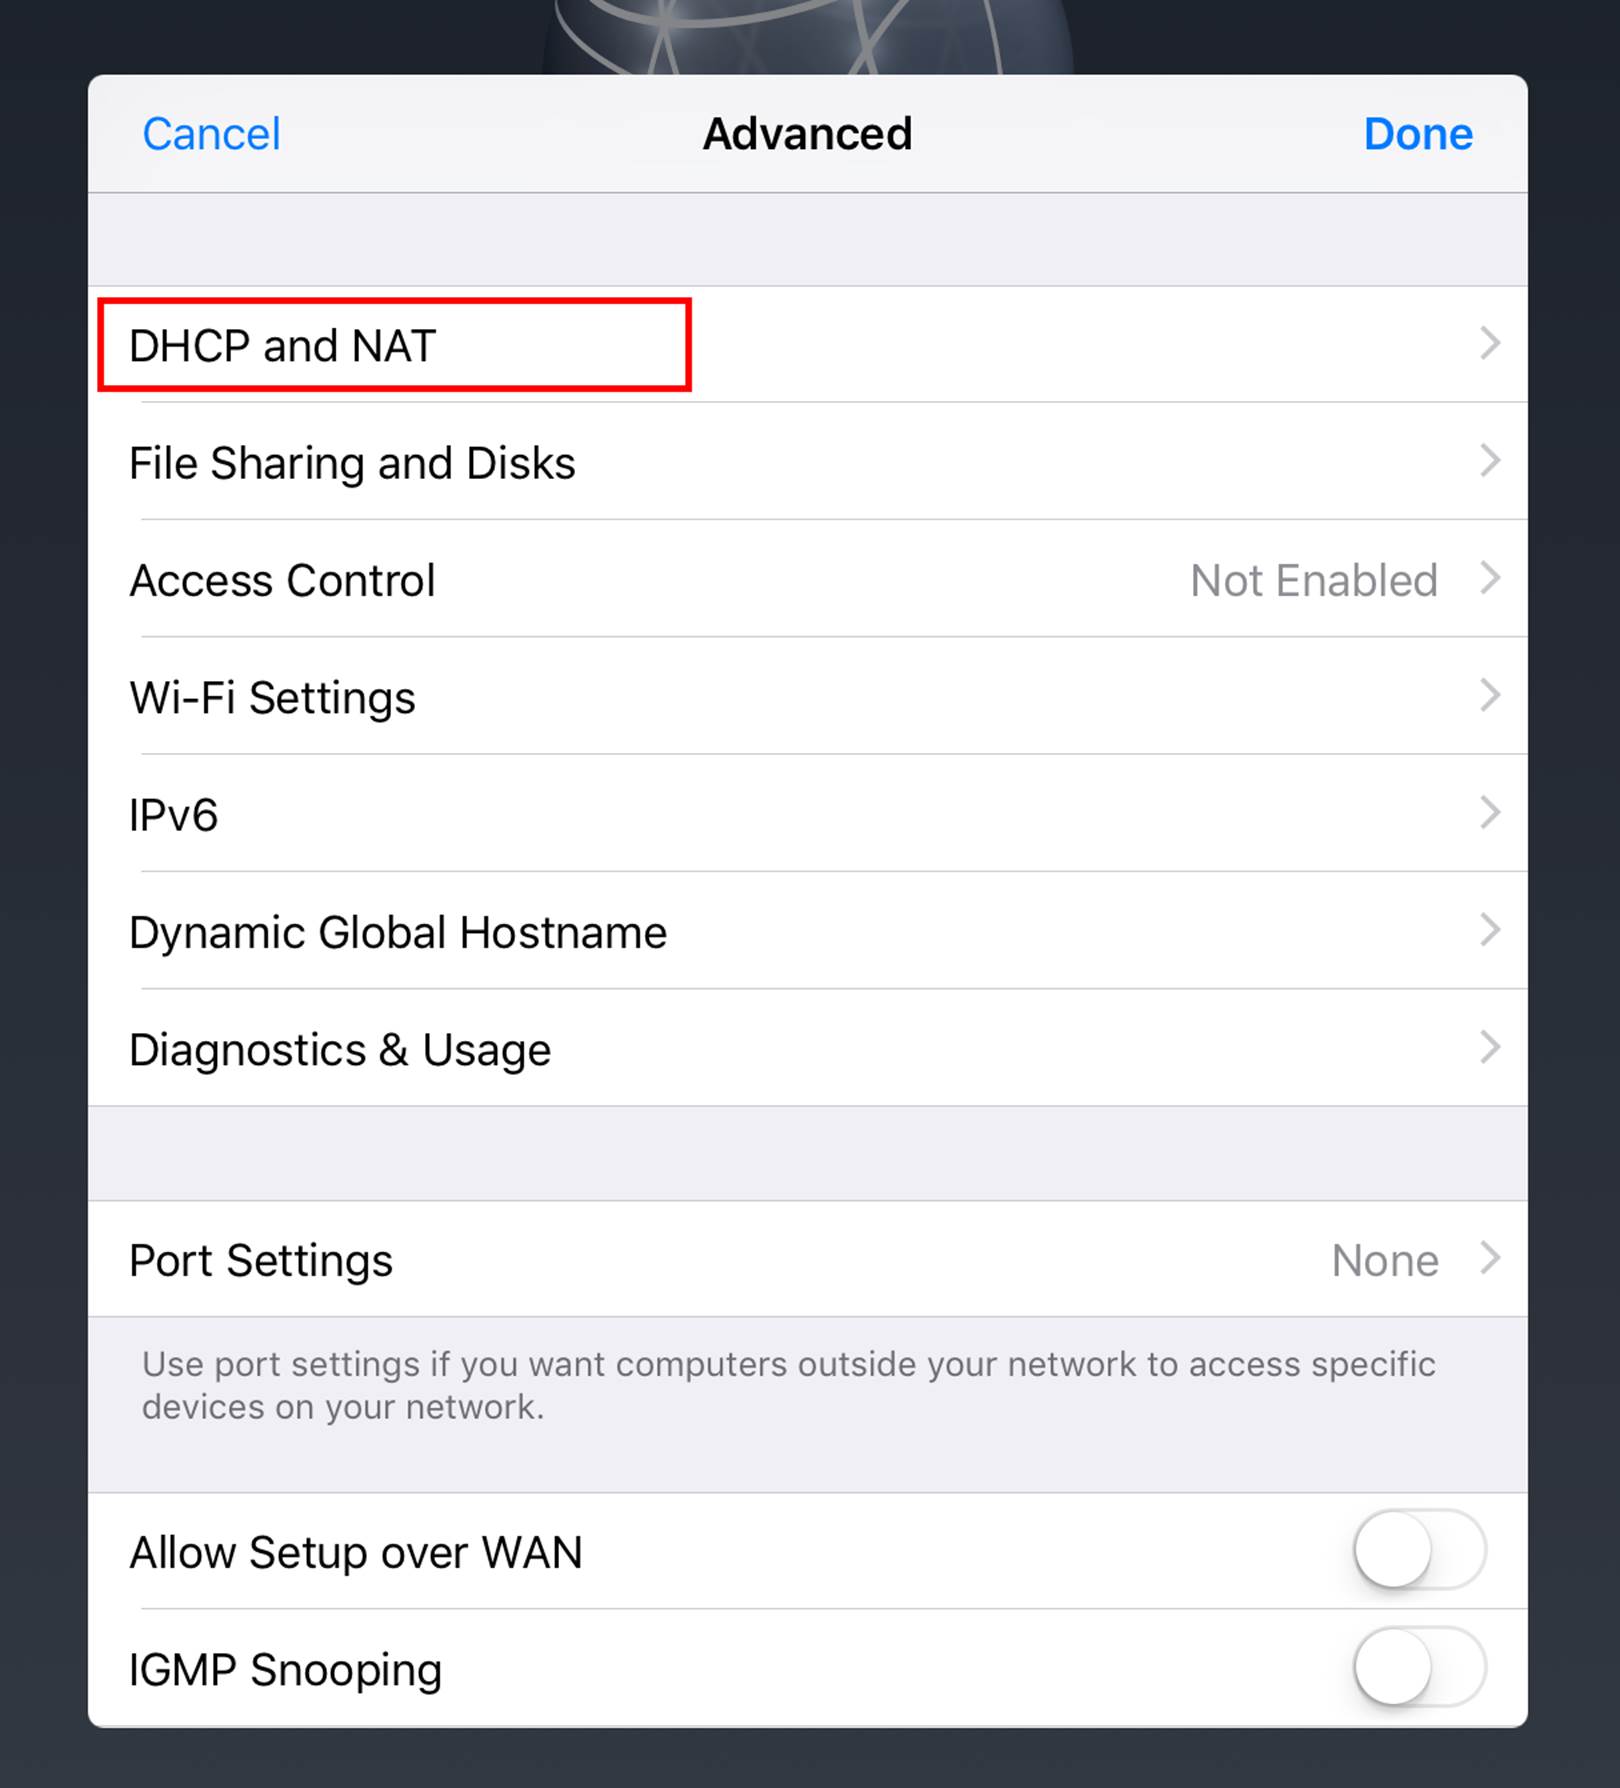
11. Tap DHCP and NAT.
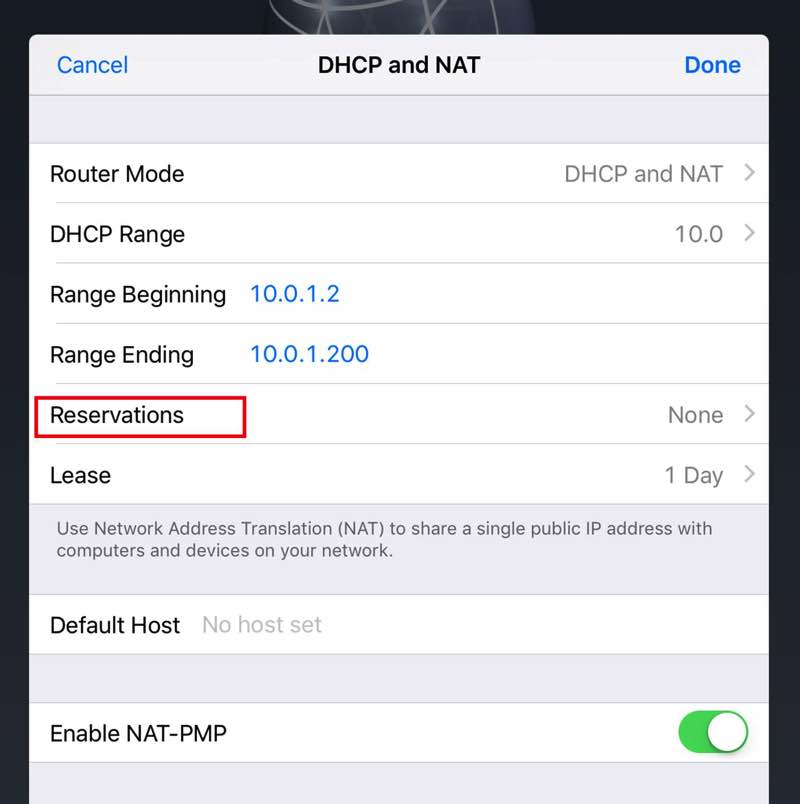
12. Tap Reservations.

13. Tap New Reservations.
14. In the Description field, give this device a name that will help identify the hardware. For example, TSYS Front.
15. Enter the MAC address you copied down in the MAC Address field.

16. In the IPv4 Address field, enter the IP address from the TSYS admin screen.
17. After adding the MAC address and deciding on an IP address to reserve, tap Done.
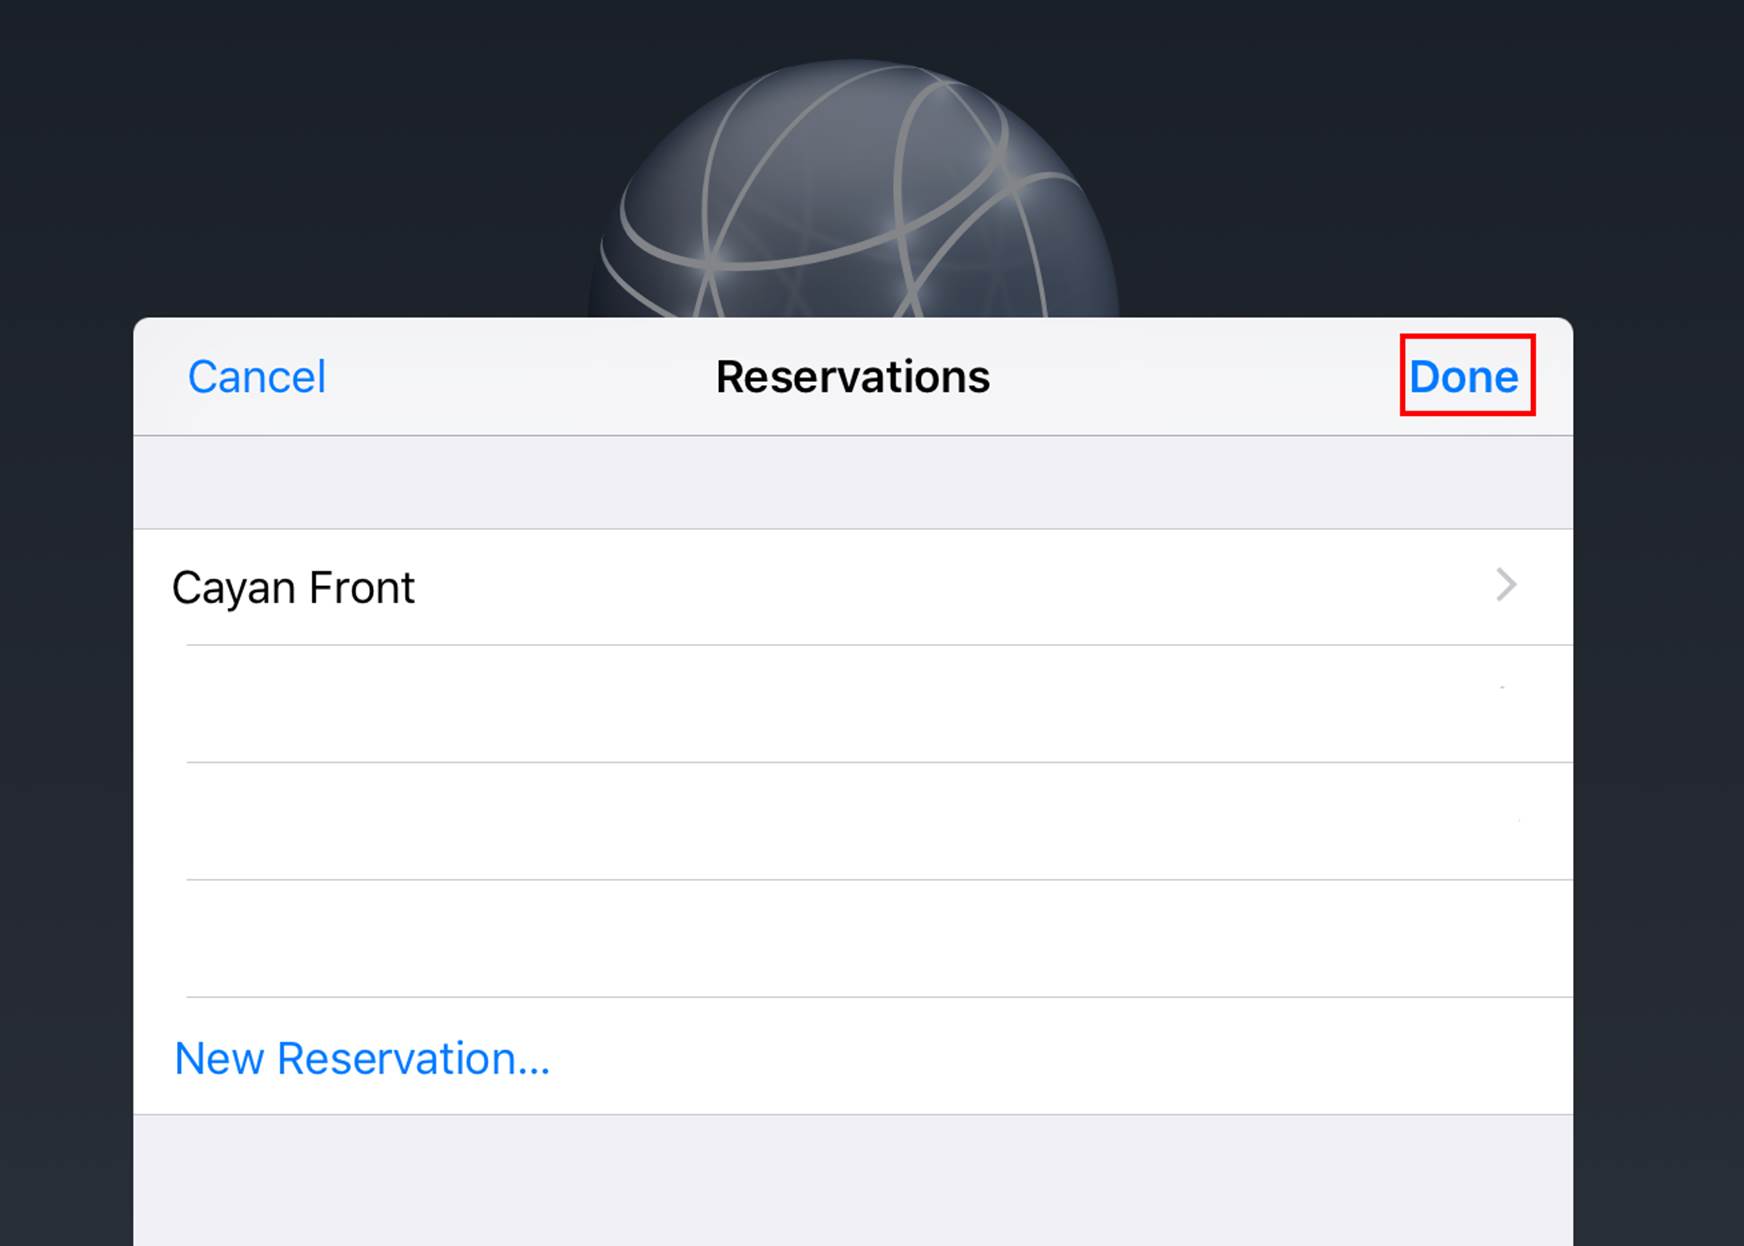
18. Your Genius device now appears in the reservation list.
19. Tap Done several more times.
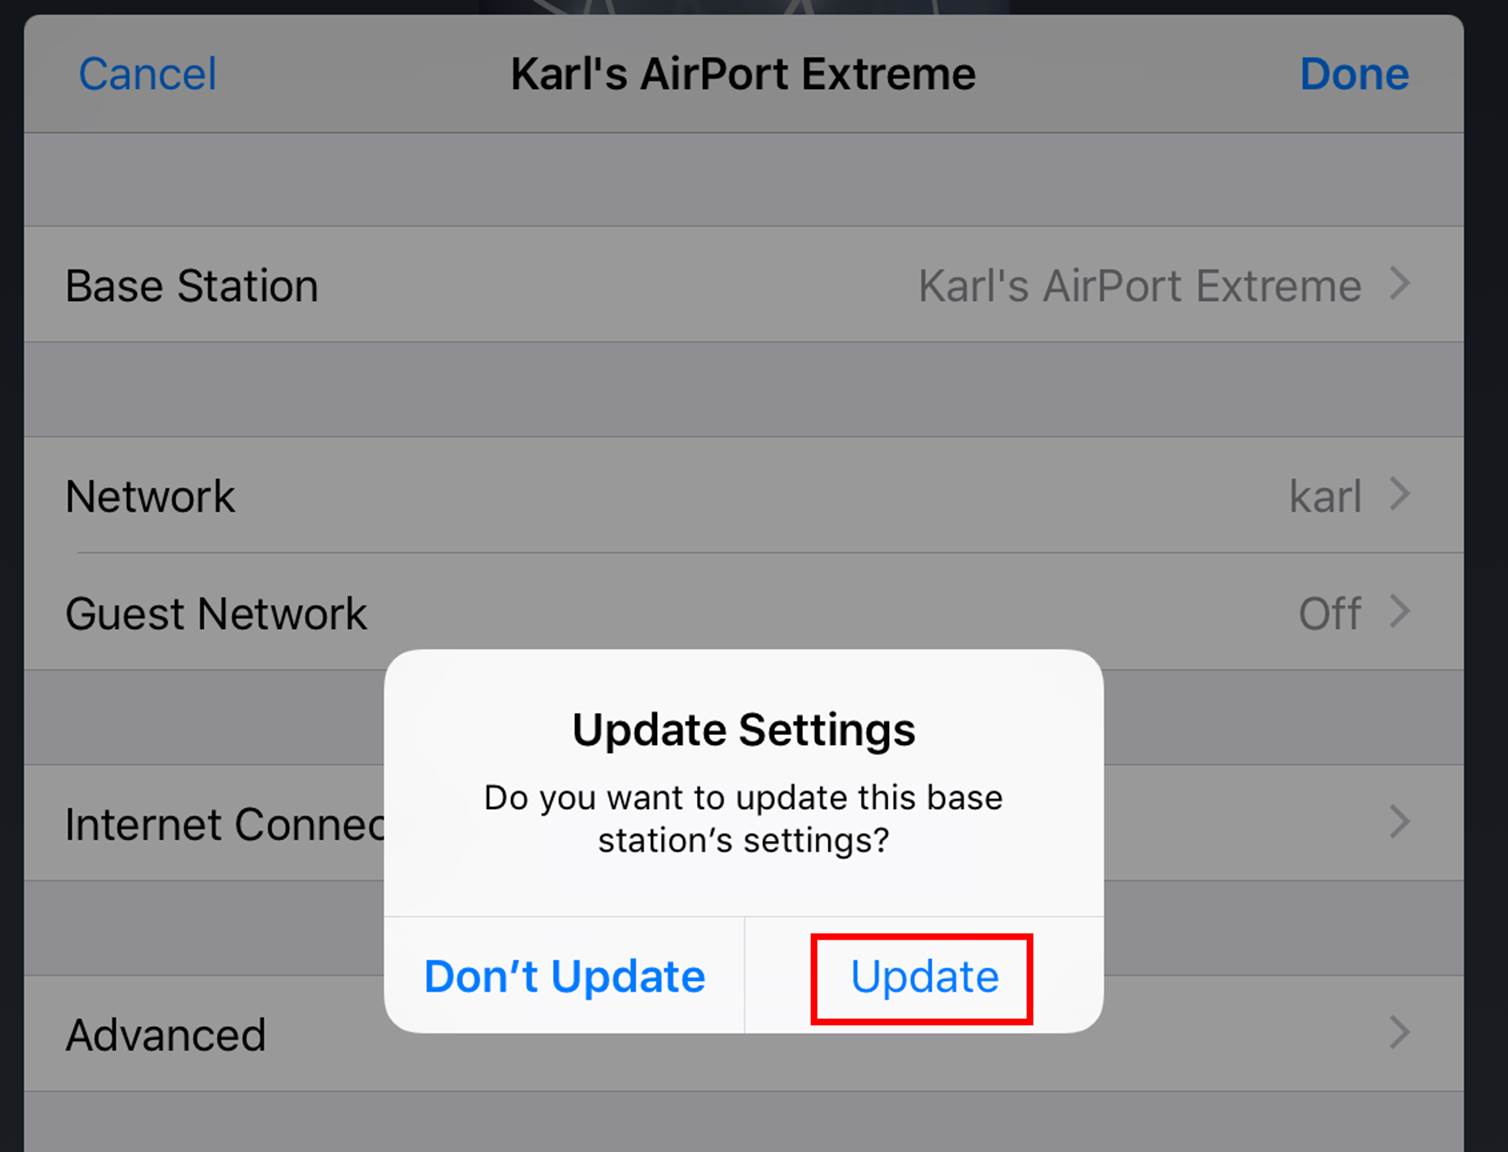
20. When you are prompted to update your router, tap Update.
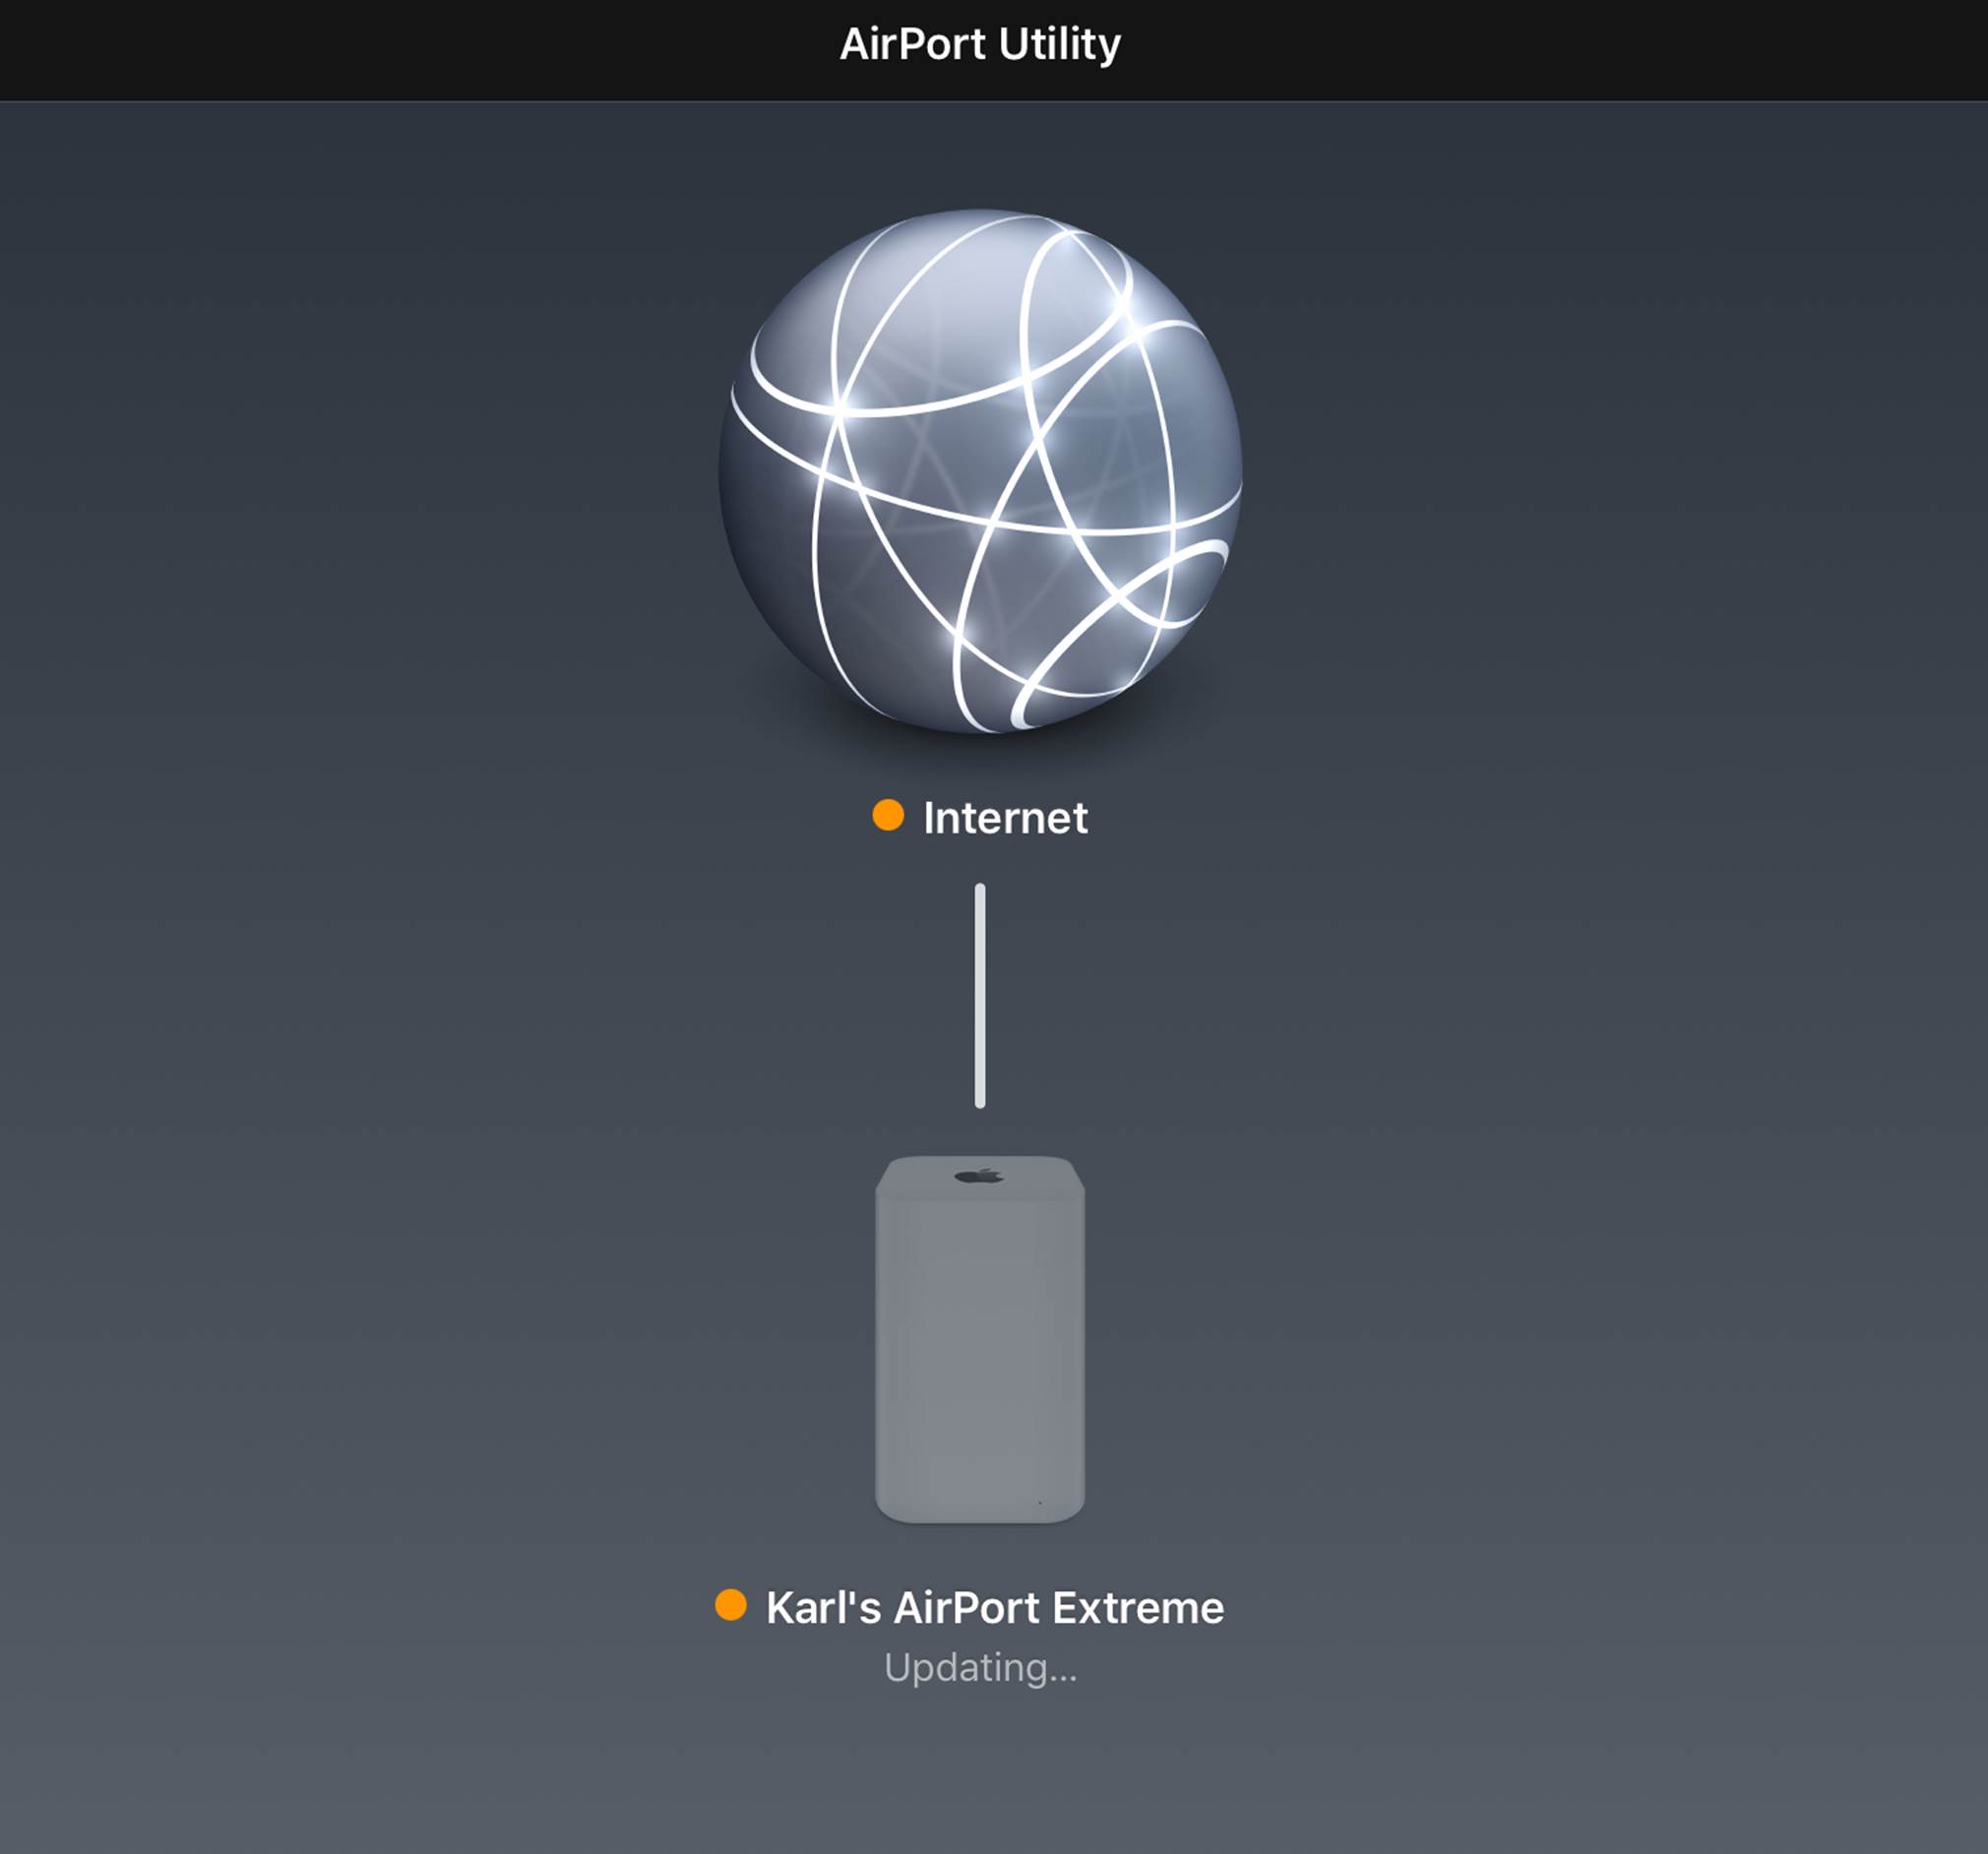
21. It will take a few minutes to update and you may lose your Internet connection briefly.
3) If you’re using a Ubiquiti AmpliFi Router
1. On the TSYS Genius device you need to get the device’s current IP address. This is the address we will reserve on the router for this device.
2. Ensure the Genius device is powered on, connected via an Ethernet cable, and at the Genius by TSYS screen.

3. Press the 0 button three times.

4. Enter your PIN Pad’s password on the Admin screen. Normally the default password is 9416557. However, consult your TSYS documentation for the password.

5. Write the IP address found at the top of the screen on a piece of paper. You will need it later.

6. Press the X button to return to the normal operation of your PIN Pad.

7. Turn the device over and look for a 12 digit letter and number combination. This is the MAC address of this machine. It is unique to this machine and is the address the router uses to recognize a device on the network. Copy this MAC address on a piece of paper. You will need it later.
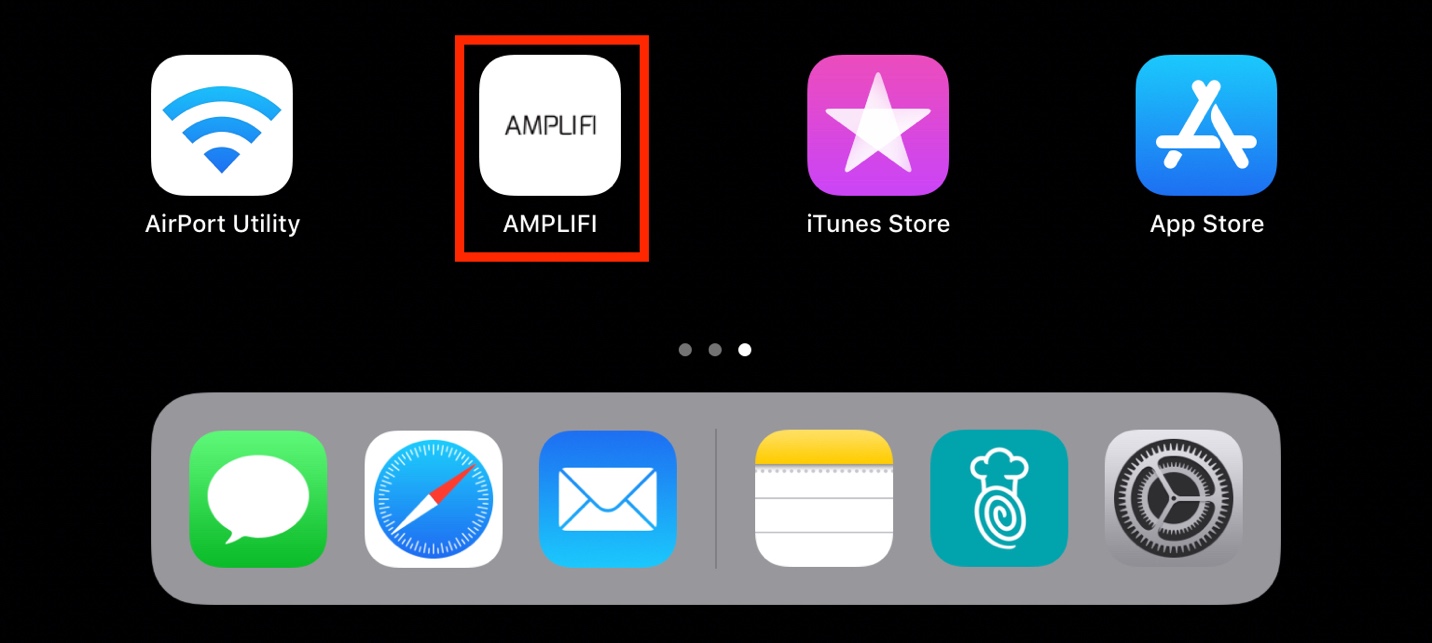
8. On your iPad, tap the AmpliFi app.
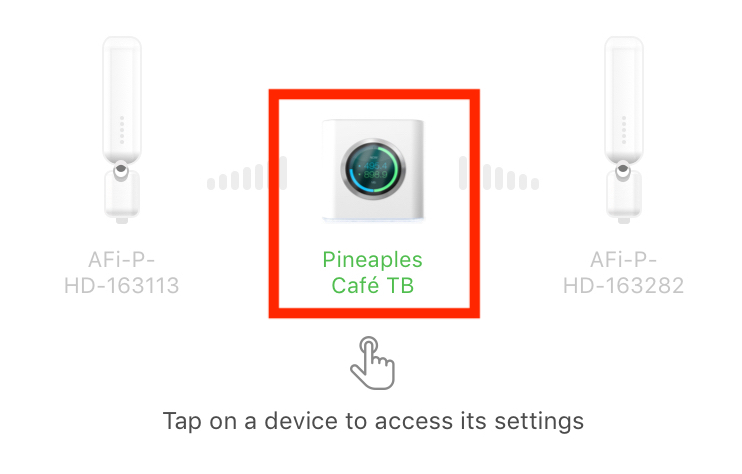
9. Tap on the picture of the AmpliFi Router in the middle of the screen.
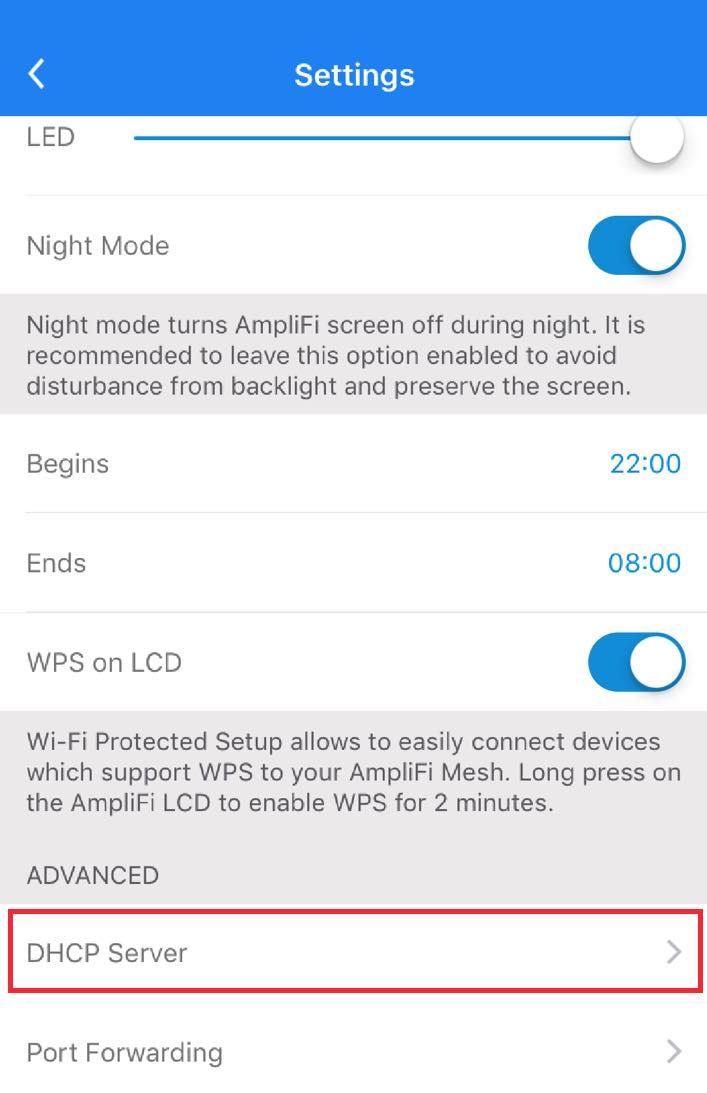
10. Scroll down to the Advanced section, and tap DHCP Server.
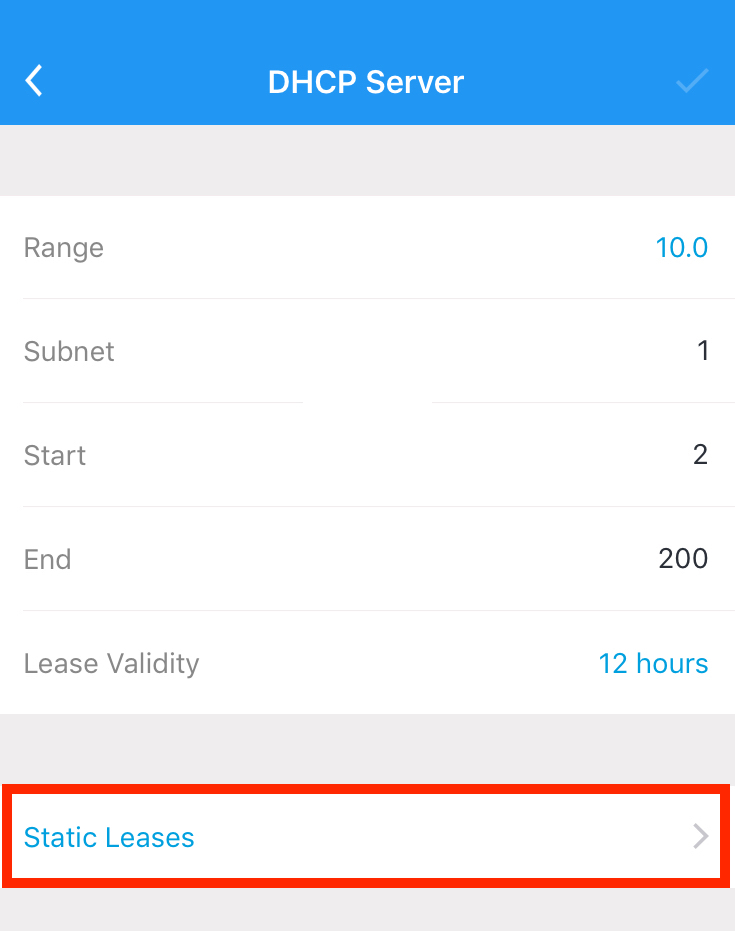
11. Tap Static Leases.

12. Tap the plus sign + in the top right-hand corner to add a new reservation.

13. Complete the following three fields:
- Name – Create a unique name for this device. For example “Genius 915”.
- The MAC Address for the device.
- The desired IP Address you wish to reserve for the device.
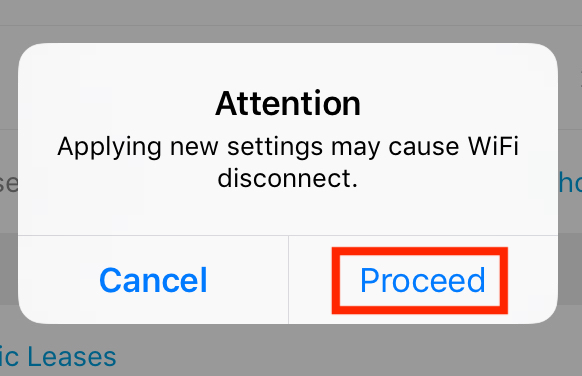
14. Tap the checkmark in the top right-hand corner, and press Proceed when the Attention dialog box appears.
Chapter 5. Configuring TSYS in TouchBistro
1. Open your restaurant on TouchBistro.
2. Log in as Admin.
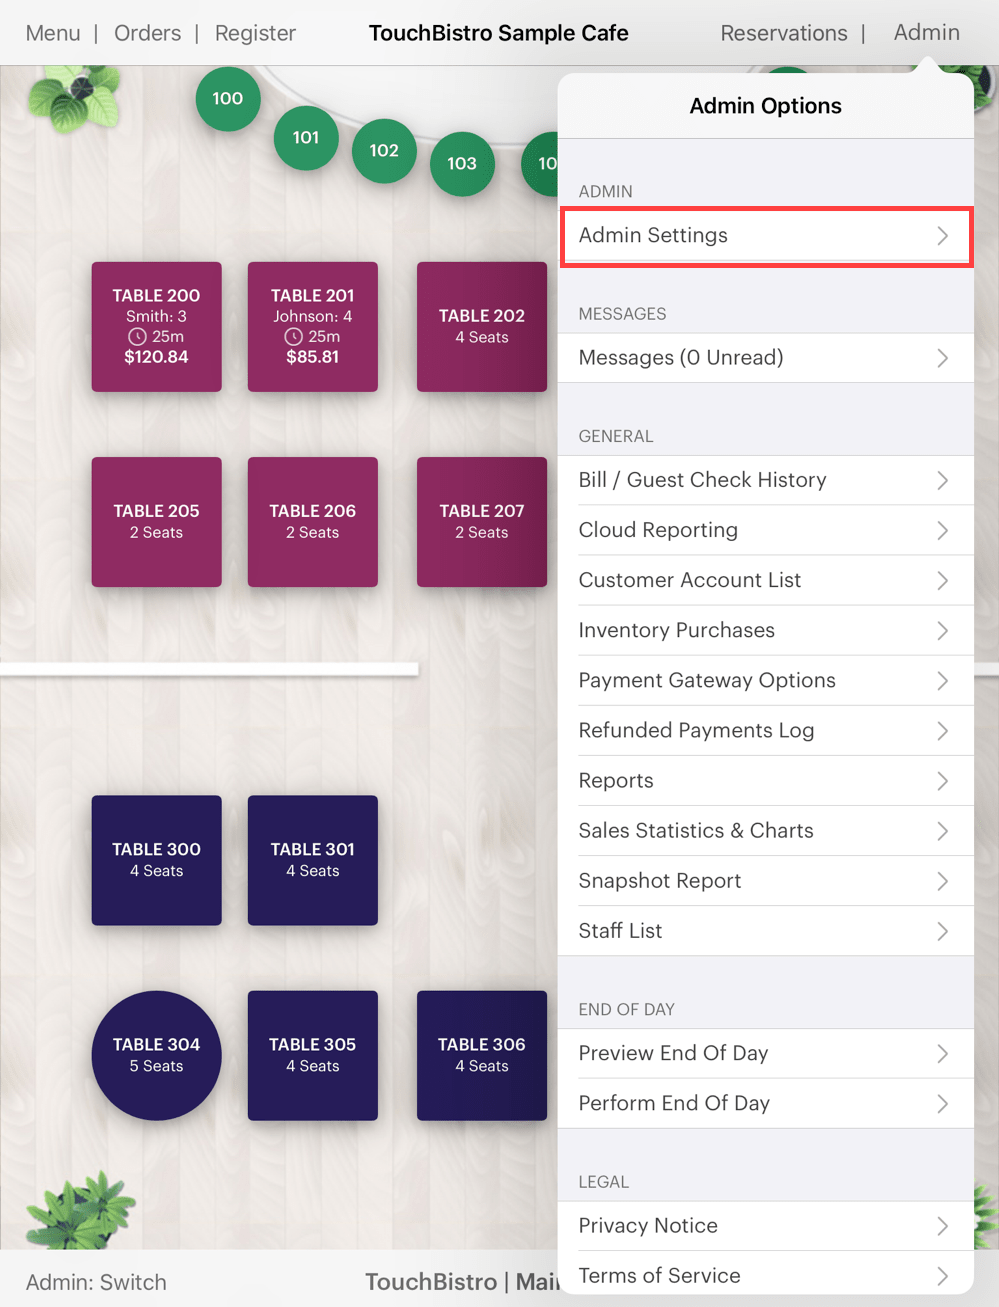
3. Tap Admin | Admin Settings in the top right-hand corner.
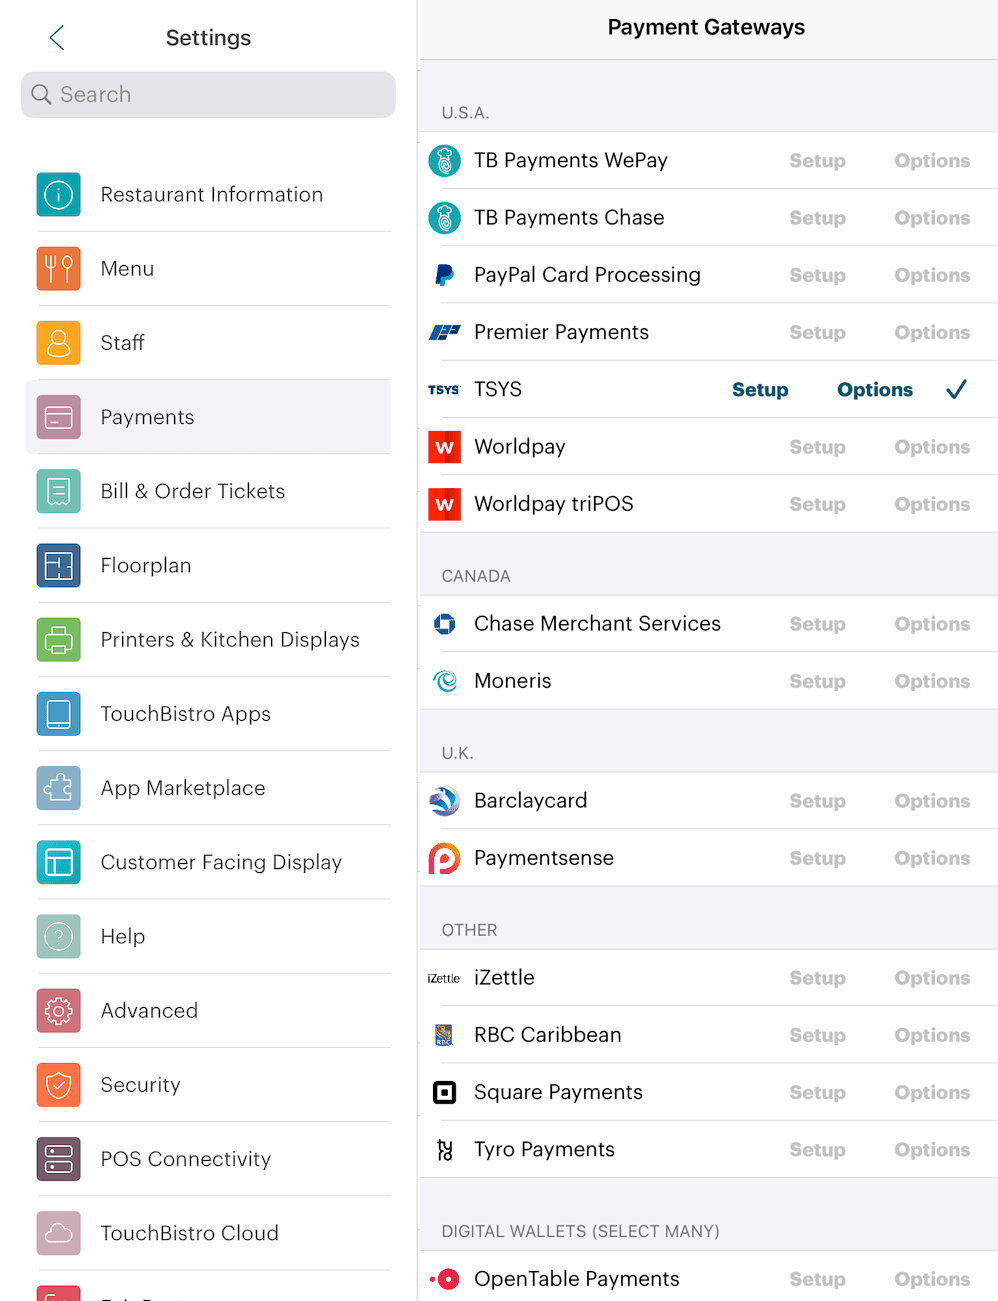
4. Tap Payment Gateways under Settings.
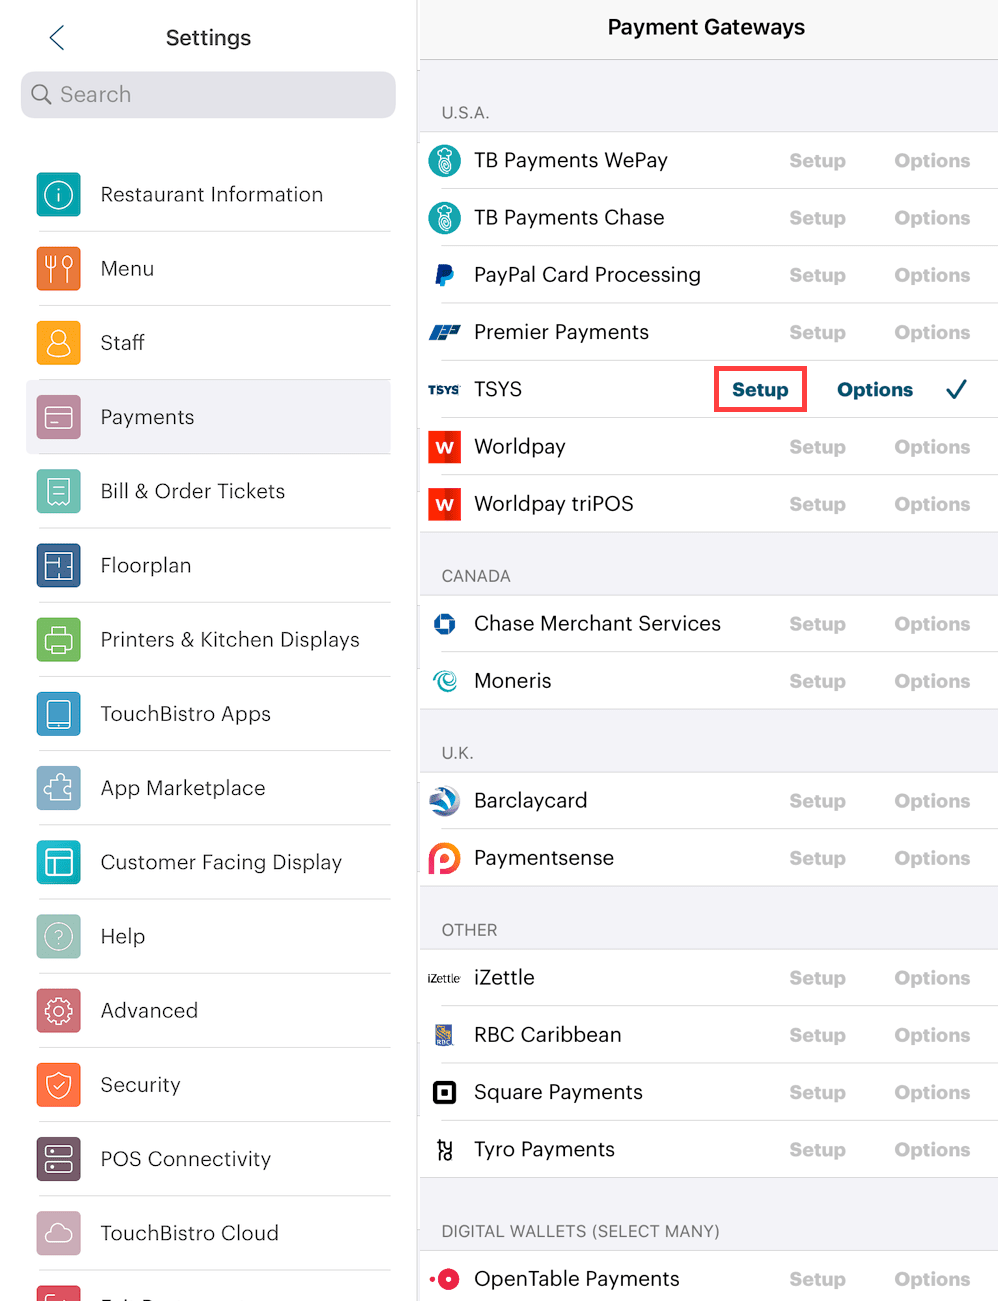
5. Tap TSYS to enable it as your payment gateway. Ensure there’s a checkmark ![]() in the TSYS cell row.
in the TSYS cell row.
6. Tap Setup.
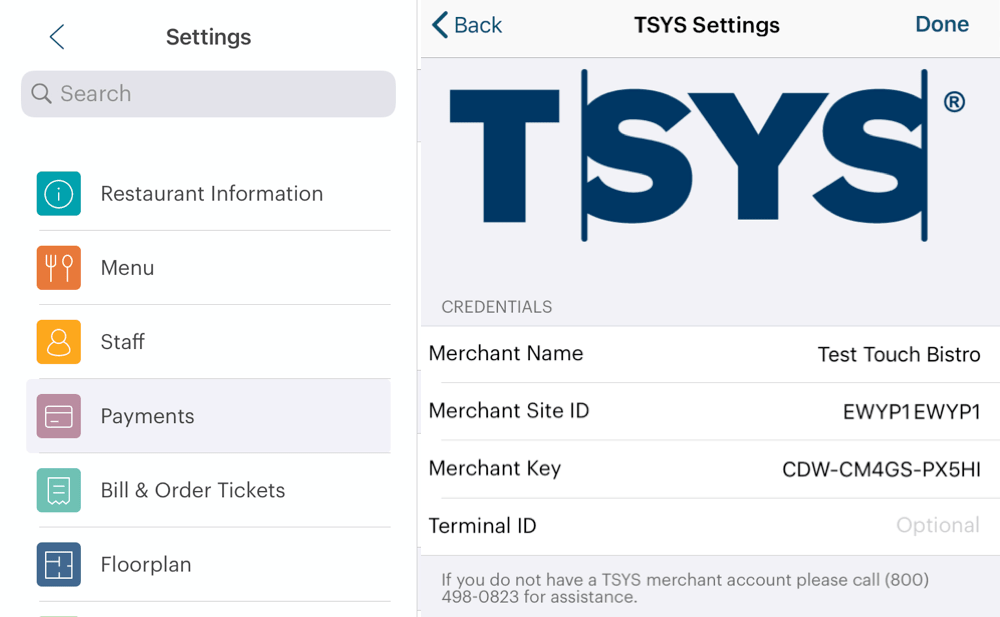
7. Enter the Merchant Name, Merchant Site ID, and Merchant Key provided by TSYS. If TSYS has supplied a Terminal ID, enter that.
Note: your Merchant Name is provided by TSYS and may not be the same as your restaurant name entered on the TouchBistro Restaurant Profile screen.
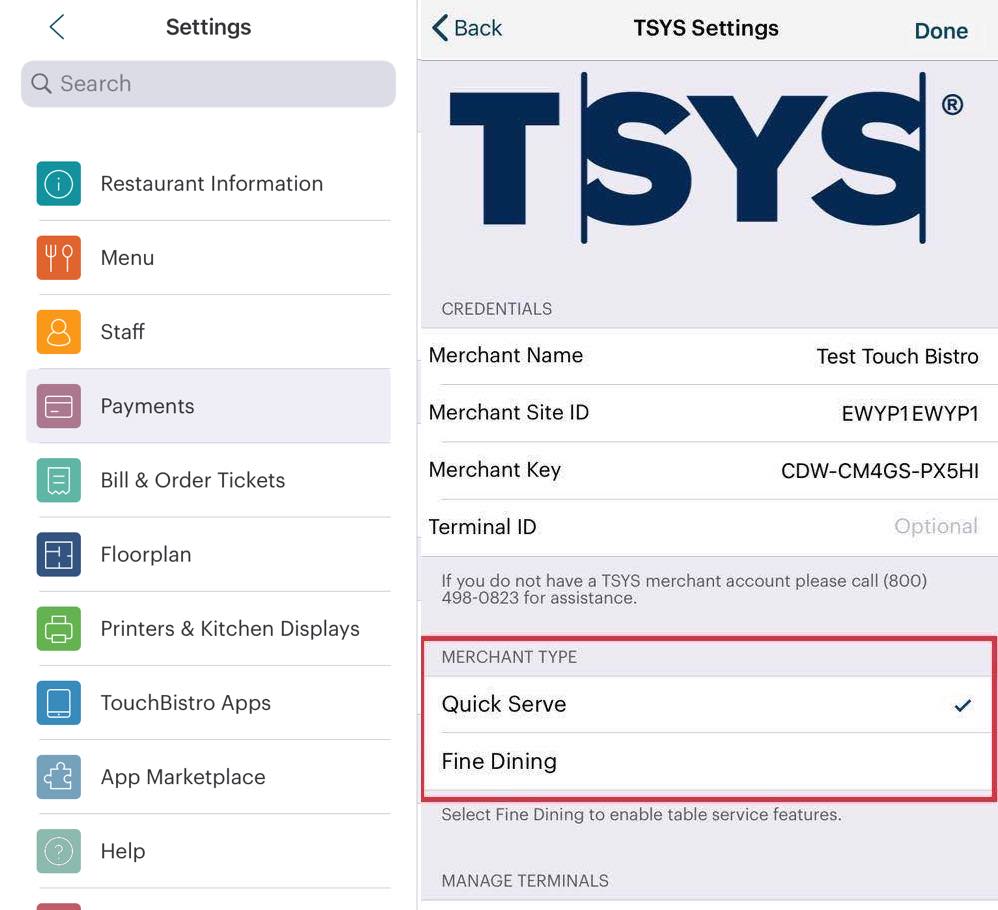
8. Choose either Quick Service or Fine Dining. Tap Quick Service if you prefer customers to sign and select the tip on the iPad. Tap Fine Dining if you prefer customers write the tip in on the credit card receipt. This will generate a pre-auth.
9. Scroll to the bottom of the TSYS Settings screen and review the options in the Advanced Settings area.
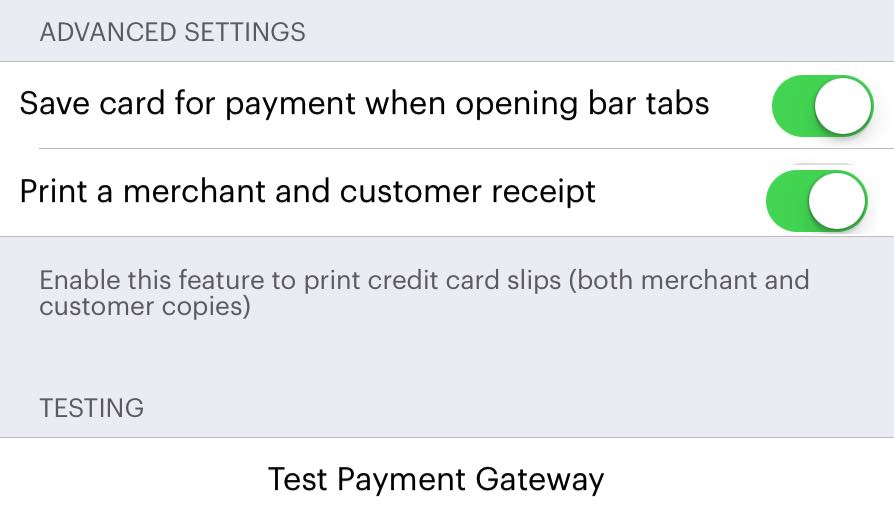
10. If you are using your swipers to start bar tabs with a swipe, you can enable Save card for payment when opening Bar Tabs to allow you to close the bar tab without having to reswipe the card. However, if you are using only the MX915/925 device, you cannot start bar tabs with a swipe.
11. By default, TouchBistro will print a merchant and customer copy of the credit card receipt. If you wish to disable printing both these copies, disable Print a merchant and customer receipt.
Note: the credit card authorization number will appear on the guest check if you print it after payment.
12. Tap Save to return to the Payment Gateways screen
13. If you are setting up a VeriFone PIN Pad, tap Manage Terminals.
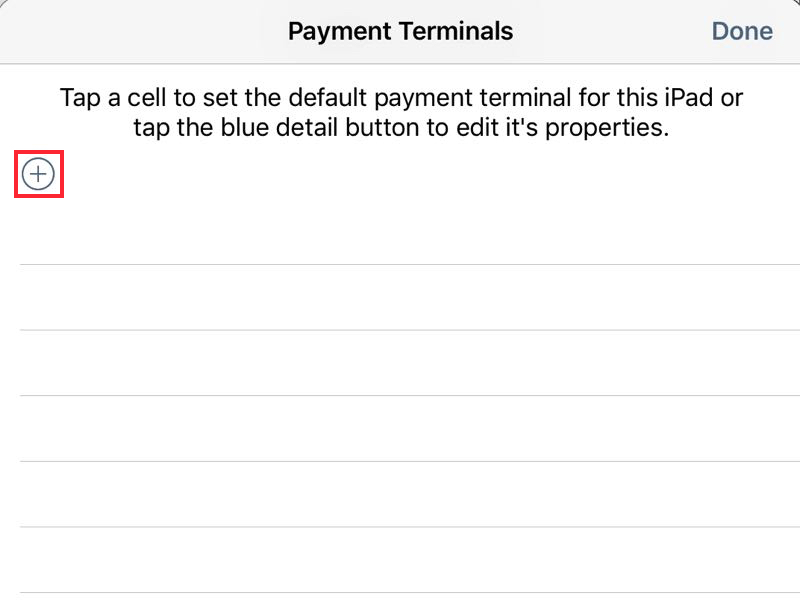
14. Tap the Add ![]() icon to add your terminal.
icon to add your terminal.
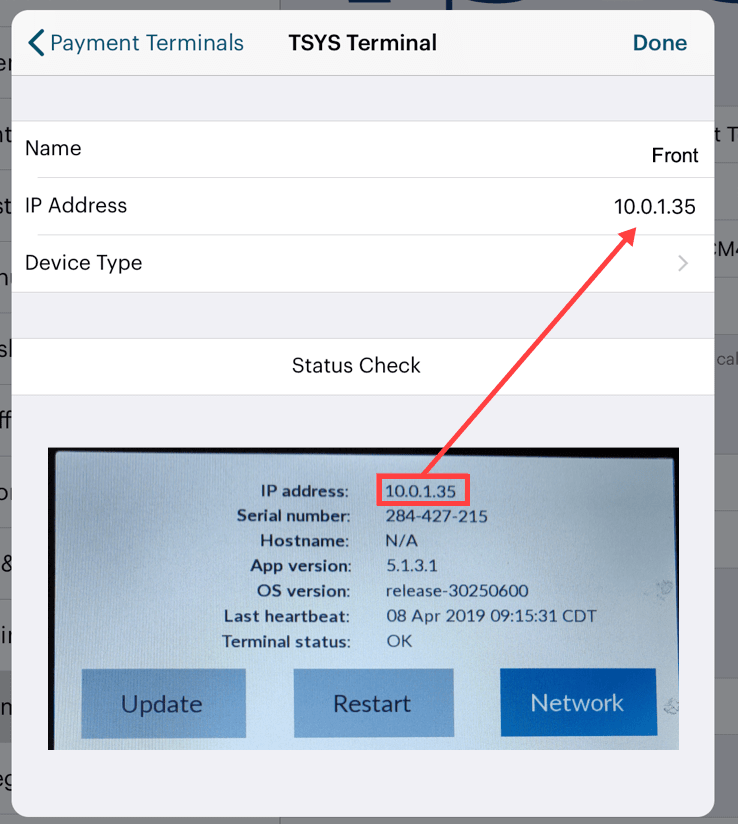
15. Enter a name to help identify the terminal. For example, indicate where it’s located. Enter the IP address you reserved.
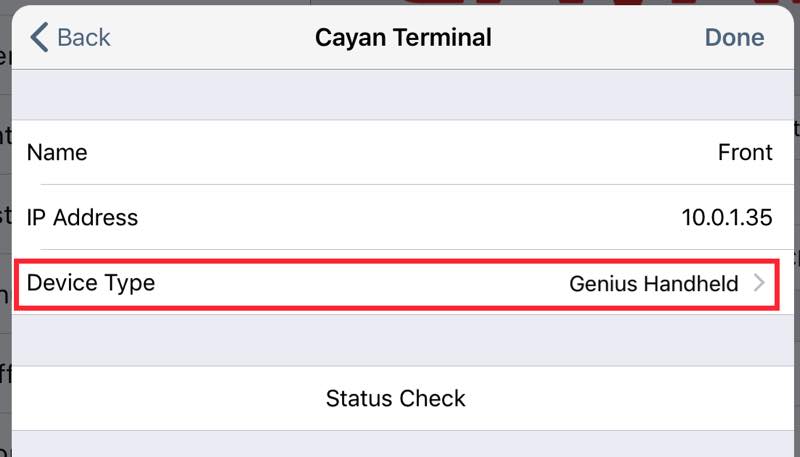
16. Tap Device Type.

17. Ensure VeriFone MX 915/925 is selected.
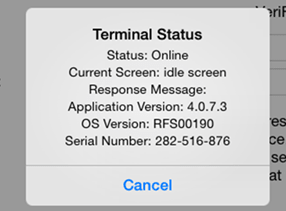
18. Tap Status Check you entered to ensure the IP address was entered correctly and the PIN Pad is connected properly. You should see an “Online” status report. Tap Cancel to close the dialog box.
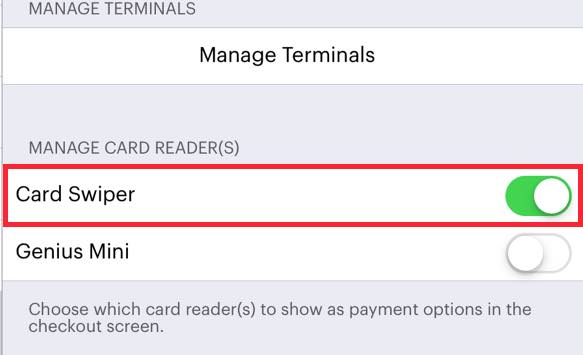
19. If you plan to use gift cards, ensure it is left enabled. If you disable this, you won’t be able to access Gift Card options on the Checkout screen.
20. Tap Done to return to the Payment Terminals screen.
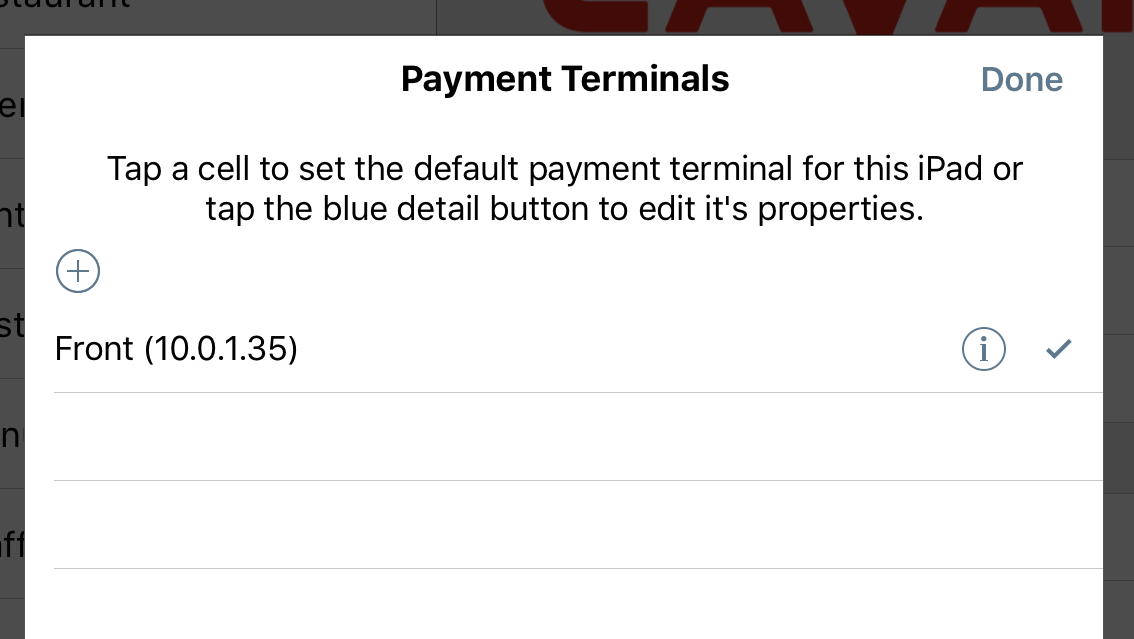
21. Ensure there’s a checkmark ![]() associated with the PIN Pad. This indicates this iPad should use this PIN Pad by default. If the payment terminal is unchecked, simply tap it.
associated with the PIN Pad. This indicates this iPad should use this PIN Pad by default. If the payment terminal is unchecked, simply tap it.
22. Tap Done to return to the TSYS Settings screen.
23. Tap Save to return to the Payment Gateways screen.
Section 1. Card-Not-Present Payments
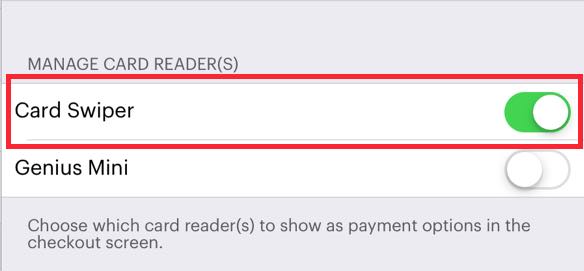
If you are not using swipers, you may not have access to card not present payments via Hosted Checkout. If you would like to support card-not-present payments via hosted checkout, enable Card Swipers on the TSYS Setup page.

This will add a TSYS Credit Card payment option. Tap Information ![]() icon and select Manual Charge via Hosted Checkout to process a card-not-present transaction. Do not use the TSYS Credit Card to attempt an integrated payment with your Genius Terminal.
icon and select Manual Charge via Hosted Checkout to process a card-not-present transaction. Do not use the TSYS Credit Card to attempt an integrated payment with your Genius Terminal.


 Email
Support
 Frequently
Asked Questions
