Setting Up the Worldpay Payment Gateway for Swipers and Hosted Pay
Table Of Contents
Chapter 2. Setting Up a Worldpay Mobile Card Reader
Chapter 1. For Administrators
This document will guide you through setting up a mobile card reader (aka a “swiper”) and a Hosted Pay solution.
Chapter 2. Setting Up a Worldpay Mobile Card Reader
1. Open your restaurant on TouchBistro.
2. Log in as Admin.
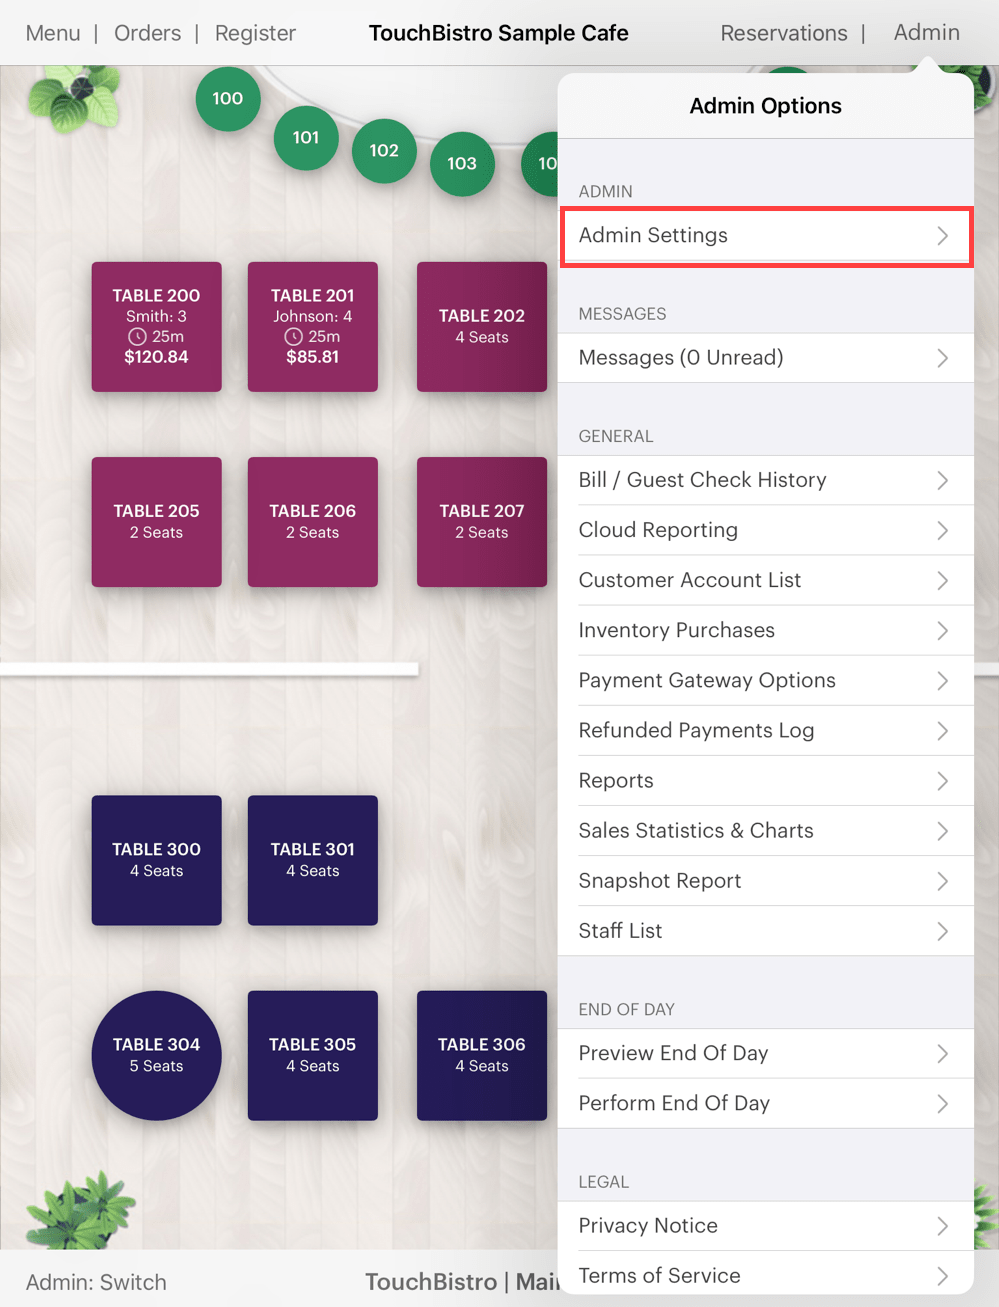
3. Tap Admin | Admin Settings in the top right-hand corner.
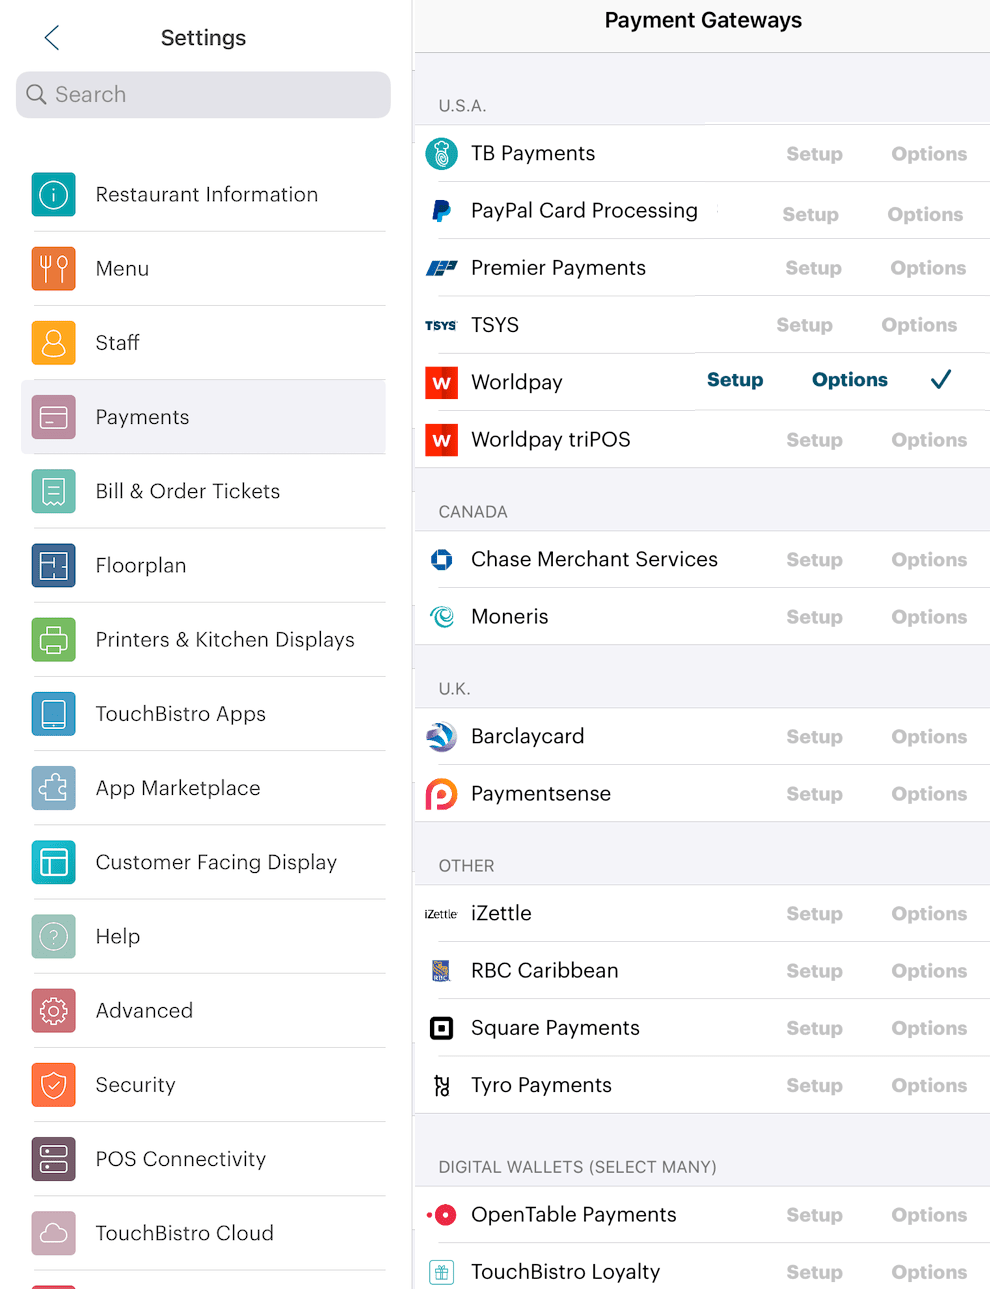
4. Tap Payment Gateways under Settings.
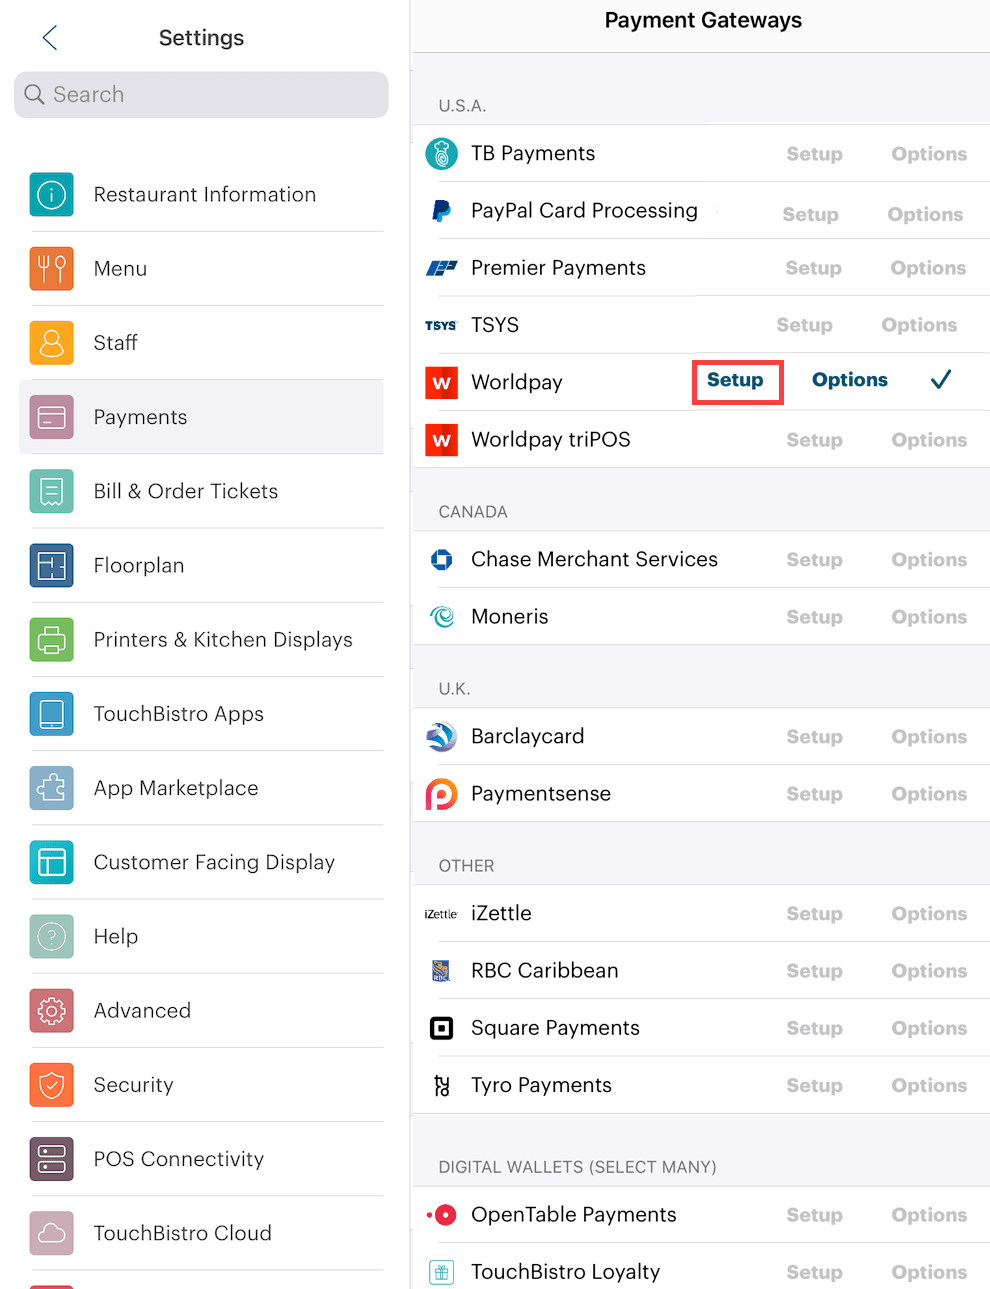
5. Tap Worldpay to enable it as your payment gateway. Ensure there’s a checkmark ![]() in the Worldpay cell row.
in the Worldpay cell row.
6. Tap Setup.
7. Plug your uDynamo card reader into the iPad’s audio jack and ensure the volume is turned all the way up. If you have an iDynamo plug it into your iPad’s lightning port.
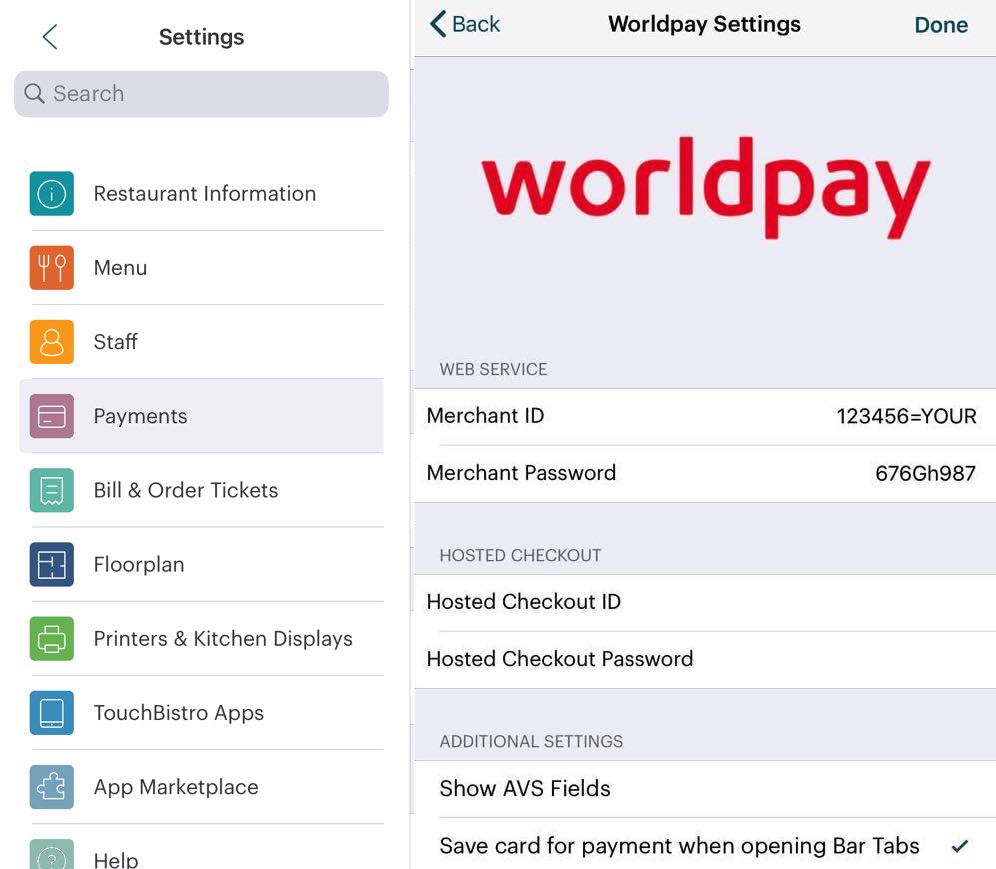
8. Enter the Merchant ID and Password from the dealer letter (pictured above). If you received a Hosted Checkout ID and password enter those.
9. Tap Done to exit the Worldpay setup screen.
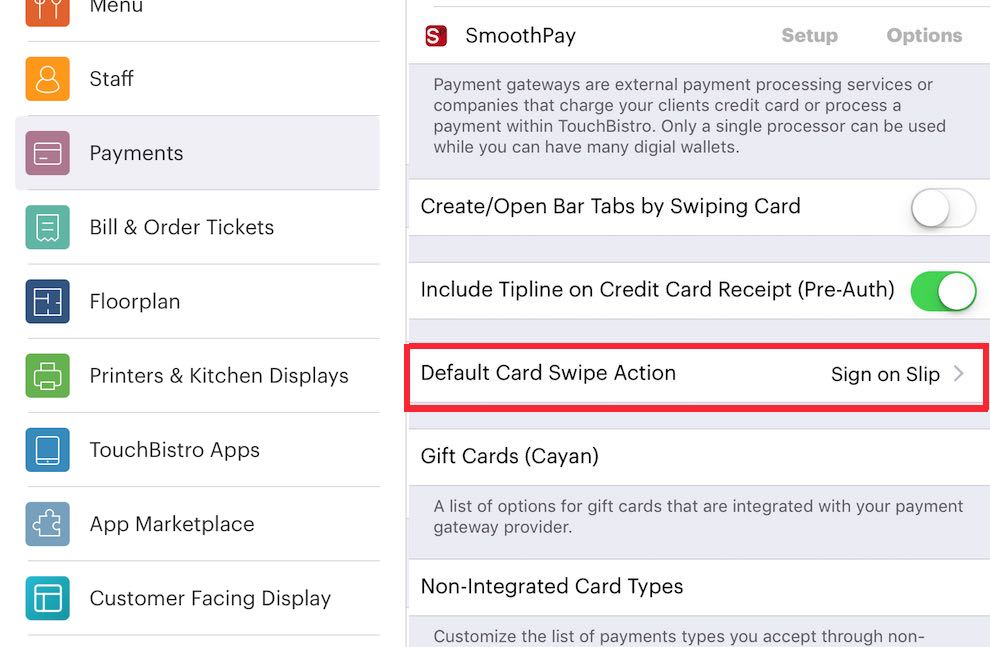
10. Scroll down and tap Default Card Swipe Action. Select if you want the customer to sign on the screen or sign a printed credit card slip (pre-auth). If you are using more than one iPad, then they can each be configured differently. For example, the stationary iPad at the bar might require Sign on Slip, whereas mobile iPads might require Sign on Screen.
Chapter 3. Configuring your Worldpay Hosted Pay Settings
Worldpay offers a hosted pay solution. That is, when a payment needs to be processed, one is directed to a page hosted by Worldpay to process the actual payment details. TouchBistro supports payments by this method as well.
Section 1. Configuring TouchBistro
1. Open your restaurant on TouchBistro.
2. Log in as Admin.

3. Tap Admin | Admin Settings in the top right hand corner.

4. Tap Payment Gateways under Settings.

5. Tap on Worldpay and ensure that a check mark appears in the cell row.
6. Tap Setup.
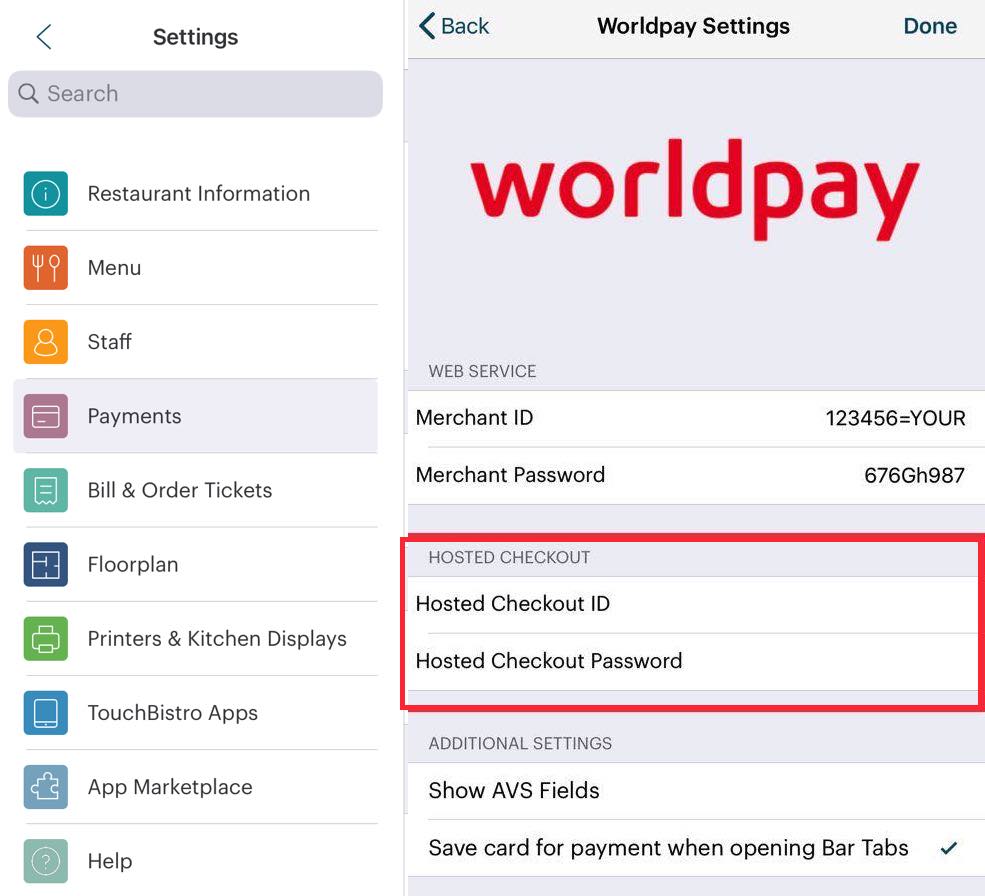
7. Enter the Hosted Checkout ID (“Hosted Checkout Manual Entry Merchant ID”) and HC Password (“Hosted Checkout Password”) you received from Worldpay.
8. Slide AVS to the green position if you wish to enable the Address Verification Service fields. This should be optional unless you’re told otherwise in your welcome letter. If enabled, your hosted pay screen will ask for address information. If the address information doesn’t largely conform with the information on file, the card can be rejected. It’s an extra layer of card security.
9. Tap Done.


 Email
Support
 Frequently
Asked Questions
