Setting Up Your RP457c – Bluetooth Connection
Table Of Contents
Section 1. Unsupported Regions
Chapter 2. After an iPadOS Update
Chapter 1. Introduction
Before you can pair your RP457c device using Bluetooth, it must first be paired using the Audio Jack. Please see Setting Up Your RP457c – Audio Connection and complete these steps before proceeding.
Due to the nature of Bluetooth pairing, if you pair your TB Payments device, you won’t be able to use it with other iPads. You can only process payments with the iPad paired to your TB Payments device.
Section 1. Unsupported Regions
Integration is not available in U.S. territories such as Puerto Rico, Guam, the U.S. Virgin Islands, American Samoa, and Nothern Mariana Islands.
Chapter 2. After an iPadOS Update
If you update your iPads to the latest iPadOS, the OS needs you to enable certain privacy settings to operate with the RP457c. You should follow these steps:
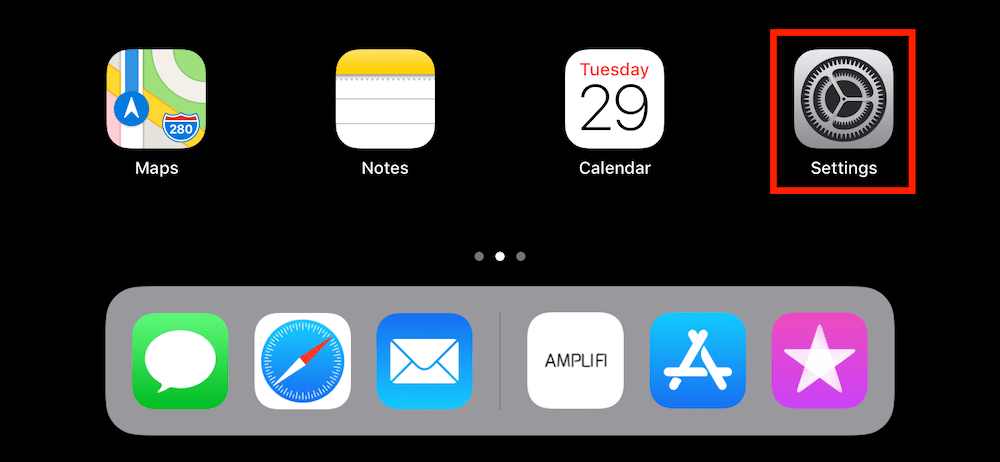
1. Tap Settings.
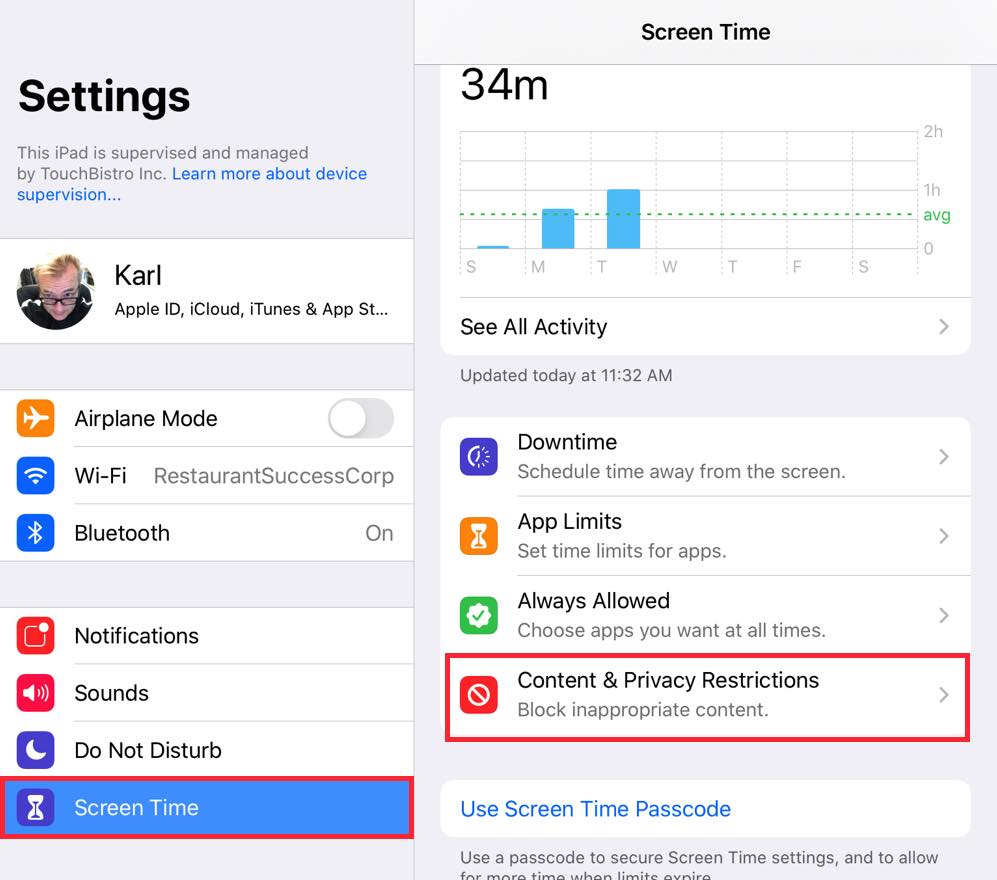
2. Tap Screen Time and then Content & Privacy Restrictions.
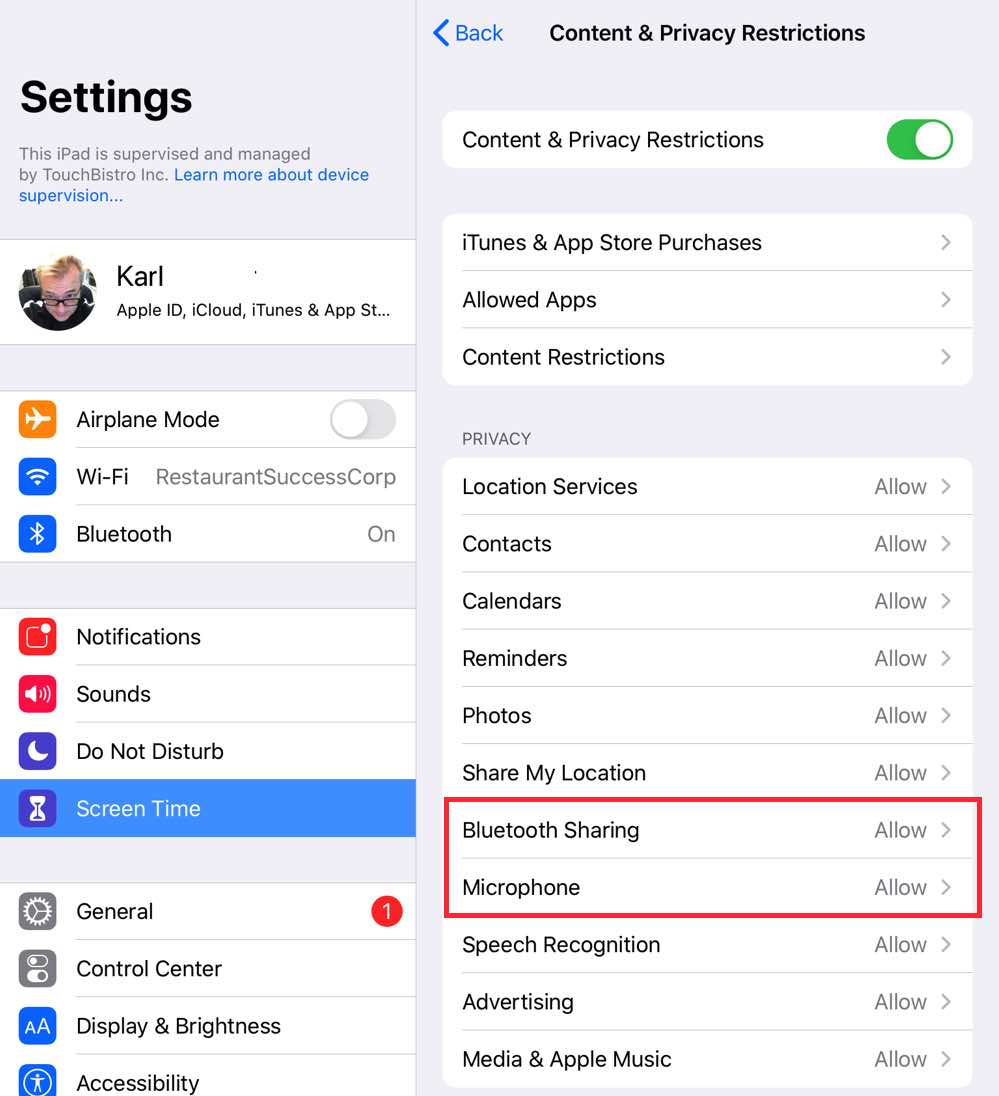
3. Enable Content & Privacy Restrictions and ensure Microphone and Bluetooth Sharing are both set to Allow Changes.
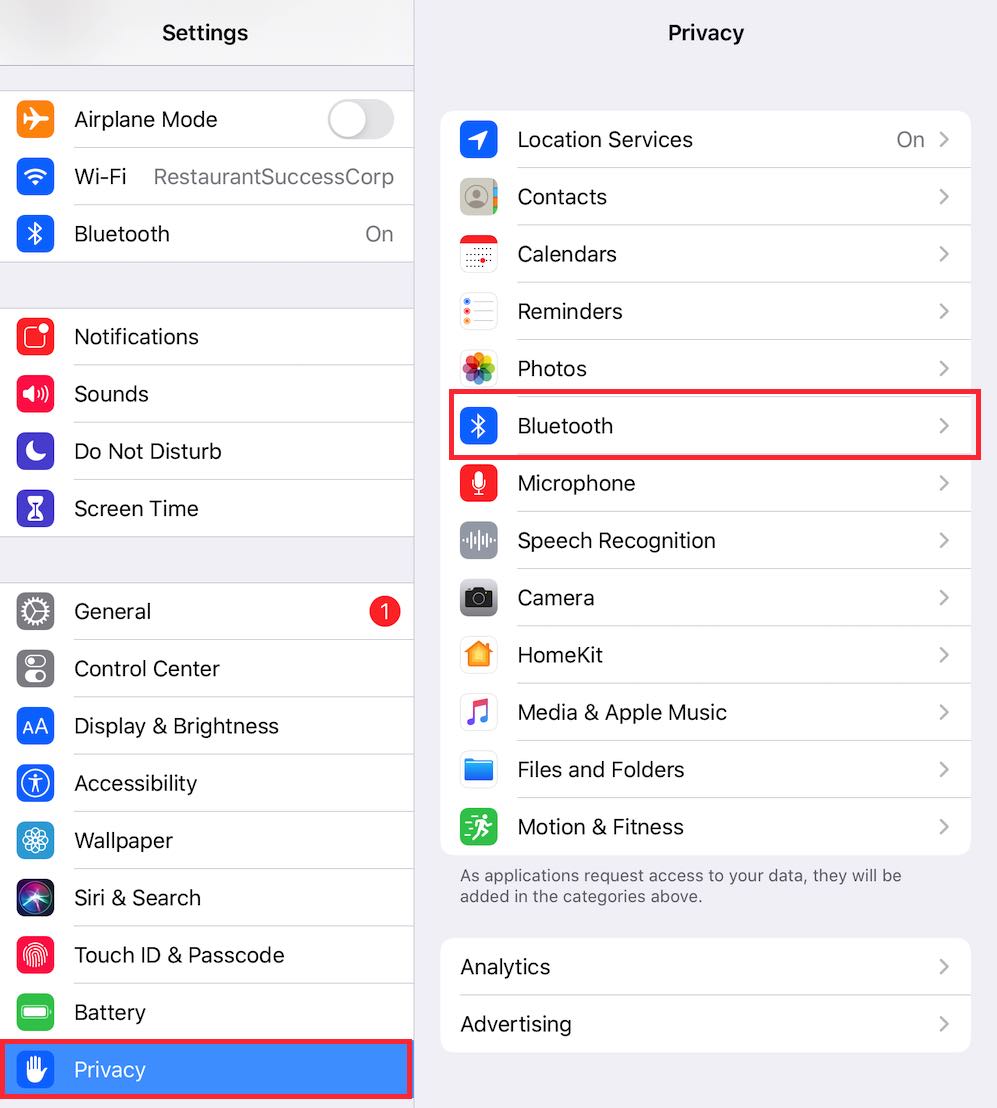
4. On the left, scroll down to Privacy and tap Bluetooth.
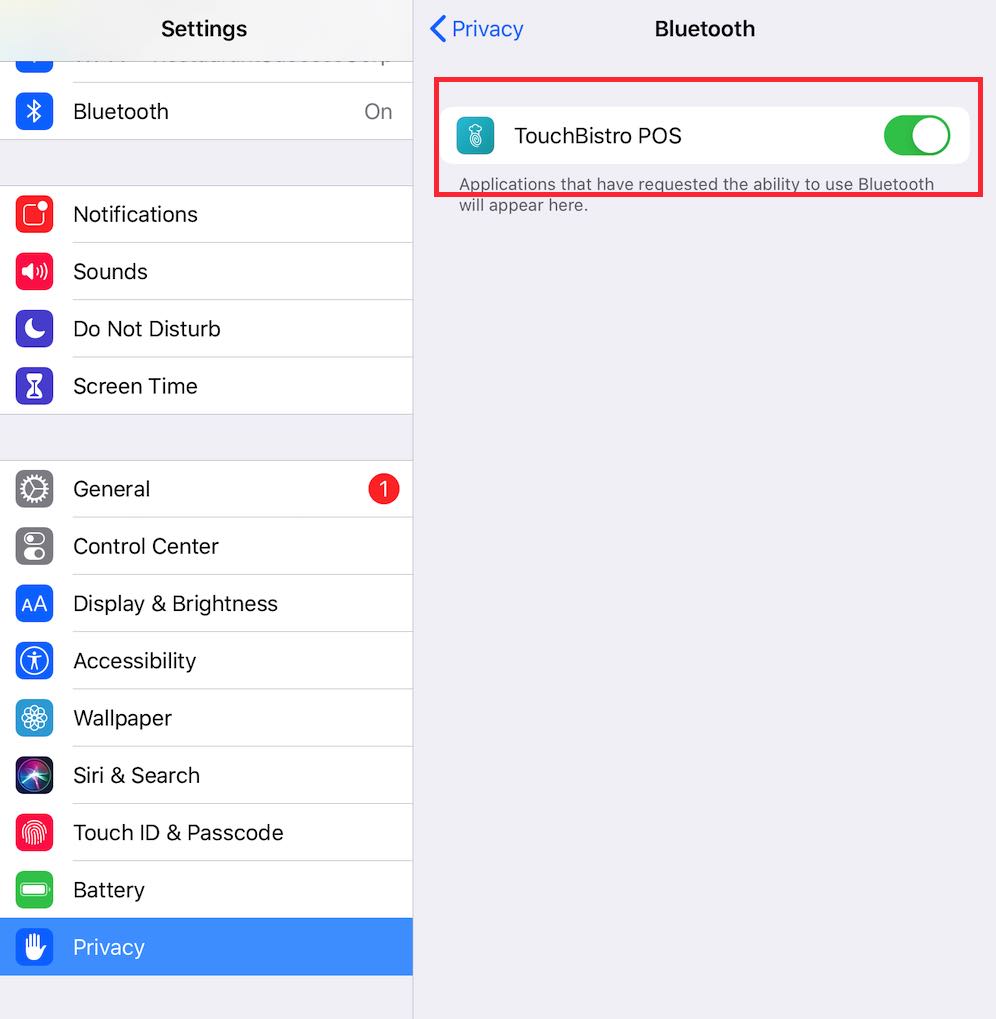
5. Ensure TouchBistro POS is enabled.
Chapter 3. Pairing
Ensure your TB Payments device is seated in your iPad’s audio jack.
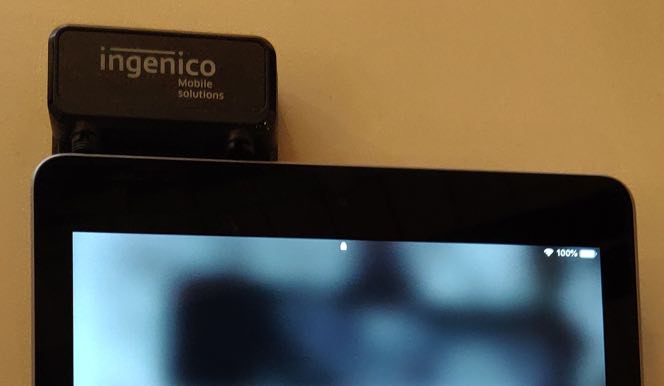
Before you can use the devices separately over Bluetooth, you need to use the audio jack channel to pair the TB Payments device with the iPad.
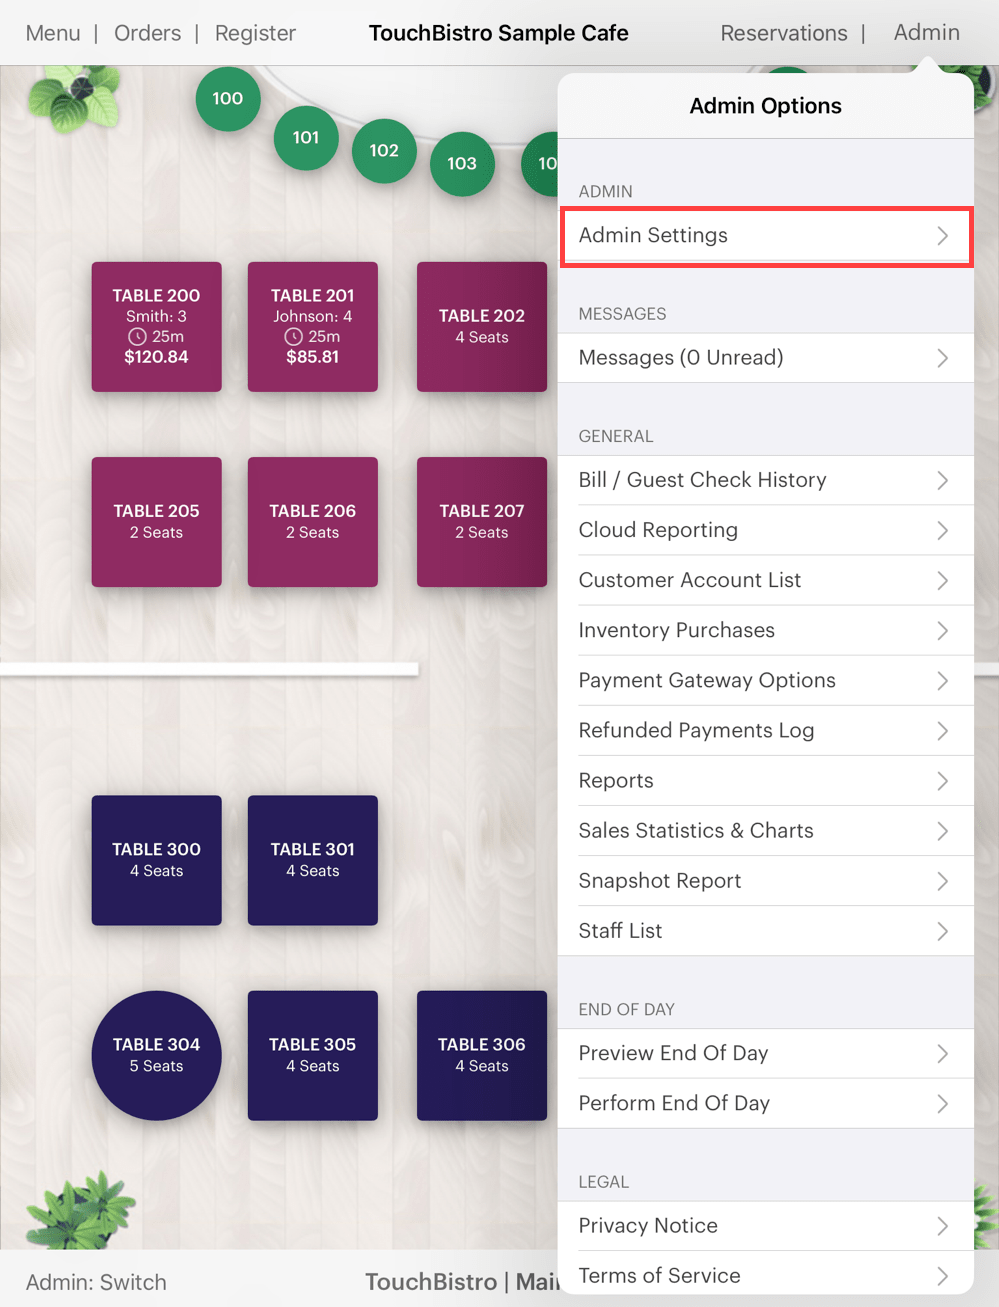
1. Tap Admin | Admin Settings.
2. Tap Payment Gateways.
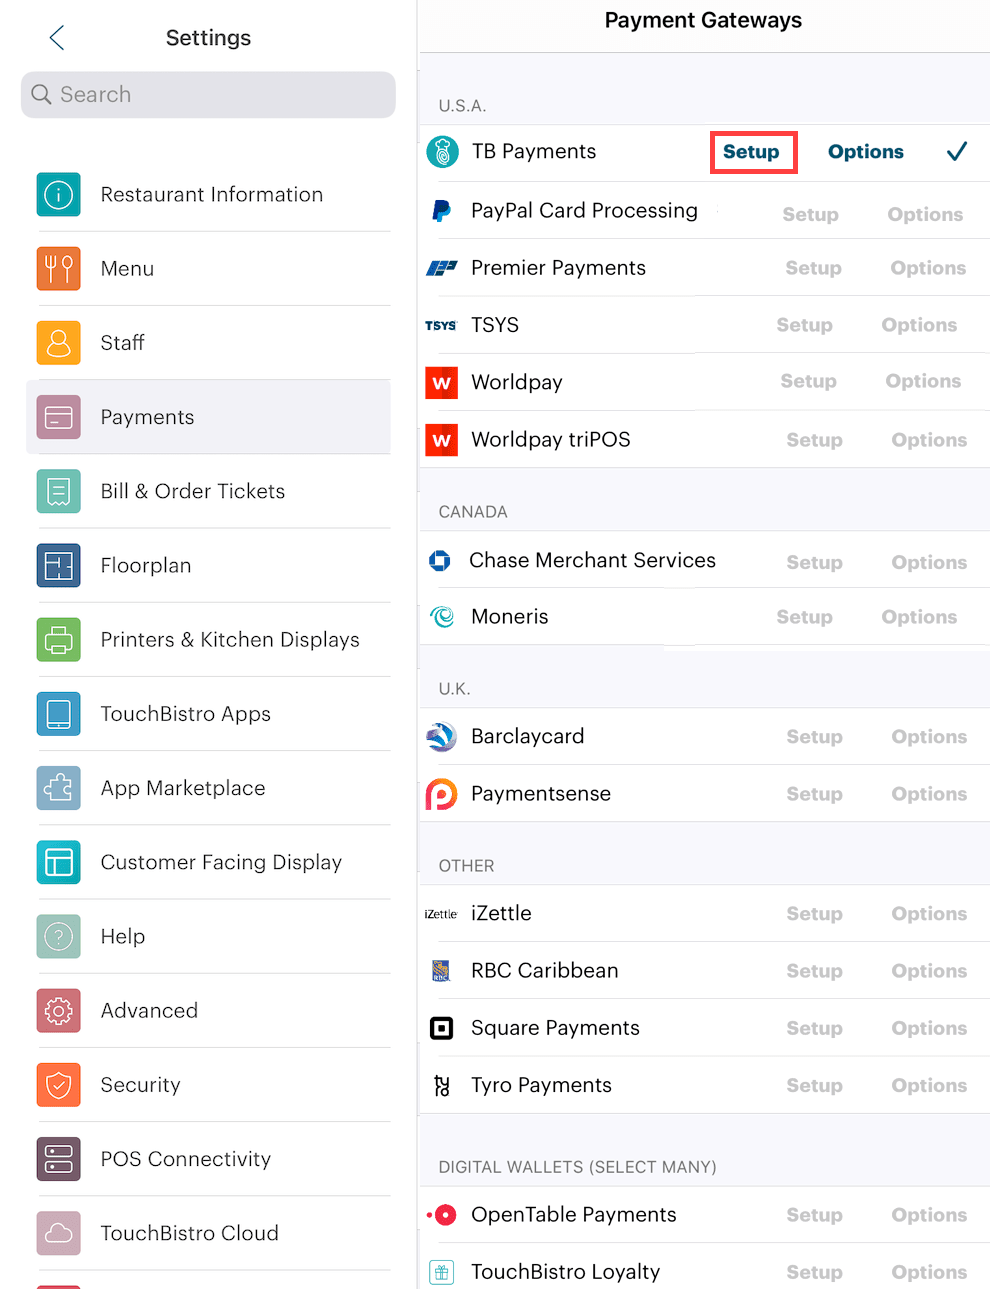
3. Tap TB Payments‘ associated Setup option.
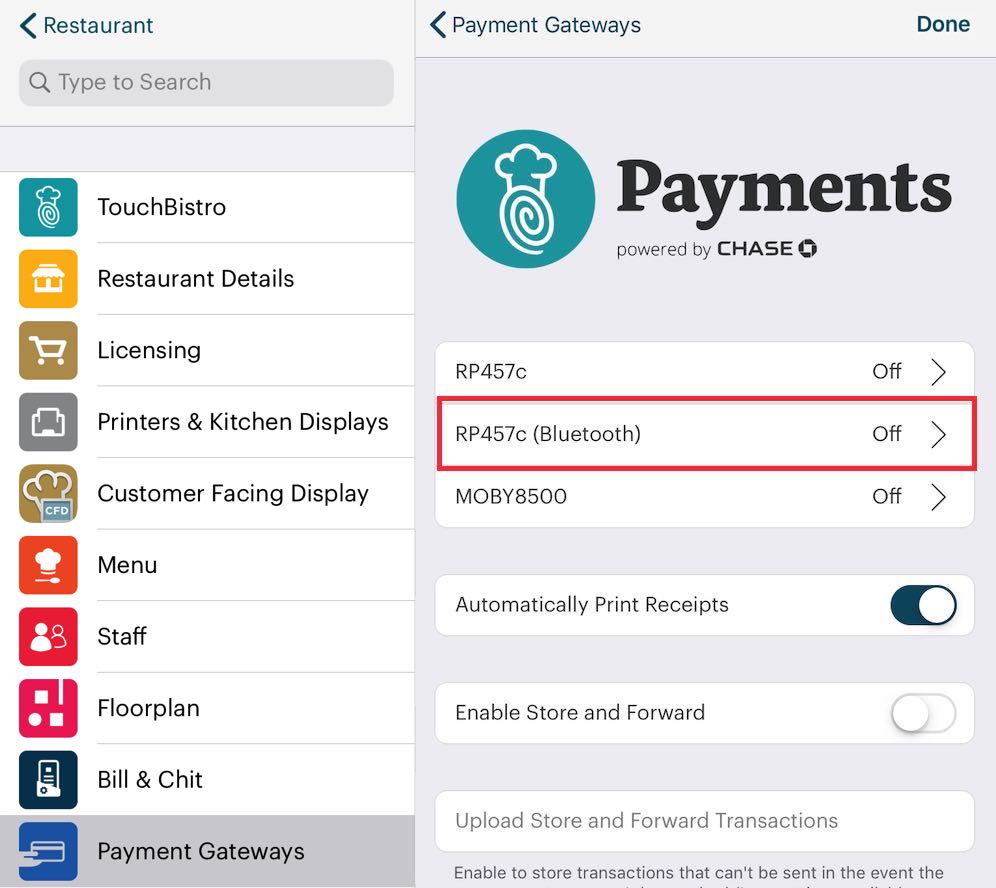
4. Tap RP457c (Bluetooth).
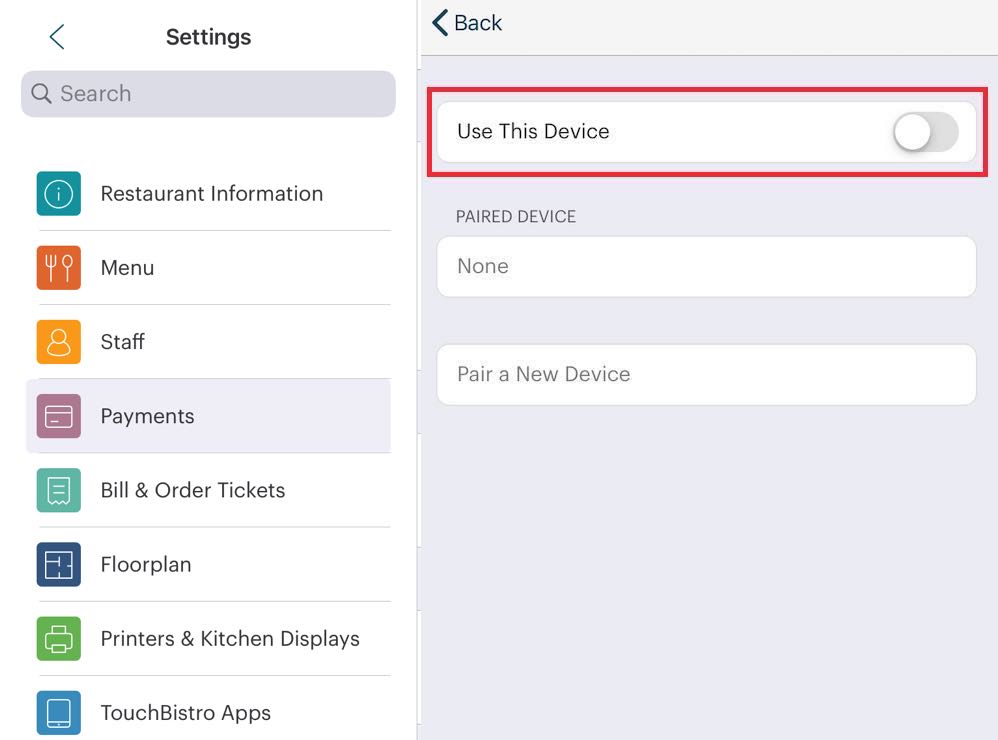
5. Enable Use This Device.
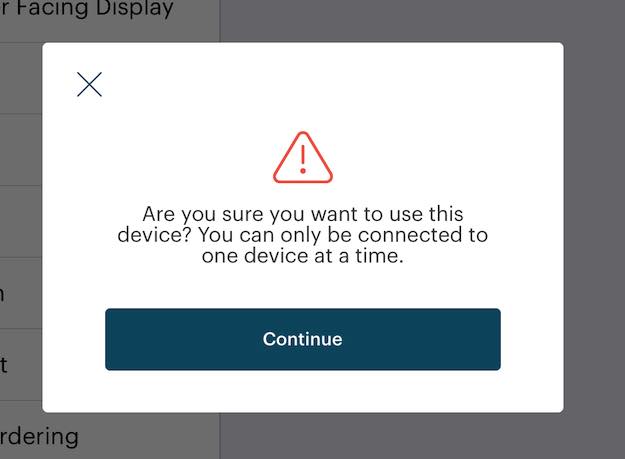
6. You will be given a warning about pairing only one device. Dismiss the warning.
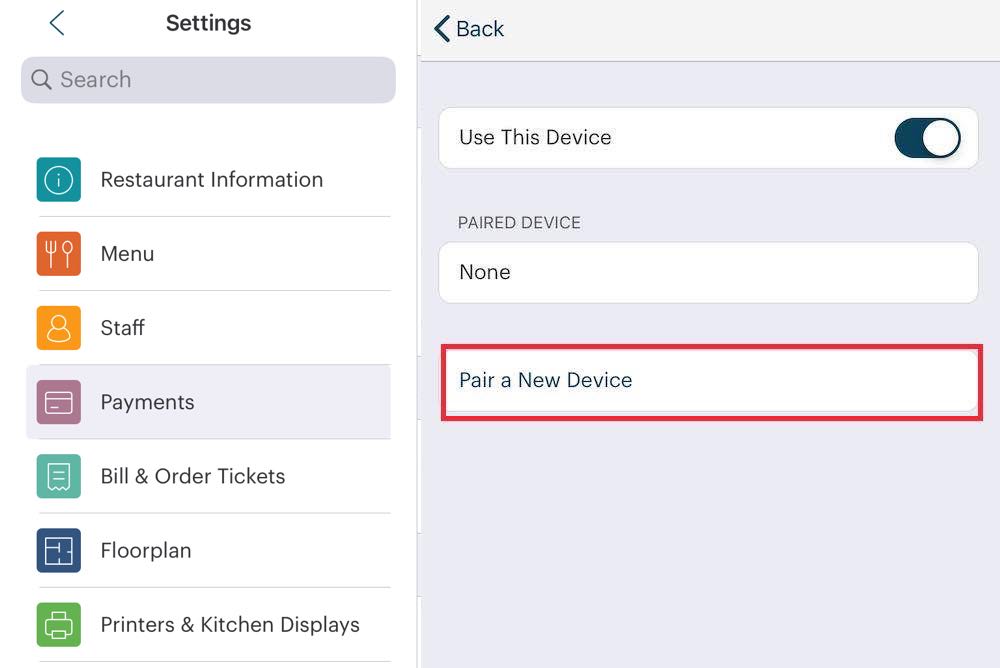
7. Tap Pair a New Device.
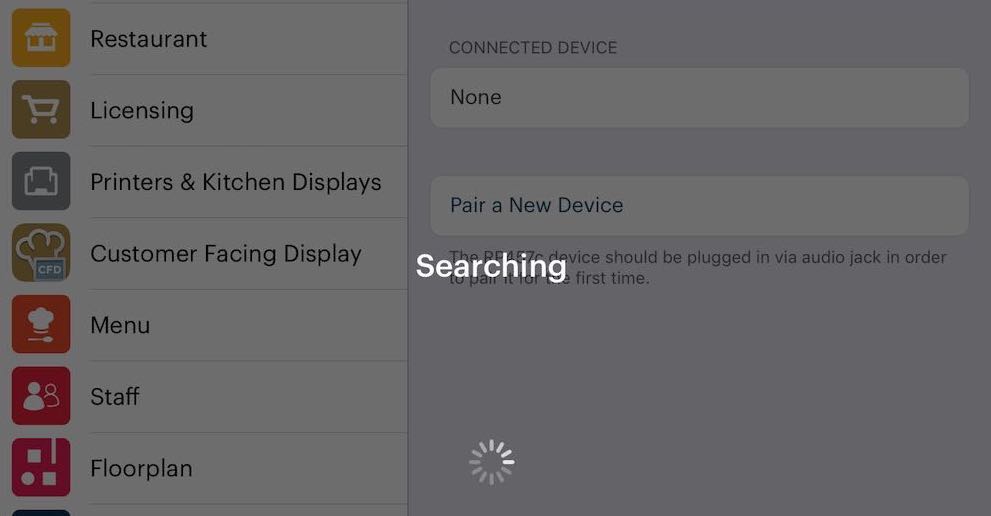
8. TouchBistro may take a few minutes to find your device over Bluetooth.
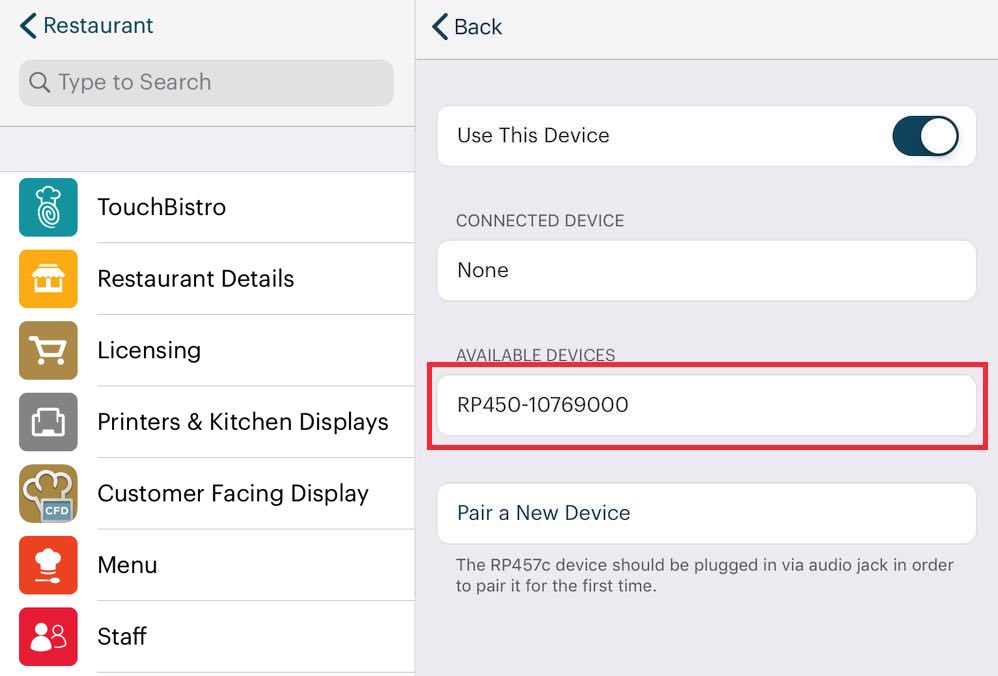
9. Tap the available device.
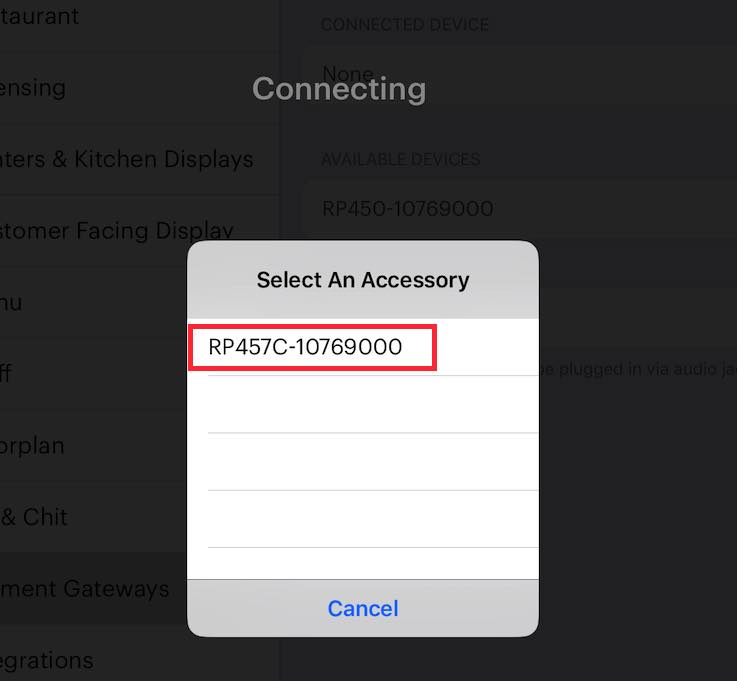
10. Tap the device again in the Select An Accessory Dialog box.
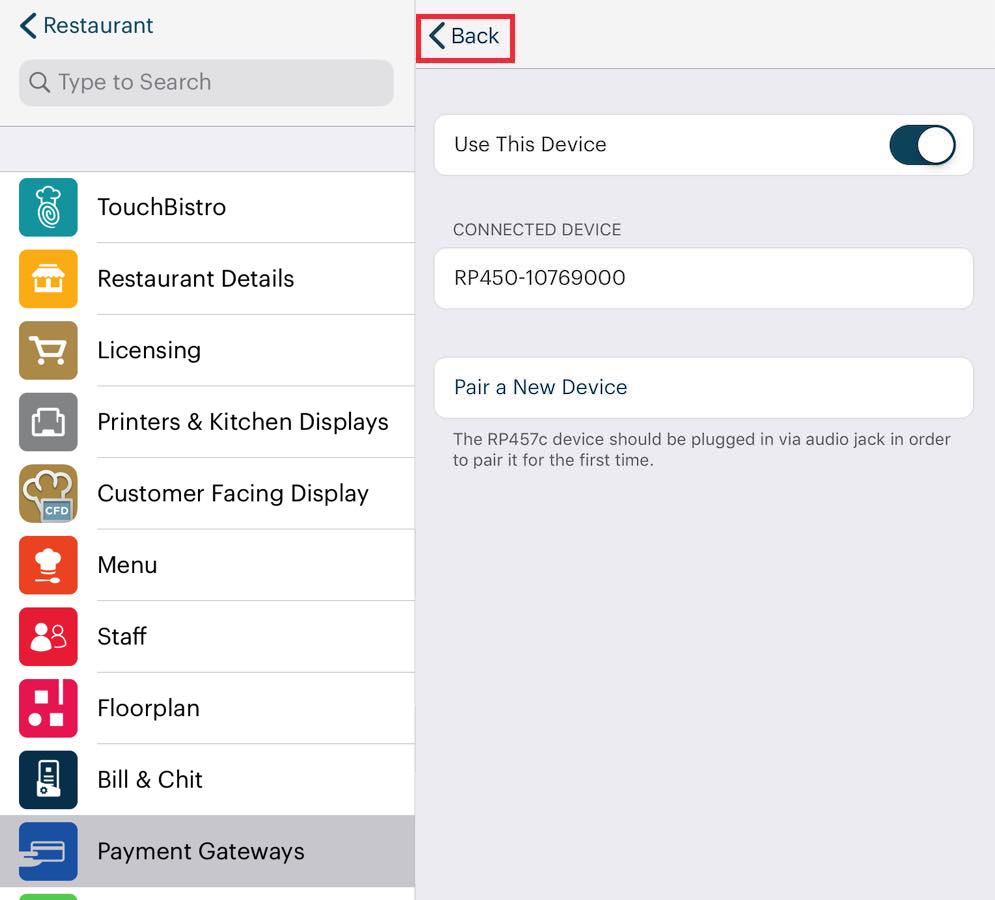
11. After pairing, you will see your device in the Connected Device section. Tap Back.
12. Tap Done.
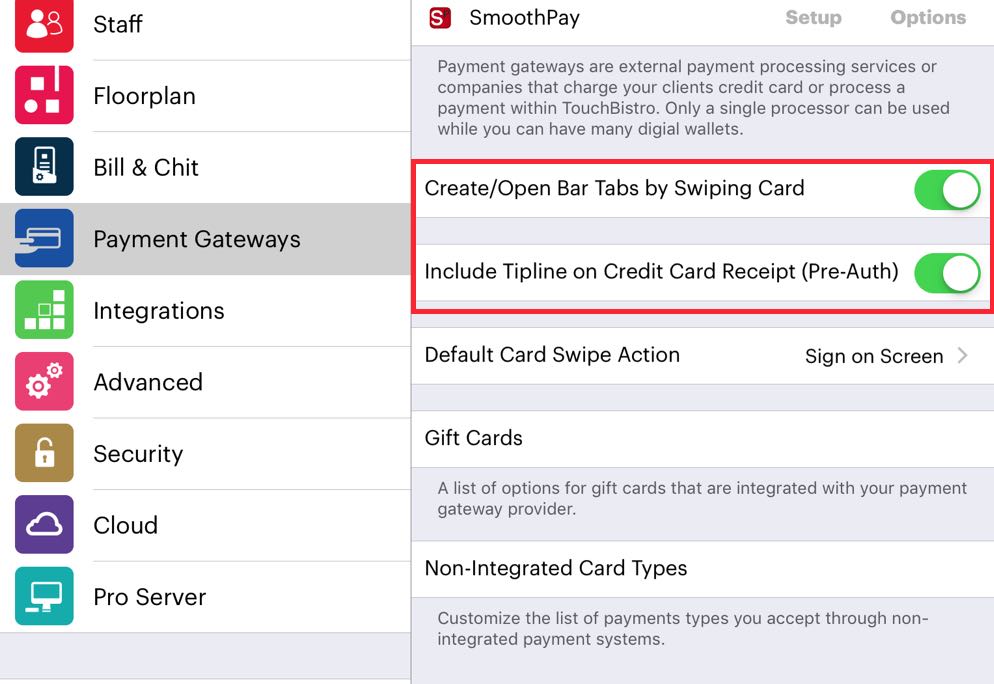
13. Scroll to the bottom of your Payment Gateways screen. If you would like customers to write in tips on the credit card slip (a “pre-auth”), enable Include Tipline on Credit Card Receipt (Pre-Auth). If you don’t want to collect a tip via the credit card slip, disable this setting.
Note: If you want to accept an offline payment, you will need to return to this screen and temporarily disable Include Tipline on Credit Card Receipt (Pre-Auth).
14. If you would like to use the payment device to speed starting and closing bar tabs, enable Create/Open Bar Tabs by Swiping Card.
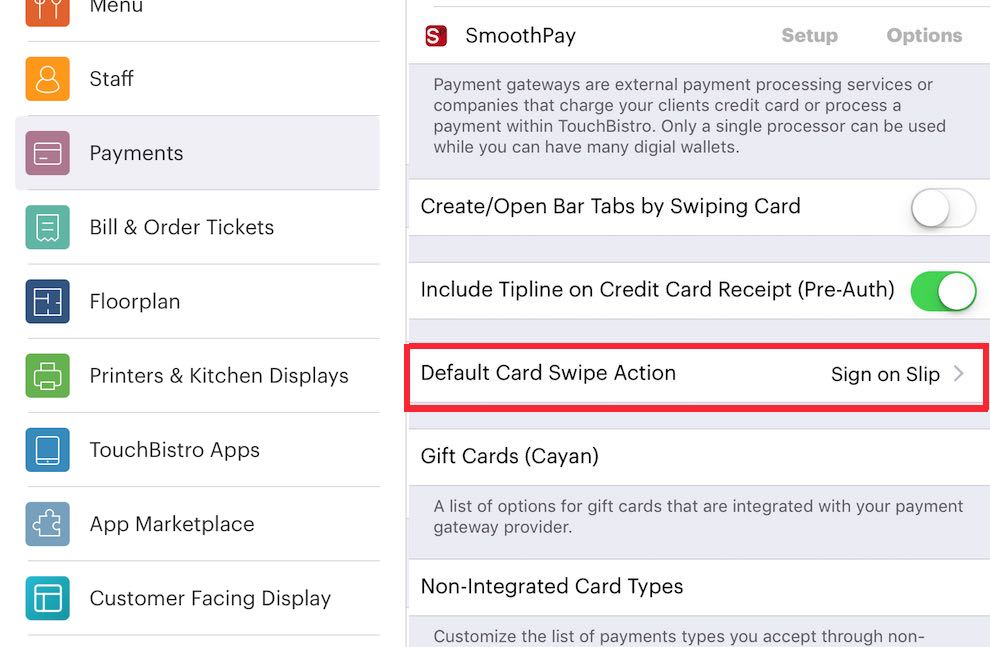
15. Scroll down and tap Default Card Swipe Action.
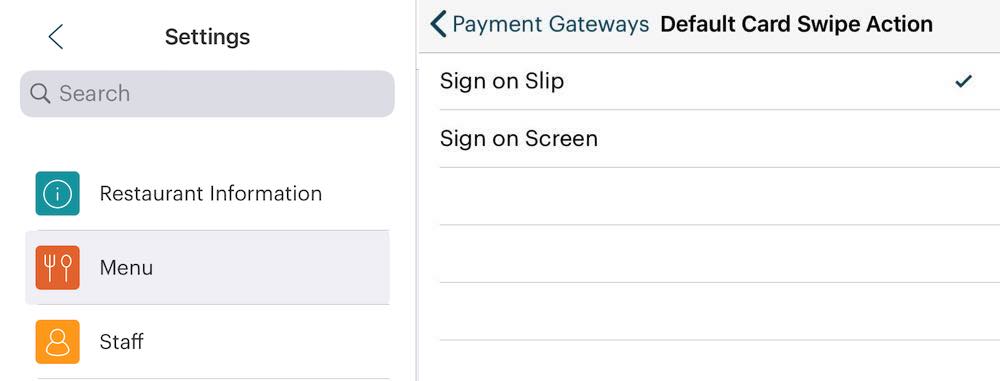
16. Select if you want the customer to sign on the screen or sign a printed credit card slip (pre-auth). If you select Sign on Slip, verify Include Tipline on Credit Card Receipt (Pre-Auth) has been enabled.
Note: Default Card Swipe Action is a local setting. That is, if you’re using a multi iPad set up, the Admin account can set Default Card Swipe Action differently for each iPad. For example, you might want iPads used by servers to be set for Sign on Slip but the iPad at the bar is set to Sign on Screen.
If you are using Pro Server, this setting is local to each iPad.
Chapter 4. If you Power Cycle Your iPad
If you restart (“power cycle”) your iPad, you will need to power cycle your RP457c for it to repair correctly.
Chapter 5. Setting Up the Payment Device in Its Cradle
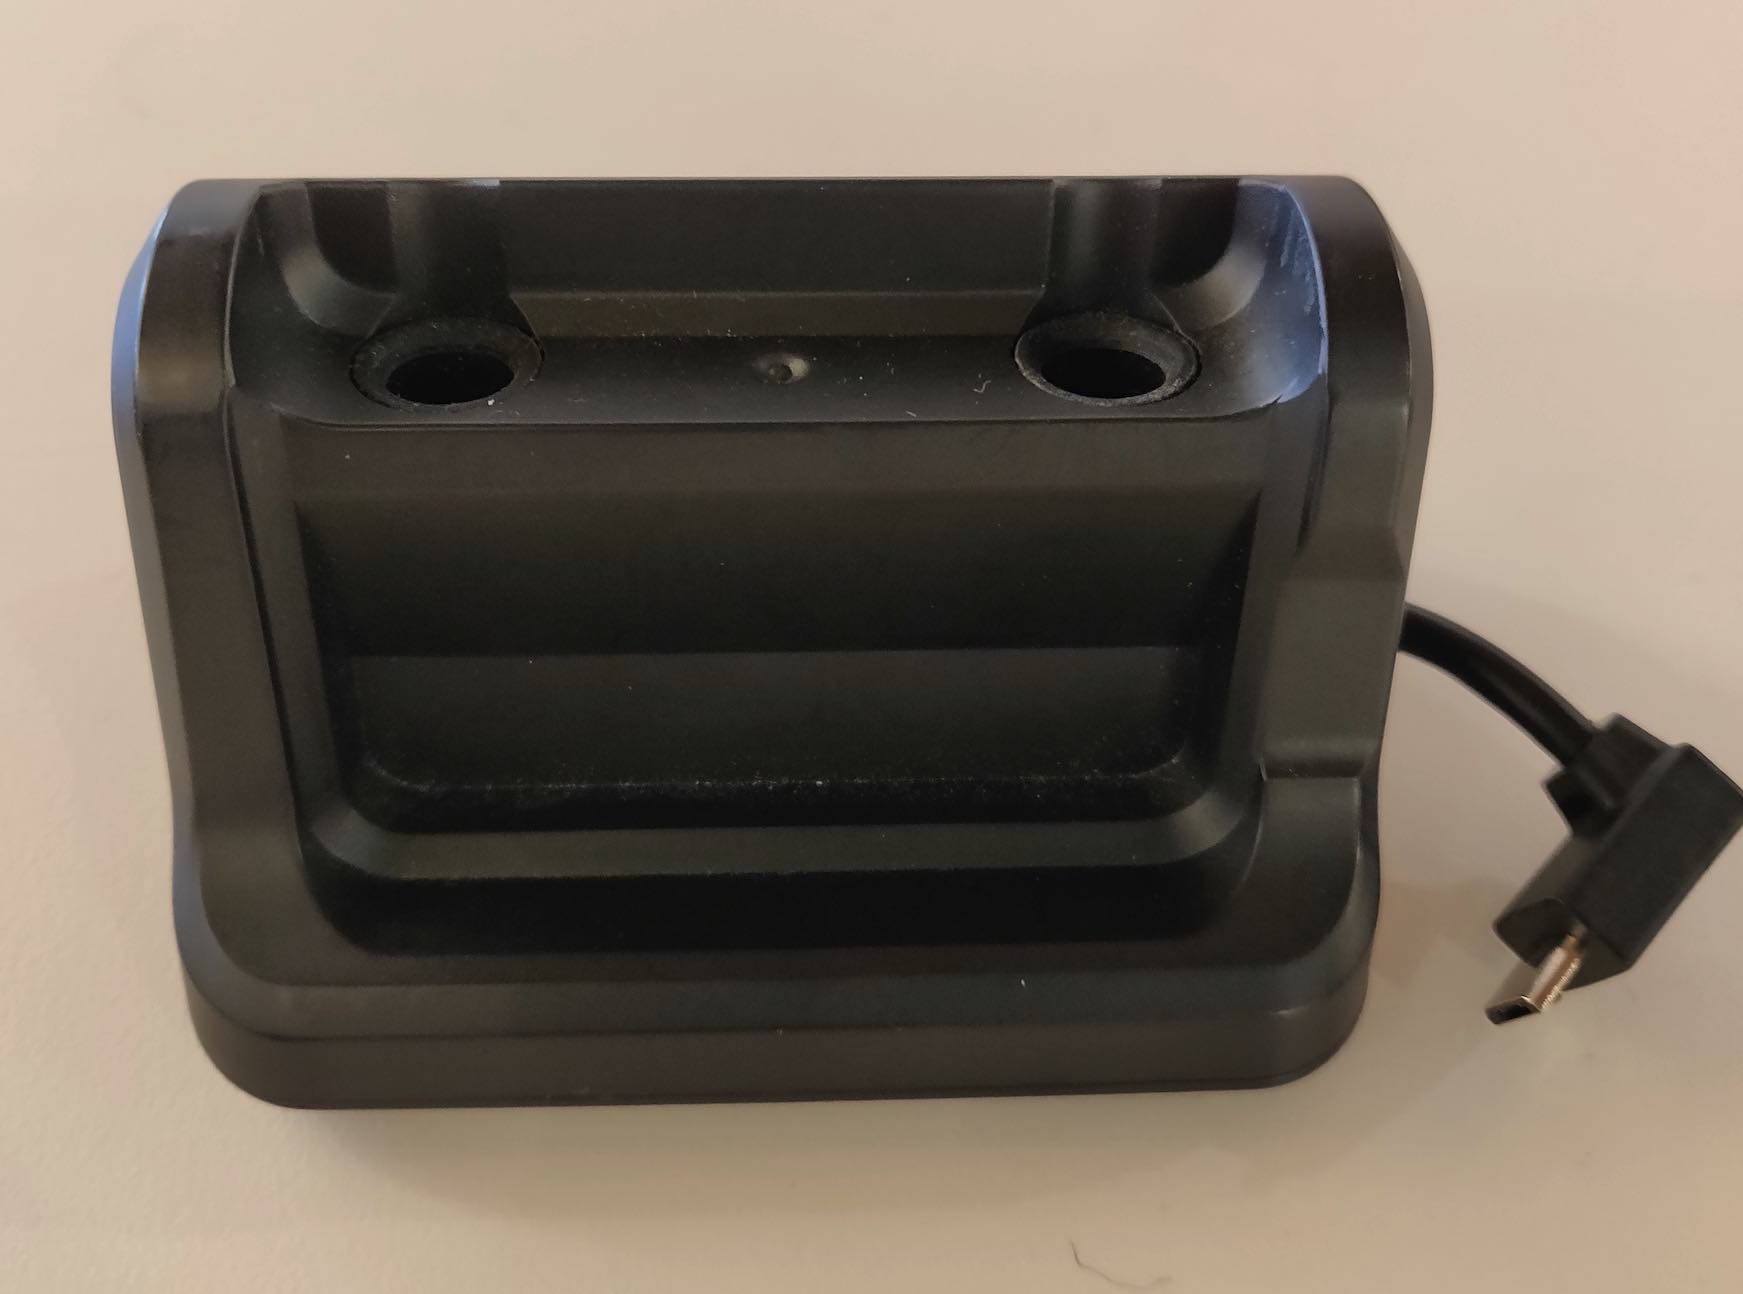
After pairing, you’re now ready to seat the payment device in its cradle.
1. Remove the payment device from the iPad’s audio jack. However, do not remove the audio jack from the payment device.
2. If you have previously installed the bumper and stabilizer, remove those before attempting to seat the payment device in the cradle.
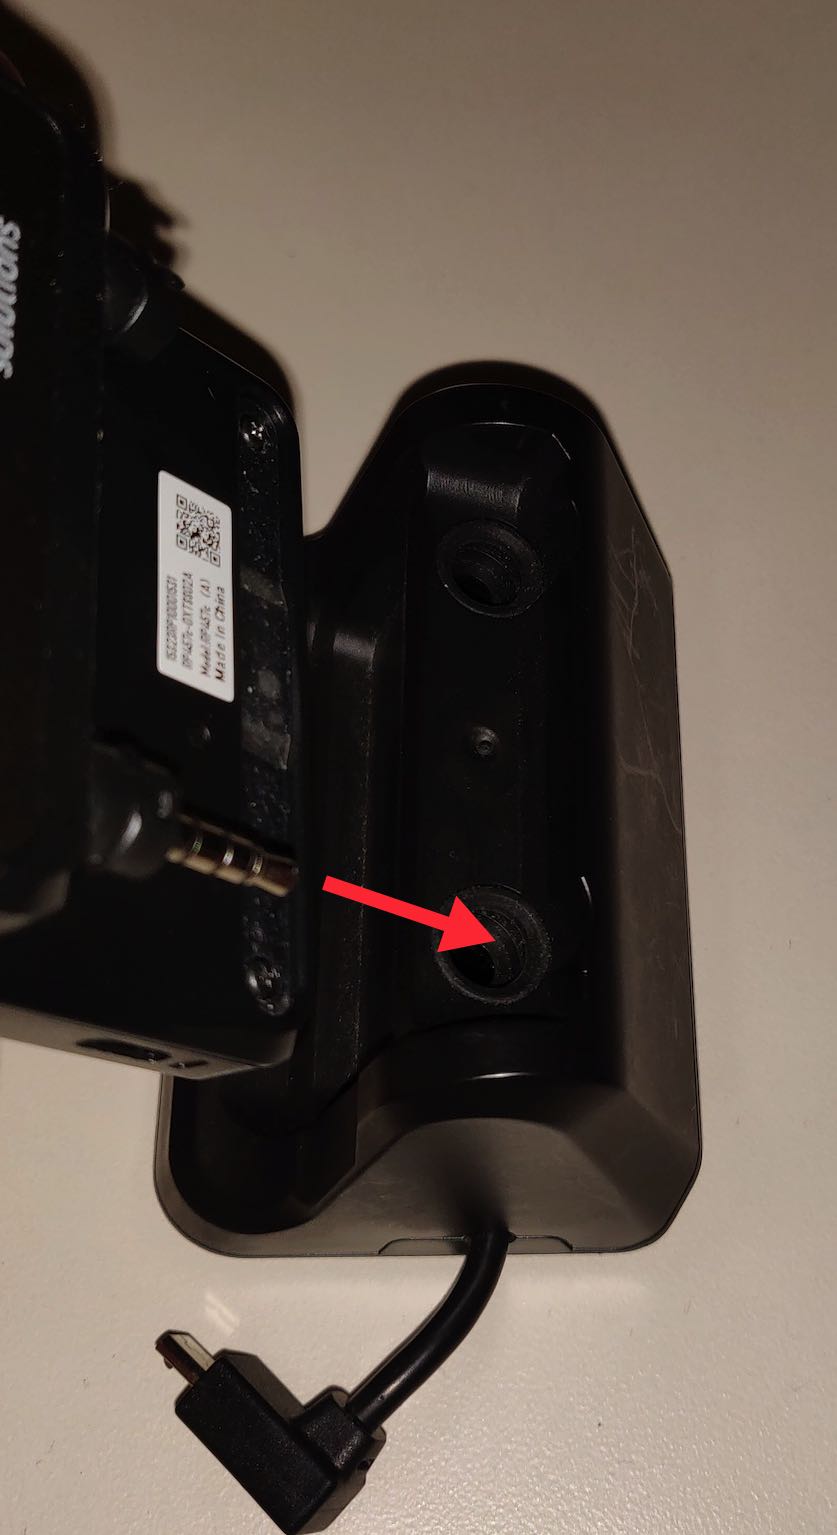
3. Insert the audio back into the cradle.
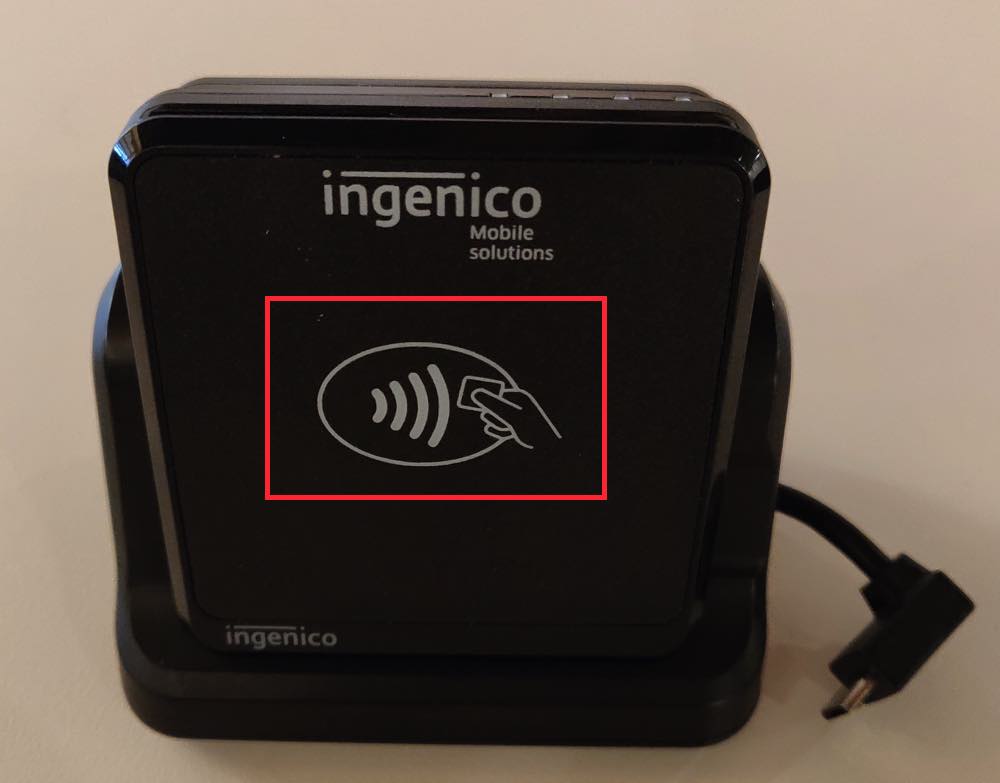
4. The flat front with the “tap to pay” symbol should be facing outwards.
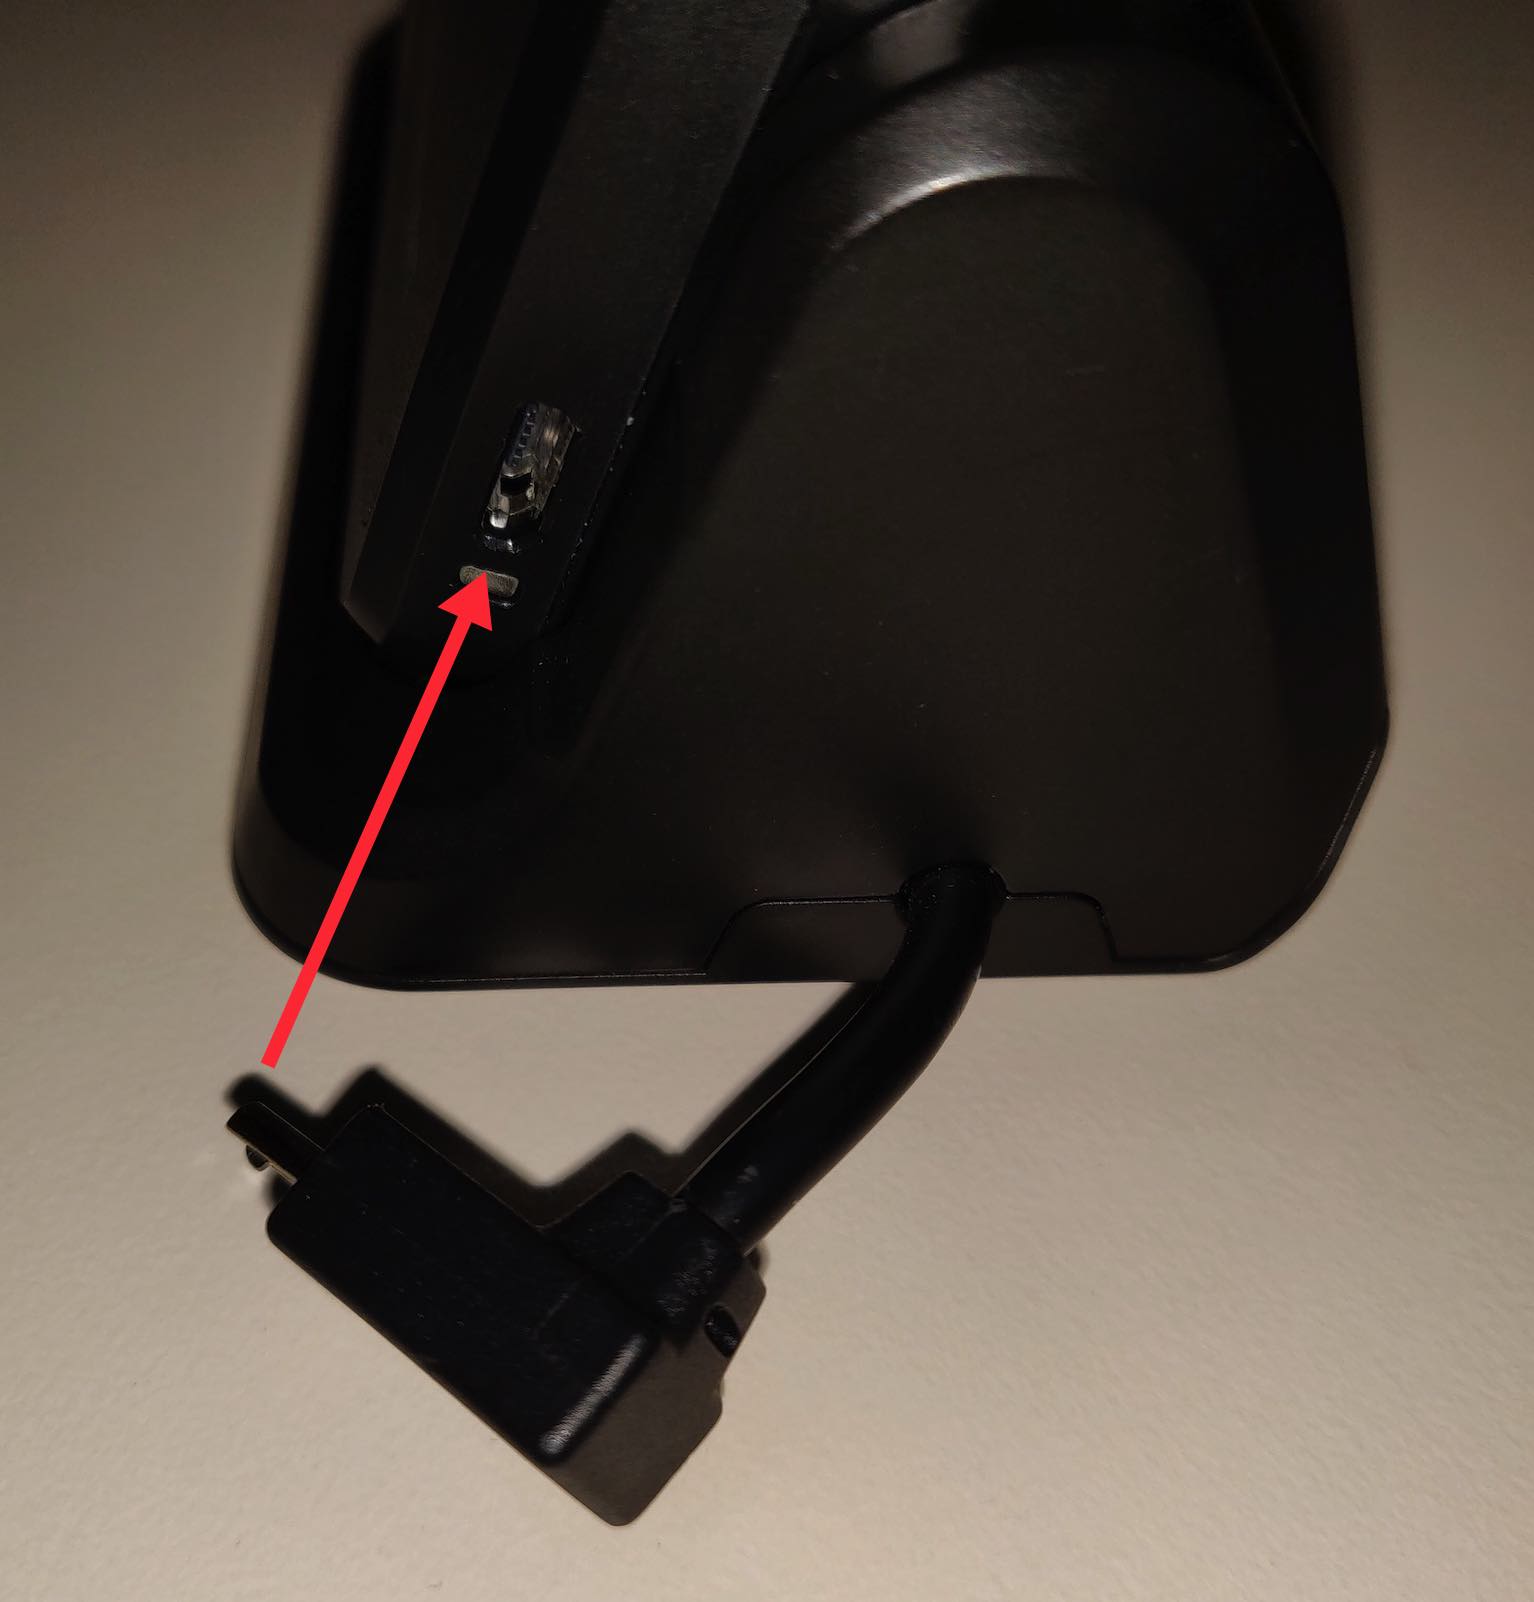
5. Plug the USB charging jack into the side of the payment device.
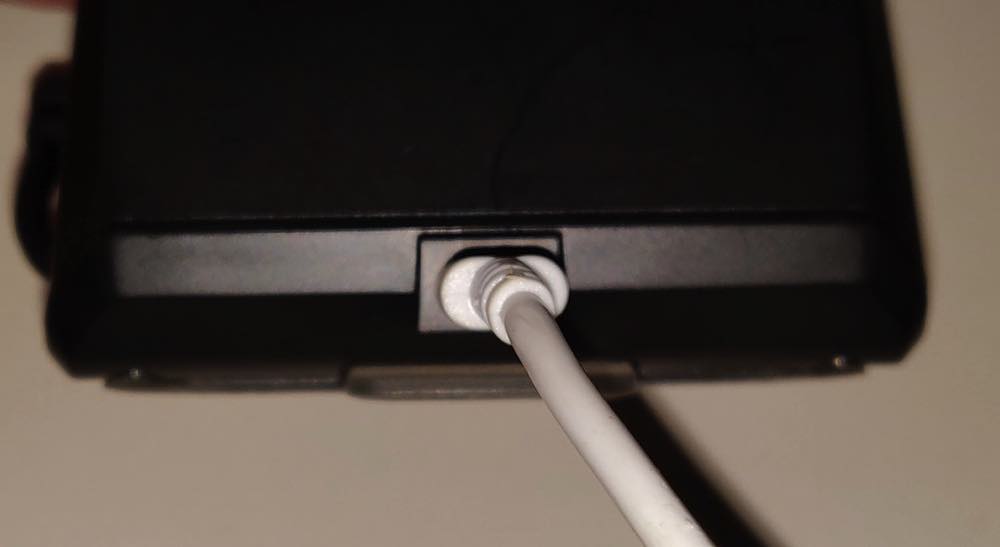
6. On the back of the cradle you can plug in a micro USB cable and then plug the micro USB cable into a source that provides continuous charging power (a USB wall socket adaptor or the back of a Star TSP100III/mC-Print3 printer). This would ensure your payment device is always fully charged.
See Next


 Email
Support
 Frequently
Asked Questions
