Setting Up your Star Micronics mC-Print3 TouchBistro Thermal Receipt Printer for LAN Mode
Table Of Contents
Chapter 2. Forgetting the Printer
Chapter 3. Connecting the mC-Print3 Printer to Your TouchBistro Router
Chapter 4. Set Up Your mC-Print3 Printer in TouchBistro
Chapter 5. Printing via LAN and Lightning Mode
Chapter 1. Loading Paper
Ensure you’ve loaded paper before pairing.
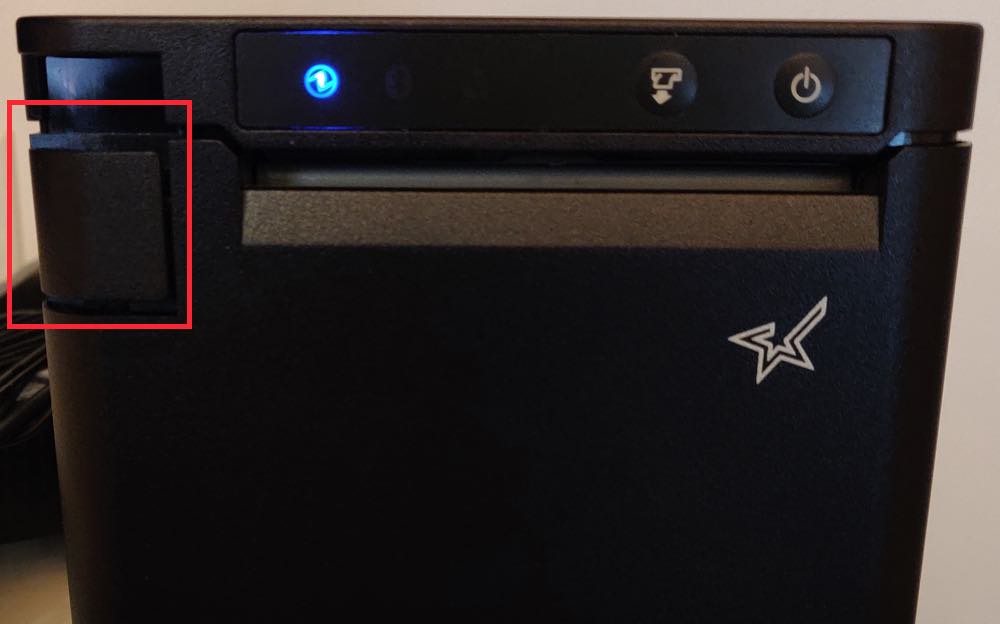
1. Pull the panel level forward to open the paper compartment.
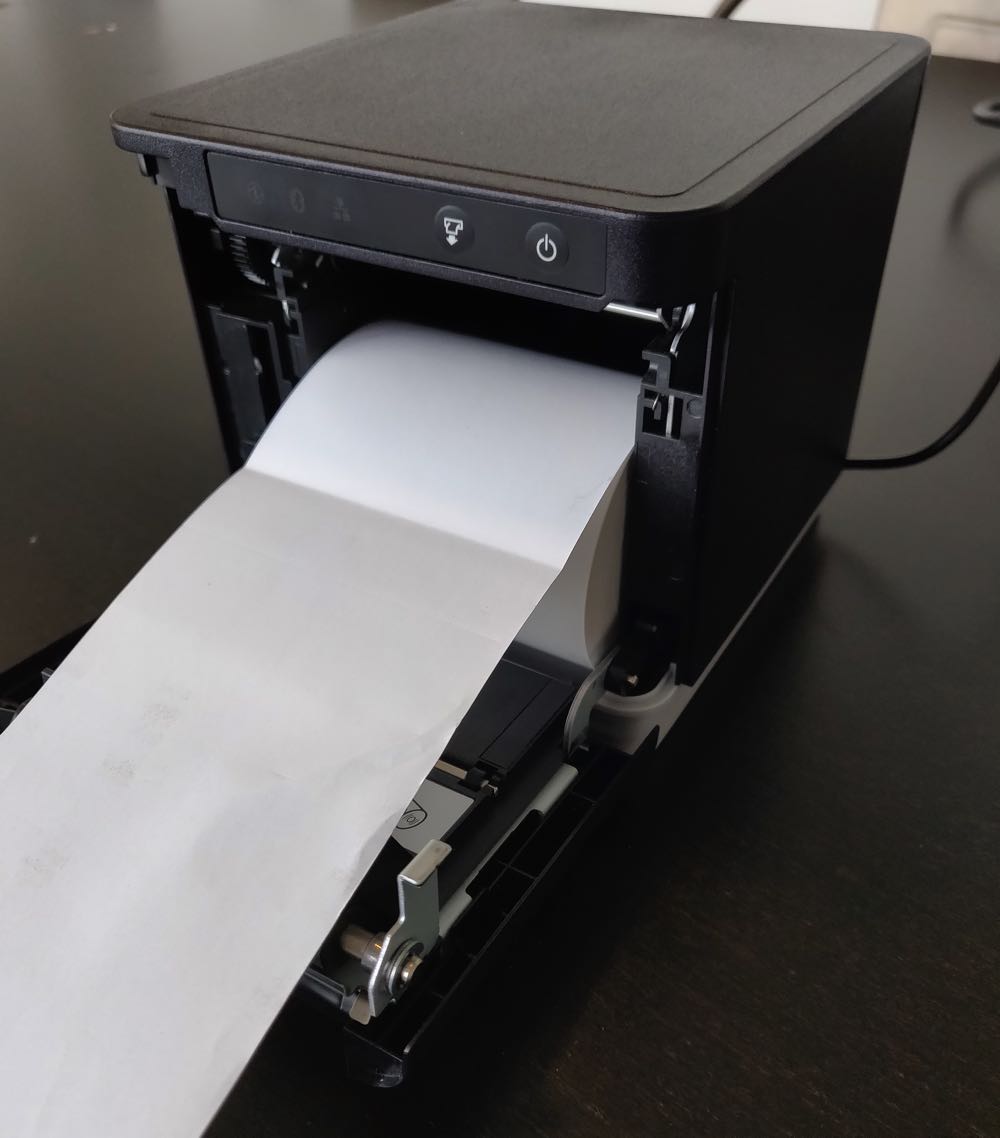
2. Load the paper as illustrated. If you’re familiar with the Star TSP100III/II series, the paper gets loaded in the opposite manner. It’s fed from the top, versus from the bottom of the roll.
Chapter 2. Forgetting the Printer
If you have previously used the mC-Print3 in Bluetooth Mode and you are now trying to use it in LAN Mode, you should first forget the pairing via the iPad its paired with. To do this:
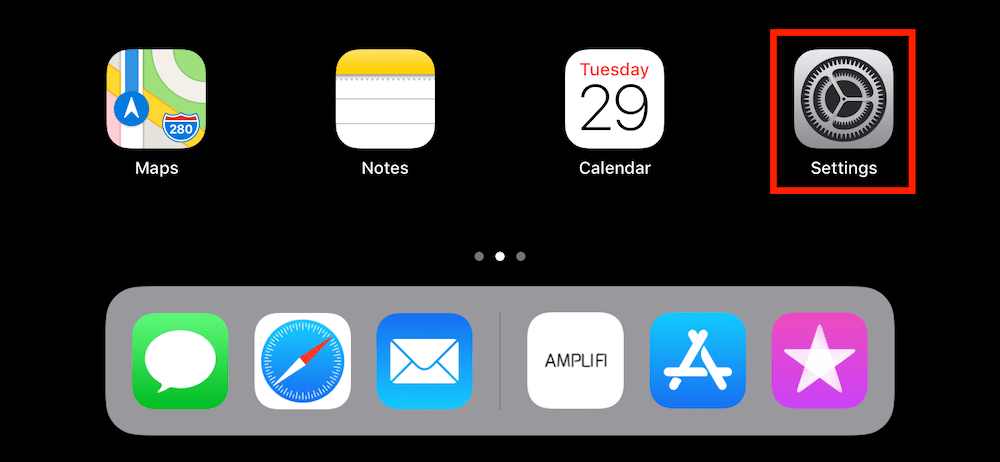
1. On your iPad, tap Settings.
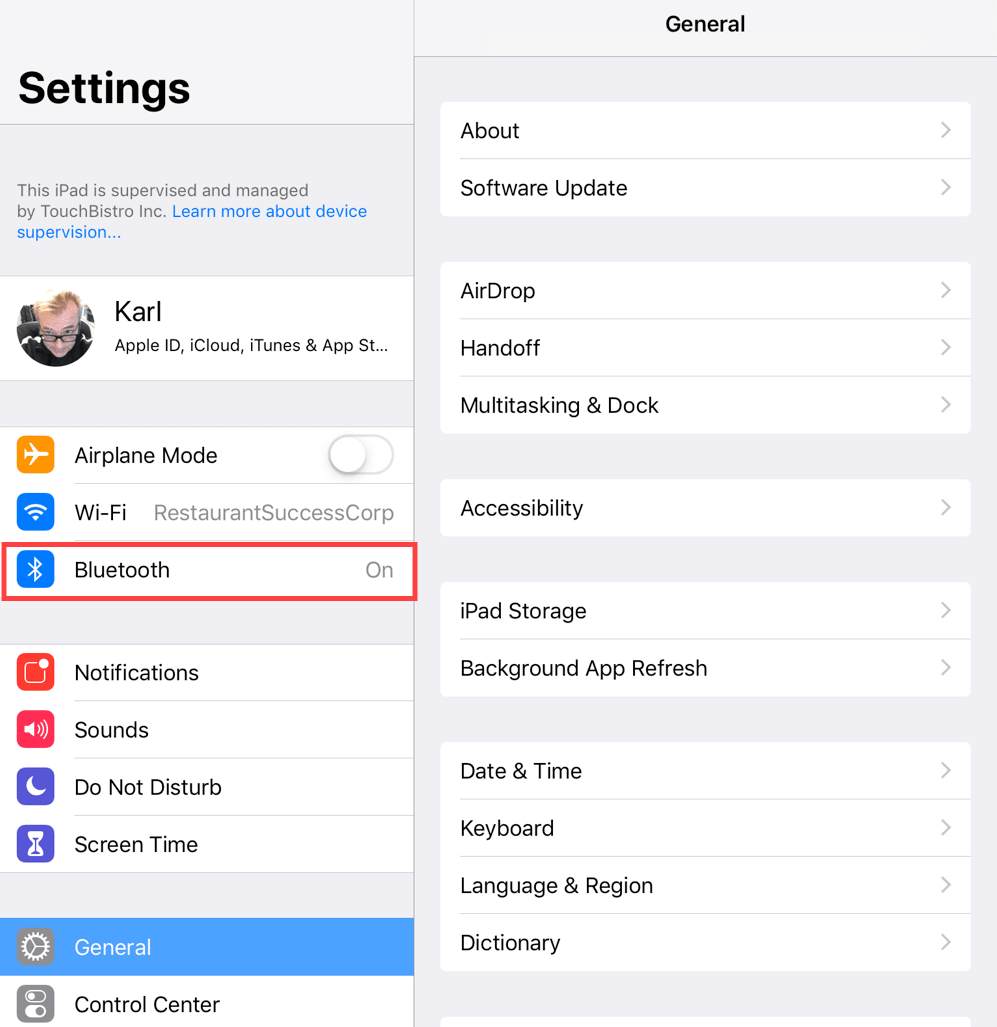
2. Tap Bluetooth.
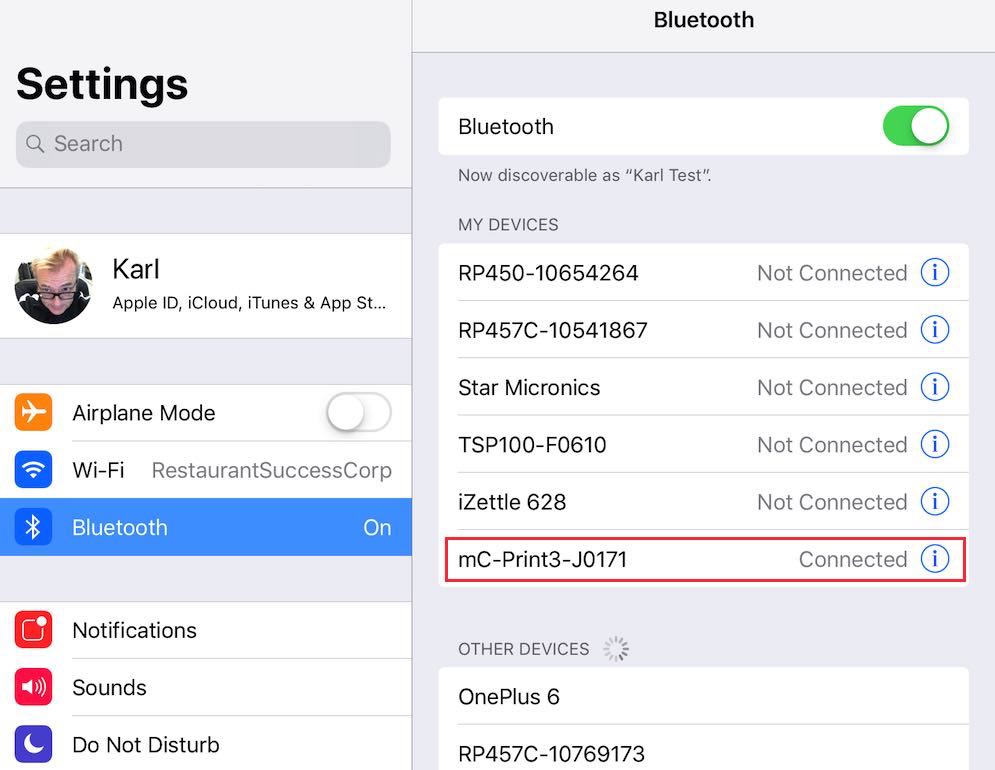
3. Tap the Information ![]() icon associated with your paired printer.
icon associated with your paired printer.
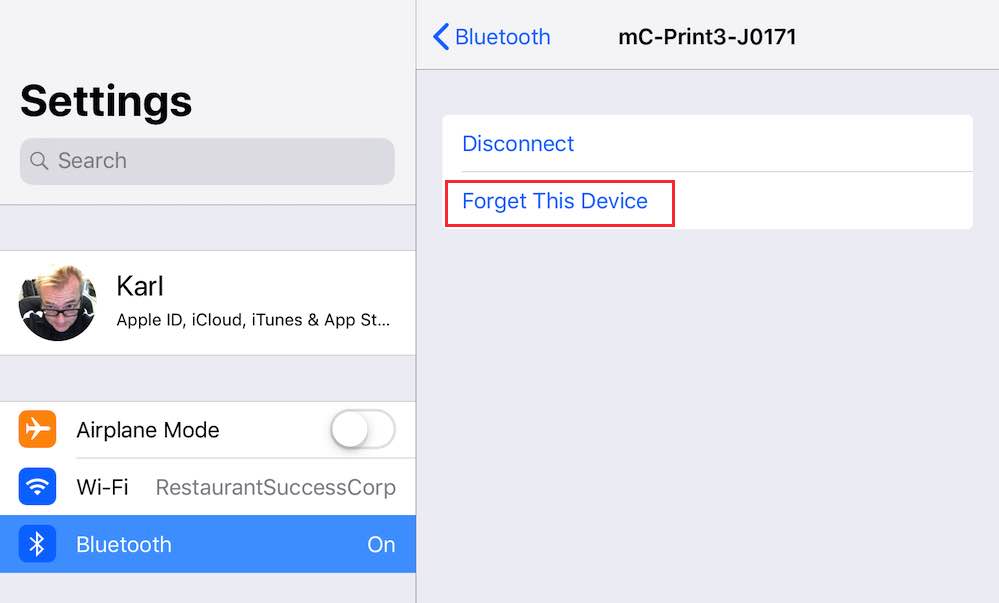
4. Tap Forget this Device.
Chapter 3. Connecting the mC-Print3 Printer to Your TouchBistro Router
1. Ensure your printer’s power cable is plugged in and plugged into an electrical socket.
2. Ensure your printer is turned off.
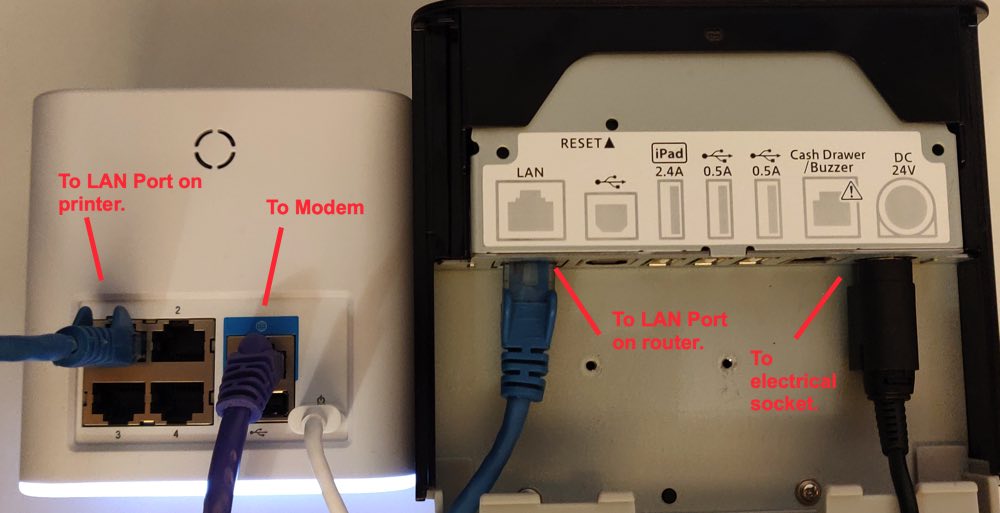
3. Plug the Ethernet cable into the LAN port on your printer.
4. Plug the Ethernet cable into one of your router’s LAN ports. These are numbered 1-4 on your Ubiquiti router.
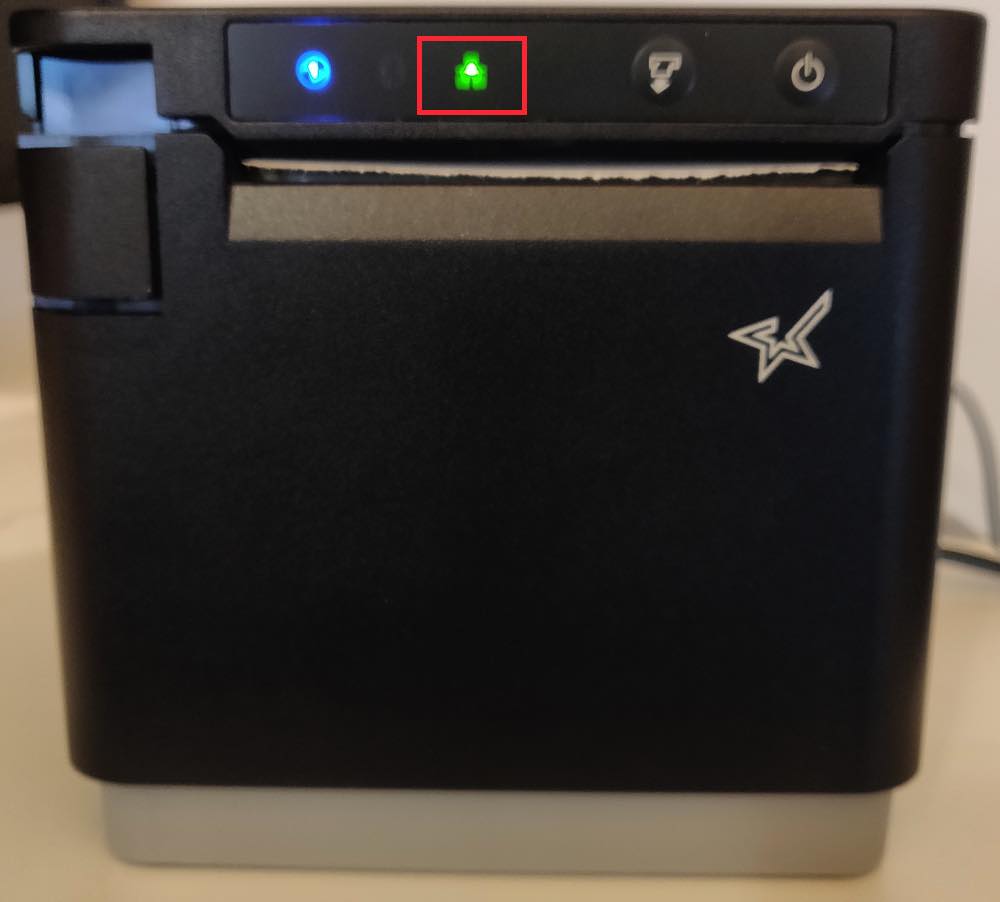
5. Turn the printer back on. After a few seconds, you should see the Ethernet Connection status light turn green indicating the printer has a working connection to your router. If this is not green, then check all cables have been plugged in snuggly.
Chapter 4. Set Up Your mC-Print3 Printer in TouchBistro
1. Open TouchBistro.
2. Load the venue’s restaurant.
3. Log in as Admin.
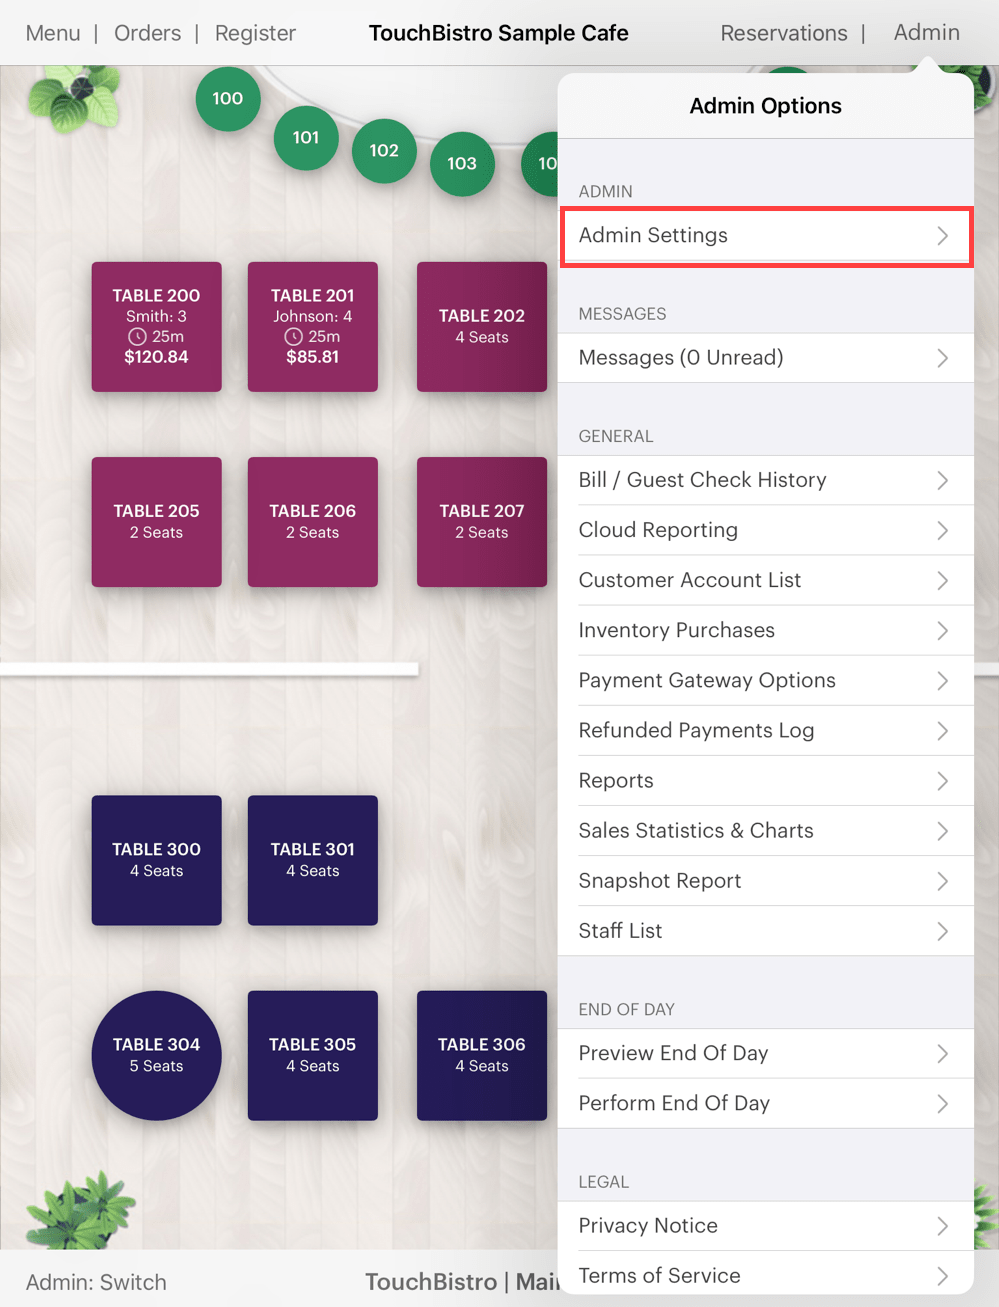
4. Tap Admin | Admin Settings.
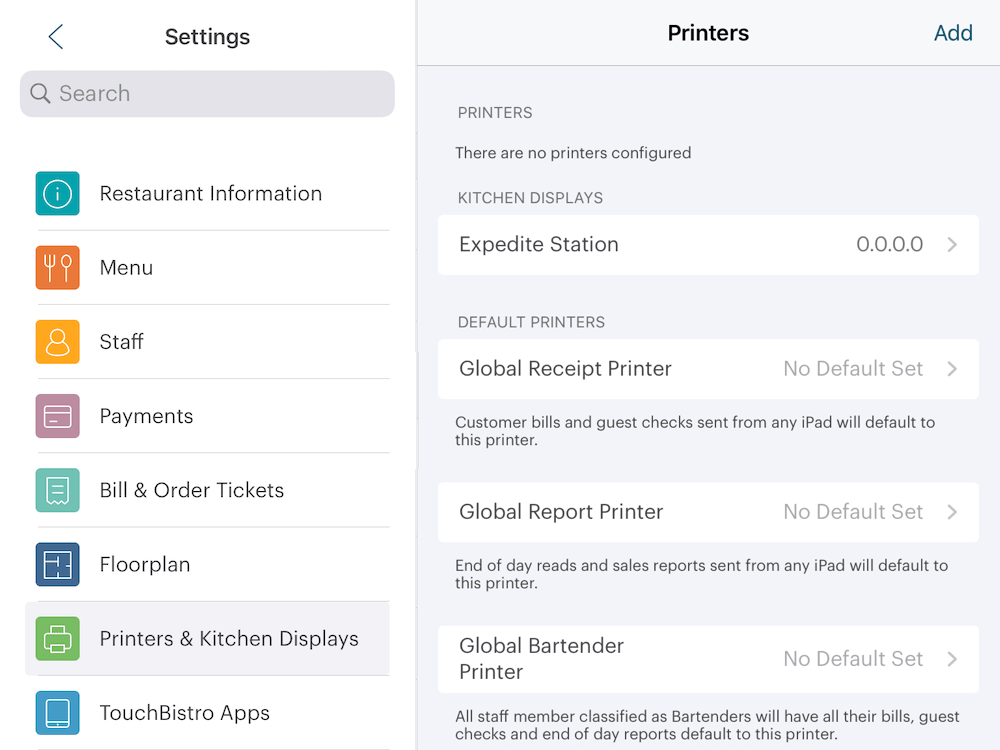
5. Tap Printers & KDS.
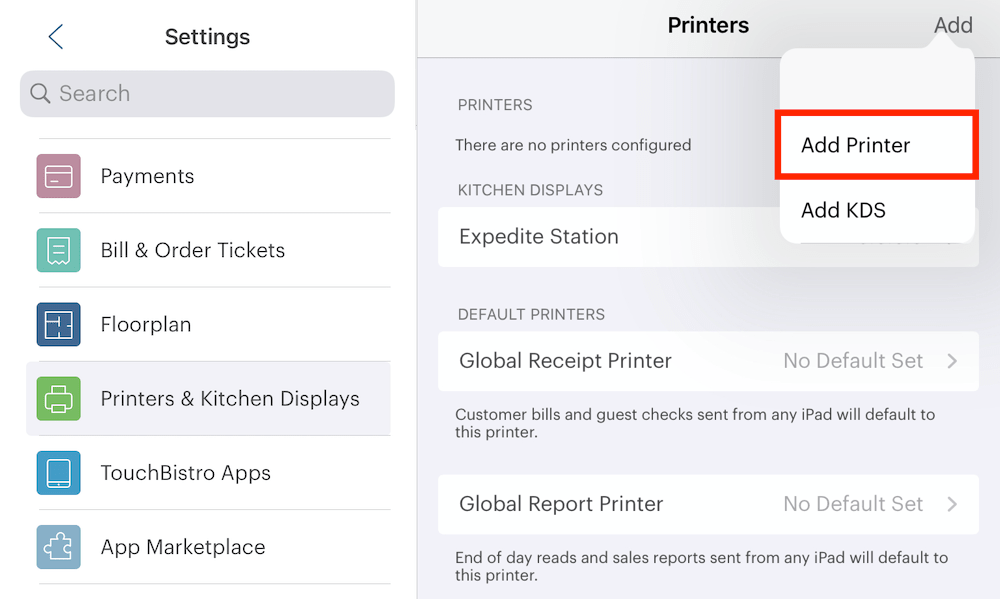
6. Tap Add Printer to add a new printer.
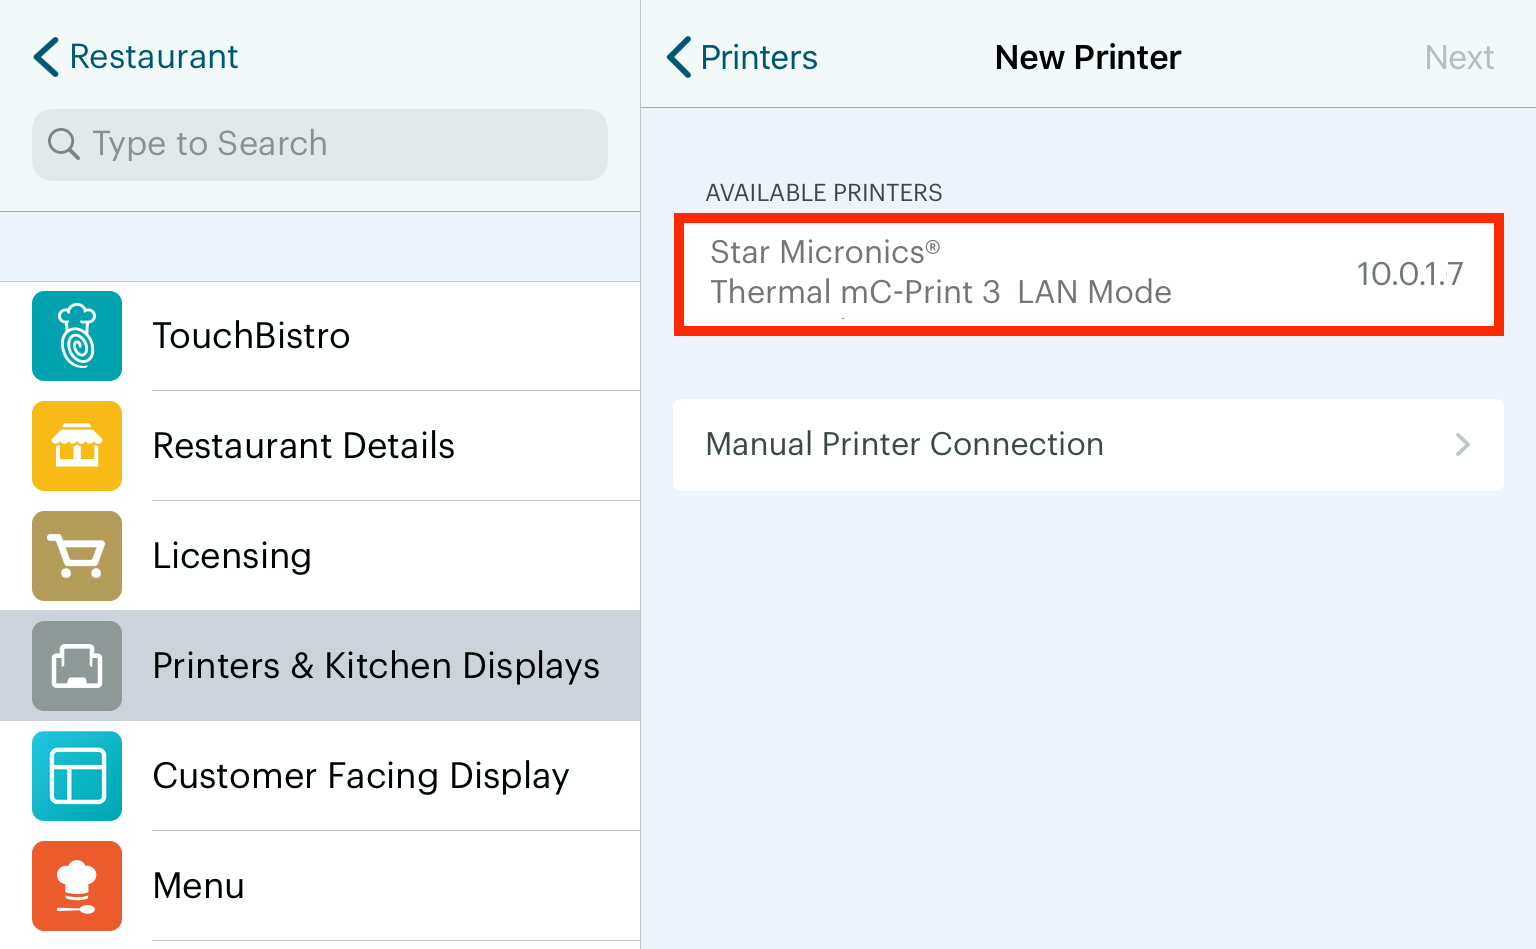
7. Wait a few moments for your printer (or printers) to appear in the New Printer screen. Tap your printer in the Available Printers list.
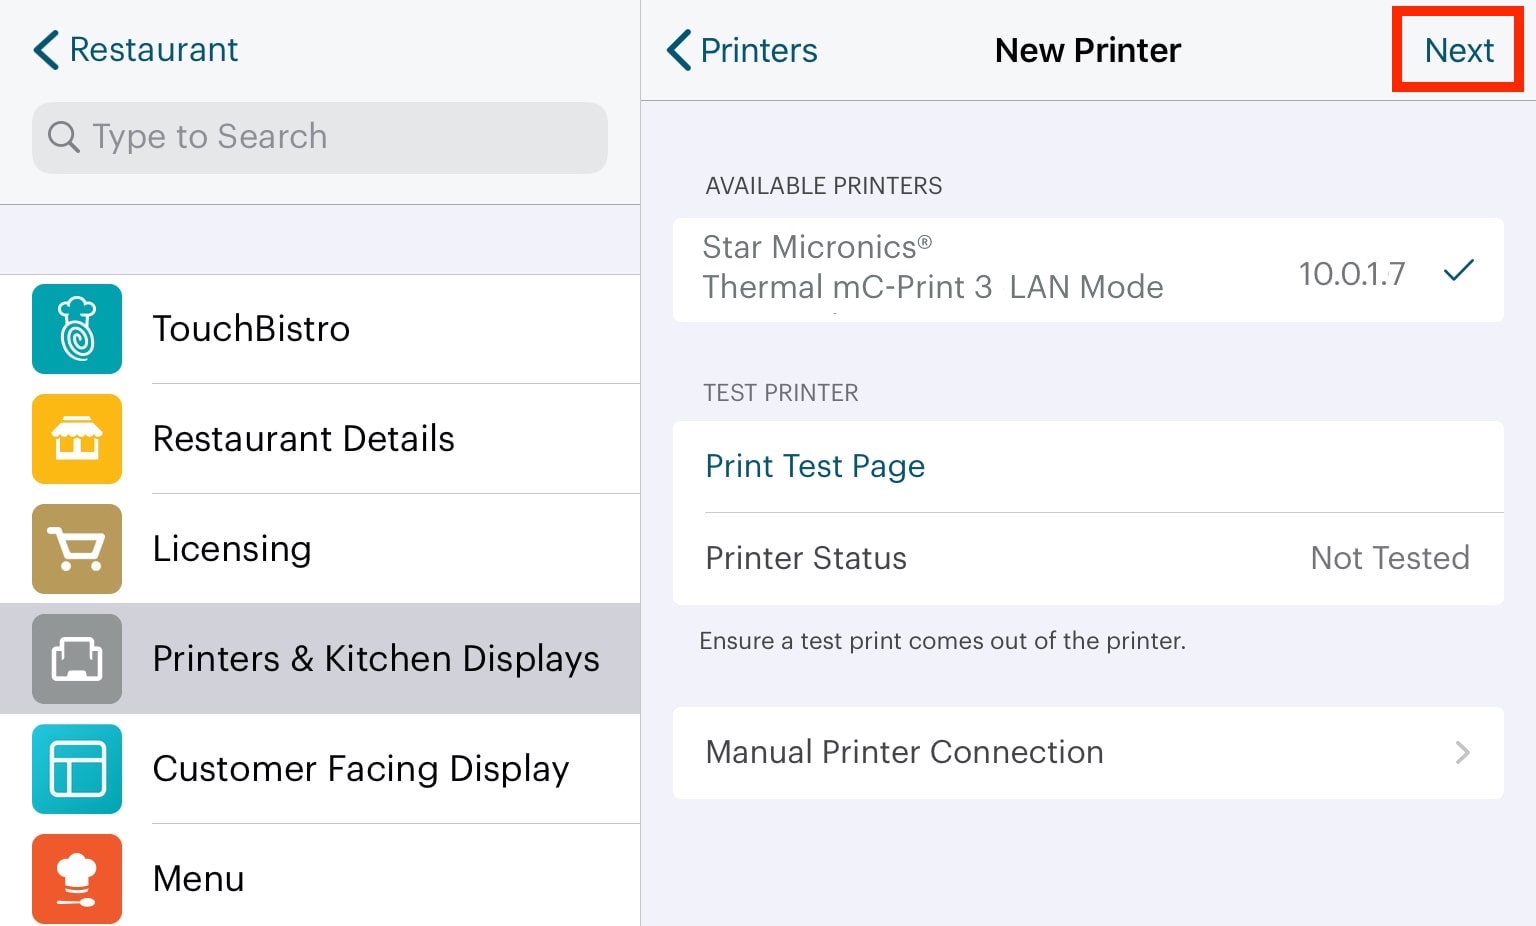
8. After selecting your printer, tap Next.

9. Tap Printer Name.
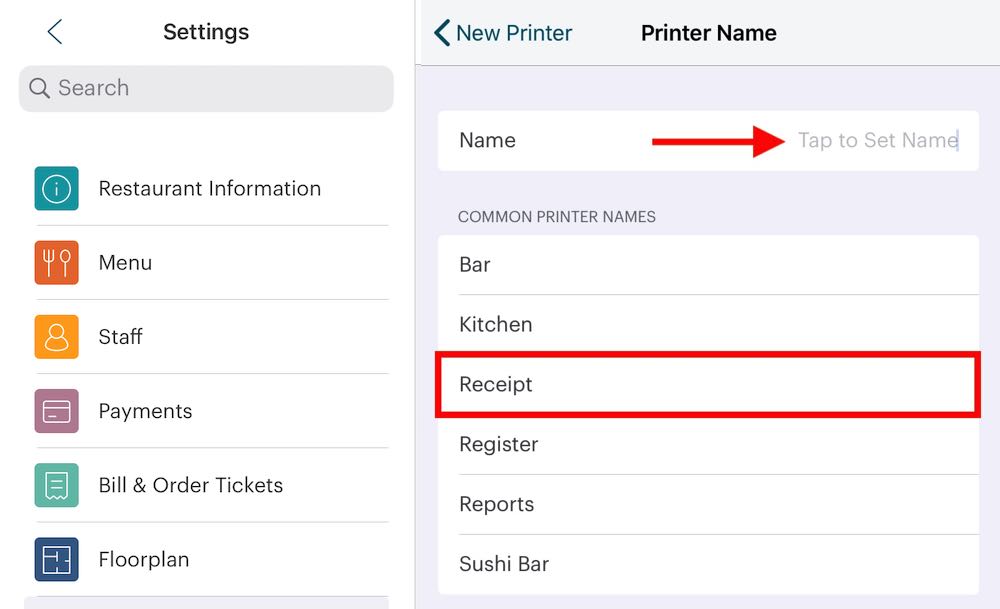
10. Either type a name for your new printer in the Name field, or make a selection from the list, for example Receipt.
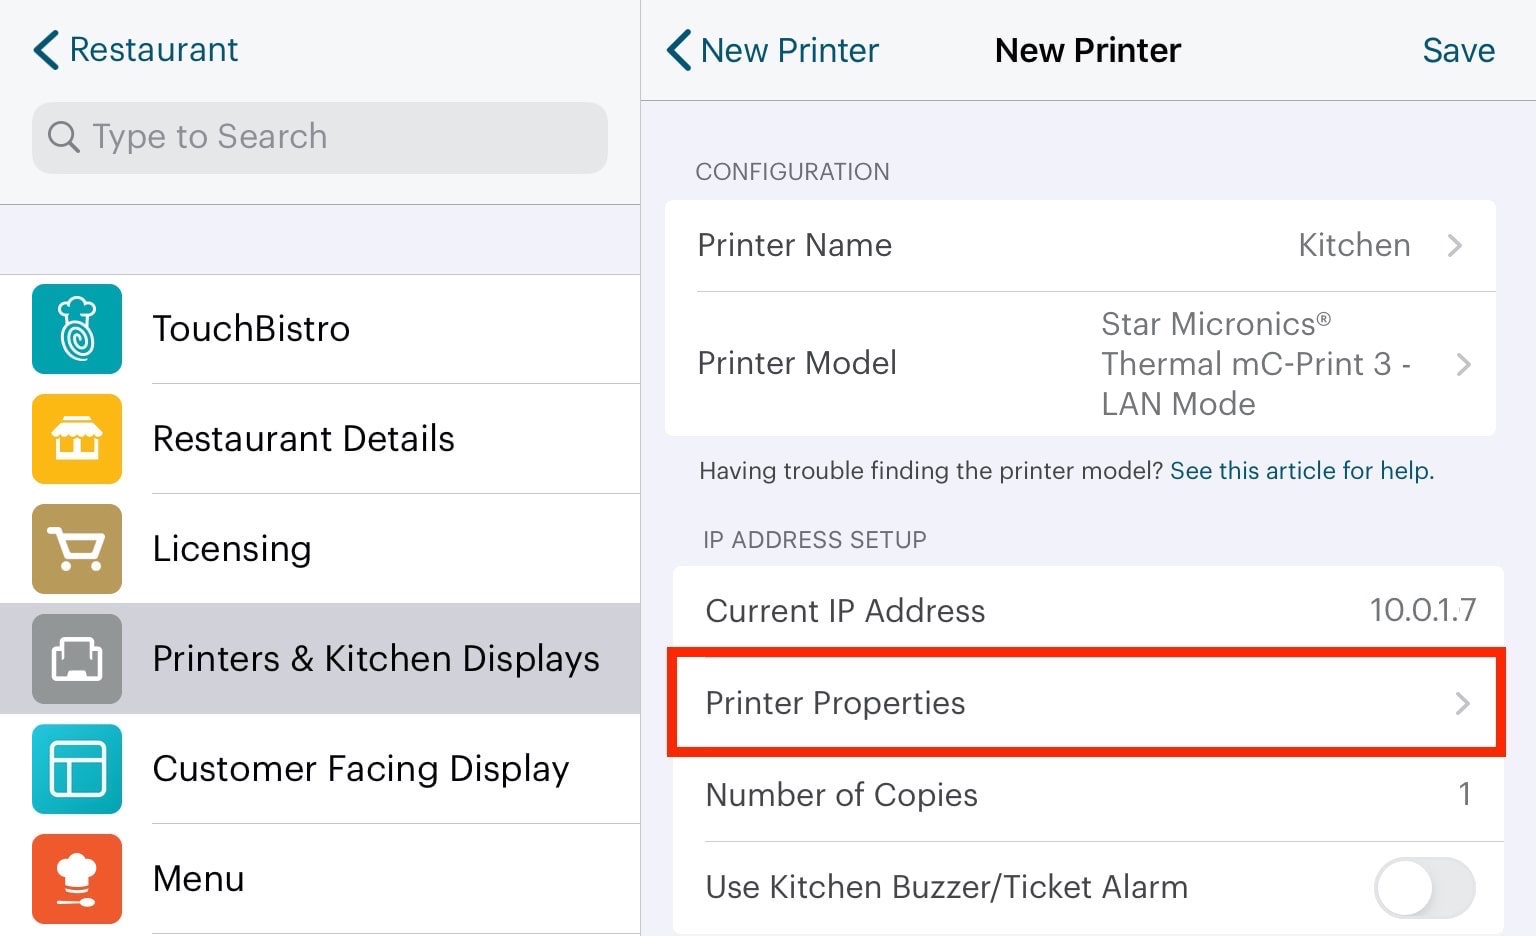
11. Tap Printer Properties.
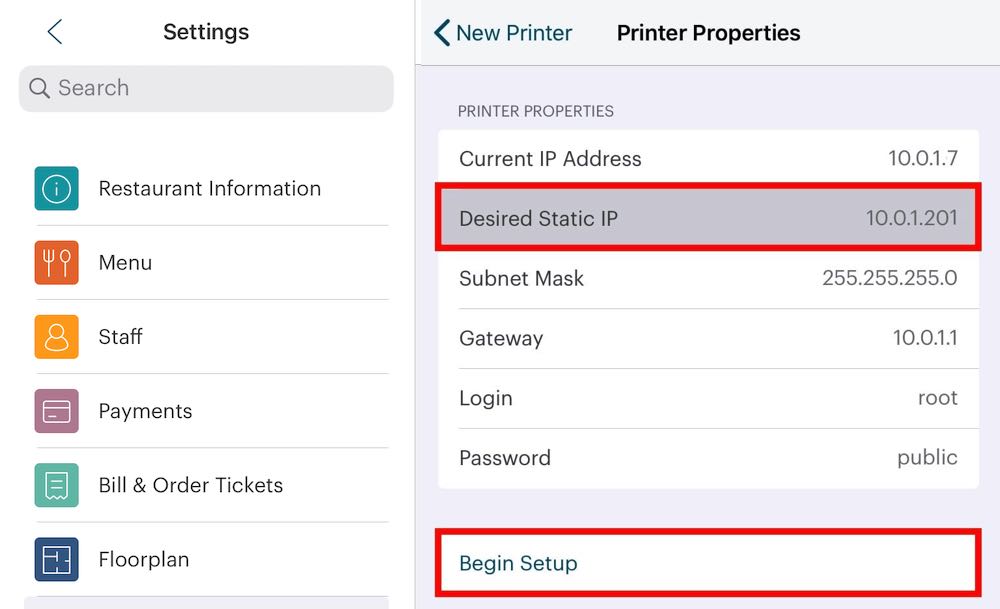
12. In the Printer IP field, enter the desired static IP, for example enter 10.0.1.201. Note: If you add an additional printer later, increment the final portion of the IP address by 1 for the new printer. For example, if later you add a kitchen printer, enter 10.0.1.202 for the kitchen printer. If you add a third printer, say a patio printer, 10.0.1.203. It’s important to not duplicate an IP address or enter an IP address less than 201.
13. Tap Begin Setup.
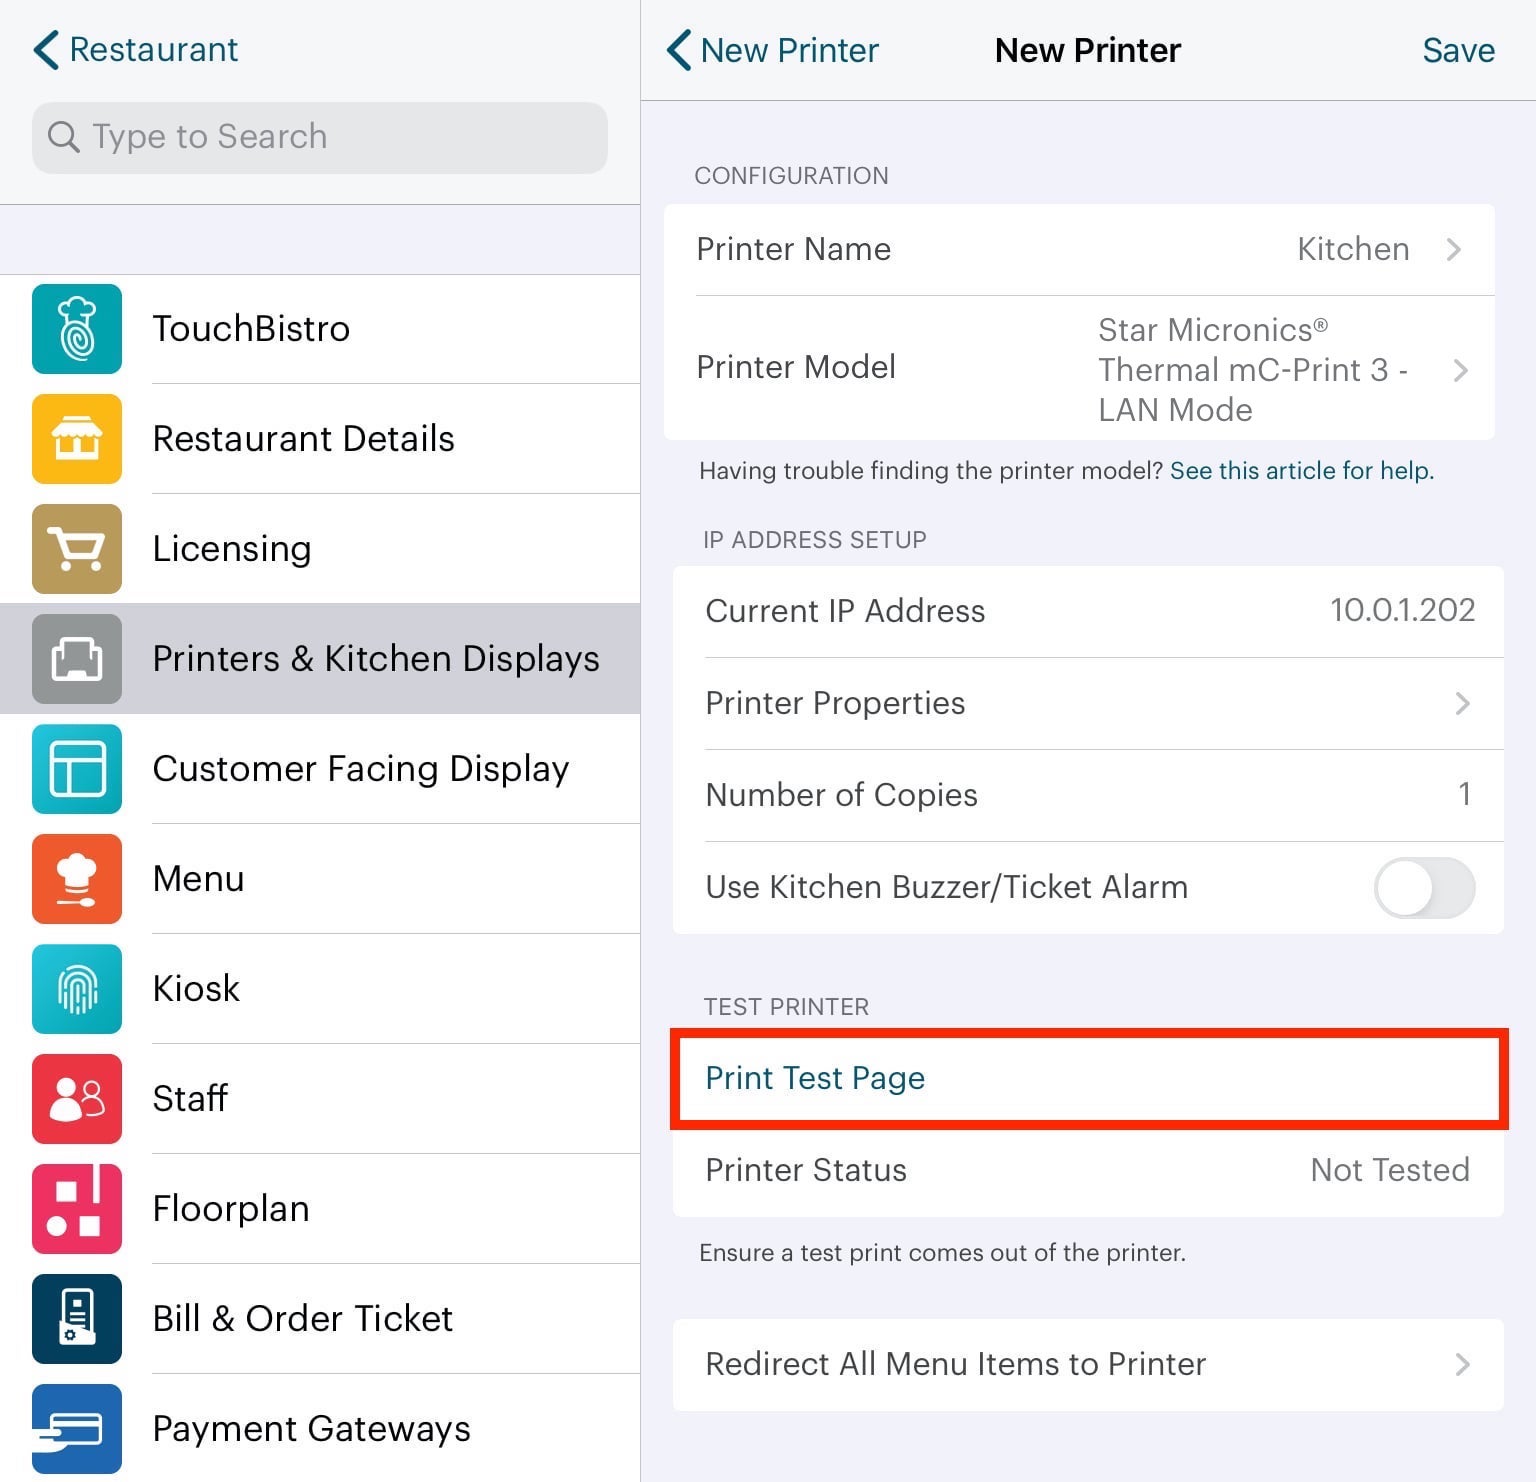
14. Tap Print Test Page.
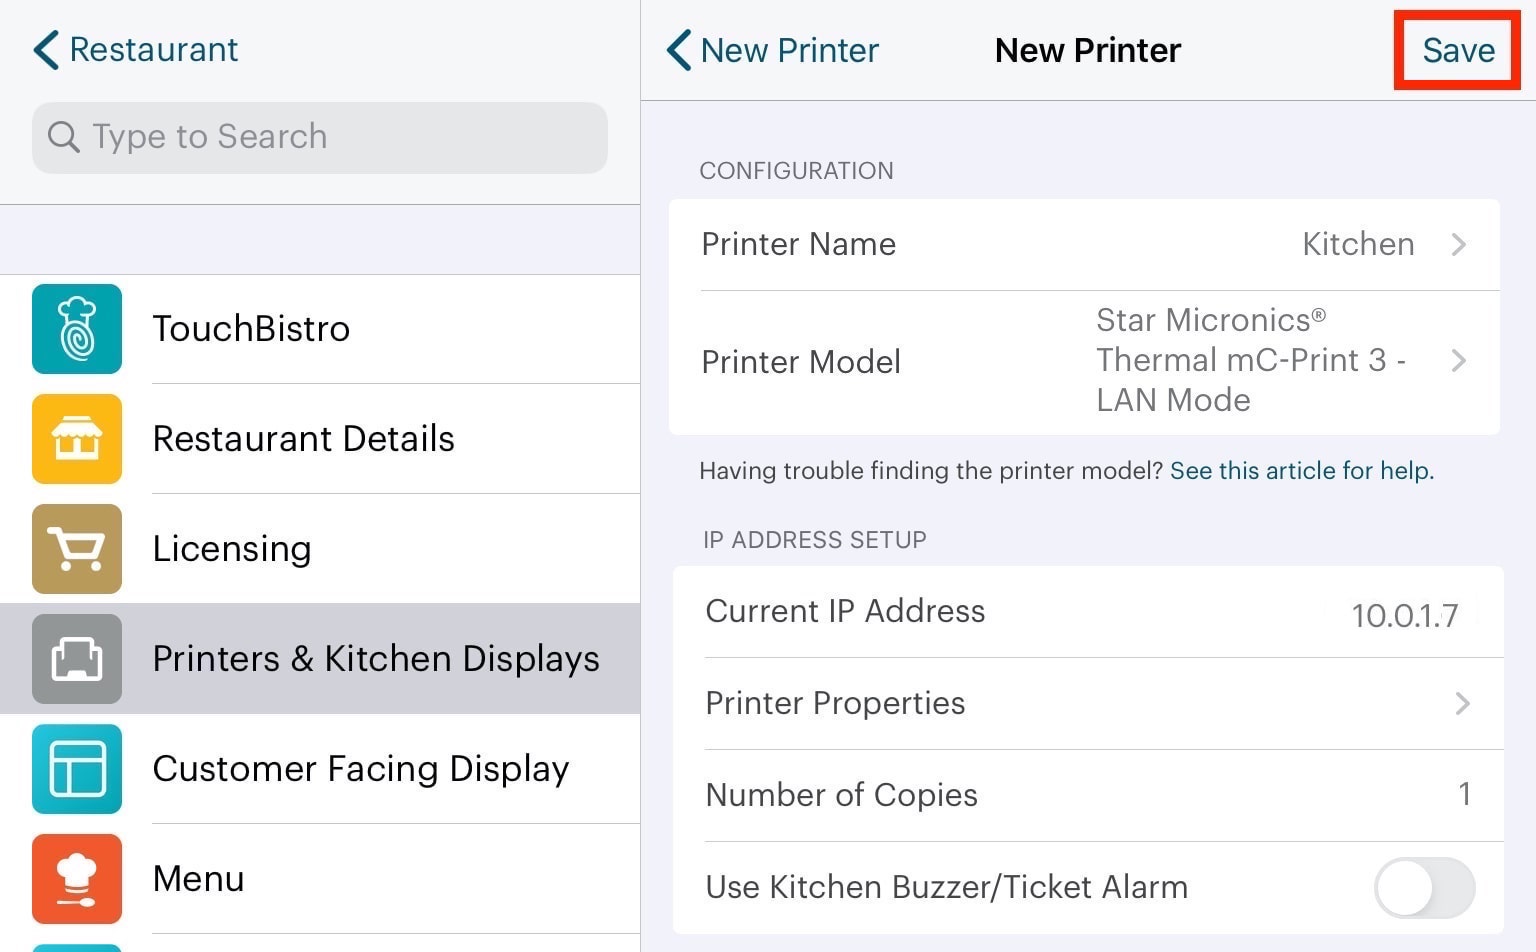
15. Tap Save.
Chapter 5. Printing via LAN and Lightning Mode
It is possible to have different iPads printing to the mC-Print3 printer, some using LAN mode and one using Lightning mode. There’s an alternative situation where you may have iPads running TouchBistro printing to the mC-Print3 printer in LAN mode and you have an iPad running a third party online ordering app printing to the mC-Print3 printer using the lightning cable. This should work but please be advised TouchBistro has not tested this and we can make no guarantee TouchBistro and a third party app can share this printer error free.
Section 1. Enable Safe Printing Mode
If you plan to print to the mC-Print3 printer using mixed modes, we advise enabling Safe Printing mode on all iPads set for LAN mode. To enable Safe Printing, do the following:

1. Tap Admin | Admin Settings on the top right.
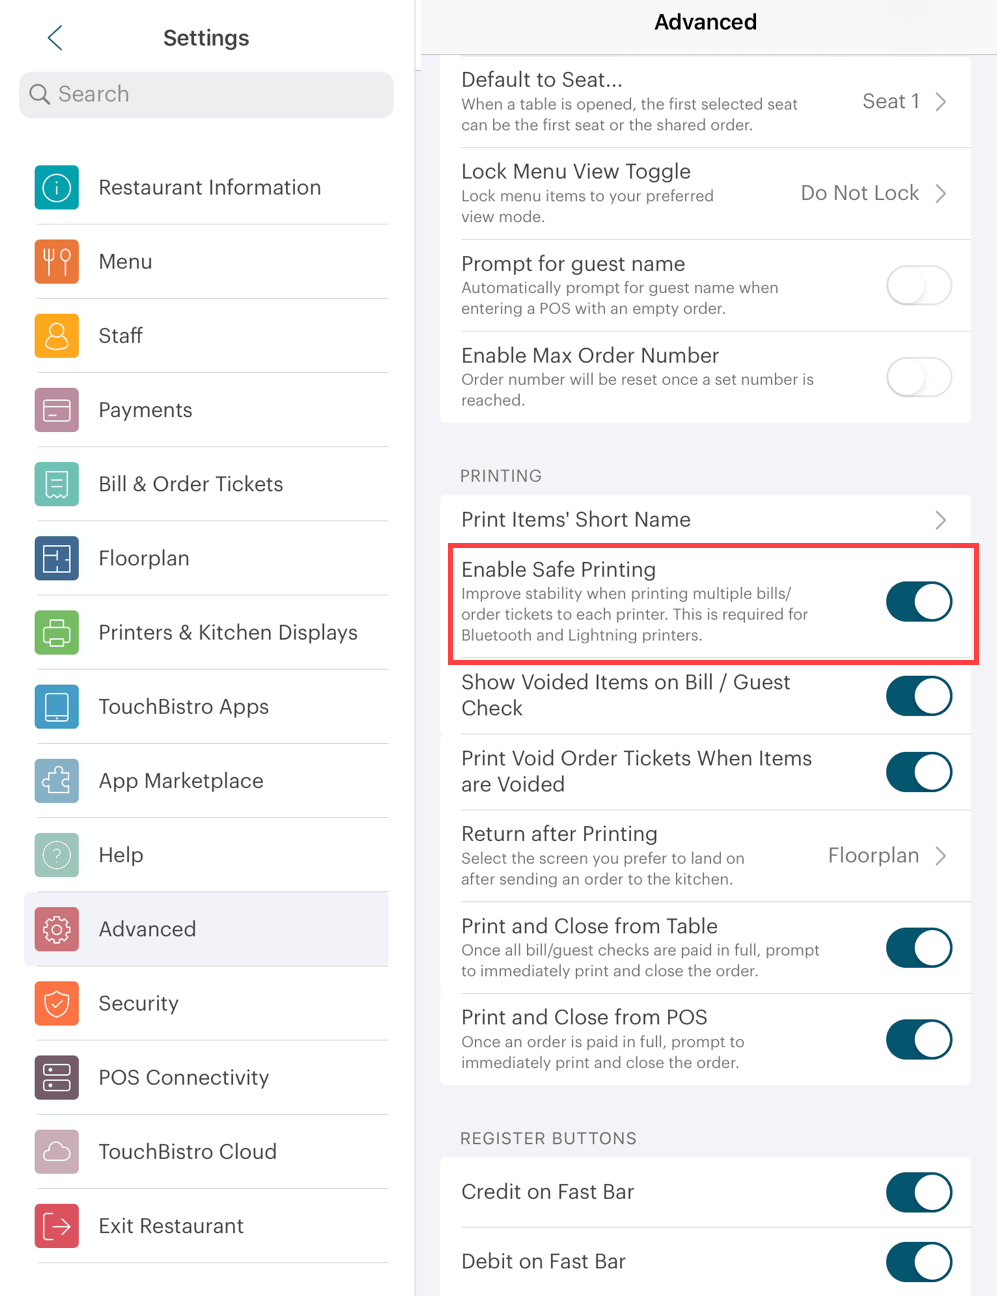
2. Tap Advanced and ensure Enable Safe Printing is enabled.
Chapter 6. Ports
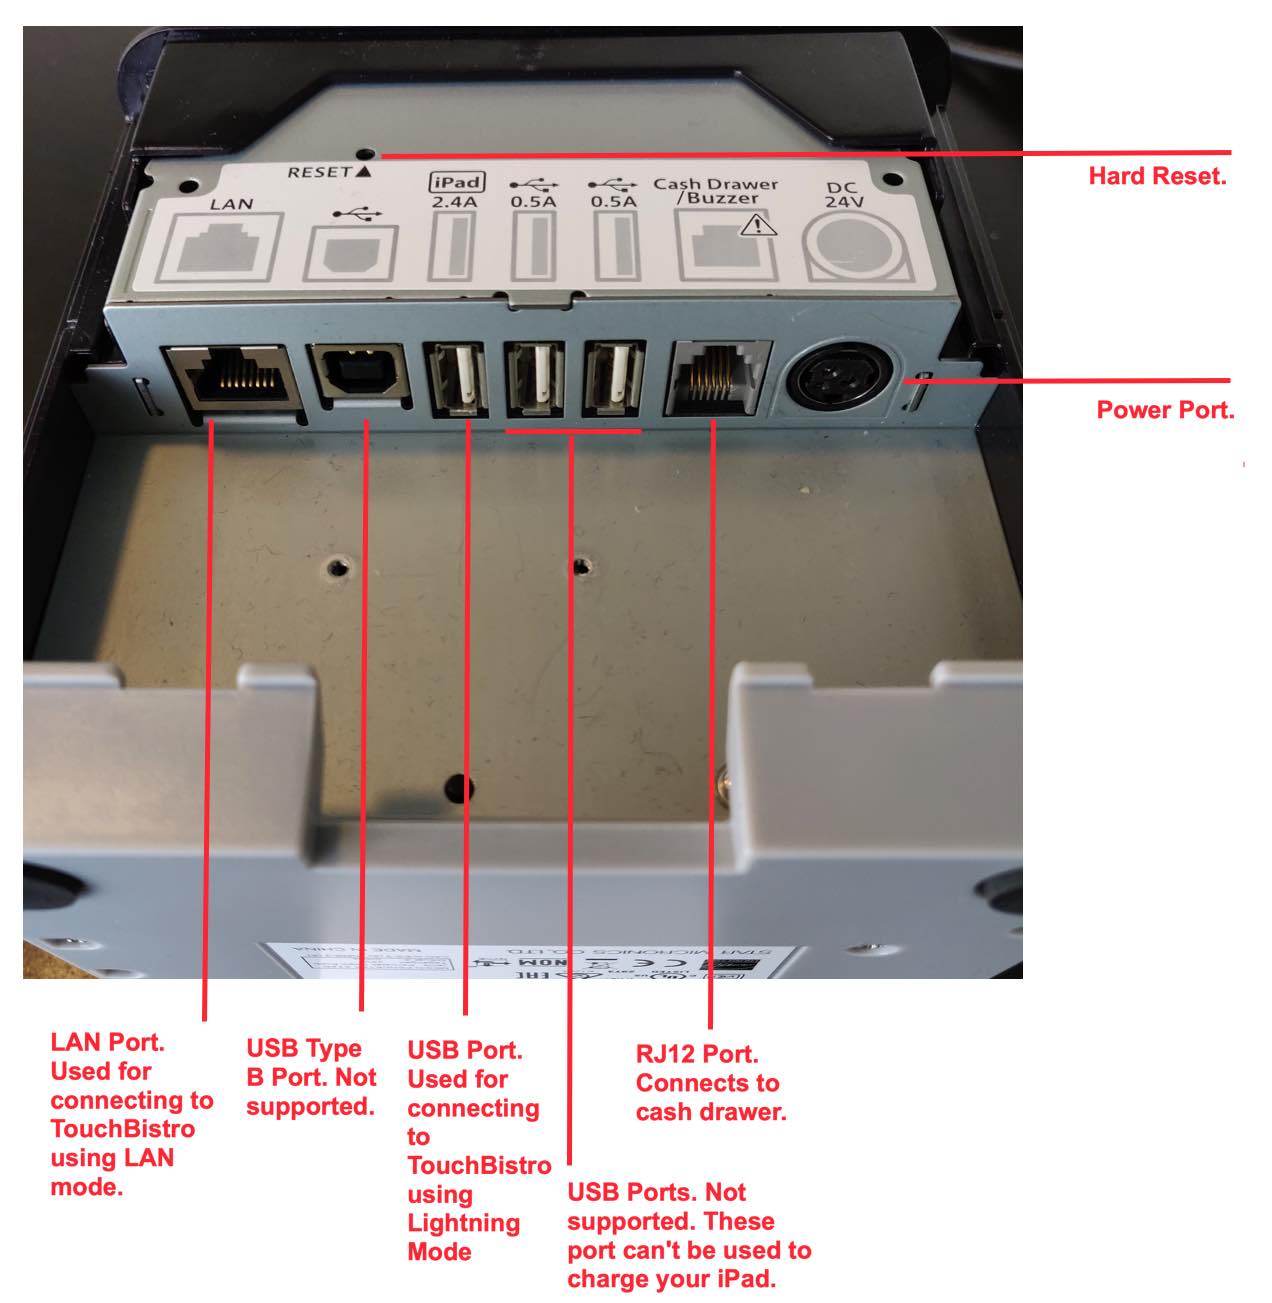
Hard Reset: If you return your printer to DHCP mode, you can use the Hard Reset button to clear your printer’s memory and reset any previous connection setting.
Power: Connect your power cable to this port.
LAN: Connects the printer to your router via a Cat5e Ethernet cable. This port is used if you’re going to use your mC-Print3 printer in LAN mode.
USB Type B: This style of USB port is not used by TouchBistro or iPad devices.
USB Port (iPad, 2.4 Amps): This port is used if you’re going to use your mC-Print3 printer in Lightning mode. It can also be used to supply power and charge an iPad.
USB Port (0.5 Amps): These ports are not used by TouchBistro. They only provide .5 amps and can’t be used to charge an iPad. However, they may provide enough amps to power a Bluetooth payment device like the TB Payments device.
RJ12 Port: The mC-Print3 can be used to open an automatic cash drawer. Plug the RJ12 cable’s “to printer” end into this port.
Chapter 7. Reset
If you wish to return your printer to DHCP mode, do the following:
1. Ensure your printer is powered off.
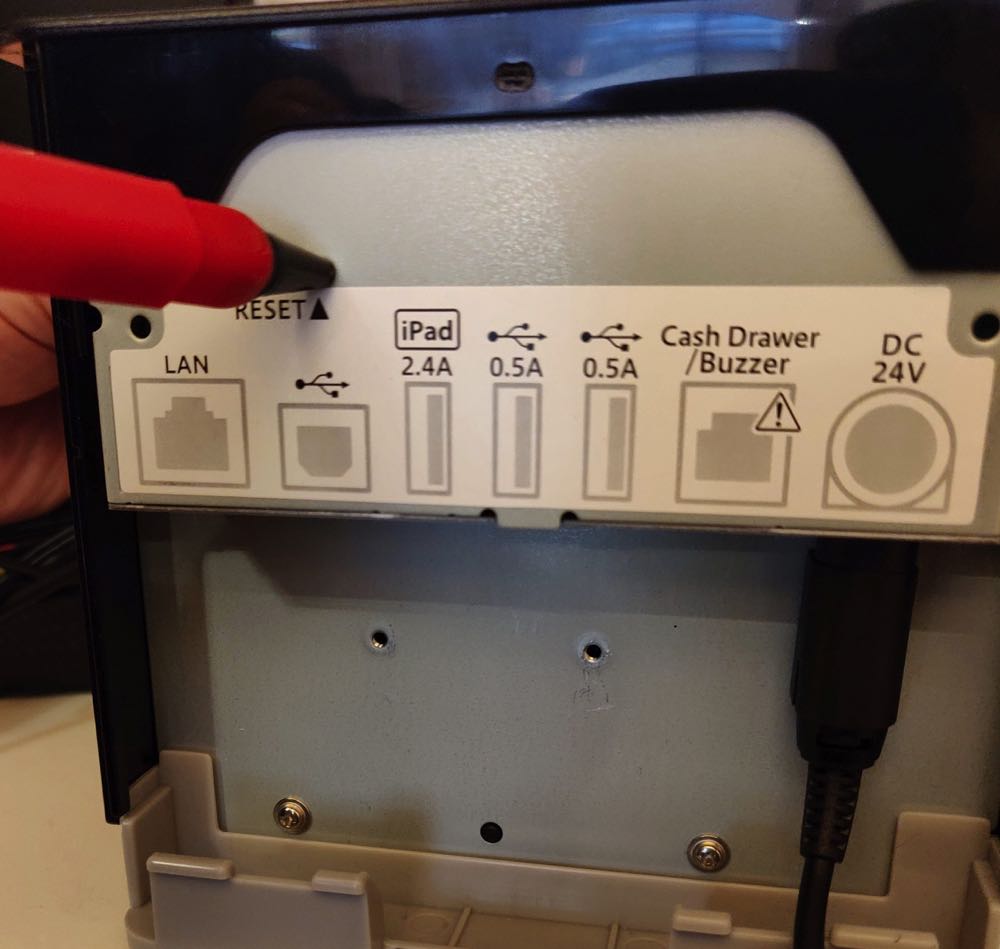
3. Insert a pen or pin to depress the Reset button.
4. Keep the Had Reset button depressed and turn the power on.
5. Keep the Reset button depressed until the status lights on the front start to flash. Release the Reset button.

6. If the Bluetooth status light is flashing but not the Ethernet Connection status light or both the Bluetooth status light and the Ethernet Connection status light are flashing, press the Feed button until only the Ethernet Connection status light is flashing
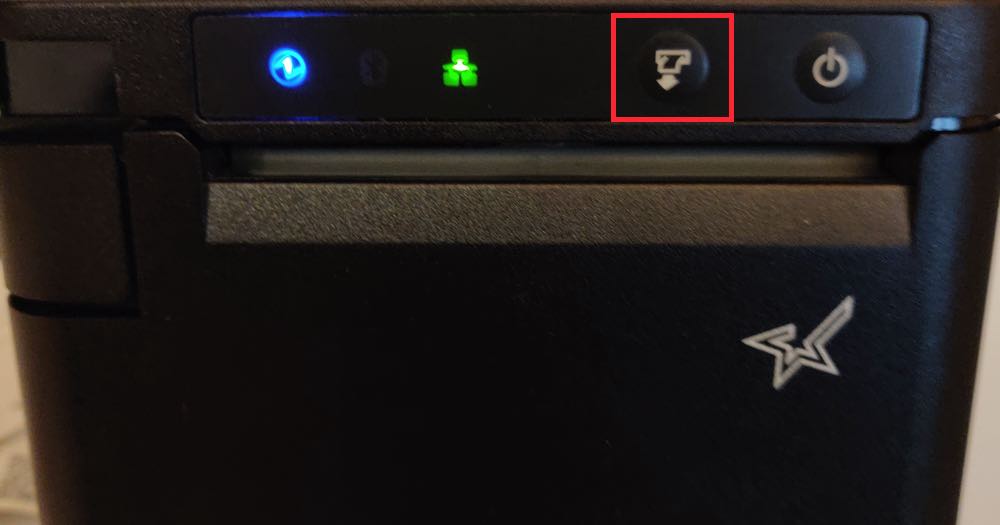
7. With the Ethernet Connection status light flashing, hold down the Feed button until the printers starts to print.
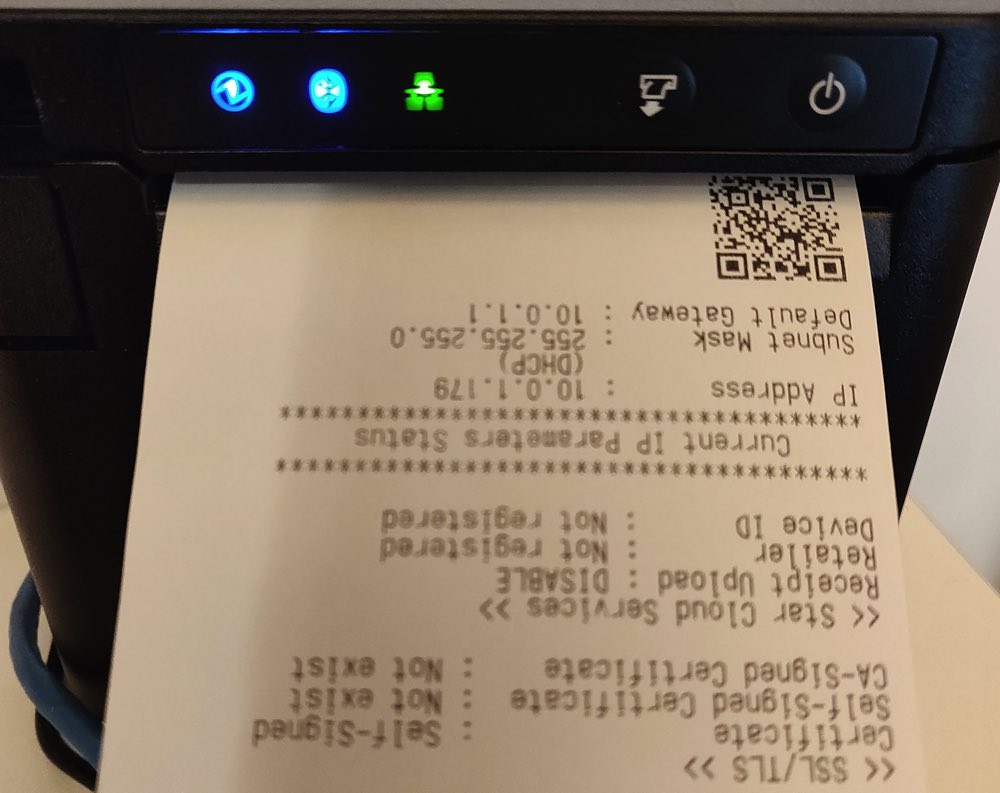
8. It will print a new Network Configuration printout with the new DHCP IP address.
Chapter 8. Troubleshooting
When a printer isn’t responding, see Printer Status Messages to find out why your printer isn’t functioning properly.
See Also
Setting Up Your Star Micronics mC-Print3 TouchBistro Thermal Receipt Printer for Lightning Mode
Setting Up Your Star Micronics mC-Print3 TouchBistro Thermal Receipt Printer for Bluetooth Mode


 Email
Support
 Frequently
Asked Questions