Setting Up and Using Payouts and Pay Ins
Table Of Contents
Chapter 2. Setting Up Pay In/Payouts
Section 1. Create Pay In/Payout Reasons
Chapter 3. Enabling Pay In/Payout Rights for Staff Types
Chapter 4. Enable Pay In/Payout Button for the Register
Chapter 6. Payout/Pay in Reporting
Section 1. Adding Payout Reports to Waiter Read and End of Day
Chapter 1. Introduction
TouchBistro allows you to set up and track cash drawer payouts (cash coming out of the cash drawer to pay for items related to your business) as well as pay ins (cash coming into your cash drawer for a reason other than a sale).
Chapter 2. Setting Up Pay In/Payouts
Section 1. Create Pay In/Payout Reasons
Before you can start using payouts and pay ins, you need to set valid reasons.
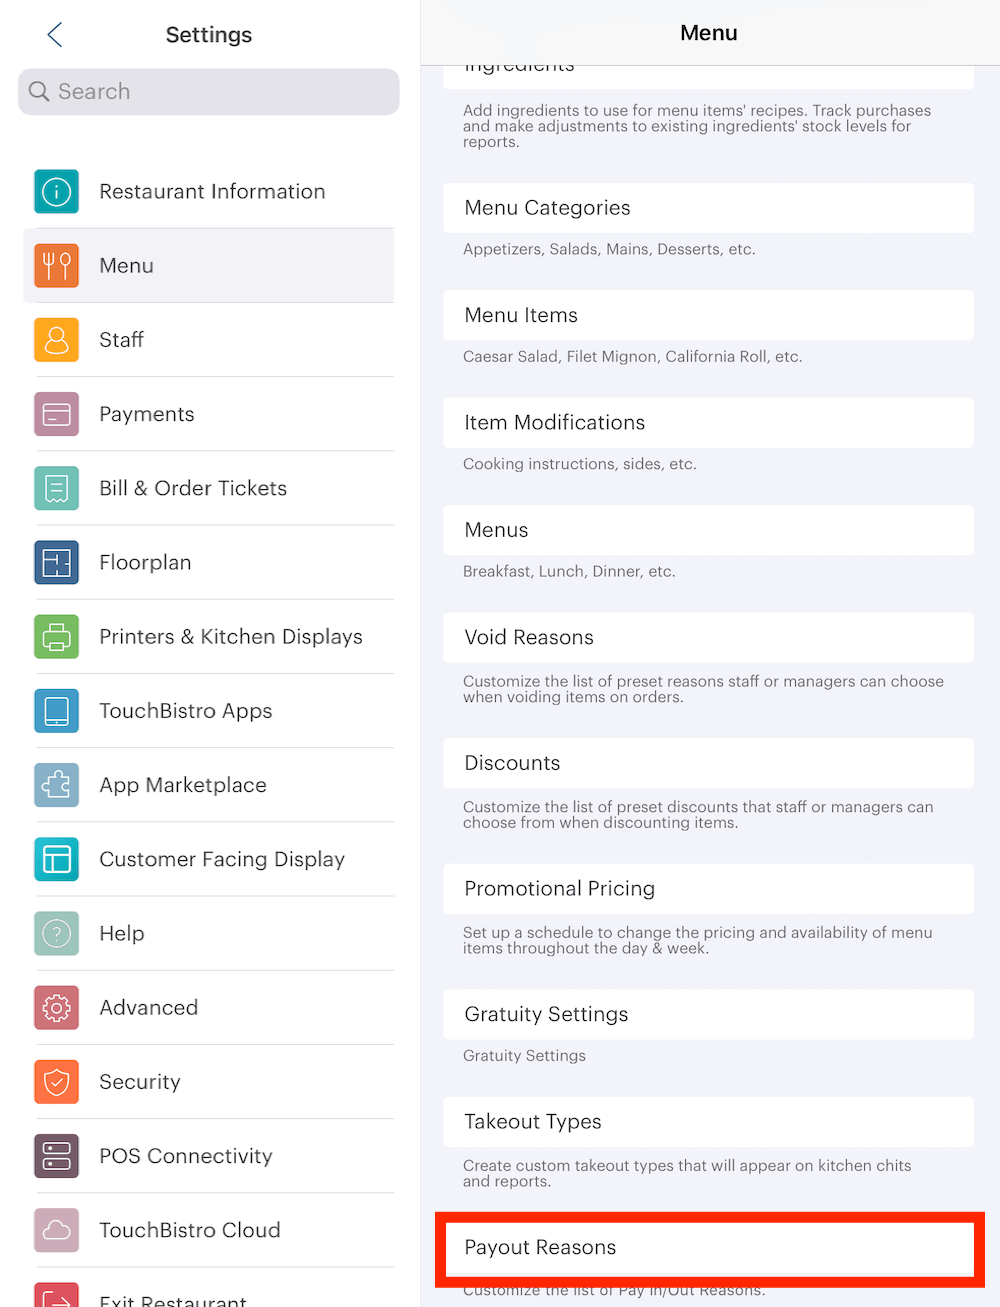
1. Tap Admin | Admin Settings | Menu | Payout Reasons.

2. Tap the Add + icon to add a reason. You can add both pay in and payout reasons.
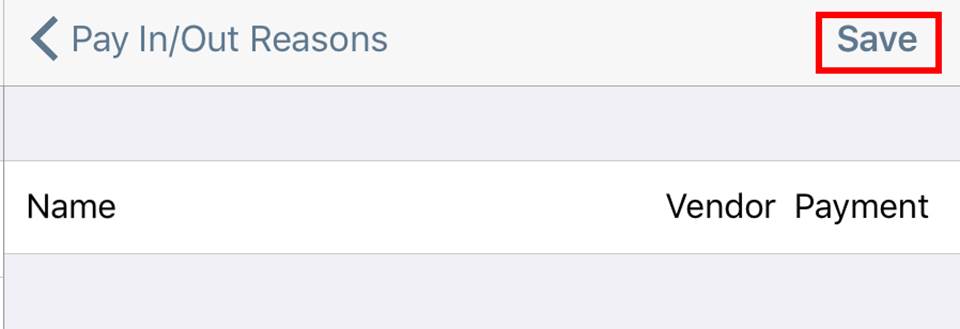
3. You might add a payout reason like “Claw refund to customer” or “Vendor payment”. A pay in reason might be something like “Float addition” or “Refund from Claw Machine Company”.
4. Tap Done when done entering the reason.
Chapter 3. Enabling Pay In/Payout Rights for Staff Types
After you’ve created your payout reasons, you should set which staff type has the ability to issue payouts and pay ins.
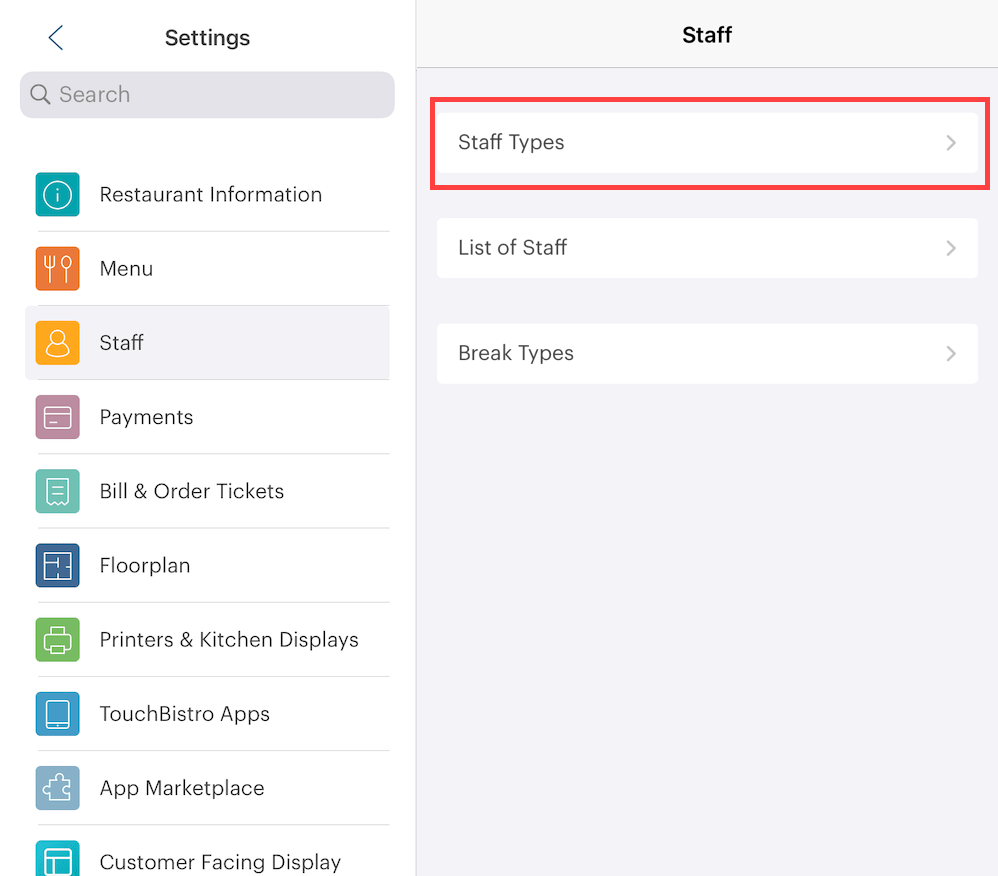
1. Tap Admin | Admin Settings | Staff | Staff Types.

2. Select a staff type like Manager or Bartender.
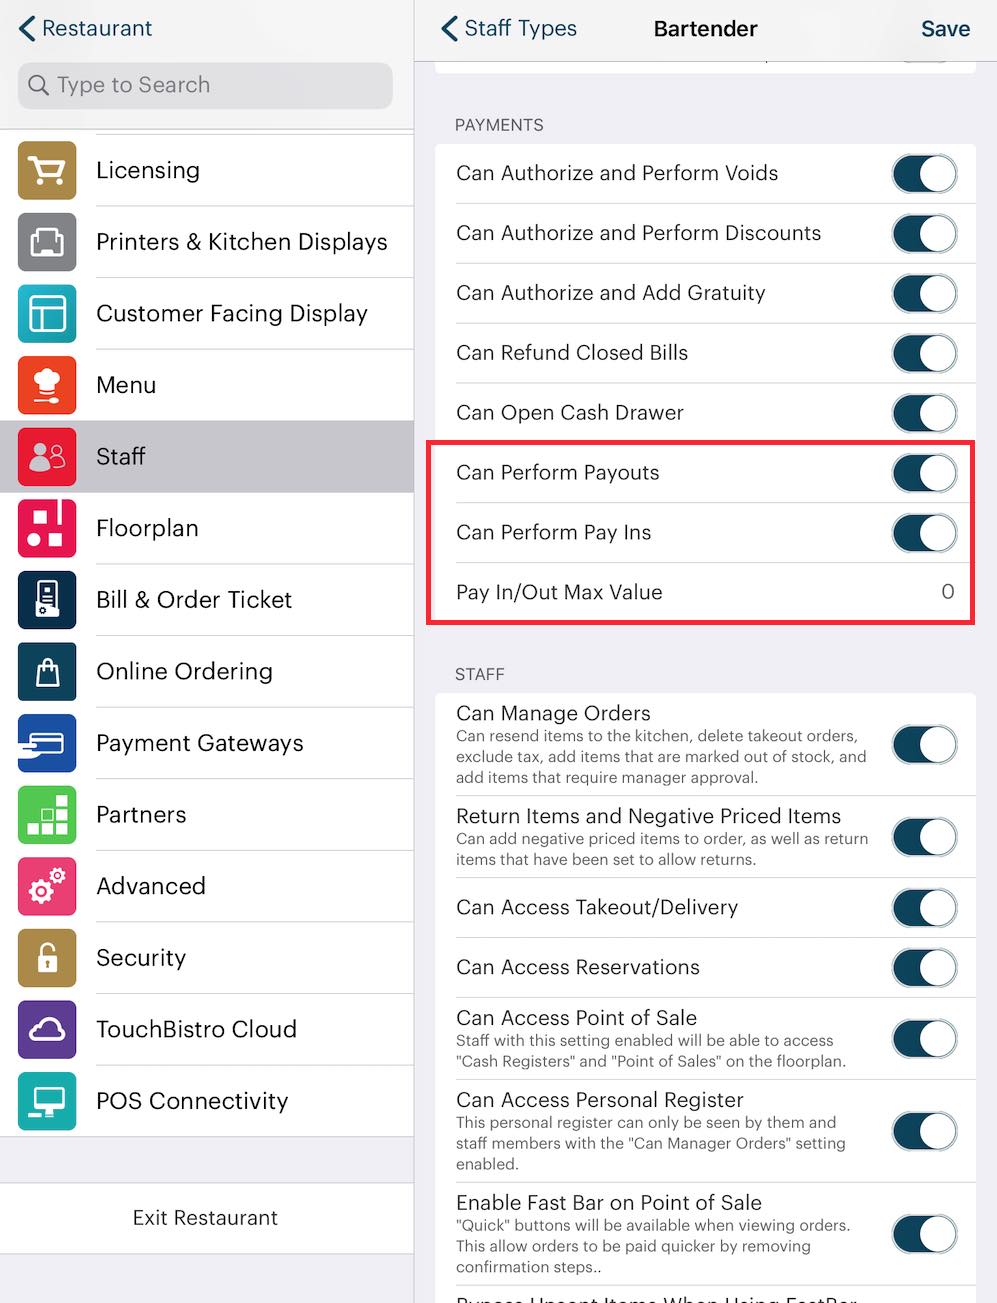
3. At the bottom of the Payment section, you will find a section to manage pay in/payout rights. Enable Can Perform Pay Ins and Can Perform Payouts. If enabled, you can limit the maximum amount the staff type is allowed to payout or accept as a pay in. For example, you might set a bartender staff type to $75 and a manager staff type to $200.
Note: the Admin may do an unlimited pay in/payout amount.
Chapter 4. Enable Pay In/Payout Button for the Register

1. Tap Admin | Admin Settings | Advanced.
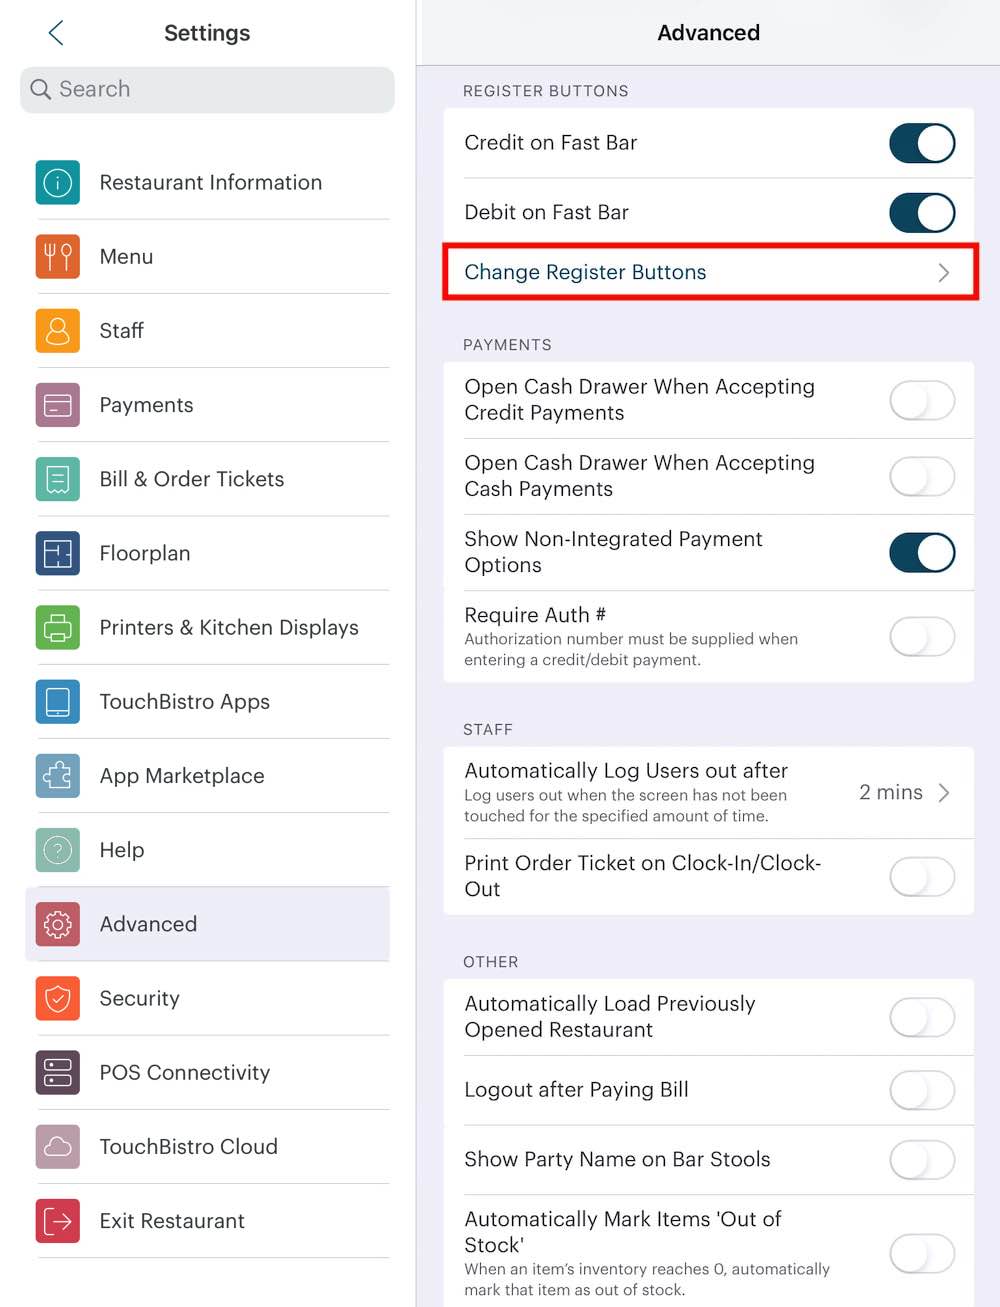
2. Scroll to the bottom and tap Change Register Buttons.
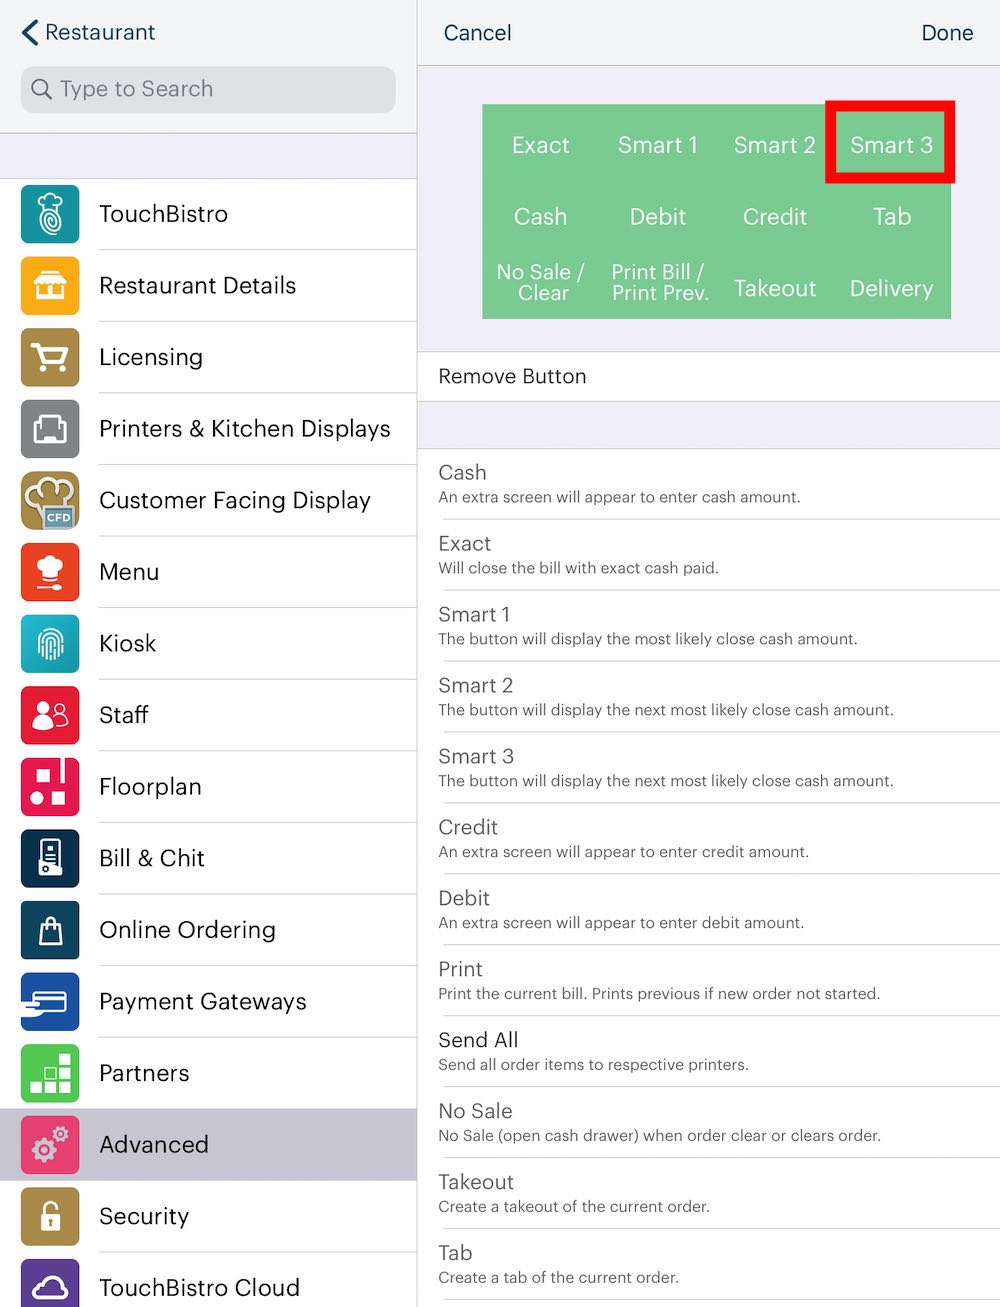
3. Tap one of the quick pay buttons you may not use like Smart 3.
4. Tap Pay In/Out.
5. Tap Done.
Chapter 5. Using Payouts
The Pay In/Out button is available only on the cash register. It’s not available when you’re on a table or any kind of order screen (delivery/takeout/bar tab).
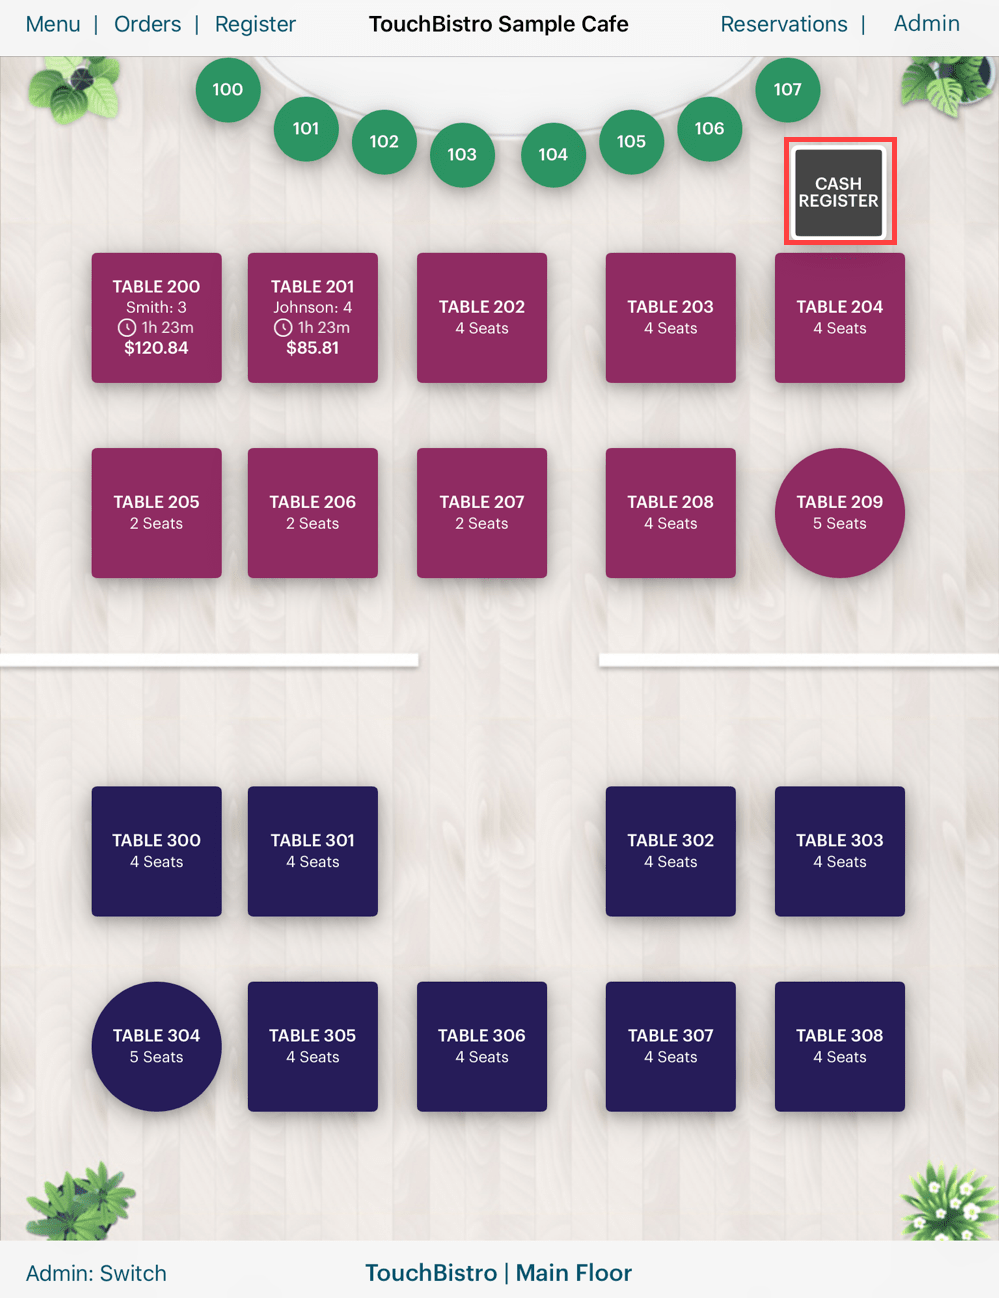
1. Tap the Cash Register to open it.
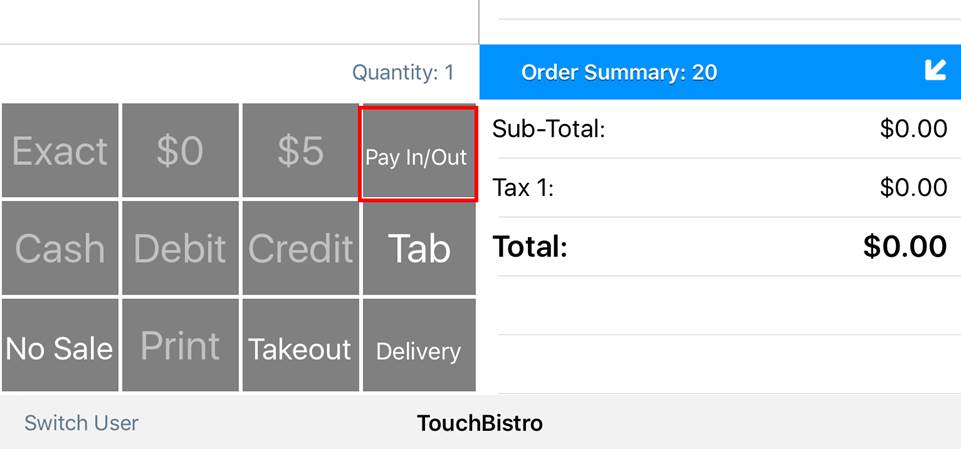
1. Tap Pay In/Out.
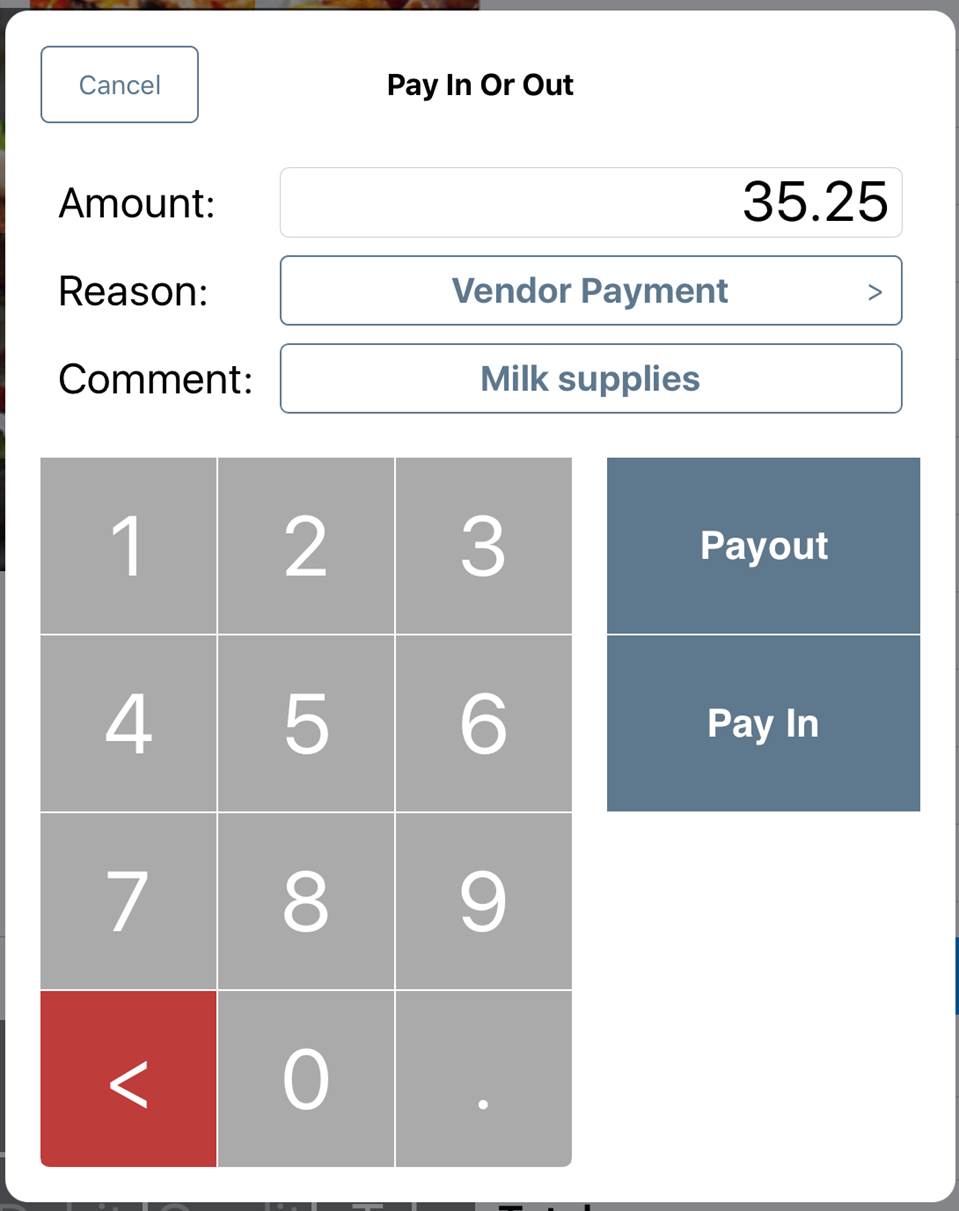
2. Enter the amount to be paid out or paid in. Tap Reason to select a pre-configured reason. Add a comment if the payout or pay in needs to be supported with additional details.
3. After you complete these details, pay Payout if this is a payout or Pay In if this is a pay in.
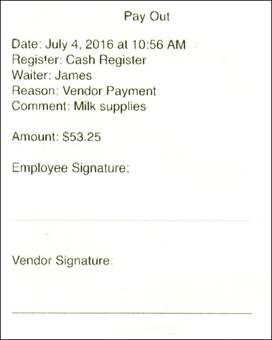
4. Select a receipt option. TouchBistro will generate a special receipt for the payout/pay in requiring server and vendor signatures.
5. If your cash drawer is connected to your receipt printer, TouchBistro will “kick” open the drawer to facilitate the payout or pay in.
Chapter 6. Payout/Pay in Reporting
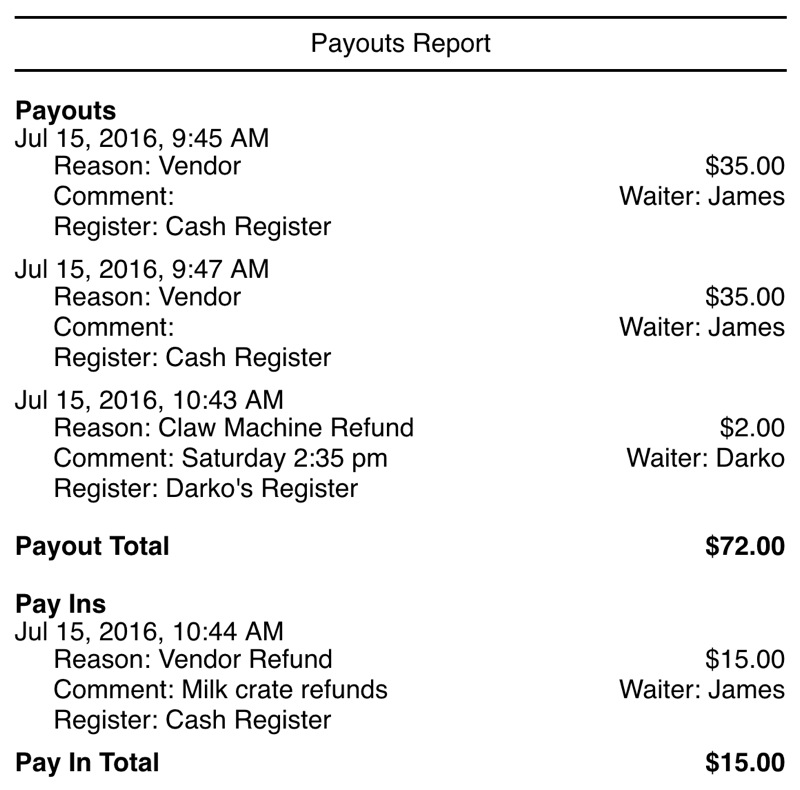
Under Admin | Reports | Accounting, we’ve added a Payouts Report to track money going in and out when the Payouts/Pay in function is used. If you are using payouts, we recommend adding this report to your End of Day and your Waiter Read reports.
Section 1. Adding Payout Reports to Waiter Read and End of Day
If you are using payouts/pay ins, we suggest adding this report to both the Waiter Read (the report that generates when a server clocks out) and your End of Day report (the report that generates when you close your day). The Payouts report if added to your End of Day can help you balance out your cash drawer at the end of the day. As well, if the server is doing a payout/pay in from his/her own float, it can help the server balance out his/her float.
To do this:
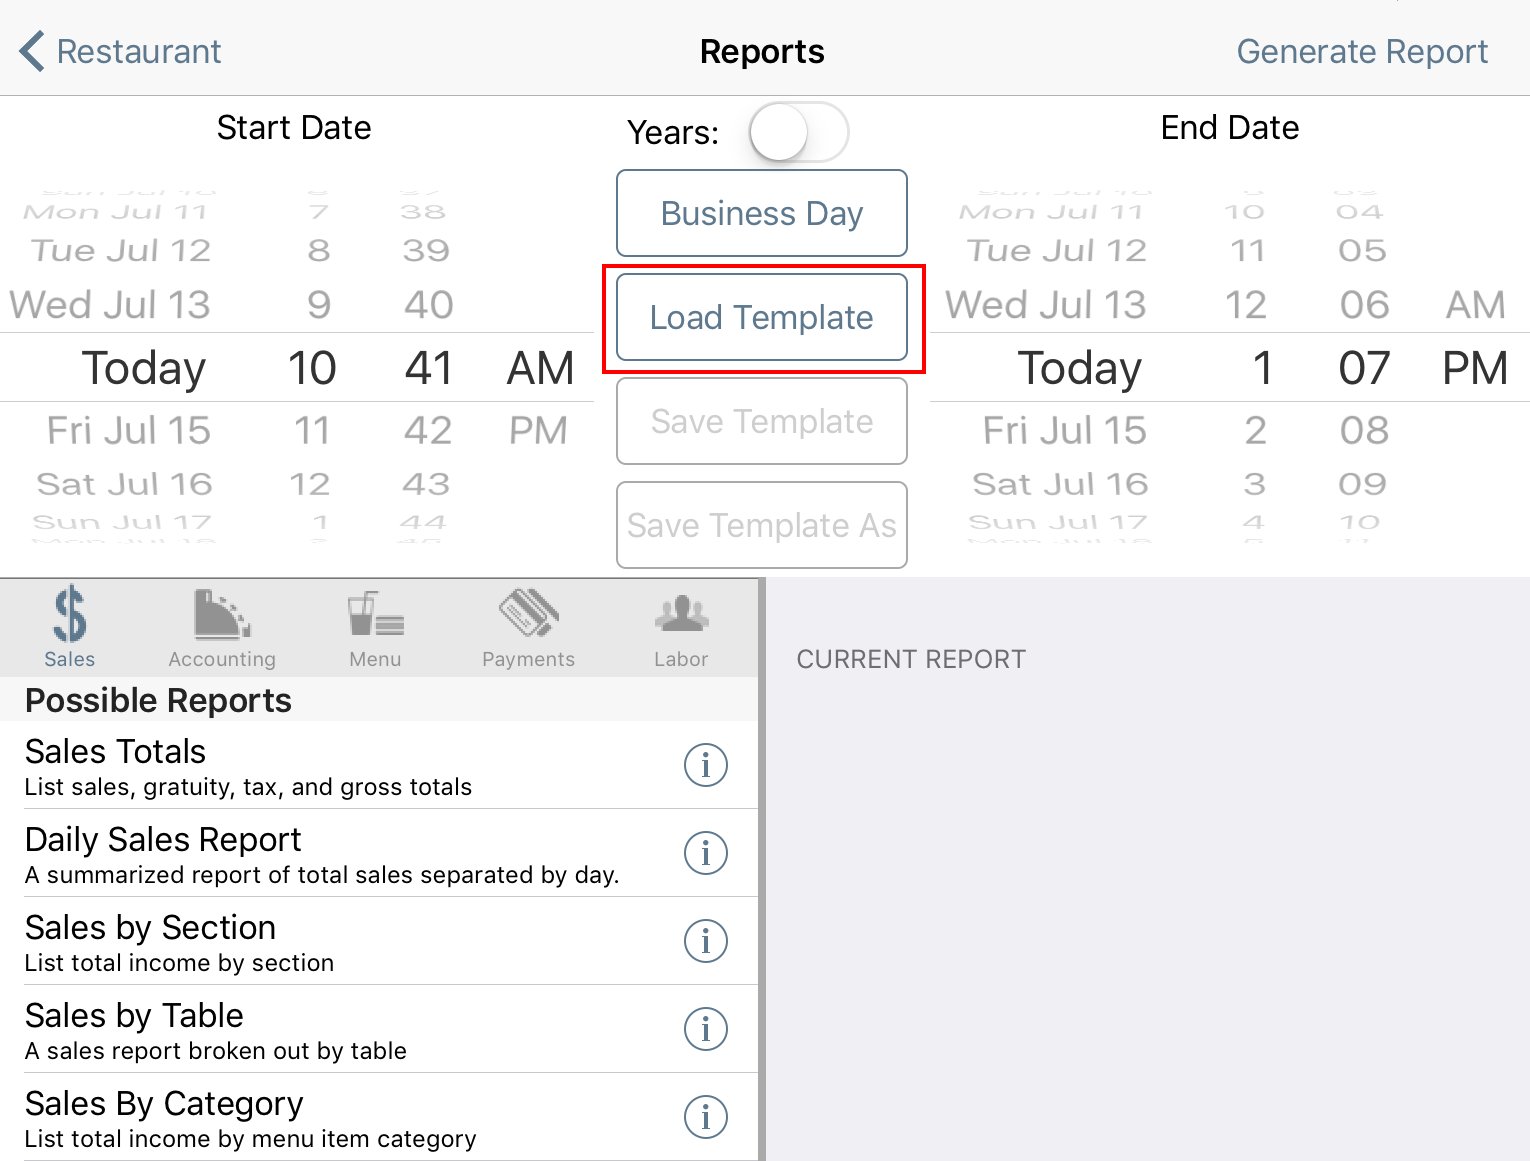
1. On the reports screen tap Load Template.
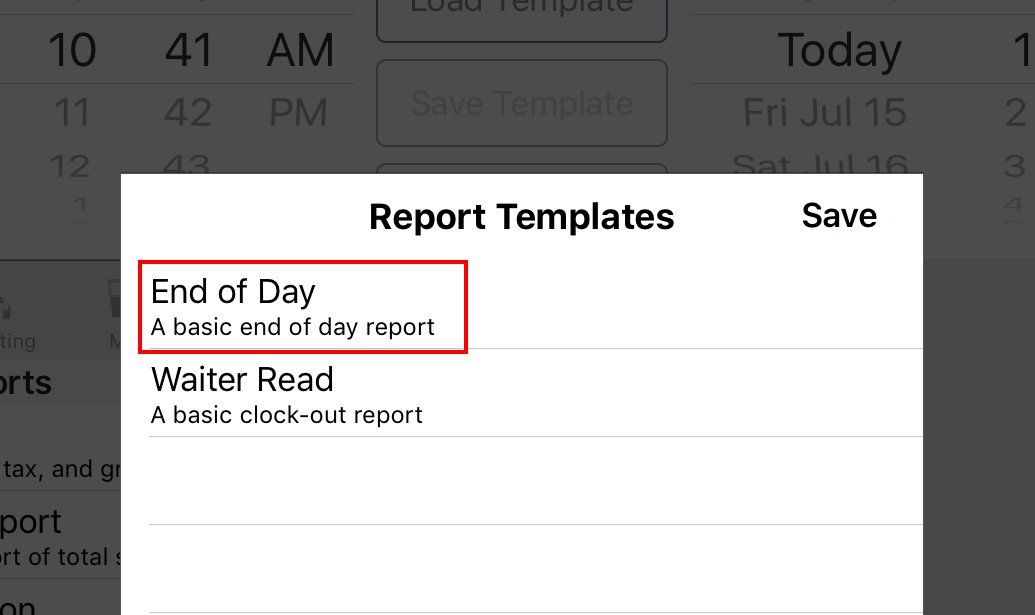
2. First tap End of Day.
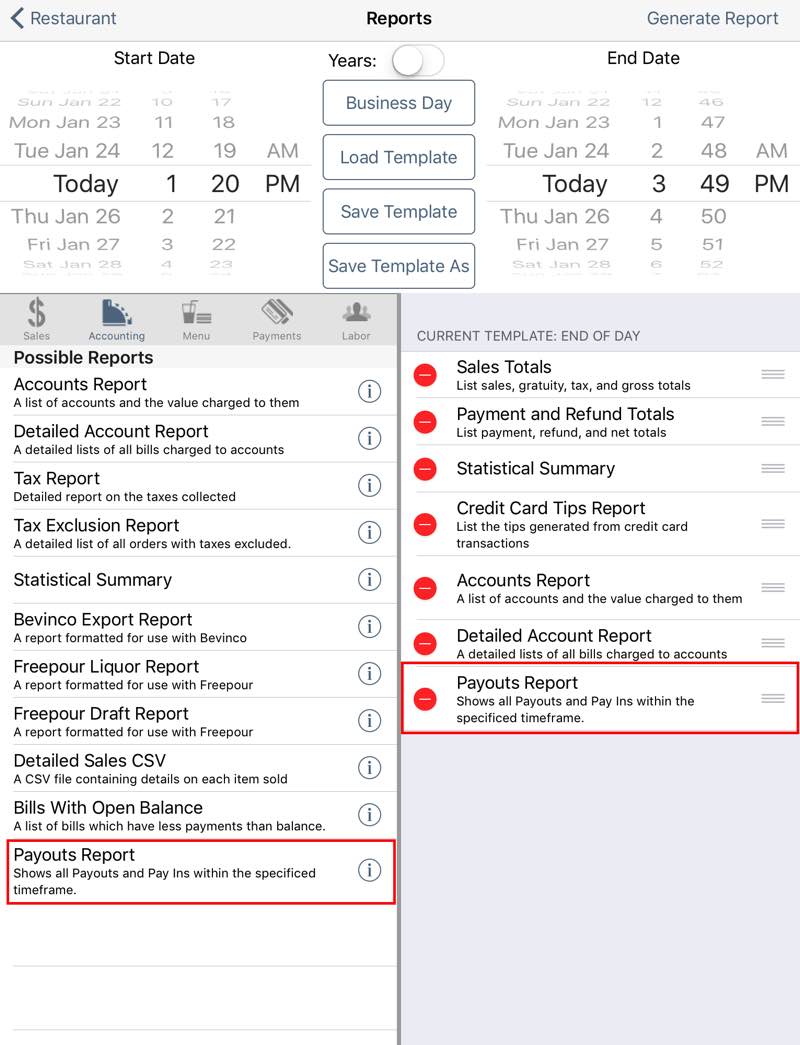
3. Tap Accounting and tap Payouts Report.
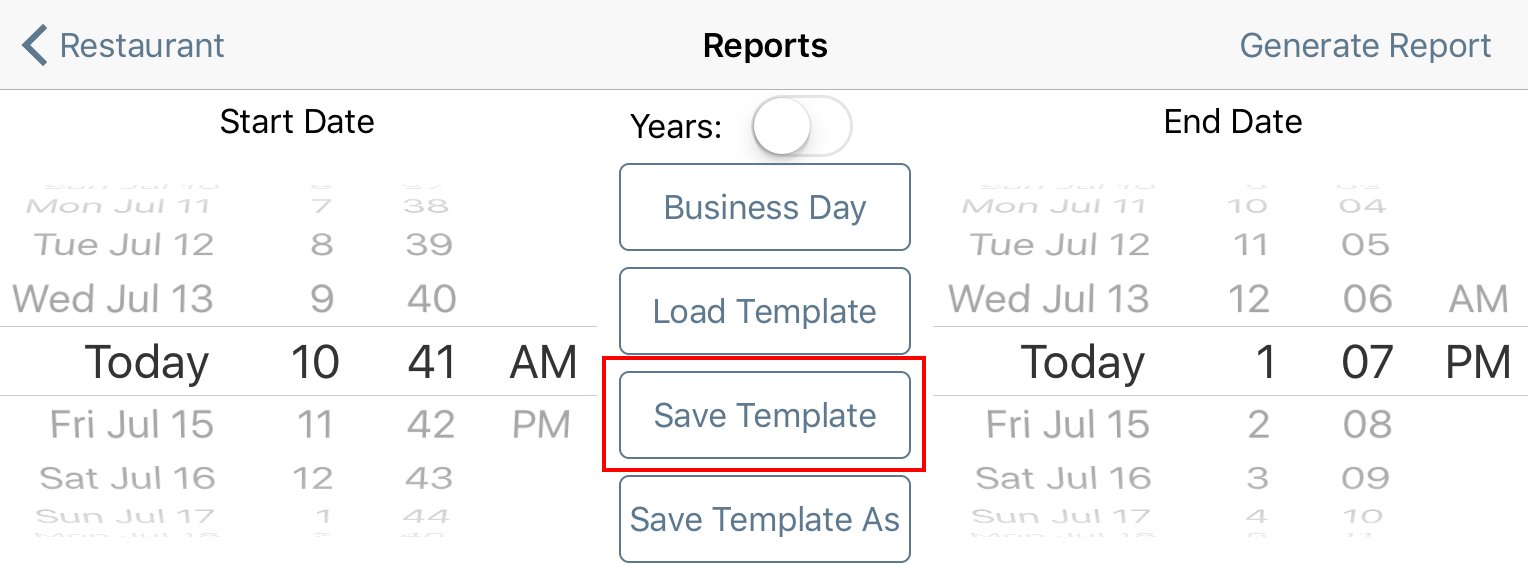
4. Tap Save Template.

5. Tap Load Template.

6. Tap Waiter Read.
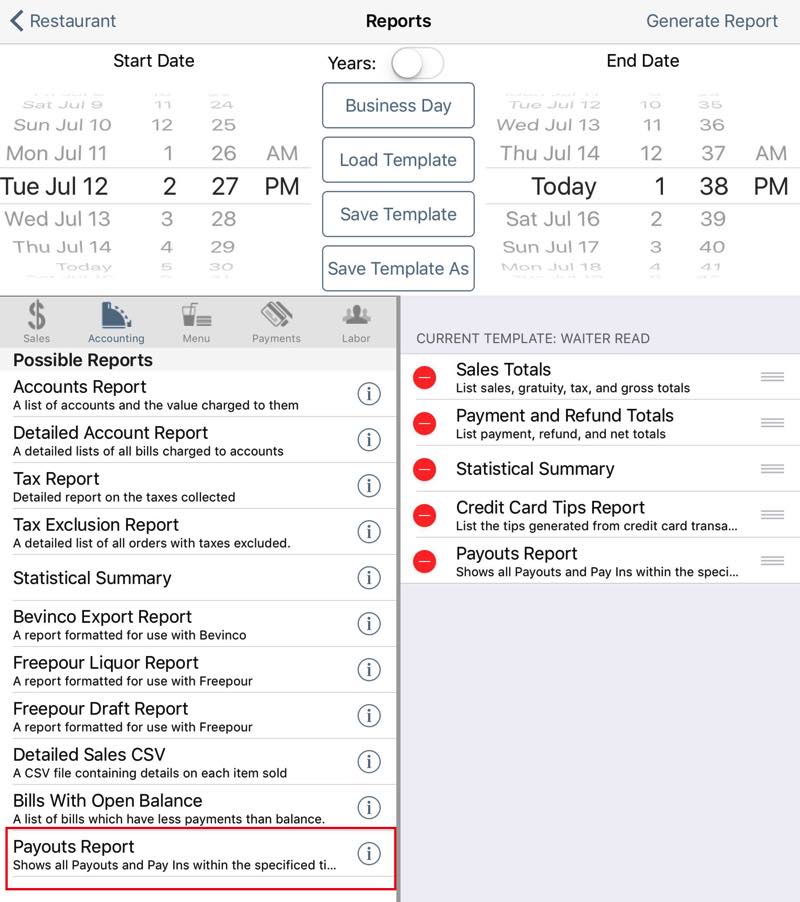
7. Tap Payouts Report to add it to the Waiter Read.

8. Tap Save Template.


 Email
Support
 Frequently
Asked Questions