Setting Up and Using the TouchBistro Ingredient-Based Inventory System
Table Of Contents
Chapter 2. Setting Up Your Ingredients and Inventory
Chapter 3. Setting Up Your Menu Item Recipes
Chapter 5. Purchases and Adjustments
1) Adjusting Using a Recipe Measure
Chapter 6. Giving Non Admin Staff Types Access to Inventory Management
Chapter 1. Introduction
TouchBistro has two inventory systems:
1. A simplified Countdown System
2. A detailed Ingredient-Based Inventory System
The Countdown system is useful for menu items that represent single, countable items you stock and sell as singular items. For example, bottles of beer, branded t-shirts, bagels, etc.
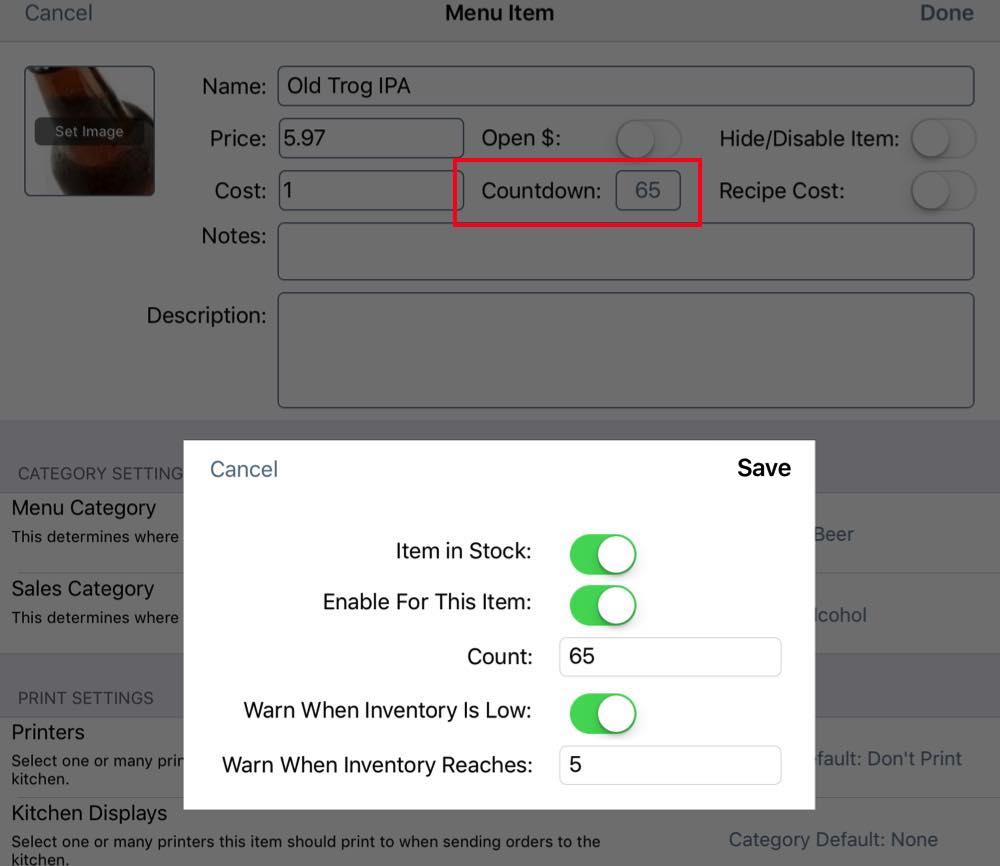
You set this up in the menu item’s Key Details area.
The Ingredient-Based Inventory system helps you track your raw ingredient inventory for non-countable menu items (for example, a burger), as well as aid you in costing those items. This guide will walk you through setting up and using the Ingredient-Based Inventory system.
Chapter 2. Setting Up Your Ingredients and Inventory
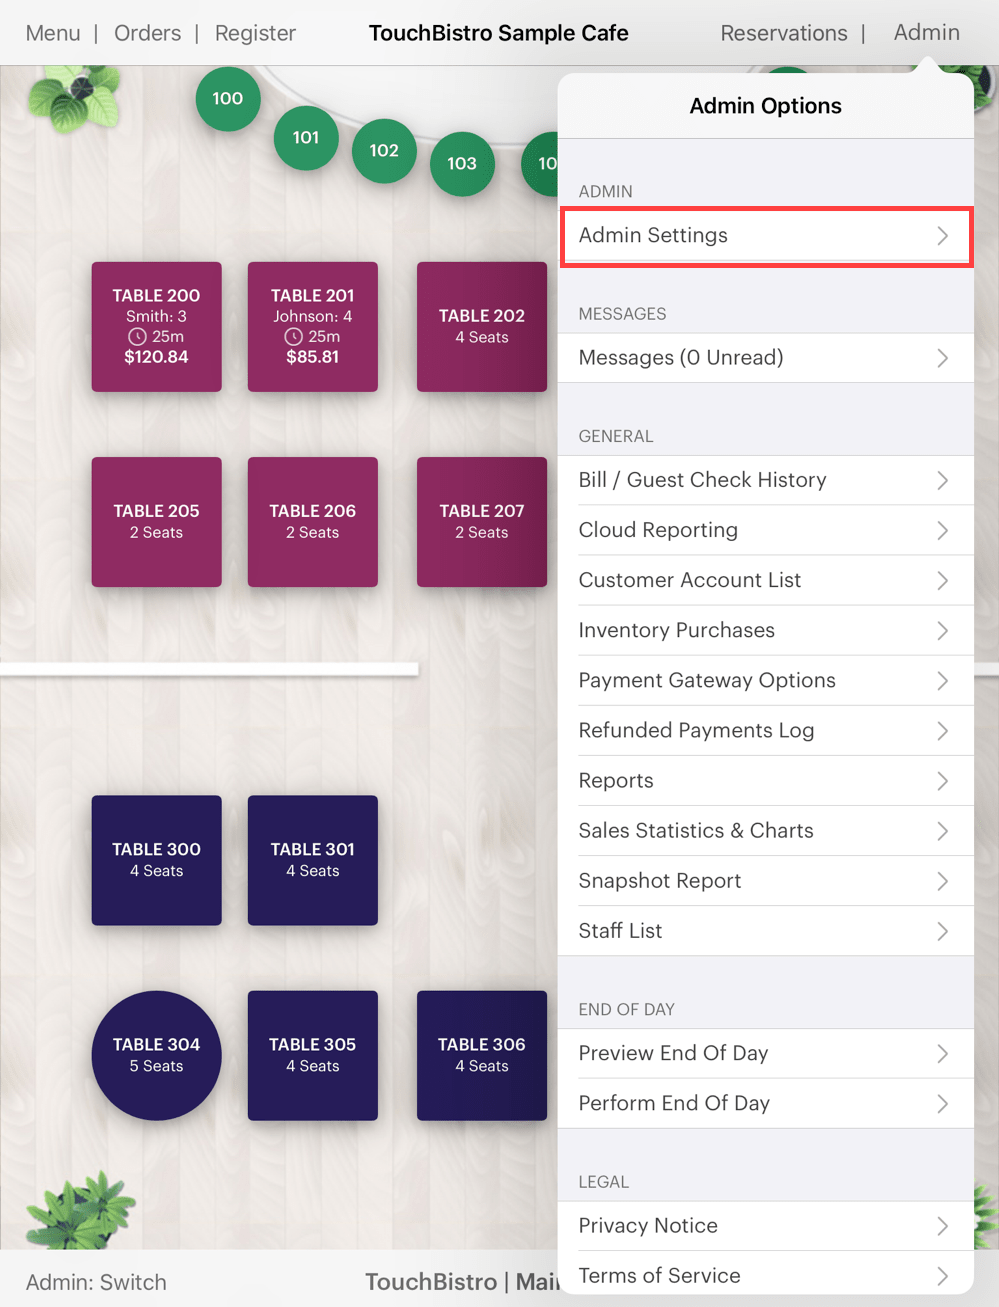
1. Tap Admin | Admin Settings.
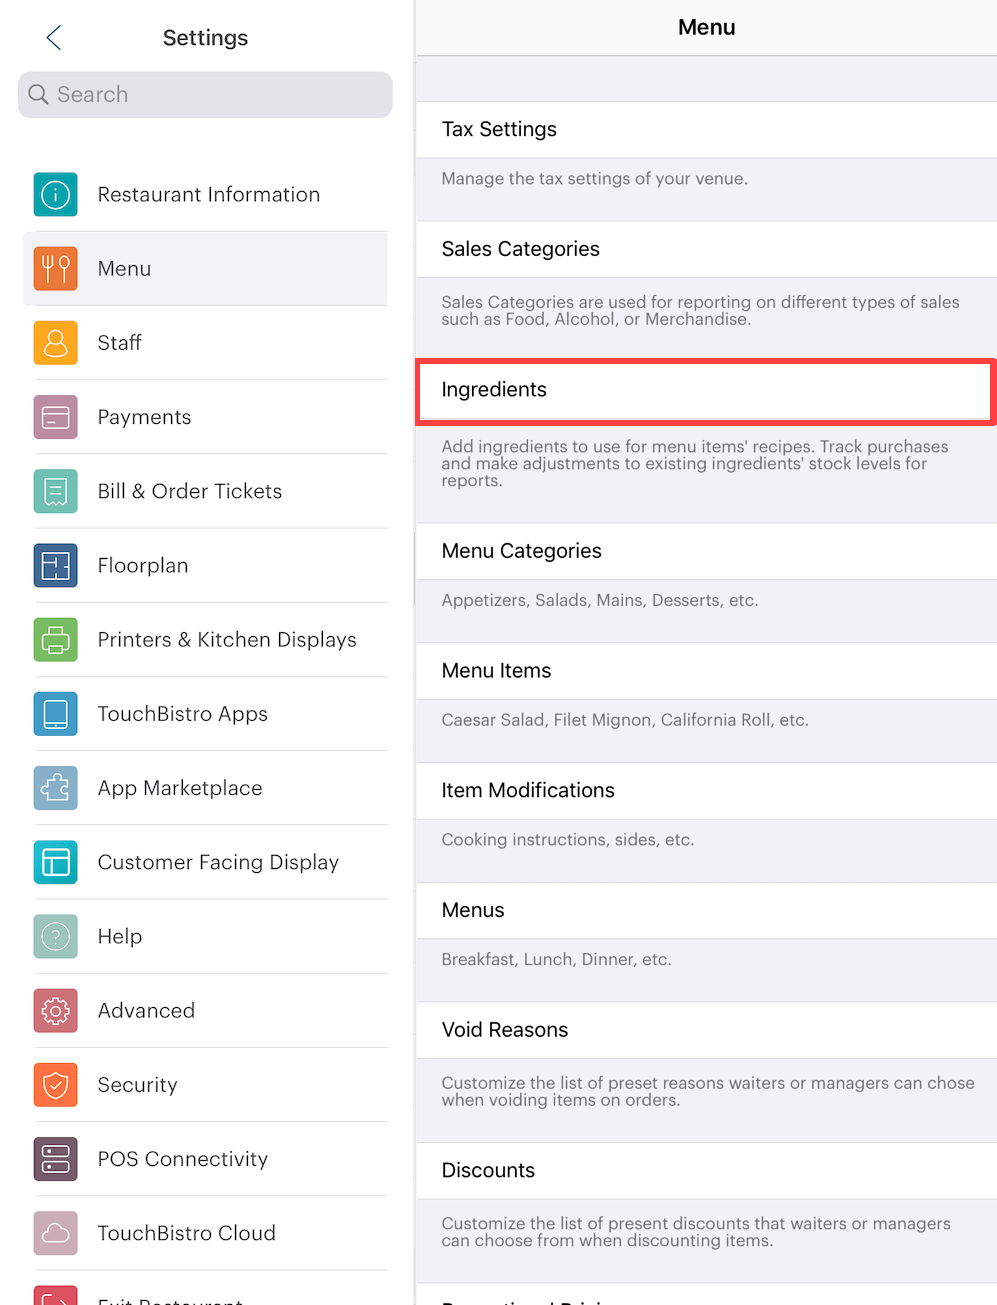
2. Tap Menu and tap Ingredients.
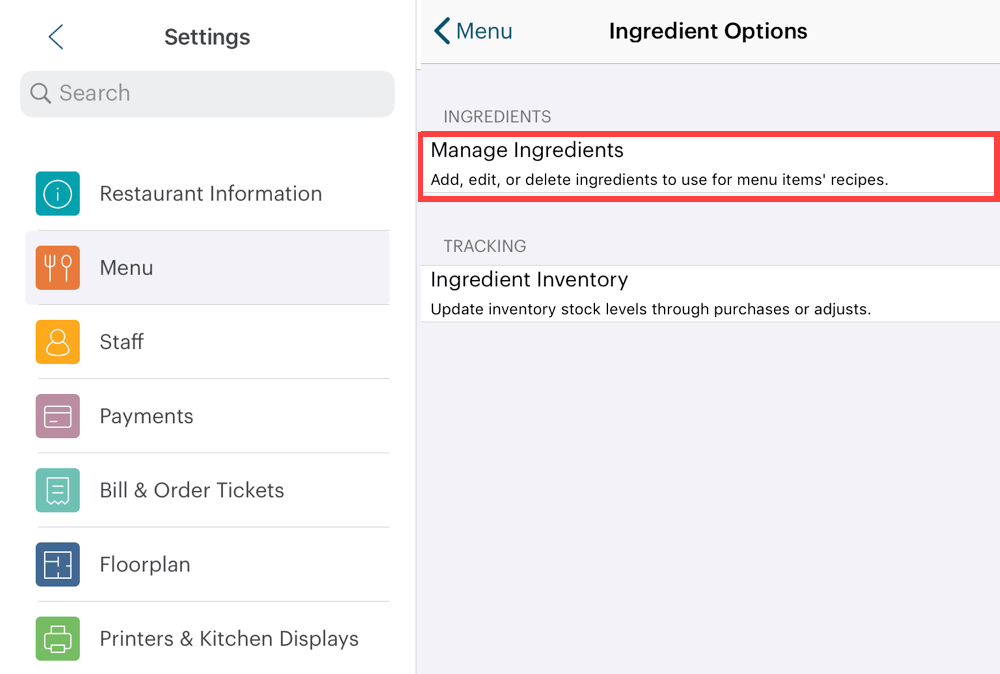
3. Tap Manage Ingredients.
4. The Ingredients Management page lets you create and define all the ingredients that go into your menu items. In this example, we’ll work through a burger example.
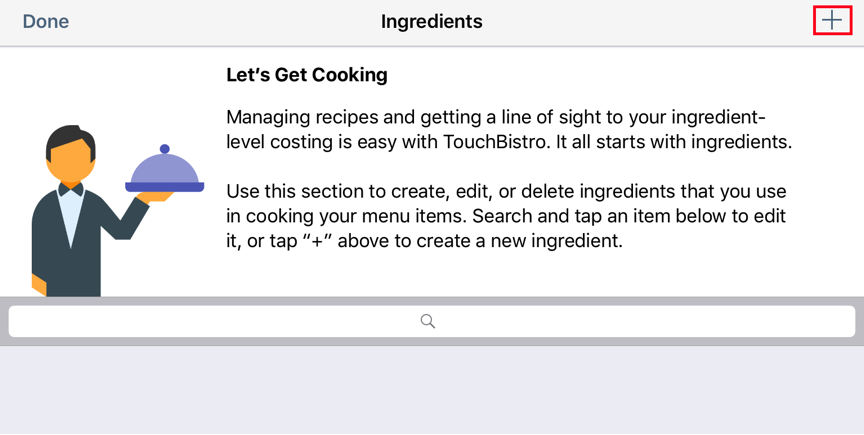
5. Tap the Add + icon at the top right.
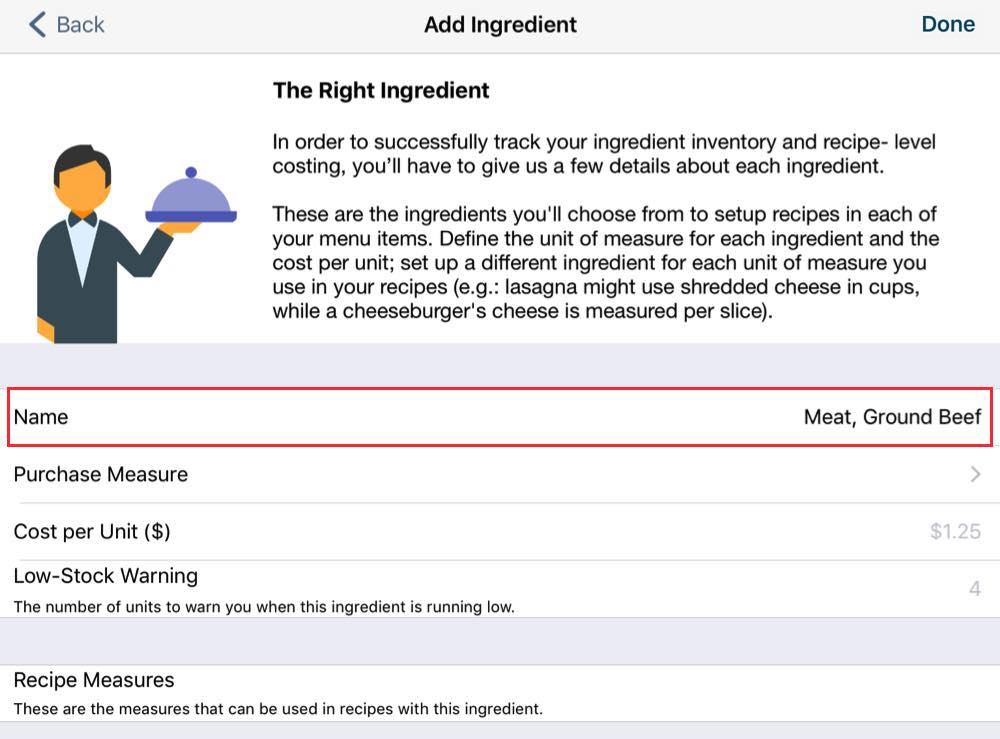
6. Enter the name of the ingredient. In this example, we’re first adding ground beef as an ingredient. So in the Name field enter “Ground Beef”. If you’re going to be working with a lot of ingredients, we recommend putting a category name before the actual ingredient name to help group ingredients. For example, “Meat, Ground Beef”, “Meat, Bacon”, “Meat, Chicken Breasts”, “Bread, Bun”, “Bread, Whole Wheat Loaf”, “Vegetable, Carrots”, “Vegetable, Tomato”, etc. We’ll see below how this can help visually group your ingredients.
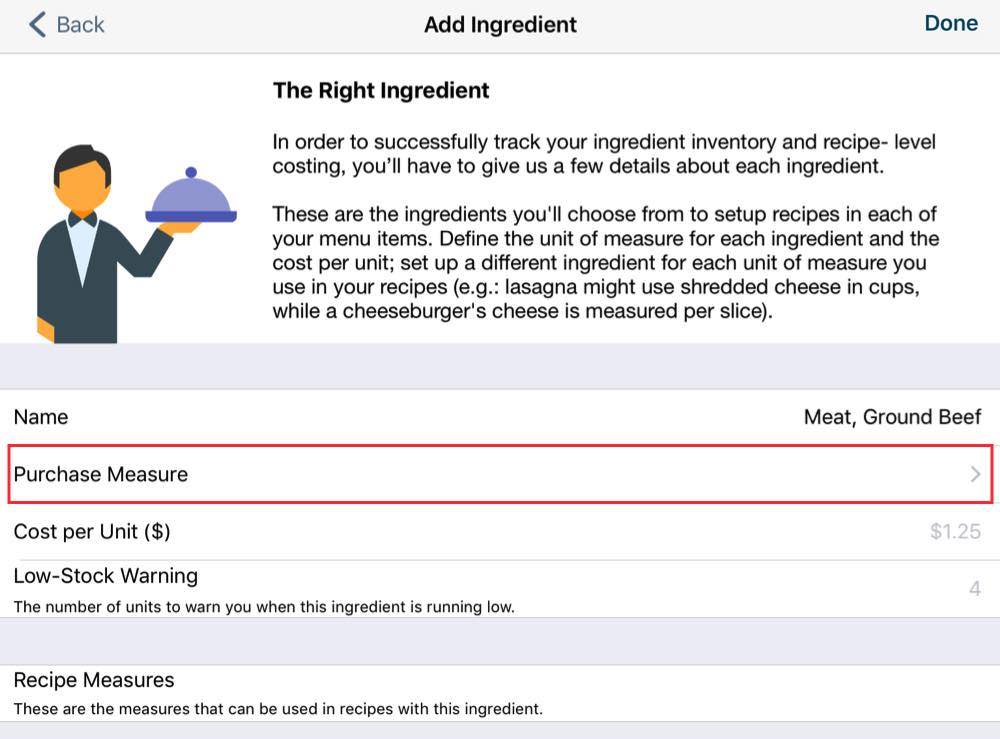
7. Tap Purchase Measure to define how this ingredient stock item is purchased or accounted for.
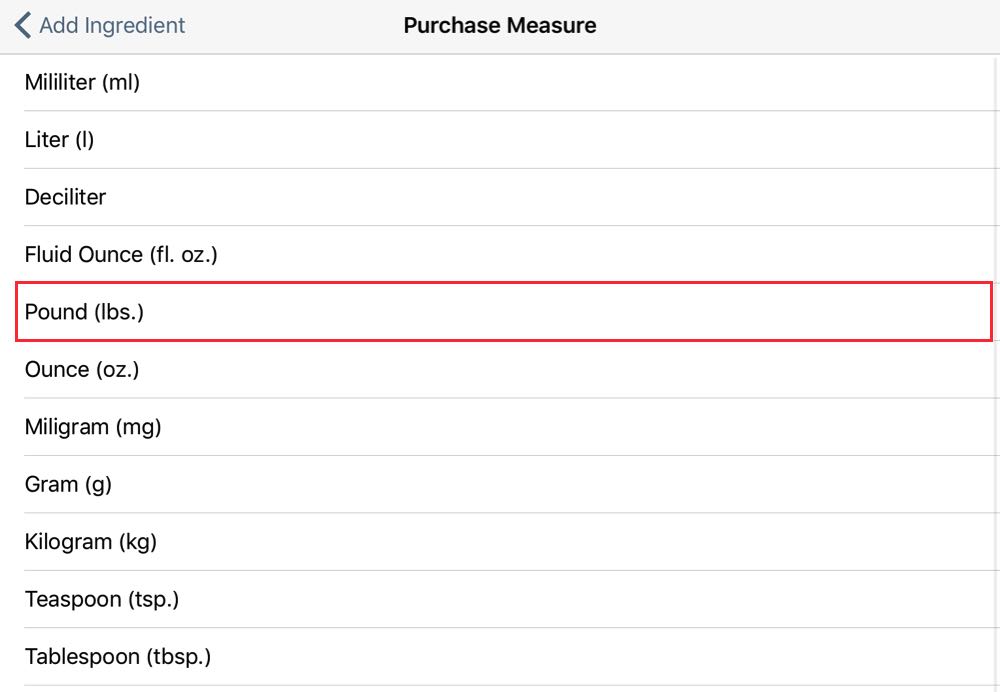
8. Scroll down the list and select the appropriate measure. You should always select the “intake” measure, that is the weight or volume measure you use when purchasing or ordering them in bulk. Do not select a measurement you would use in your recipes. In the case of ground beef, you would purchase it by the pound (or kilogram). So, for ground beef, select a measure like Pound or Kilogram.

9. Tap Cost Per Unit ($) to indicate how much you pay for the selected measure. For example, you might pay $5.75 for a pound of ground beef. You may have to make a calculation here to work out the cost per unit. For example, you buy vodka in 1.75L bottles for $16. Your Purchase Measure is Liter. So your Cost per Unit would be $16 / 1.75L = $9.14 per liter.

10. If you want the system to send you an alert when stocks are low, tap Low-Stock Warning and enter a value. For example, enter 10 for a warning when you’re down to 10 pounds of ground beef.
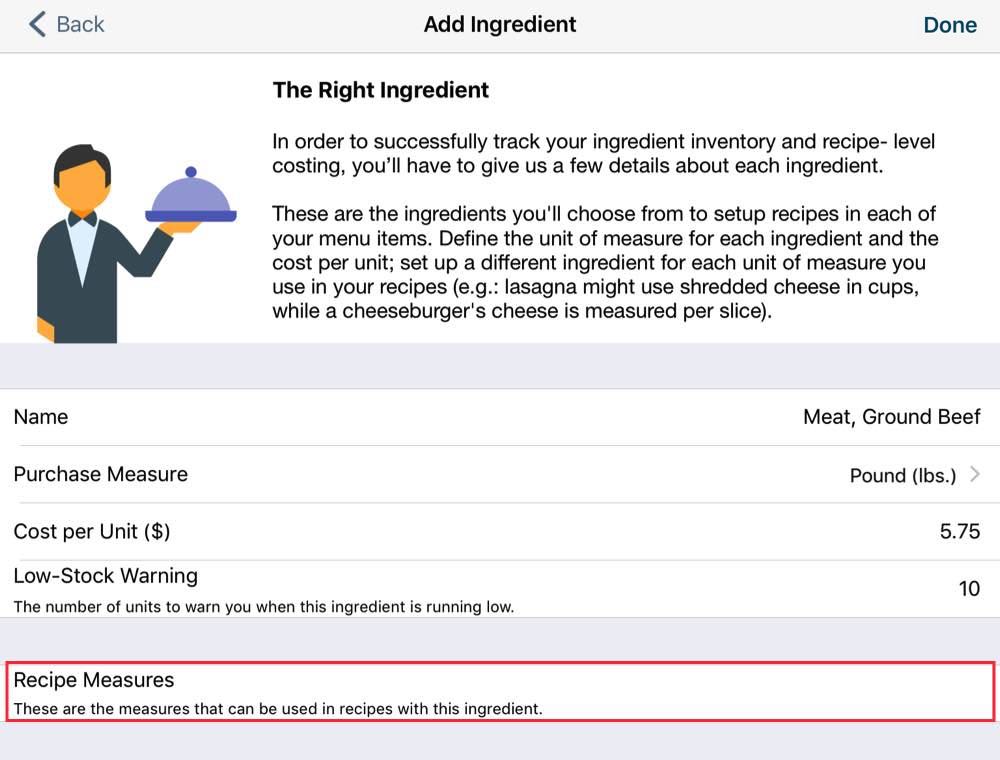
11. Finally, we can select measures and conversions for our recipes. Tap Recipe Measures.
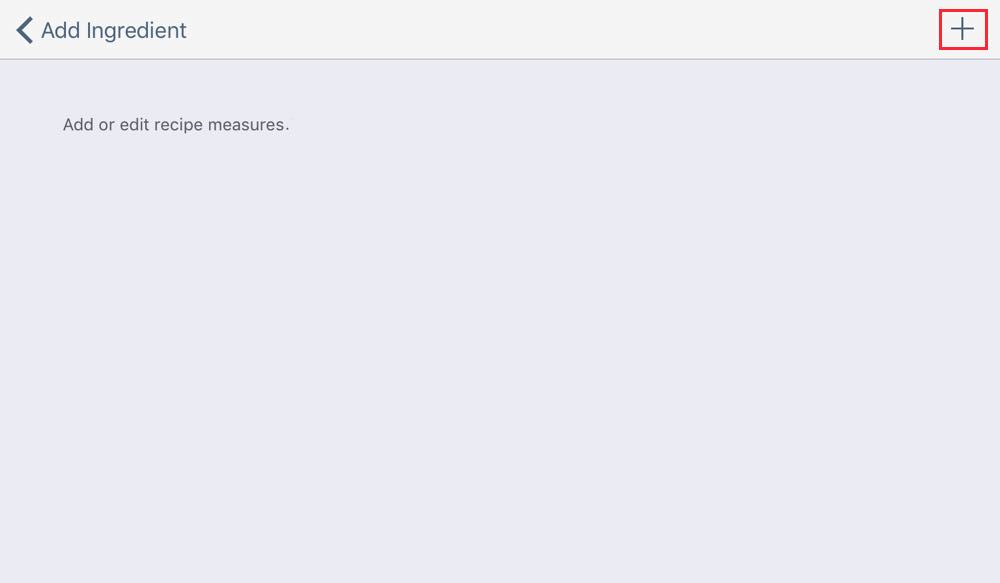
12. Here we will add all the measures used by our recipes for ground beef. Tap the Add + icon at the top right to enter our first Recipe Measure. For example, our burger might use 4 ounces of ground beef to make each burger patty.
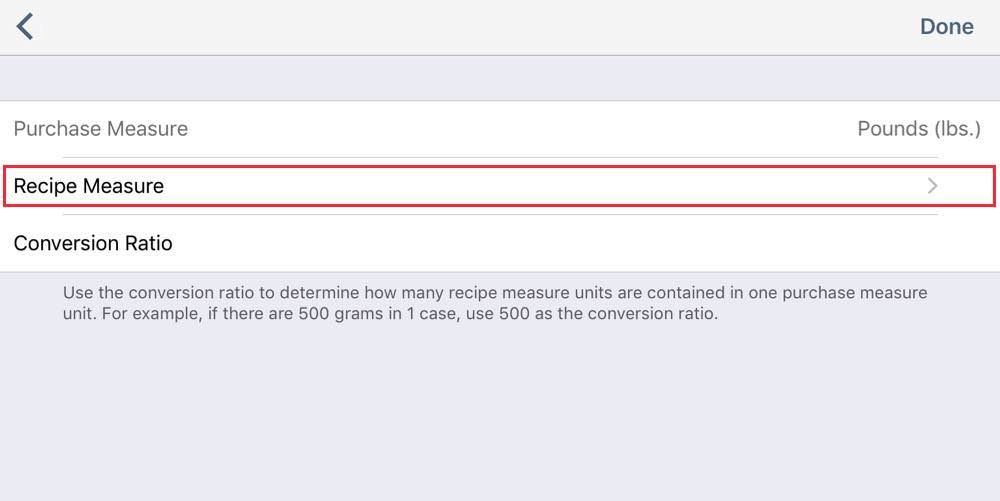
13. Tap Recipe Measure to select the first measurement we want to use for our menu item recipes.
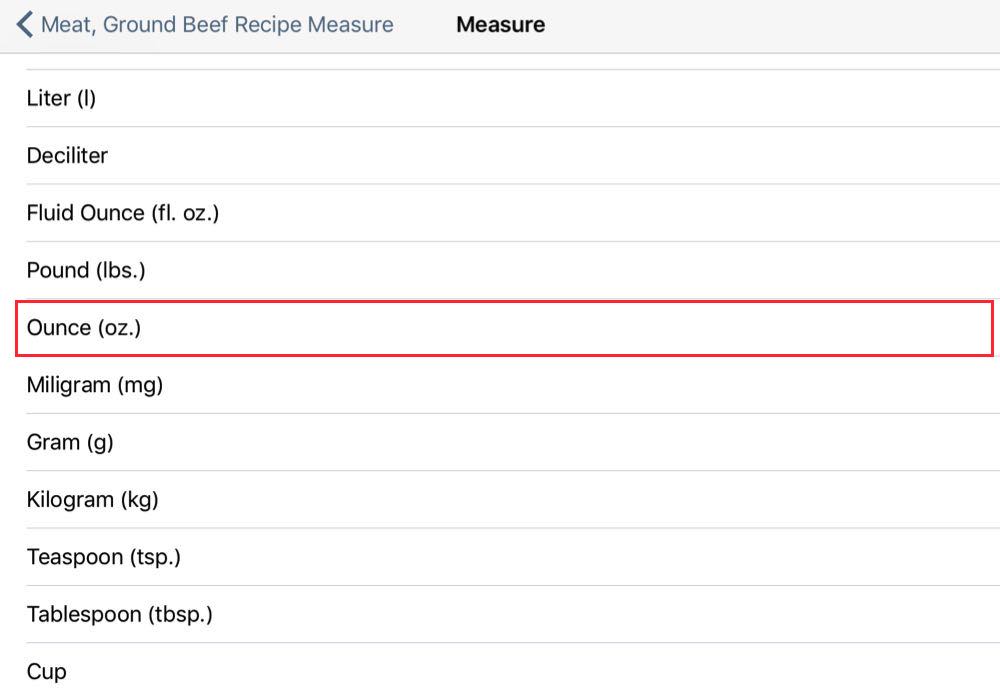
14. Tap the desired recipe measure. For example, tap Ounce.
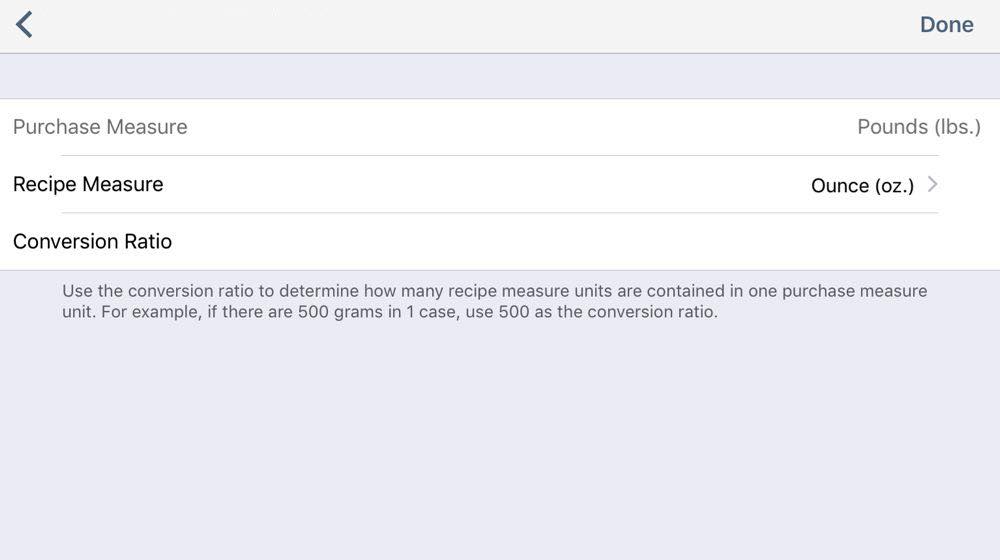
15. Next enter the Conversion Ratio. That is, enter how many of the Recipe Measures are contained in one unit of the Purchase Measure. There are a number of sites online that can give you these conversion ratios. You can also use the conversion chart in this guide.
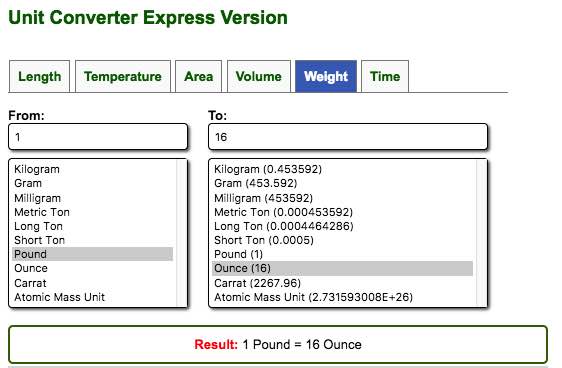
16. For example, there are 16 ounces in a pound. (You can also use Google. For example, search “How many ounces in a pound“).
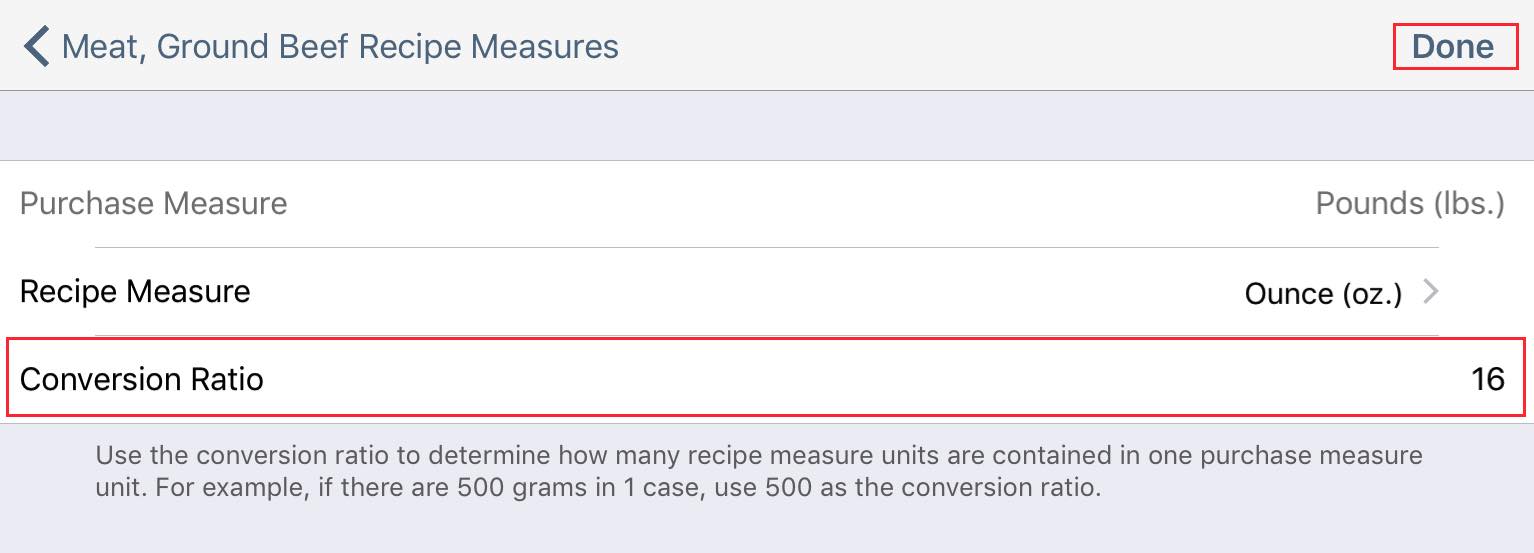
17. So enter 16 (there are 16 ounces in a pound) in the Conversion Ratio field and tap Done.
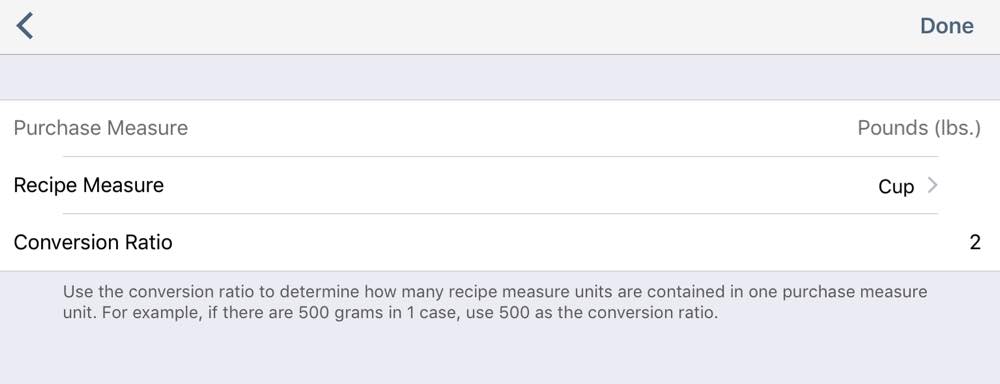
18. We can add additional recipe measures. For example, a spaghetti and meat sauce menu item, you might use 2 cups of ground beef. A beef taco menu item might use 2 tablespoons of ground beef.
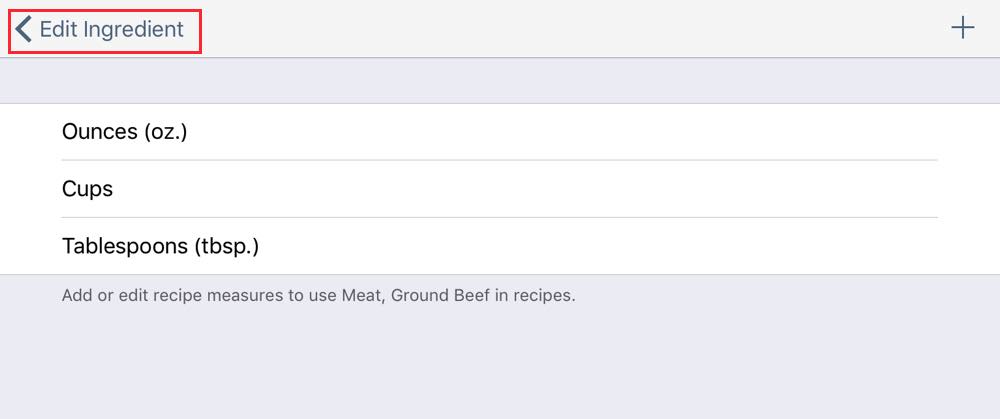
19. Tap Edit Ingredient when you’re done.
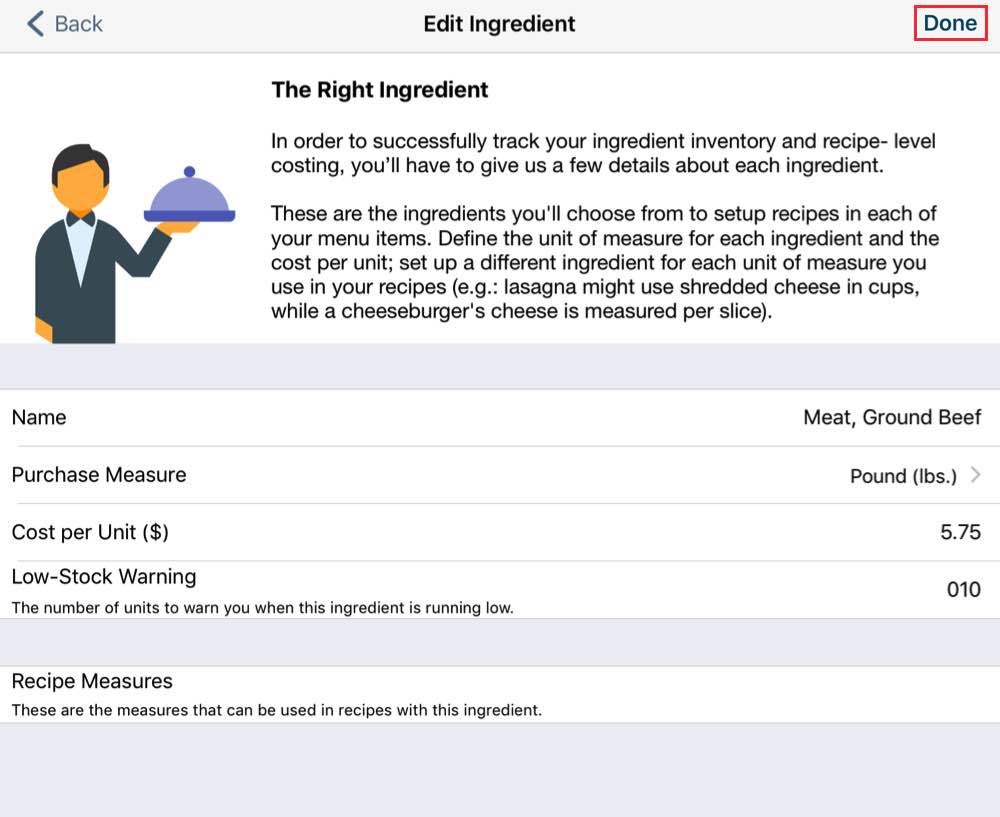
20. Tap Done when you’ve completed this ingredient.
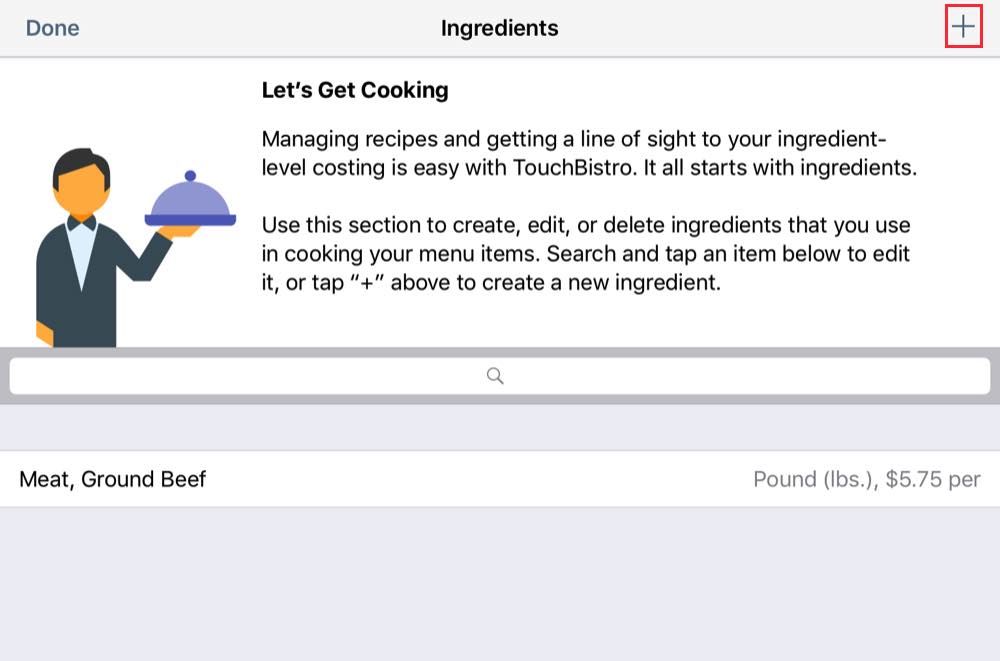
21. Next we’ll add hamburger buns. So tap the Add + icon at the top right.
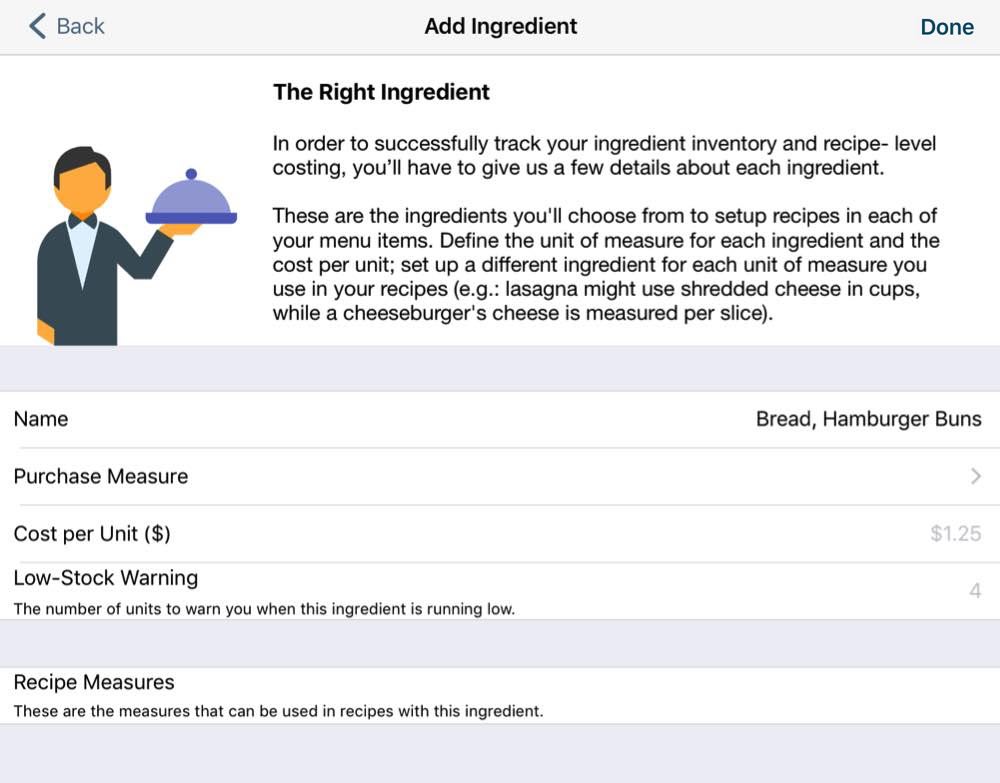
22. Enter Hamburger Buns or Bread, Hamburger Buns as the name.
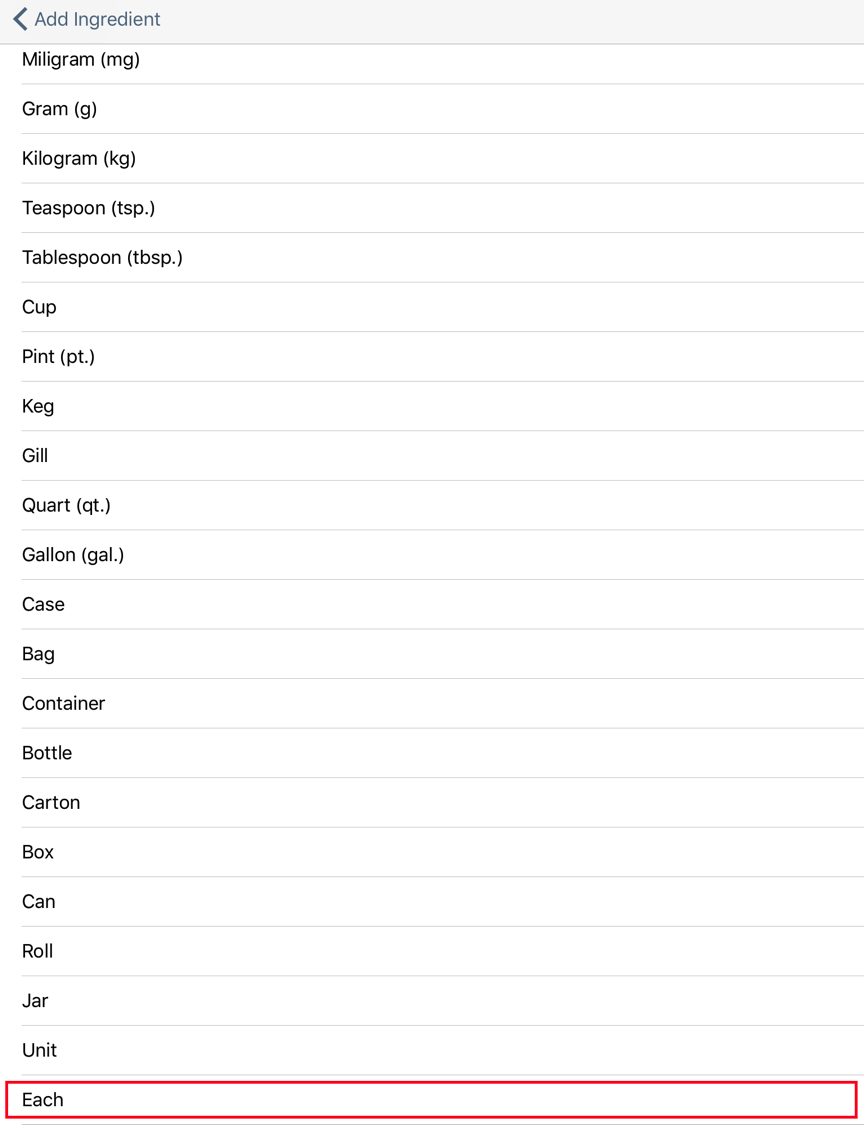
23. For the Purchase Measure, again use the “intake” measure. For example, we buy buns individually, so select Each.
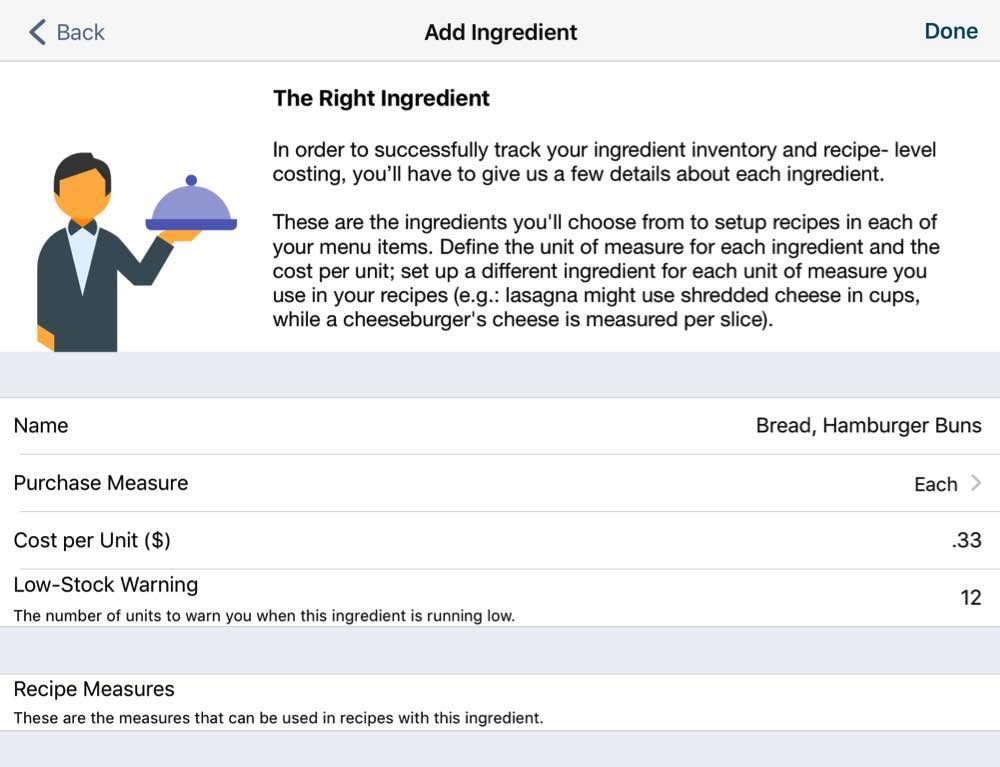
24. Enter how much you pay for each bun. For example, you pay 33 cents per hamburger bun. Enter a Low Stock Warning value (for example, 12 buns).
25. Although buns are stocked by “each” and a burger order consumes the stock by each, we have to set up an identical Each recipe measure. So tap Recipe Measure.

26. Tap the Add + icon at the top right.
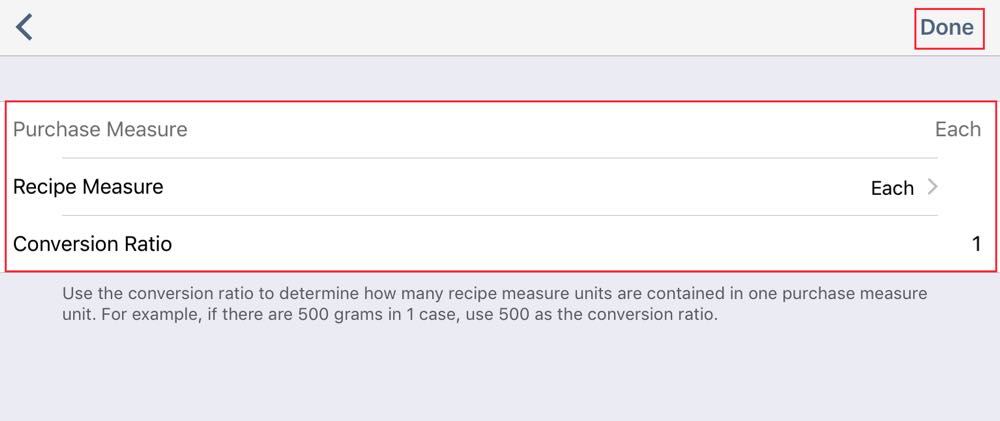
27. Select Each as the Recipe Measure and enter a Conversion Ratio of 1. Tap Done.

28. Tap Add Ingredient to return to the hamburger bun ingredient screen.
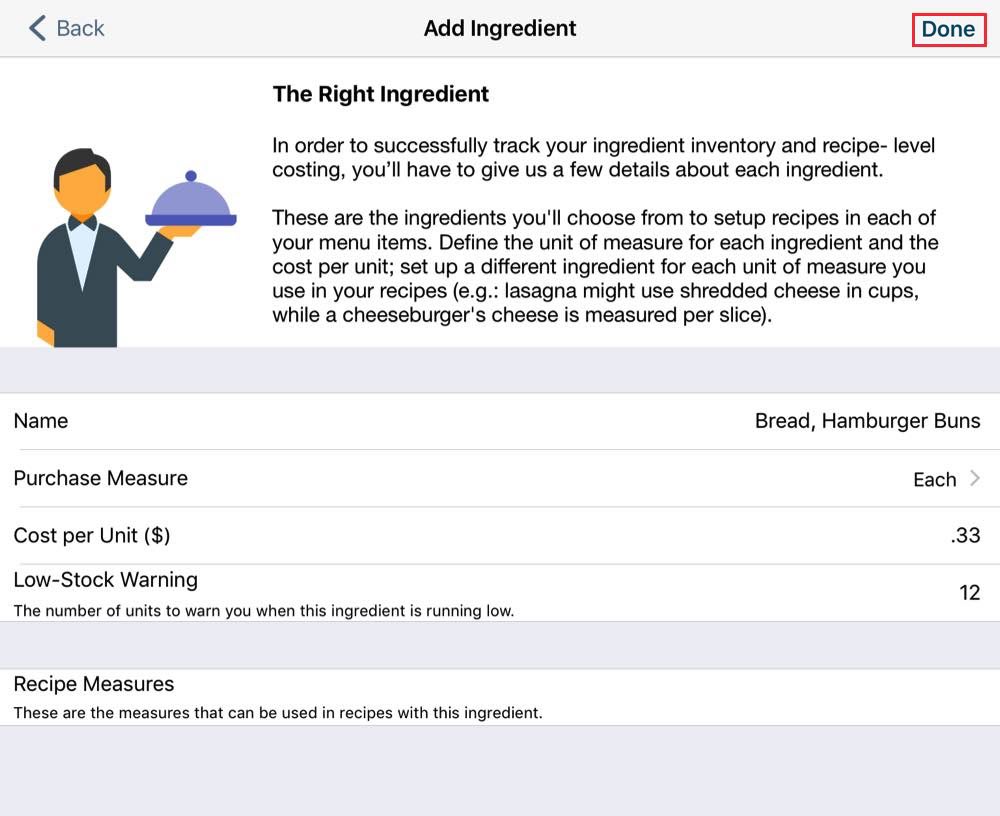
29. Tap Done when you’ve completed this ingredient.
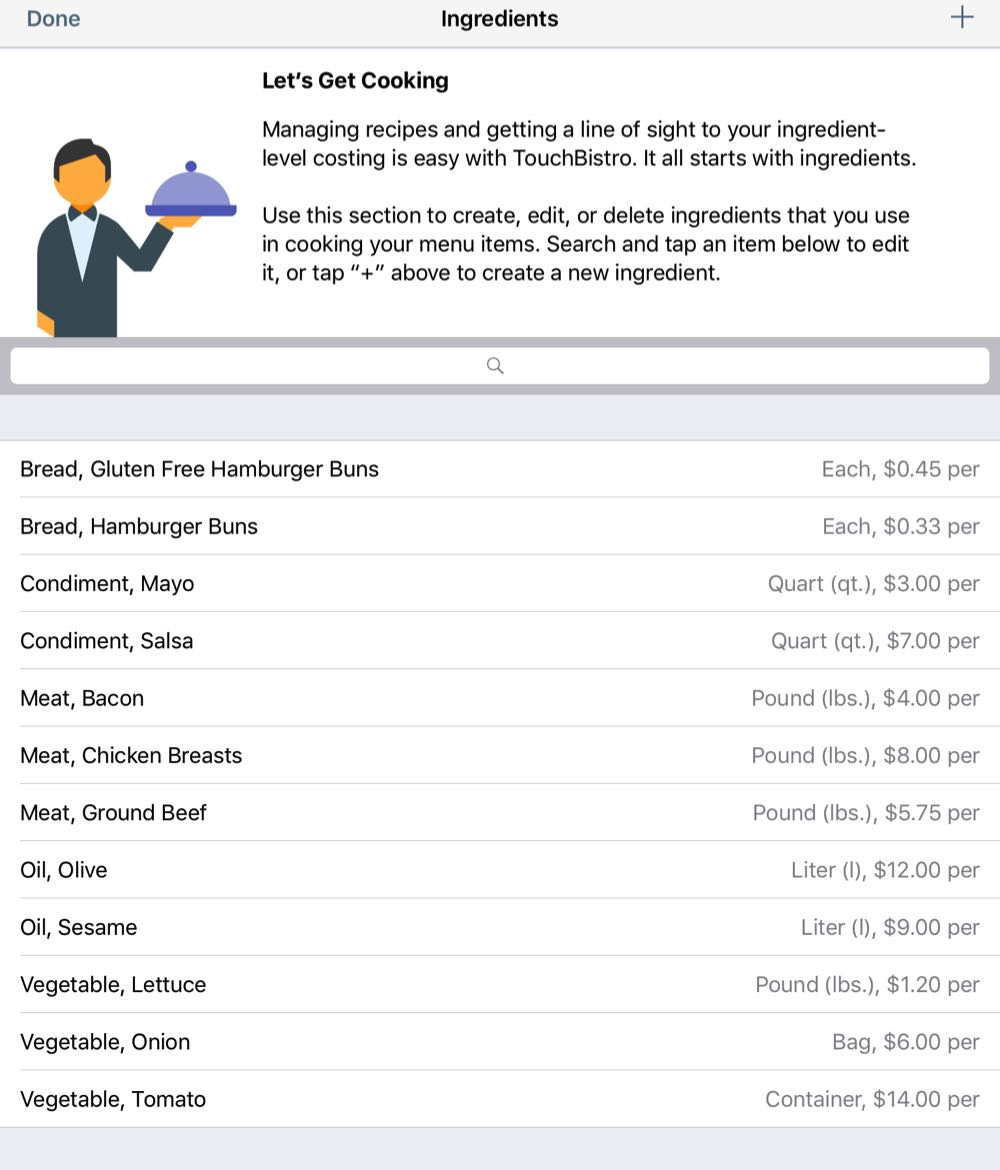
30. Complete all the other ingredients used for your burger (for example lettuce, onions, and tomatoes). As noted, putting a category name before your ingredient (Meat, Bacon or Oil, Olive) can help you visually organize and group your list of ingredients, speeding stock counts at the end of the night.
31. Tap Done to return to the previous screen.
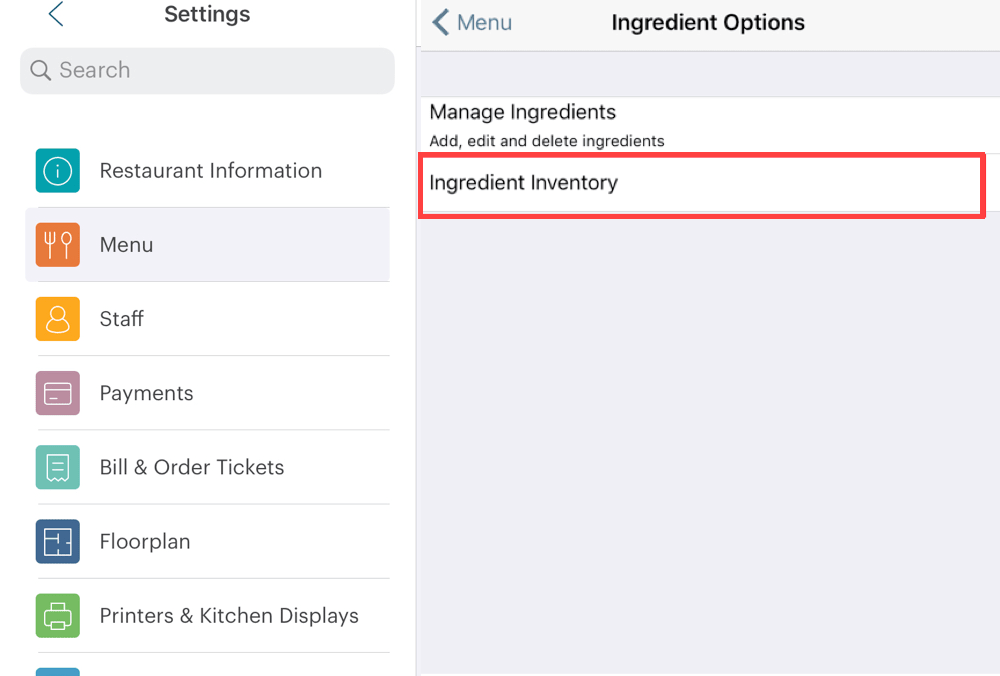
32. Tap Ingredient Inventory.
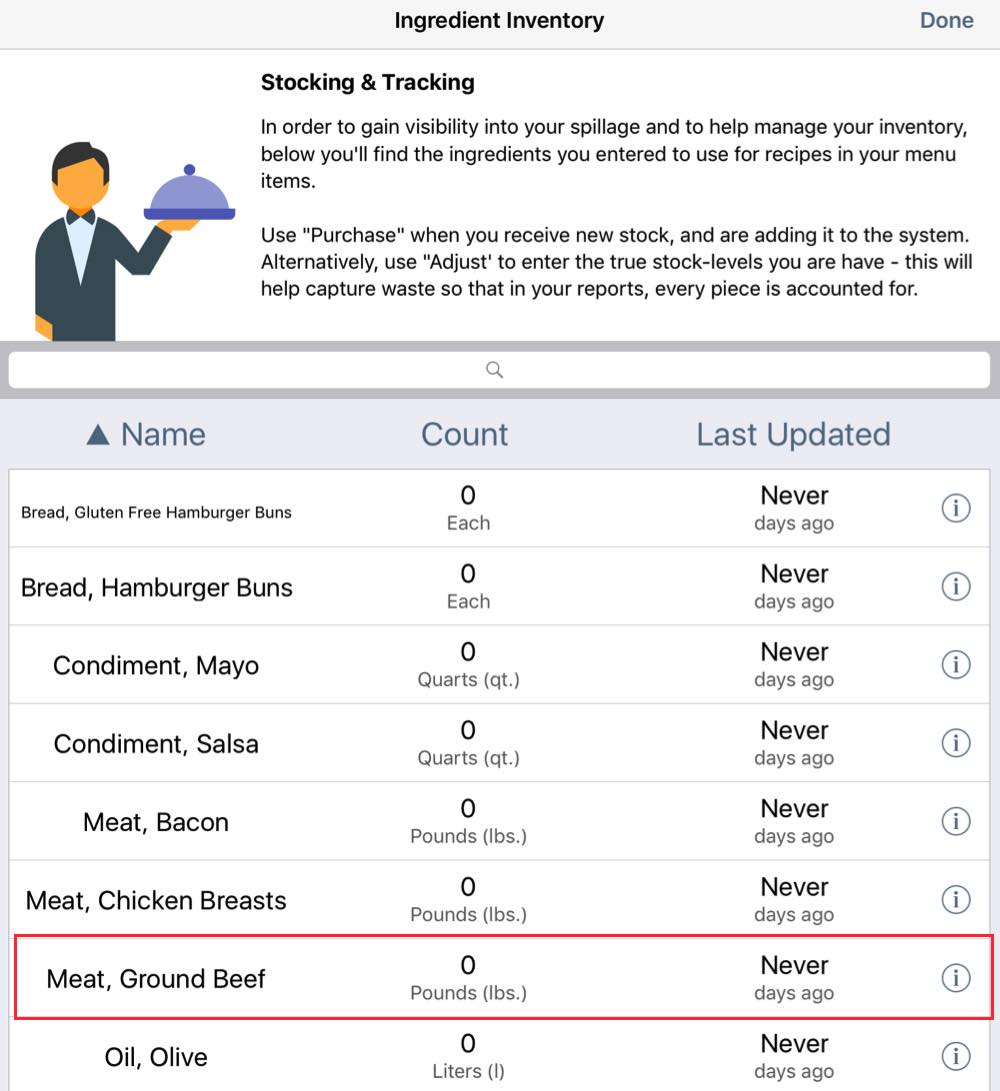
33. You will see a list of the ingredients you just added. You can now enter how much of each you have in stock. Tap, for example, Ground Beef.
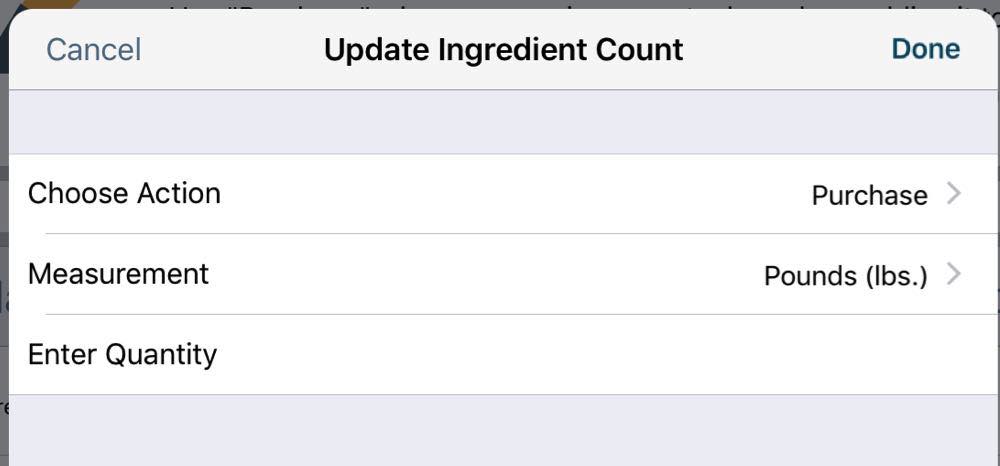
34. Leave Choose Action set to Purchase. Purchase is used when you are adding additional stock or starting with new stock. If you need to correct an error, you can tap this and set it to Adjust. We’ll deal with stock adjustment below. As well, leave Measurement set to the purchase measure (Pounds).
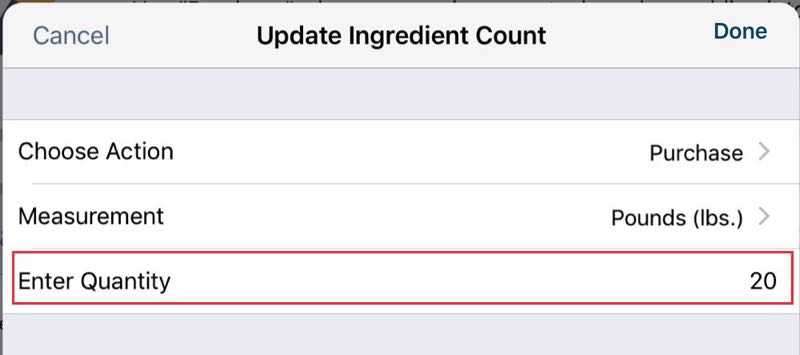
35. In the Enter Quantity field, enter how much ground beef was added to stock. For example, 20 pounds. Tap Done.
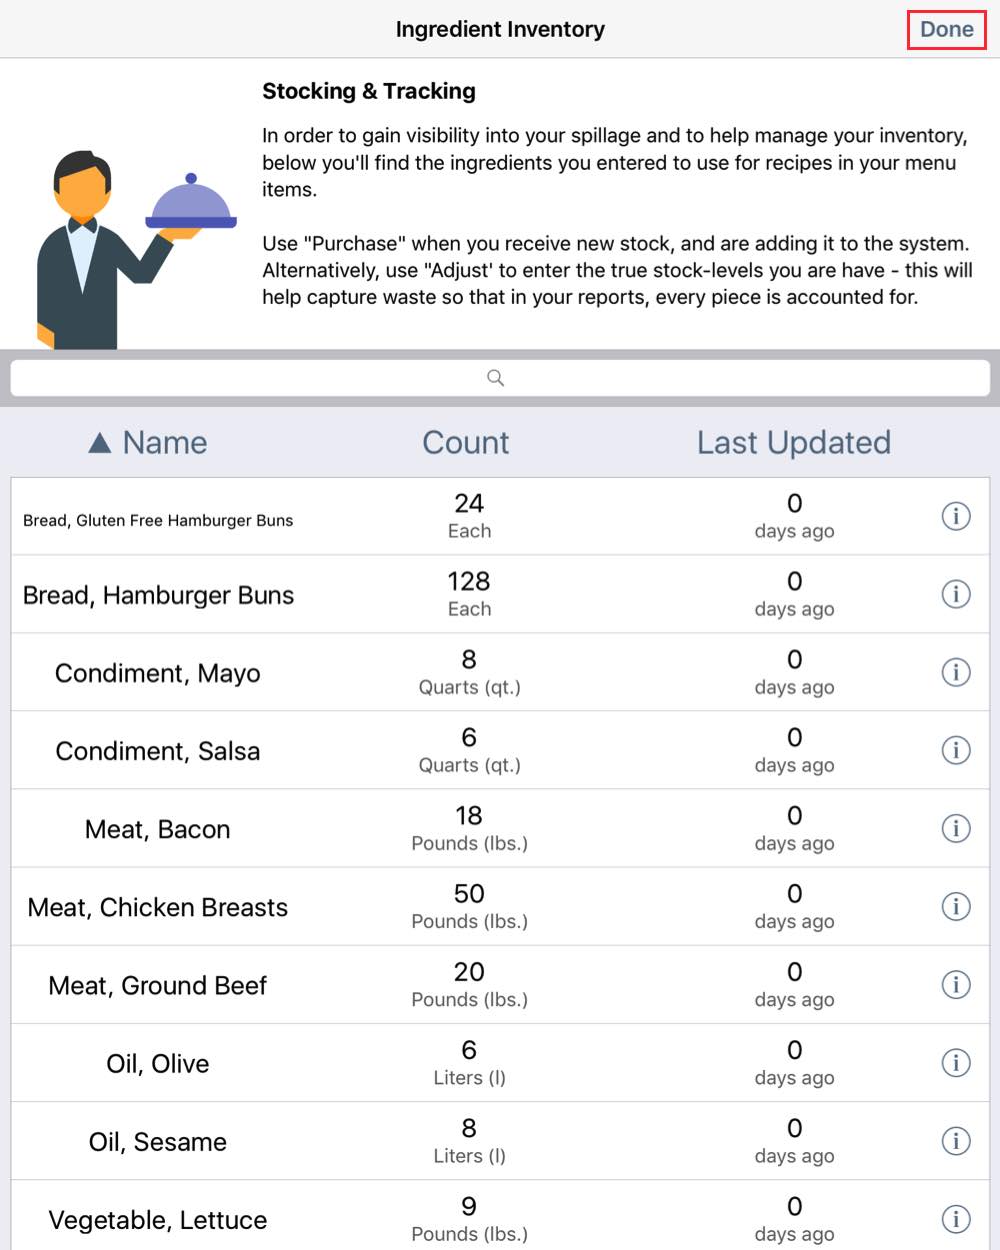
23. Repeat these steps for the remaining ingredients.
24. Tap Done when you’ve completed your inventory counts.
Chapter 3. Setting Up Your Menu Item Recipes

1. Tap Admin | Admin Settings.
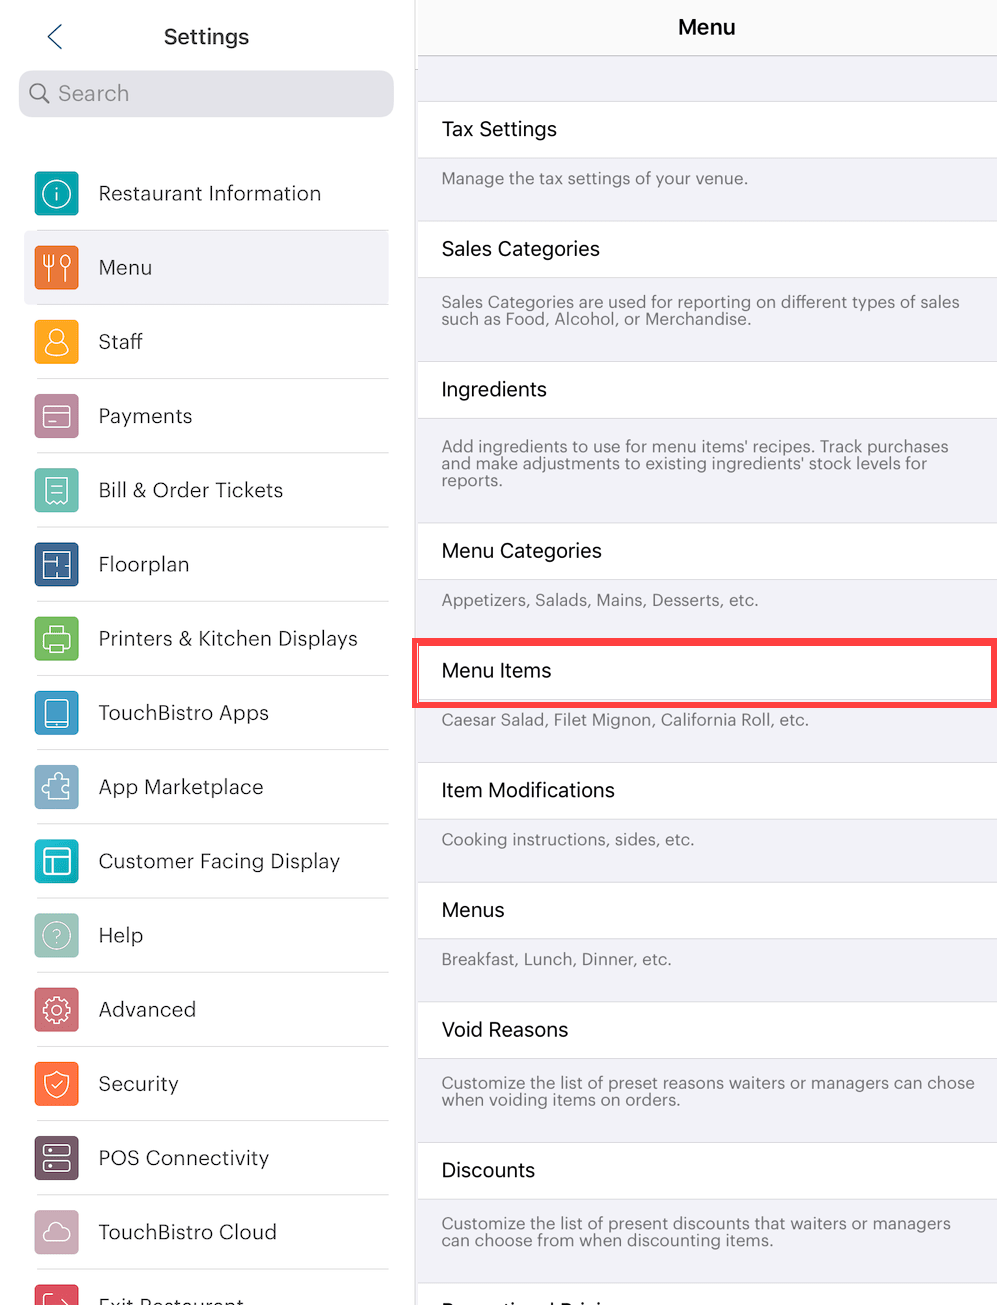
2. Tap Menu and tap Menu Items.
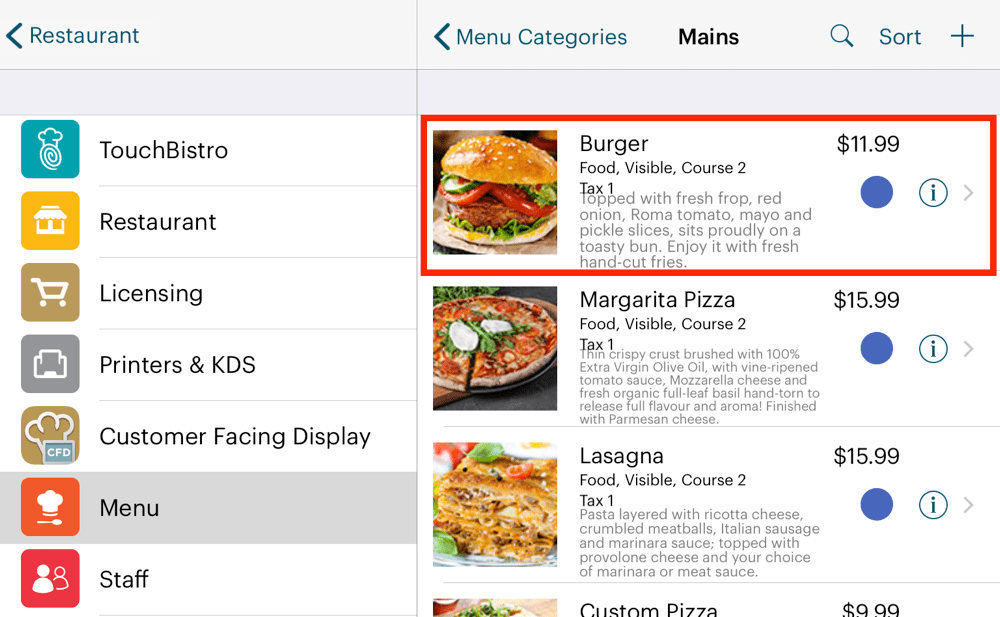
3. Open a category and open a menu item. For example, our Burger menu item.
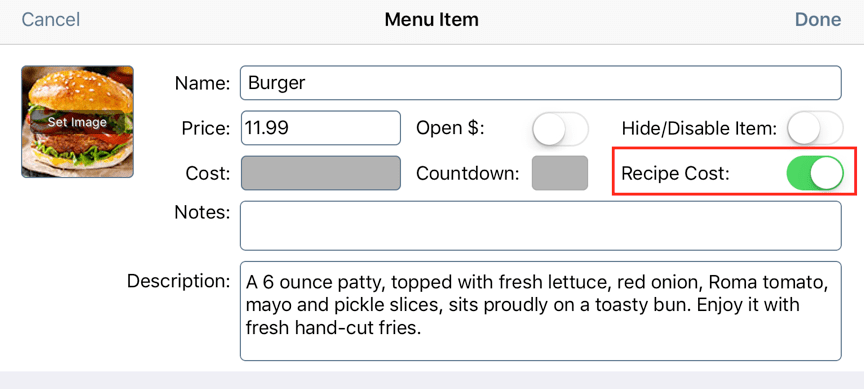
4. Slide Recipe Cost to the green position to cost this menu item based on the menu recipe we’re about to input.
5. Scroll down to the Ingredients section.
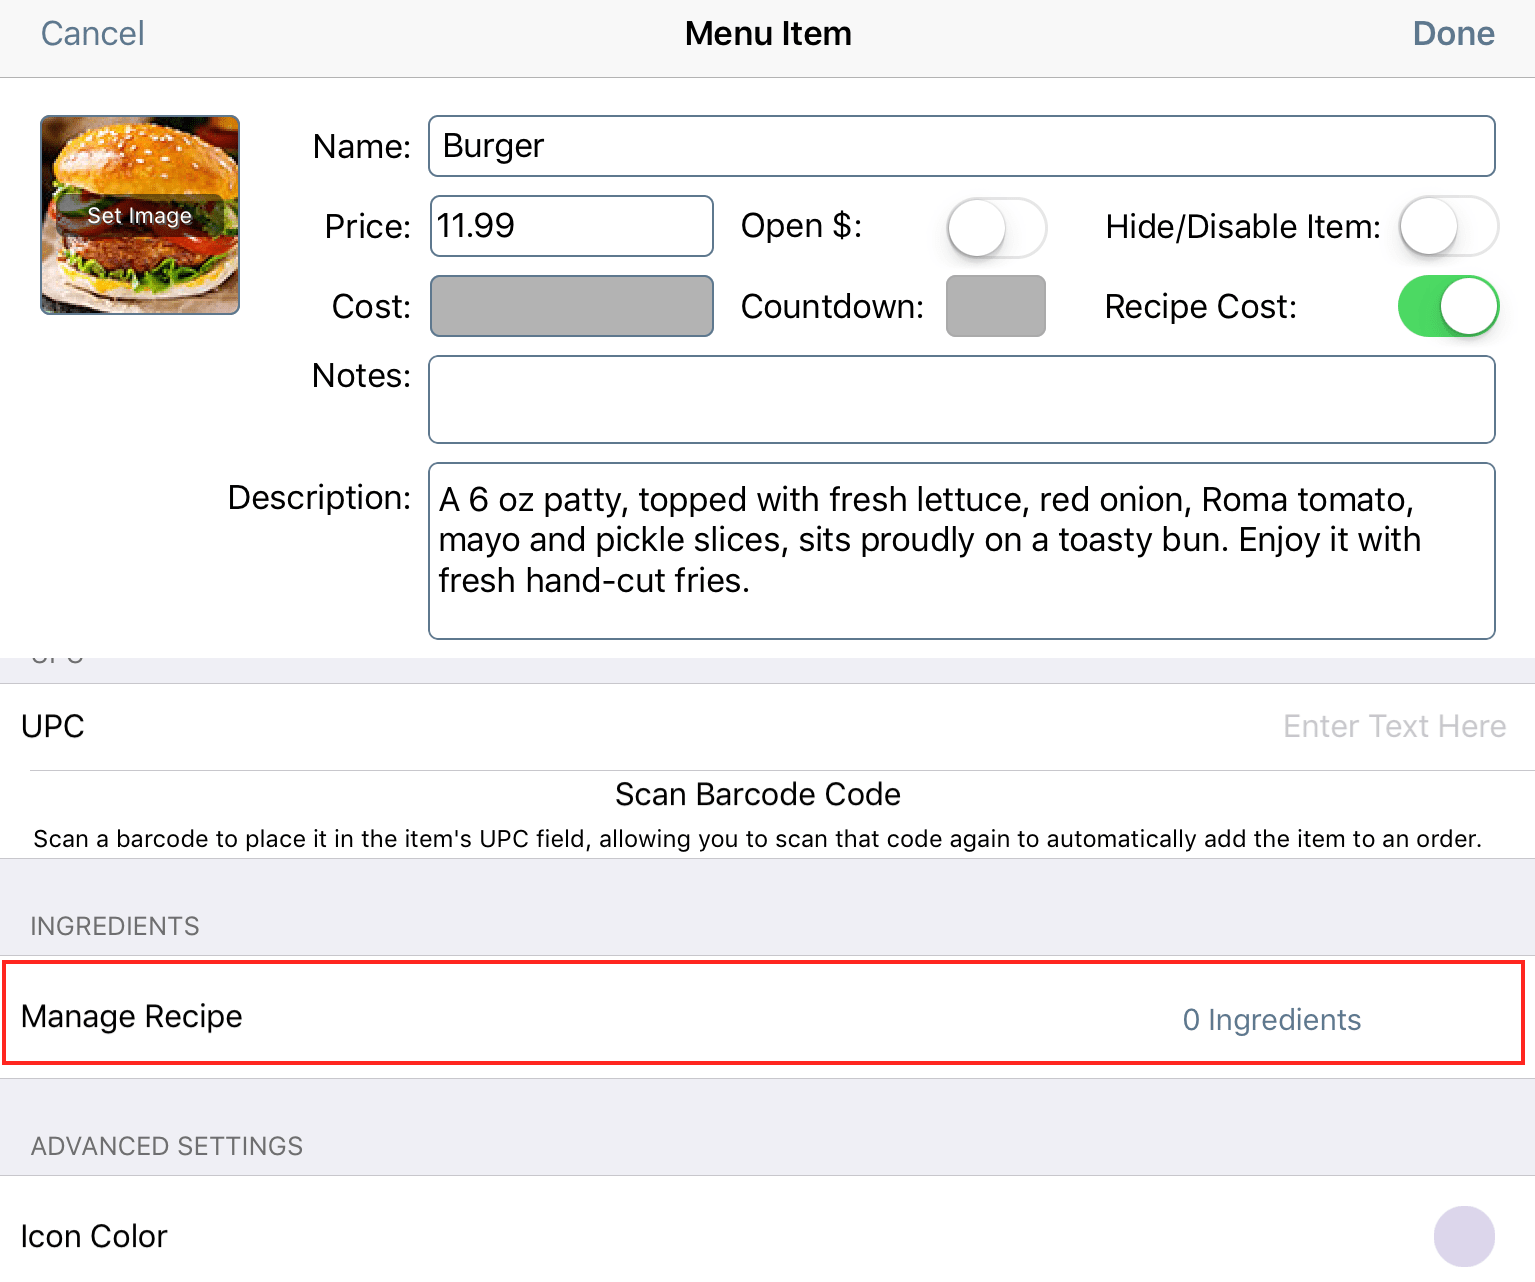
6. Tap Manage Recipe.
7. The full list of inventoried ingredients we added previously is available. If the list is long you can use the Search field to locate ingredients.
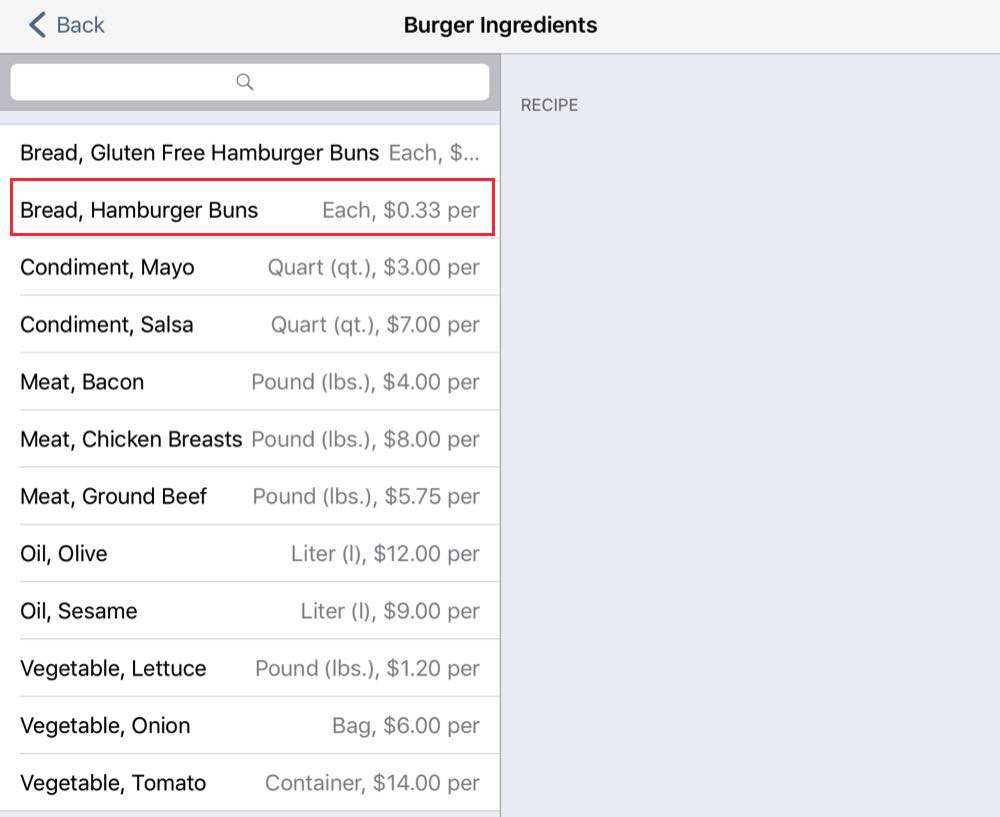
8. In the burger example, we’ll first tap Hamburger Buns.
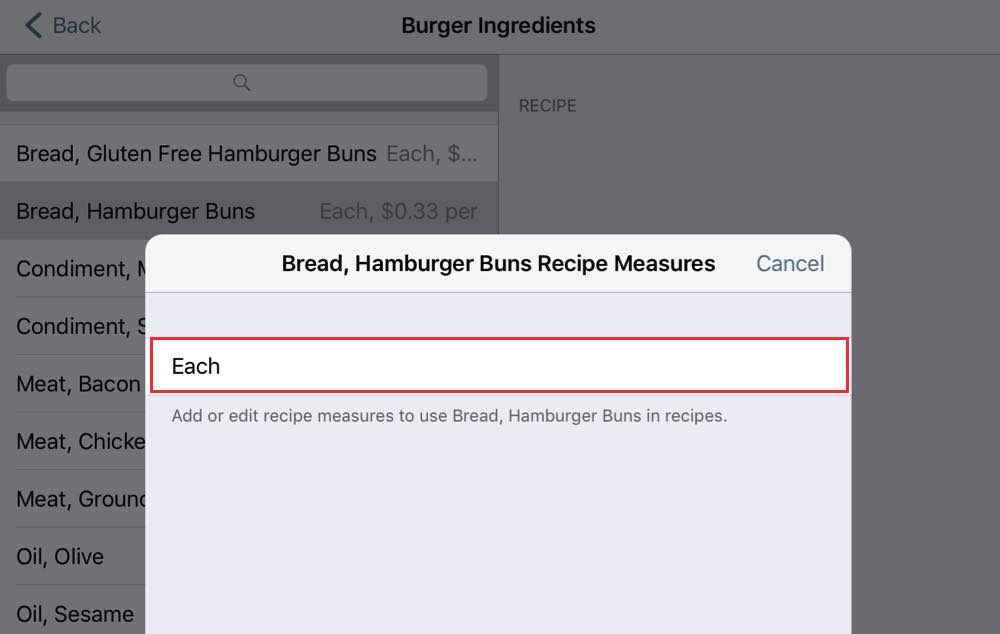
9. Select the appropriate Recipe Measure. In the case of buns, we set up only one measure. Each indicates one bun is deducted from the ingredient inventory when a burger is ordered.
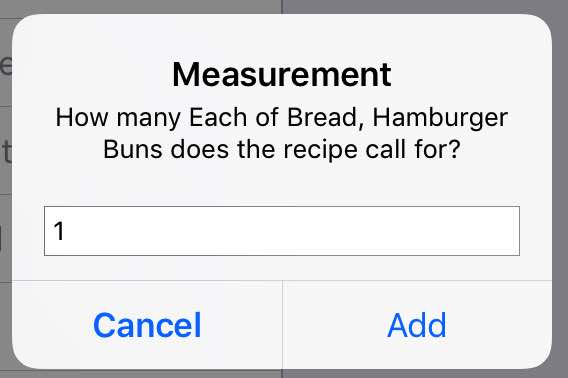
10. We’re prompted for the quantity. In this case, a burger only uses 1 bun. Enter 1 and tap Add.
11. Next we’ll add Ground Beef.
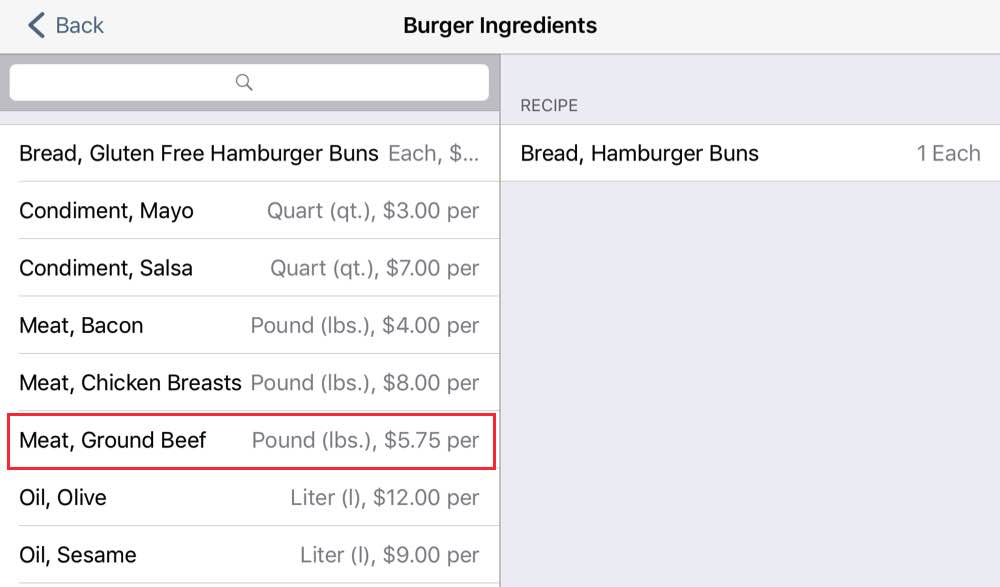
12. Tap Ground Beef.
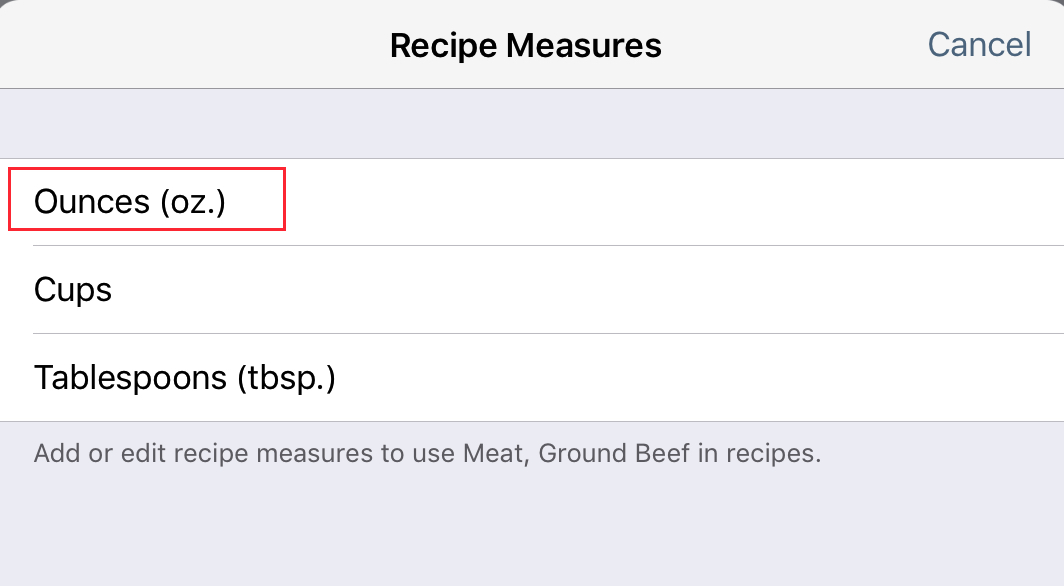
13. Select the appropriate Recipe Measure. When we added Ground Beef as an ingredient, we set up measures for different kinds of recipes. In the case of a burger, we measure our stock of ground beef by the ounce. So tap Ounces.
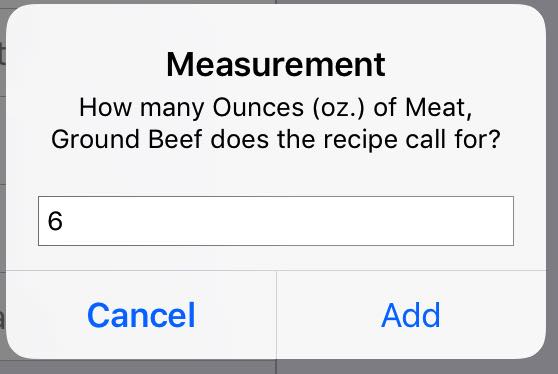
14. Enter how many ounces of ground beef each burger menu item uses. For example, 6 ounces. Tap Add.
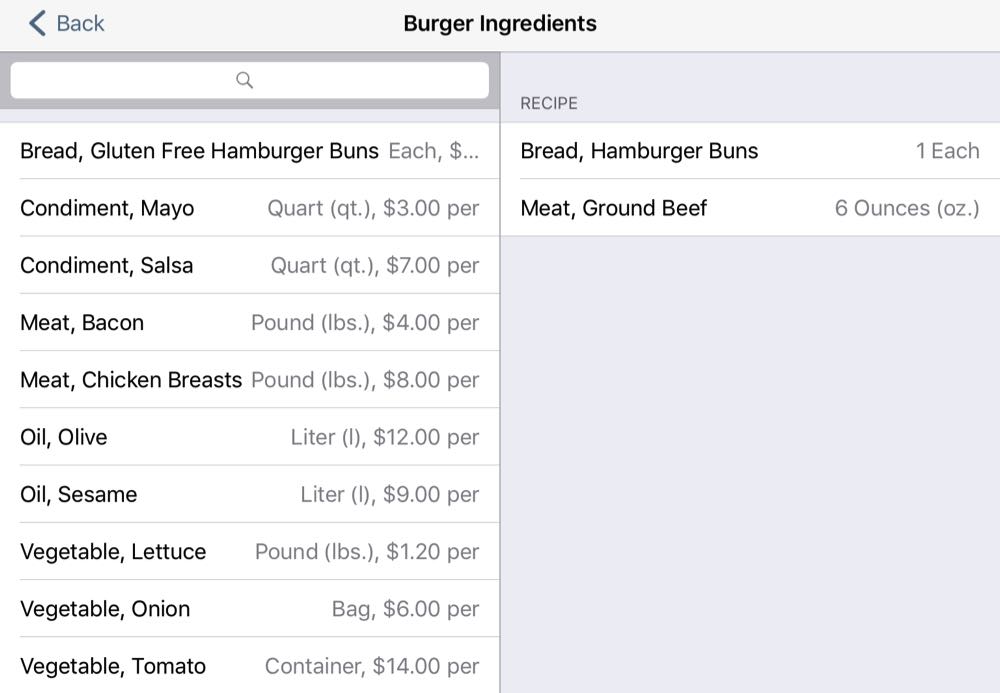
15. We can now add additional ingredients. For example, tap Onion. You’ll notice we inventory onions by the bag.
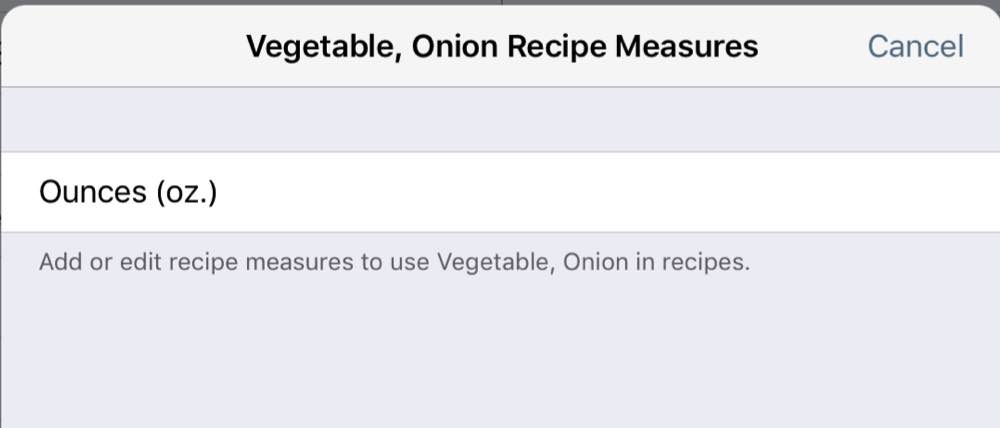
16. In all of our recipes, we use onions by the ounce.
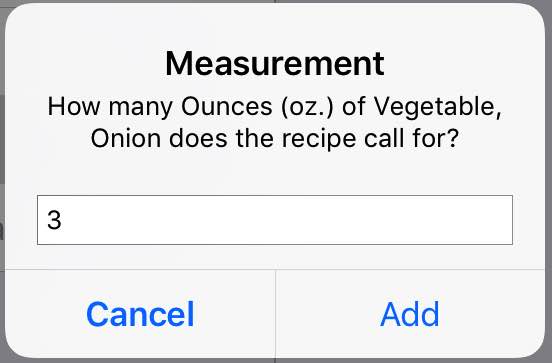
17. Enter the amount of onions used. In this case, 3 ounces. Tap Add.
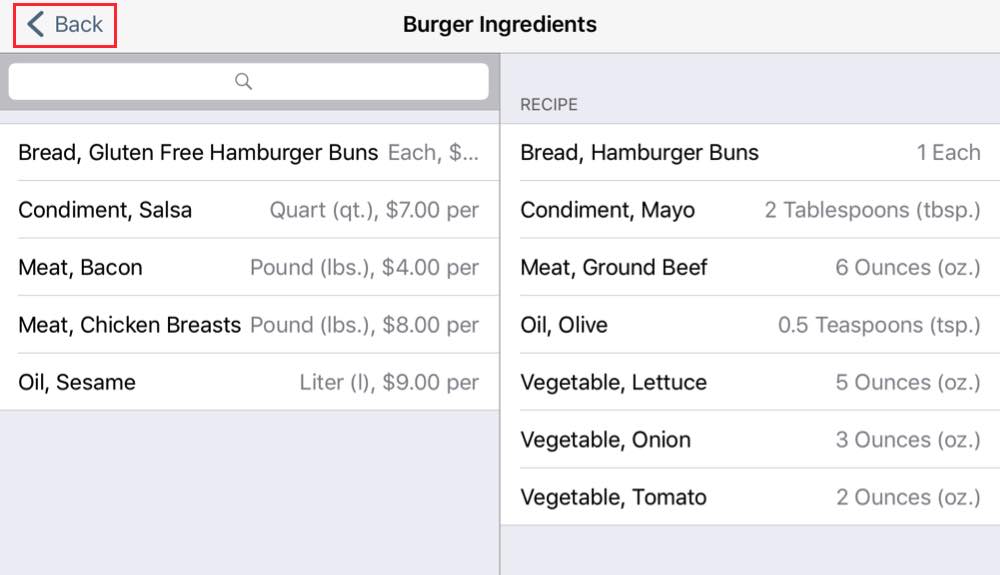
18. Repeat these steps and conversions for the remaining ingredients. Tap < Back when you are done.
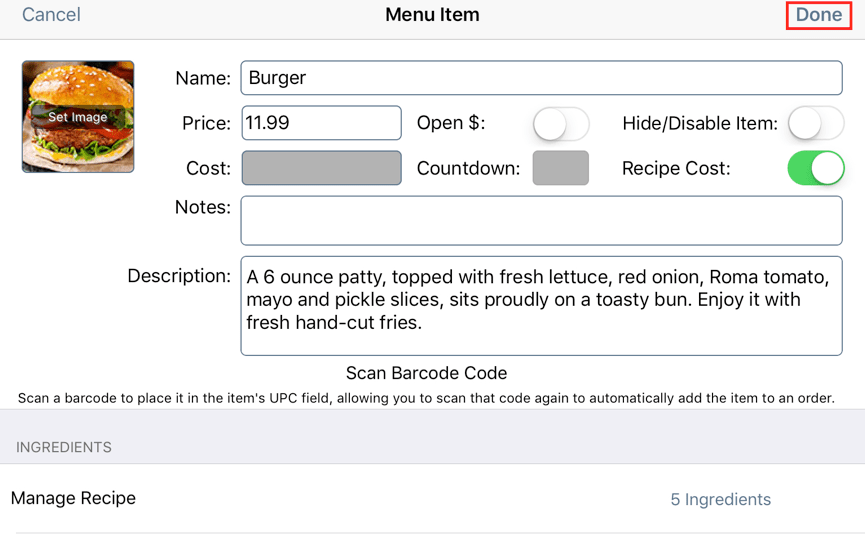
19. Tap Done when completed.
Chapter 4. Reporting
Section 1. iPad Reports
TouchBistro provides two iPad reports that help you track stock, consumption, and help you project when you will need to reorder. To access these reports:
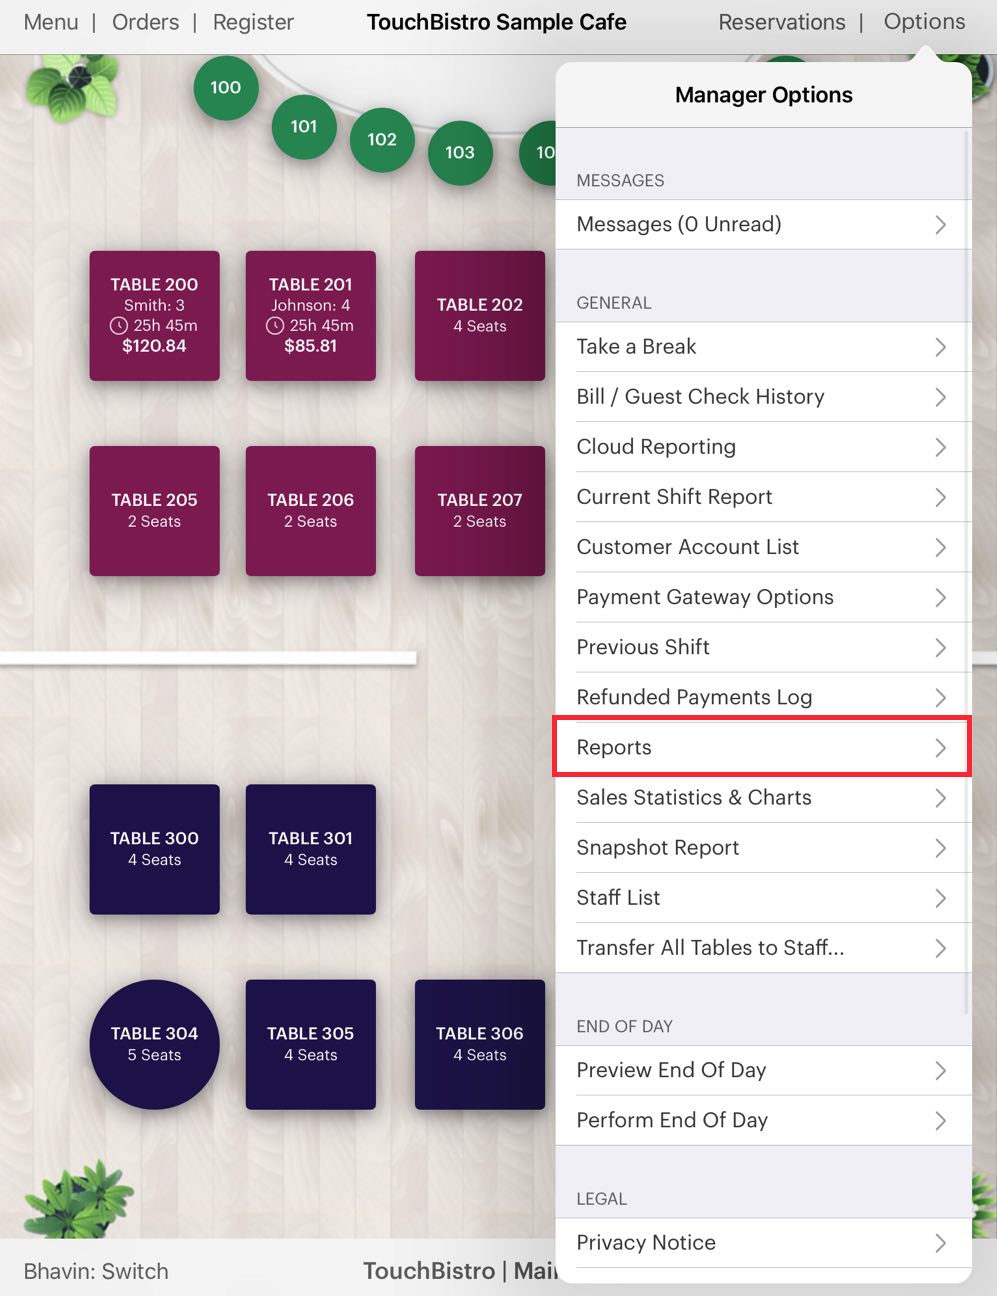
1. Tap Admin (or Options if you’re a manager) and then tap Reports.
2. Select Today. We’ll assume you’re generating this report at the very start of your business day.
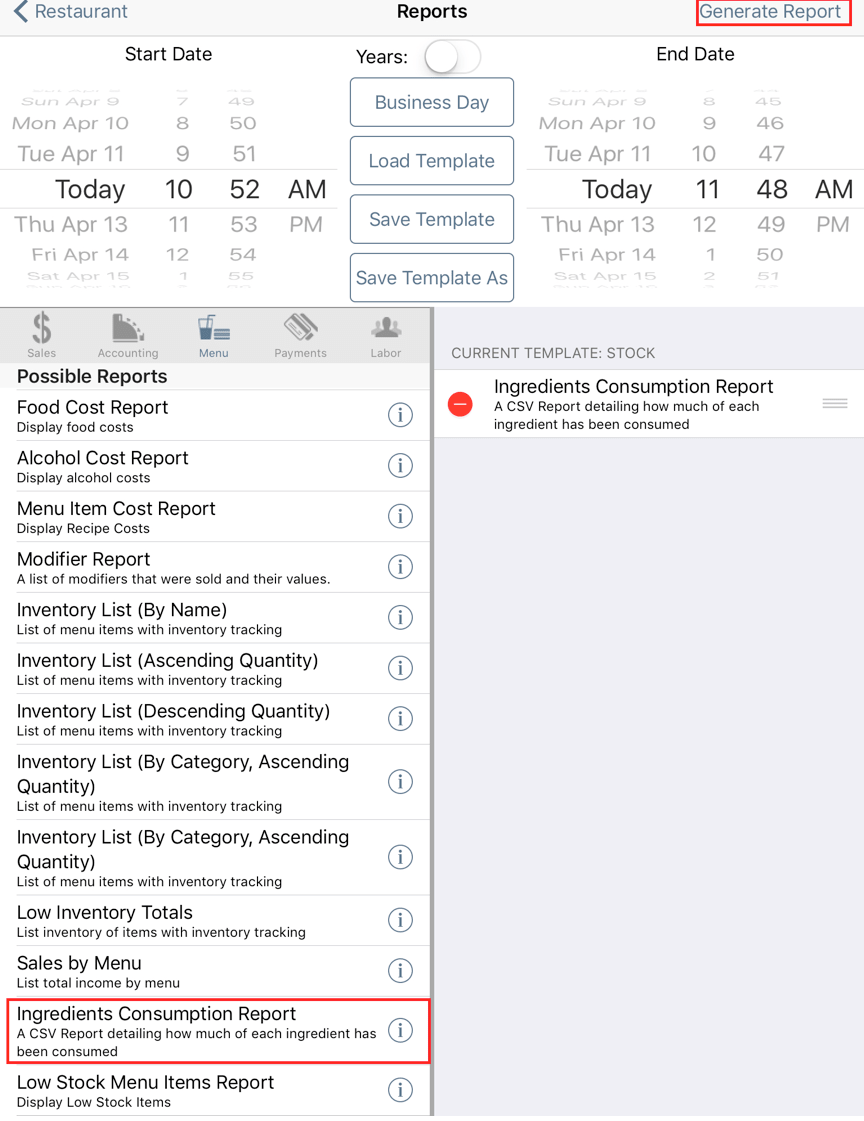
3. Tap Menu and then add the Ingredients Consumption Report. We’ll examine the Low Stock Menu Items Report report below.
4. Tap Generate Report.
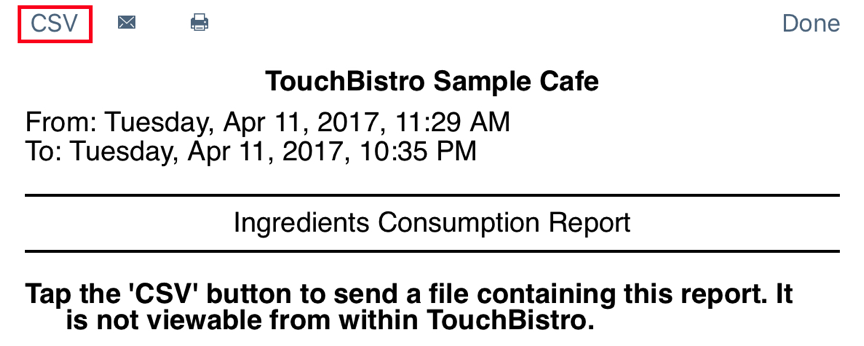
5. These inventory reports cannot be displayed and are CSV only. To view, tap CSV and email the report to yourself.

6. When you open the emailed CSV, you will see your stock figures you entered in the Ending Stock column.
1) End of the Day
In this example, we’ll assume 10 burgers were ordered. Nine were purchased and consumed. One was voided by the server.
At the end of the day, we return to the Menu reports (Admin | Reports | Menu).
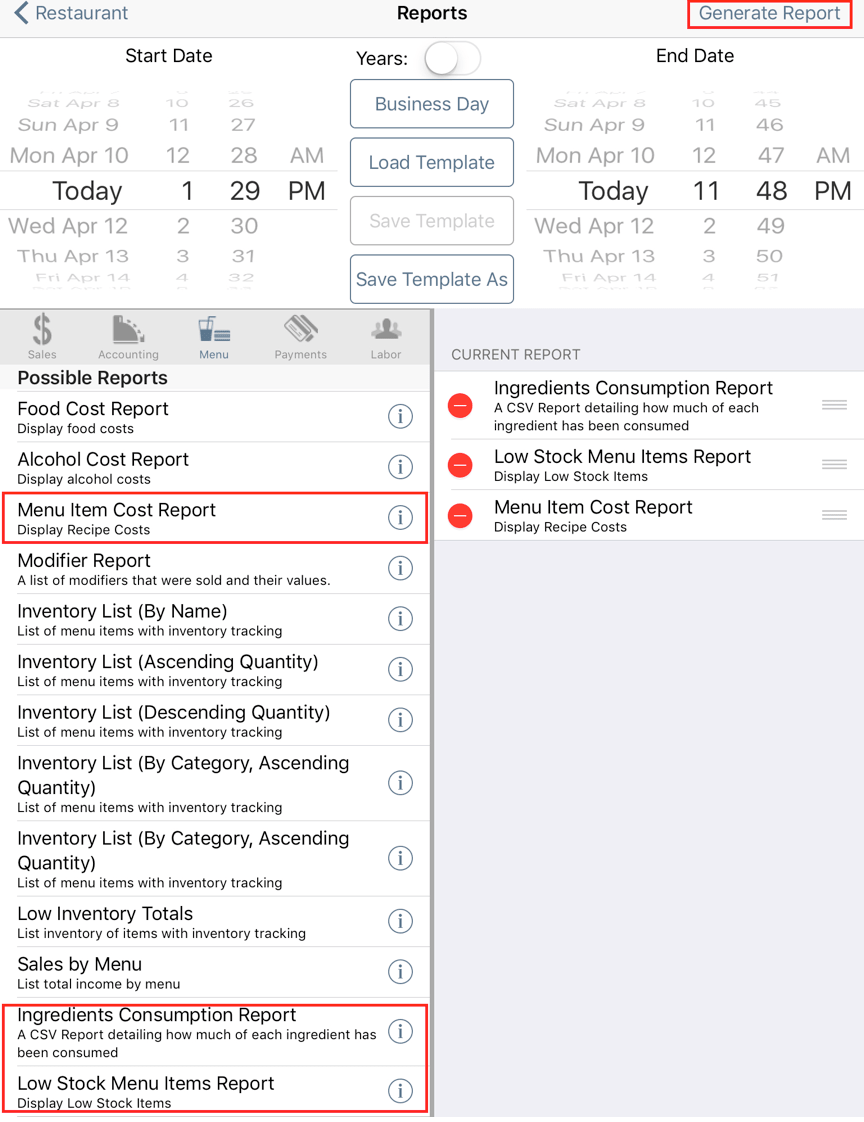
1. This time add the Low Stock Menu Items Report and the Menu Item Cost Report in addition to the Ingredients Consumption Report.
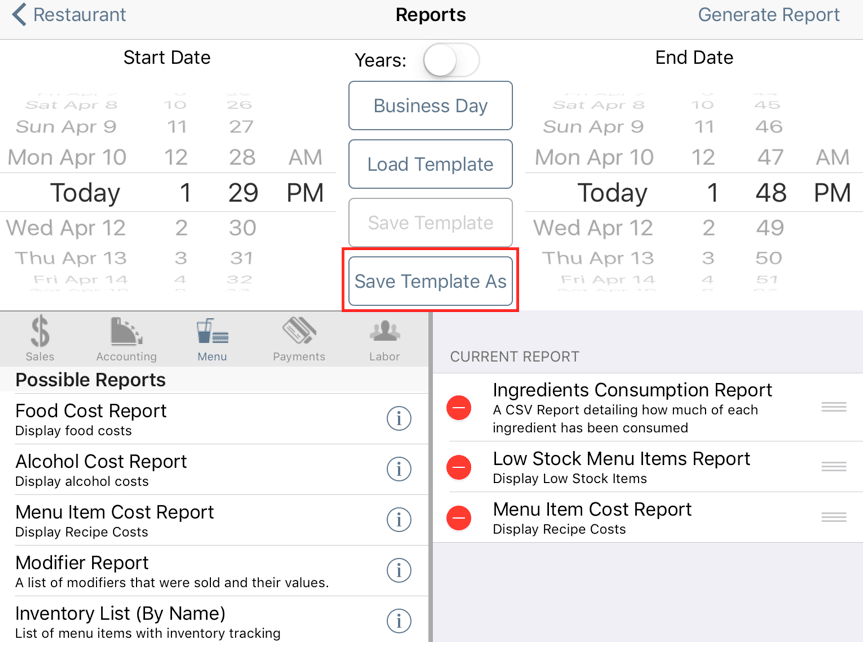
2. At this point you may want to save this report configuration as a template so you can quickly recreate it. To do this tap Save Template As.
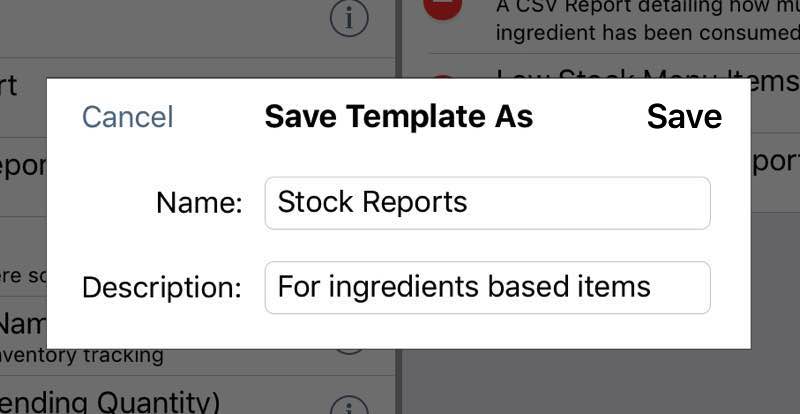
3. Give the template a name and a description and tap Done.
4. You can later tap Load Template to access and generate these three reports again.
5. Tap Generate Report.
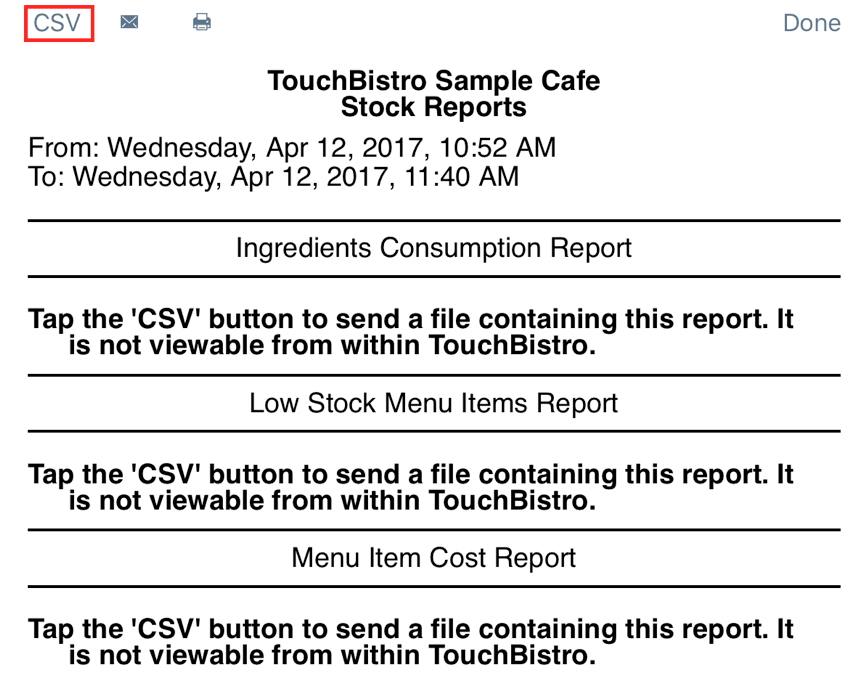
6. These inventory reports cannot be displayed and are CSV only. To view, tap CSV and email the report to yourself.
7. Access your email and open the mailed CSV file.

8. If we examine the Ingredients Consumption Report we can see:
|
Column
|
Description
|
|
Amount Used
|
This column indicates the amount (by indicated measure) of the ingredient used. For example, we can see having made 10 burgers in the day we used 10 buns, 3.75 lbs of ground beef, 2 lbs of tomatoes, etc.
|
|
Total Cost
|
Here we can see the raw cost of the ingredients used to make the ten burgers.
|
|
Ending Stock
|
This column properly reflects the ingredients consumed to make the 10 burgers.
|
|
Daily Consumption Rate
|
This column indicates the amount used for each ingredient for the report’s given time period (say the business day).
|
|
Waste Quantity
|
Because we voided one burger, the Waste Quantity column reflects the ingredients used to make the burger. If the item was voided with a void set up to return the item (or ingredients) to stock, this report would not record any waste.
|
|
Waste Cost
|
The total cost for the wasted ingredient for the given time period.
|
|
Total Adjustment Quantity
|
If we used the Adjust option to correct our stock, this column reflects the difference between the last known ending stock and the new stock total. Adjustments are treated in detail below.
|

9. The Low Stock Ingredients Report gives, for any particular menu item, an estimation of how many you can still make and serve based on existing ingredient inventory. This estimate will be high if many menu items share the same ingredients. It also indicates how many of the menu items were sold for the report’s given time period. For example, in our burger example, 10 were ordered. One was voided and logged as waste. Nine were sold. The sold quantity is reflected here.

10. The final report we added to our CSV is the Menu Item Cost Report. This report indicates:
|
Column
|
Description
|
|
Avg. Recipe Cost
|
The cost of all ingredients by recipe measure.
|
|
Avg. Menu Item Price
|
An average amount realized for the menu item. This will factor in discounted items. For example, you have a menu item called Chicken Fingers and the menu item is priced at $10.
If you sold five at the full price of $10 and five at $5 because, say, a happy hour special reduced the menu item by 50%, your average price would be $7.50. This report would reflect that.
|
|
Avg. Gross Profit
|
Avg. Menu Item Price less the Avg. Recipe Cost.
|
|
Avg. Food Cost%
|
Avg. Recipe Cost divided by Avg. Menu Item Price
|
Section 2. Activity Log
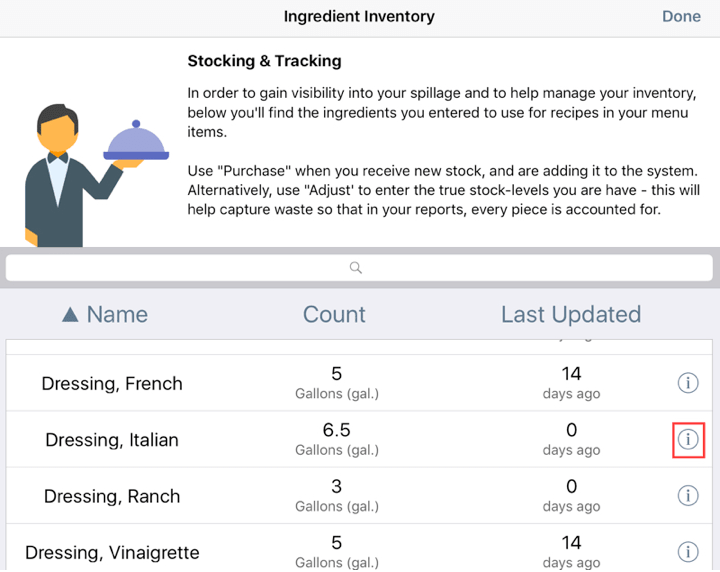
On the Stocking & Tracking screen you can access an ingredient Activity Log. Tap the Information ![]() icon associated with the ingredient to see a log of purchases and adjustments.
icon associated with the ingredient to see a log of purchases and adjustments.
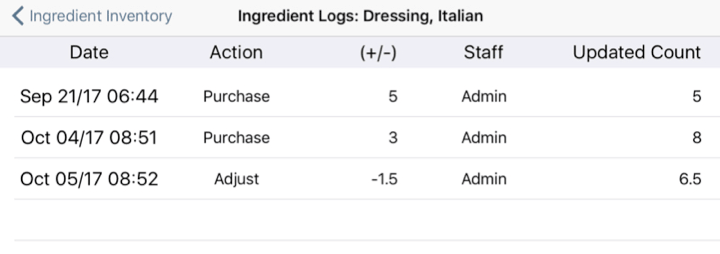
The log displays changes to the inventory by purchase measure and the date the change was made. This log cannot be printed or exported.
Chapter 5. Purchases and Adjustments
As we saw above, when you first set up your ingredient inventory you used the Purchase option. The Purchase option should be used to add additional stock (that is, when you purchase more stock).
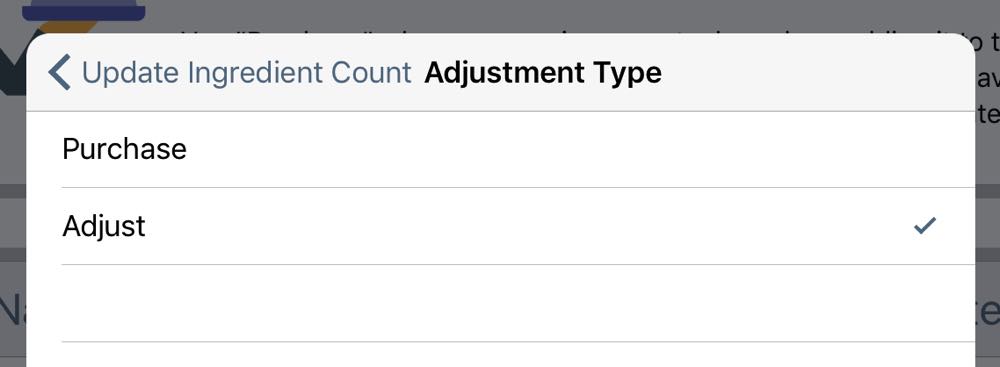
If you tap Choose Action you can select the Adjust action. This should be used to correct miscounted stock. We’ll see how to use this action later.
Section 1. Purchases

At the end of the day, you notice your ground beef stock is getting low. So you take a delivery of an additional 20 lbs.
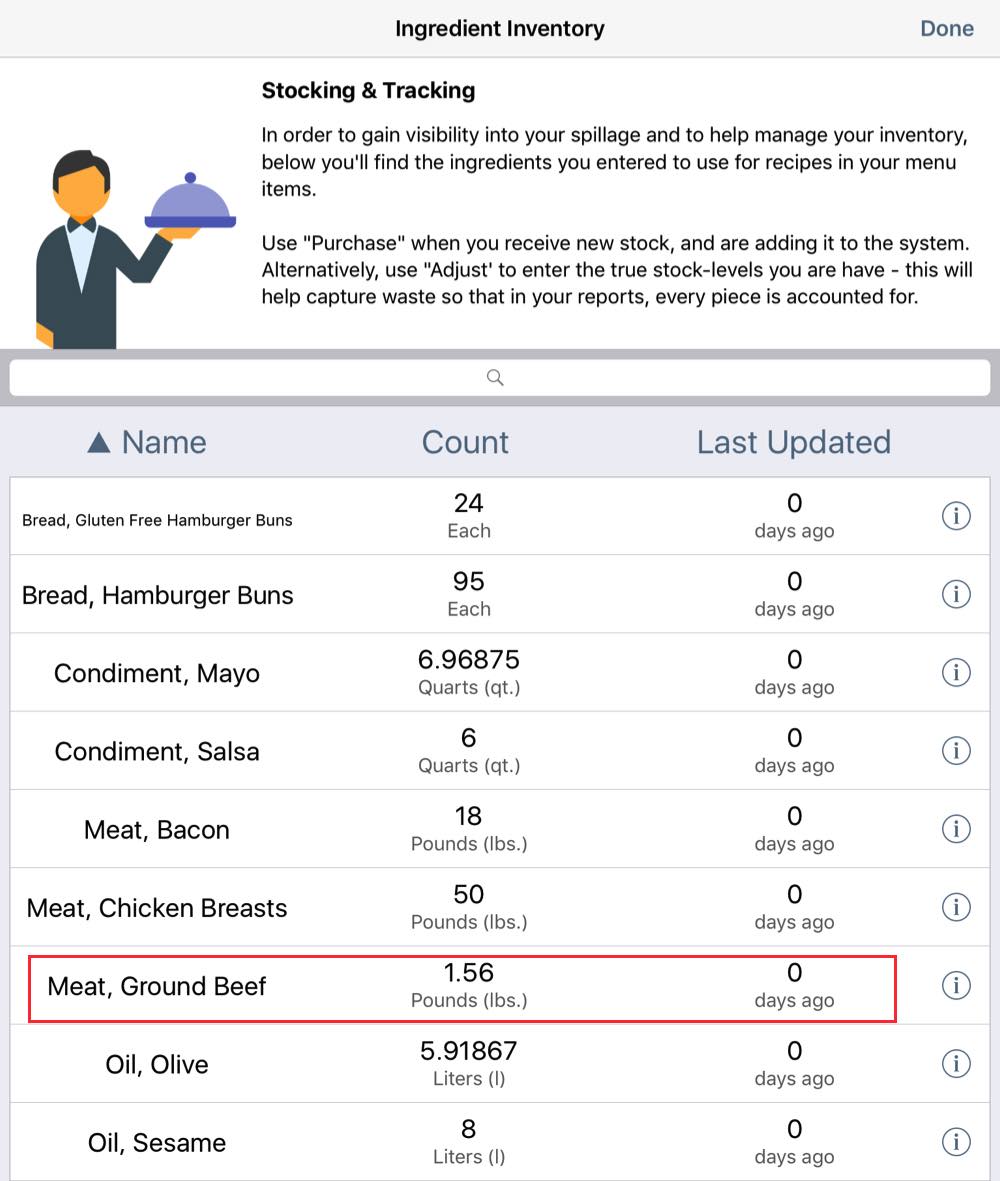
1. Tap your ingredient.

1. Leave Choose Action set for Purchase and Measurement set for Pounds.
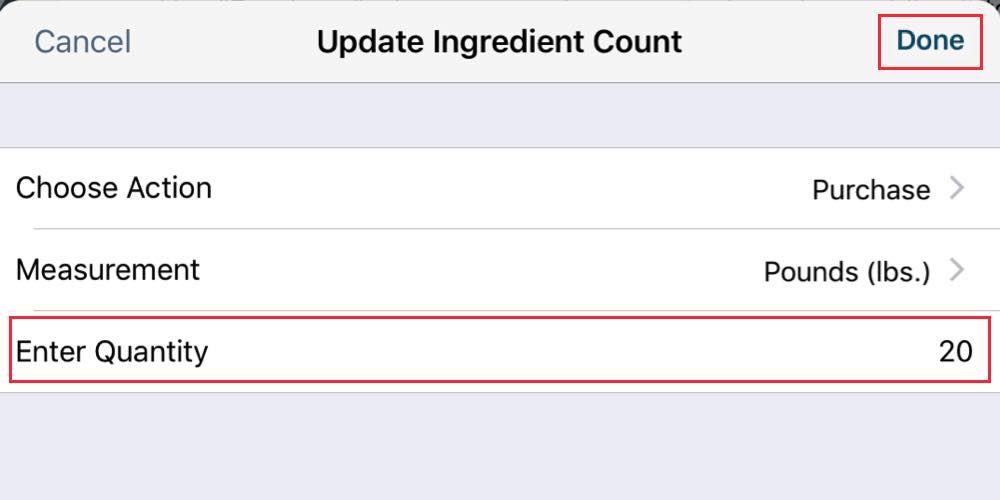
2. Enter the amount purchased in the Enter Quantity field (for example, you’ve purchased 20 lbs). Tap Done.
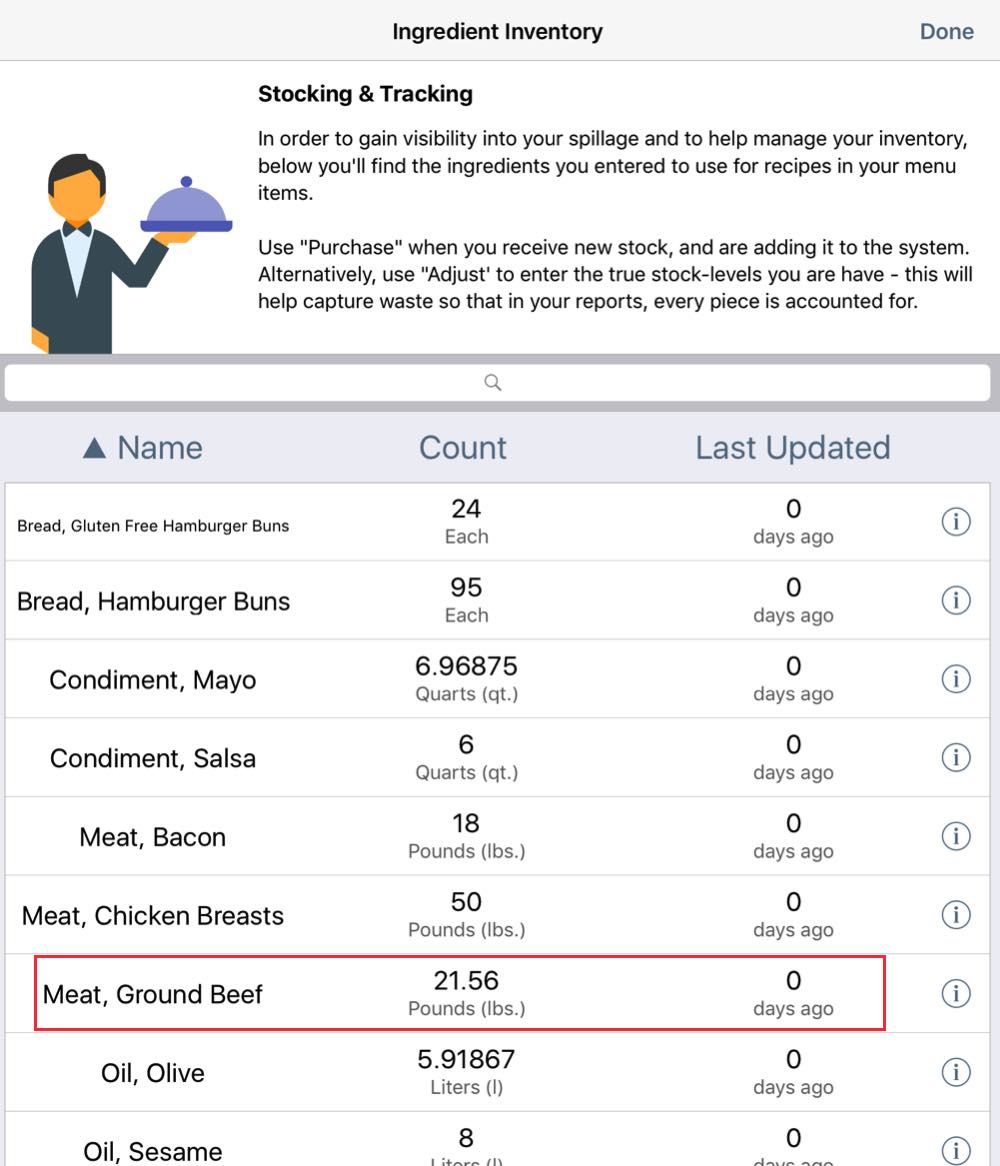
3. TouchBistro reflects the new count (1.56 + 20 = 21.56).

4. If we ran our Ingredients Consumption Report after taking delivery, we would see the Ending Stock column likewise reflect the purchase. Note, the Total Adjustment Quantity field remains at 0.
Note: If you add new stock and the cost per unit of the new stock has changed (higher or lower), you should figure out the average unit cost. See this guide for a discussion and a utility that will help you calculate average unit costs.
Section 2. Adjustments

Let’s say you start your day and you notice the inventory count for your ground beef is wrong. Your Ingredients Consumption Report indicates you have 21.5 pounds but your count comes up with 19 pounds. You can use the Adjustments option to correct your inventory.
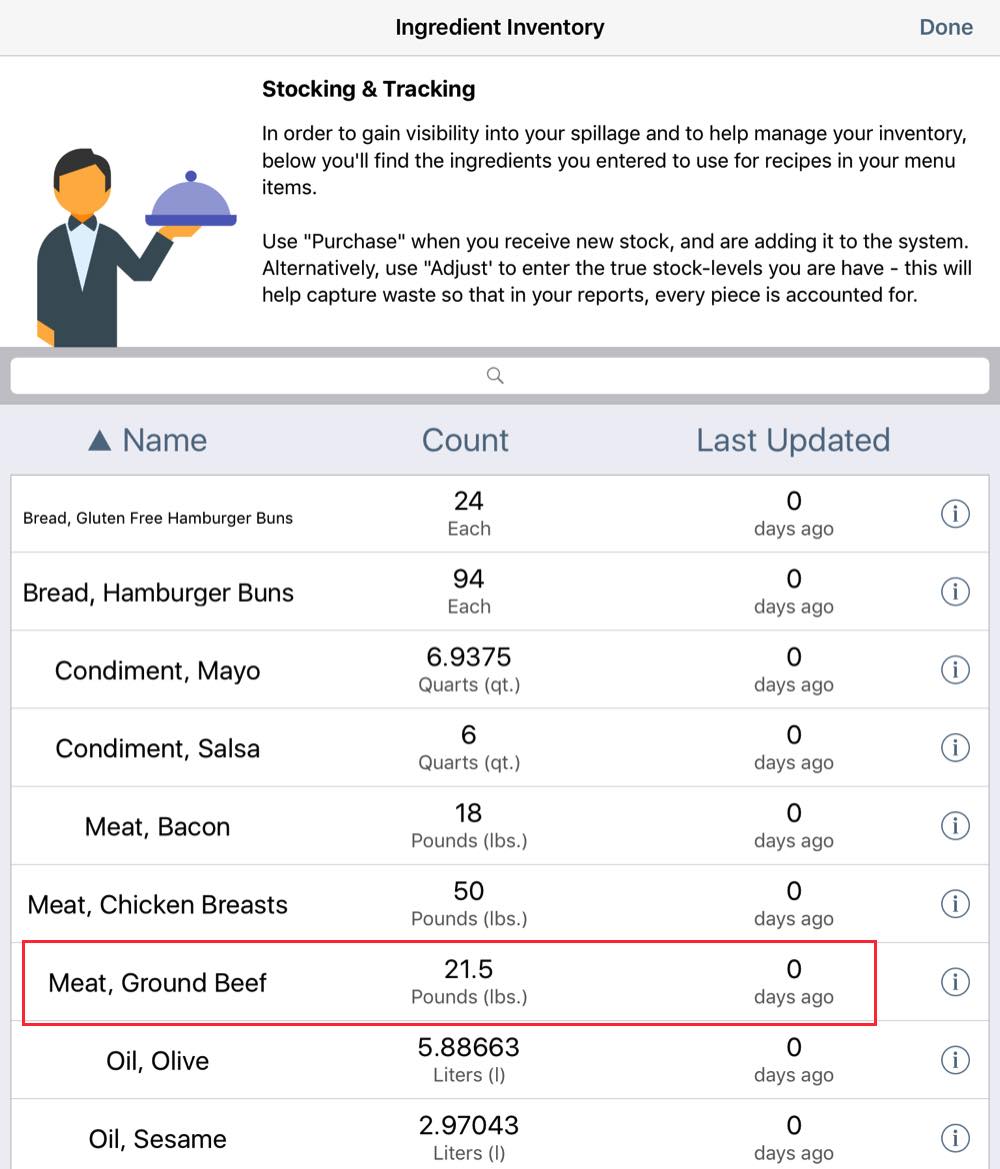
1. Tap your ingredient.
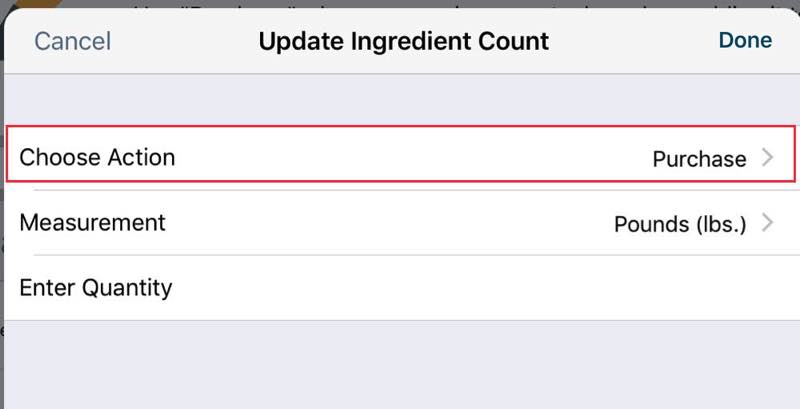
2. Tap Choose Action.

3. Tap Adjust.
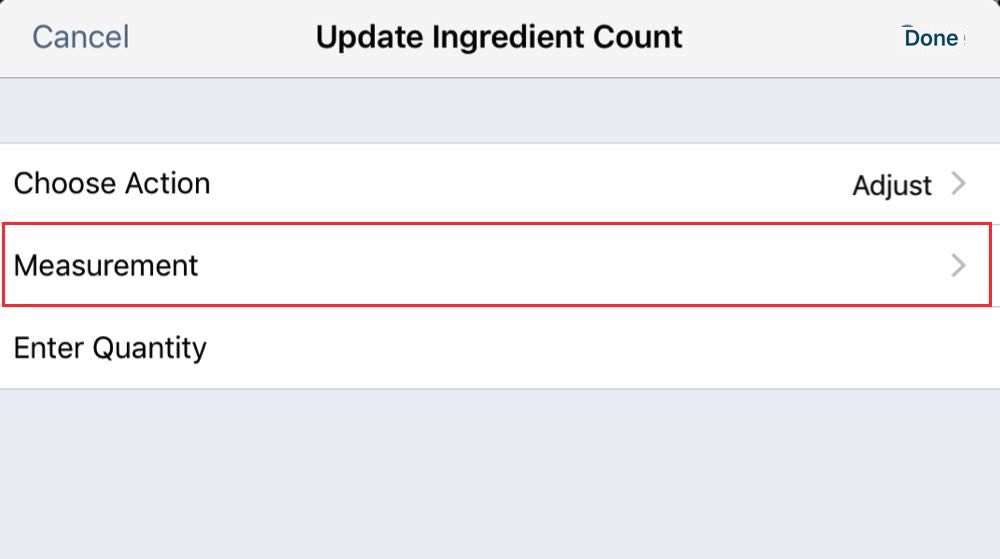
4. Tap Measurement.
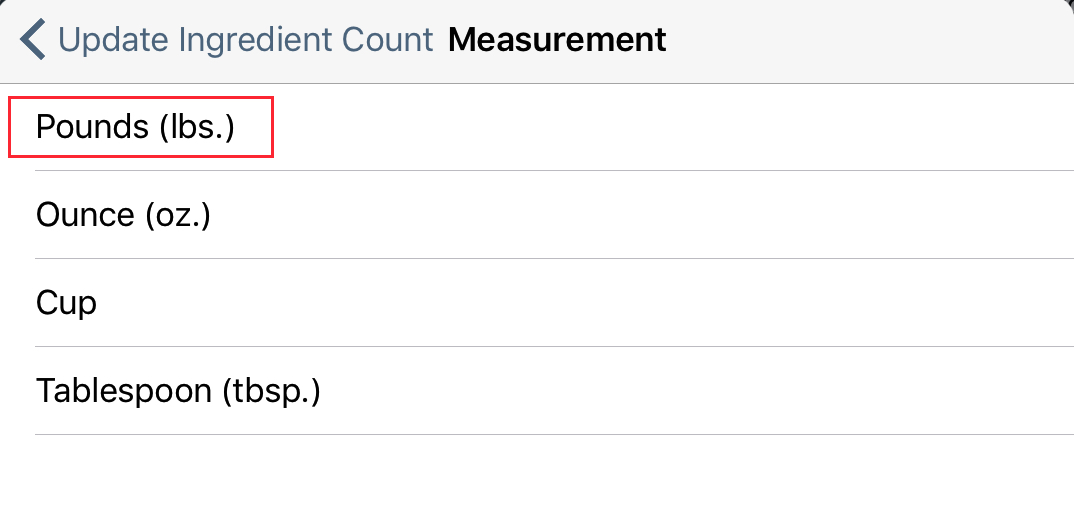
5. In most cases, you’ll adjust by the original Purchase Measure. For example, your true inventory count is 19 pounds. However, there are some circumstances where you might want to adjust using a Recipe Measure. We’ll see an example of this later.
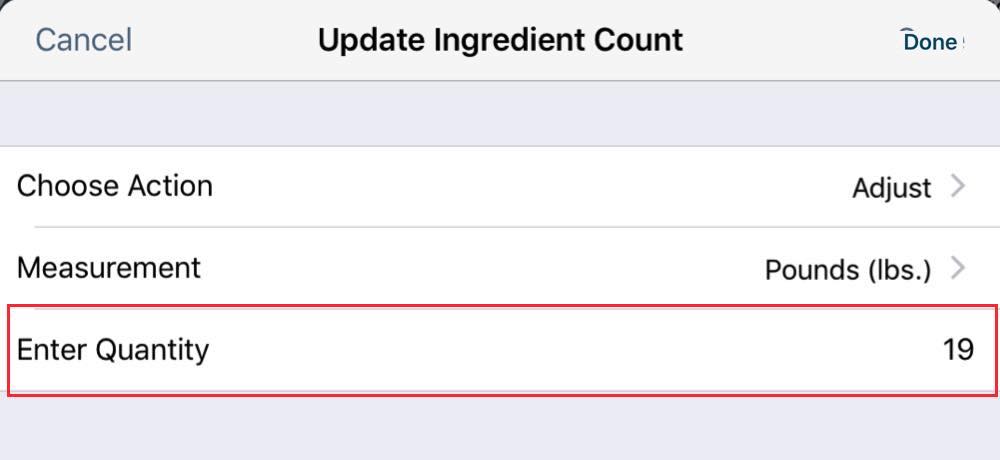
6. Enter the correct stock count, for example 19 pounds and tap Done.

If you run the Ingredients Consumption Report you can see how TouchBistro logs the new end of day inventory as well as logs change due to an adjustment.
1) Adjusting Using a Recipe Measure
As we saw above, you can adjust your inventory count using your Purchase Measure. TouchBistro also gives you the option to adjust using a Recipe Measure. Usually, you might use a Recipe Measure if you only have a small quantity left.
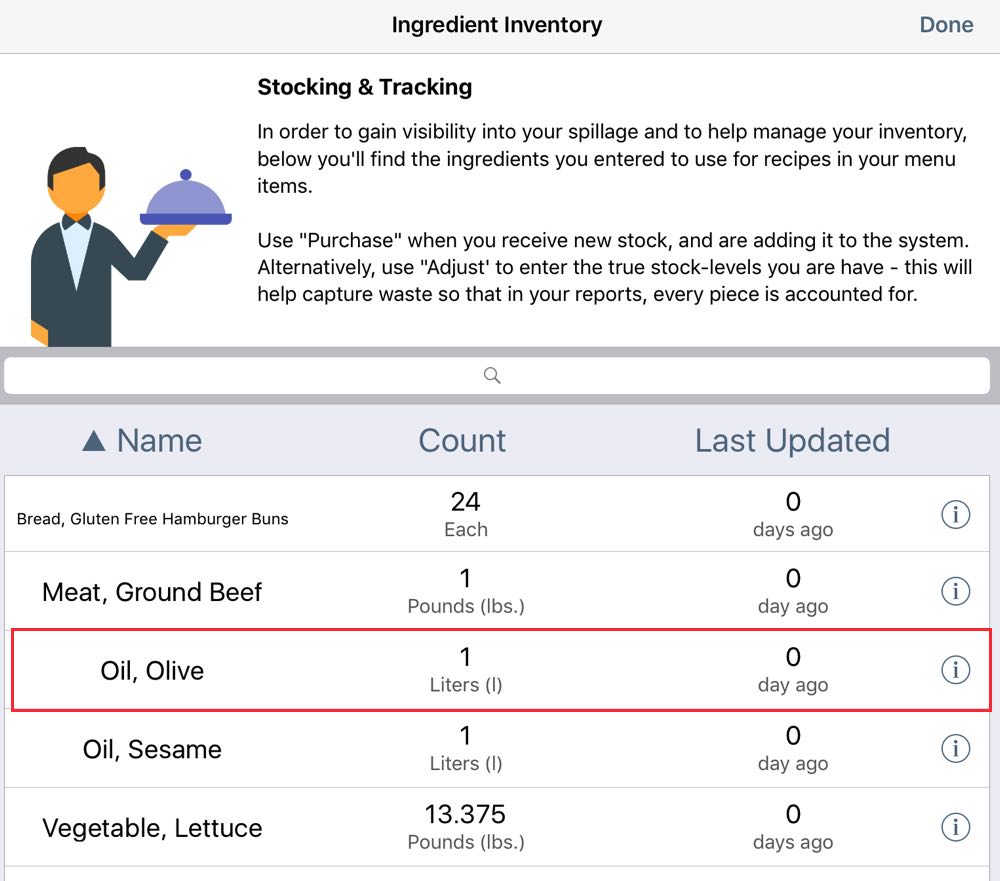
For example, you buy olive oil by the liter but it’s clear you only have 2 teaspoons left. Instead of trying to mentally calculate what fraction of a liter 2 teaspoons represent, you can simply adjust the new inventory using the 2 teaspoon measurement and let TouchBistro do the calculation.
1. Tap your ingredient.
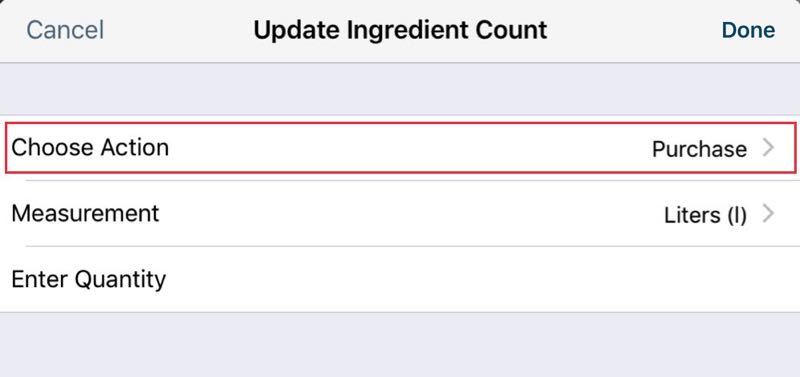
2. Tap Choose Action.

3. Tap Adjust.

4. Tap Measurement.
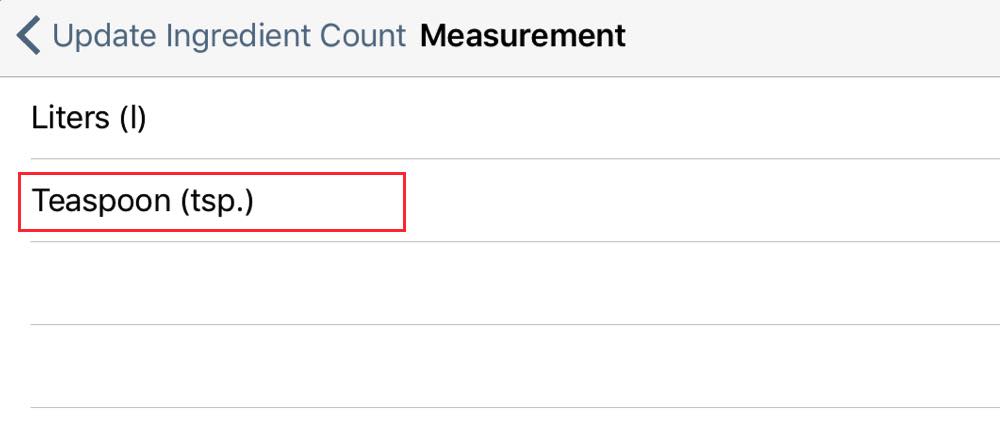
5. Select your desired Recipe Measure. In this case, we’ve determined there are only 2 teaspoons remaining.
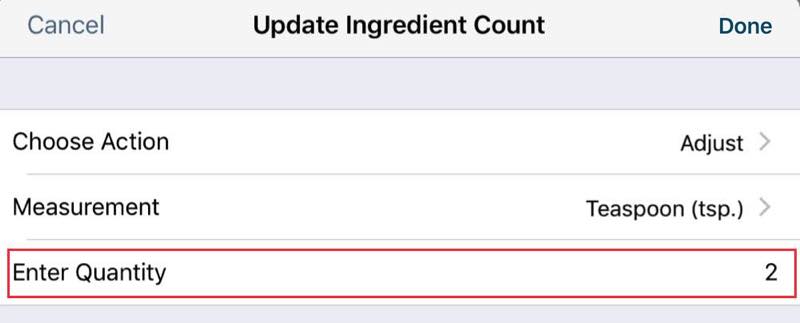
6. Enter the correct stock count, for example 2 teaspoons remain. (Remember, Adjust is not an up/down bump. You are not trying to bump up/bump down the stock by 2 teaspoons. You are entering the actual stock count). Tap Done.
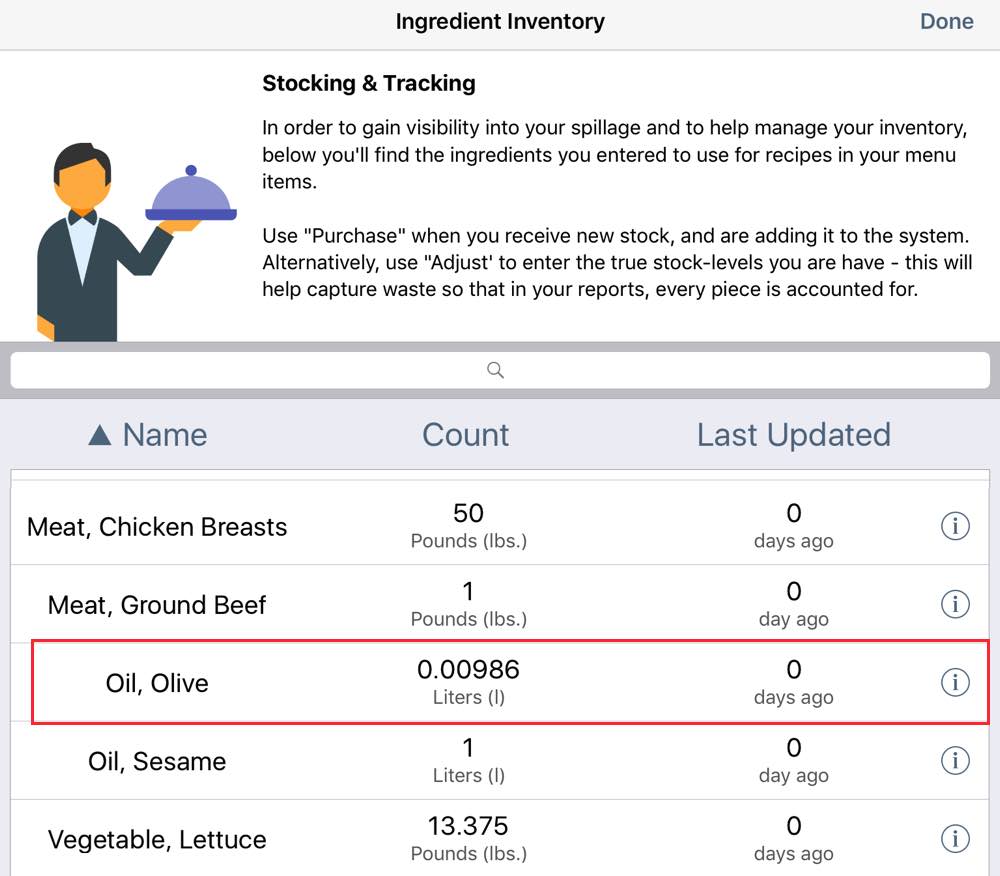
We can see from our updated Stocking & Tracking screen, TouchBistro converts the 2 teaspoons of remaining olive oil into the Purchase Measure.
Chapter 6. Giving Non Admin Staff Types Access to Inventory Management
You can give non-Admin staff types access to the Stocking & Tracking screen.
To do this:
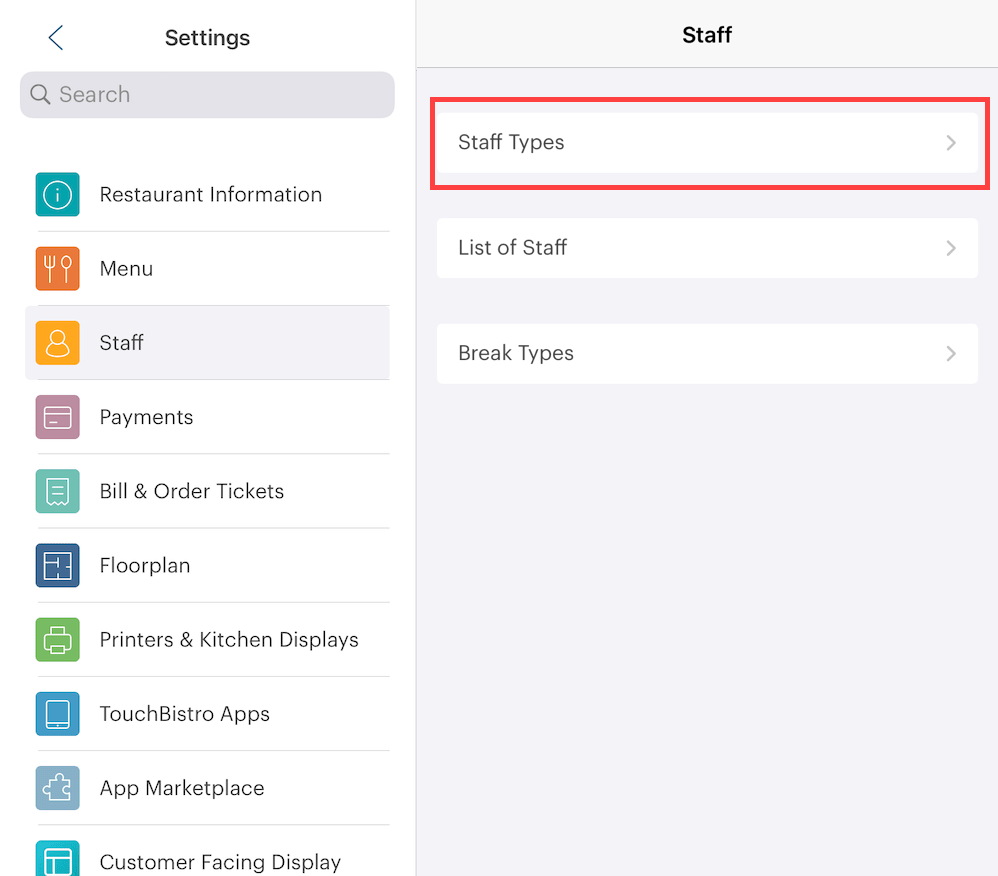
1. Access your Staff Types screen (Admin | Admin Settings | Staff | Staff Types).
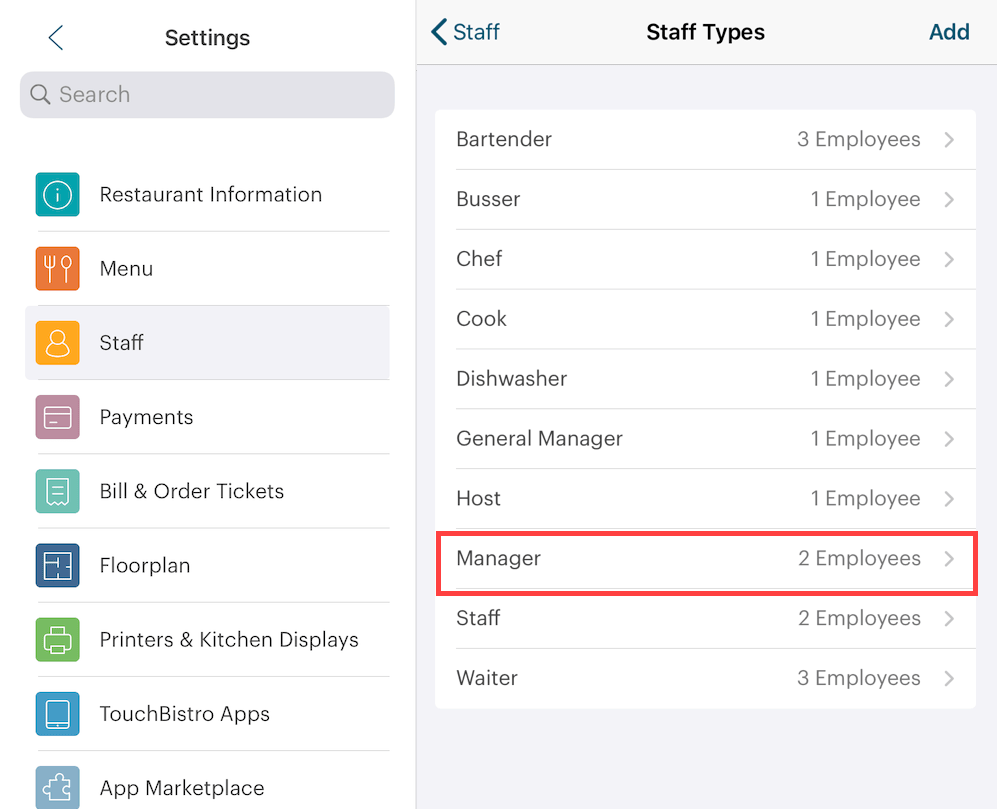
2. Open a staff type (for example a manager staff type or a chef staff type) and scroll to the bottom of the Manager Permissions section.

3. Enable Can Manage Ingredient Purchases.
4. Any staff member logged in with a staff type that has its option enabled can access the Stocking & Tracking screen to add/adjust an ingredient’s stock.
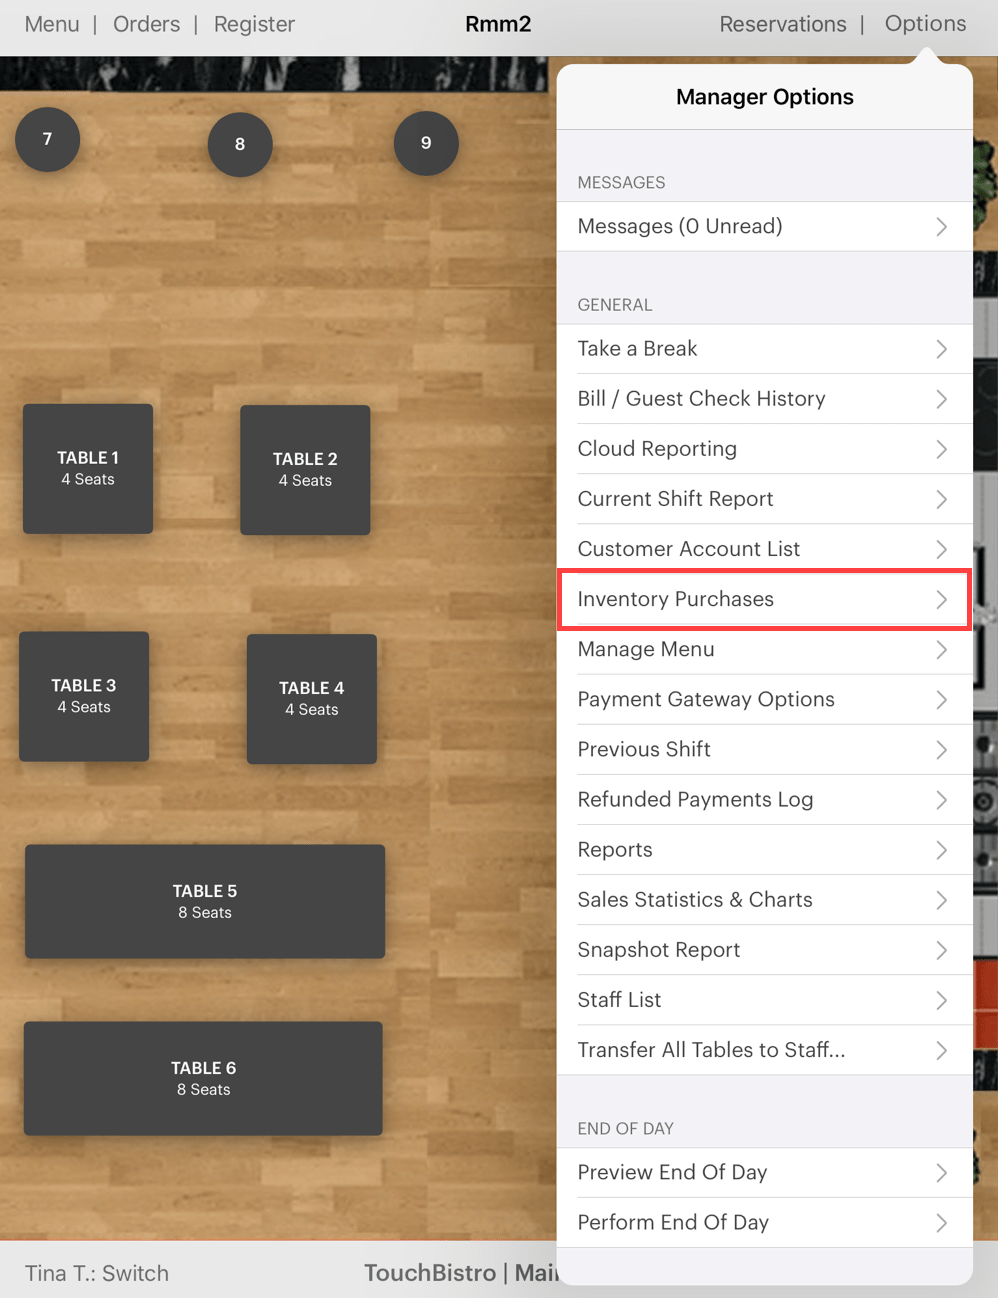
5. Tap Options | Inventory Purchases.
Chapter 7. Quick Access Conversion Chart
All conversions are rounded to the 3rd decimal point. Although we have taken care to ensure the accuracy of this conversion chart, this chart is offered for your convenience only with no implied guarantee of accuracy. Please double check your conversions. Use at your own risk.
|
Purchase Measure
|
Recipe Measure
|
|
1 Liter
|
4.227 US Cups 3.520 Imperial Cups 4 Metric Cups (250 ml Canadian cup) 33.814 US Fluid Ounces 35.195 Imperial Fluid Ounces 2.113 US Pints 67.628 US Tablespoons 202.884 US Teaspoons |
|
1 Milliliter
|
0.338 US Fluid Ounces 0.352 Imperial Fluid Ounces
|
|
1 US Gallon
|
16 US Cups 13.323 Imperial Cups 15.142 Metric Cups (250 ml Canadian cup) 128 US Fluid Ounces 133.228 Imperial Fluid Ounces 8 US Pints 256 US Tablespoons 768 US Teaspoons
|
|
1 Imperial Gallon
|
19.215 US Cups 16 Imperial Cups 20 Metric Cups (250 ml Canadian cup) 160 Imperial Fluid Ounces
|
|
1 US Quart
|
4 US Cups 3.33 Imperial Cups 3.785 Metric Cups (250 ml Canadian cup) 32 US Fluid Ounces 2 US Pint 64 US Tablespoons 192 US Teaspoons
|
|
1 US Pint
|
2 US Cups 1.665 Imperial Cups 1.893 Metric Cups (250 ml Canadian cup) 16 US Fluid Ounces 32 US Tablespoons 96 US Teaspoon
|
|
1 Imperial Pint
|
2.402 US Cups 2 Imperial Cups 2.273 Metric Cups (250 ml Canadian cup) 20 Imperial Fluid Ounces 32 Imperial Tablespoons 96 Imperial Teaspoon
|
|
1 Pound
|
16 Ounces 2 US Cups 1268 Pinches 634 Dashes
|
|
1 Kilogram
|
35.274 Ounces 7.813 US Cups
|


 Email
Support
 Frequently
Asked Questions
