Menu Categories – Setting your Printer and KDS
If you are using ticket printers (for example, you send orders to a kitchen printer), you cannot specify the Menu Category‘s default ticket printer on the cloud portal. You need to access the app and configure the printers for each Menu Category you added via the cloud site. After uploading your changes and additions, do the following:

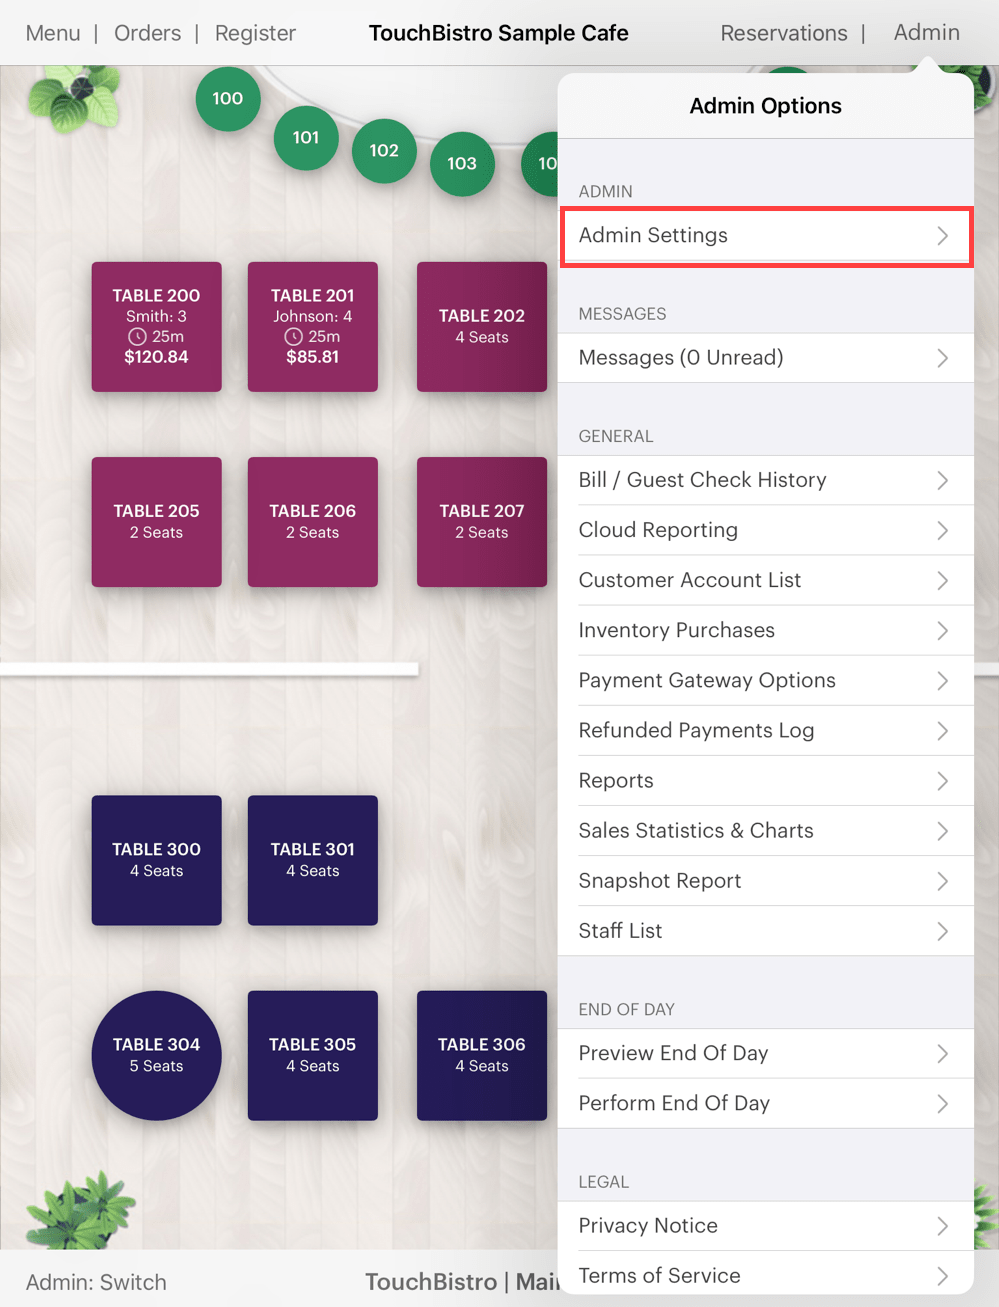
1. Tap Admin | Admin Settings.

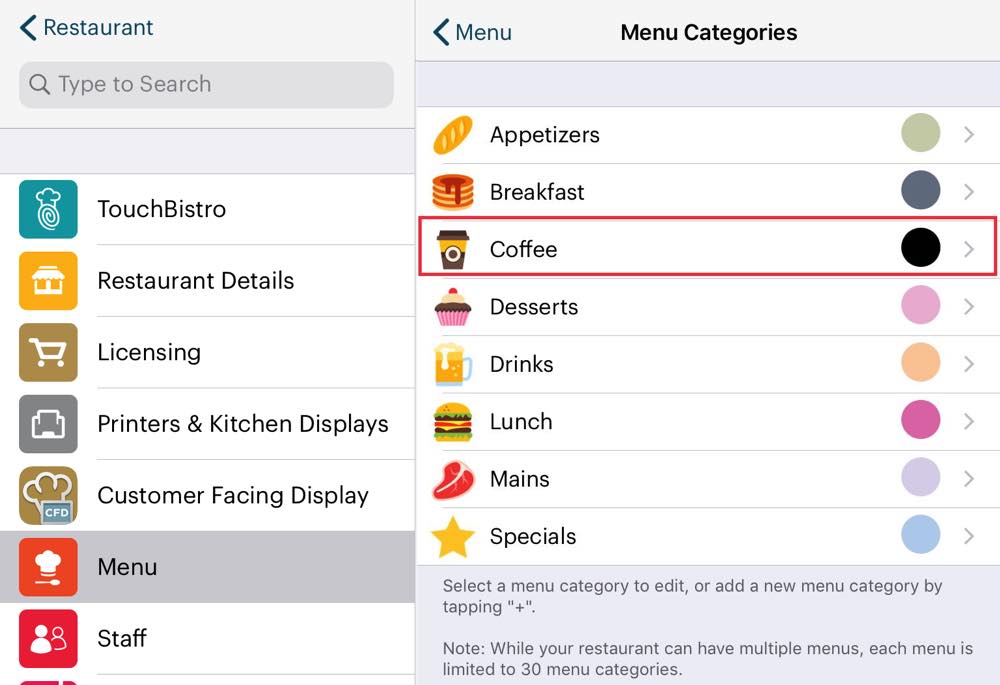
2. Tap Menu. As you can see when you enable Remote Menu Management, you cannot edit most of your menu items from the app.

3. Tap any Menu Category you added.

4. Tap Default Printer.

5. Select the ticket printer this Menu Category should use. For example, you want all coffee orders sent to the bar printer. Tap Done.

6. If you are using TouchBistro KDS, tap Kitchen Display System to indicate the KDS device (or devices) these menu items will be displaying on when ordered.

7. Tap the KDS you setup under Printers & KDS. If you have multiple KDSs, you can select more than one. Also, individual menu items can be set to send to multiple KDSs.

8. Tap Done. You can now tap on another category to configure it for the KDS.
See Next Step
Step 9 – Fine Tune Your Menu Items in the App
See Previous Step


 Email
Support
 Frequently
Asked Questions
