Taking Swiper and Hosted Pay Payments with Worldpay
Table Of Contents
Chapter 1. Accepting Credit Card Payments via the Sign on Screen Method
Chapter 2. Accepting Credit Card Payments via the Sign on Slip Method
Section 1. Reconciling Tips Written on Receipts
Section 1. Refunding a Bill before you Close Your Day
1) Refund Process is Interrupted
Section 2. Performing a Partial Refund
Section 3. Performing a Refund for a Bill from a Previous Day
Section 4. Reprint a Credit Card Slip
Chapter 4. Bar Tab Creation with a Credit Card Swipe
2) Using the Zero Auth to close a Bar Tab
Chapter 1. Accepting Credit Card Payments via the Sign on Screen Method
After you’ve set up your Merchant details in the Admin section, you or your staff are now ready to start accepting credit card and gift card payments. If you are using an audio jack swiper, ensure the volume is turned all the way up.
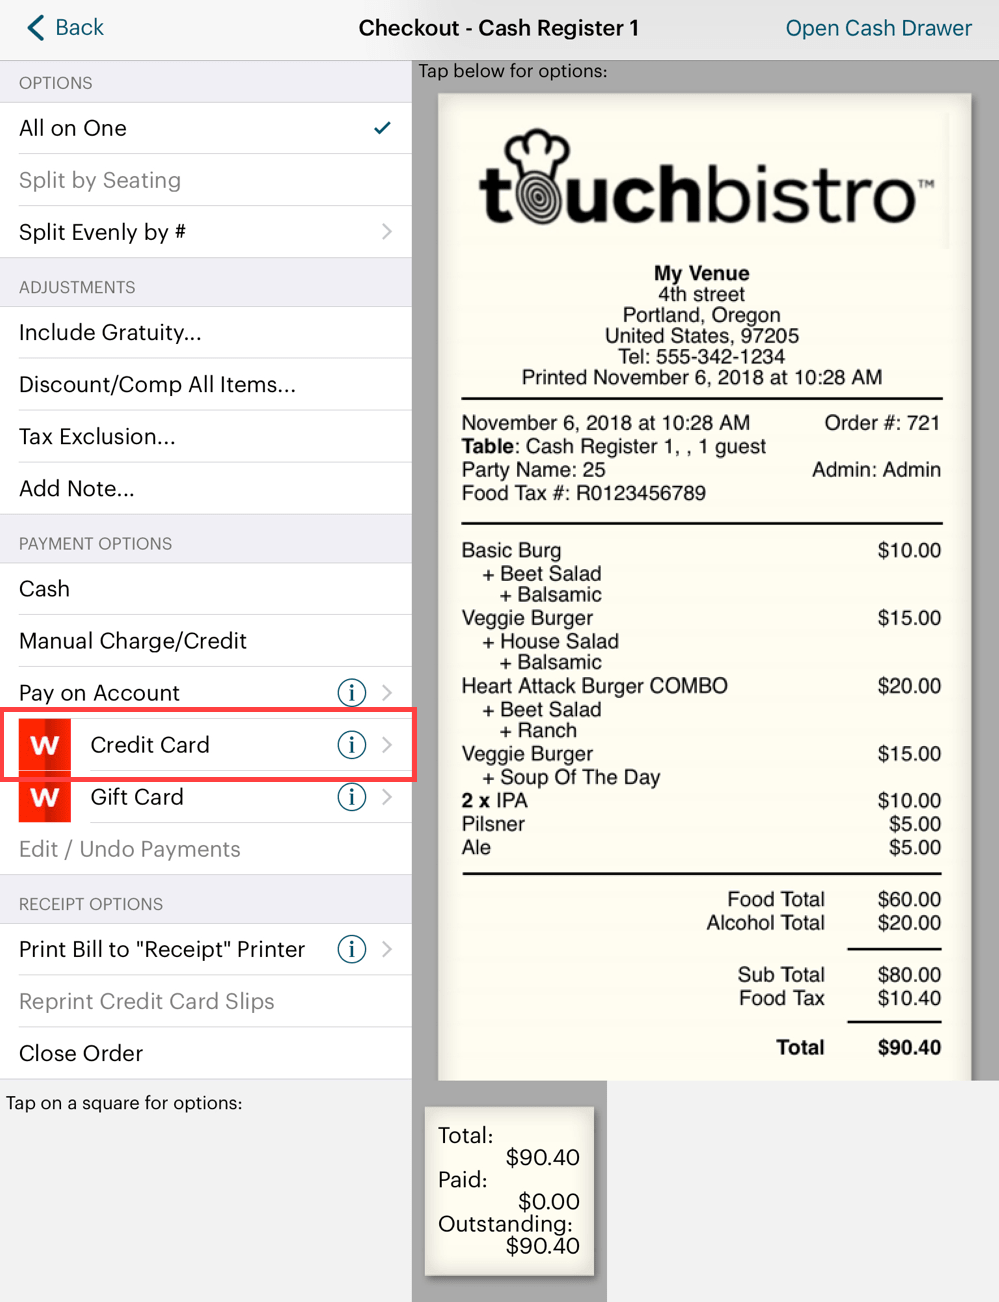
1. From the Checkout screen, tap Credit Card.
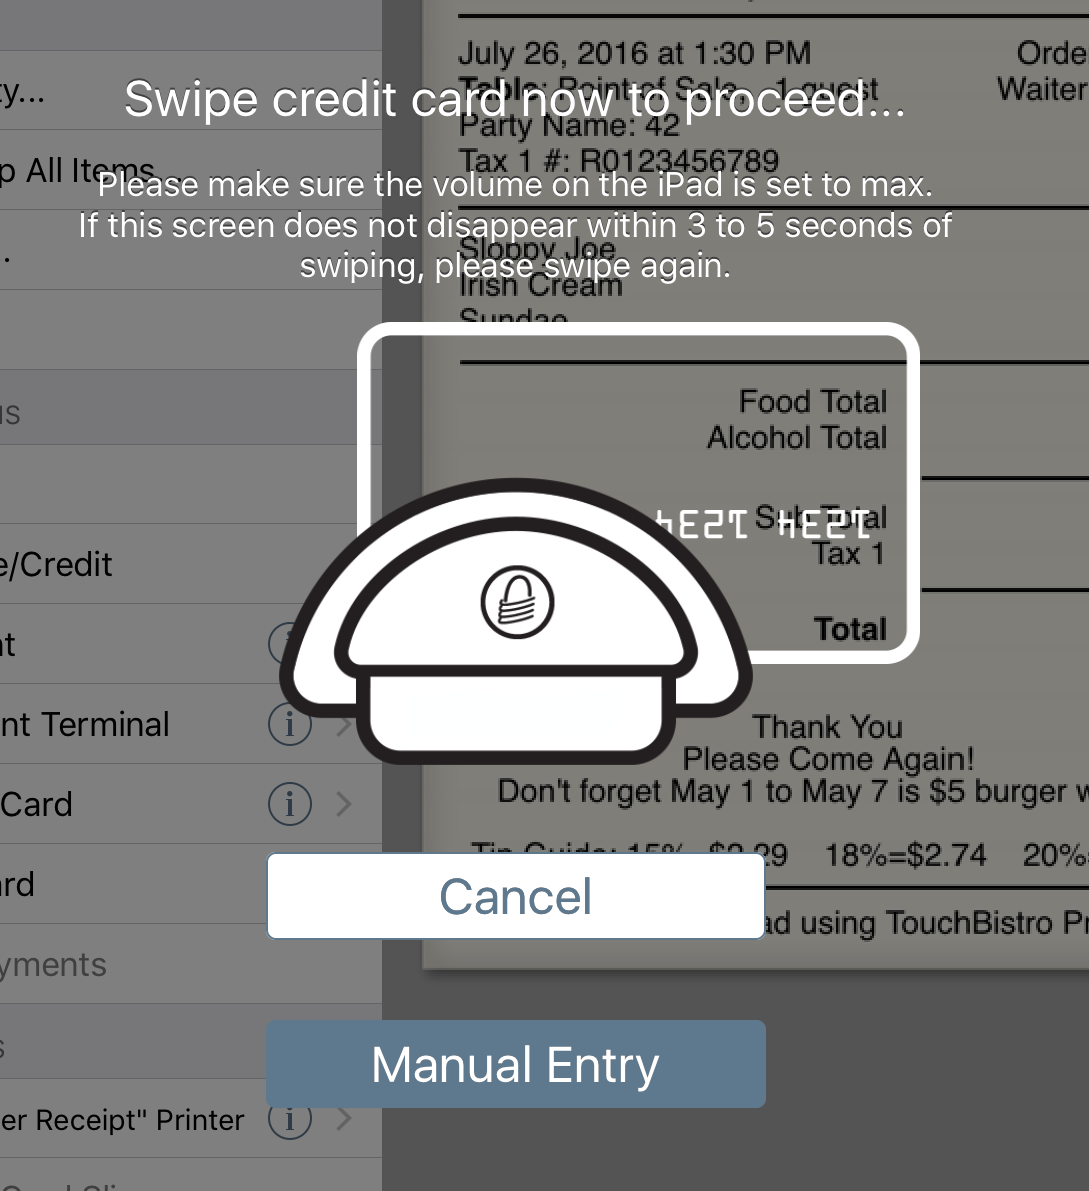
2. Slide the credit card through the reader. The magnetic stripe should be down and facing away from you.
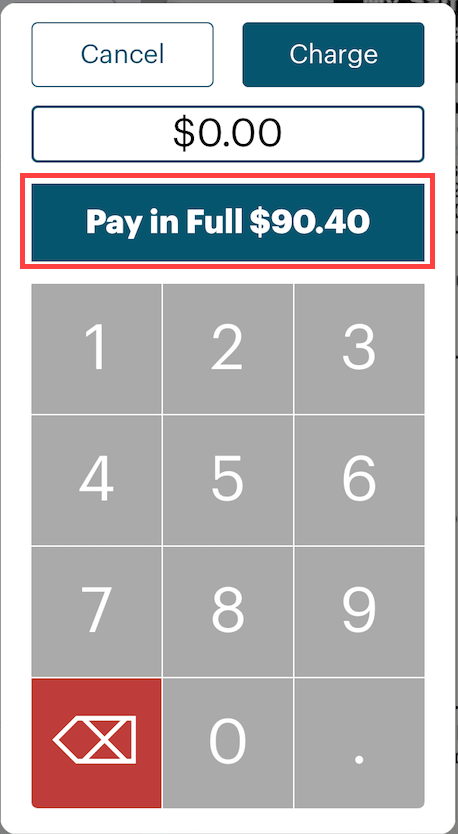
3. Tap Pay in Full. Do not include tip.
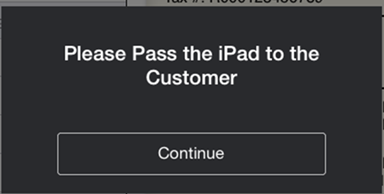
4. You will be prompted to pass the iPad to the customer. Tap Continue.
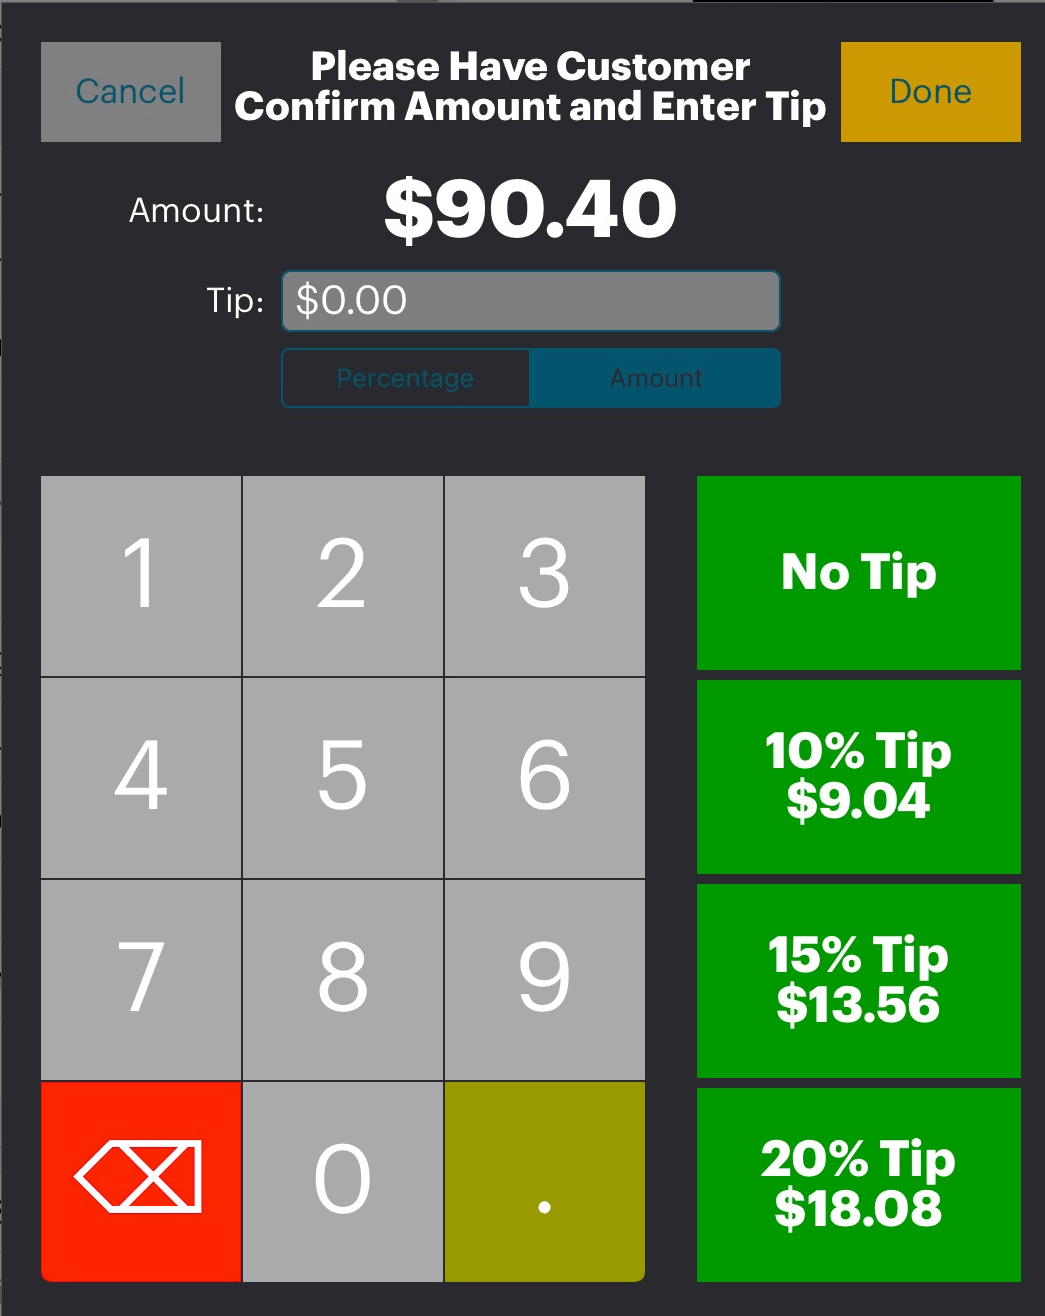
5. TouchBistro will present the customer with tipping options. Instruct the customer to select a tip and tap Done when ready.
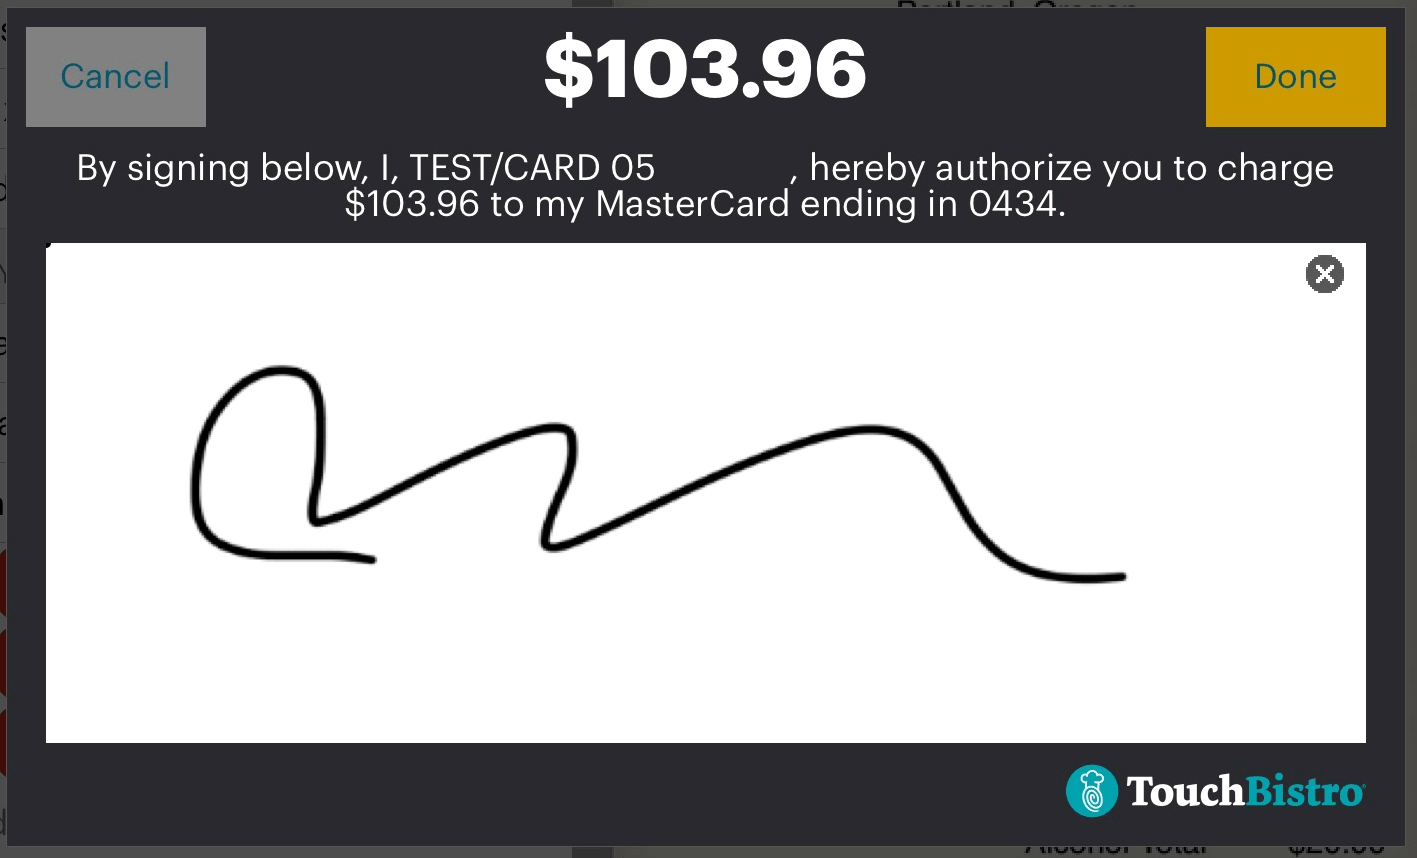
6. TouchBistro will present the customer with a sign on screen box. Instruct the customer to sign with the tip of their finger or an iPad compatible stylus in the white box.
7. Tap Done to process the checkout.
Note: tips left on credit cards are assigned to the owner of the table. If another staff member clocks in and processes the payment, the tip will be assigned to the table owner, not the clocked-in staff member who takes the payment. For example, Sally opens and serves the table. During her break James clocks in and the table asks to pay. James processes the payment. The tip left on the credit card will be assigned to Sally.
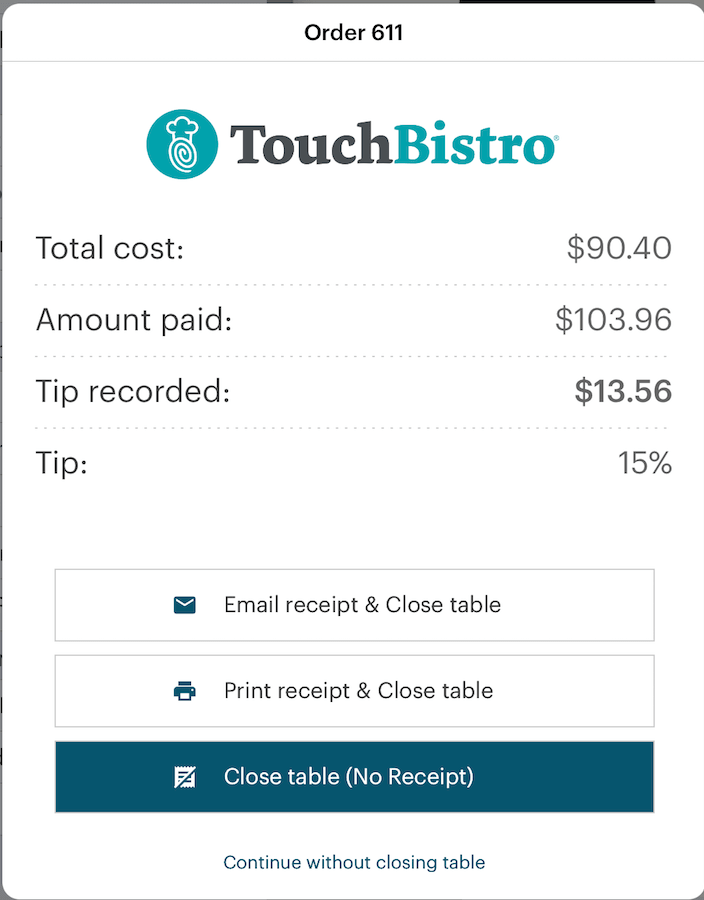
8. After the bill has been paid in full, TouchBistro will prompt you to close the table.
9. Tap one of the receipt options.
Chapter 2. Accepting Credit Card Payments via the Sign on Slip Method
The Sign on Slip method assumes you want the customer to write a tip on the credit card receipt. This is known as a pre-auth. Pre-auths need to be reconciled at the end of a server’s shift.

1. From the Checkout screen, tap Credit Card.

2. Slide the credit card through the reader. The magnetic stripe should be down and facing away from you.

3. Retain the iPad, do not pass it to the customer, and tap Pay in Full. Do not include tip. Alternatively, if the customer only wishes to pay a portion of the full amount, enter the amount the customer wishes to charge to the card and tap Charge.
4. TouchBistro will print your credit card receipt printer.
5. Present the receipt to the customer for signing and inclusion of a tip.
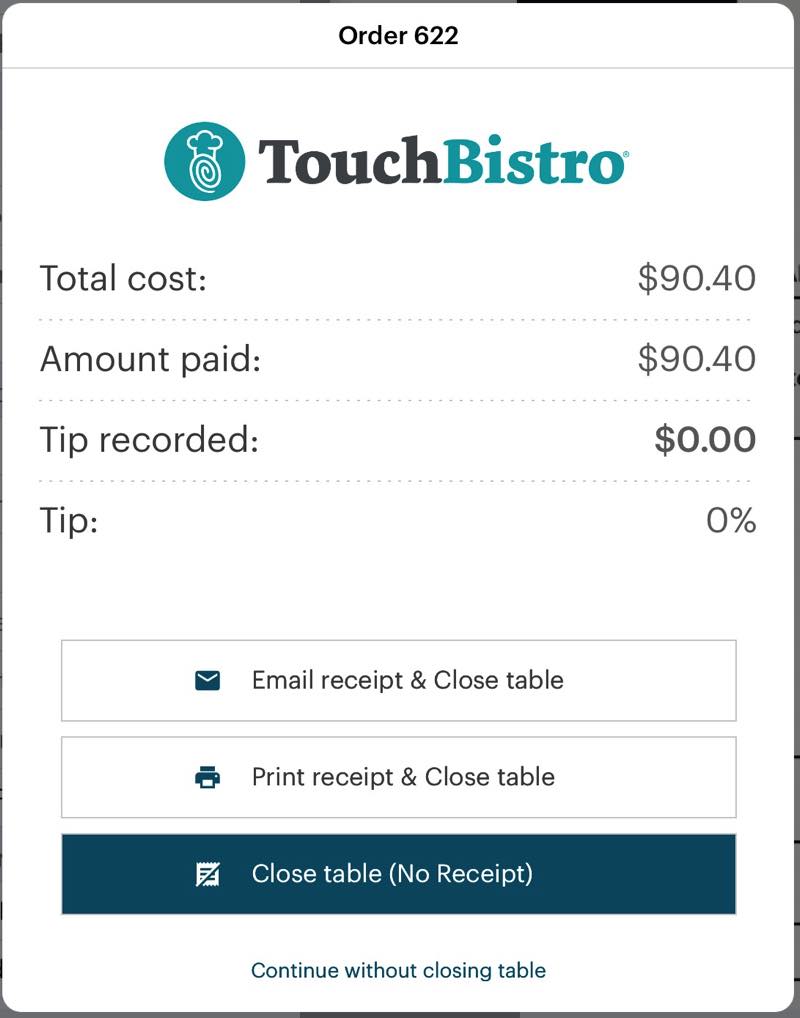
6. After the bill has been paid in full, TouchBistro will prompt you to close the table.
7. Tap one of the receipt options.
Section 1. Reconciling Tips Written on Receipts
If the customer writes in a tip on the credit card receipt, the server (table owner) or a user with a manager or admin passcode needs to access the closed bill and enter the tip.
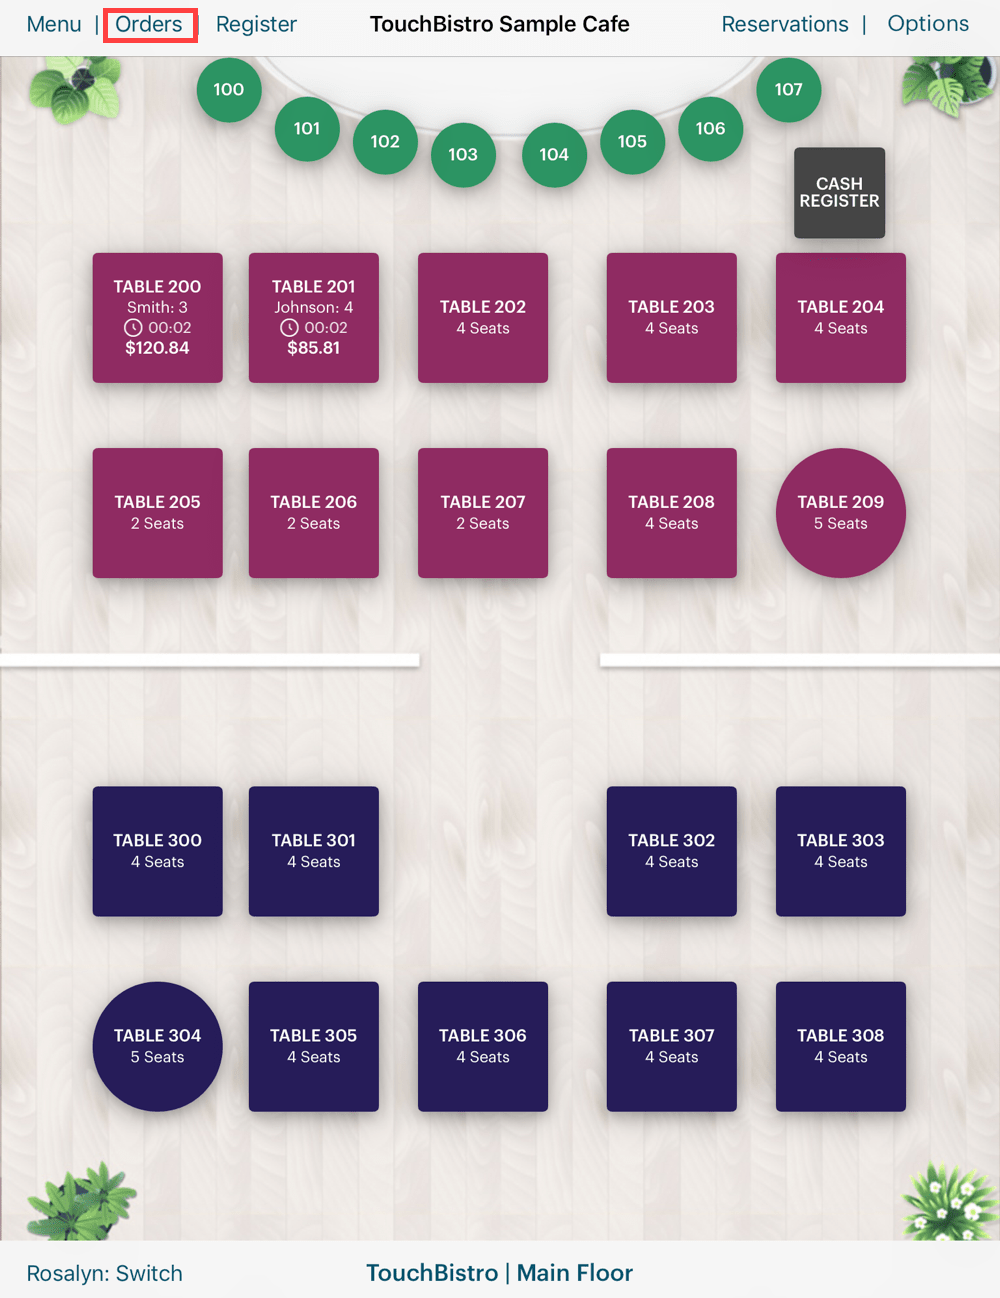
1. From the floor plan layout screen, tap Orders.
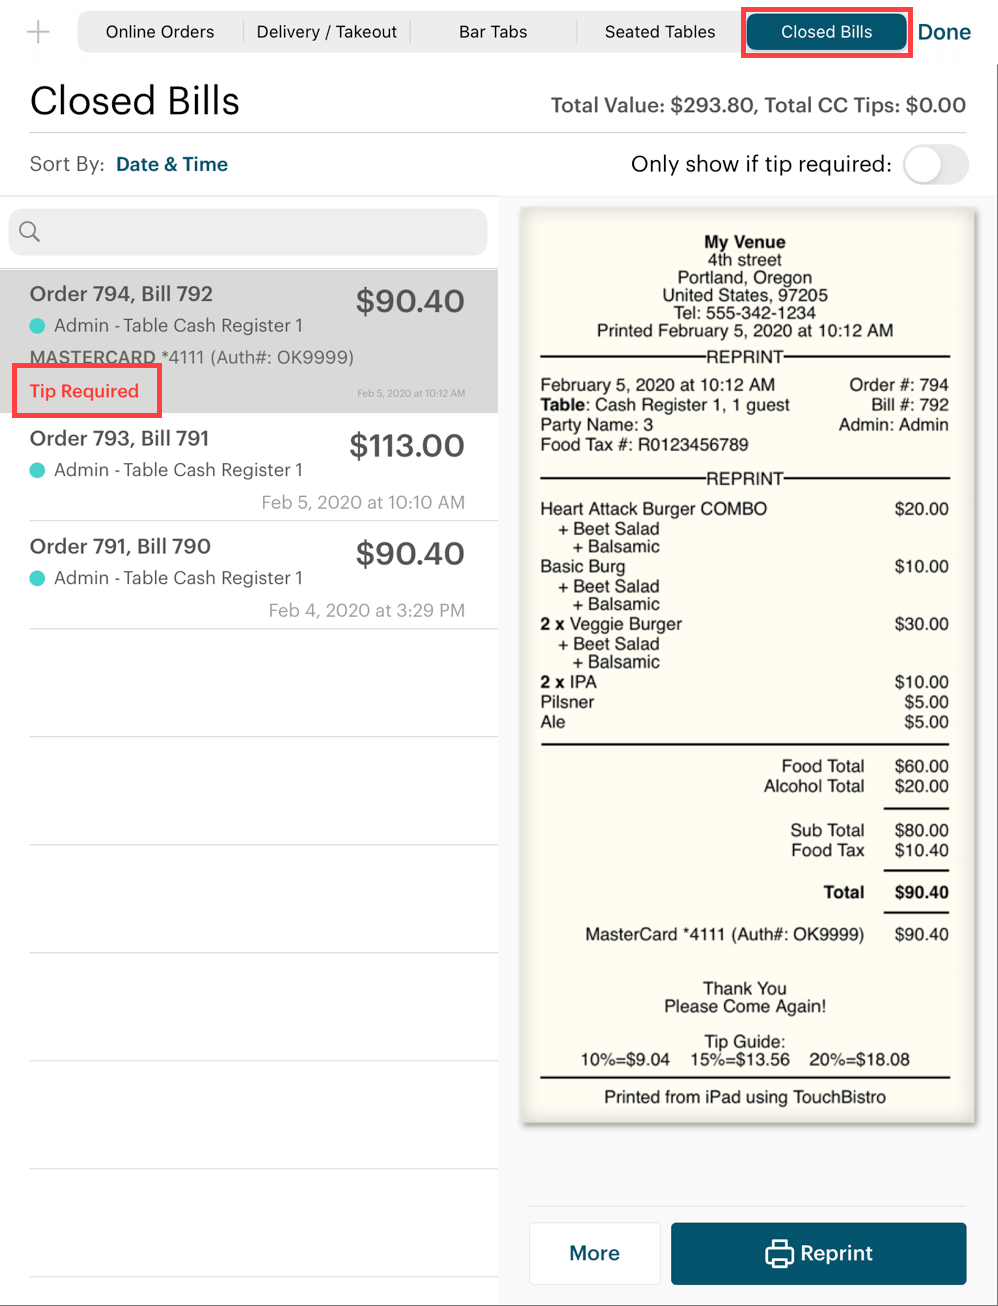
2. Tap the Closed Bills tab.
3. Locate the bill with Tip Required. If you have a lot of closed bills, slide Only show if tip required to the green position to filter out bills not requiring tip reconciliation. To further aid you, the Closed Bills tab also displays the authorization details found on the credit card slip and the guest check. That is the credit card type used, the last four digits of the credit card. This information is only displayed on closed bills that need the pre-auth completed.
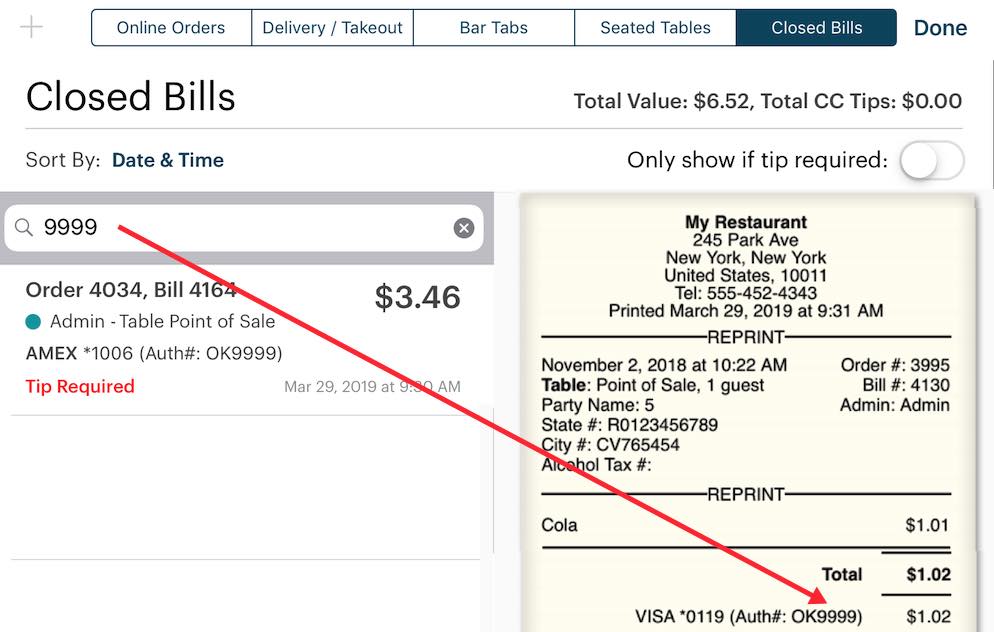
Additionally, you can enter the bill’s authorization number or the last four digits of the credit card number in the search field and find any bills that match the entered number pattern.
4. When you’ve located the bill, tap the bill.
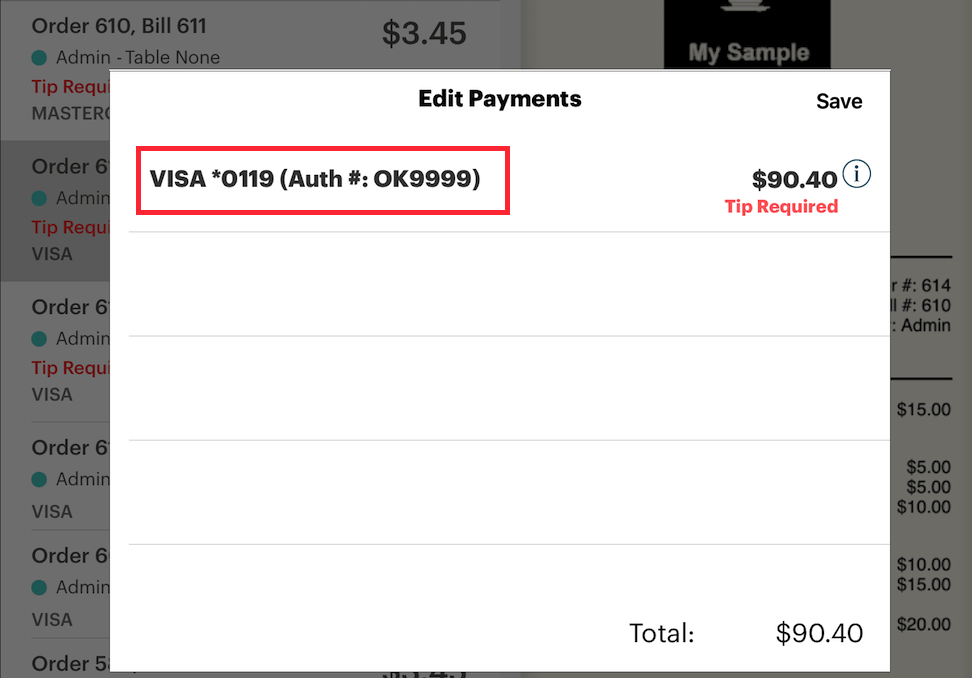
5. Tap the listed payment’s cell area.
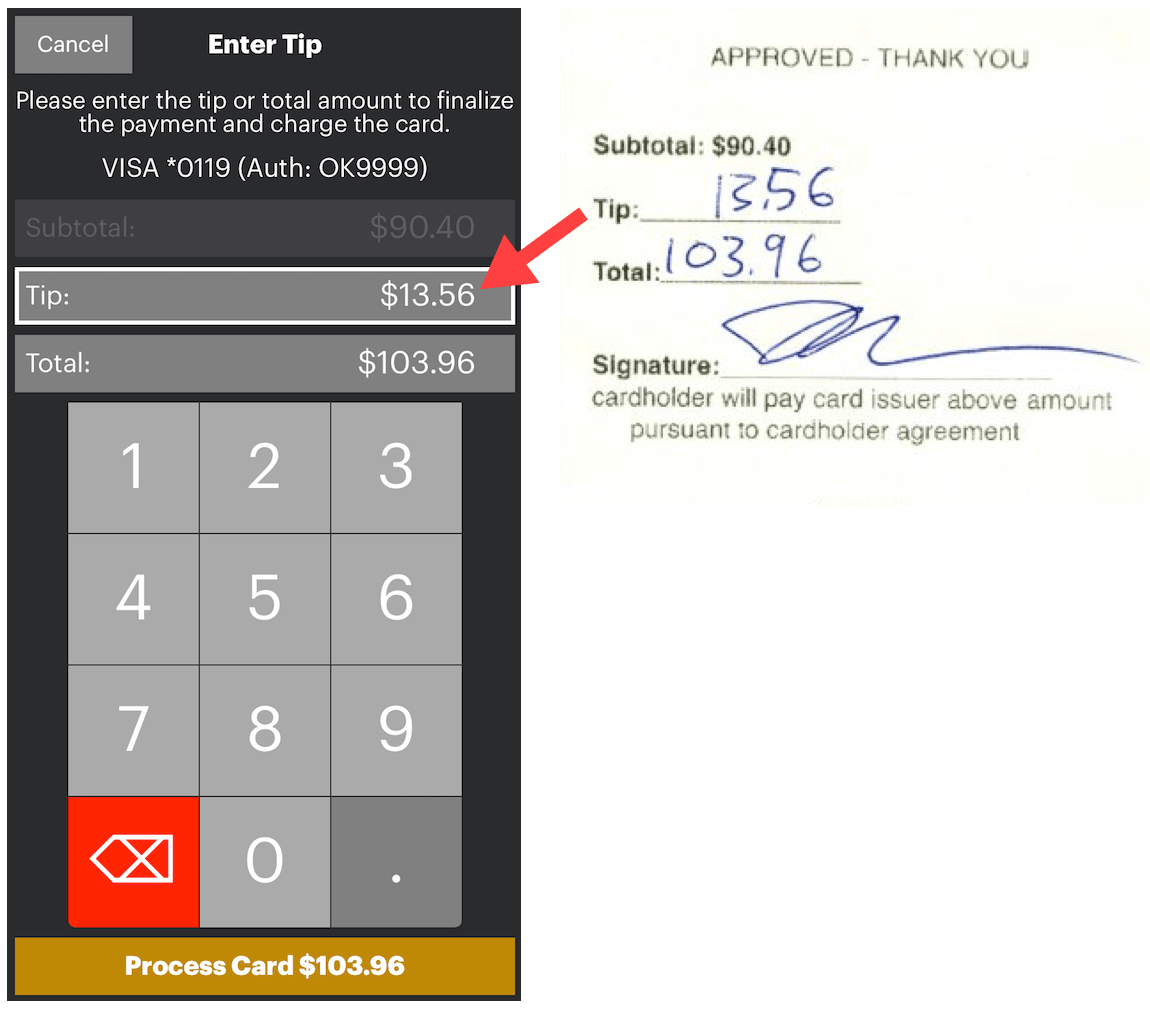
6. Enter the tip written on the receipt in the Tip field. Tap Process Card.
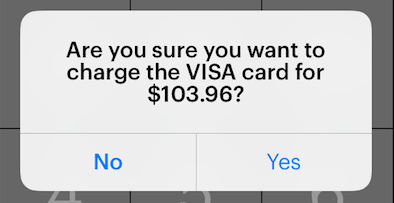
7. Verify you want to charge the credit card for the new amount and tap Yes.
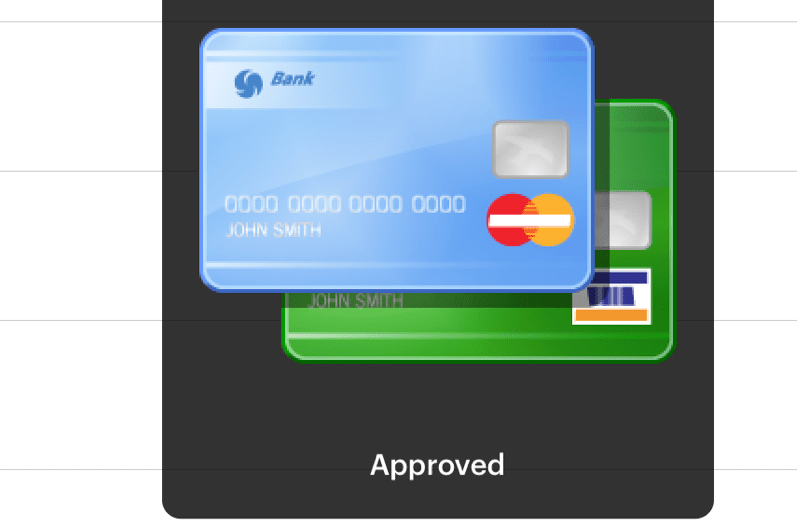
8. You will see an approval message.
9. Repeat if the bill had multiple payments requiring the entry of tips.
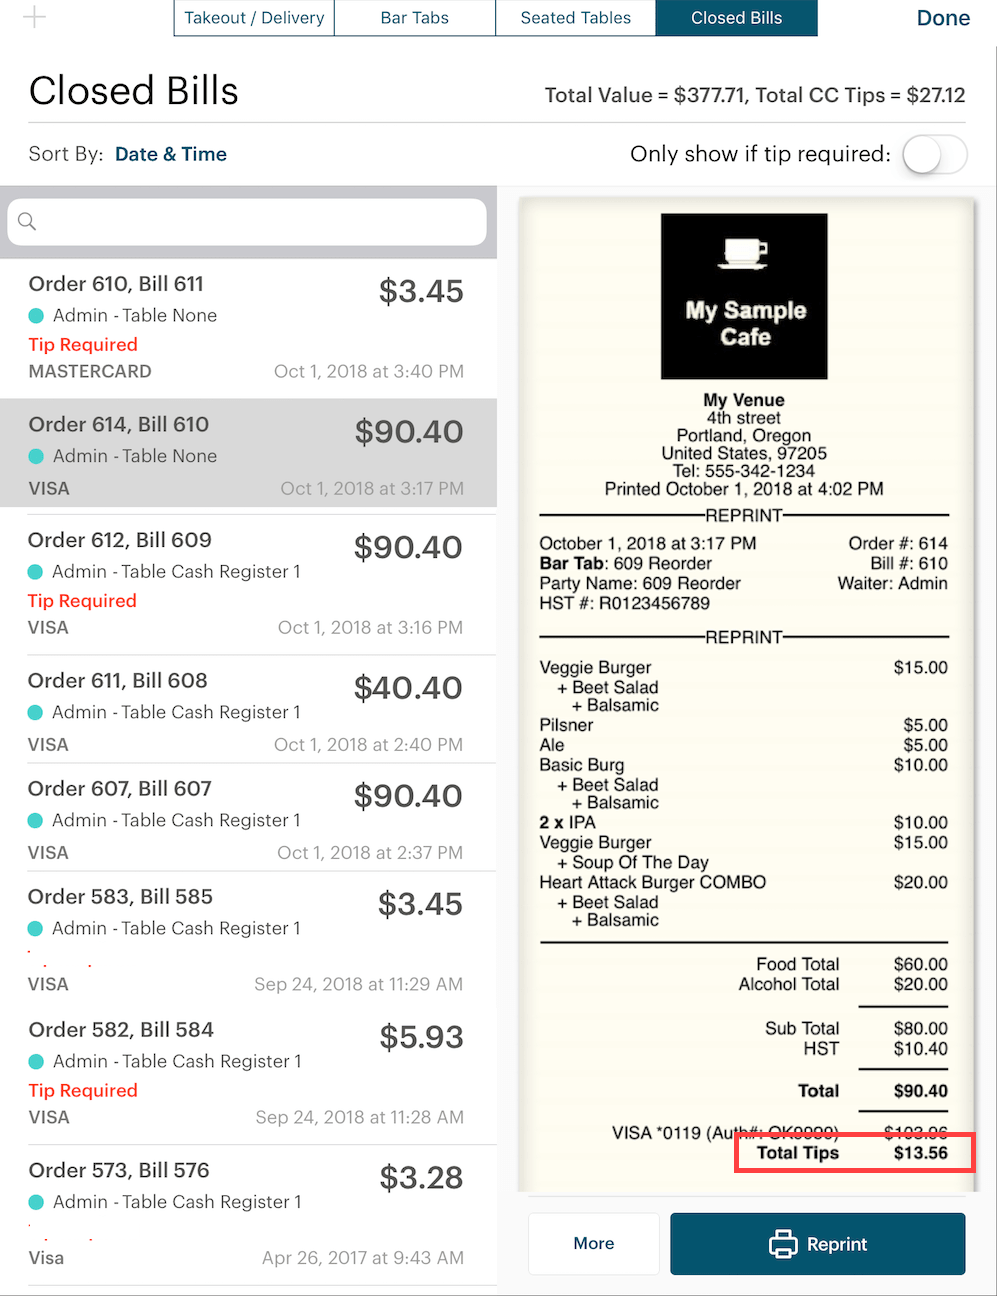
10. If you tap on the bill, in the Print Preview, you will see the tip has been added to the final bill.
Chapter 3. Doing a Refund
You can do three types of refunds. You can do a refund for the full amount of a bill before your end of day (that’s still part of an un-submitted batch). You can do a full refund of a bill that was part of a submitted batch and from a previous day. As well, you can do a partial refund for a bill that’s part of a batch or from a previous day.
Section 1. Refunding a Bill before you Close Your Day

1. From your floor plan, tap Orders.
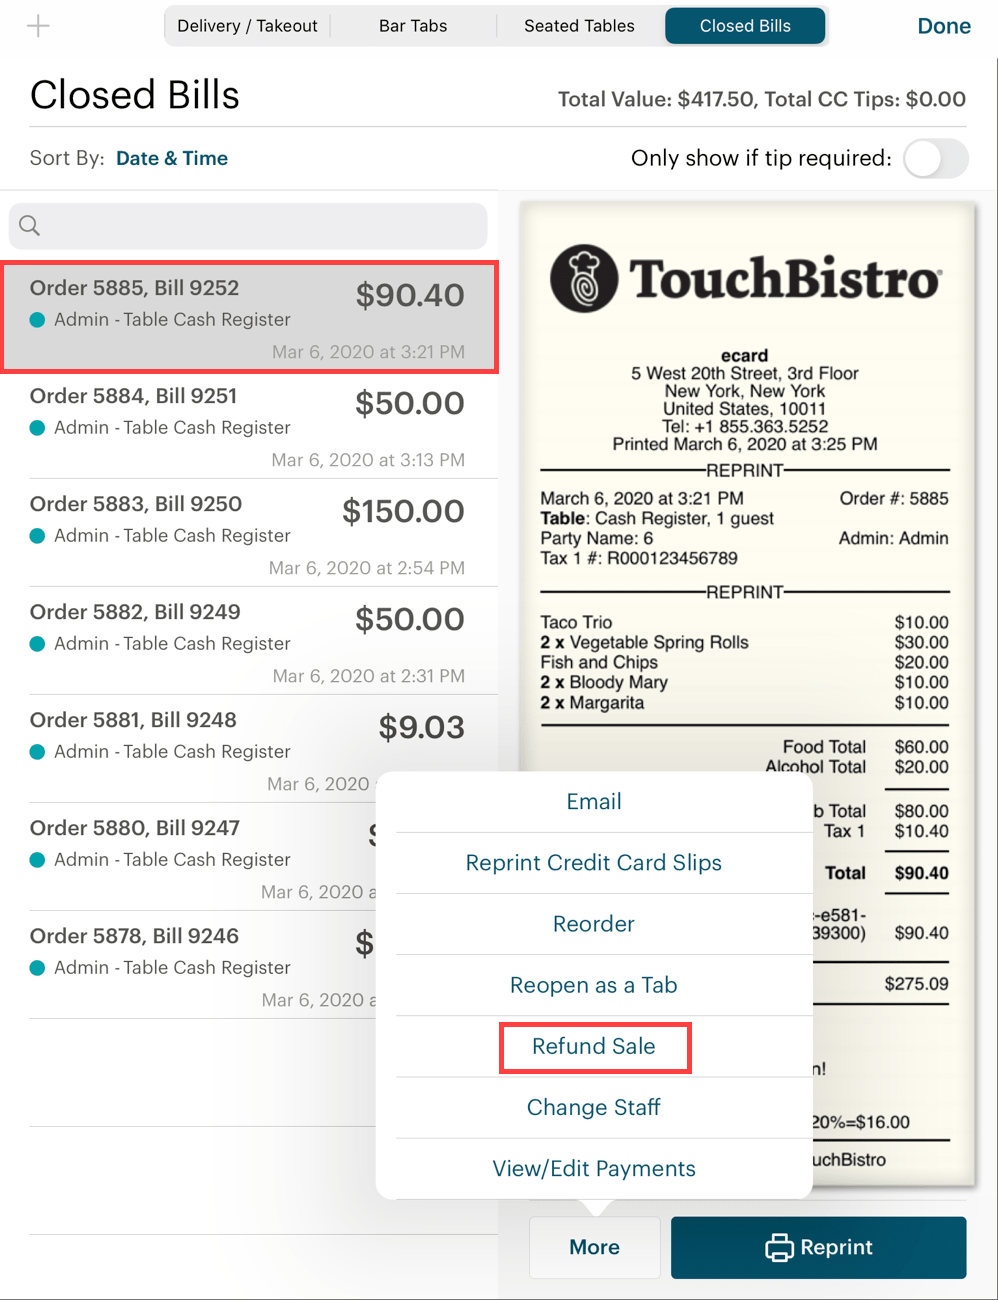
2. Tap the bill you wish to refund and tap the More button. Tap Refund Sale.
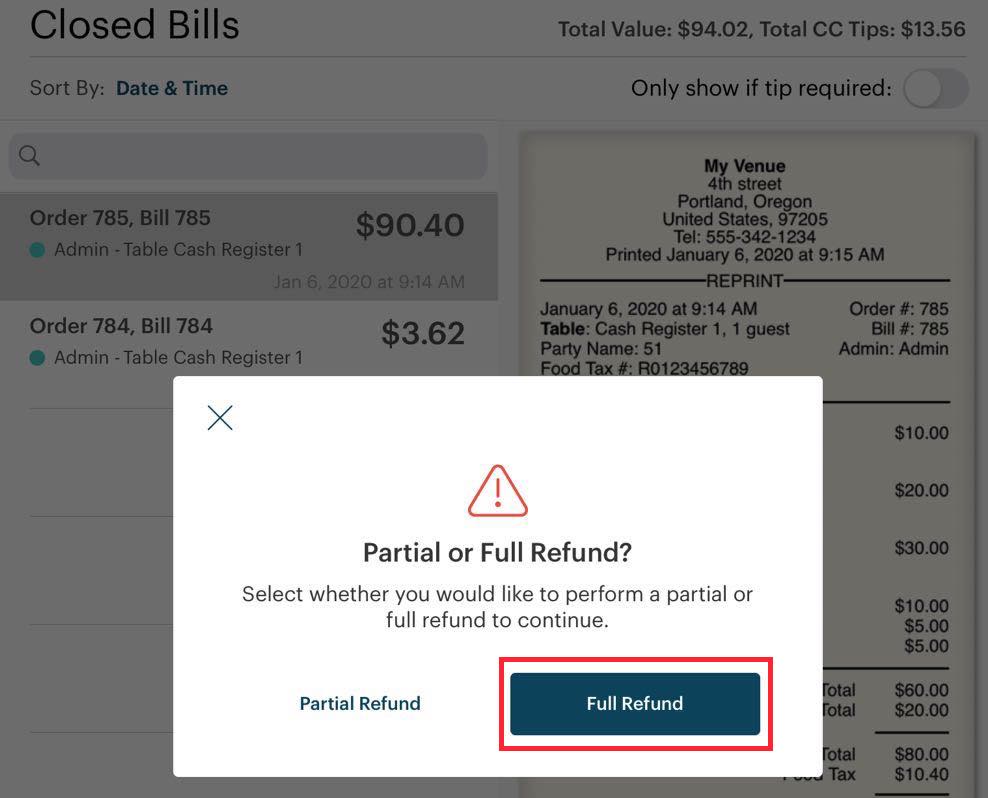
3. Tap Full Refund.
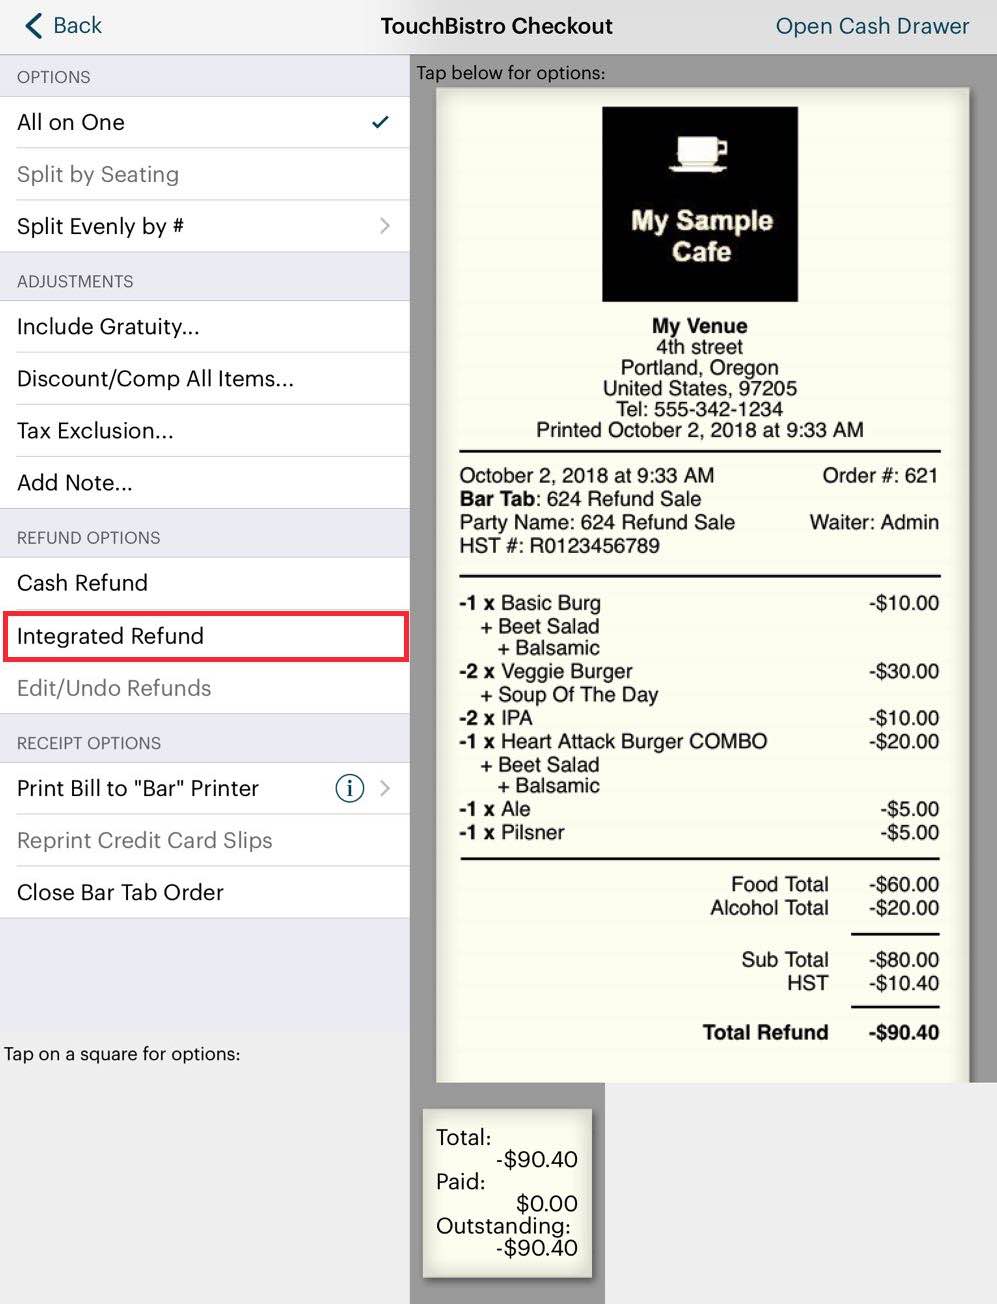
4. Tap the Integrated Refund option.
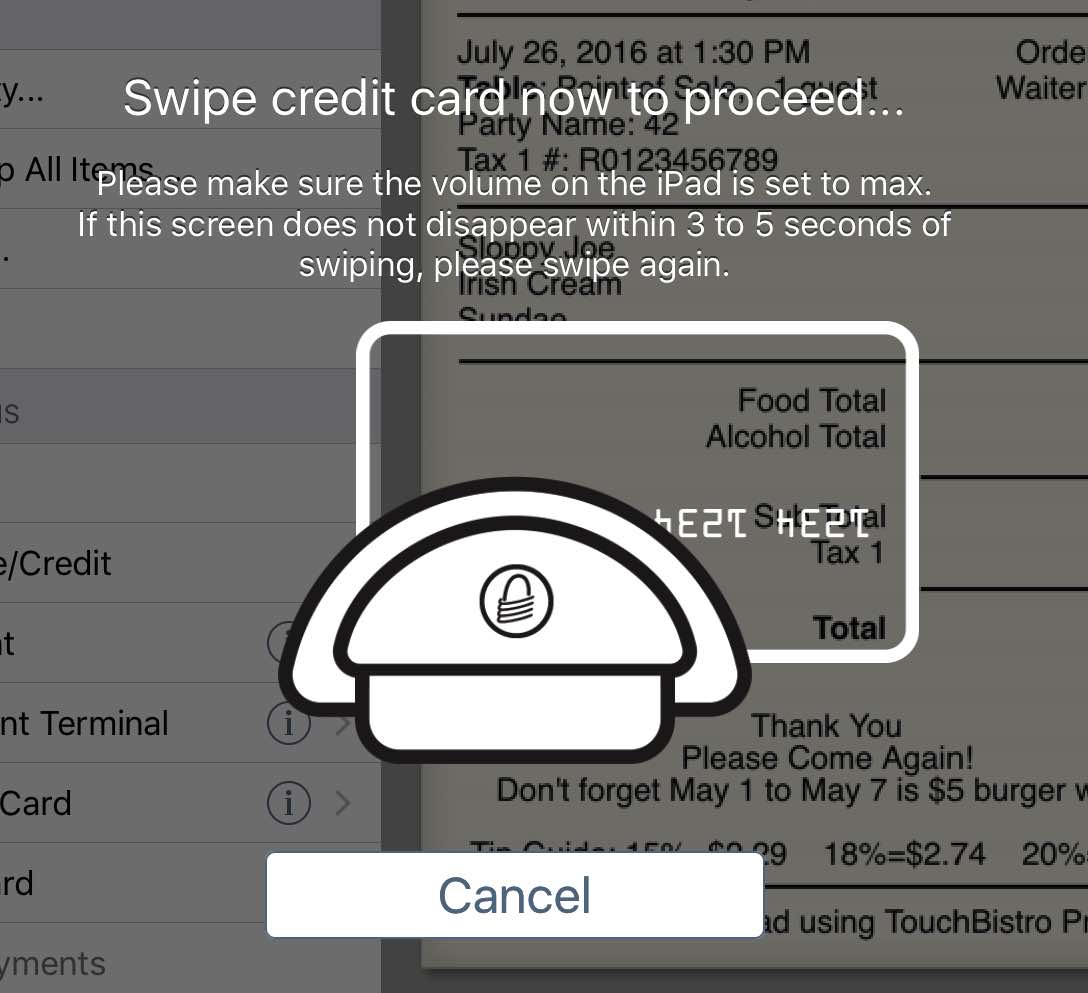
5. Follow the prompts on the iPad and swipe the card when prompted.
6. Verify the amount and tap Refund.
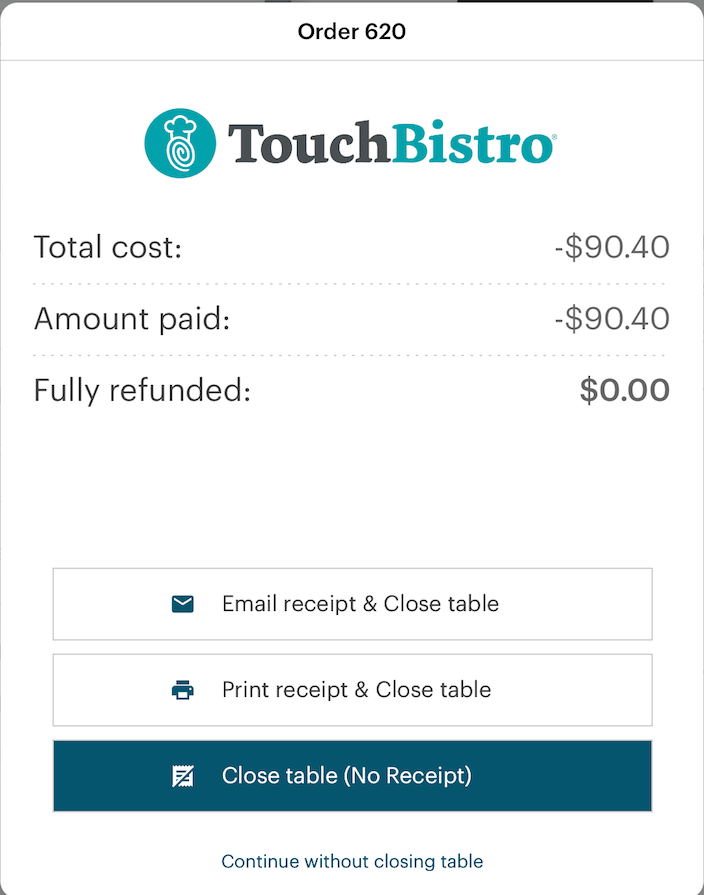
7. Close the sales refund invoice.
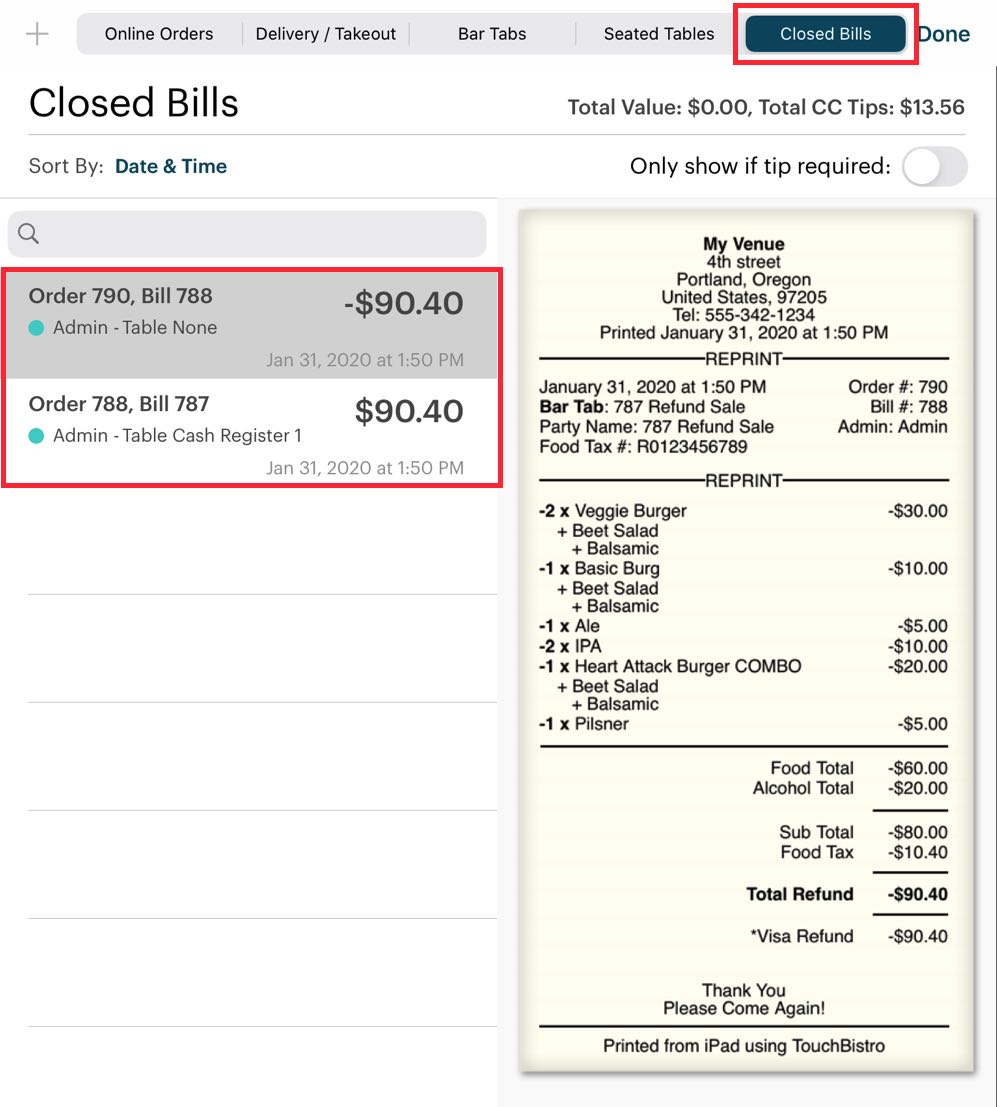
8. You are returned to the Closed Bills tab. Your refunded negative sales invoice is moved to Closed Bills.
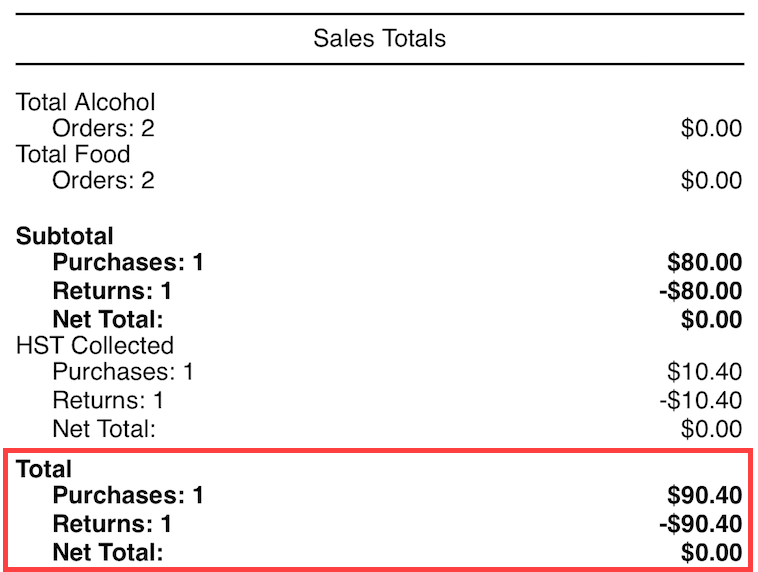
9. Your end of day will properly reflect the original bill and the matching refund. In the example pictured above, we’ll assume we’ve only performed a single transaction for the day. We can see our order for $90.40 matched with a $90.40 refund.
1) Refund Process is Interrupted
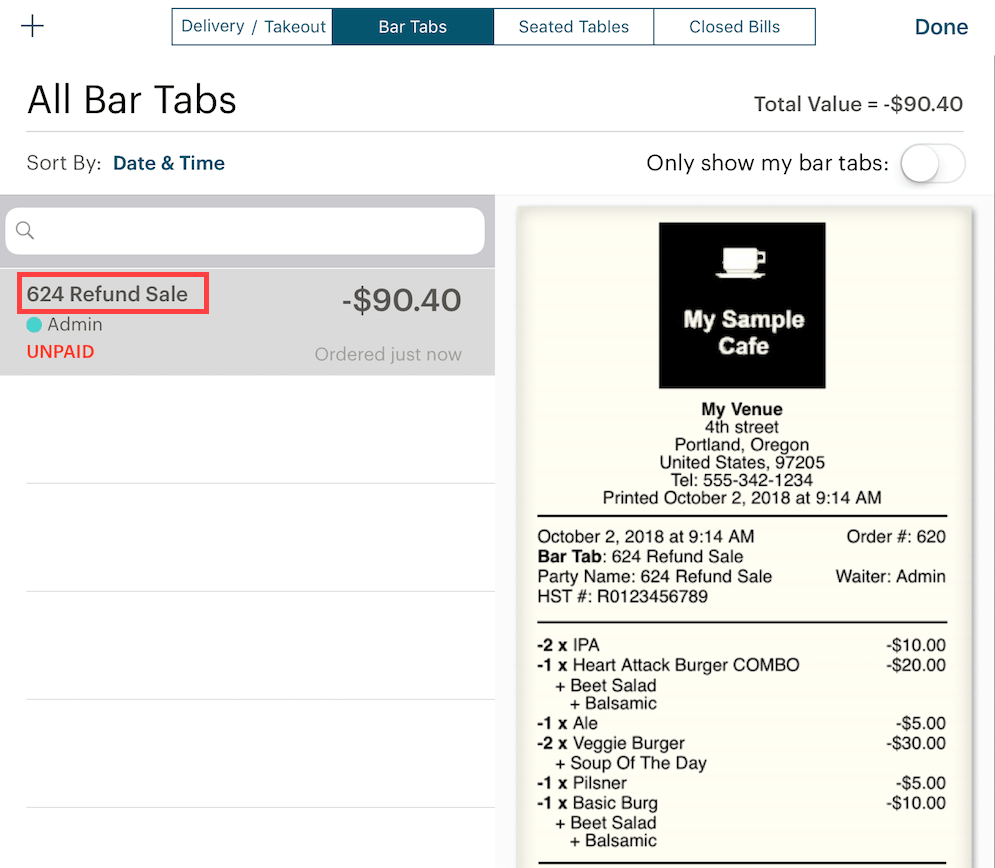
If for some reason you are interrupted and you did not complete the refund process, you can access Bar Tabs and find your negative refund invoice under bar tabs. The refund sale invoice is automatically named after the bill number of the refunded bill. Tap it and tap Edit Order to open it (or right swipe on the order).
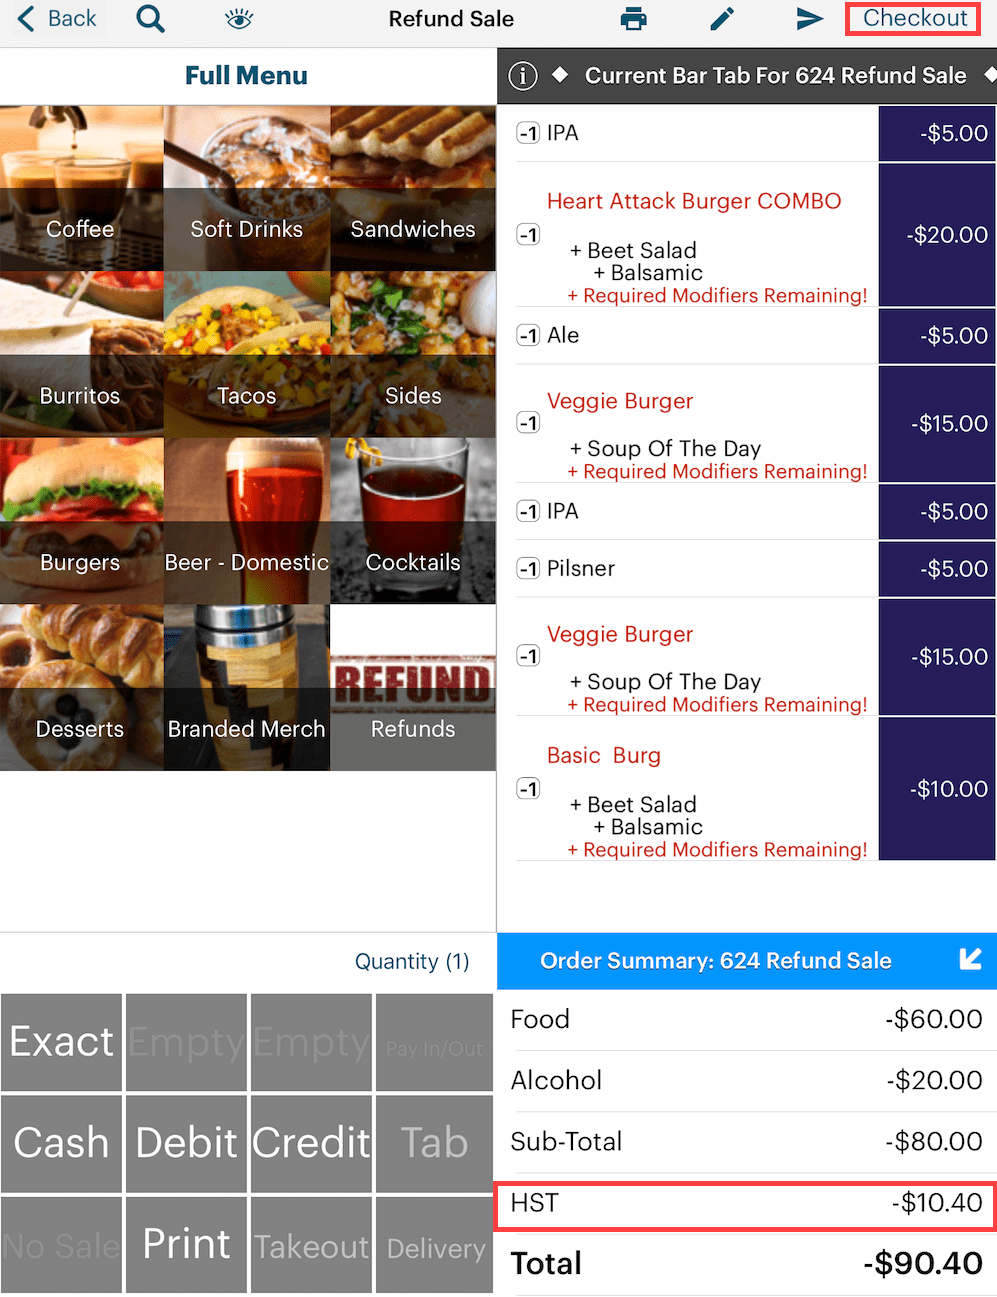
When you open the refund sale invoice, you will notice all items in the refunded bill are negative quantities. If the items have programmed mandatory modifiers, ignore the warning. If the refunded items are inventoried, TouchBistro returns the inventory count. As well TouchBistro correctly calculates the refunded tax. Tap Checkout to close out this refund invoice.
Section 2. Performing a Partial Refund
These steps assuming you’re refunding a bill for the current day. If the bill that needs to be refunded is from a previous day, find the bill via Bill / Guest Check History.

1. From your floor plan, tap Orders.

2. Tap the bill you wish to refund and tap the More button. Tap Refund Sale.
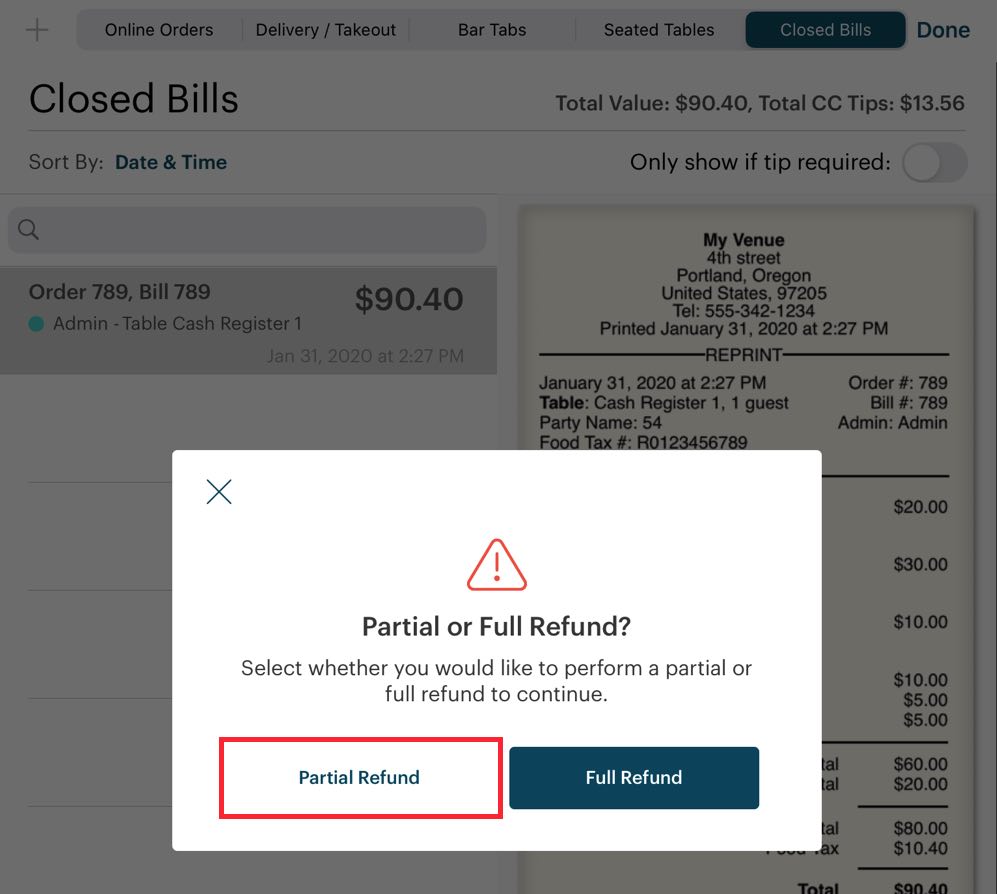
3. Tap Partial Refund.
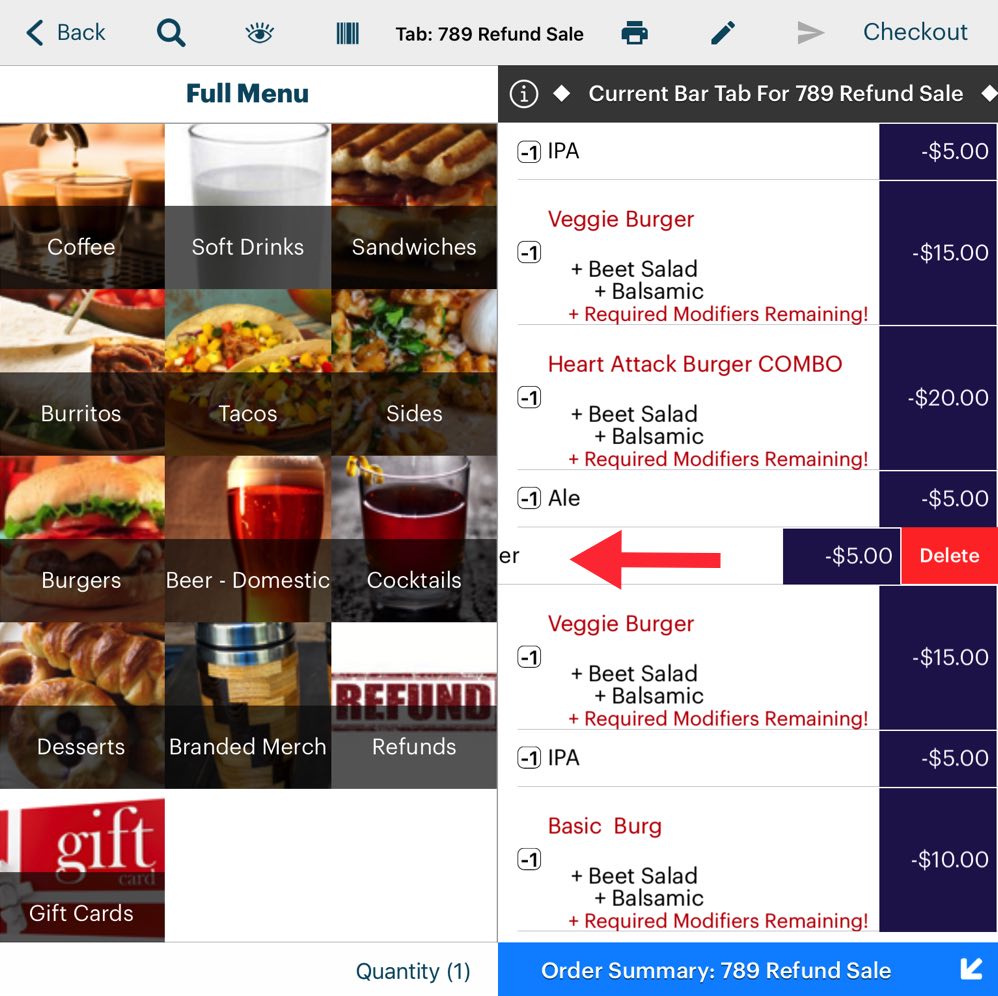
4. Swipe left on the items you don’t want to refund and tap Delete.
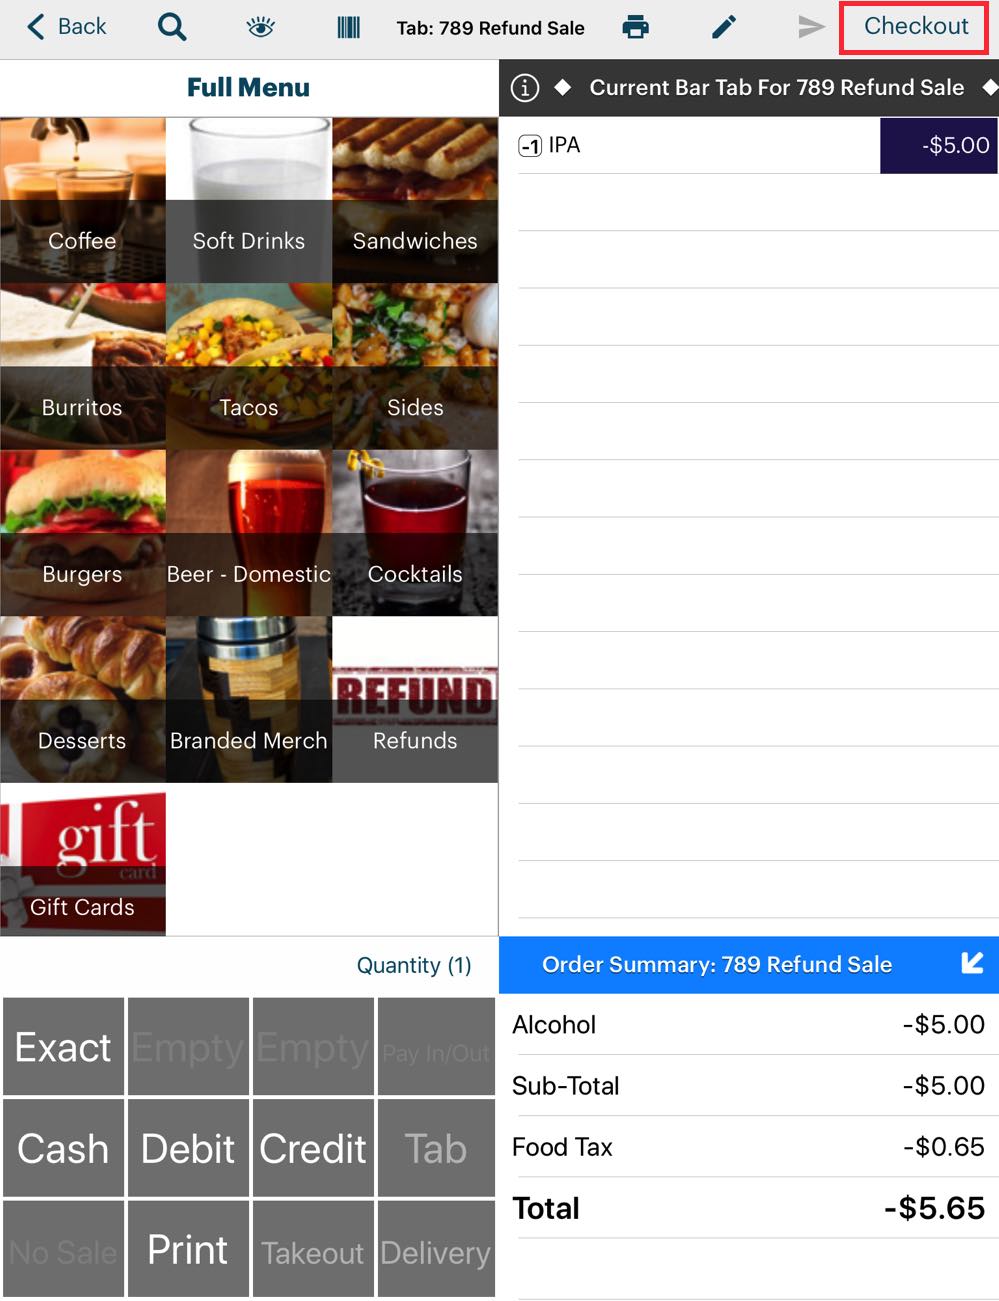
5. Tap Checkout. Ignore any warnings about unsent items.
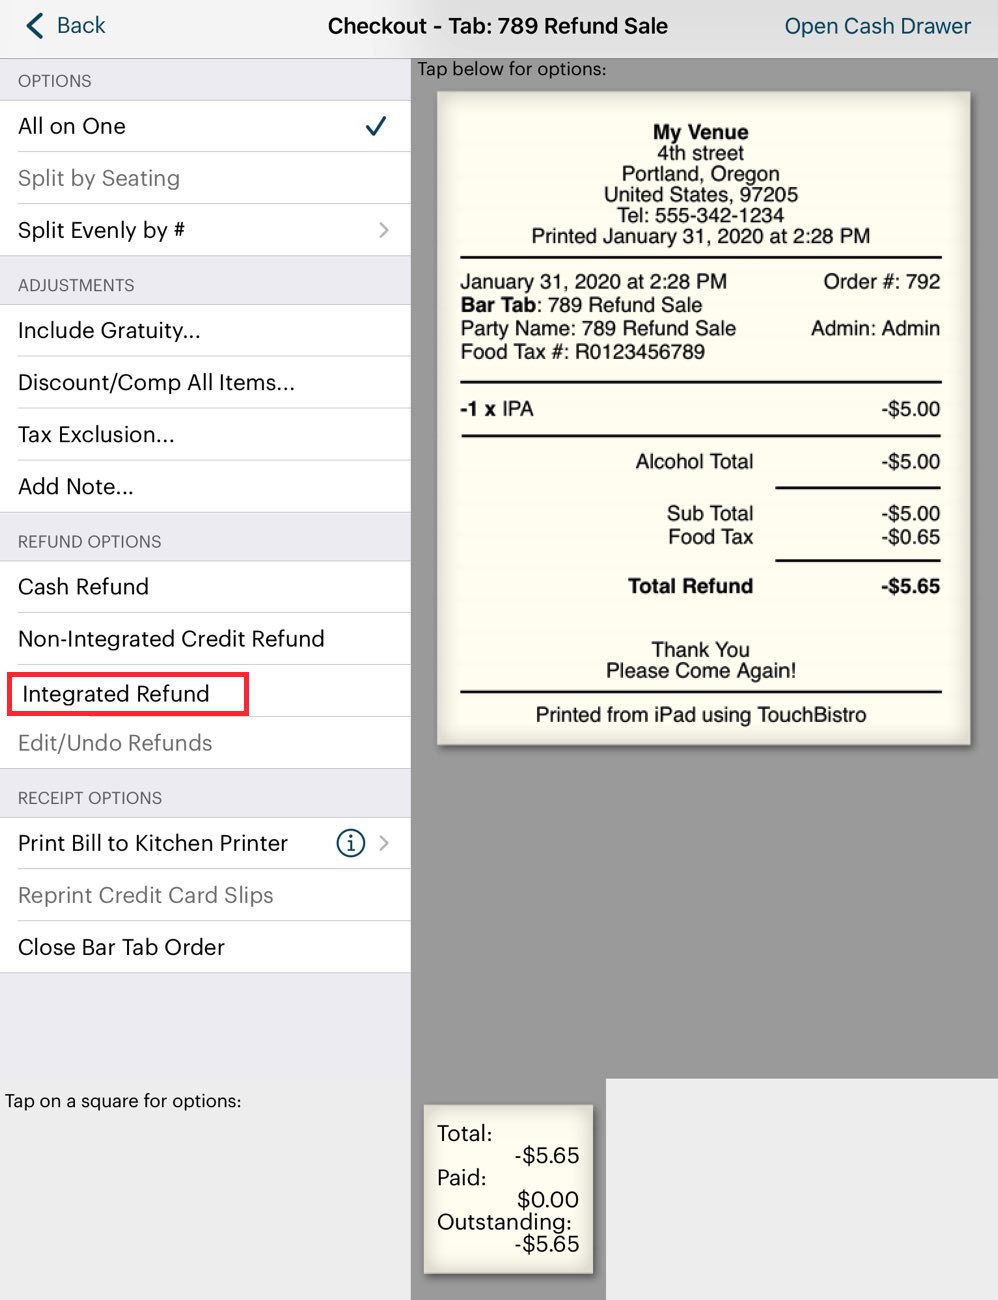
6. Tap the Integrated Refund option.
7. Follow the normal steps for performing a full refund.
Section 3. Performing a Refund for a Bill from a Previous Day
If you need to refund a bill from a previous day, it will no longer be found under the Closed Bills tab. Use the Bill / Guest Check History option.
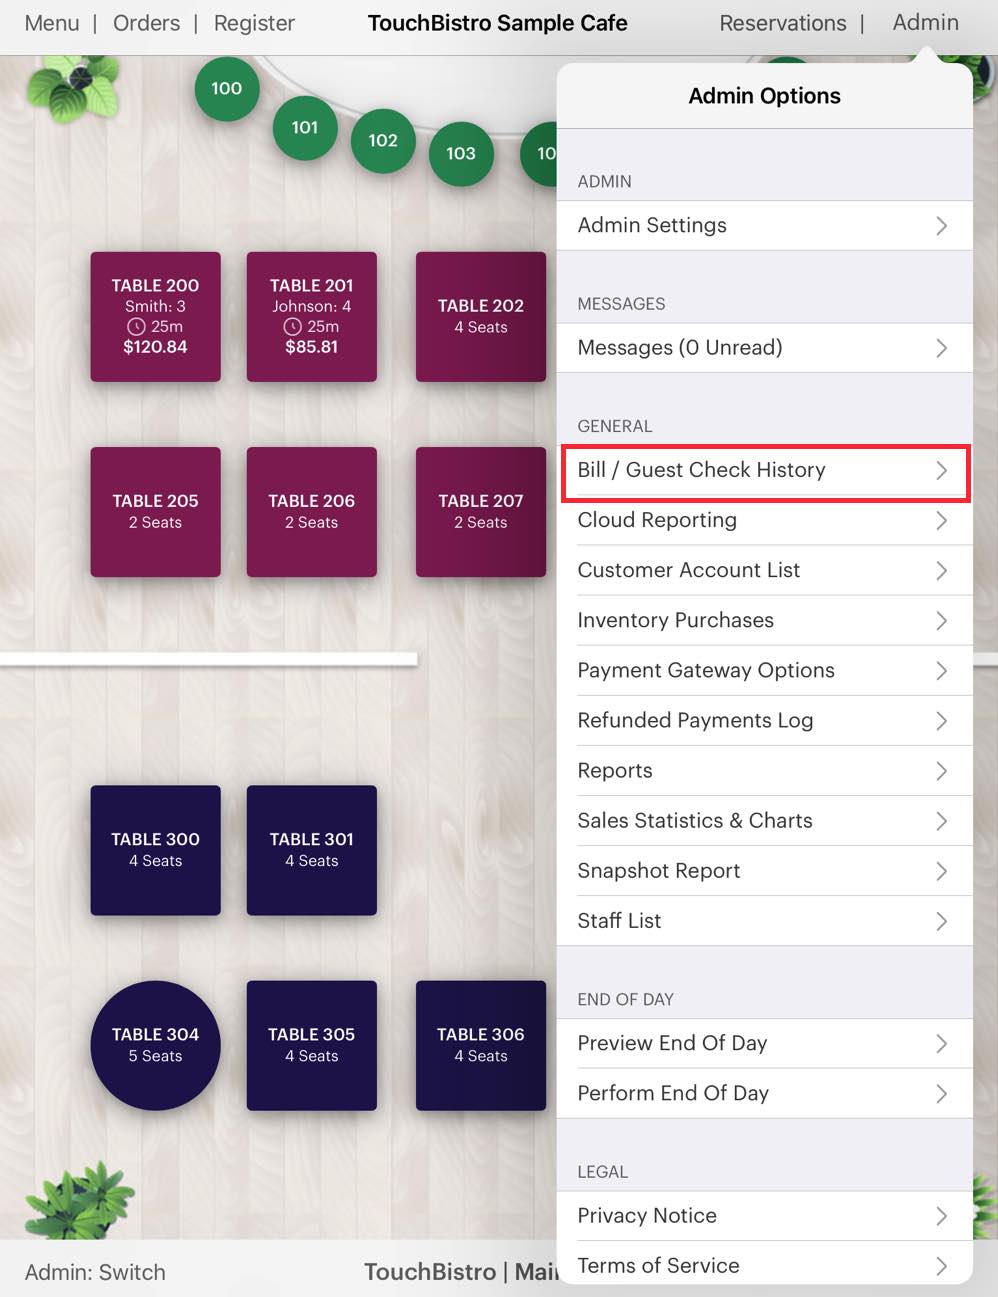
1. Tap Admin | Bill / Guest Check History.
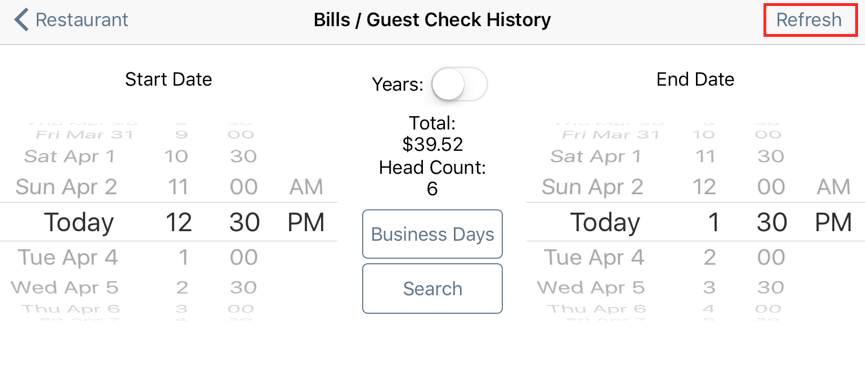
2. Use the date/time wheels to set a search range based on the date/time the bill was paid. Tap Refresh.
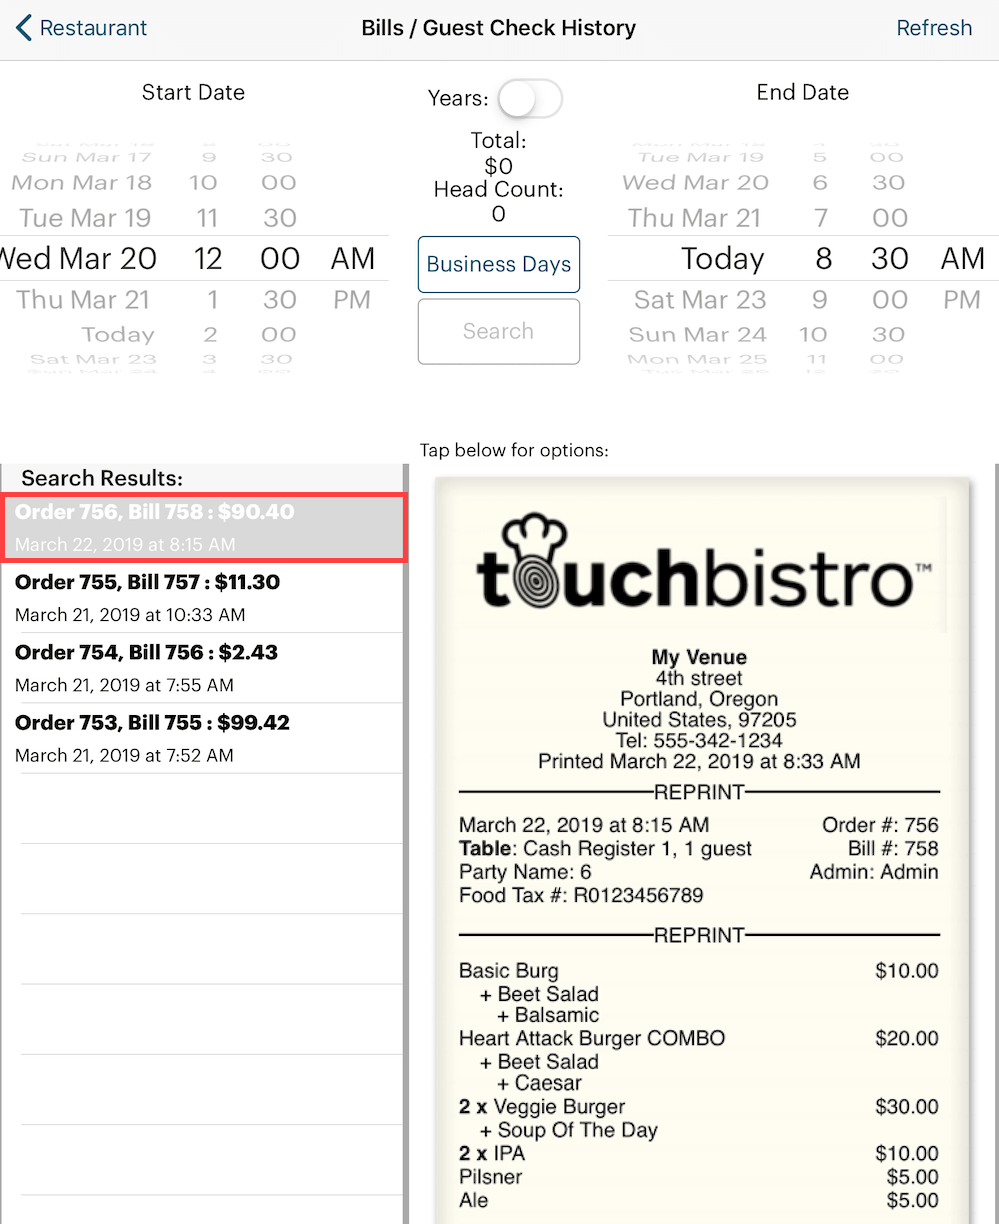
3. Locate the bill in the search results and tap it.
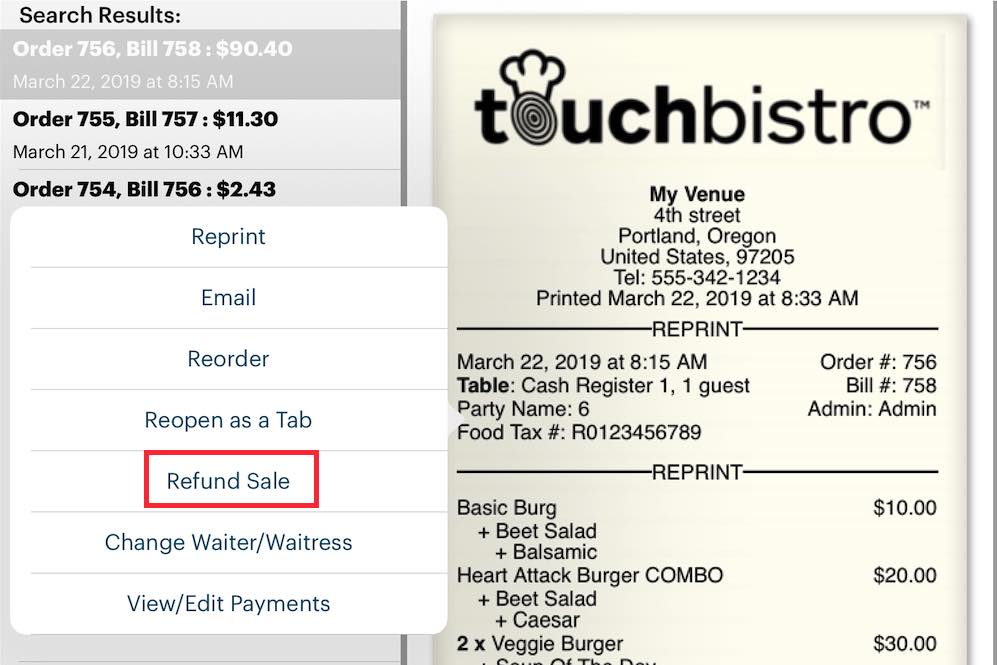
4. Tap Refund Sale.

5. Tap Full Refund.

6. Tap the Integrated Refund option.

7. Follow the prompts on the iPad and swipe the card when prompted.
8. Verify the amount and tap Refund.

9. Close the sales refund invoice.

10. Your end of day will properly reflect the original bill and the matching refund. In the example pictured above, we’ll assume we’ve only performed a single transaction for the day. We can see our order for $90.40 matched with a $90.40 refund.
Section 4. Reprint a Credit Card Slip
If you need to reprint a credit card slip, see this guide for complete details.
Chapter 4. Bar Tab Creation with a Credit Card Swipe
When opening a bar tab, typically you hold onto the card and input name and card data into the Bar Tab screen to keep record of which card is held against which tab. To speed up this process, you can open a bar tab, swipe the offered card, and automatically populate the Bar Tab details screen.
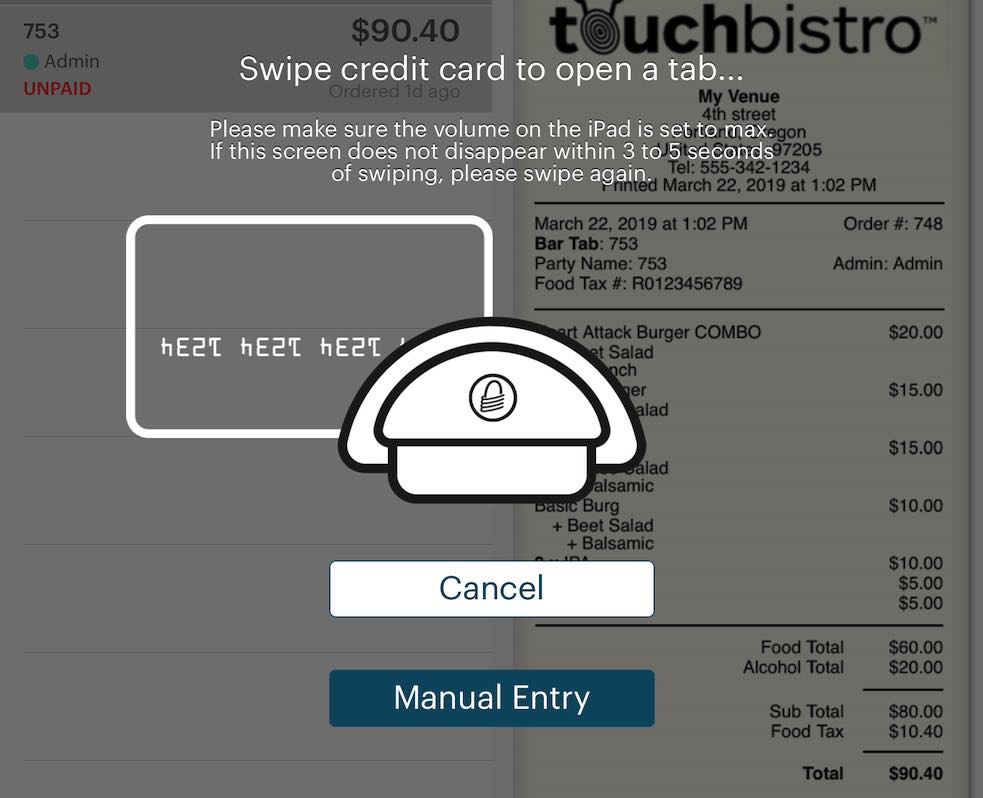
When you tap the Add + button to add the bar tab, you will be prompted to swipe the card. Upon swiping the card, you will be immediately taken to the Order screen.
Tap Manual Entry to create the bar tab without the card.
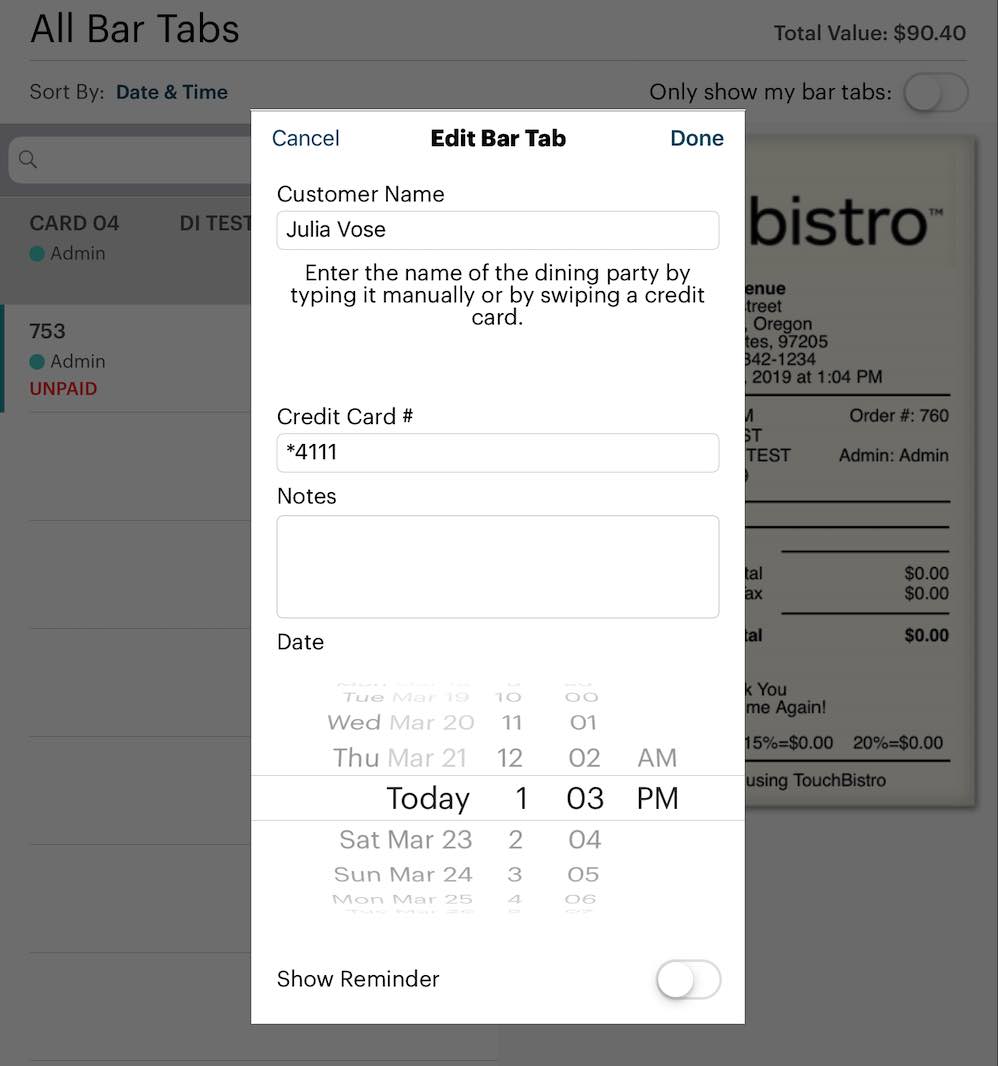
TouchBistro will also add the name on the card and the last four digits to the Bar Tab details screen. If you later transfer the tab to a table, the name captured by the swipe will be carried over to the table.
Section 1. Authorization
If you are using Worldpay as your integrated payment provider, you can enable TouchBistro obtaining a Worldpay “valid card” authorization when swiping to create a bar tab. After swiping the card to create the tab, TouchBistro will receive an authorization token that lets you process the card from the checkout without having to re-swipe the credit card when the patron wishes to close his/her bar tab.
It’s important to understand no pre-authorization is issued by Worldpay. Worldpay issues a “zero auth”. In other words, the swipe does not check if the card holder has enough remaining credit limit to pay for the accrued tab. The charge may still be rejected. So you should retain the card even if you’ve enabled this zero auth option.
If you start an order with “zero auth” enabled, and subsequently transfer the order to a bar tab, the authorization will be lost. Also if two zero auth bar tabs are merged together, one of those two authorizations will be lost.
1) To enable zero auth
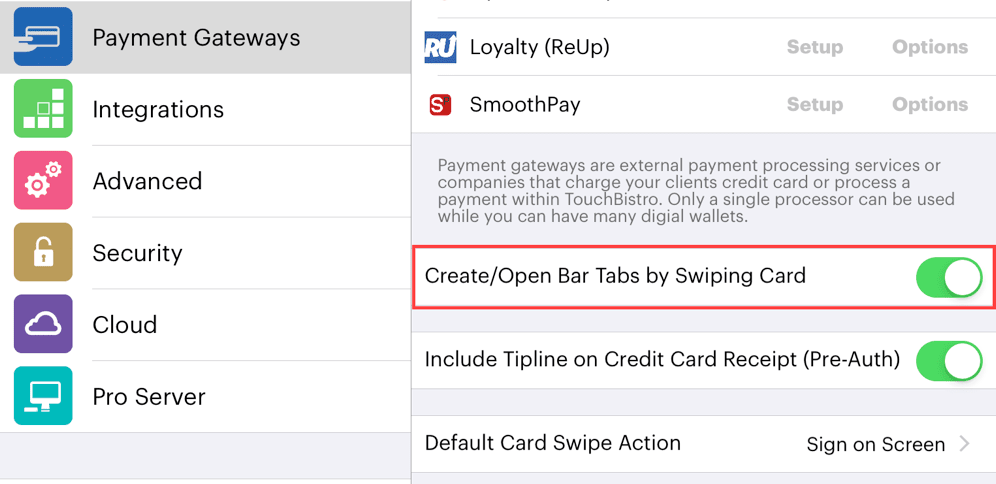
1. Access Admin | Admin Settings | Payment Gateways and enable Create/Open Bar Tabs by Swiping Card. If Default Card Swipe Action is set to Sign on Screen, note that all Zero Auths will generate a credit card slip that needs to be signed and will come with a pre-auth.
2. Tap Worldpay’s associated Setup option.
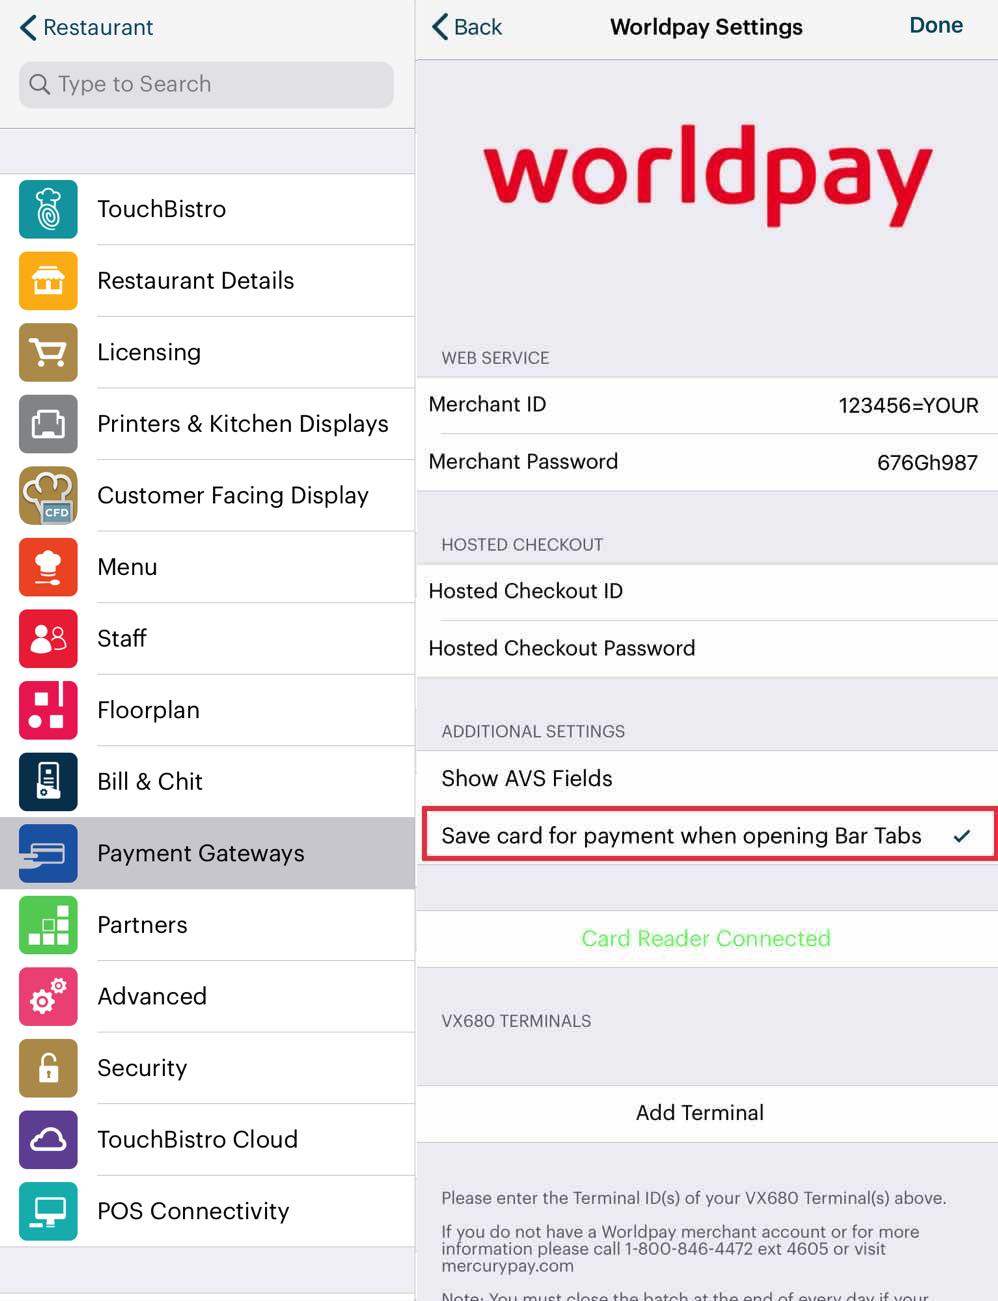
2. Enable Save card for payment when opening Bar Tabs.
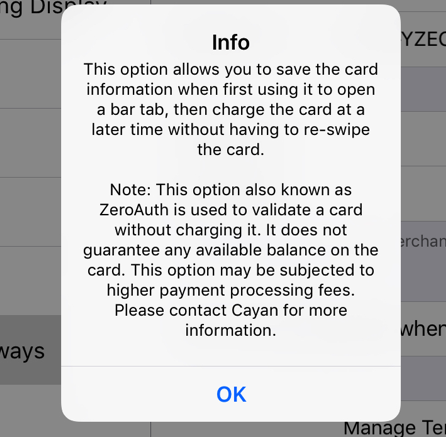
3. When you enable this feature note the limitations and possible higher merchant fees for these kinds of transactions. You cannot use this feature with American Express cards.
4. Tap Done.
2) Using the Zero Auth to close a Bar Tab

1. Add a bar tab and swipe the card.
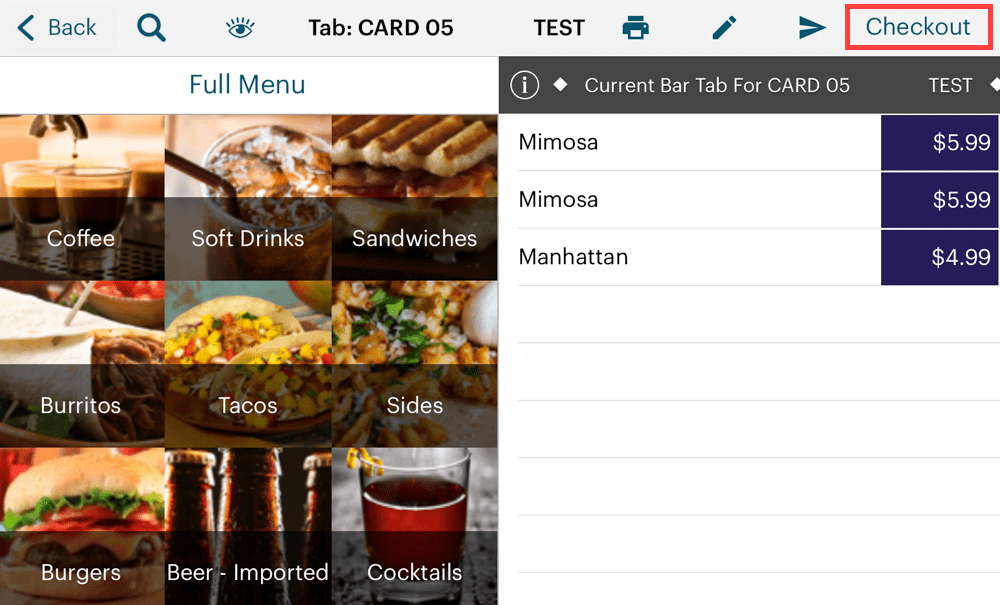
2. When the patron wants to close the tab and pay, tap Checkout.

3. Under Payment Options you will see the charge card offered. Tap it.
4. Process the payment as prompted.
Section 2. Disable Swiper Prompt
If you prefer not to use this method to populate bar tabs, you can turn it off under Admin | Admin Settings | Payment Gateways.
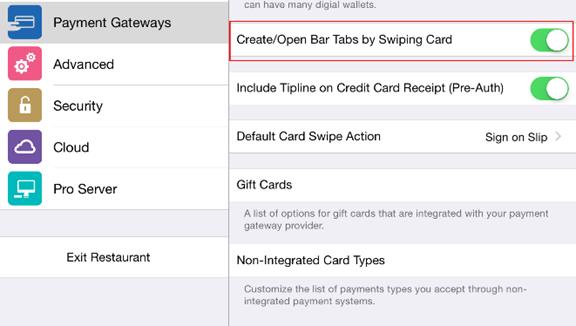
Disable Create/Open Bar Tabs by Swiping Card.
Chapter 5. Using Hosted Pay
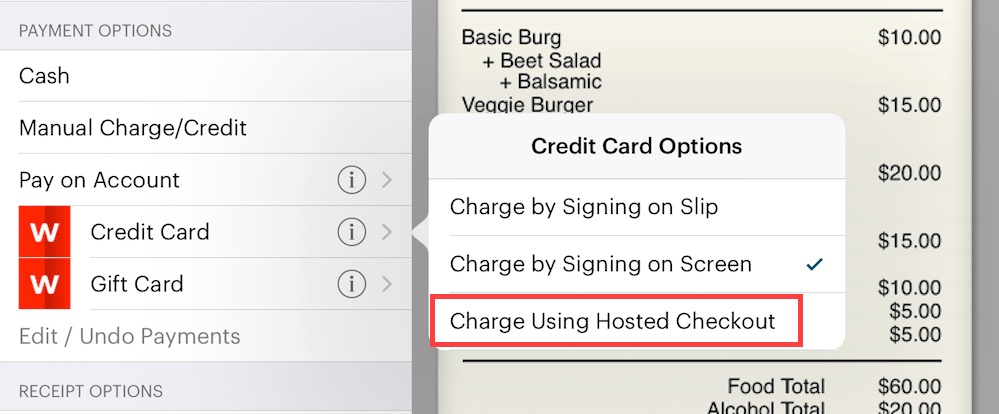
1. From the Checkout screen, tap the Information ![]() icon next to Credit Card.
icon next to Credit Card.
2. Tap Charge Using Hosted Checkout.

3. Tap Pay in Full. Do not include tip.
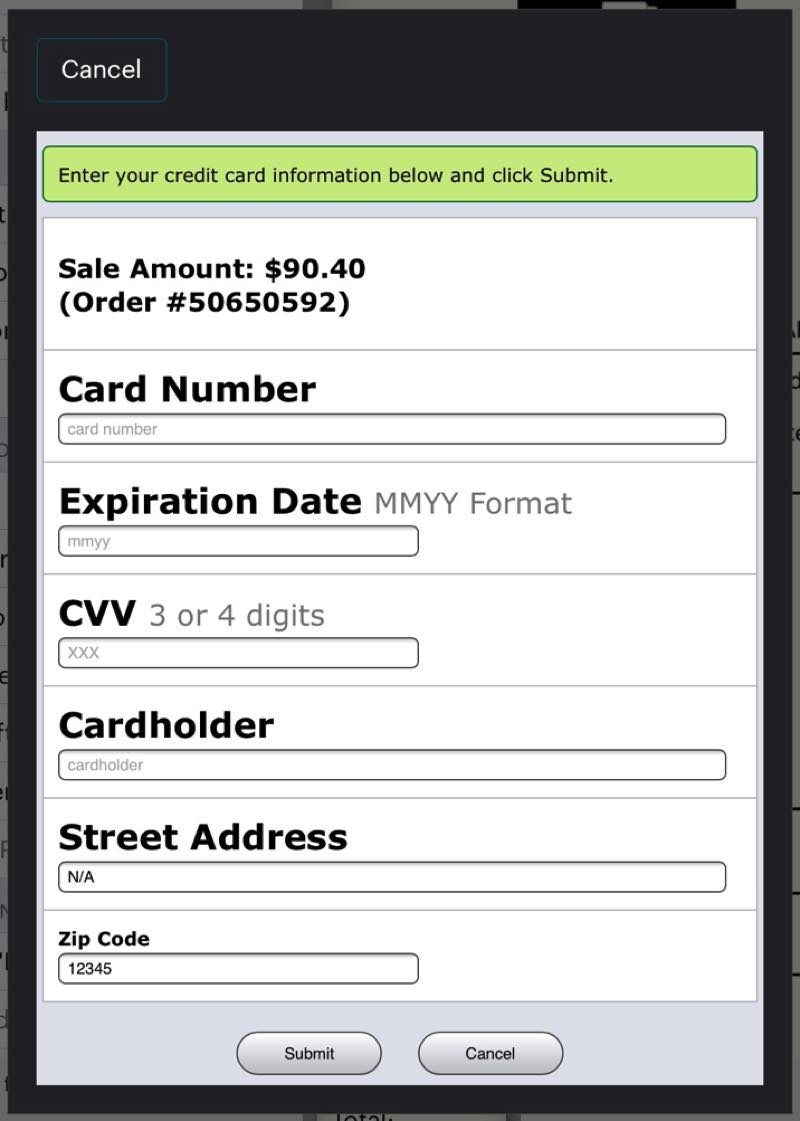
4. Enter the credit card details and tap Submit.
Chapter 6. Closing Your Batch
Follow these steps to close your batch via TouchBistro:
1. Login as an Admin or Manager.
2. Tap Admin or Options (if you’re logged in as a Manager profile).
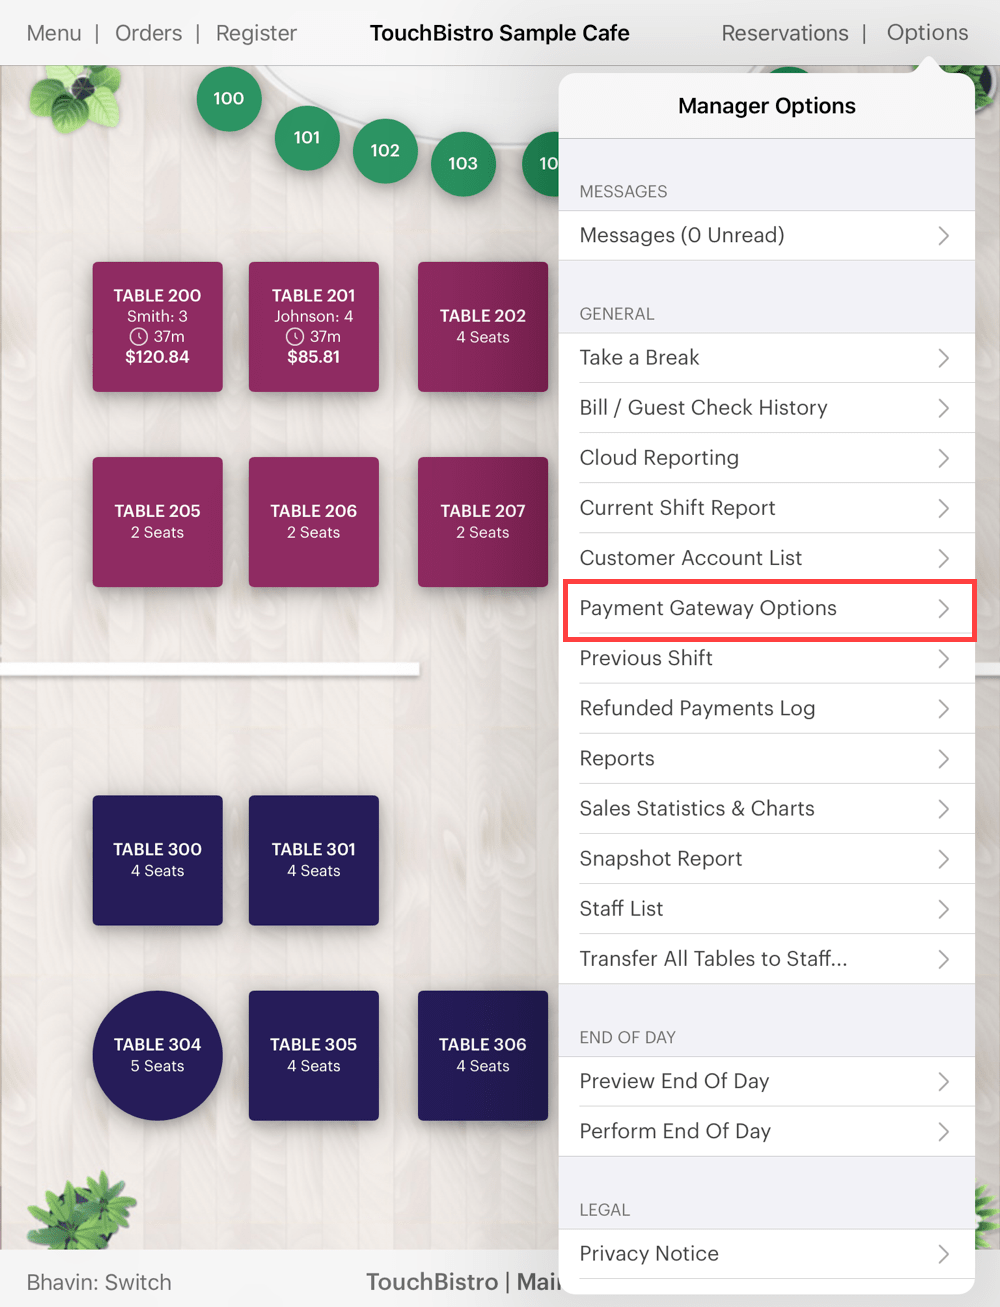
3. Tap Payment Gateway Options.
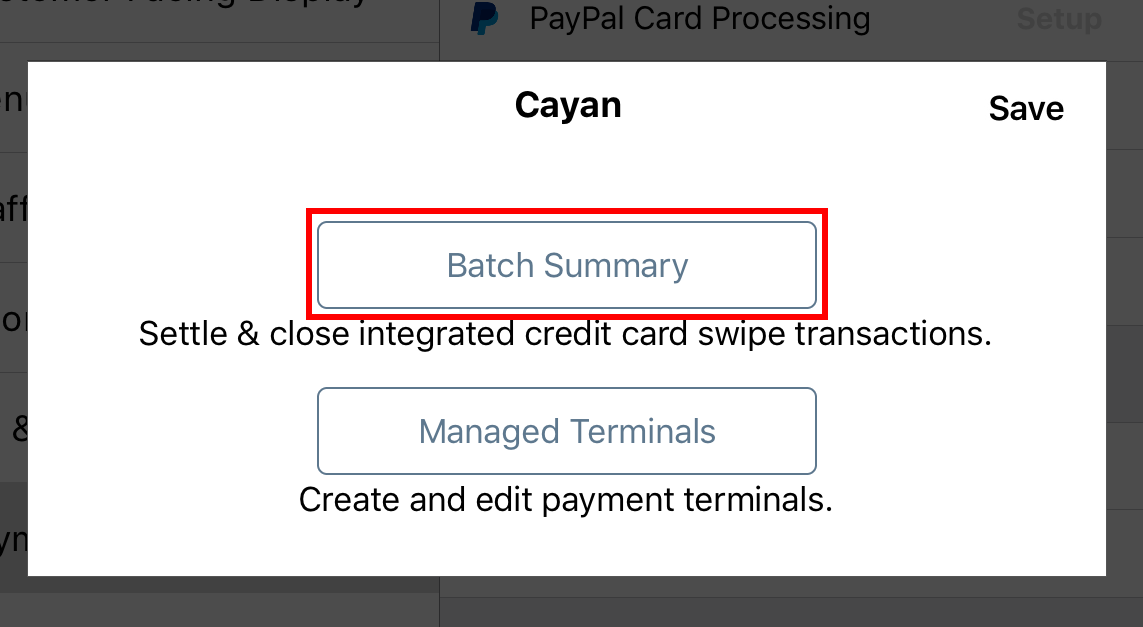
4. Tap Batch Summary.
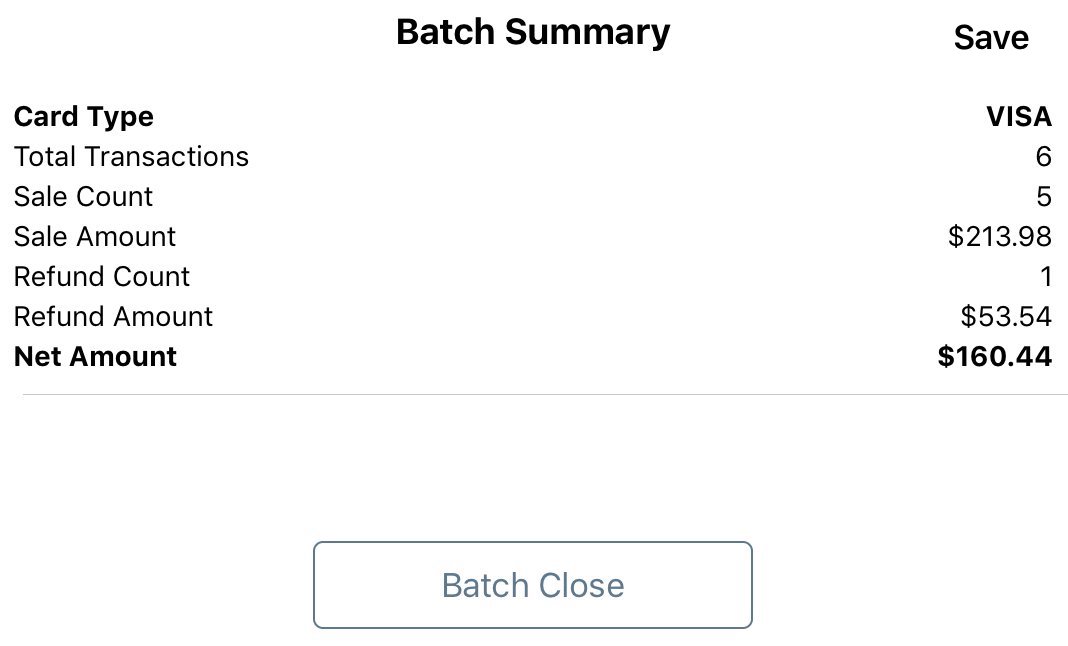
5. Review the batch summary and tap Batch Close.
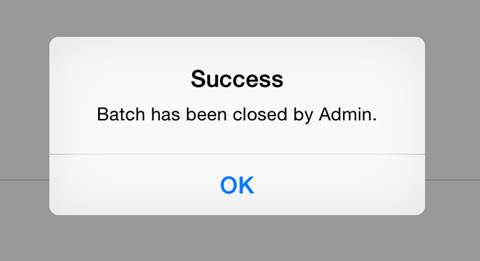
6. TouchBistro will prompt you your batch has been submitted successfully. Tap OK.


 Email
Support
 Frequently
Asked Questions
