TouchBistro Online Ordering Diner Experience
Chapter 1. Introduction
This guide will show you how a customer might navigate your online ordering site.
Chapter 2. Landing Screen

When the diner accesses your TouchBistro Online Ordering page via your website’s order button or the direct link, the diner will be given a choice between selecting Delivery (if offered) or Pickup. If you are offering scheduled orders, the diners will likewise get a choice between ordering ASAP or Scheduling.
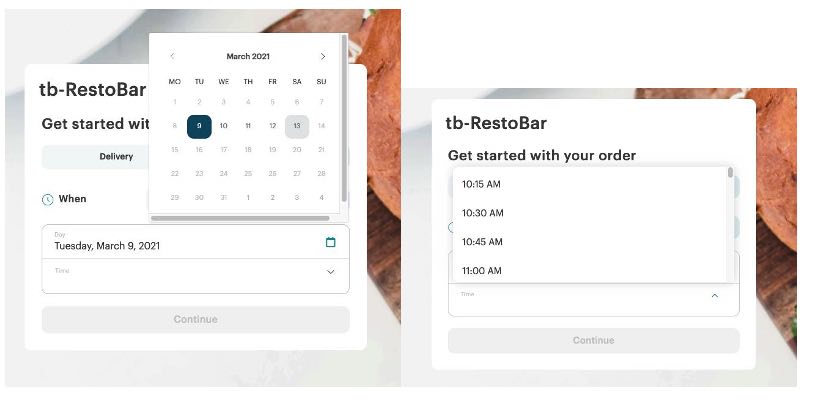
If the diner picks Schedule, the diner will be prompted to pick a date and time. Date and time are limited based on settings you set in order settings.
Section 1. Understanding Available Time Slots

The calendar will only allow the date based on the figure entered into Schedule days in advance. So, if you enter 5, the calendar will allow the diner to pick the current day or one of four days into the future. Time is restricted by your configured pickup and wait times. Based on the pictured settings, if the customer wants scheduled pick up and it’s 1 pm, the first available time offered will be 1:30 pm (current time + 30 min pickup wait time). If the customer wants scheduled delivery and it’s 1 pm, the first available time offered will be 2 pm. Time choices are also restricted by your opening and closing hours set up on Cloud. A customer will not be able to schedule an order any later than your closing time. A customer will also not be able to order any earlier than opening time + configured wait time. Likewise, a diner cannot order later than closing time – configured wait time.
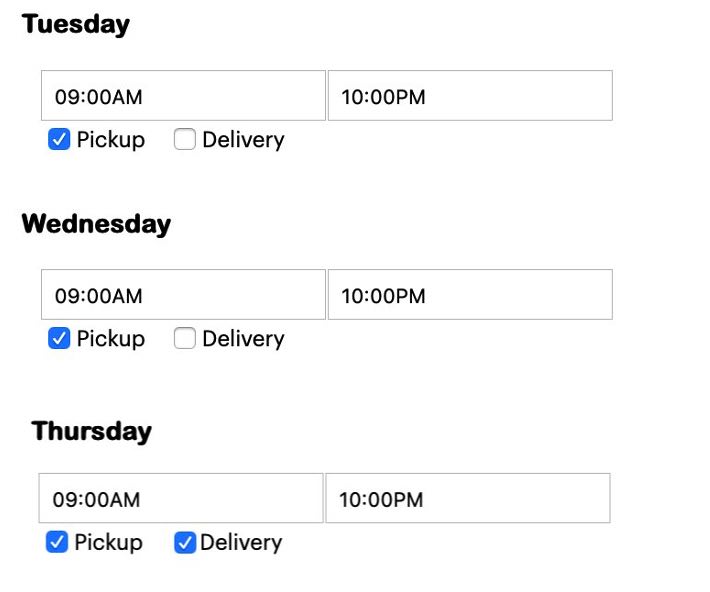
Based on the pictured example, a customer trying to order pickup for Thursday morning will not be able to order any earlier than 9:30 am (opening time + 30-minute configured wait time). Likewise, the customer won’t be able to schedule an order past 9:30 pm (closing time – 30-minute configured wait time).
We also don’t allow 24-hour delivery/pickup or on closure days. No orders can be placed between 11:30 pm and midnight.
Example 1
You open at 10:00 AM. You’ve set your pickup wait time to 30 minutes. The earliest time slot the diner will be offered for the desired day is 10:30 AM (10:00 am + 30 minutes).
Example 2
The diner orders at 2 pm and the pickup wait time is 30 minutes. The earliest time slot the diner will be offered for pickup is 2:30 pm (2 pm + 30-minute wait time). If the diner orders at 2:05 pm, the earliest time slot the diner will be offered for pickup is 2:45 pm (2:05 pm + 30-minute wait time).
Example 3
You close at 11 pm and the pickup wait time is 30 minutes. The last time slot the diner is offered is 10:30 PM. If the diner tries to order at 10:35 PM, the diner will not be offered any time slots for the day as 10:35 PM + 30 minutes takes you past your 11 pm closing time.
Time Slot Intervals
Time slot intervals are ever fifteen minutes. However, they may not appear to diners as every quarter-hour on the quarter-hour. Time slots for the day are calculated based on your opening time plus wait time. So, if you open at, say, 10:10 am and your wait time is 30 minutes, the first time slot for the day will be 10:40 AM (10:10 AM + 30 minutes). The next will be 10:55 AM (10:45 AM + 15 minutes), followed by 11:10 AM (10:55 AM + 15 minutes). If you are seeing such odd time slots and prefer your time slots to fall on the quarter-hour, adjust your opening time and/or wait times.
Chapter 3. Order Menu Screen
Section 1. Change Order Type
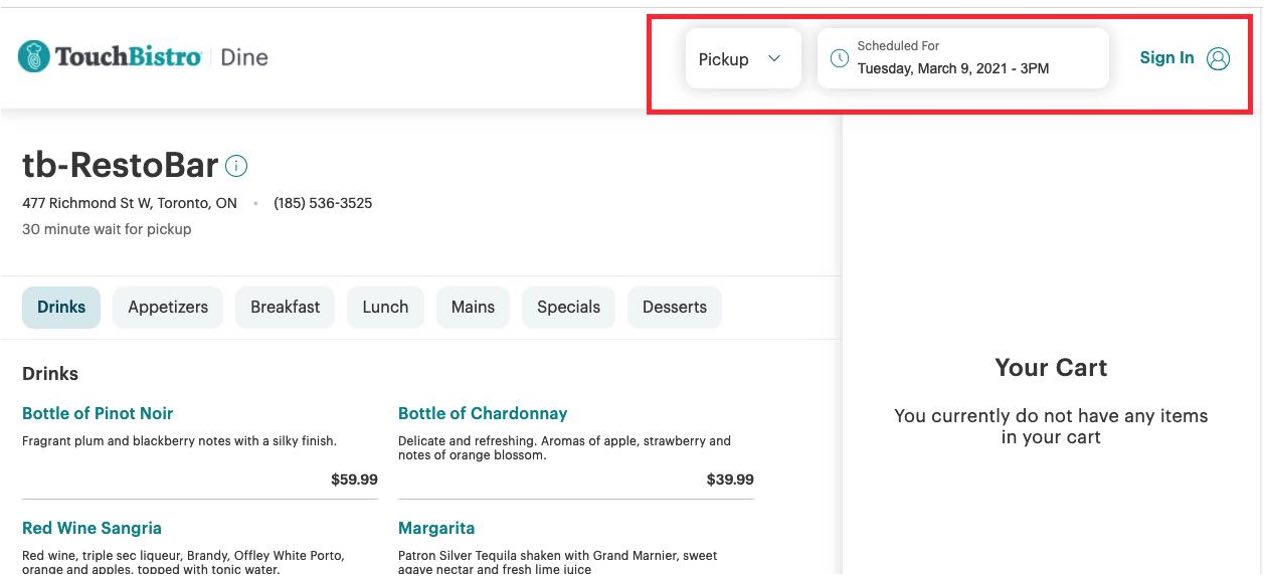
After selecting the order type and timing, the diner will be taken to the order page. Across the top the diner can change order type and schedule. As well, the diner has an opportunity to sign in with their TouchBistro Dine account.
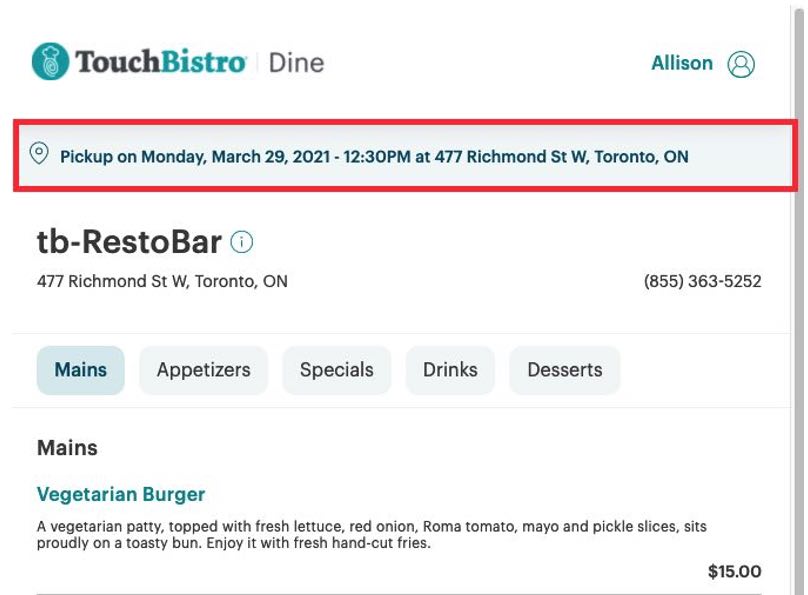
Depending on the device, a smaller mobile screen may remove the controls. The diner can still adjust order type/time by clicking the confirmation text at the top.
Section 2. Menu Category Selection
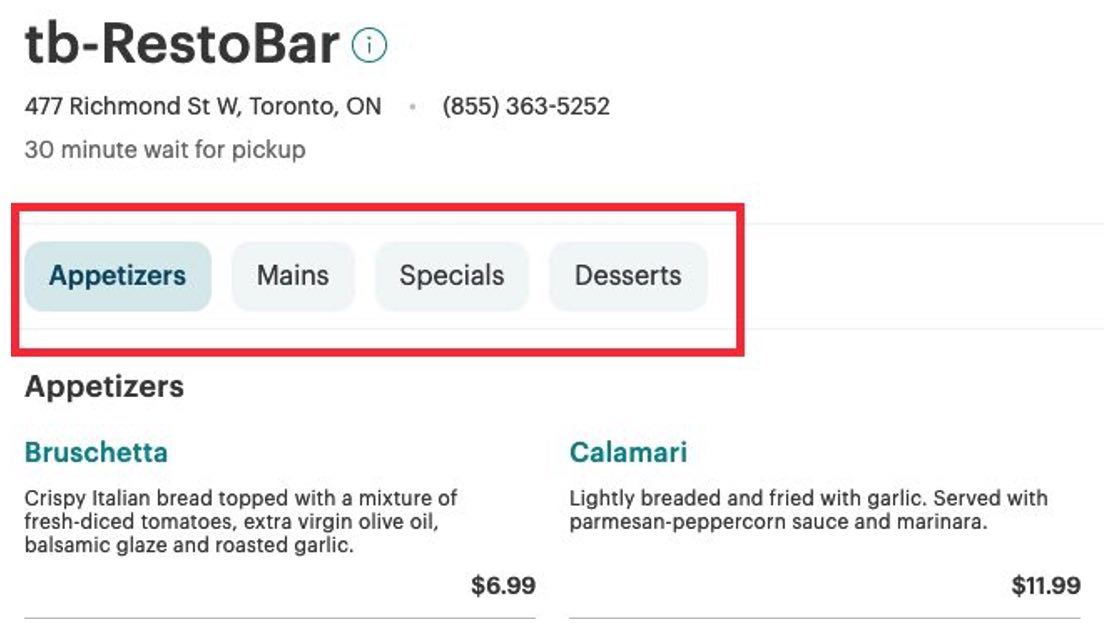
TouchBistro Online Ordering will show the diner your online ordering menu categories and menu items under the selected category.
Section 3. Menu Items

Menu items will display the descriptions you set in TouchBistro POS as well as the prices. To change either, access your menu item in Admin | Admin Settings | Menu | Menu Items and adjust as necessary.
Chapter 4. Menu Item Ordering

To order an item, the diner needs to click on the desired menu item. That will start the process of ordering one or more of the chosen menu items.
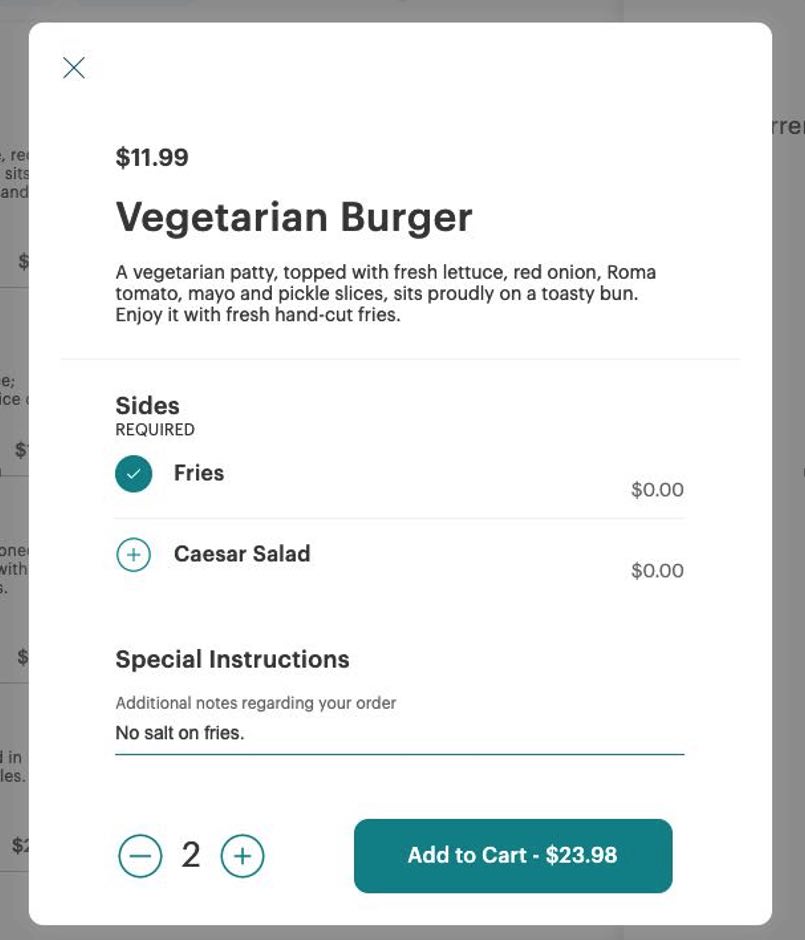
The diner can click the Add button to increase the quantity. The diner can click Next to add the item to the shopping cart. If the item has forced modifiers, the diner will be required to select one or more modifiers before being able to add the order item(s) to the cart. If the diner ordered more than one of the same item, the selected modifier will apply to BOTH orders.
The diner can also add special notes about the item ordered. For example “sauce on the side” or “no salt”.
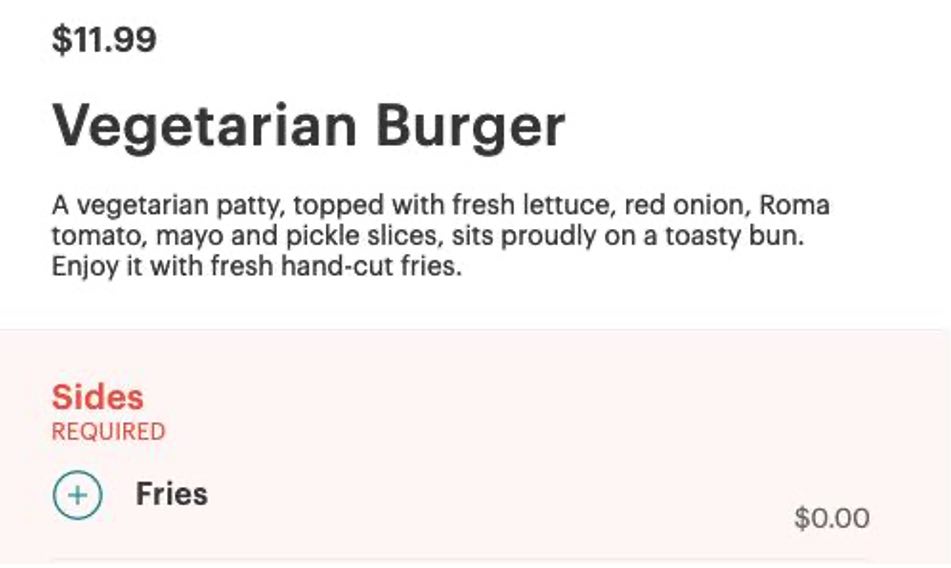
If the diner tries to add the item to the cart without completing the forced modifiers, the diner will see a warning dialog.
When the diner has completed all the forced mods for each item ordered, the diner can click Add to Cart. The Add to Cart button will also show a subtotal of the items ordered with any upcharges from mods.
Section 1. Your Cart
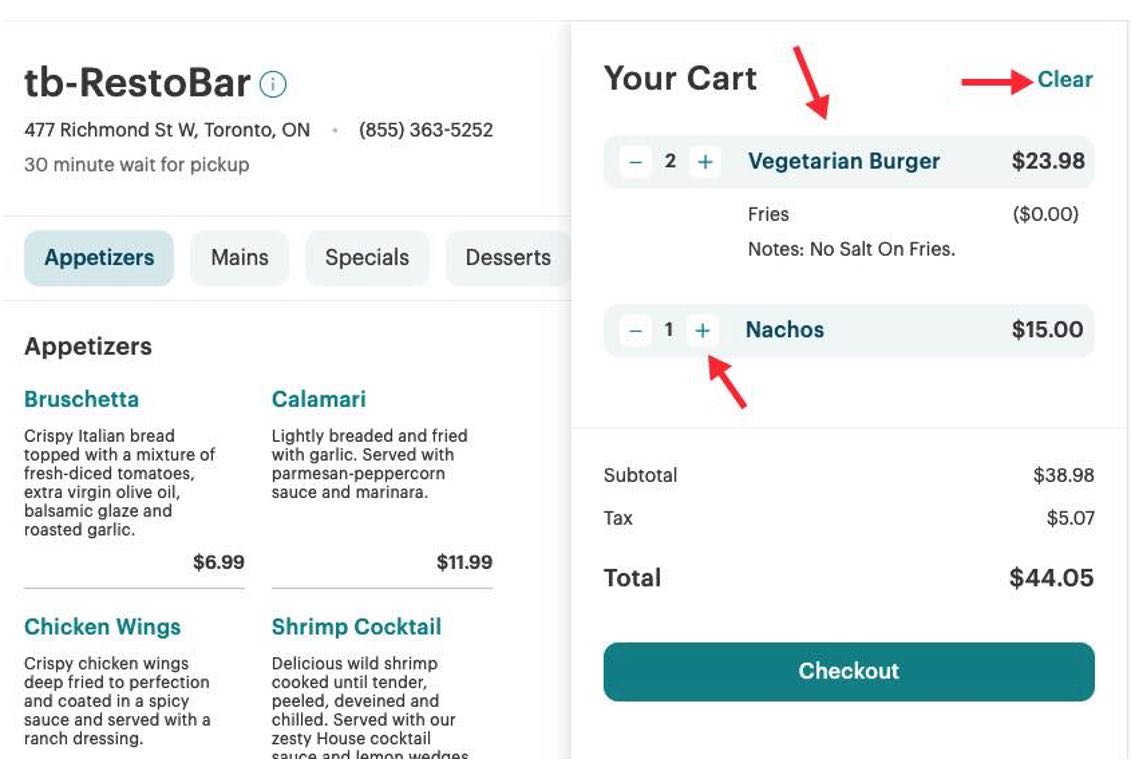
As the diner adds items to order, they will appear on the left in the cart. At any time, the diner can:
- Click Clear to delete all items from the cart.
- Click a menu item name to make changes to the modifiers or notes.
- Click -/+ to increase or decrease the number order. Reducing the count to zero prompts the customer to remove the item.
Chapter 5. Checking Out
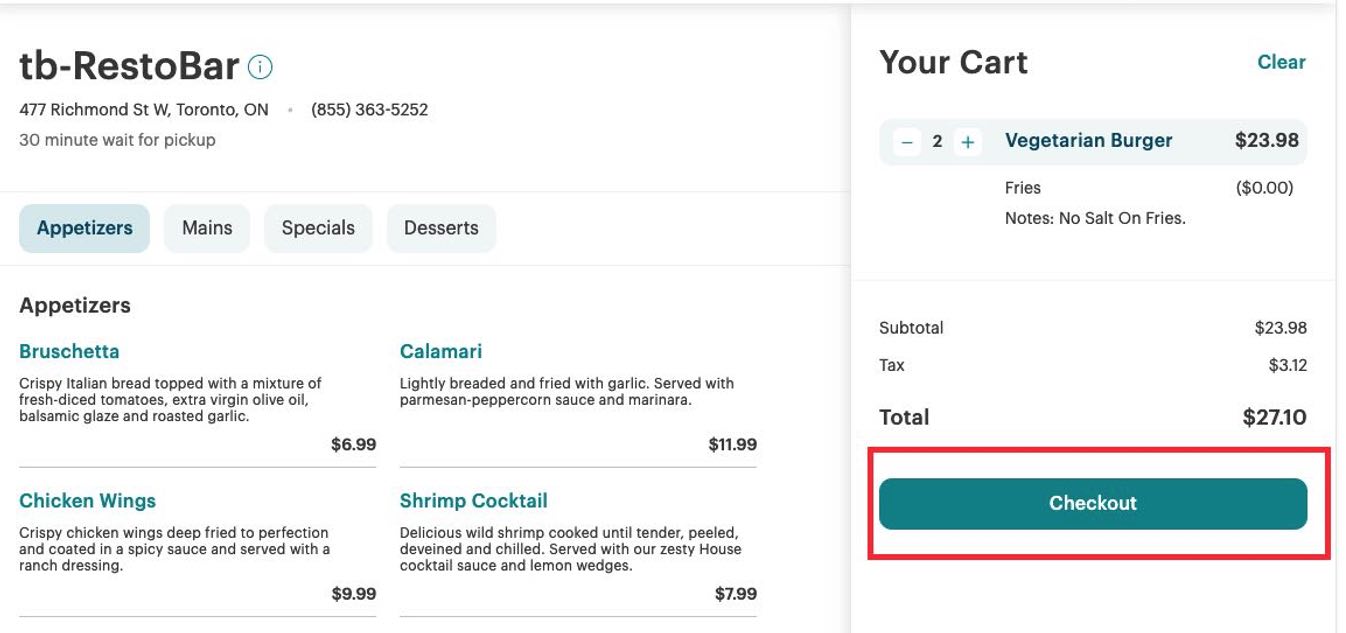
As the diner adds items for order, they will appear on the left in the cart. When the diner is ready to send his/her order the diner should click the Checkout button.
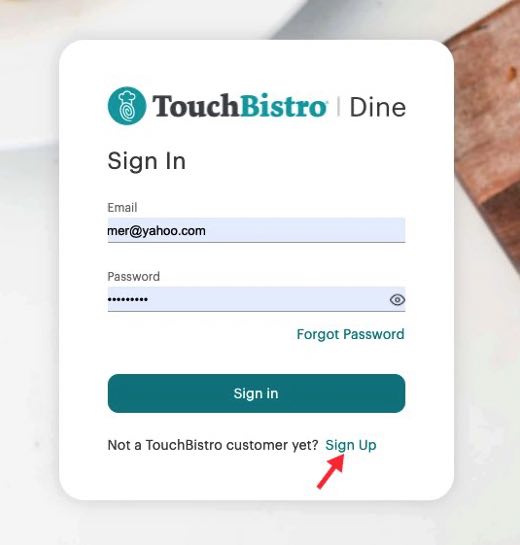
If the diner has yet to sign in, the diner will be prompted to either sign in with his/her existing account or create a new account.

After the diner clicks the Checkout button and signs in, the diner will get a chance to review his/her order. The diner can:
-
- Click a menu item to adjust modifiers or change quantity.
- Enter general instructions like “Extra ketchup”.
- Request cutlery sets.
- Choose available payment options. Note: Scheduled orders offer Pay by Card Online only.
- If the diner is paying online, the diner can select a tip amount and must enter the required card details.
- Indicate he/she wishes to get order status details to his or her phone. The phone field will auto-populate based on the phone entered in the TouchBistro Dine profile.
The diner should then click Place Order.
Chapter 6. Registration
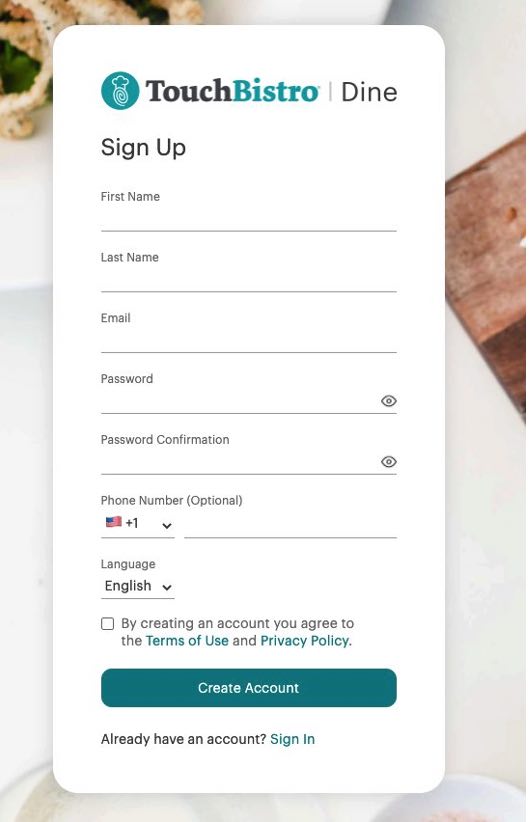
Registration is quick and easy. The customer simply has to fill out their name, phone number, email, and password. They will also need to agree to the Terms of Use and Privacy Policy. After that they can create their account by clicking Create Account.
Chapter 7. Confirmation Page
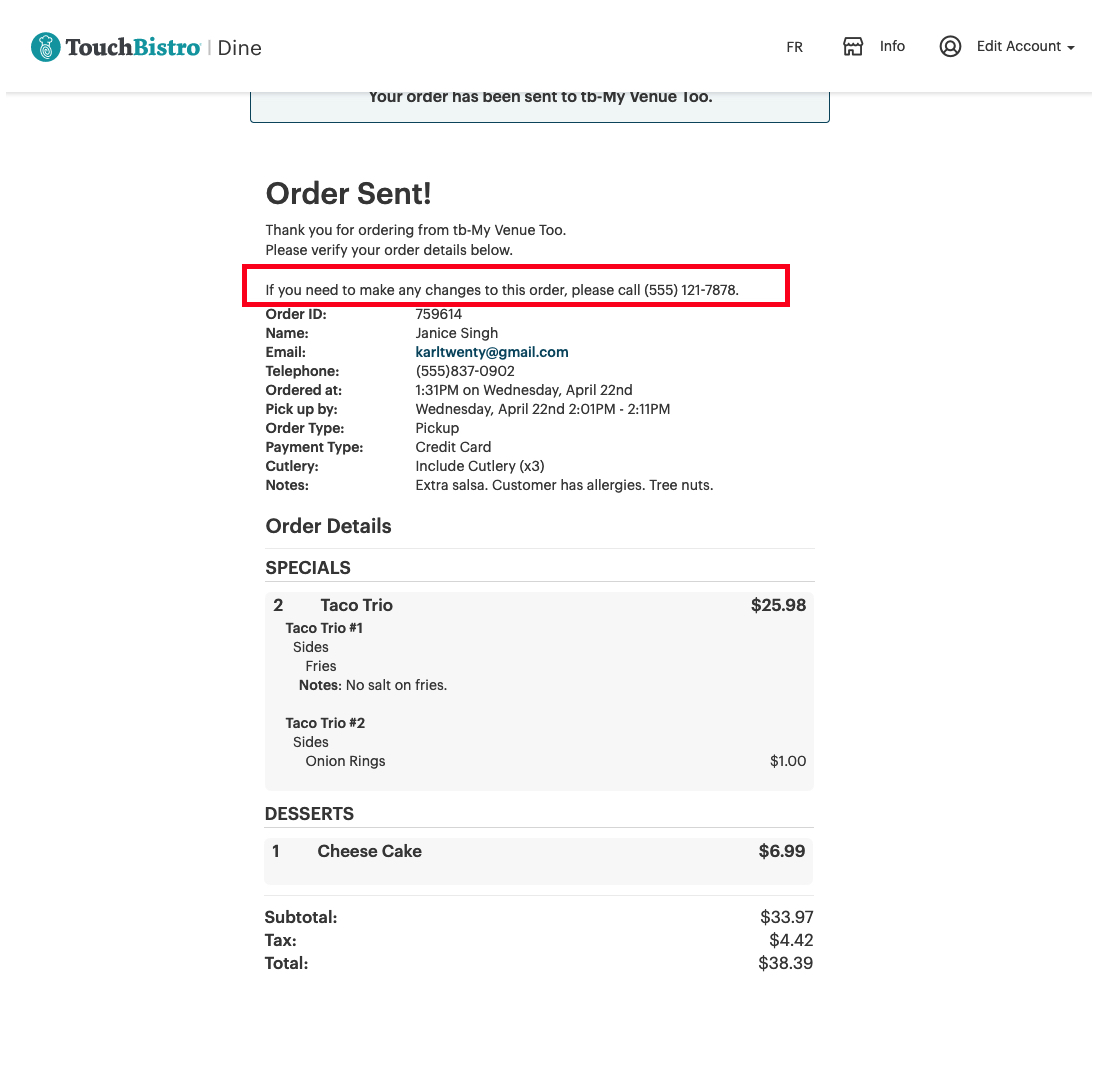
After clicking Submit Order, the diner will get a confirmation page. At this point, the diner cannot cancel or modify the order. The diner is given your venue’s phone number and instructed to call your venue to modify the order.


 Email
Support
 Frequently
Asked Questions
