Applying for TouchBistro Online Payments
Table Of Contents
Chapter 2. Application Procedure
Section 1. Legal Business Information
Chapter 1. Introduction
This guide will walk you through the steps you need to follow to apply for TouchBistro Online Payments and be successfully adjudicated.
Chapter 2. Application Procedure
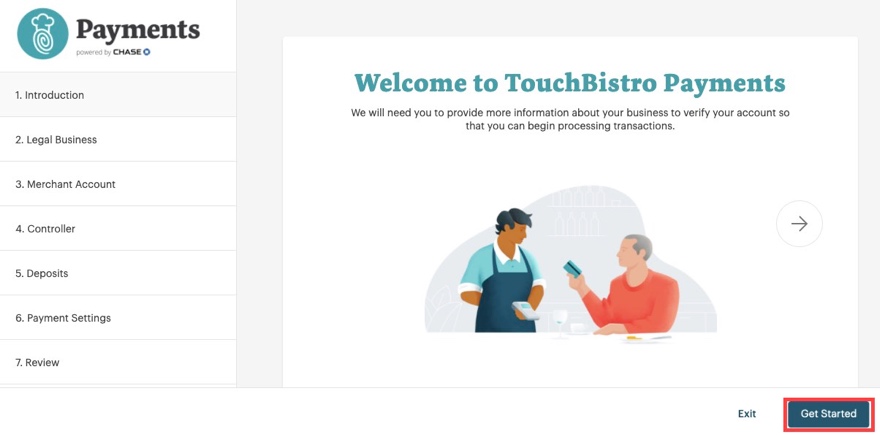
When you receive your application invite email from TouchBistro, click the link. Click Get Started.
The application process is fairly straightforward. Complete, in full, sections 2-7. When you complete each section, remember to click Save & Continue.
Section 1. Legal Business Information
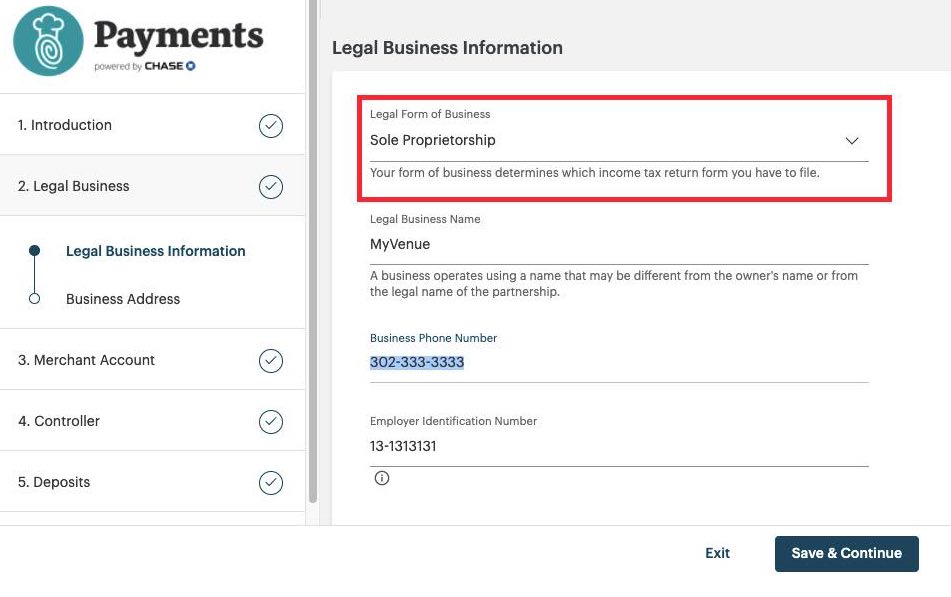
It’s important on this screen to correctly identify your business’s legal structure. For example, you’re a sole proprietorship or you’re structured as a corporation. Depending on your selection, the information you have to supply on subsequent screens may be different. For example, if you select anything other than Sole Proprietorship, you will need to provide details for each director or partner of your business. So, have this kind of information ready before you proceed through the application.
Section 2. Controller
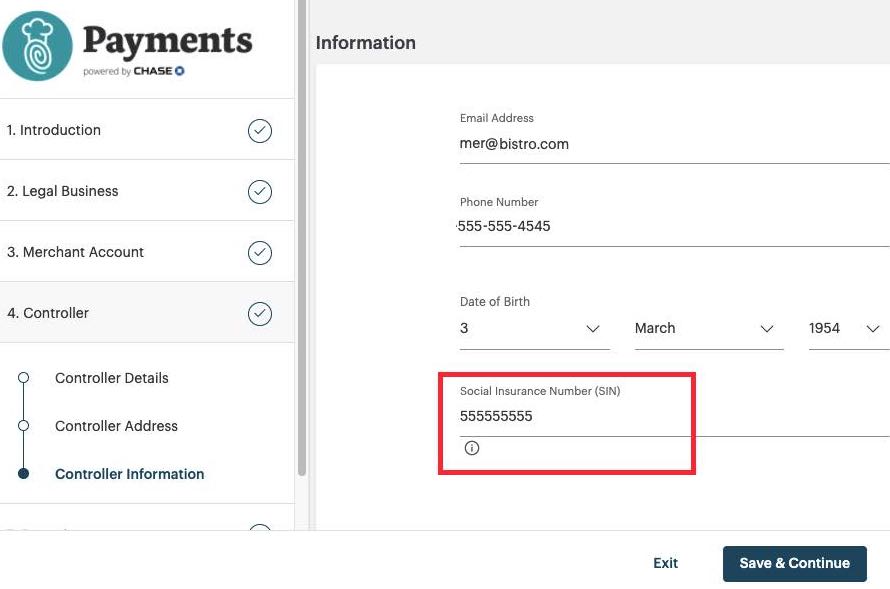
Under the Controller page, you will have to give details about all owners/directors. You must list anyone who owns at least 25% of the business. The email you enter here is the email that will be used for communication during the approval process. You will also be prompted for your social insurance number. Please note the SIN field is optional and you are not required to complete it.
Section 3. Deposits
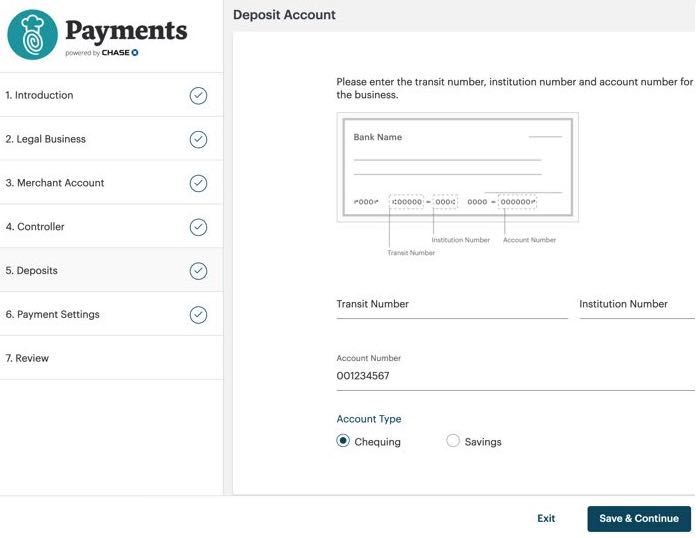
Ensure you have your deposit account details ready, particularly your transit and institution numbers. If you are using a chequing account, frequently these numbers can be found on checks you have drawn up for your account. If you do not have checks (for example, you’re using a savings account), a call to your bank will also provide these details.
Section 4. Payment Settings – Batch Close
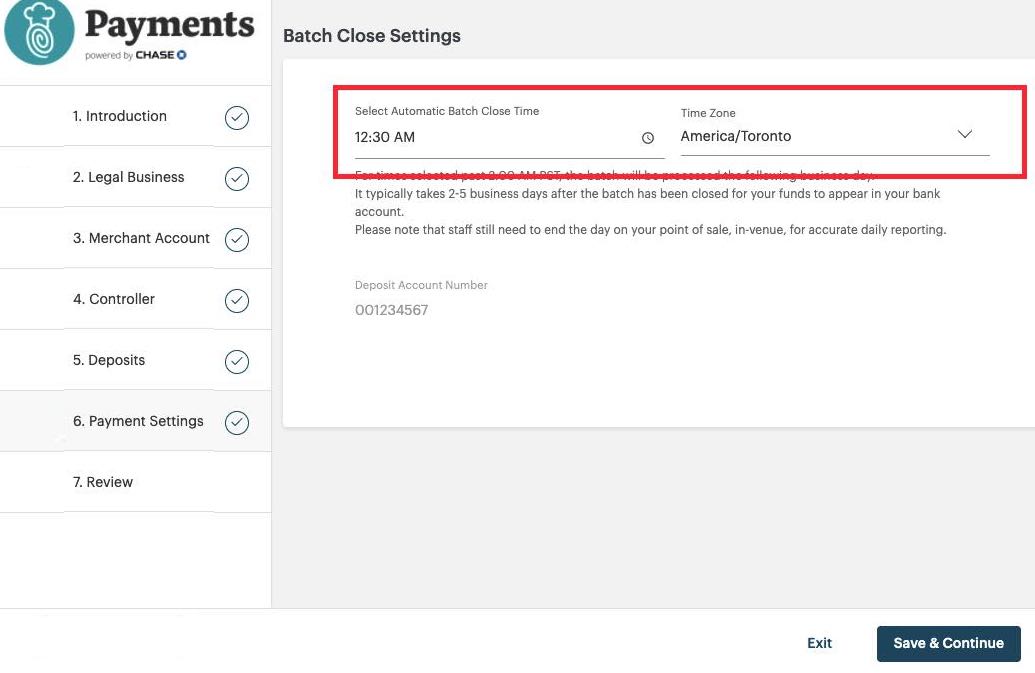
This page lets you set when you want your batch to close, that is when do you want TouchBistro to submit funds from your accepted payments to your merchant account? It is important that you not only set your batch close time but you set your Time Zone correctly.
Note if you set your batch past 5 am EST (2 am PST), your batch won’t be processed until the following business day.
Typically, after your batch is submitted, it can take 2-5 business days for your funds to appear in your merchant account.
Section 5. Review
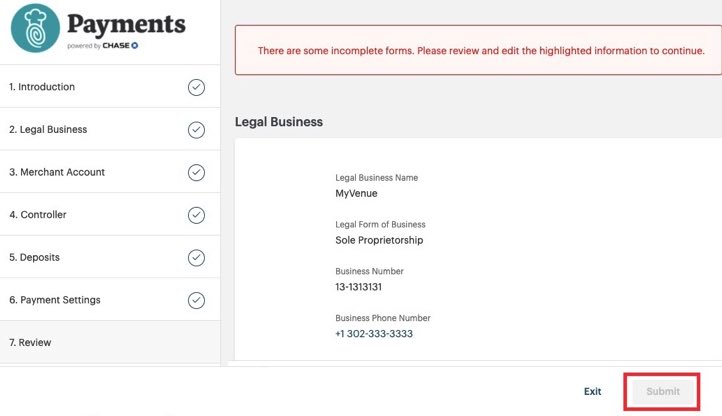
Once you have completed all the necessary information, proceed to the Review page. The review page will allow you to review all information you’ve entered. Scroll down to see all your entered information. It’s important to check it for accuracy. If you have missed the required information, the Review page will alert you. Return to the previous section or sections with the missing information.
If all information is correct and complete, you can click Submit to submit your application for adjudication. Submit will not un-dim until all necessary information has been entered.
Chapter 3. After Submitting
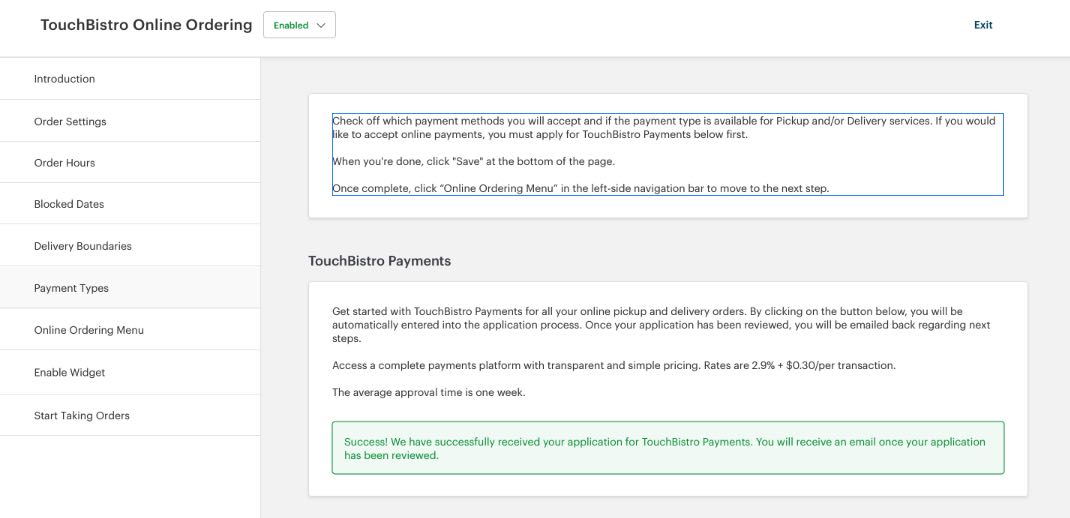
After you submit, TouchBistro will review your application and alert you via email once your application has been approved. If everything has been filled out correctly, it should only take about 1 business day for approval. TouchBistro will use the email you entered under the Step 4 – Controller screen for this communication.
There may be some cases, however, where TouchBistro requires additional supporting documentation (like a copy of a driver’s license or passport). If so, you will receive an email requesting the required documentation and instructions on how to submit it.
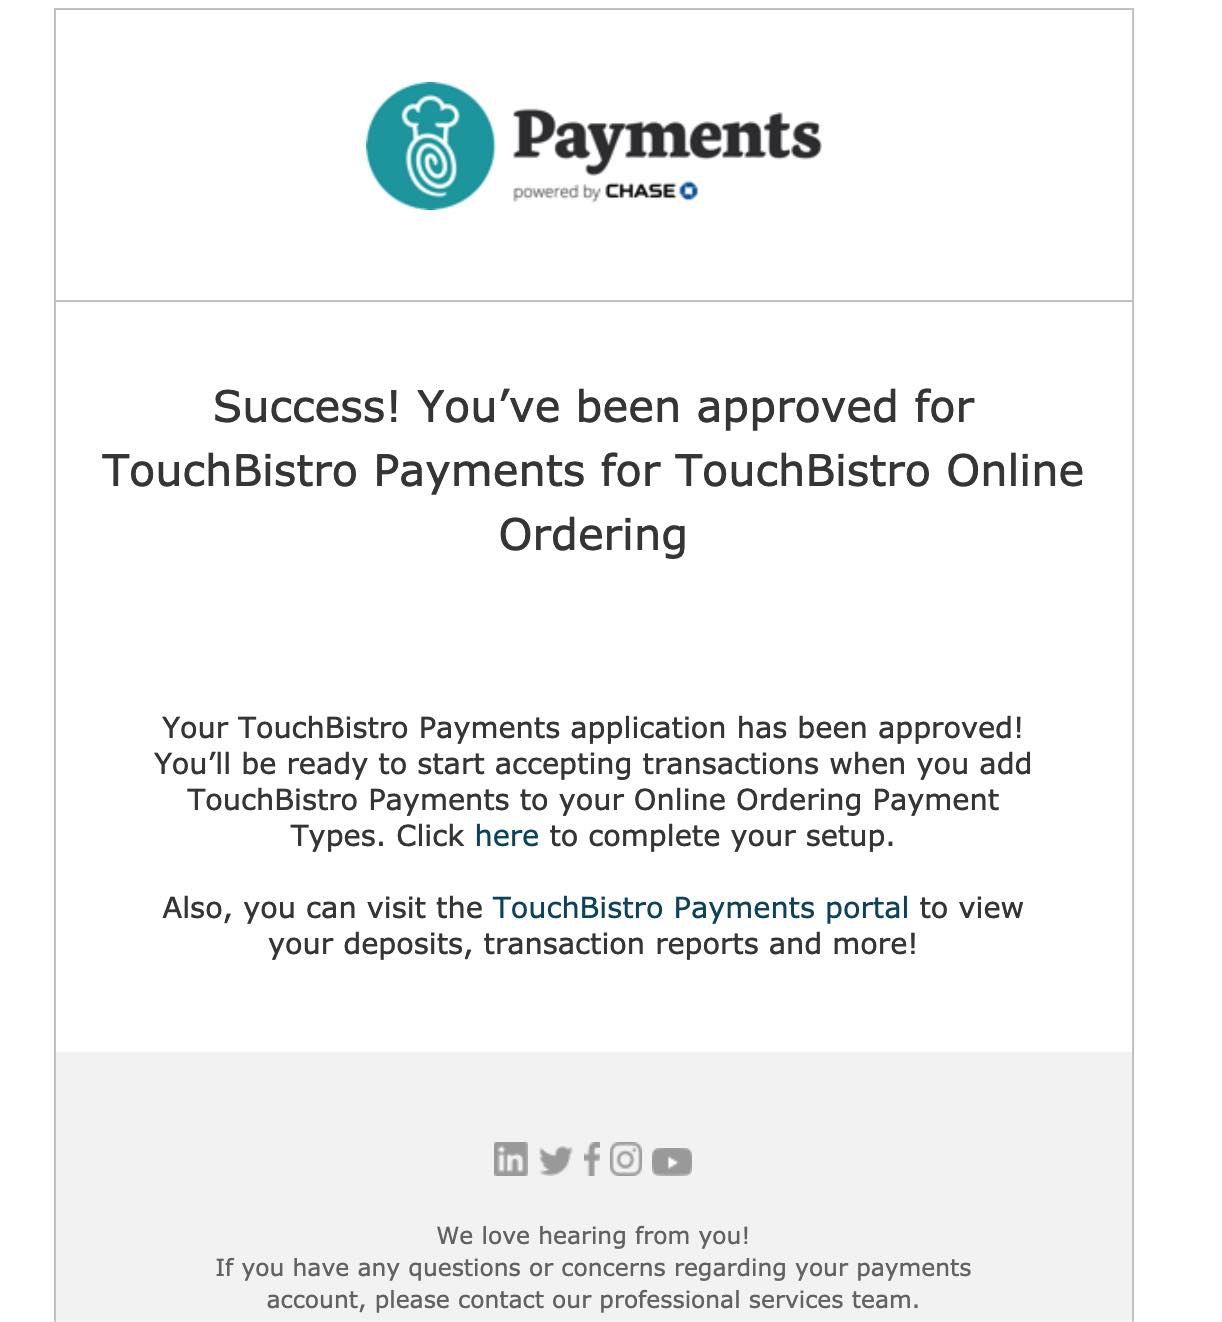
When you are approved you will receive an email that appears similar to the one above.
Section 1. Uploading Supporting Documents
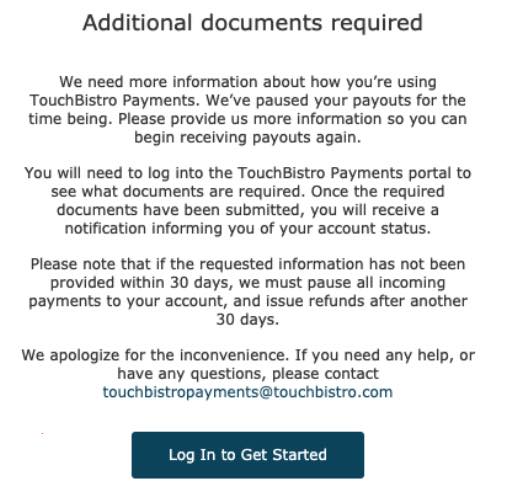
There may be some cases where TouchBistro requires additional supporting documentation (like a copy of a driver’s license or passport). If so, you will receive an email similar to the one above requesting the required documentation and instructions on how to submit it.

2. Log in with your TouchBistro Cloud portal credentials.
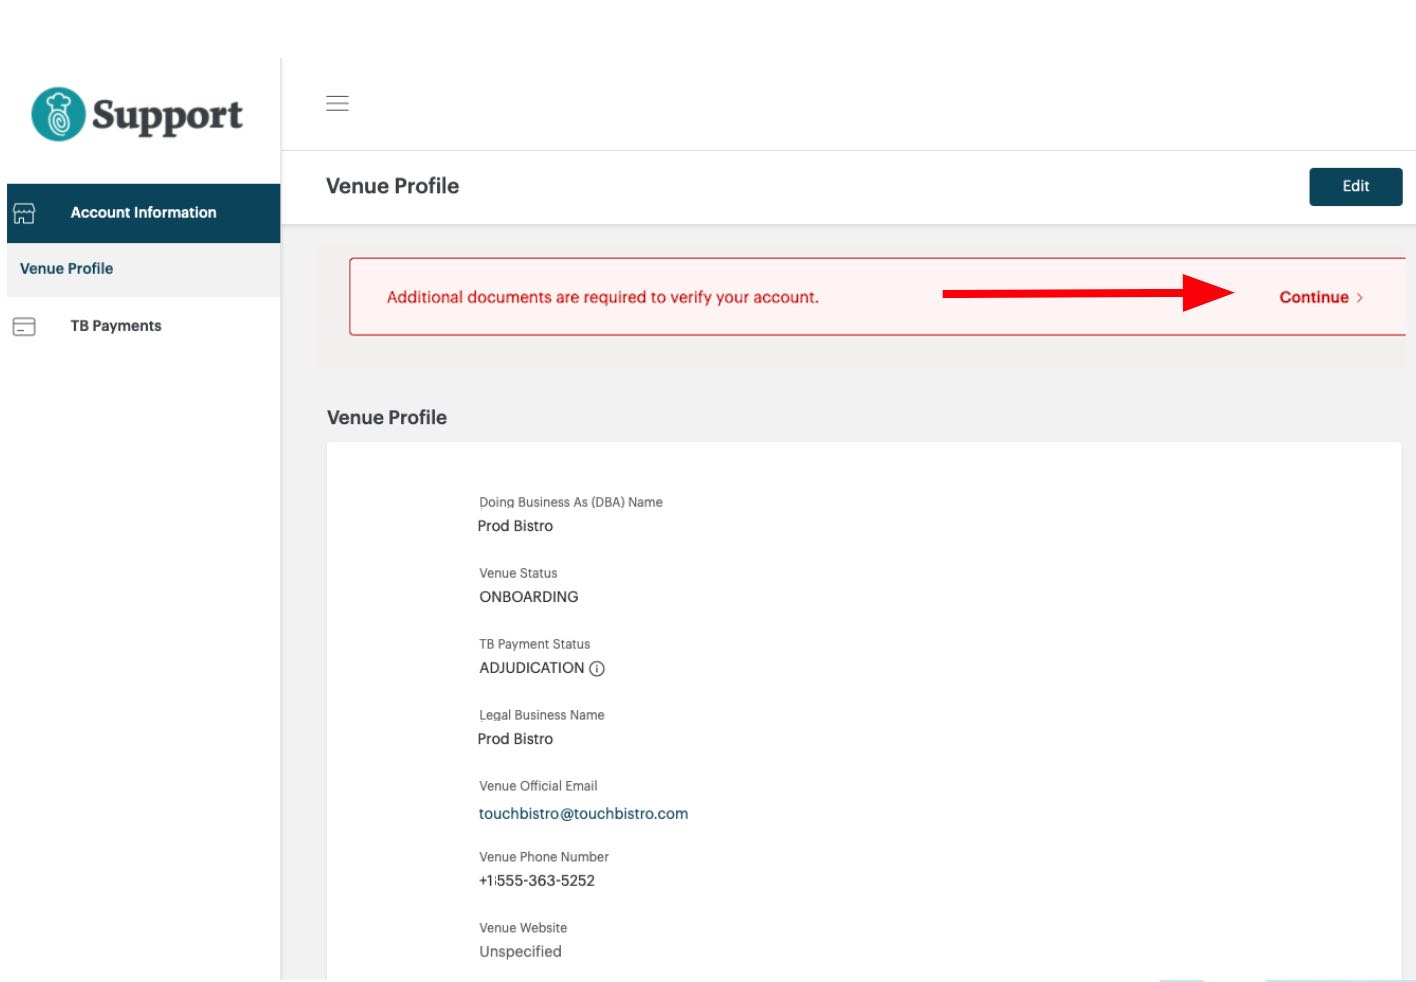
3. Click Venue Profile. You’ll see a prompt for additional documents. Click Continue
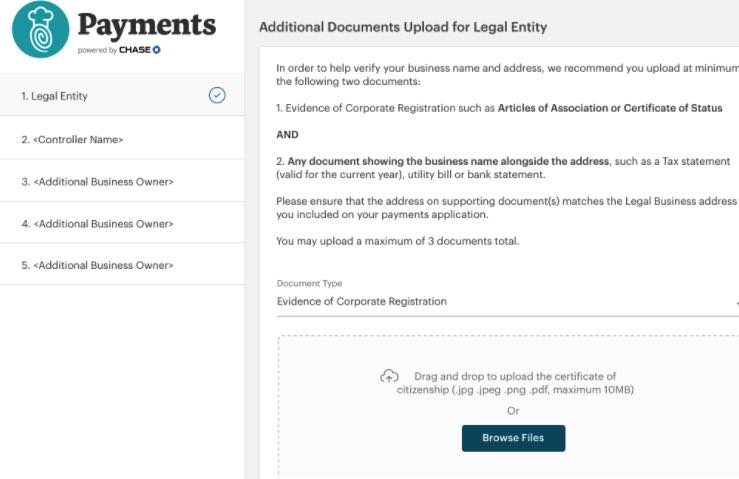
4. Along the side, you will see one or more tabs indicating who or what needs additional supporting documentation. For example, you may see a tab for your Legal Entity and one for your Controller. Click on each tab and follow the directions as to what is an acceptable supporting document for each tab. Click on the document type (for example Current Bank Statement) and click Browse Files and locate either an image scan (JPG/PNG) or a PDF scan of the document. After uploading the requested supporting documentation for the first tab, proceed to the next tab.
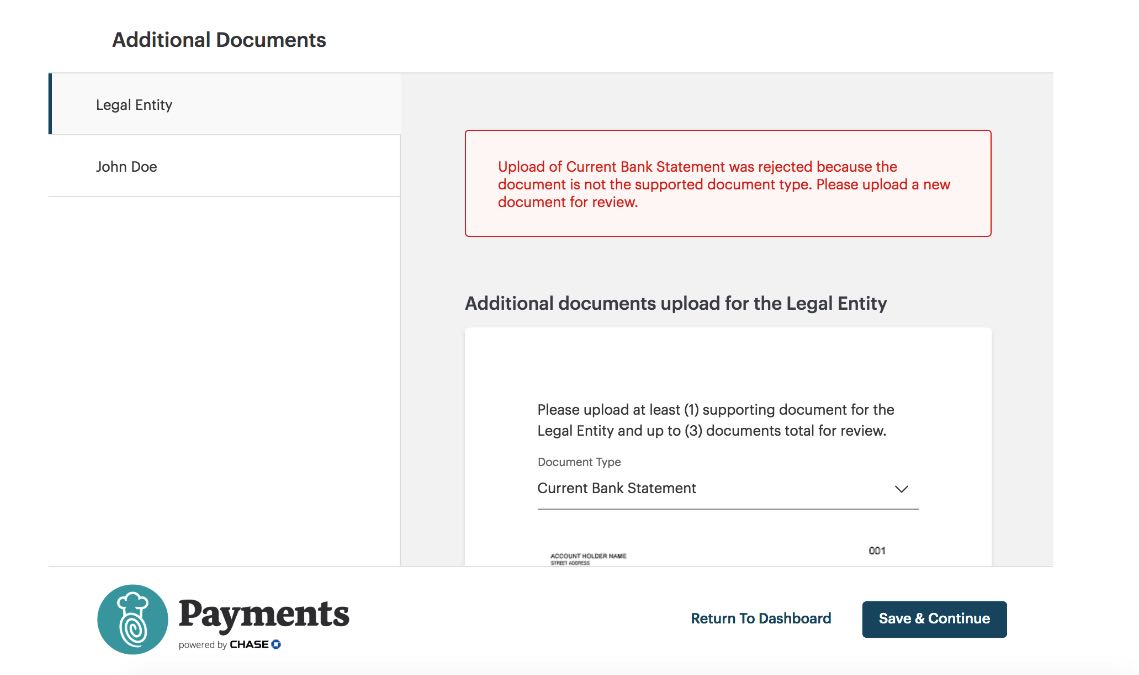
5. If for some reason your document is rejected, you will be notified of the rejection reason (e.g., the document was illegible, the wrong supporting documentation was uploaded, the document was incomplete). You will be prompted to upload a new document.


 Email
Support
 Frequently
Asked Questions