Using Google’s Waitlist Widget
Table Of Contents
Chapter 1. Introduction
Google has a reserve a table function that allows users to book reservations without leaving Google’s user interface. If no tables are available when the party finds your venue via Google search/maps, it will offer a “join waitlist” function to diners.
Waitlisting is offered only to a party if there are no available tables within a 15- or 30-minute window. Parties cannot use it to waitlist themselves at a future date/time. For example, if the party searches for a table at a future date like Valentine’s Day, the Google waitlist widget will not offer the party a chance to add themselves to a waitlist.
Chapter 2. Before You Begin
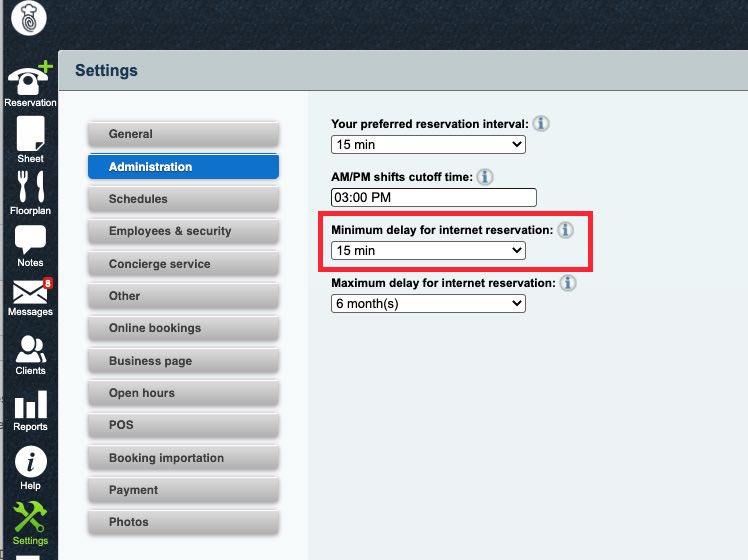
Before the venue enables waitlisting, you should go to Settings | Administration. Ensure Minimum delay for internet reservations is set to either 15 min or 30 min. If it is set to any value higher, your Google business page will not offer a diner the option to waitlist themselves.
Chapter 3. Enabling
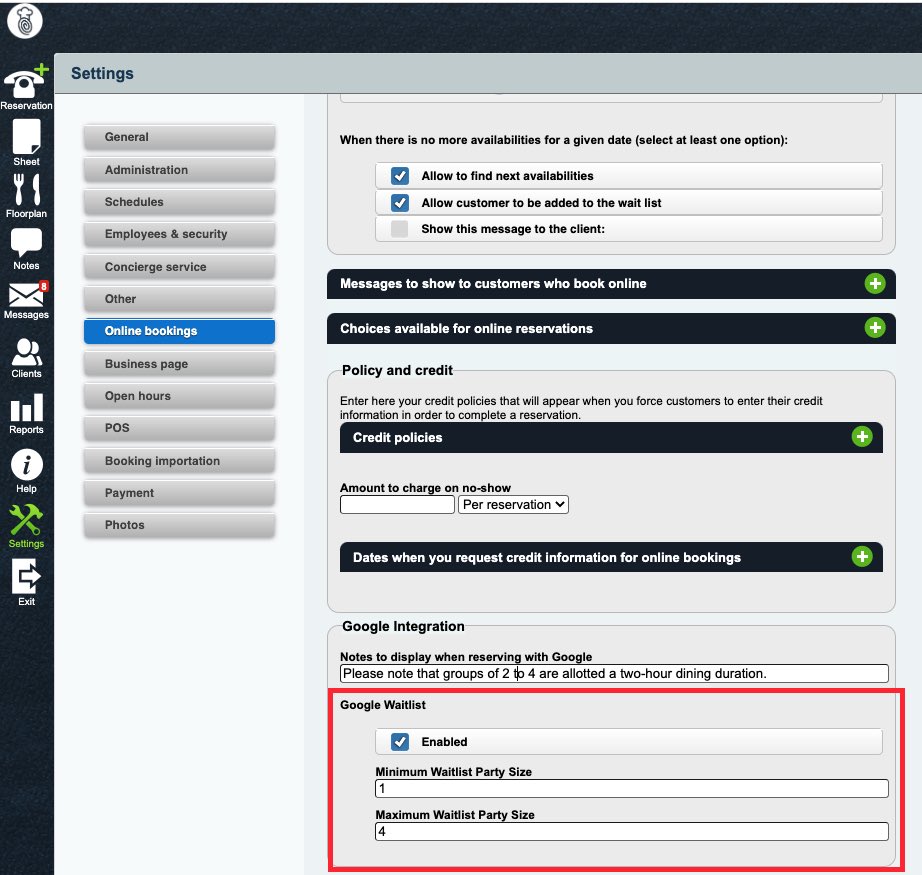
You should click Settings | Online bookings and scroll down to the Google Integration section. Check Enabled under Google Waitlist. Use the Minimum and Maximum Waitlist Party Size fields to control the minimum and maximum party size that can waitlist themselves. For example, if you set Maximum to 4, a diner won’t be able to select a waitlist party size greater than 4. Also note, Maximum cannot be set higher than 10.
Note: After enabling the integration, it will take 24 hours to take into effect on Google’s end.
Chapter 4. Using Waitlisting
We’ll walk through an end-to-end example to illustrate how the waitlisting feature works.

1. Currently all our tables are booked and we’ve added, via TouchBistro Reservations, a party to the waitlist.
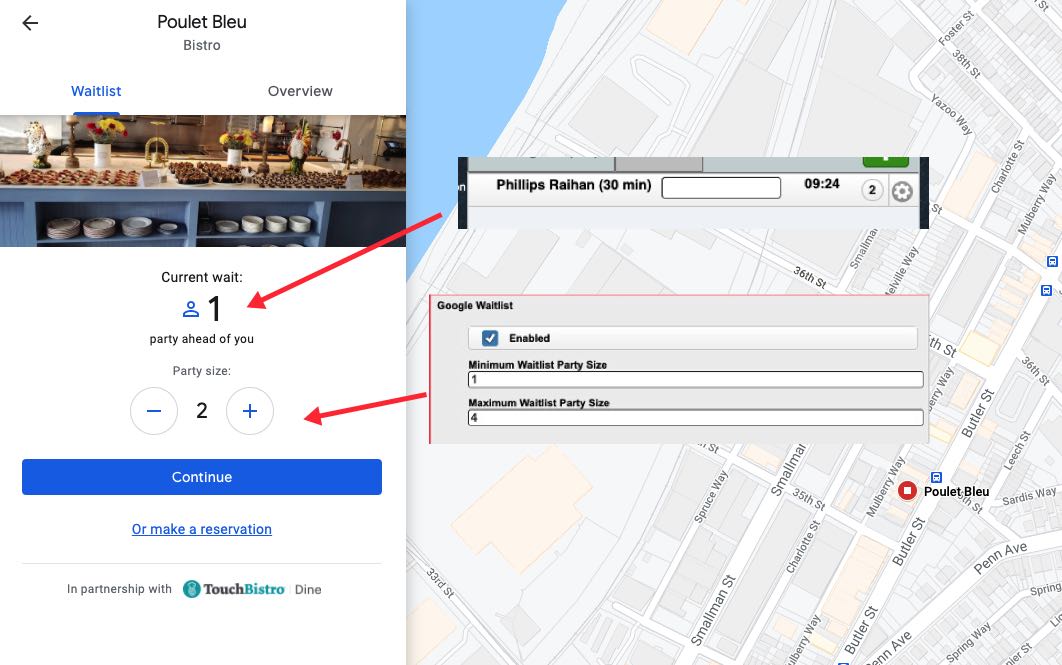
2. Meanwhile another party has discovered our venue on Google maps. If there were available tables, the Business Page would offer the reservation widget. However, since there are no tables available contemporaneous to the diner accessing the business page, they will now see the waitlist widget. They can click Or make a reservation to find an available table at a future time or use the offered waitlist widget to add themselves to the TouchBistro Reservations waitlist. As the pictured example shows, the waitlist widget knows there is already one party on the TouchBistro Reservations waitlist and lets this party know. Currently, it does not offer an estimated waiting time. The party can use the –/+ buttons to indicate party size.
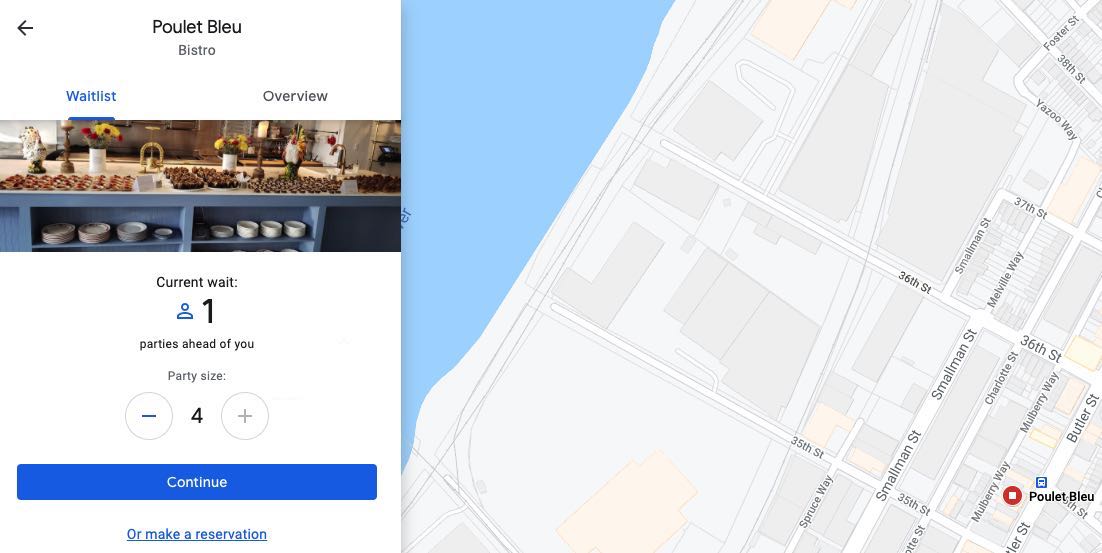
3. However, the party size will max out at 4 based on the Maximum Waitlist Party Size setting.

4. If the party clicks Continue, they may be required to enter name and phone number information. If they’ve used the waitlist before, the system will default to their saved profile. They can review these details and click Join.

5. The party is given a confirmation screen. They can click Done.
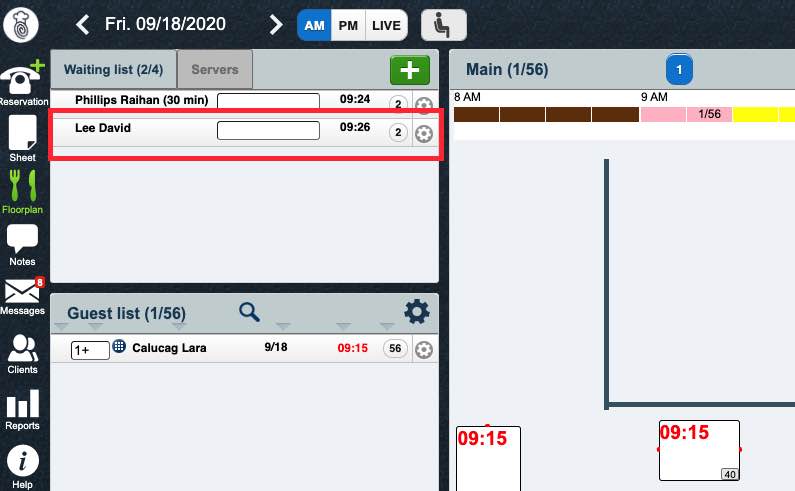
6. TouchBistro Reservations will then reflect the diner’s self waitlisting.
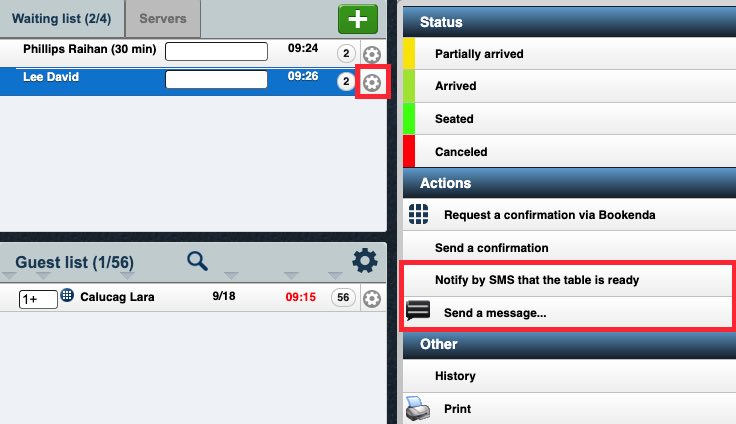
7. You can use the normal communication options to inform the party via SMS that their table is ready or they may lose their table if they do not respond shortly.

8. If you use the Notify by SMS that the table is ready option and the self-waitlisting party refreshes or returns to the Business Page, they will see a message that their table is ready.
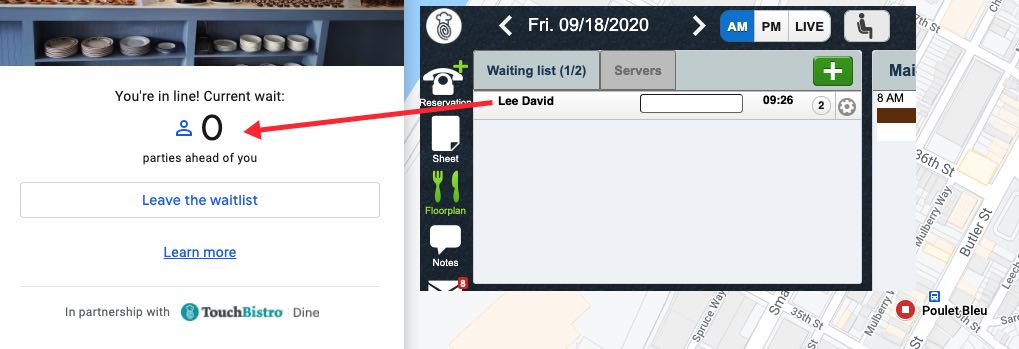
9. If you seat a party that was ahead of the party that waitlisted via google, and the self-waitlisting party refreshes or returns to the Business Page, they will see an update as to their place in line. Here, we sat the Phillips party, so the waitlisting widget on the Google page now indicates there are no longer any parties ahead of them waiting for tables.

10. The party also has the option to click Leave the waitlist. If they will be prompted to confirm.
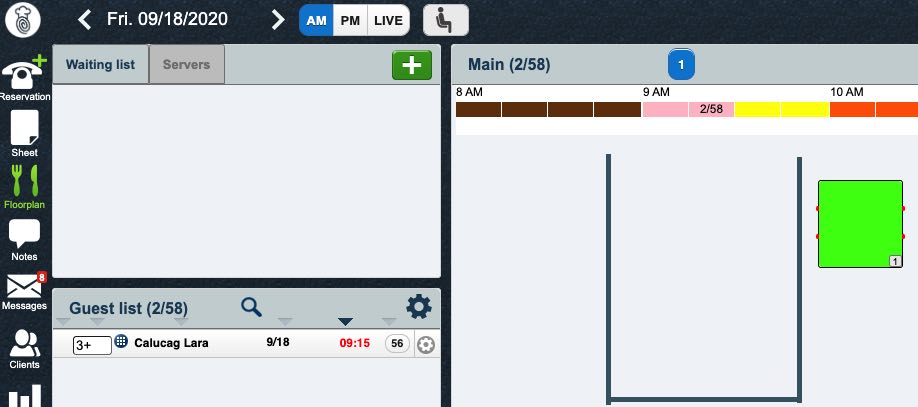
11. The party will be removed from the TouchBistro Reservations waitlist.


 Email
Support
 Frequently
Asked Questions
