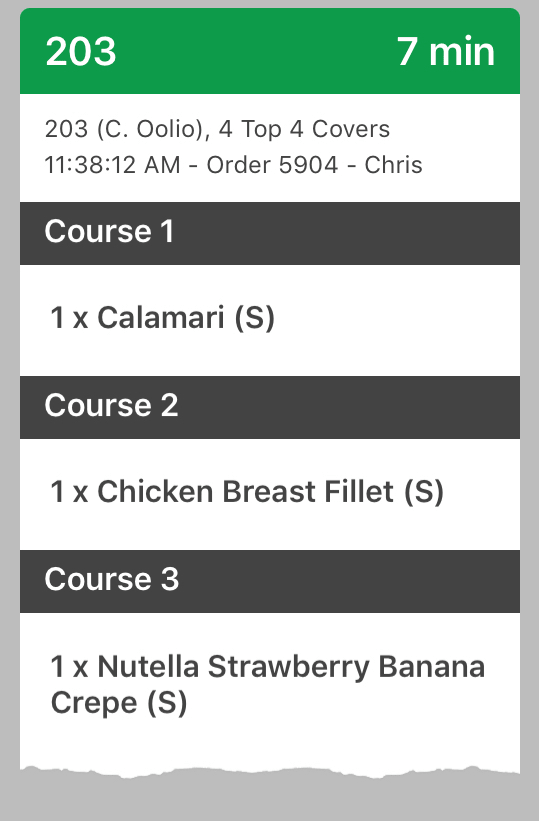
Using the KDS
Table Of Contents
Chapter 4. Reprioritizing Kitchen Tickets
Chapter 5. Customizing the KDS
Chapter 6. Responding to KDS Orders from TouchBistro
Chapter 8. Managing Closed Tickets
Chapter 9. Sending Order Tickets to Both a Printer and the KDS
Chapter 1. Video Tutorial
Chapter 2. Introduction
The following guide will take you through the process of managing orders using the Kitchen Display System (KDS).
Chapter 3. Using the KDS
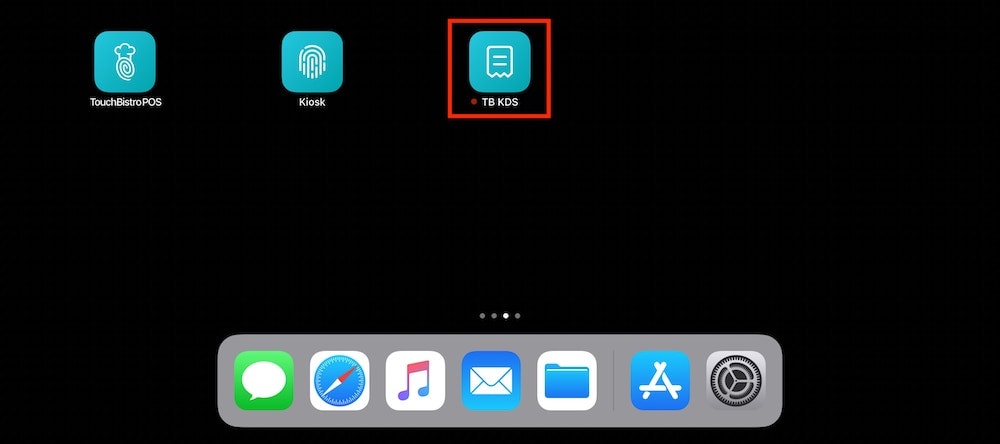
1. Launch the KDS app. You’ll notice the KDS is available in landscape mode only.
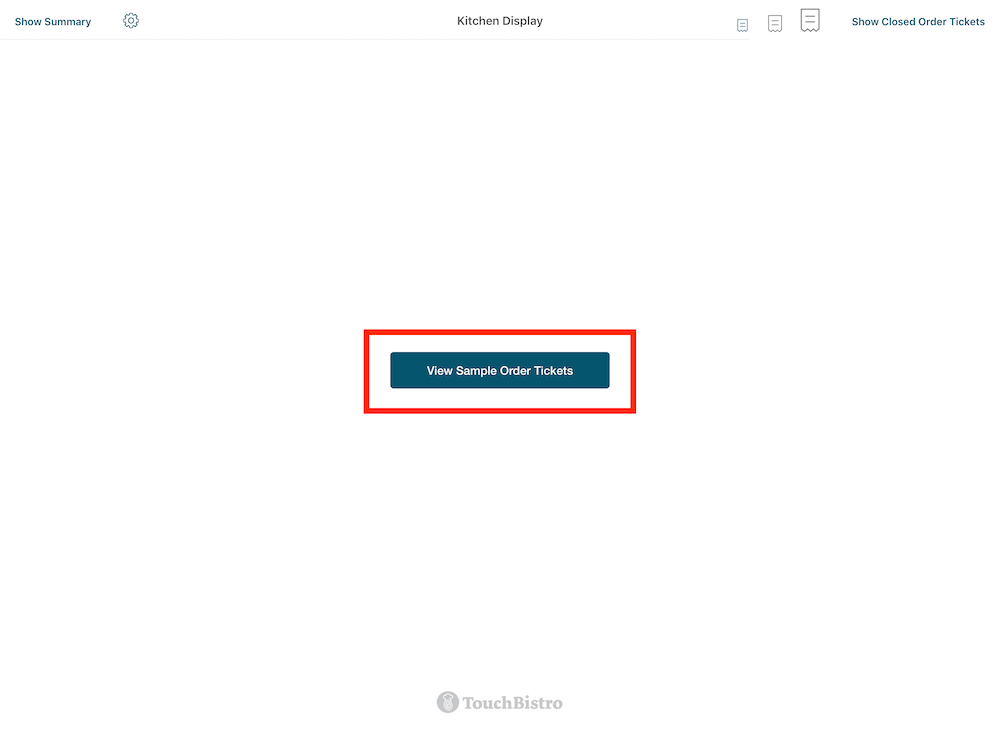
2. Tap View Sample Order Chits if you would like to first practice.
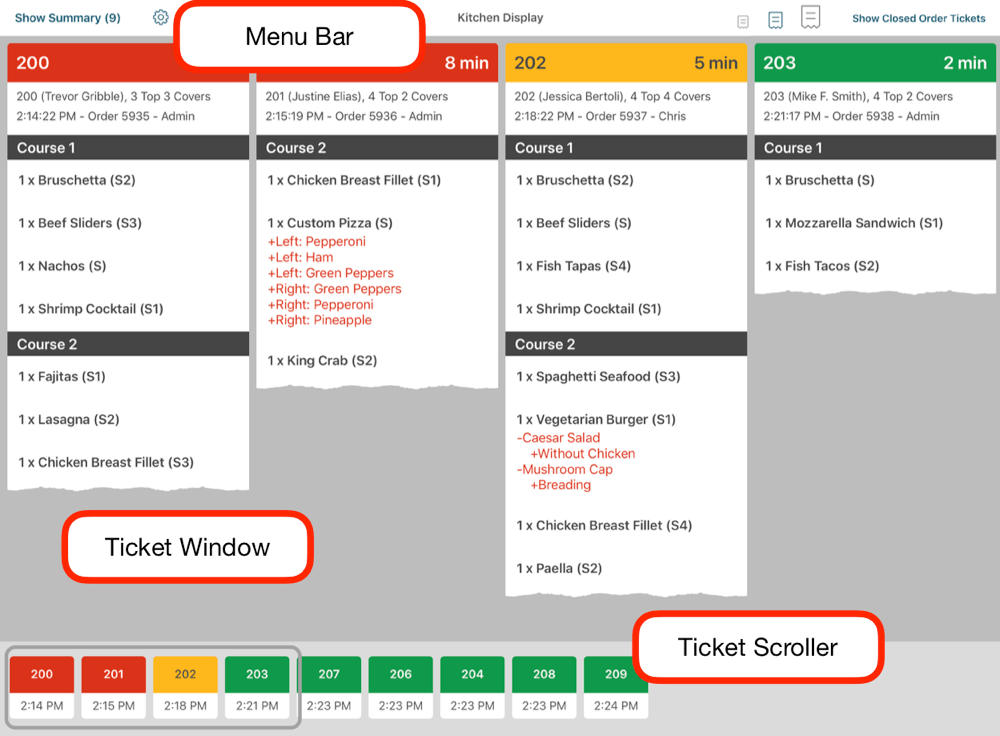
3. In the screen is divided into three parts:
|
Section
|
Description
|
|
Menu Bar
|
Provides summary, setup, and view options.
|
|
Order Ticket Window
|
Displays open order tickets and items configured to appear on KDS order tickets. An order ticket displays: • Each order ticket keeps a running timer how long the order ticket has been active. As order tickets remain unfulfilled they will change color from green, to yellow, to red. • The table number you’ve configured in TouchBistro. • The number of guests at the table. • The time the table was sat. • The guest check order number. • The server’s name. • The menu items ordered along with which seat ordered the item (S1, S2, etc.). Note, the KDS will not display additional seat properties you add like name/gender. Tap, hold, and scroll to the left to see more order tickets. Order Tickets are all identified by the table number you’ve given your tables in TouchBistro.
|
|
Ticket Scroller
|
The Ticket window displays a limited number of tickets. The Ticket Scroller lets you move the window. Tap a table to indicate where the window should display. Tap, hold, and scroll to the left to see more tickets.
|
4. When a new order ticket is sent from TouchBistro, the KDS will make a pinging sound to alert staff a new order ticket has arrived.
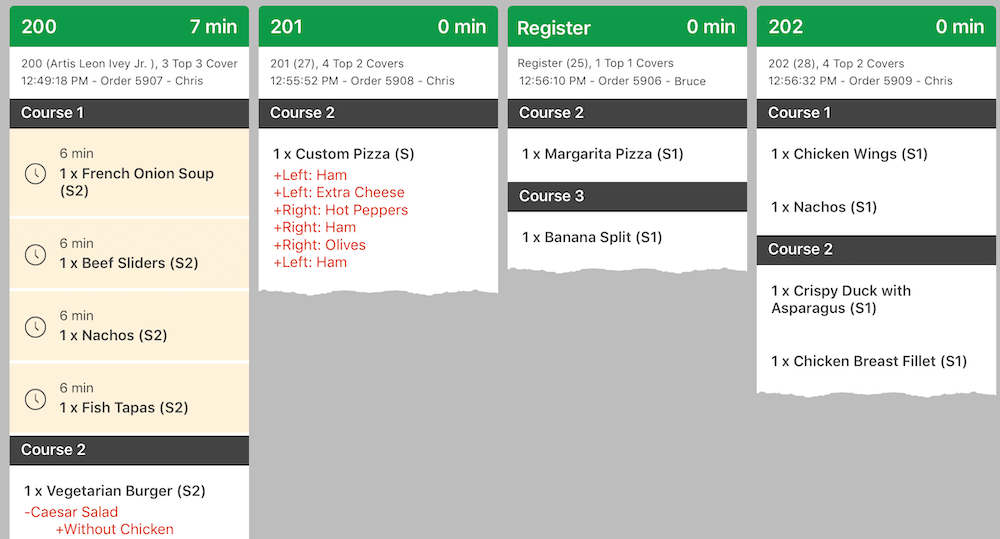
5. When an order ticket item is “fired”, tap the order ticket item (for example “Scallops” or “Pizza”). It will turn yellow and start its own running timer how long it’s been in preparation. If accidentally tapped, tap and hold the item to remove the “fired” setting.
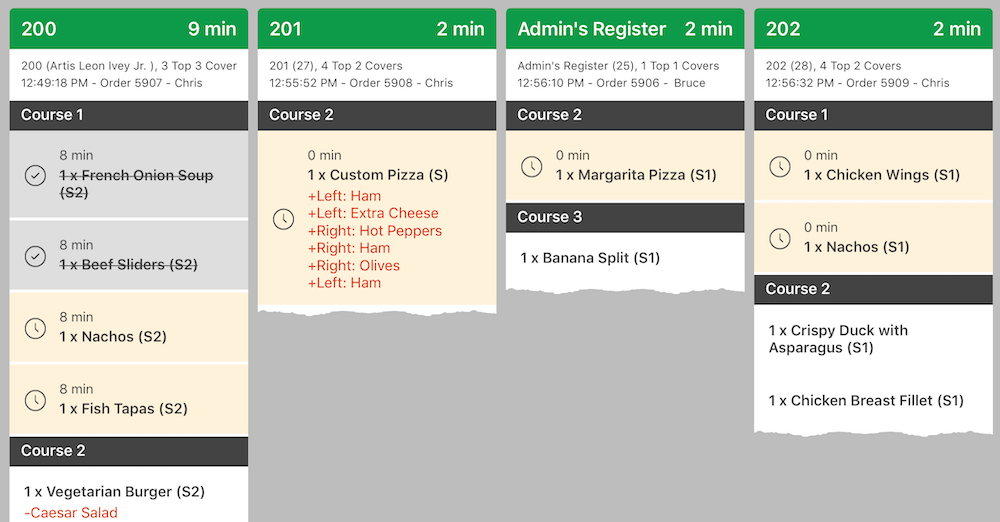
6. When an order ticket item is ready for being expedited (“put up”) tap it again. It will turn grey to indicate the item has been expedited. If accidentally tapped, tap and hold the item to remove the “put up” setting.
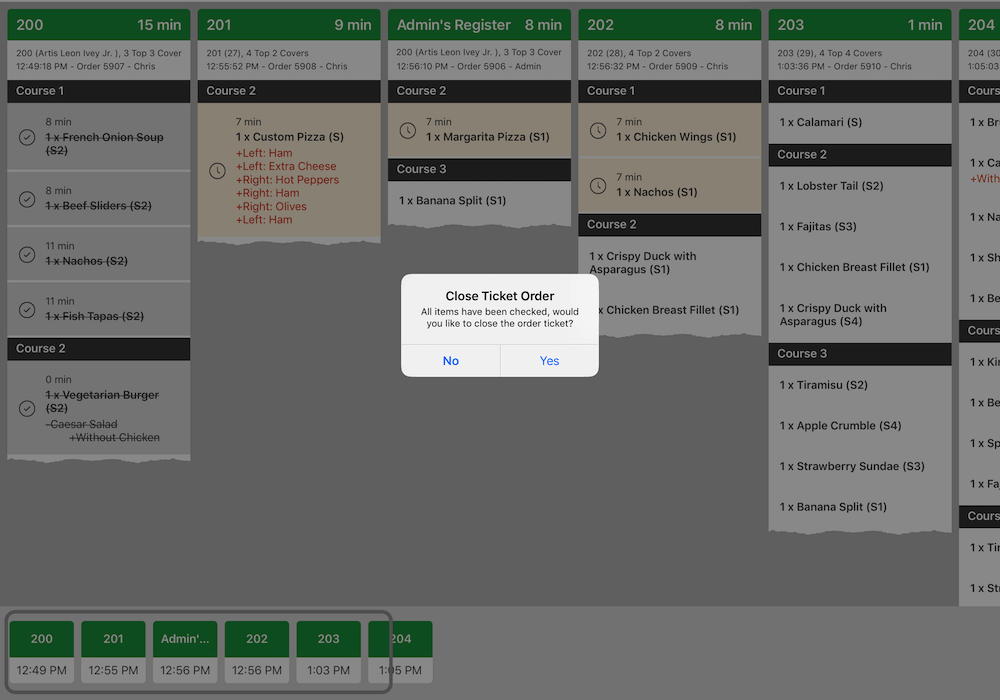
7. When all order ticket items have been closed, the KDS will prompt you to close the whole order ticket.
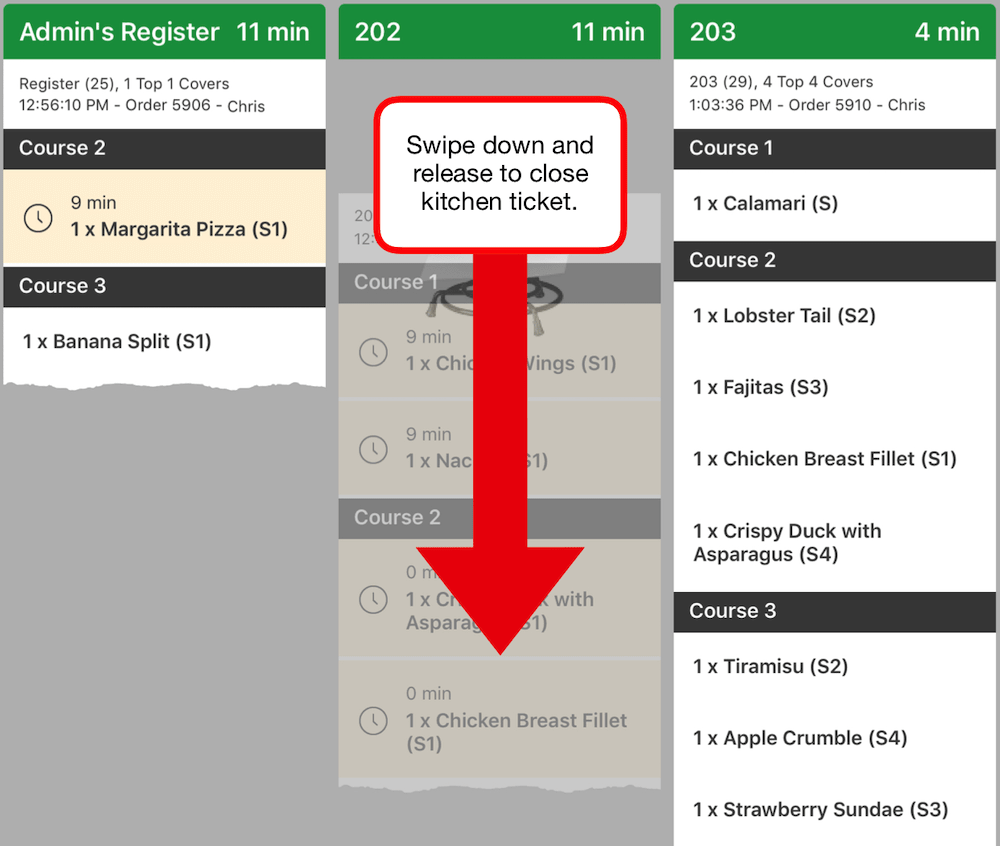
8. You can also close a whole order ticket by tapping it and quickly dragging it down off the screen.

9. For a summary of how many menu items are outstanding, tap Show Summary in the Menu Bar.
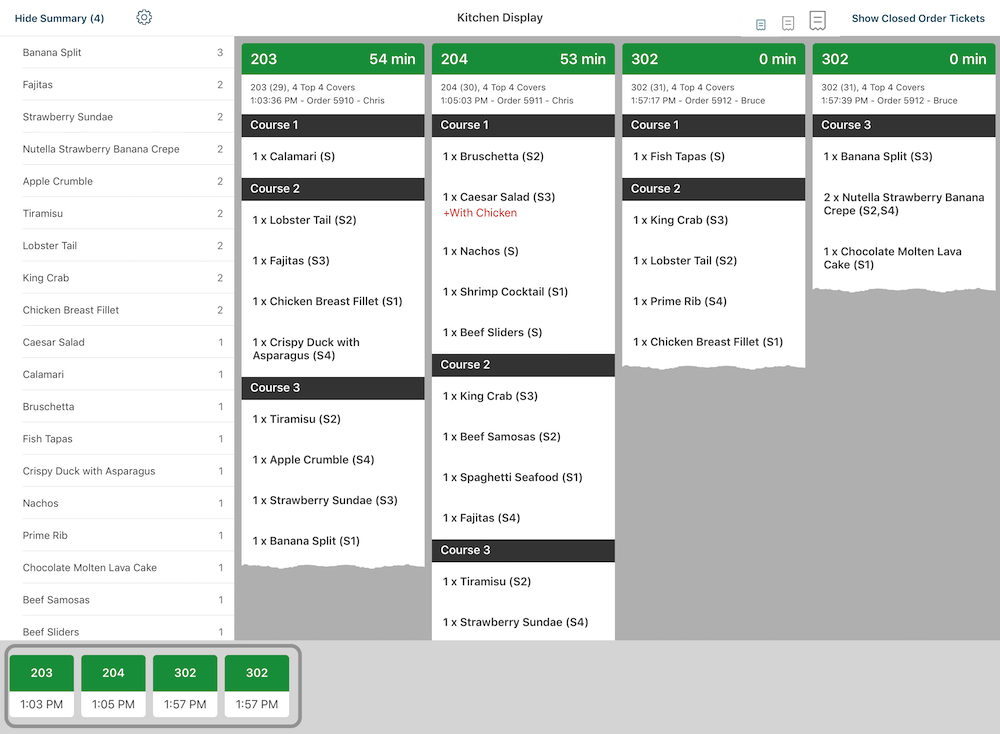
10. Tap Hide Summary to close the summary.
Chapter 4. Reprioritizing Kitchen Tickets
Kitchen tickets can be re-arranged within the Ticket Scroller at the bottom of the screen, so that greater priority can be given to certain orders, when necessary. In the below example, we can take ticket number 302 from the back of the queue and move it from right-to-left, bringing it to the beginning of the queue, thereby giving it greater priority.
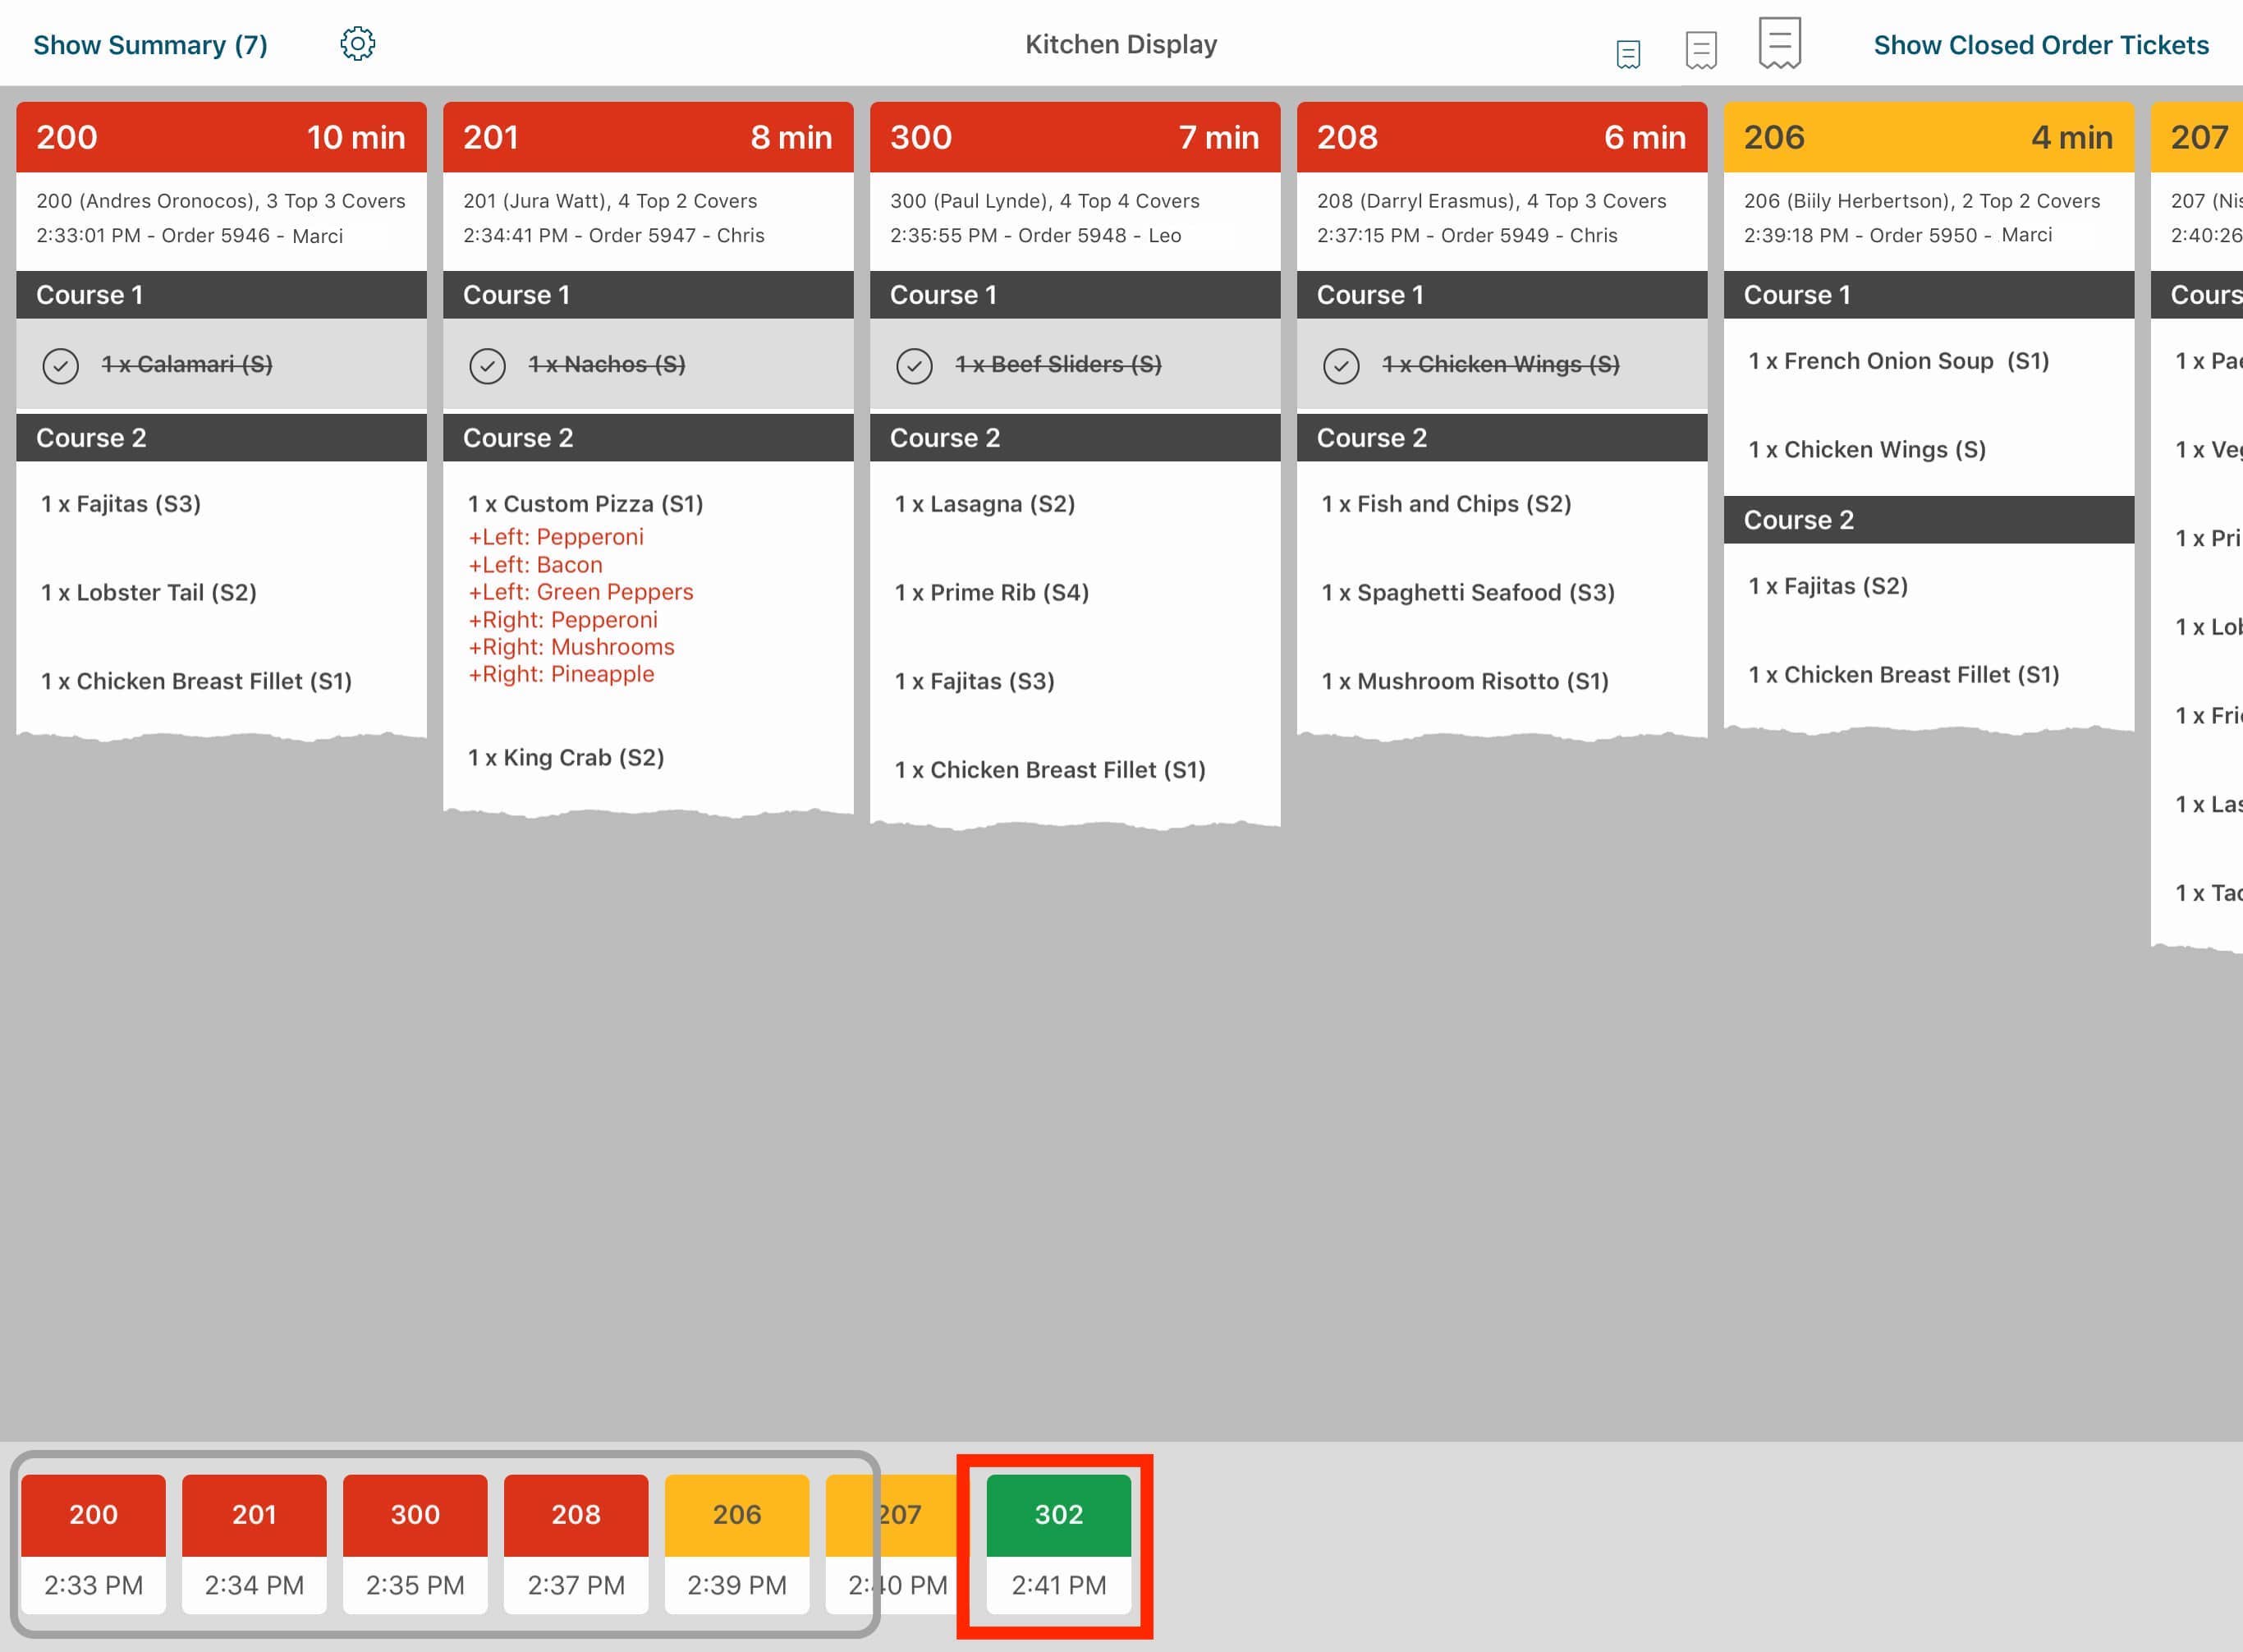
1. Tap-and-hold on the ticket you’d like to reprioritize in the Ticket Scroller at the bottom of the screen, and keep your finger depressed. In the above example, we will move ticket number 302 from the end of the queue to the beginning of the queue.
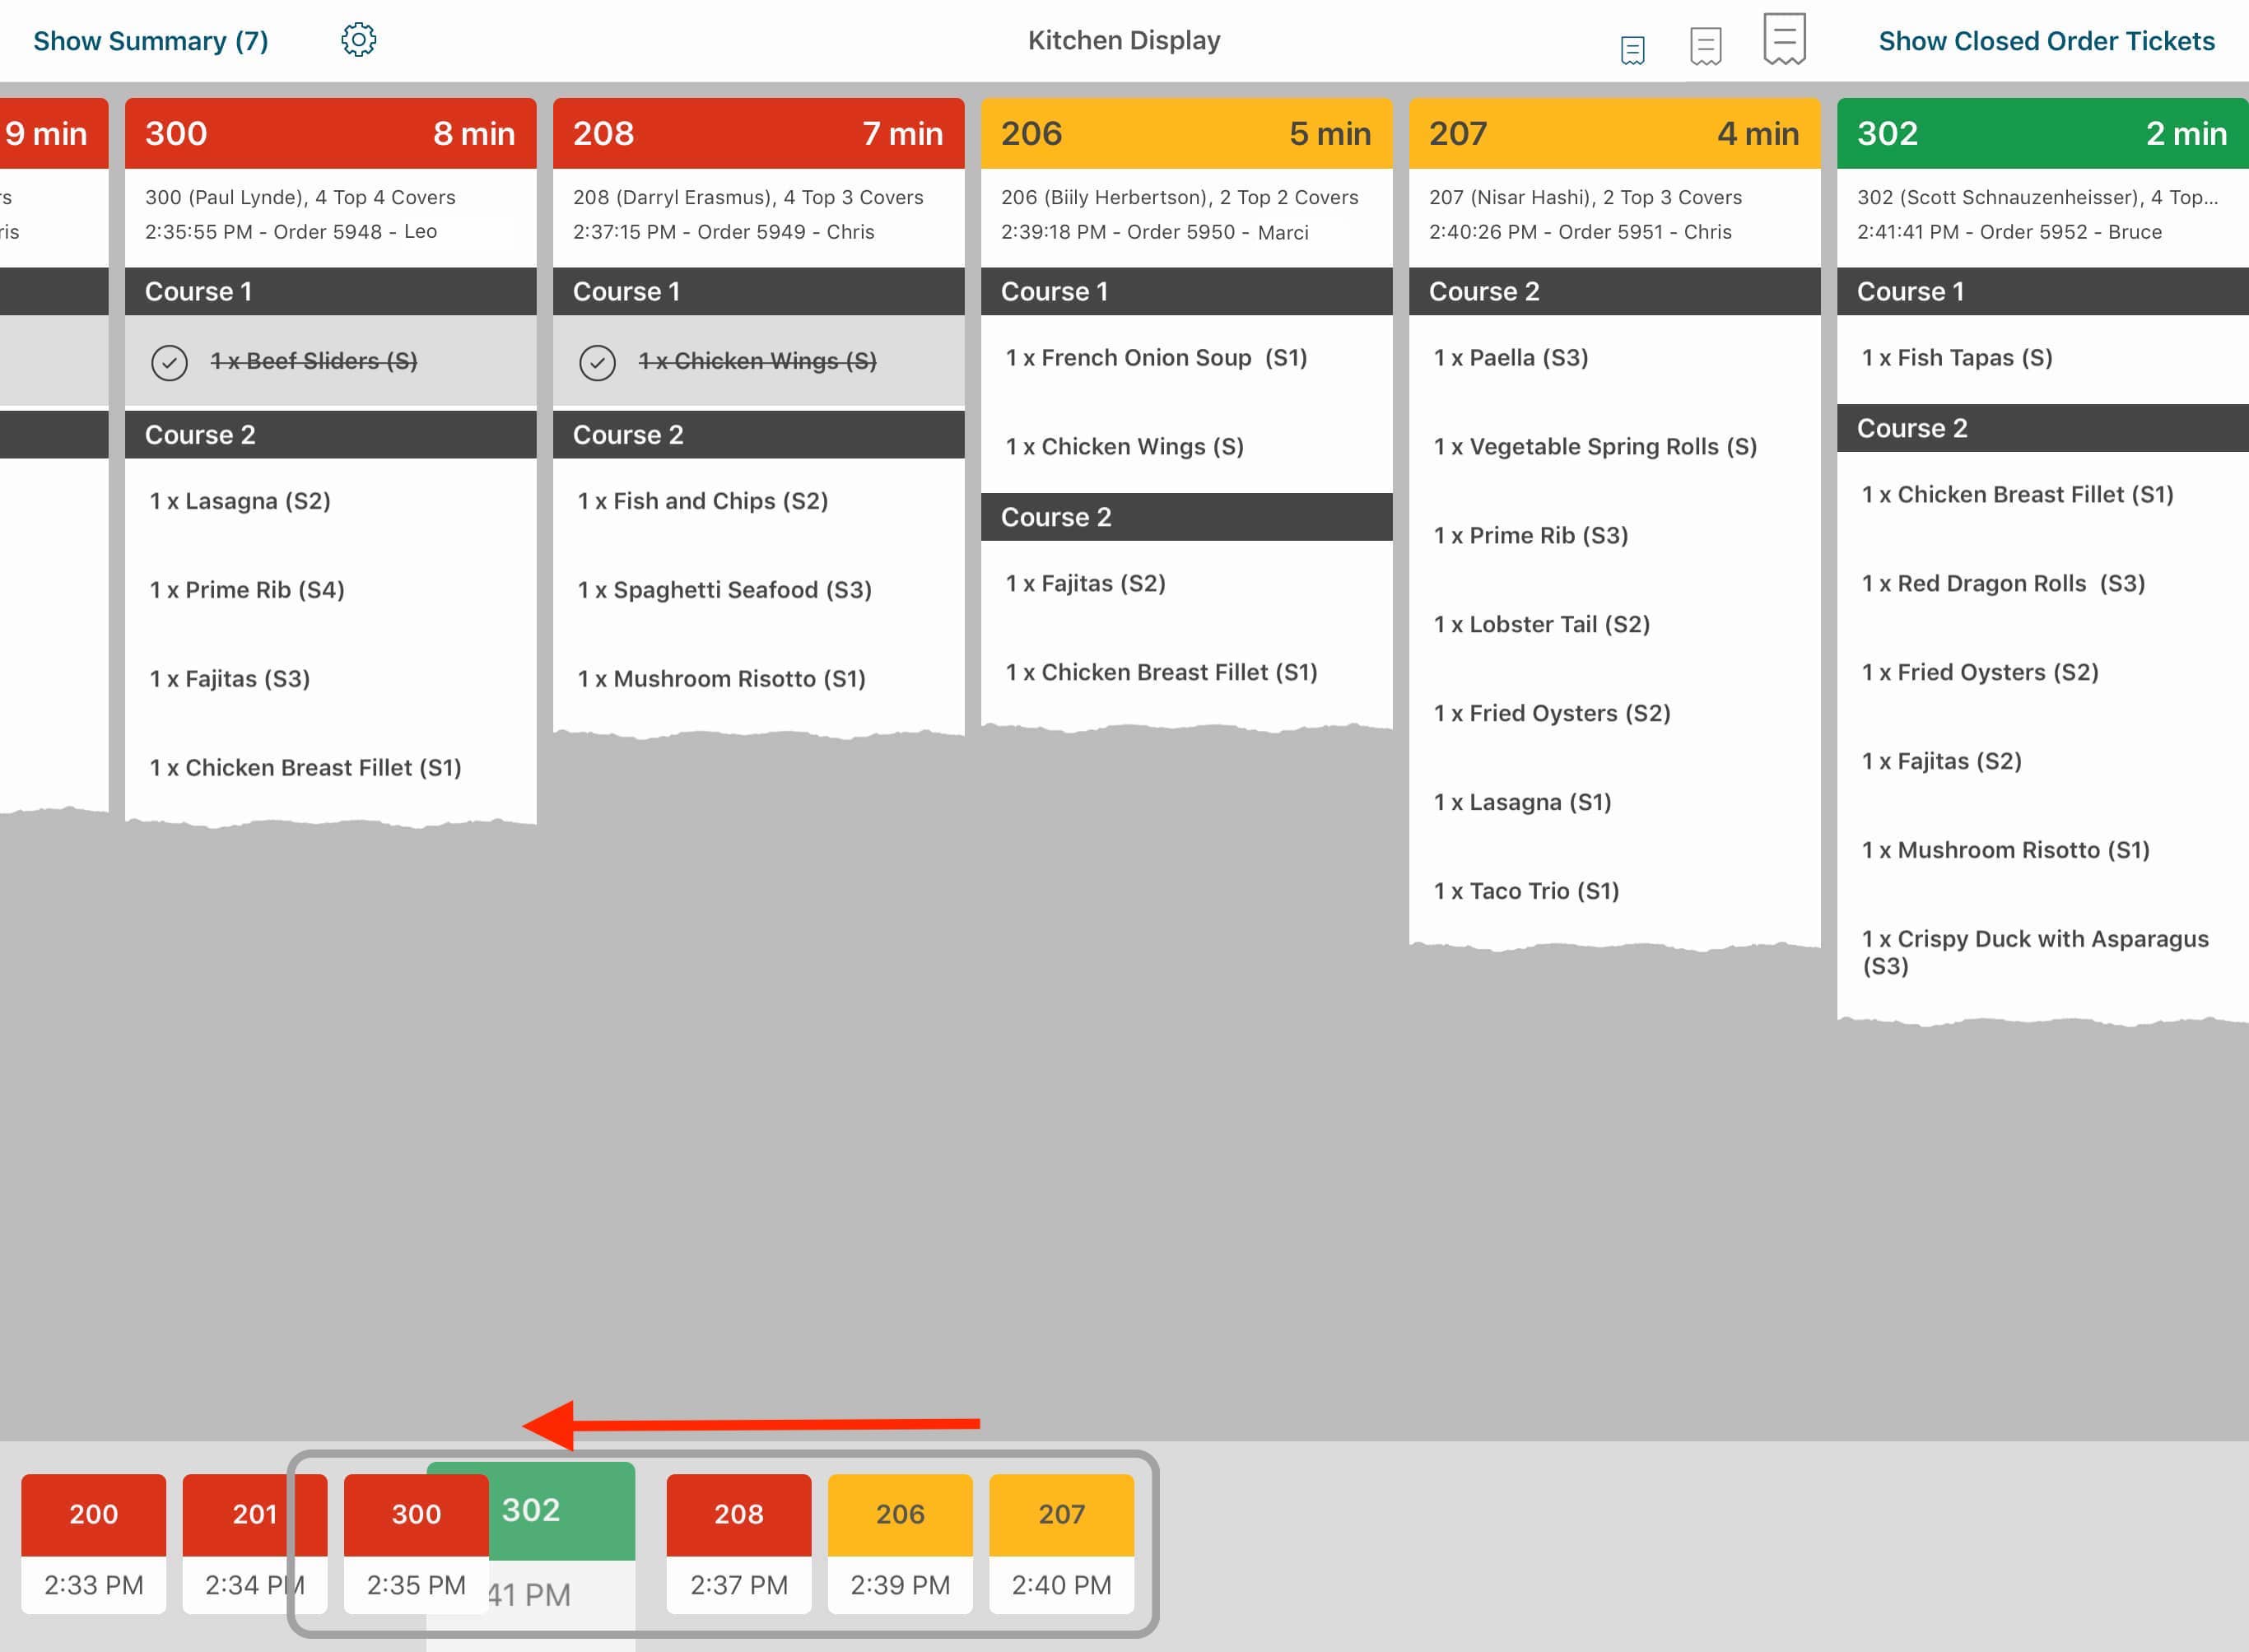
2. When the icon appears to “pop up”, drag the icon left or right. In the above example, we are dragging ticket number 302 from right to left.
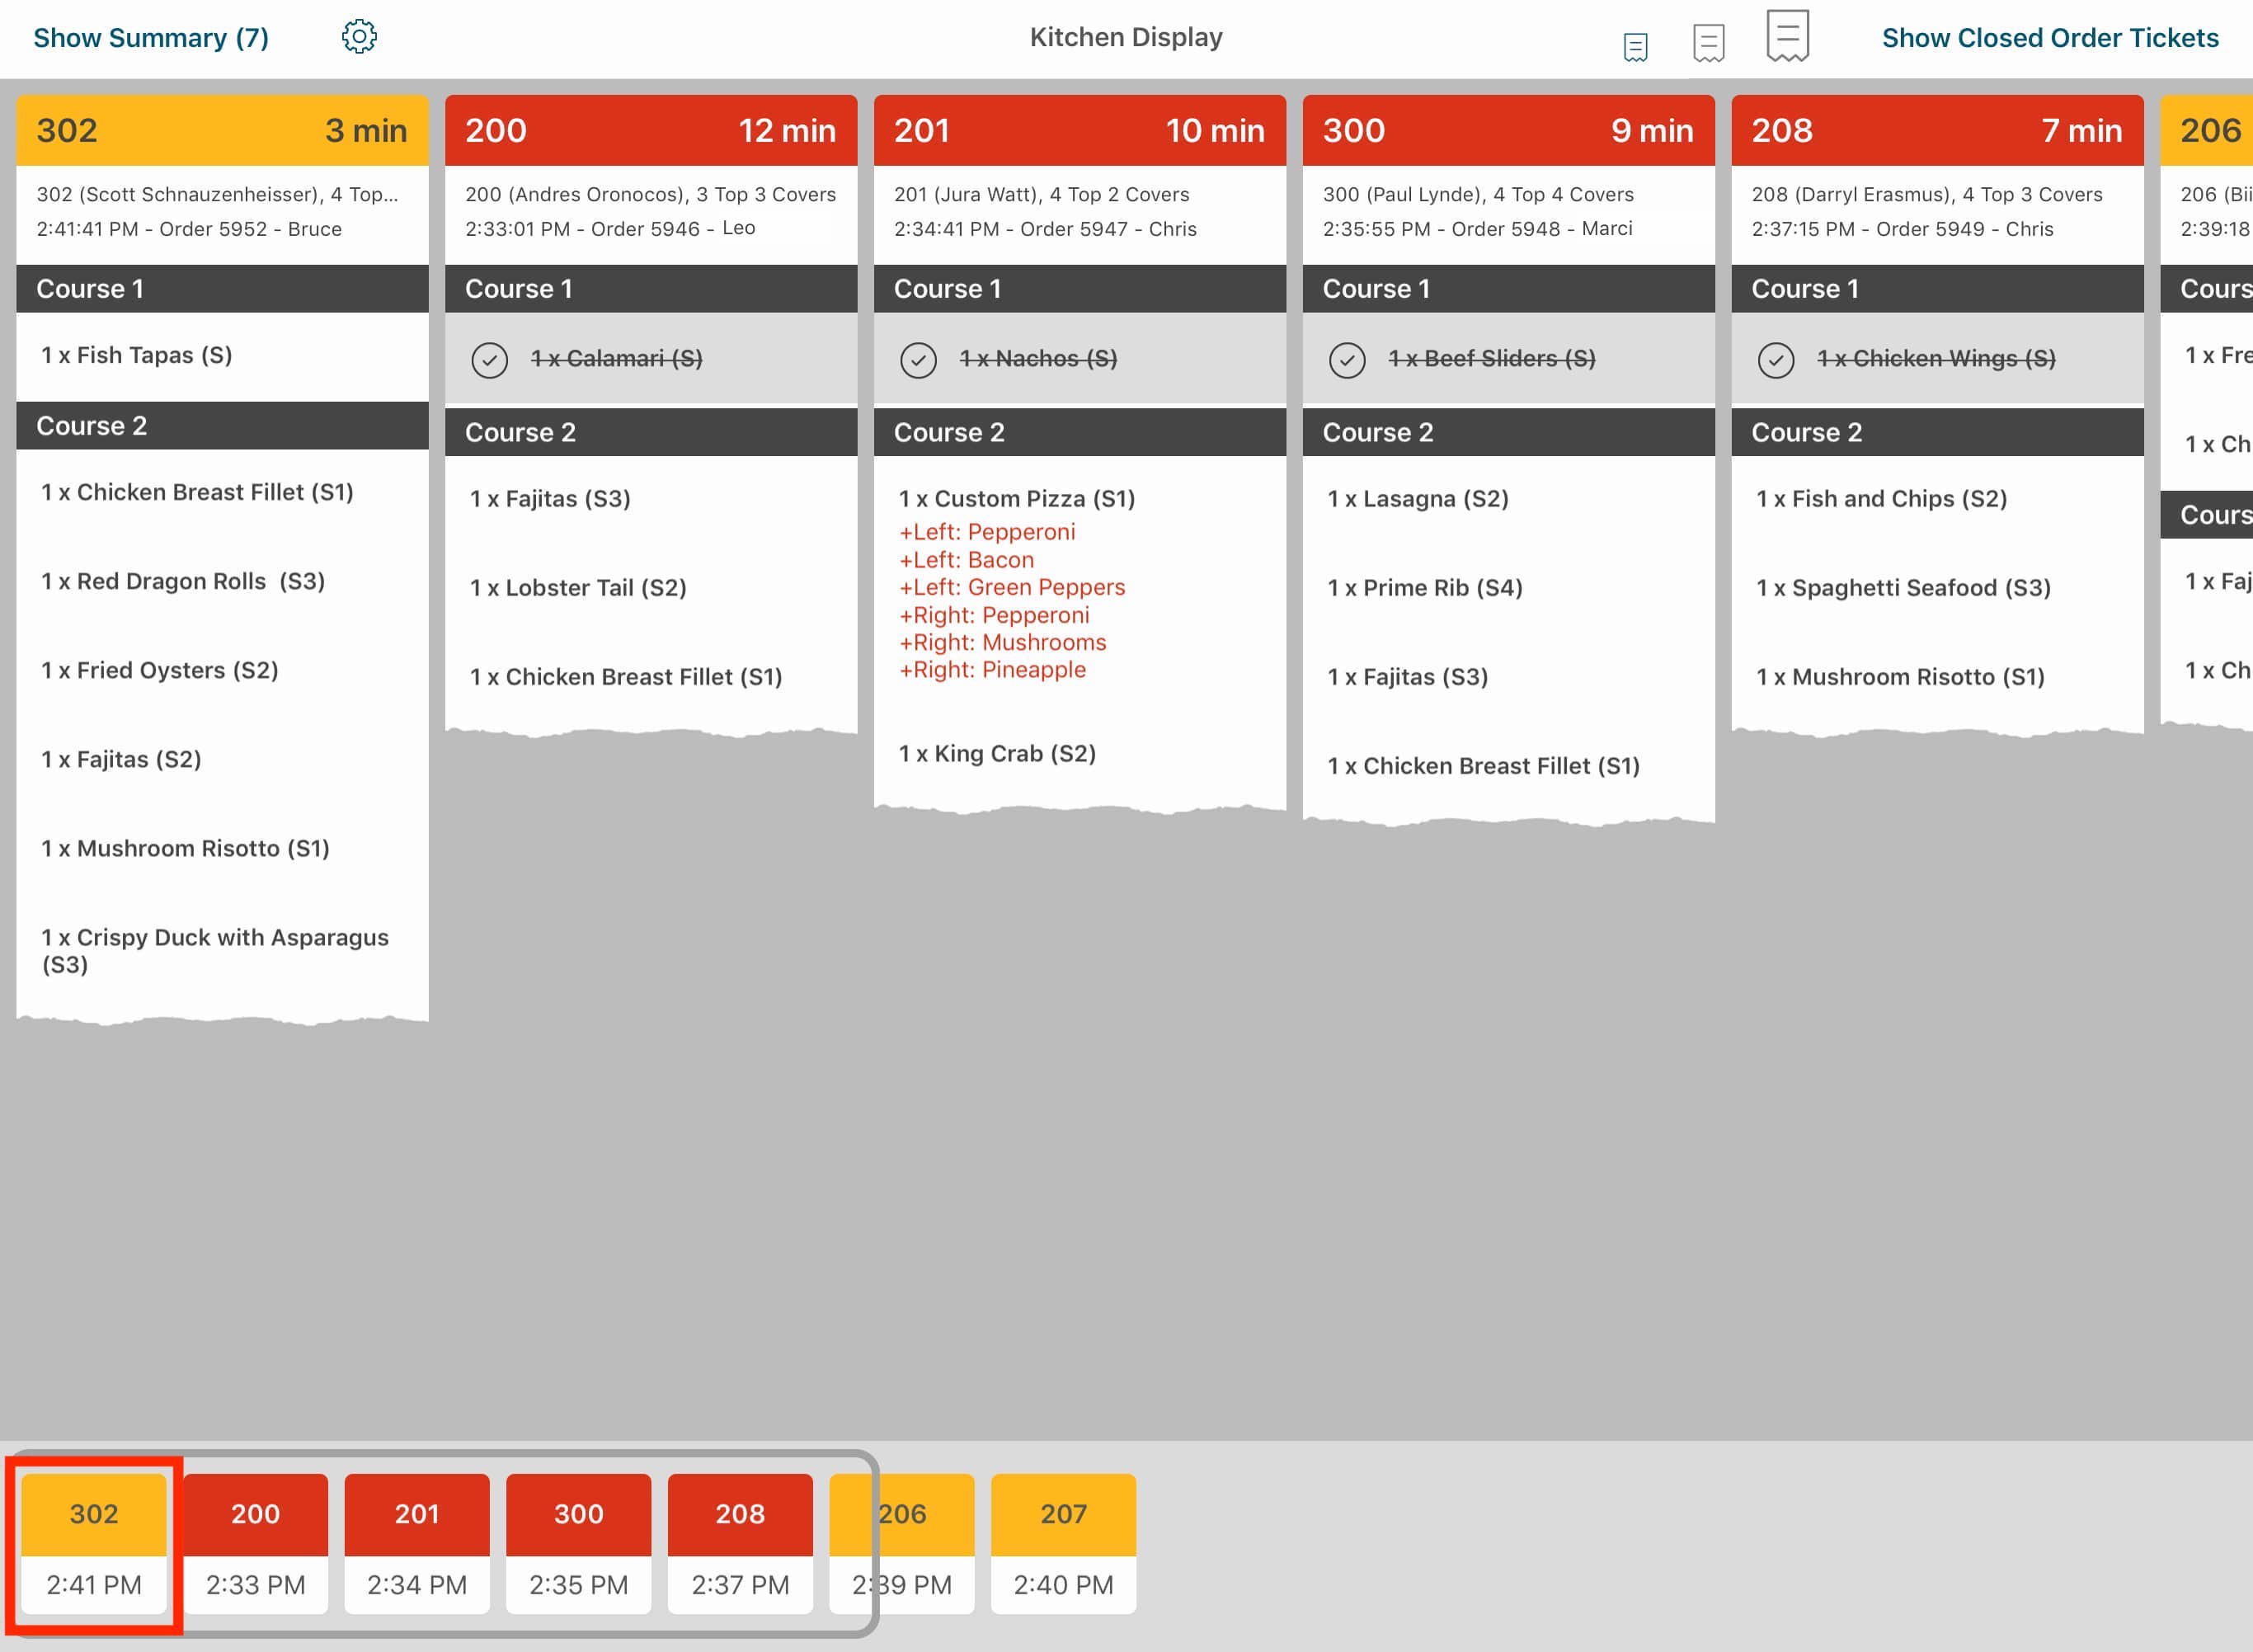
3. Release your finger once the ticket is placed in the position in the queue where you need it to be. In this case, we’ve placed ticket number 302 at the far left, at the beginning of the queue, giving it high priority.
Chapter 5. Customizing the KDS
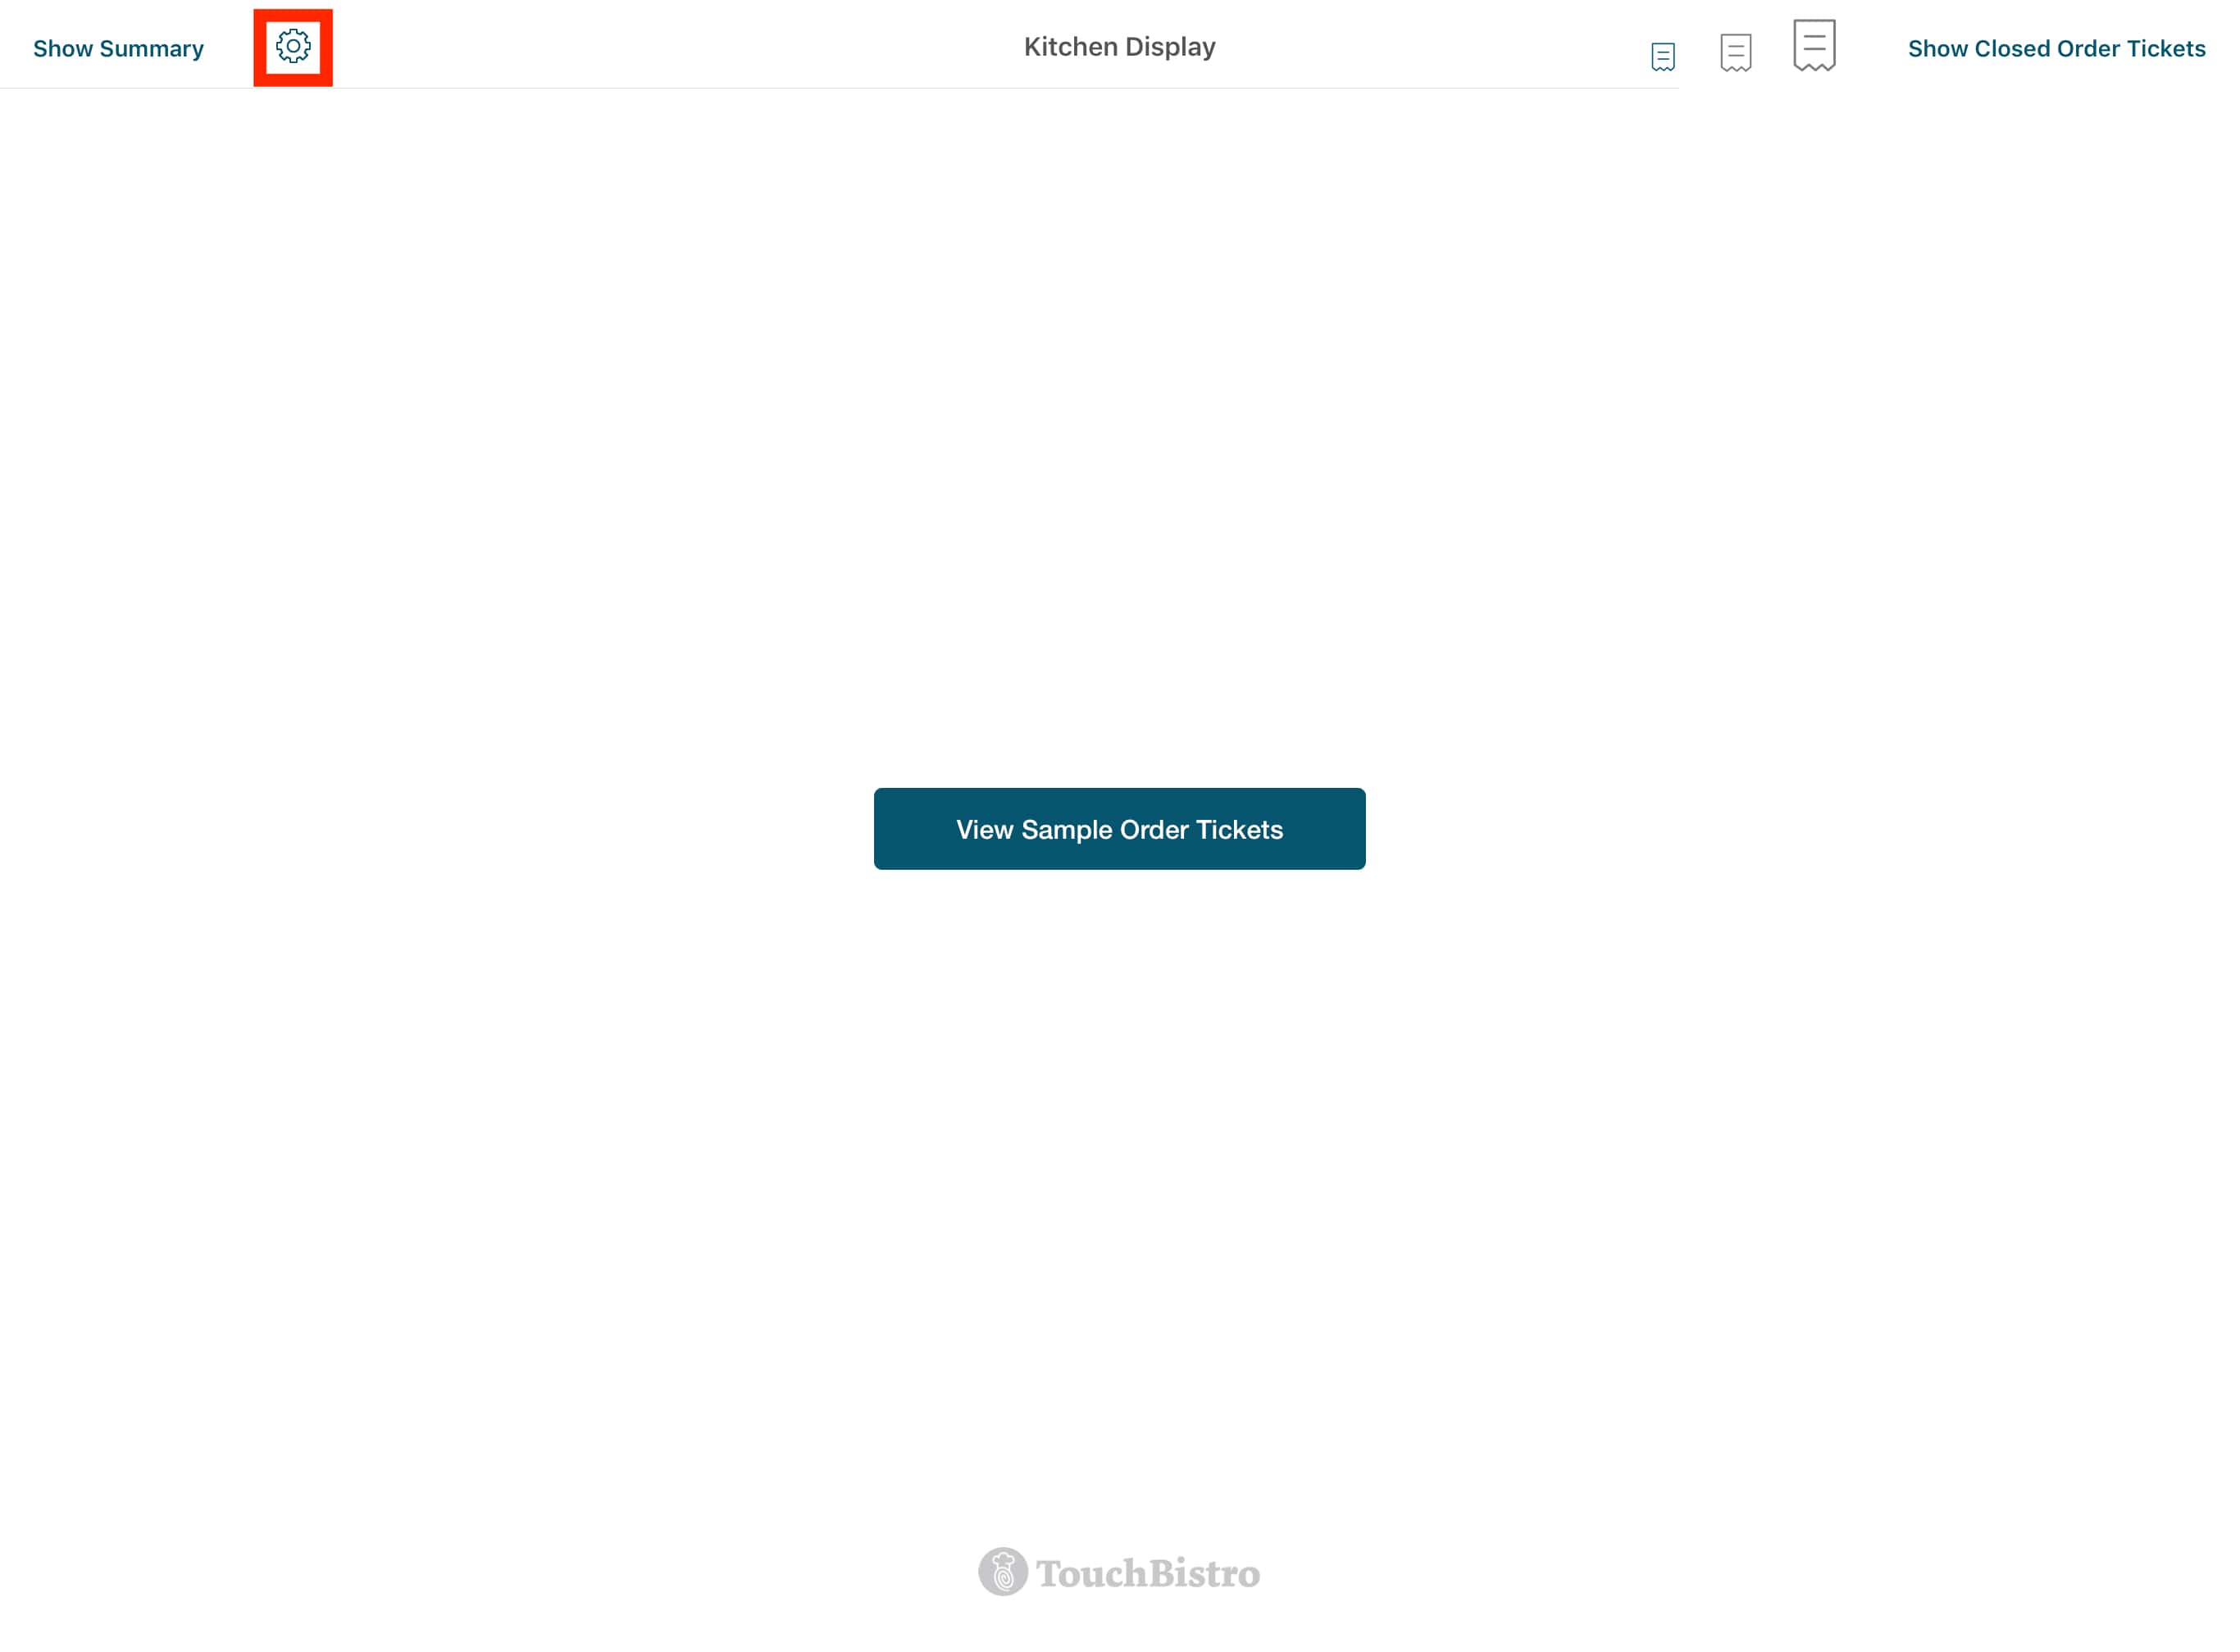
1. Tap the Setup ![]() icon in the menu bar to customize the KDS.
icon in the menu bar to customize the KDS.
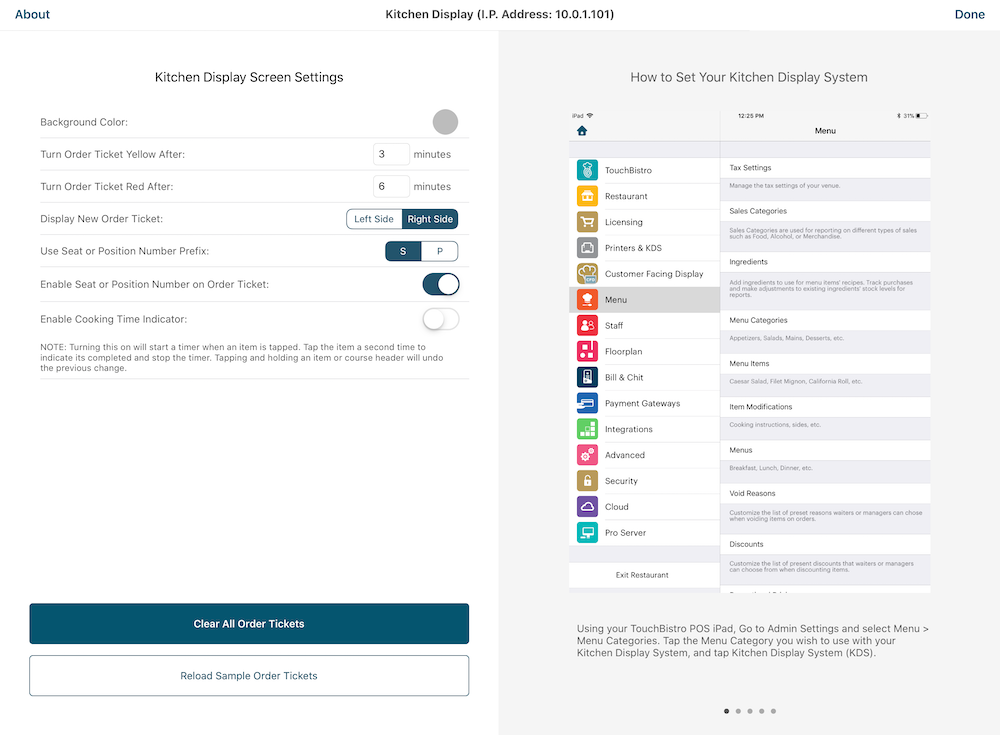
2. The customization page provides the following options:
|
Option
|
Description
|
|
Background Color
|
To customize your background color.
|
|
Order Ticket Color
|
To customize when your order tickets turn yellow and then red, enter a new minute mark in the appropriate field.
|
|
Display New Order Ticket
|
By default, new order tickets are available from the right side. If you wish order tickets to appear from the left side, tap From Left Side.
|
|
Use Seat or Position Number Prefix
|
Tap S if you want your order tickets to indicate seat number. Tap P if your venue uses a position system and you want your order tickets to indicate Position number.
|
|
Enable Seat or Position Number on Order Ticket
|
By default, each item has an associated seat number on the order ticket. If you wish to suppress the seat number display, slide this setting to the non-green position.
|
|
Enable Cooking Time Indicator
|
If you disable this setting, tapping an order ticket item will immediately mark it as “put up”.
|
|
Clear All Order Tickets
|
Tap if you wish to clear all order tickets on the KDS display. Tap if you’ve been using the sample tickets for practice.
|
|
Reload Sample Order Tickets
|
Tap if you’d like to restore the sample tickets back to their original state for practice.
|
|
Done
|
Tap Done to save your changes and return to the ticket display.
|

Chapter 6. Responding to KDS Orders from TouchBistro
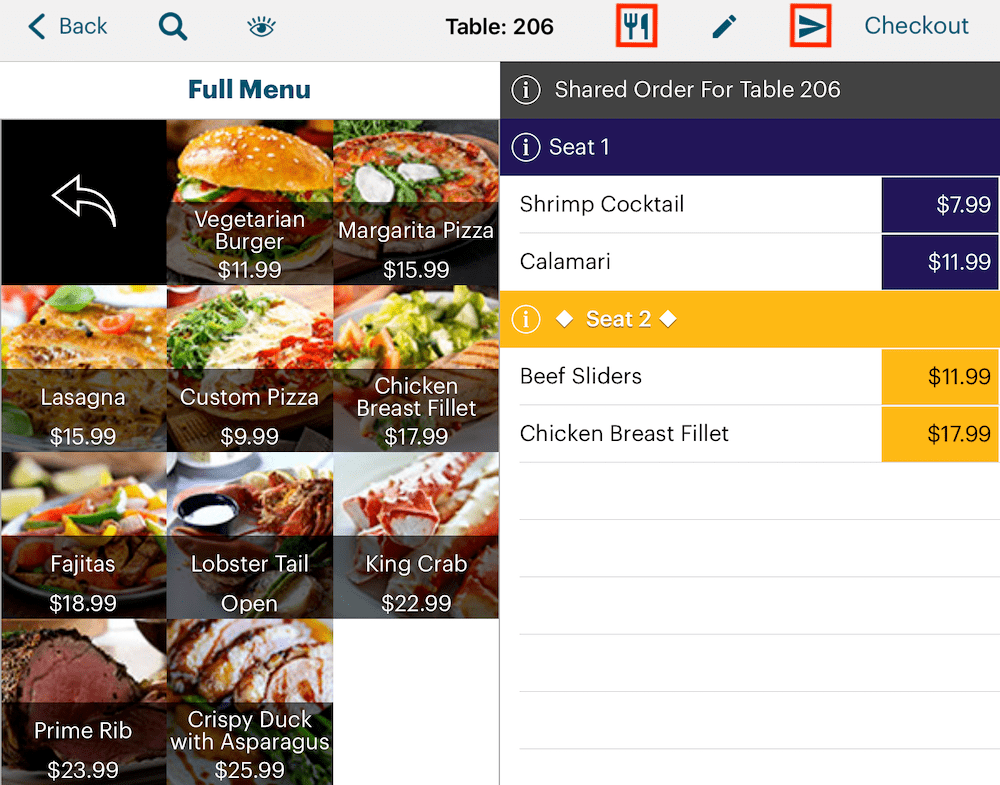
1. From the Order screen, tap either Send All or send items to the KDS via the Course option. Note: the KDS does not support the Resend option under Course.
2. TouchBistro will report items have been sent successfully.
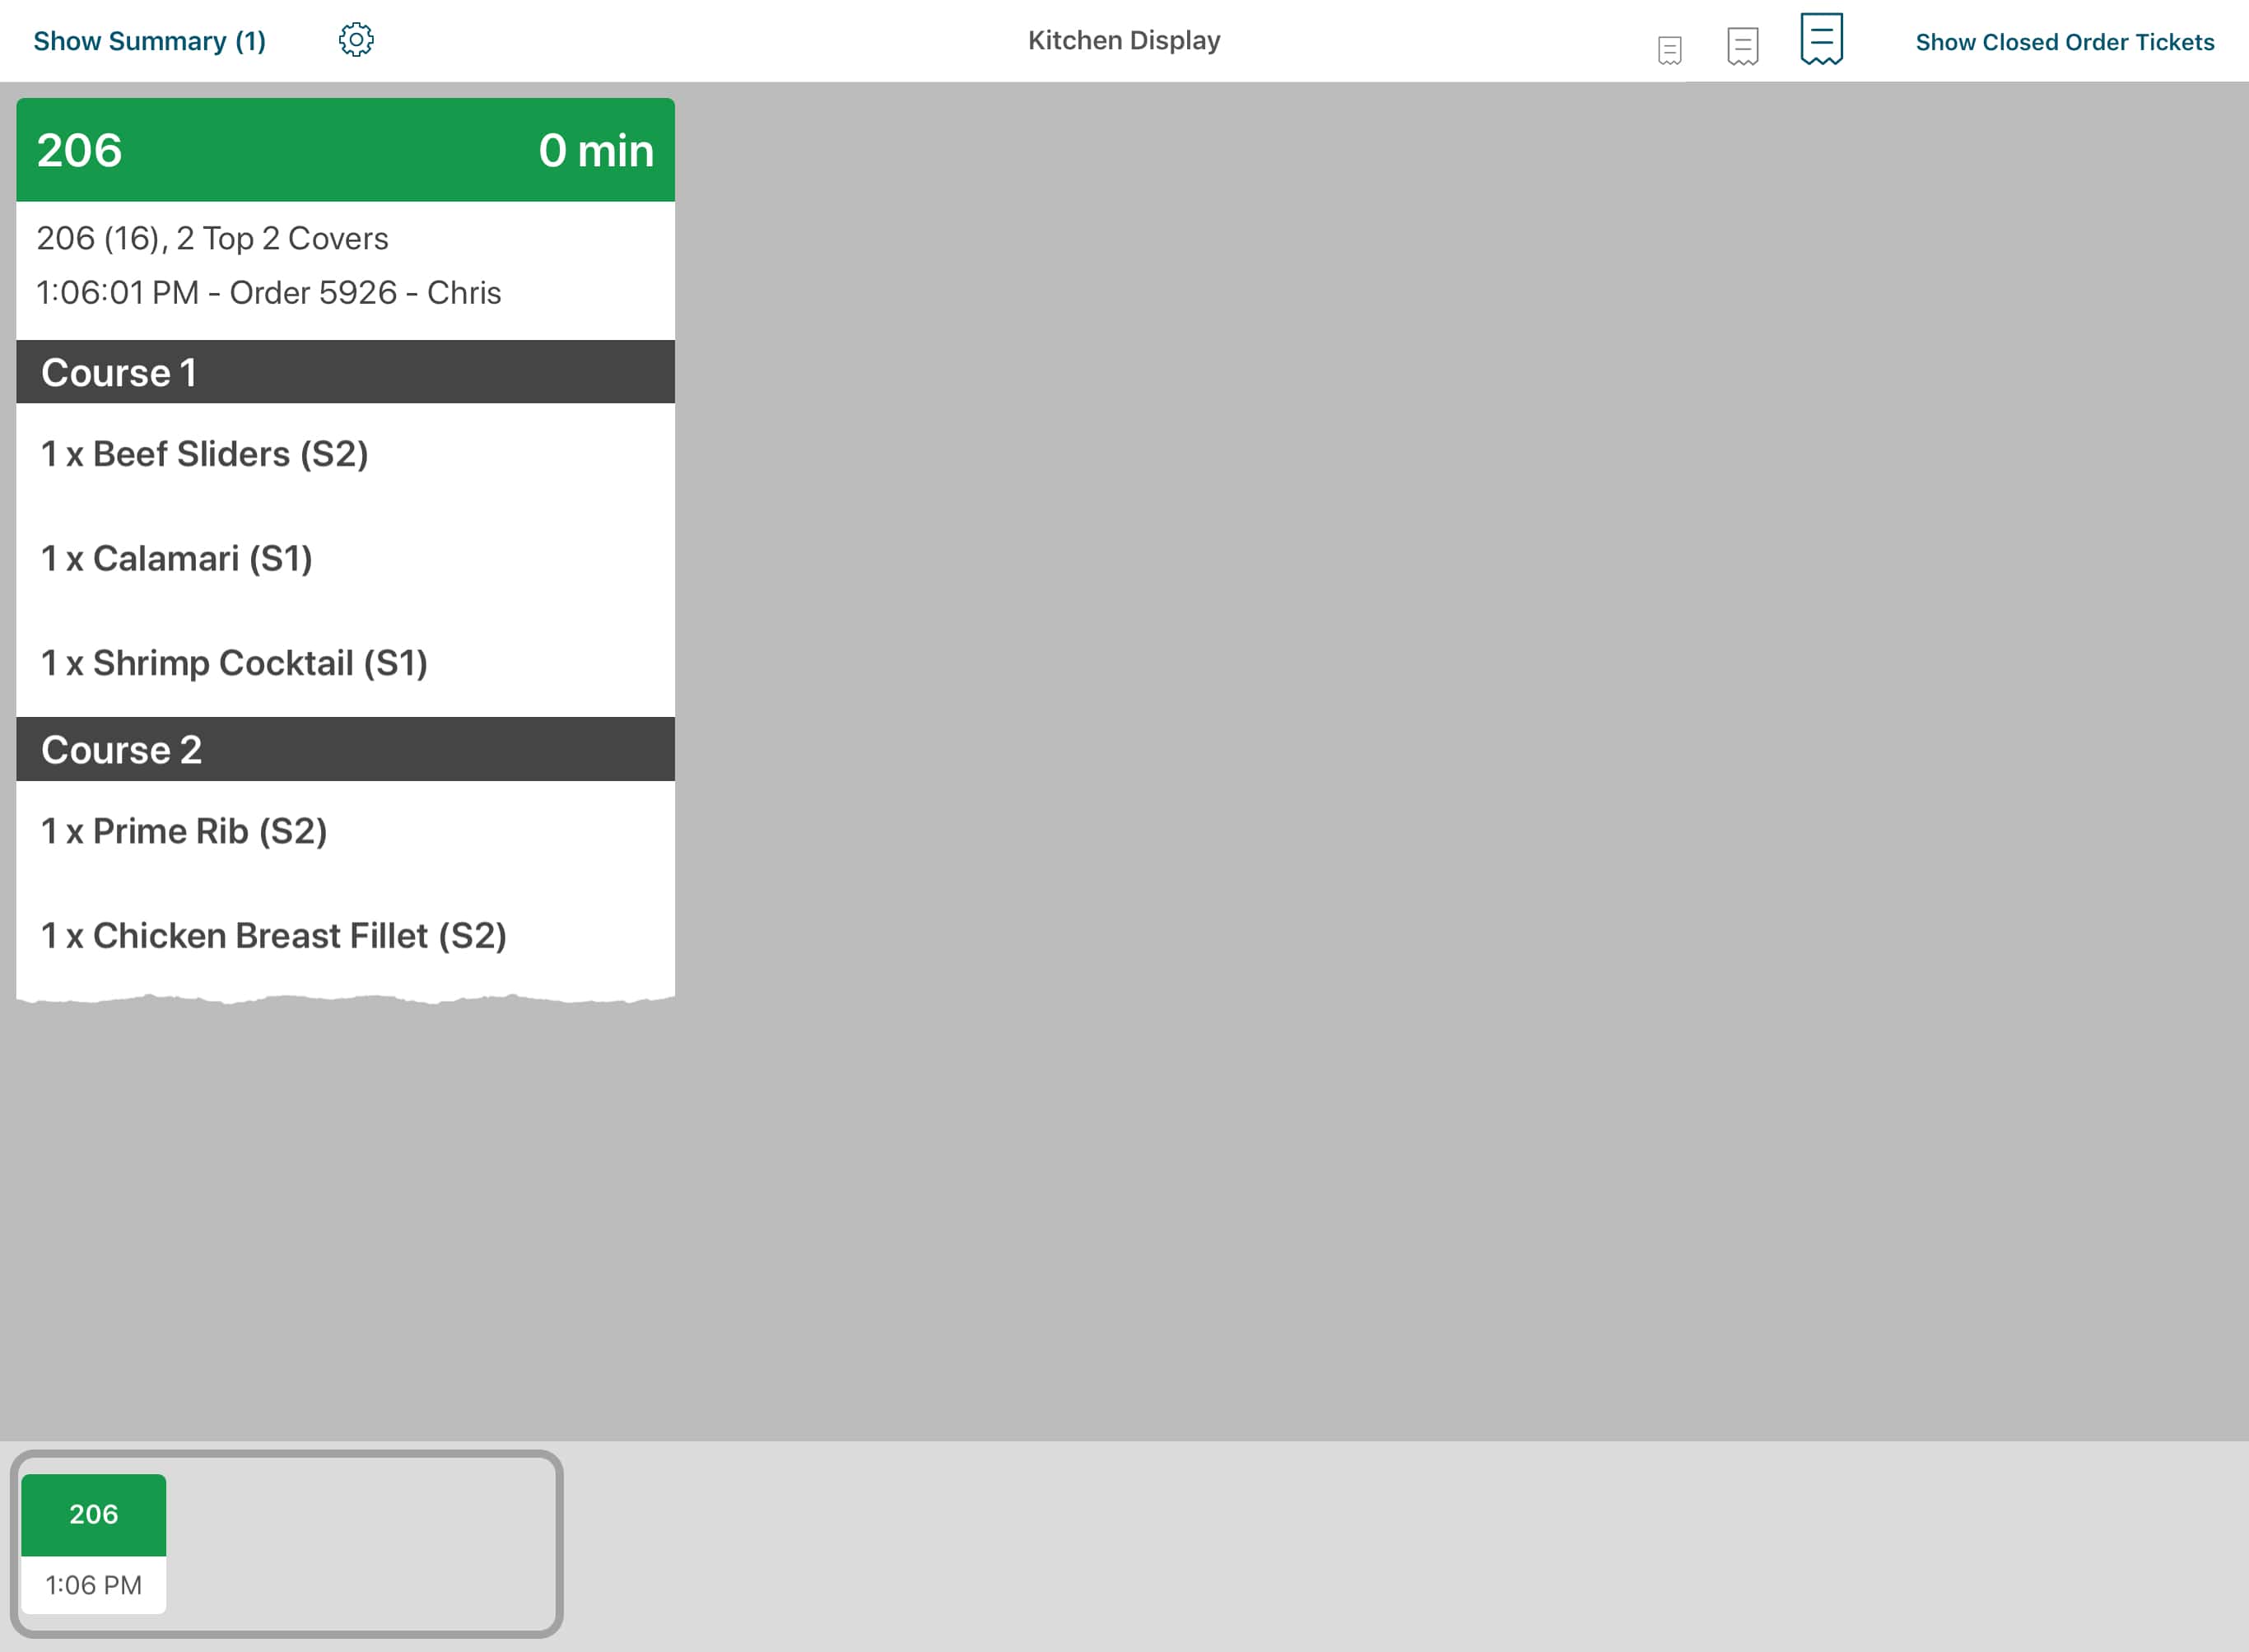
3. You will see your order tickets appear in the Order Ticket Window on the KDS, accompanied by an audible alert ping.
Note: The KDS is currently a one way system. When items are marked as “fired” or “up” the KDS, the KDS does not transmit this information to TouchBistro.
Chapter 7. Sending a Void
You can send voided items to the KDS. A void is an item on your order that has been sent to the KDS but shortly thereafter a customer asks to cancel the order.
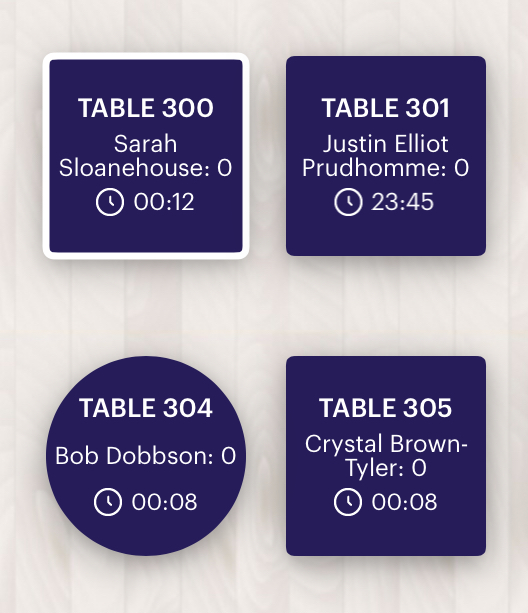
1. After sending an order, you are sent back to the floor plan. Access the table requesting the void.
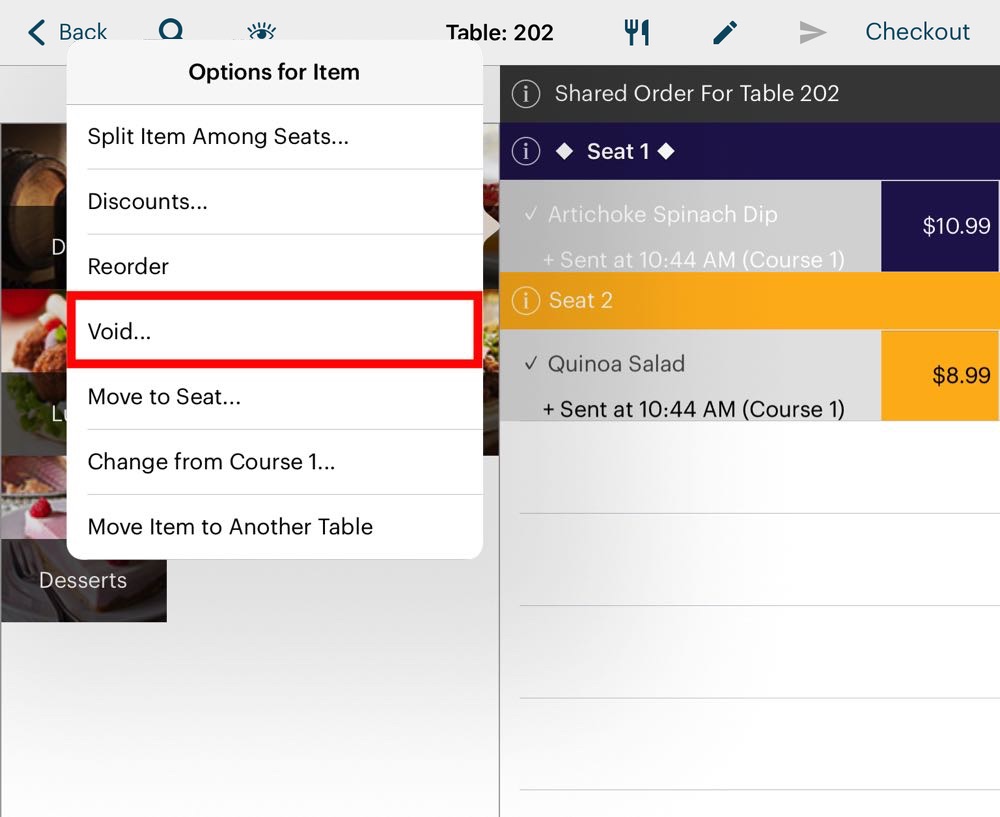
2. Tap the item you need to void. And then tap Void in the Options for Item menu.
3. Depending on security settings, you may need a manager approval to void the item.
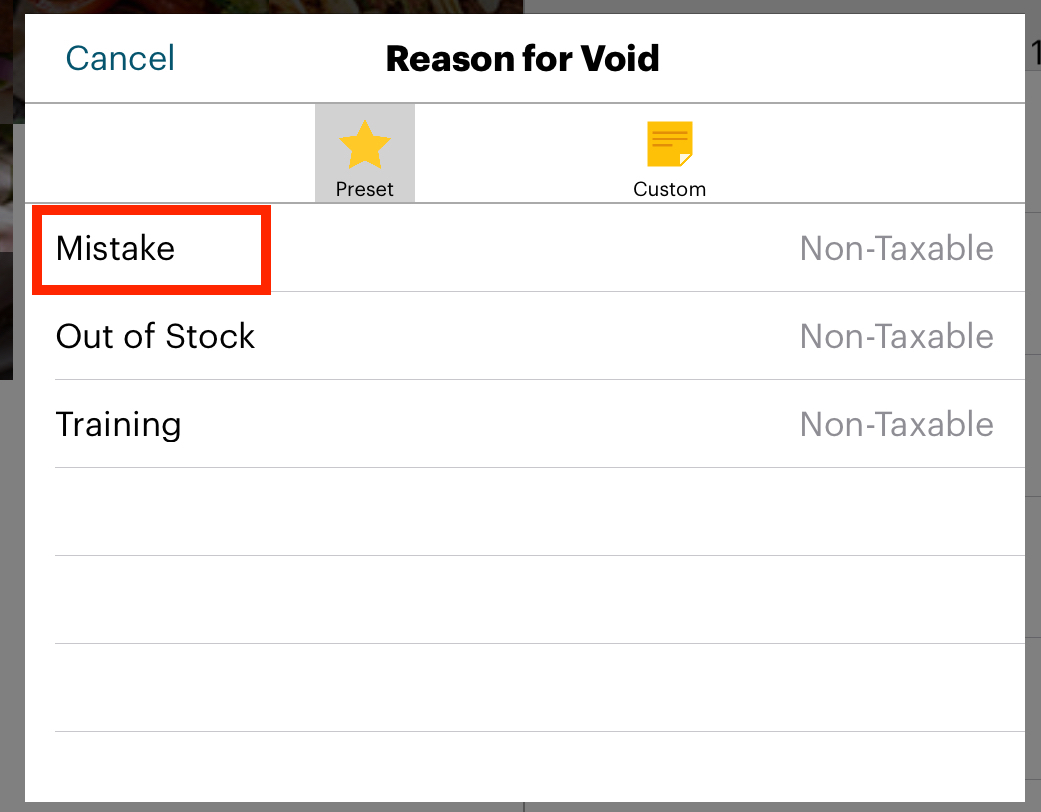
4. TouchBistro prompts you to enter a reason for the void. Voids are logged and reportable.
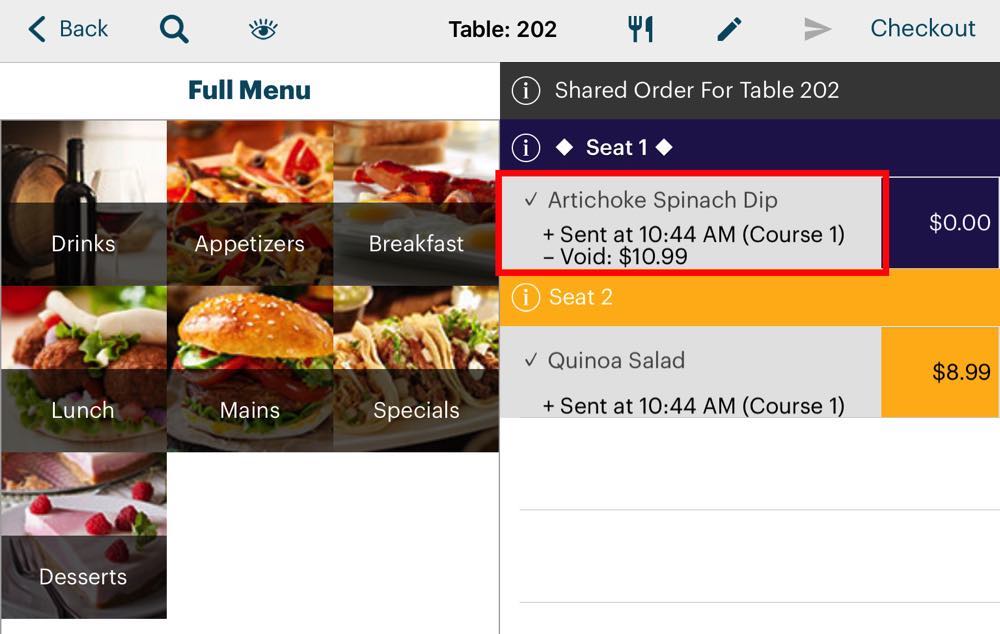
5. The item gets marked as voided and the price zeroed out.
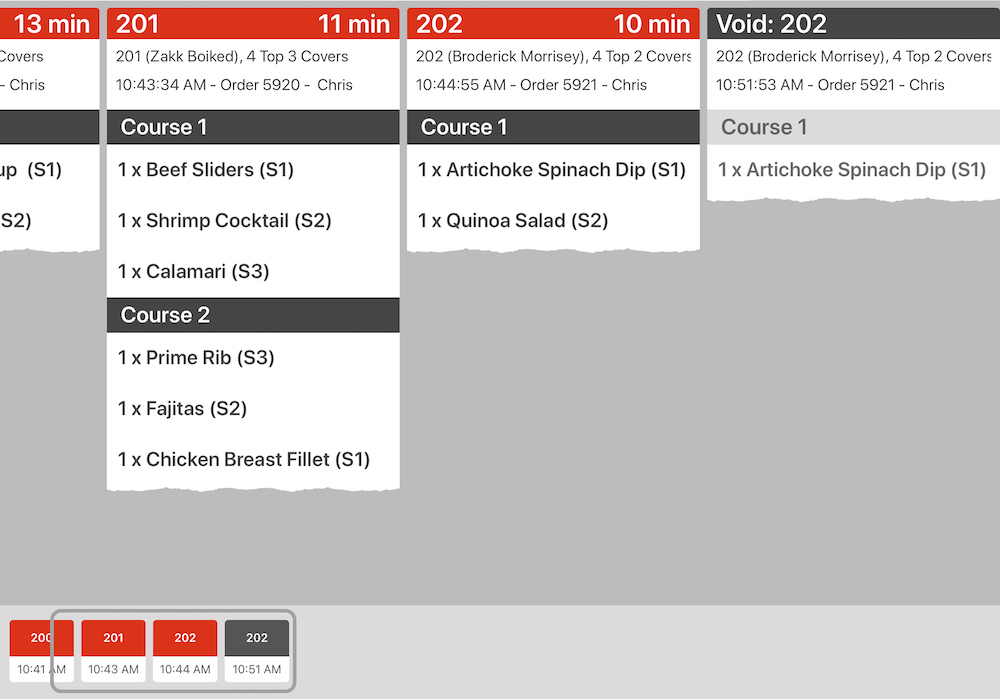
6. Finally, on the KDS, the item voided and table details appear in the Order Ticket window with table details in red to indicate this is a void. In the example above, you can see that the Artichoke Spinach Dip is visible on the order ticket for Order 5921, and voided on the next adjacent ticket.
Chapter 8. Managing Closed Tickets

1. To review closed order tickets, tap Show Closed Order Tickets in the Menu Bar.

2. If you accidentally closed a ticket, tap the ticket three times and it will be restored.
3. Tap Show Open Order Tickets to return to the open order ticket window to view your open tickets and any tickets you restored.
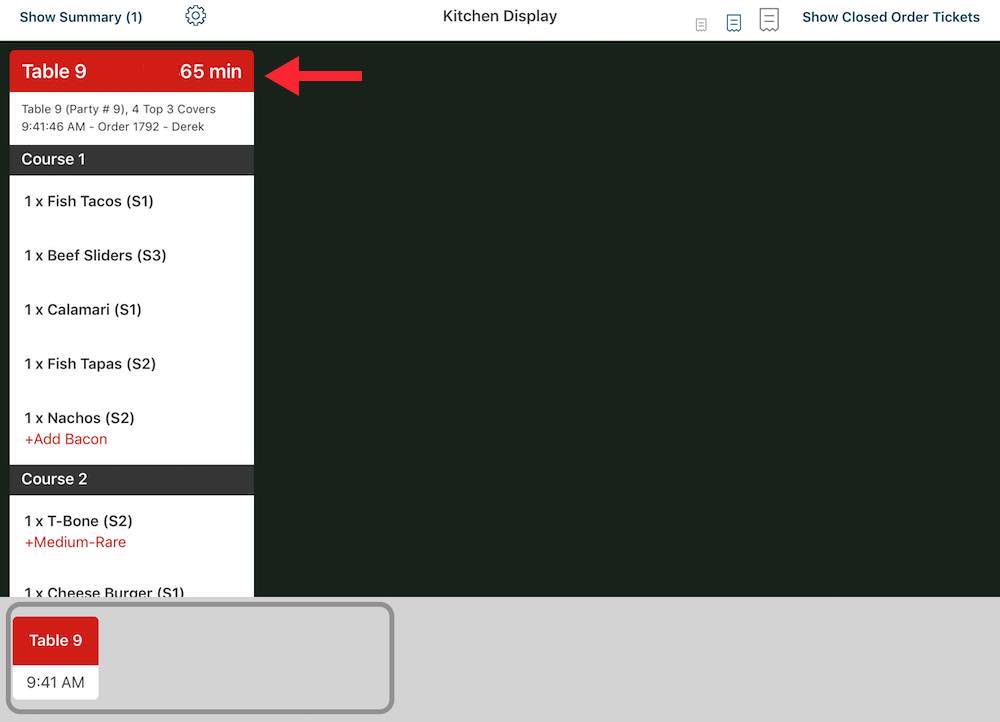
4. Your restored ticket will mark the open time from the time it was originally sent to the KDS, not from the point it was restored.
Chapter 9. Sending Order Tickets to Both a Printer and the KDS
Some TouchBistro users prefer to still send traditional printed order tickets to the kitchen and use the KDS as a method to monitor kitchen activity and progress. If you prefer to use the KDS as an oversight tool, you can set your Menu Categories to print both to an order ticket printer and the KDS.
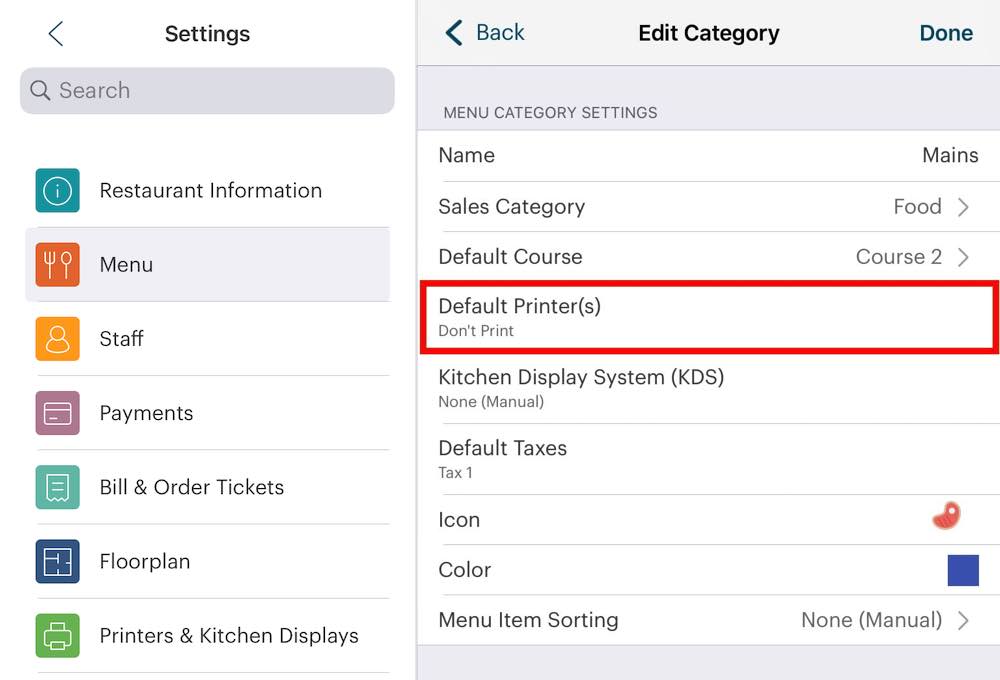
1. On the menu category, tap Printer.
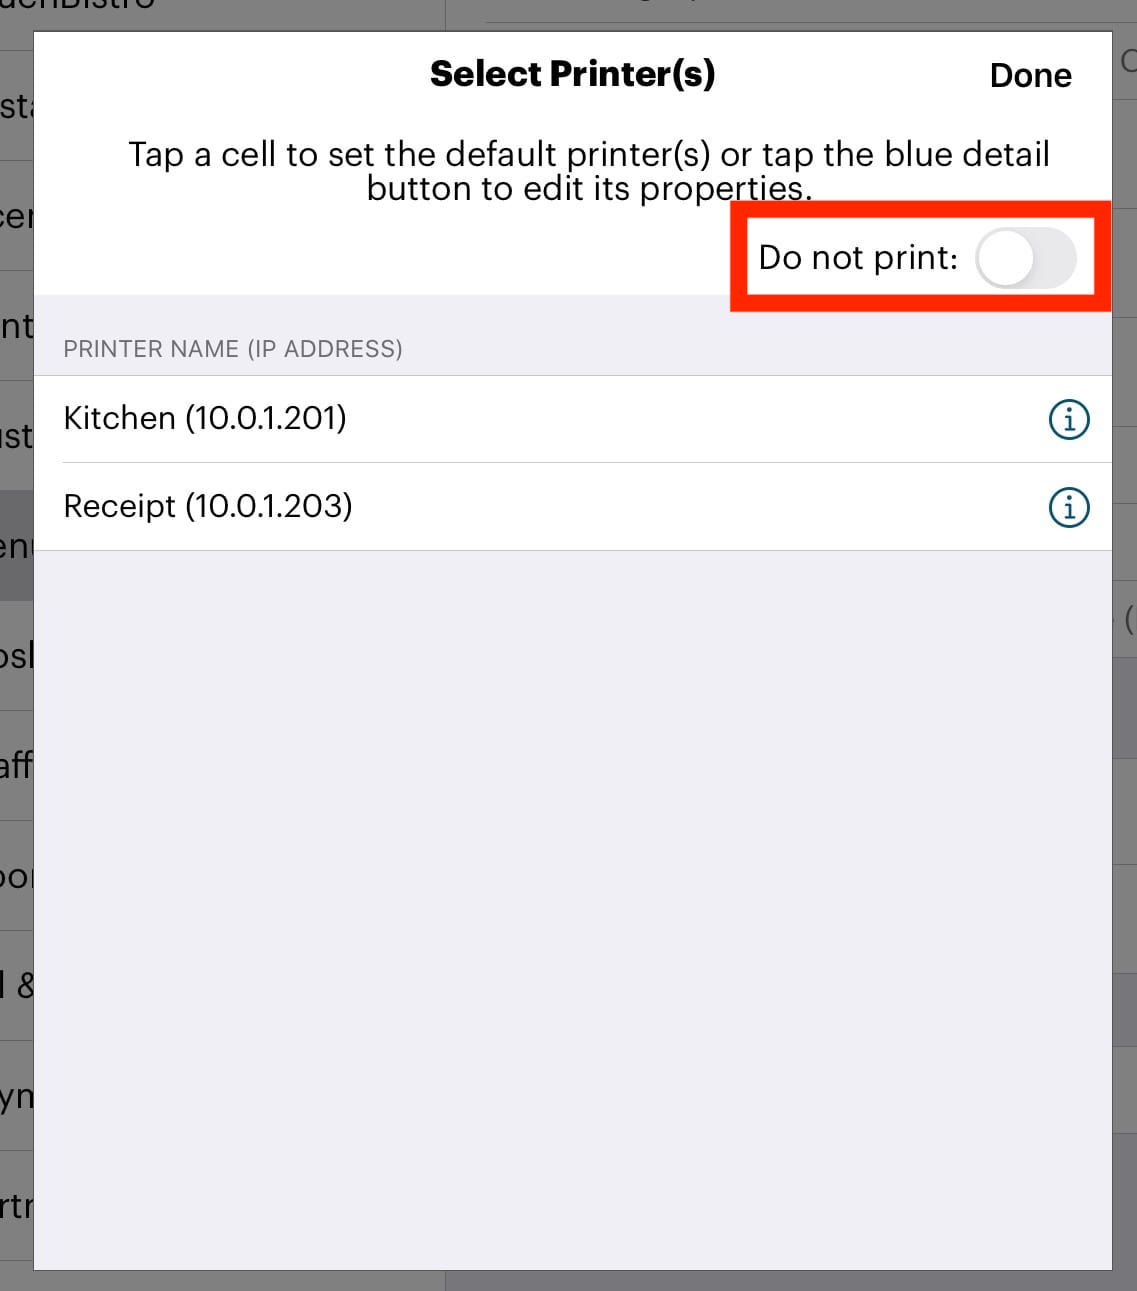
2. Slide Do not print this item to the disabled (non green) position.
3. Select your kitchen ticket printer. If you don’t already have a kitchen ticket printer set up, then set up your printer.
4. Tap Done.
See Also
Setting Up and Using the KDS tutorial video


 Email
Support
 Frequently
Asked Questions
