Using the Worldpay iPP350
Table Of Contents
Chapter 1. Accepting Credit Card Payments
Section 1. Refunding a Bill before you Close Your Day
1) Refund Process is Interrupted
Section 2. Performing a Partial Refund
Section 3. Performing a Refund for a Bill from a Previous Day
Section 4. Performing a Partial Refund
Chapter 1. Accepting Credit Card Payments
After you’ve set up your Merchant details in the Admin section, you or your staff are now ready to start accepting credit card payments with your iPP350.
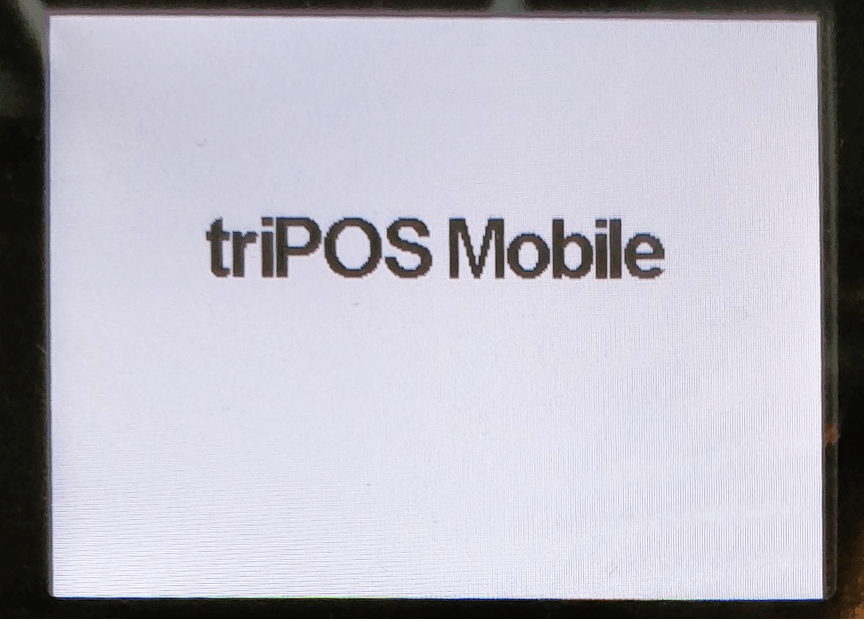
1. Ensure your iPP350 is connected and ready. If connected and ready, it will display triPOS Mobile.
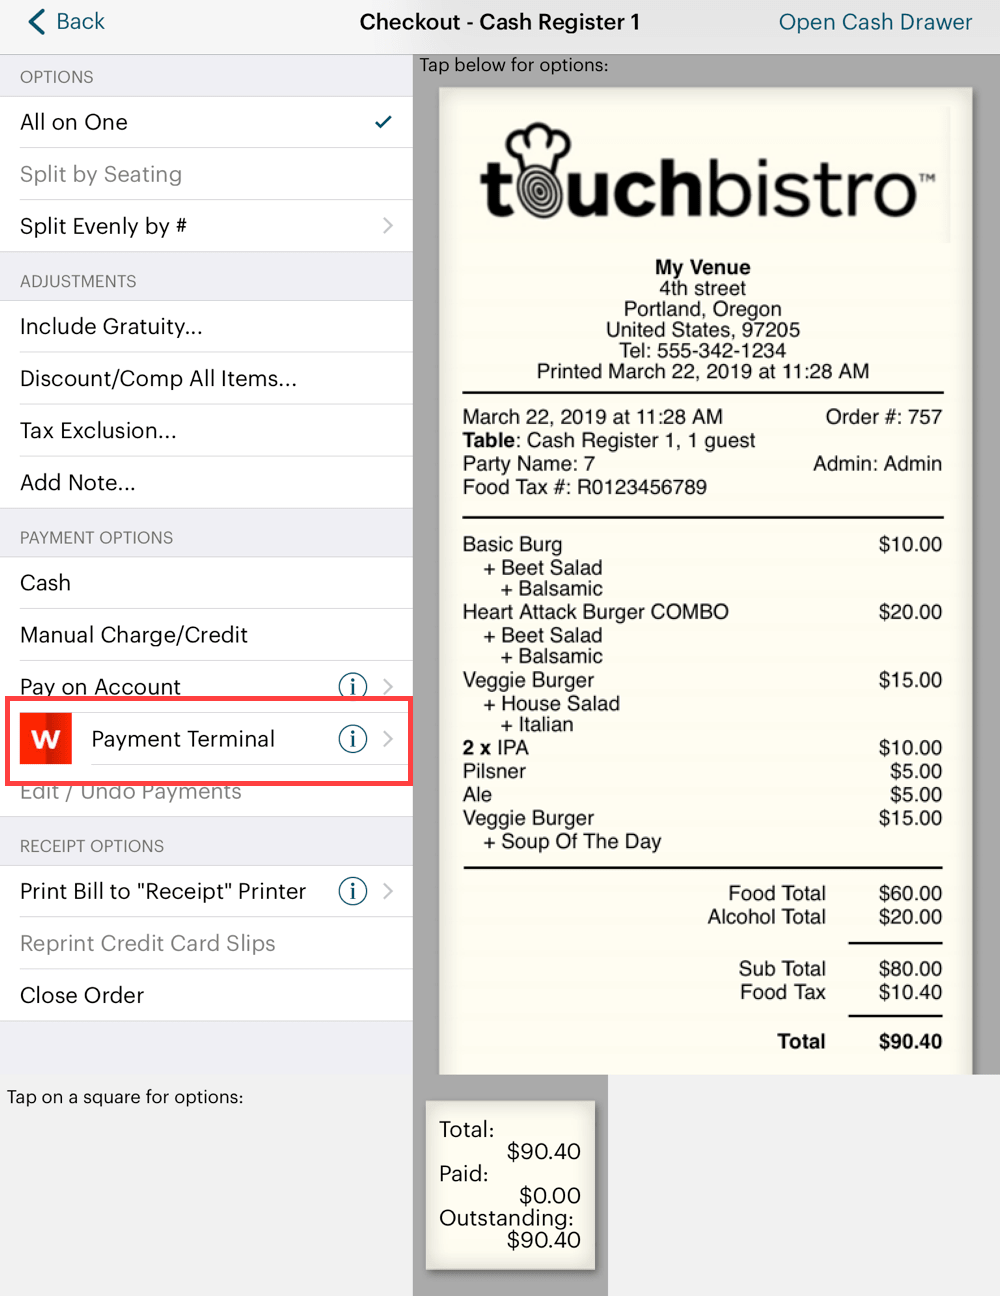
2. From the Checkout screen, tap Payment Terminal.
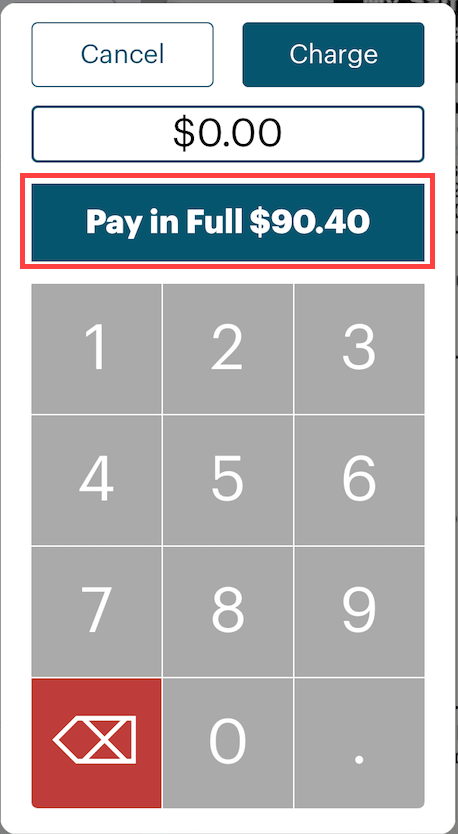
3. Tap Pay in Full. Do not include tip. Alternatively, if the customer only wishes to pay a portion of the full amount, enter the amount the customer wishes to charge to the card and tap Charge.
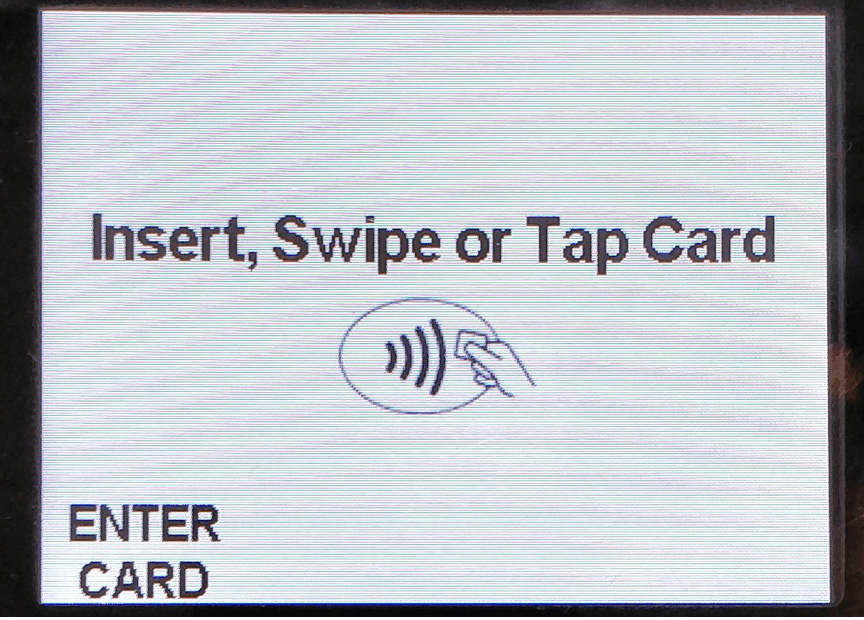
4. Tap, swipe, or insert the offered card. Alternatively, tap F1 to manually enter the card number.
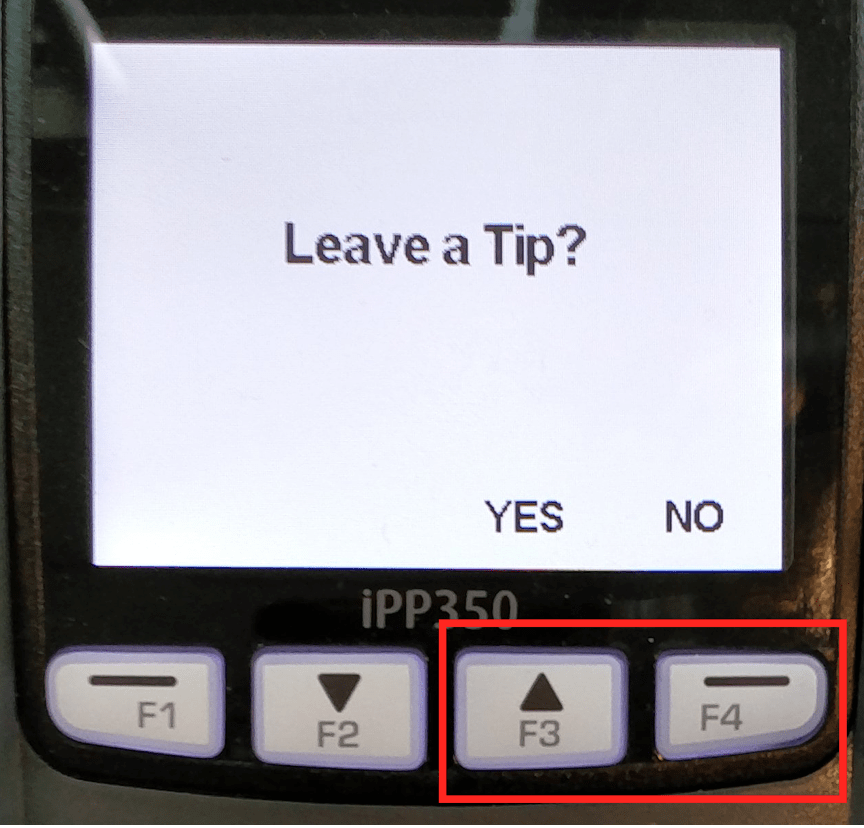
5. If tipping was enabled, tap F3 to leave a tip or F4 to not leave a tip.
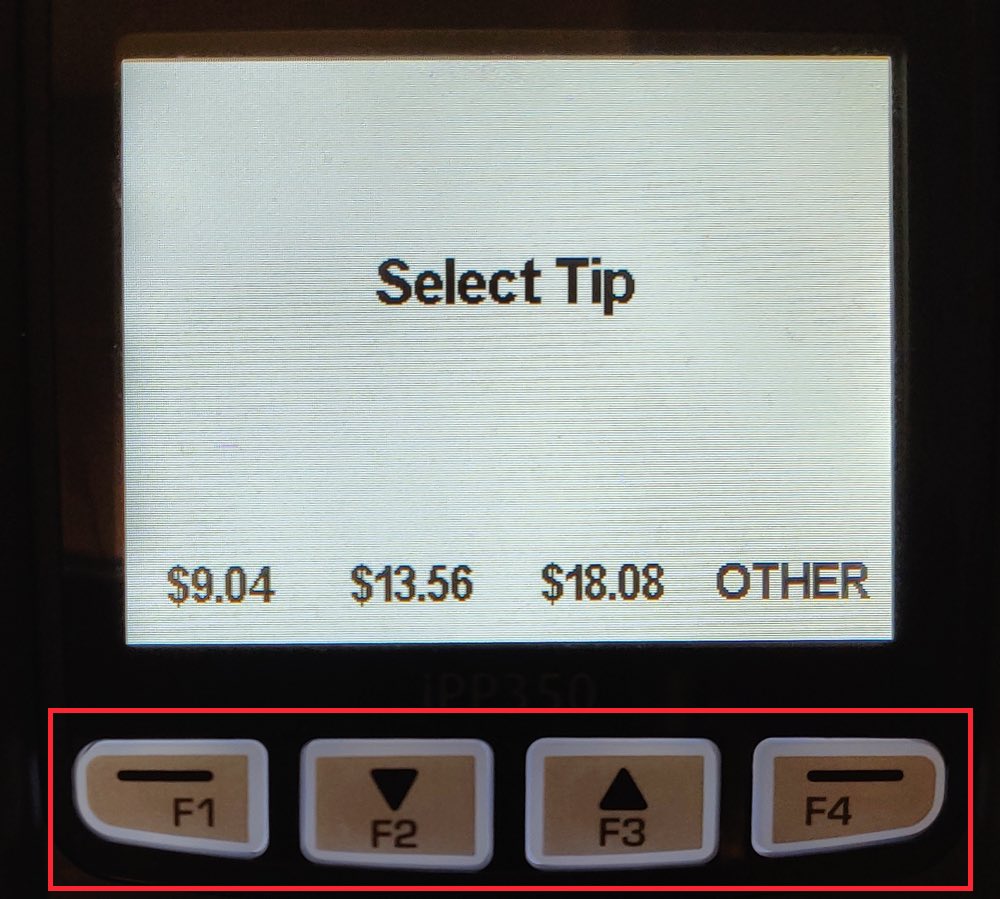
6. If the customer chooses to leave a tip and you’ve turned on the Show Tip Guide on Terminal option, the iPP350 will display the post-tax dollar amounts suggested by the tip guide you set up in TouchBistro. Tap F1, F2, or F3 to select one of the suggested dollar amounts or tap F4 to input a custom dollar amount.
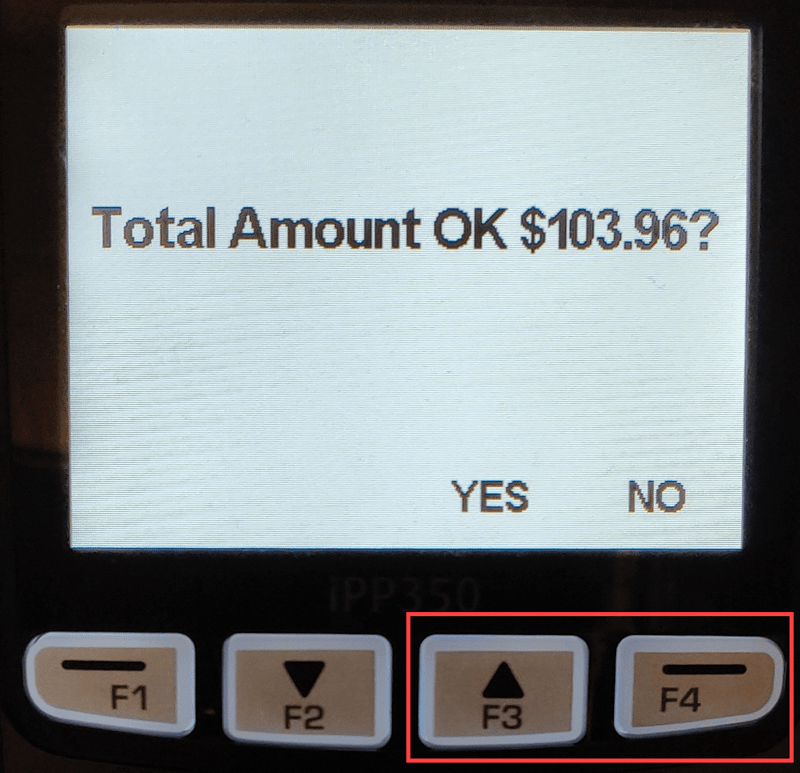
7. The customer is then prompted to verify the total amount (with tip). Press F3 to accept or F4 to cancel.
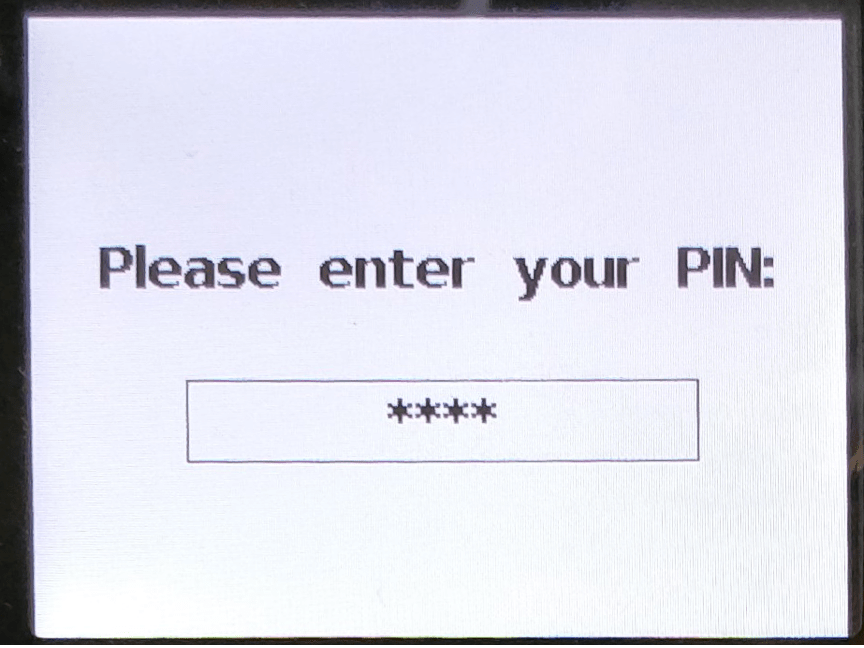
8. If this card is protected by a PIN the customer should enter the PIN and press the Enter ![]() key.
key.

9. The payment will be processed and the customer will be prompted to remove his/her card.
10. TouchBistro will generate a customer and merchant copy of the credit card receipts. If the card was swiped and didn’t prompt for a PIN, TouchBistro will print a Merchant copy that needs to be signed.
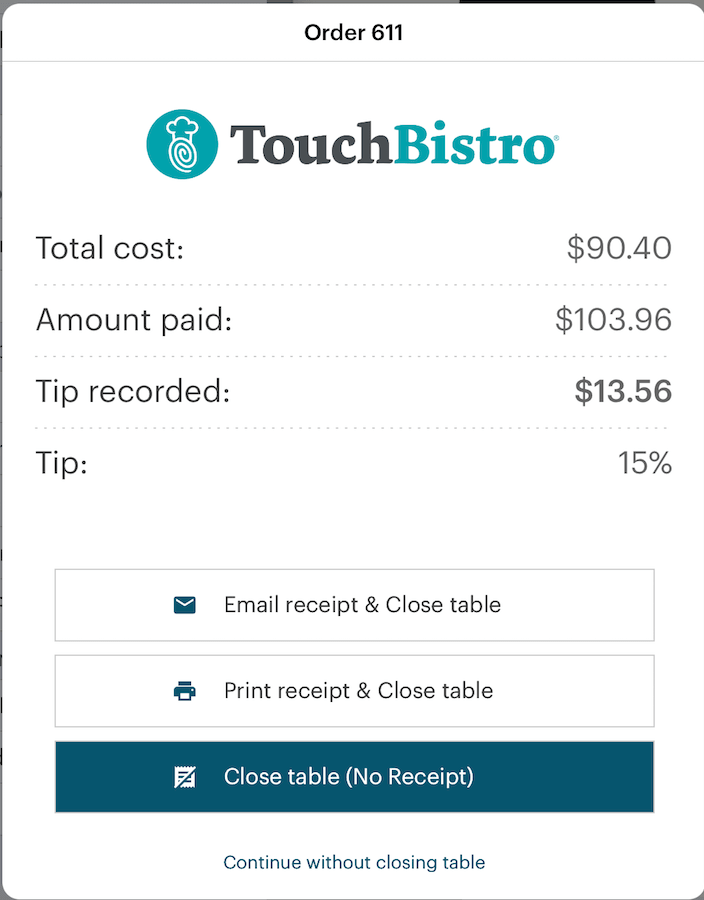
11. You can then close the table or order.
Chapter 2. Doing a Refund
You can do three types of refunds. You can do a refund for the full amount of a bill before your end of day (that’s still part of an un-submitted batch). You can do a full refund of a bill that was part of a submitted batch and from a previous day. As well, you can do a partial refund for a bill that’s part of a batch or from a previous day.
Section 1. Refunding a Bill before you Close Your Day
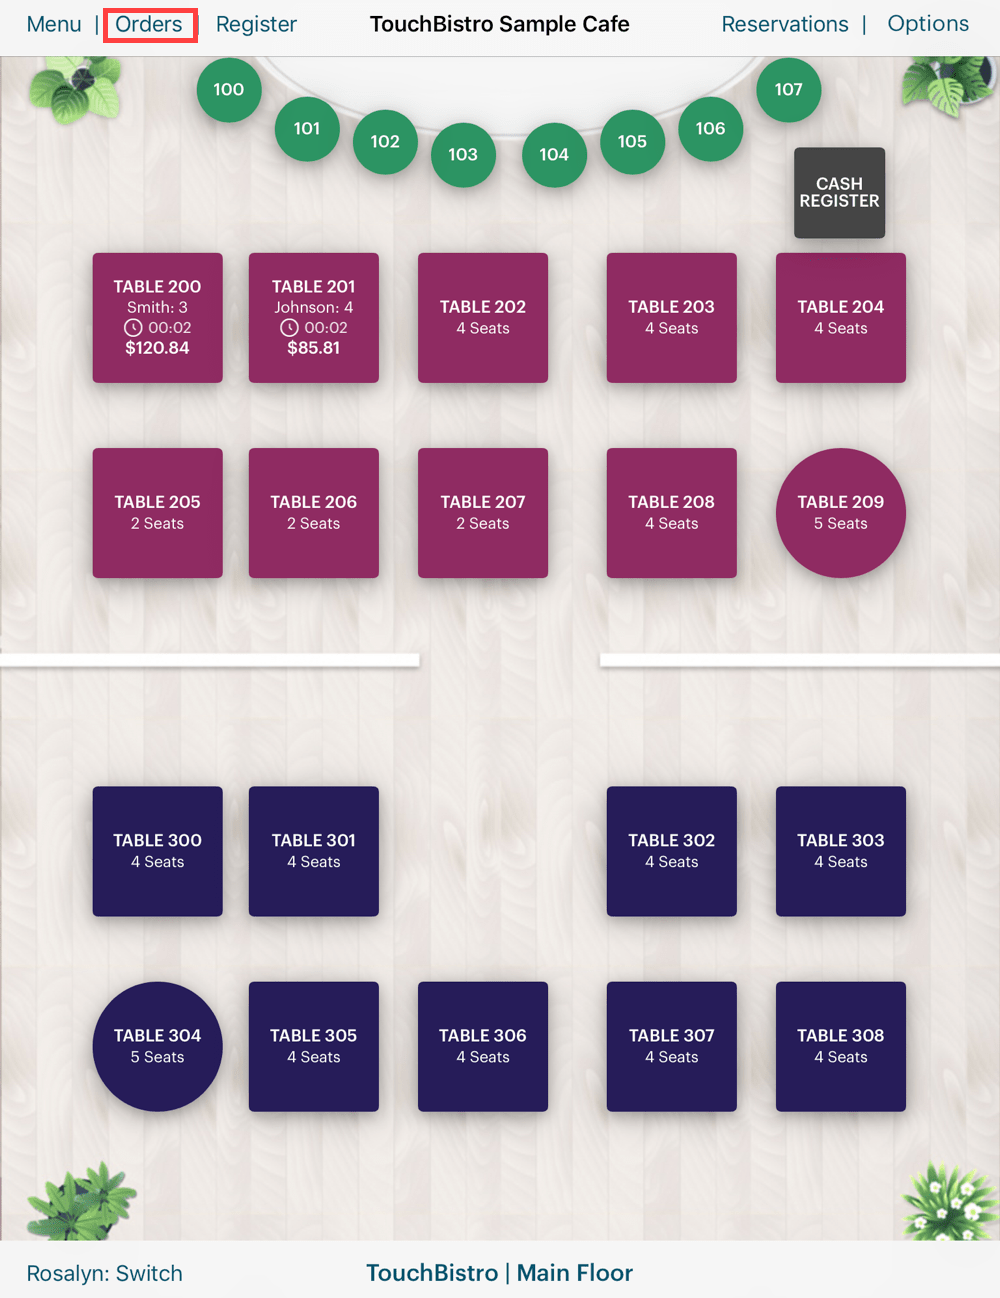
1. From your floor plan, tap Orders.
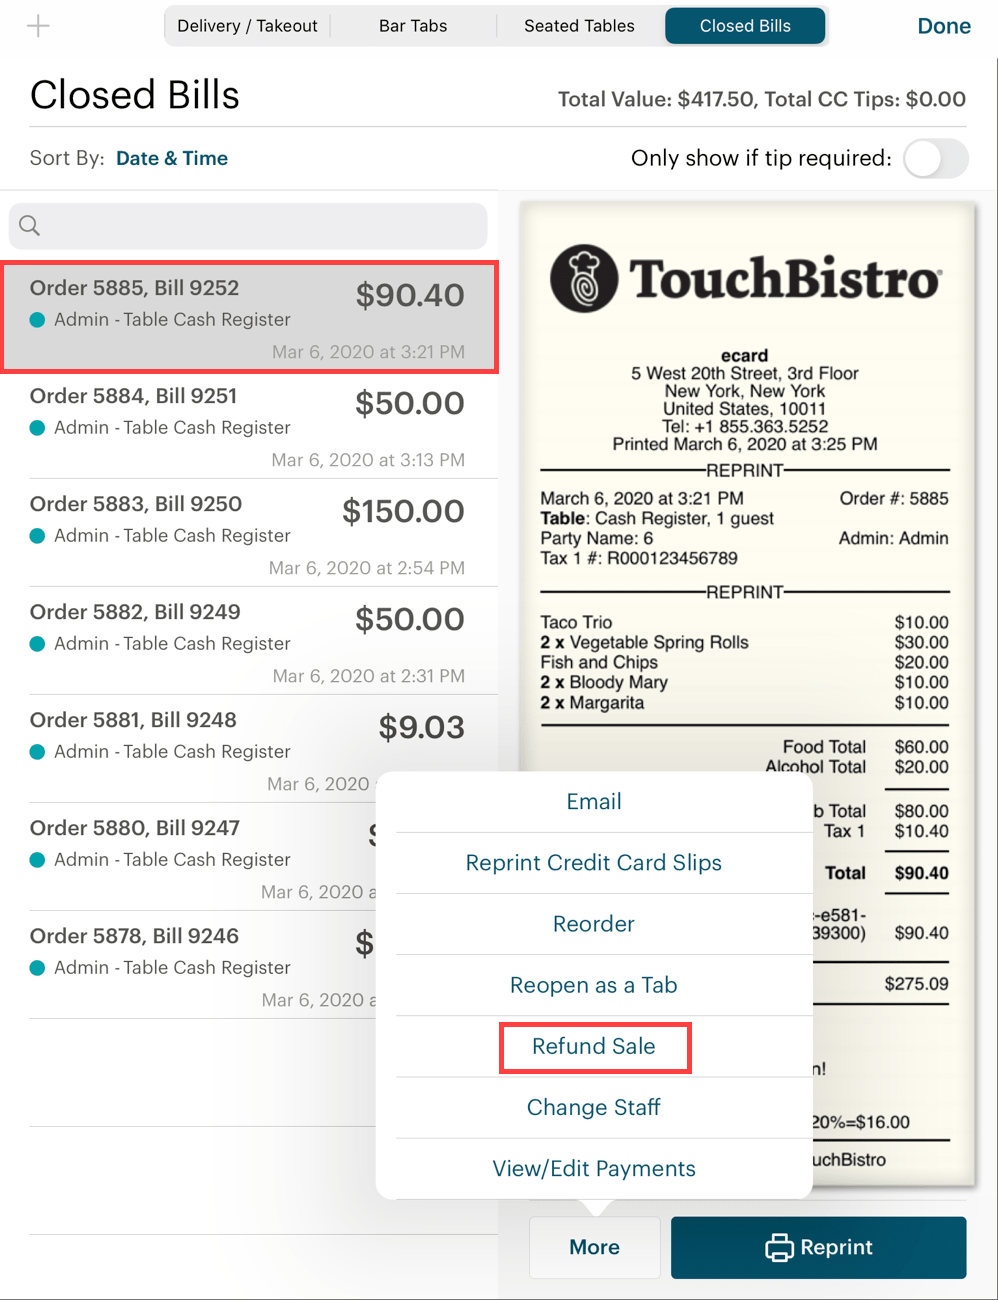
2. Tap the bill you wish to refund and tap the More button. Tap Refund Sale.
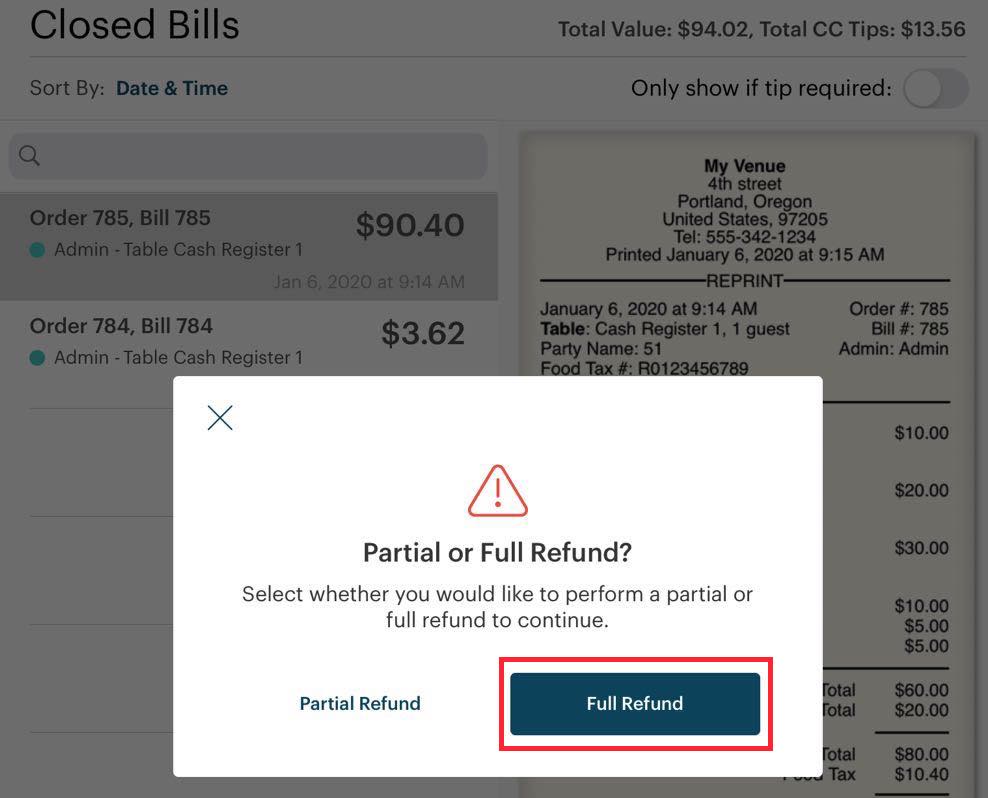
3. Tap Full Refund.
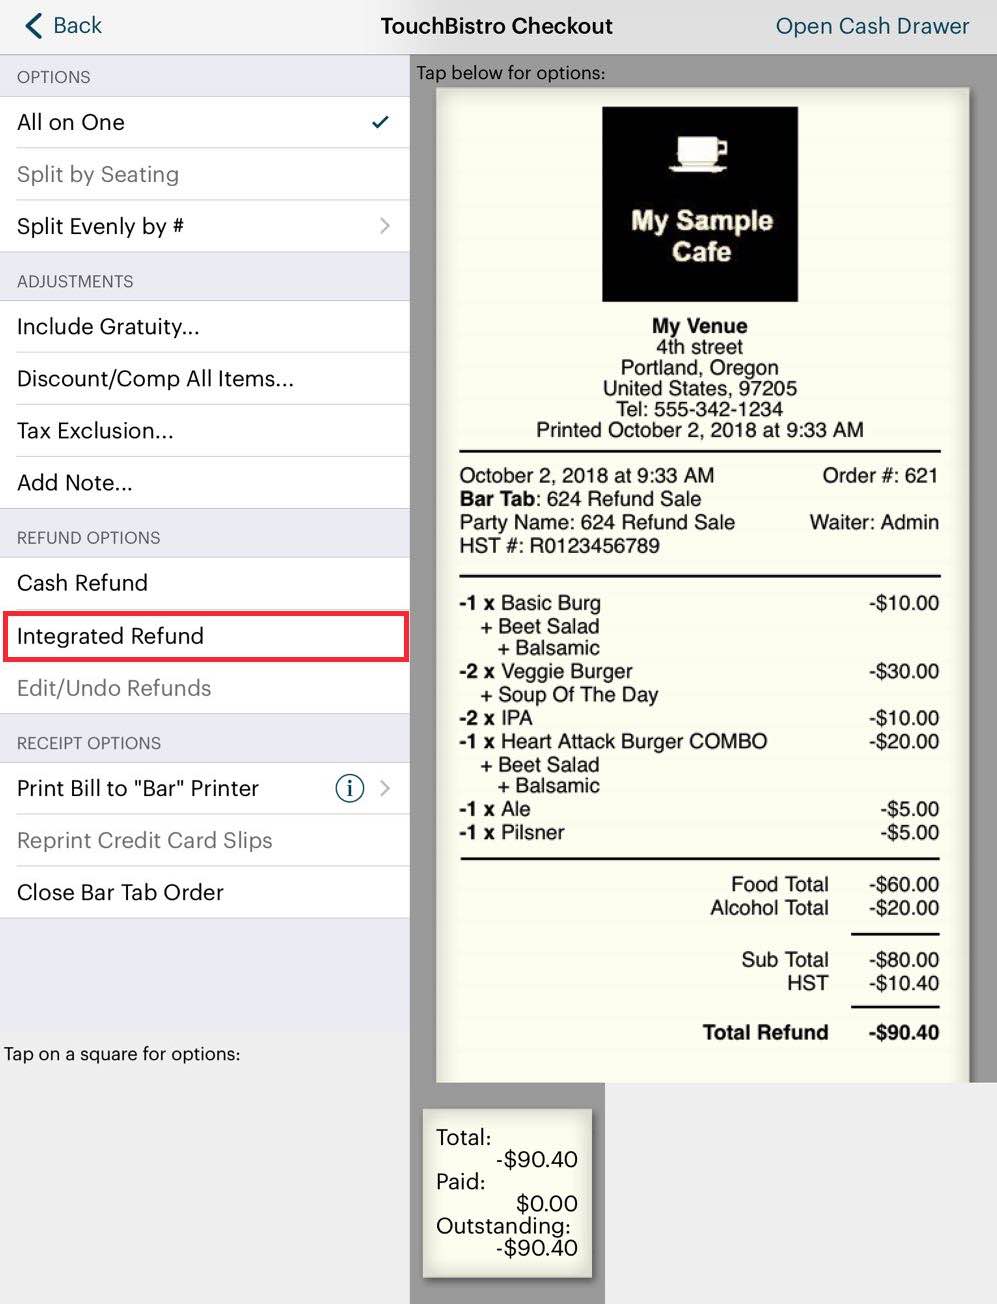
4. Tap the Integrated Refund option.

5. Follow the prompts on the Worldpay terminal and swipe or insert the card when prompted.
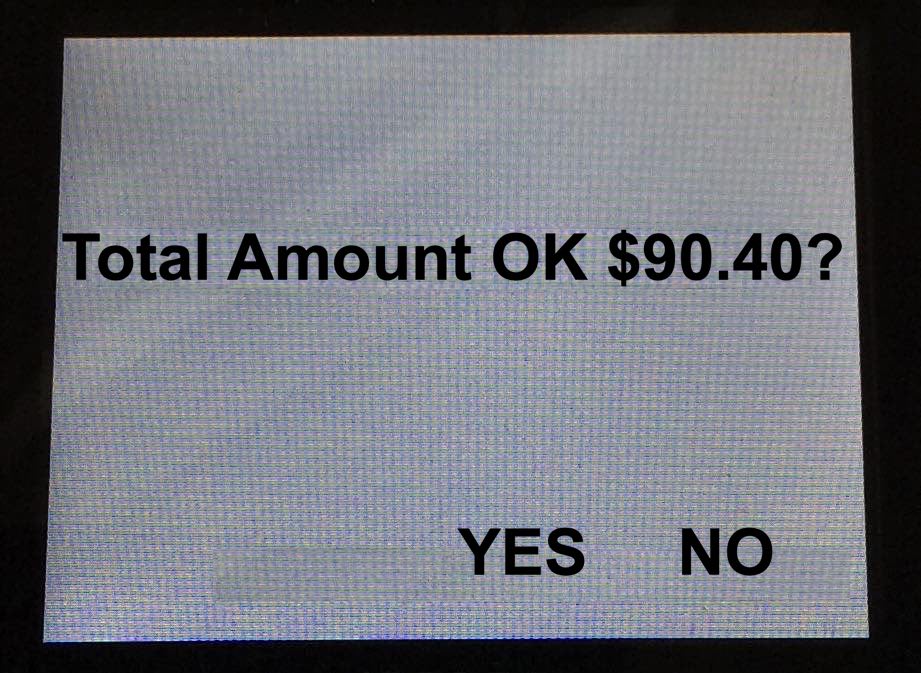
6. Verify the amount and press F3 on the PINpad to confirm.
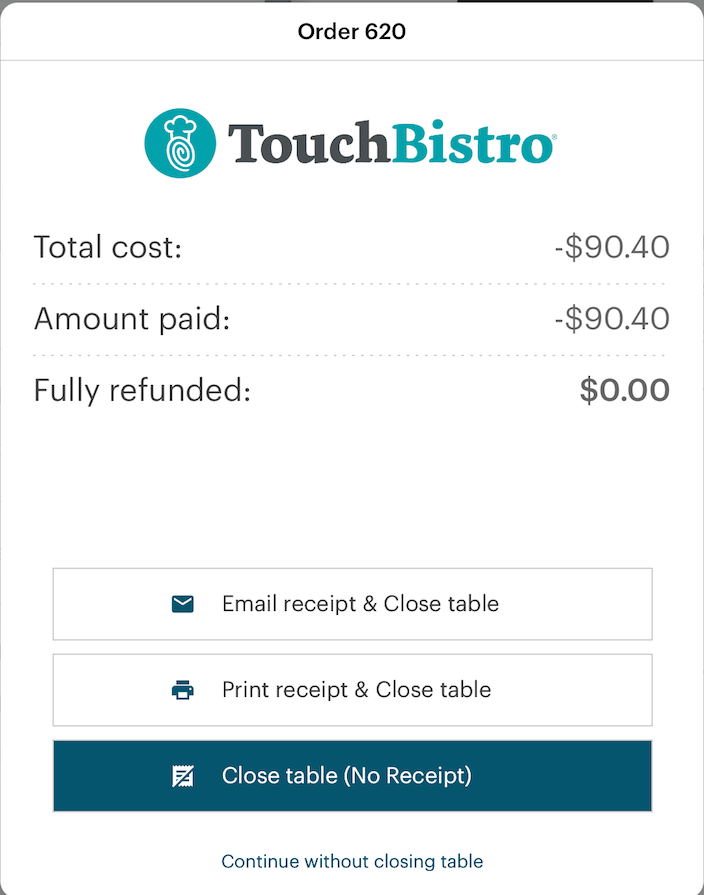
7. Close the sales refund invoice.
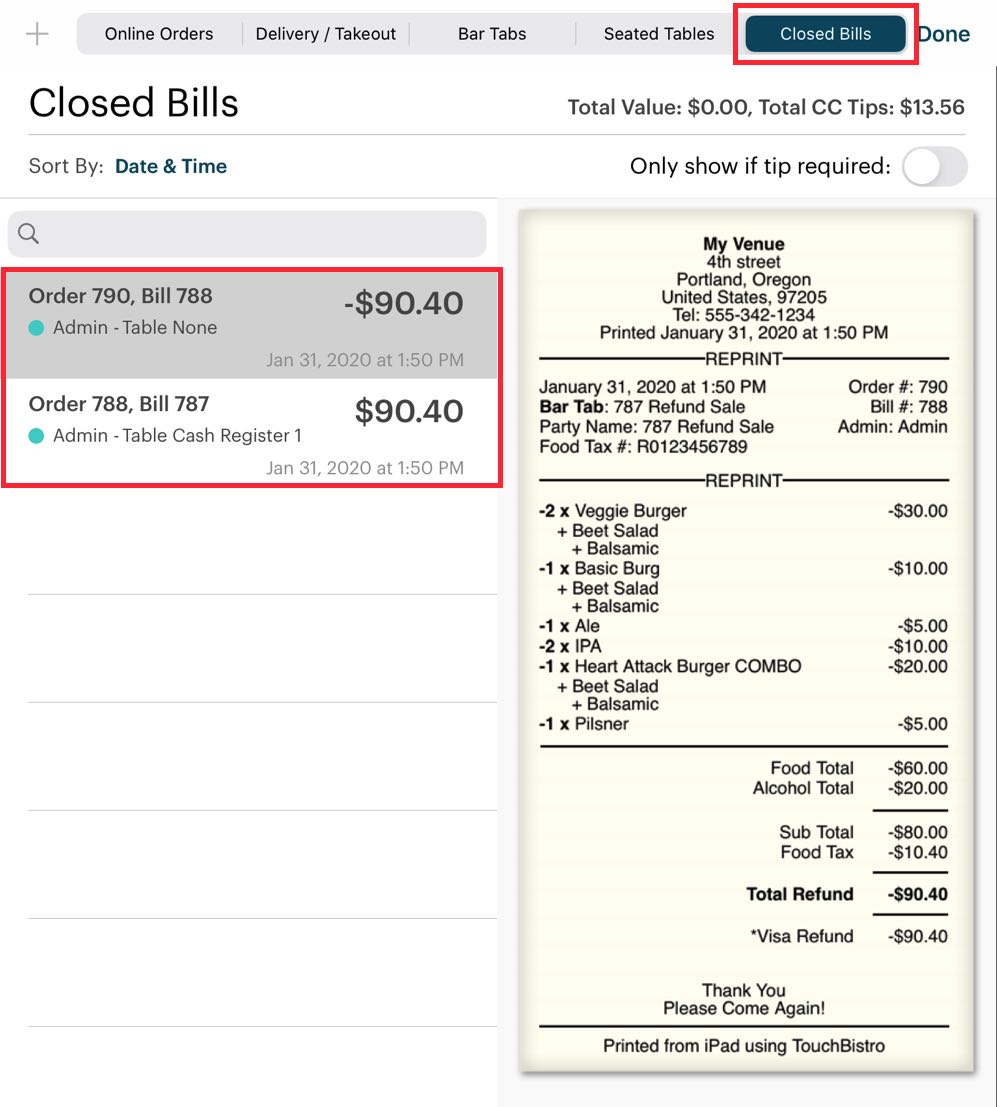
8. You are returned to the Closed Bills tab. Your refunded negative sales invoice is moved to Closed Bills.
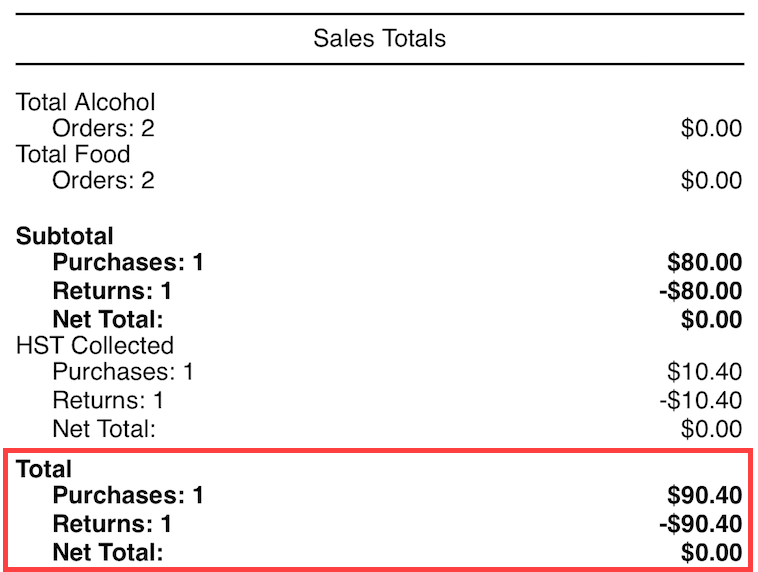
9. Your end of day will properly reflect the original bill and the matching refund. In the example pictured above, we’ll assume we’ve only performed a single transaction for the day. We can see our order for $90.40 matched with a $90.40 refund.
1) Refund Process is Interrupted
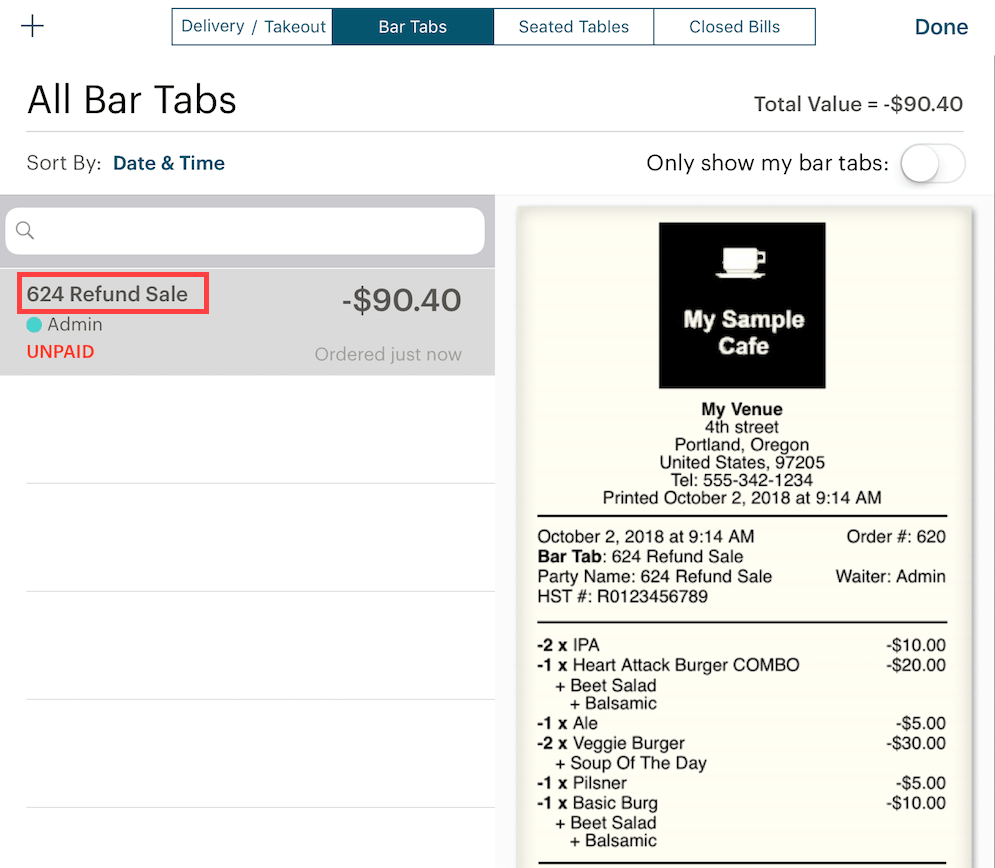
If for some reason you are interrupted and you did not complete the refund process, you can access Bar Tabs and find your negative refund invoice under bar tabs. The refund sale invoice is automatically named after the bill number of the refunded bill. Tap it and tap Edit Order to open it (or right swipe on the order).
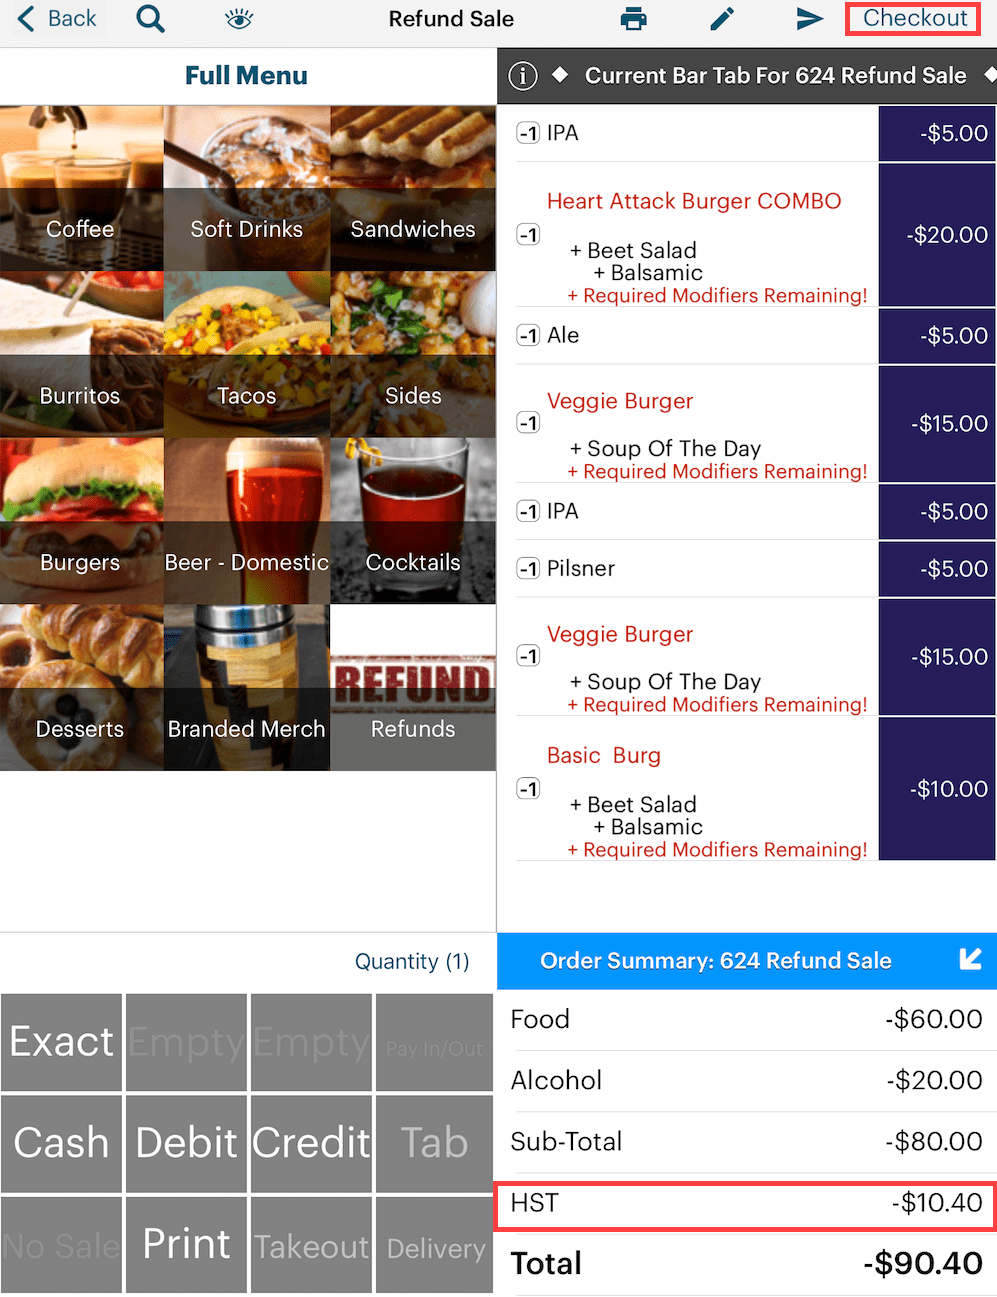
When you open the refund sale invoice, you will notice all items in the refunded bill are negative quantities. If the items have programmed mandatory modifiers, ignore the warning. If the refunded items are inventoried, TouchBistro returns the inventory count. As well TouchBistro correctly calculates the refunded tax. Tap Checkout to close out this refund invoice.
Section 2. Performing a Partial Refund
These steps assuming you’re refunding a bill for the current day. If the bill that needs to be refunded is from a previous day, find the bill via Bill / Guest Check History.

1. From your floor plan, tap Orders.

2. Tap the bill you wish to refund and tap the More button. Tap Refund Sale.
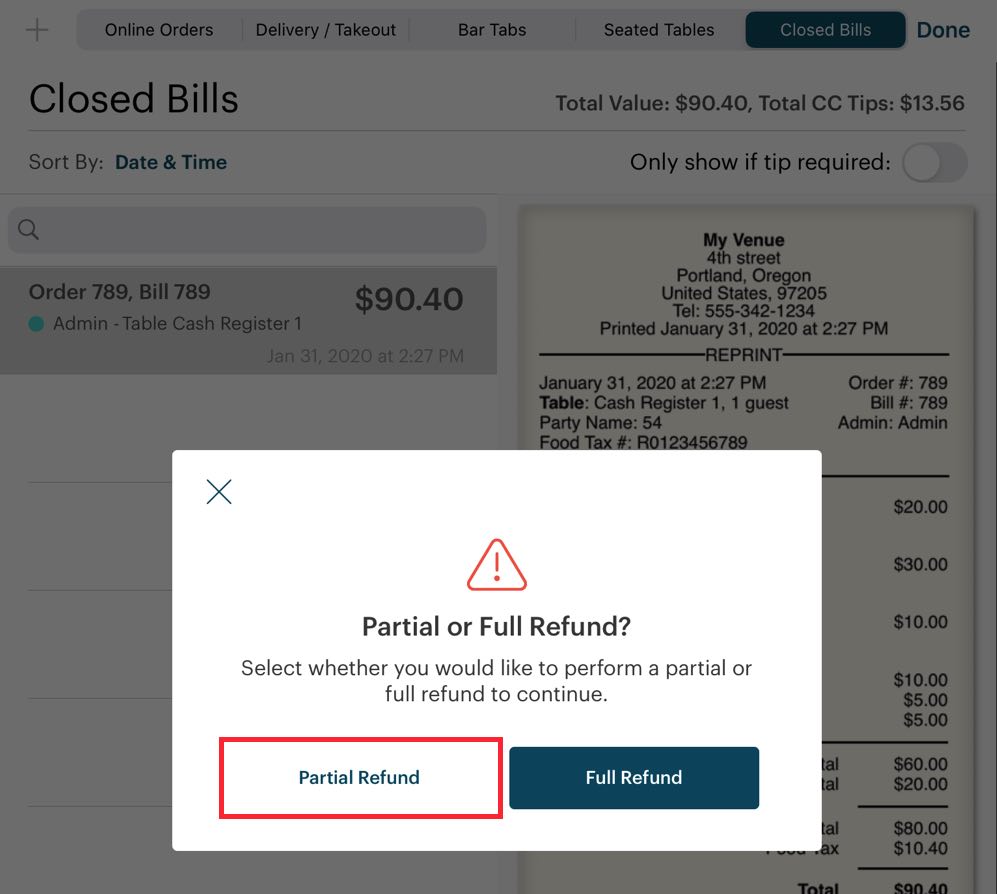
3. Tap Partial Refund.
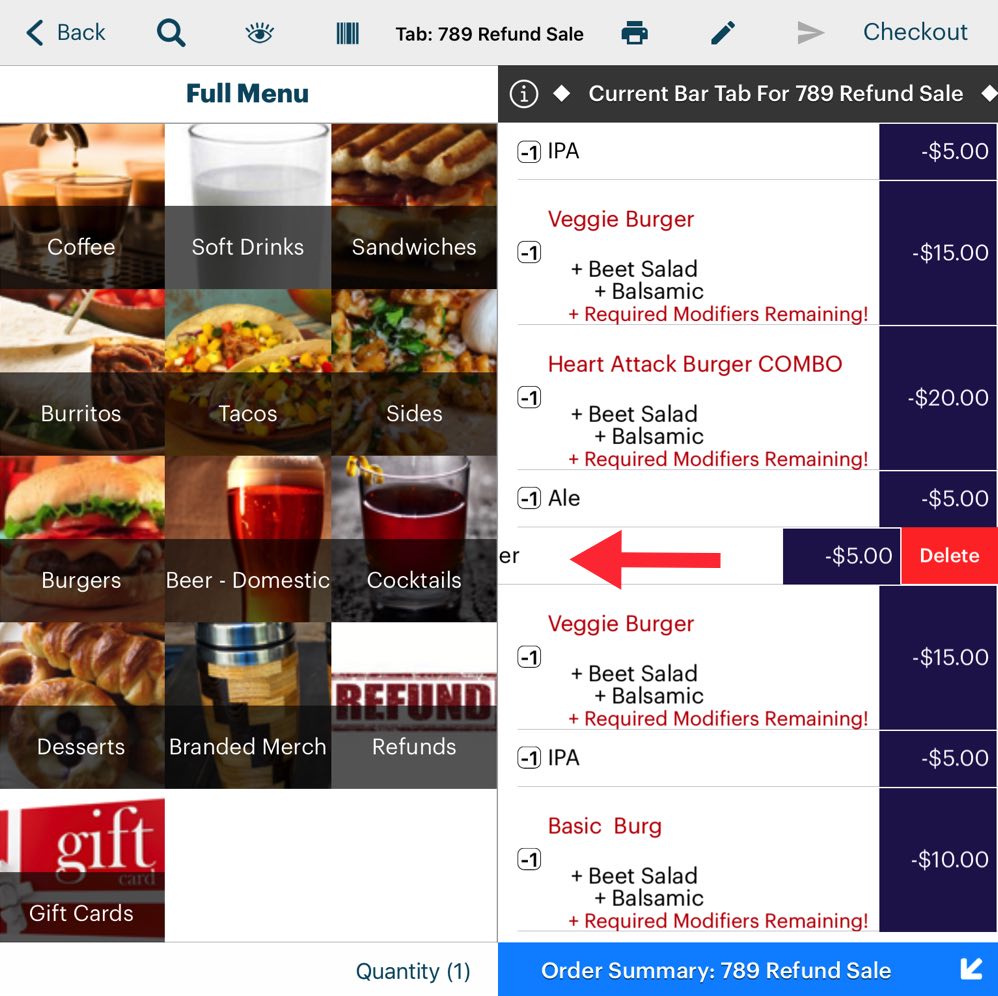
4. Swipe left on the items you don’t want to refund and tap Delete.
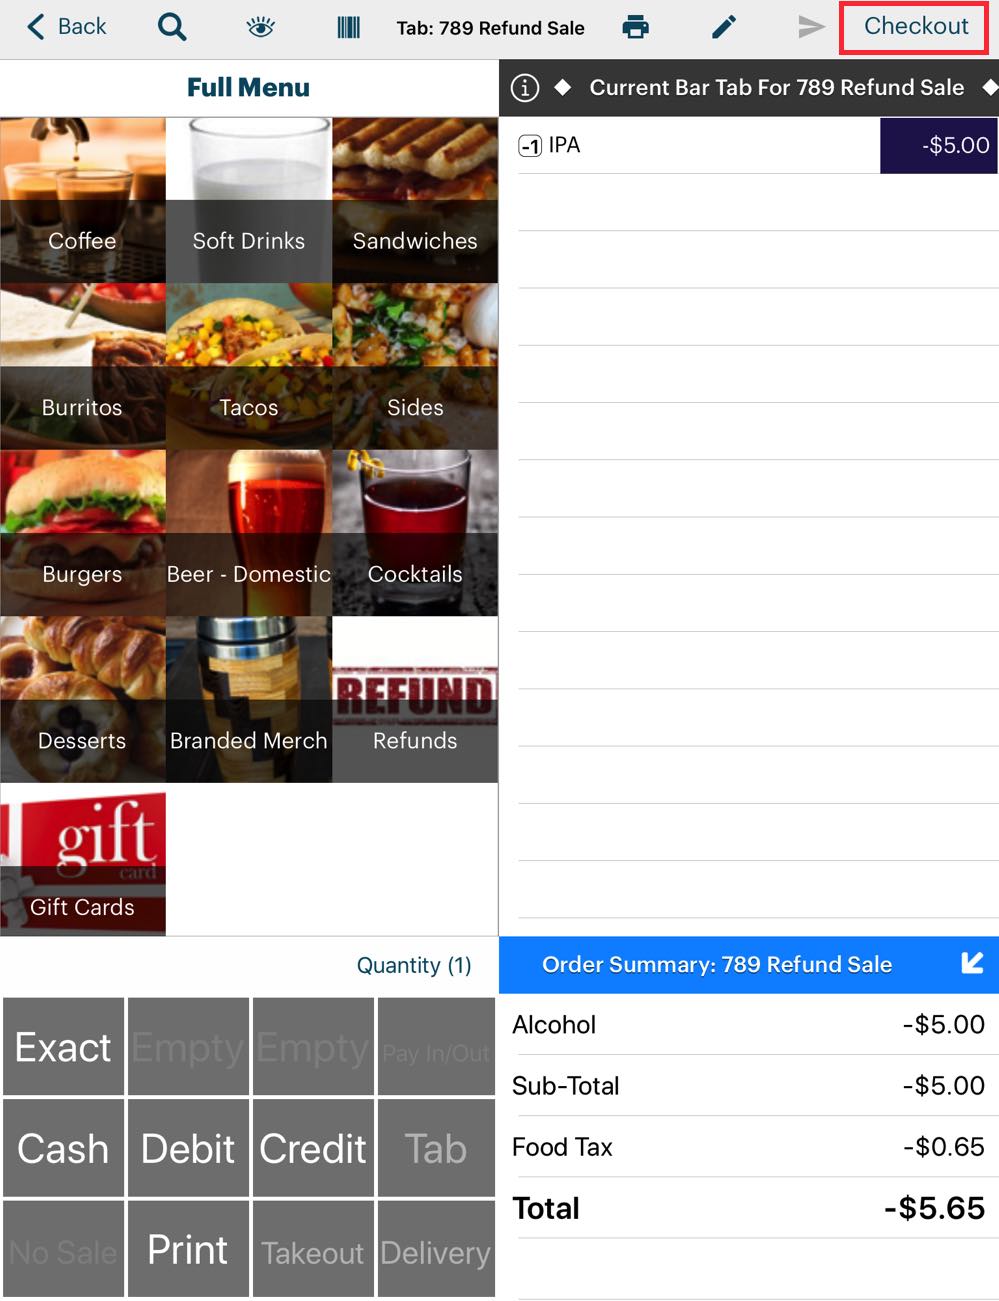
5. Tap Checkout. Ignore any warnings about unsent items.
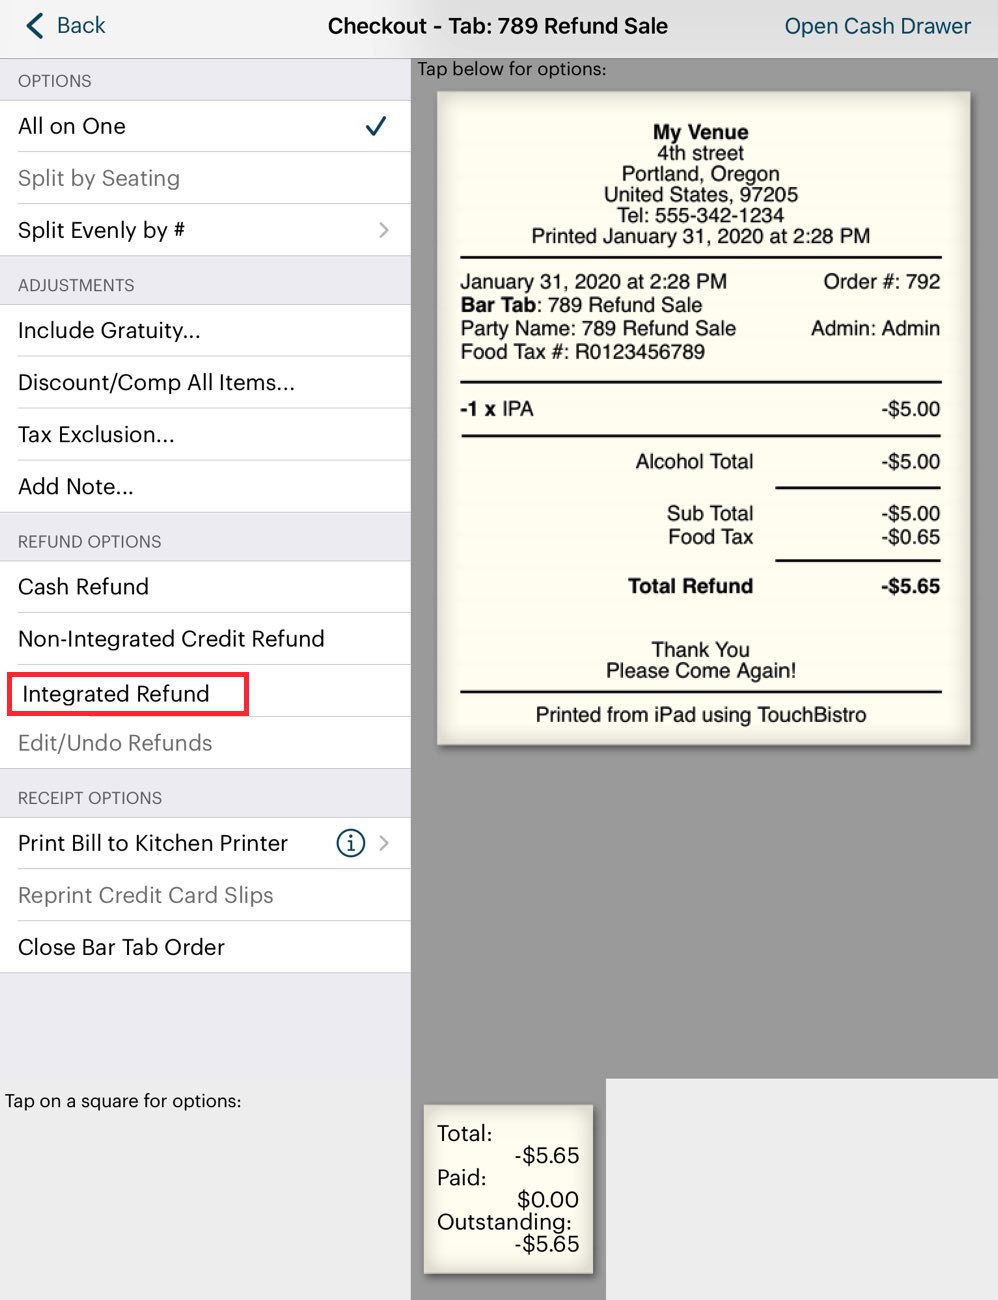
6. Tap the Integrated Refund option.
7. Follow the normal steps for performing a full refund.
Section 3. Performing a Refund for a Bill from a Previous Day
If you need to refund a bill from a previous day, it will no longer be found under the Closed Bills tab. Use the Bill / Guest Check History option.
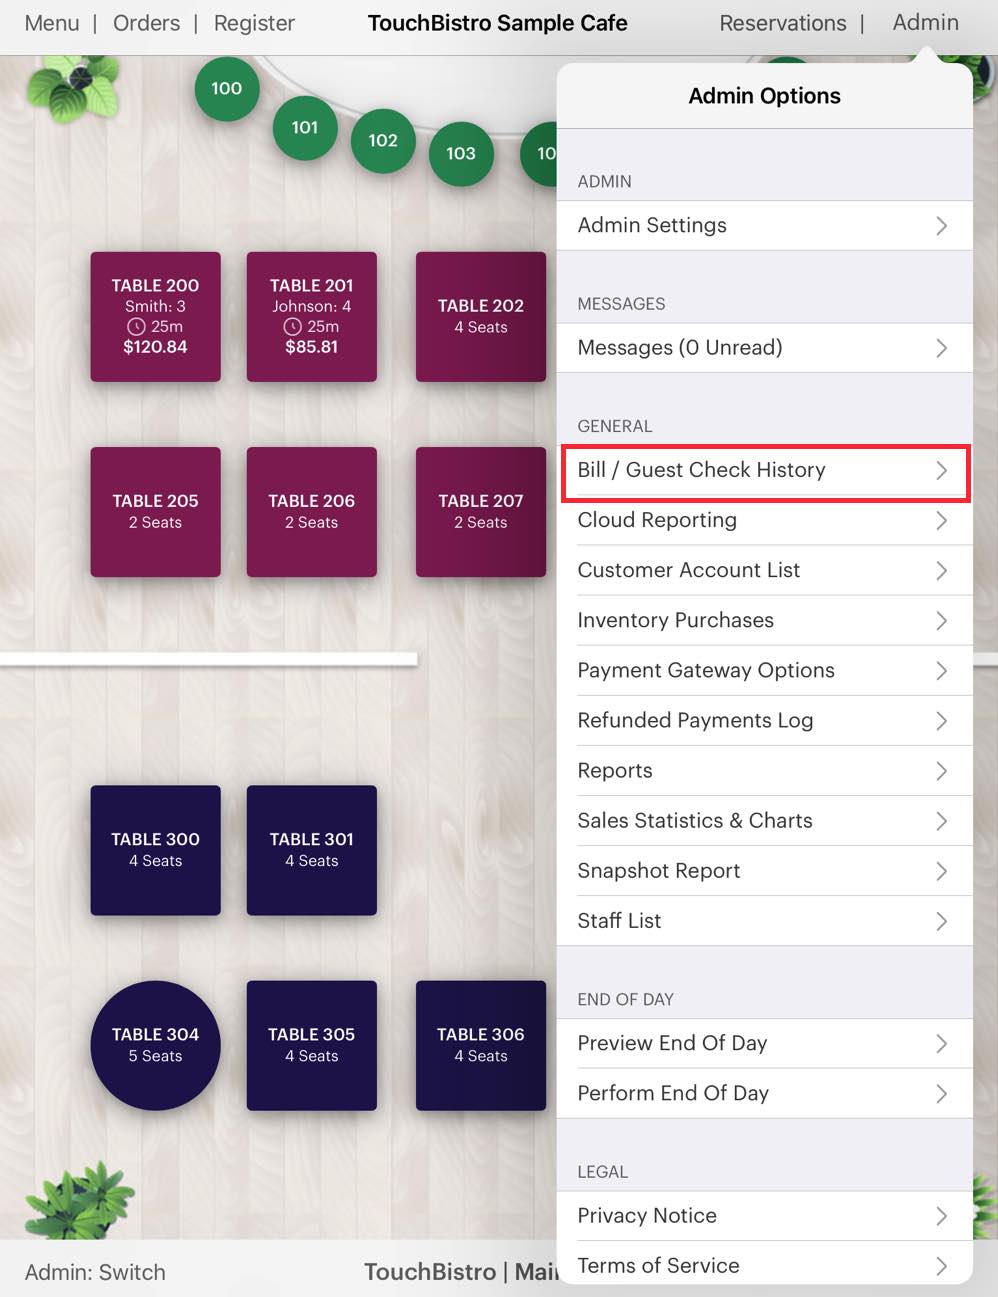
1. Tap Admin | Bill / Guest Check History.
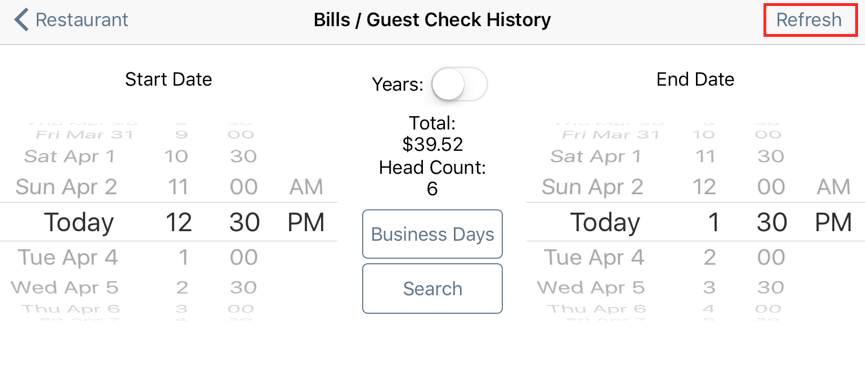
2. Use the date/time wheels to set a search range based on the date/time the bill was paid. Tap Refresh.
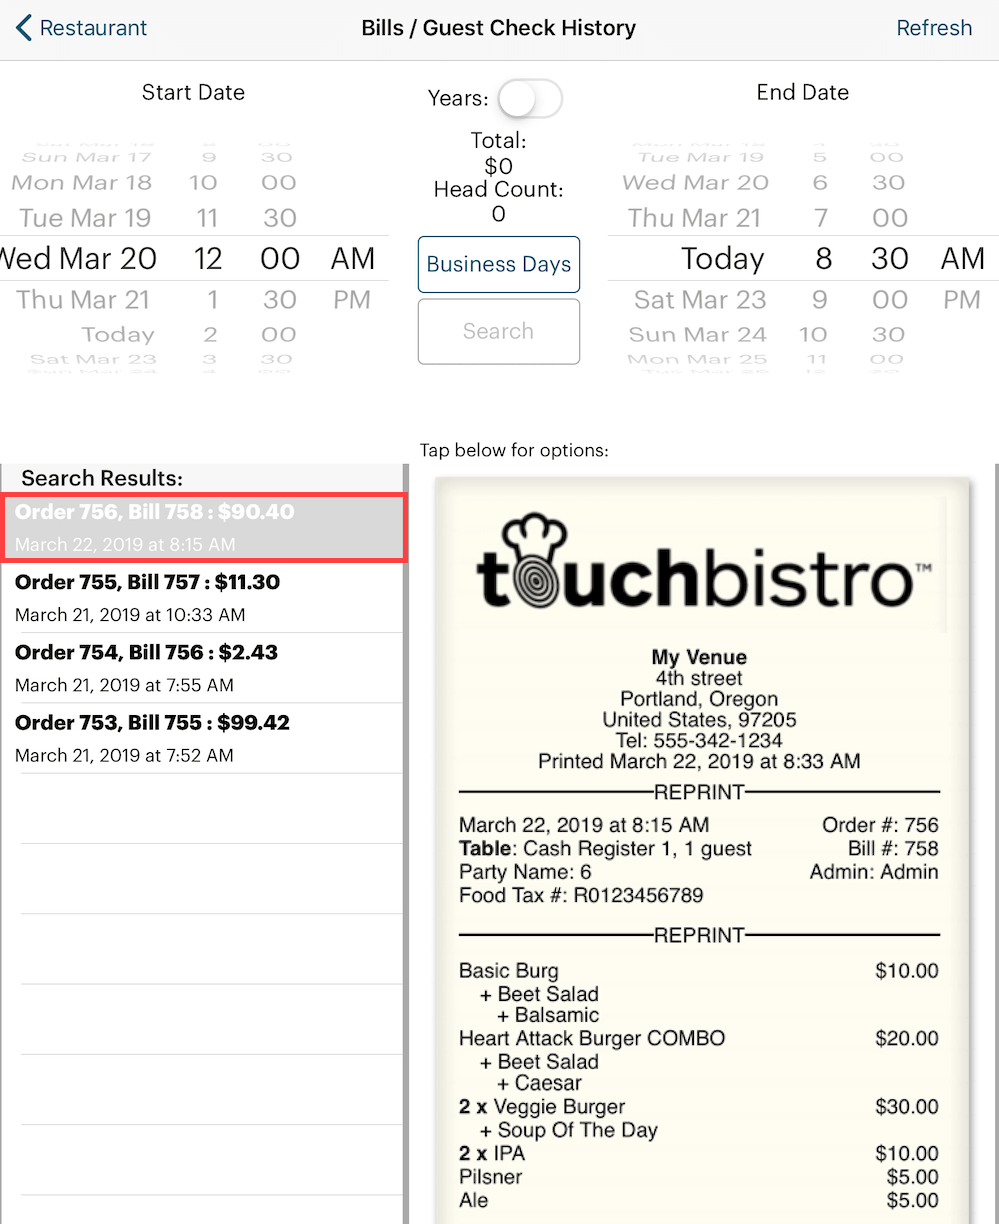
3. Locate the bill in the search results and tap it.
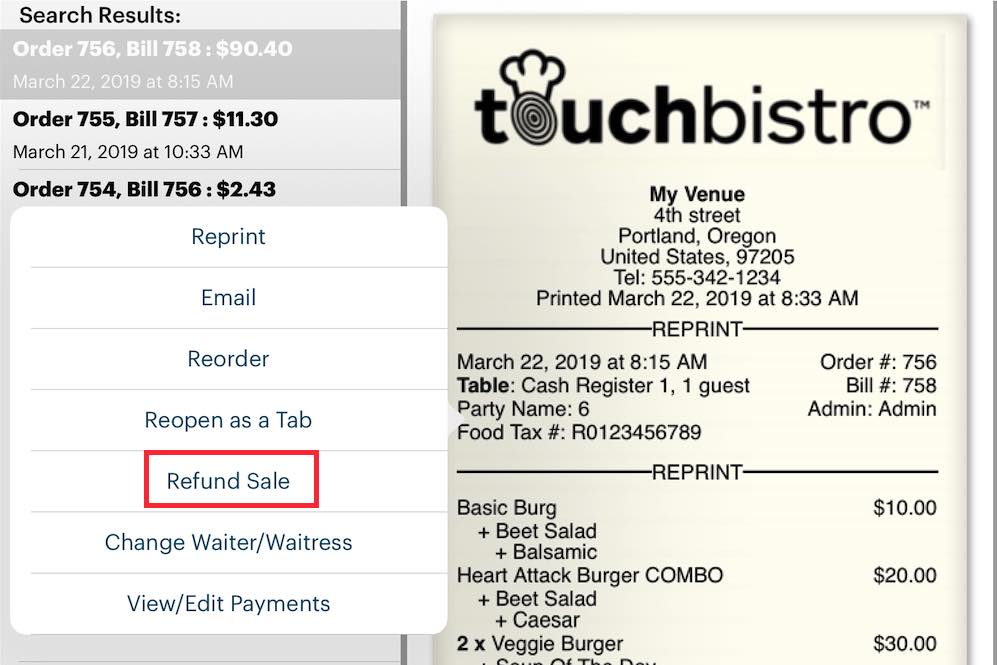
4. Tap Refund Sale.

5. Tap Full Refund.

6. Tap the Integrated Refund option.

7. Follow the prompts on the Worldpay terminal and swipe or insert the card when prompted.

7. Verify the amount and press F3 on the PINpad to confirm.

9. Close the sales refund invoice.
Section 4. Performing a Partial Refund
There may be times you need to perform a partial refund, instead of a complete refund of the bill. For example, you need to refund one item. In the below example, we’ll assume the customer returns before the end of day and the batch submission.

1. From your floor plan, tap Orders.

2. Tap the Closed Bills tab, tap the bill you wish to refund, tap More and then tap Refund Sale.
3. After tapping Refund Sale, TouchBistro creates the refund sale invoice under Bar Tabs. So tap that.

4. The refund sale invoice is automatically named after the bill number of the bill with the return. Tap it and tap Edit Order to open it (or right swipe on the order).

5. Examine the bill and determine what item(s) you’re refunding. In this example, we’re going to refund the price of the pilsner plus the tax.

6. So open the refund sale invoice, you will notice all items are negative quantities. However, we’re only interested in balancing out the refund for the pilsner. So we need to delete the items not refunded.
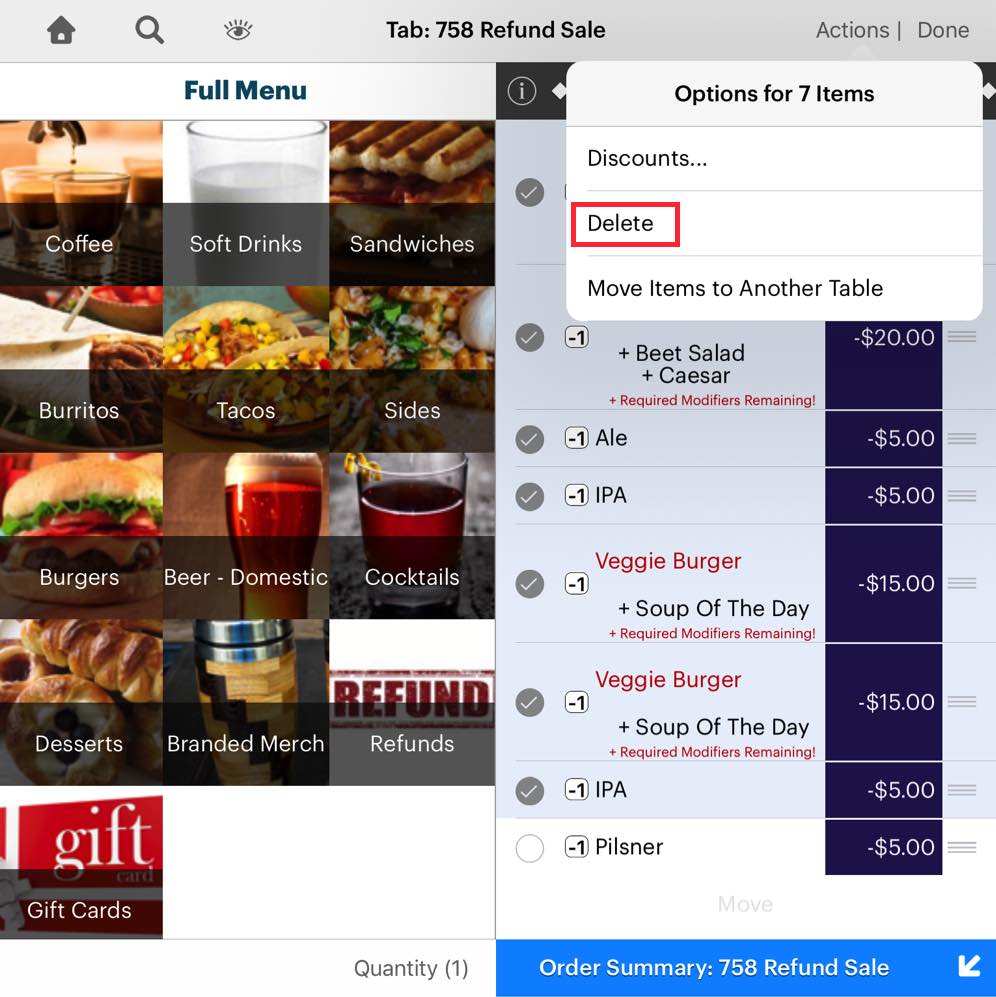
7. Tap each item and tap Delete or use the group action ![]() selection icon and delete several items at once.
selection icon and delete several items at once.
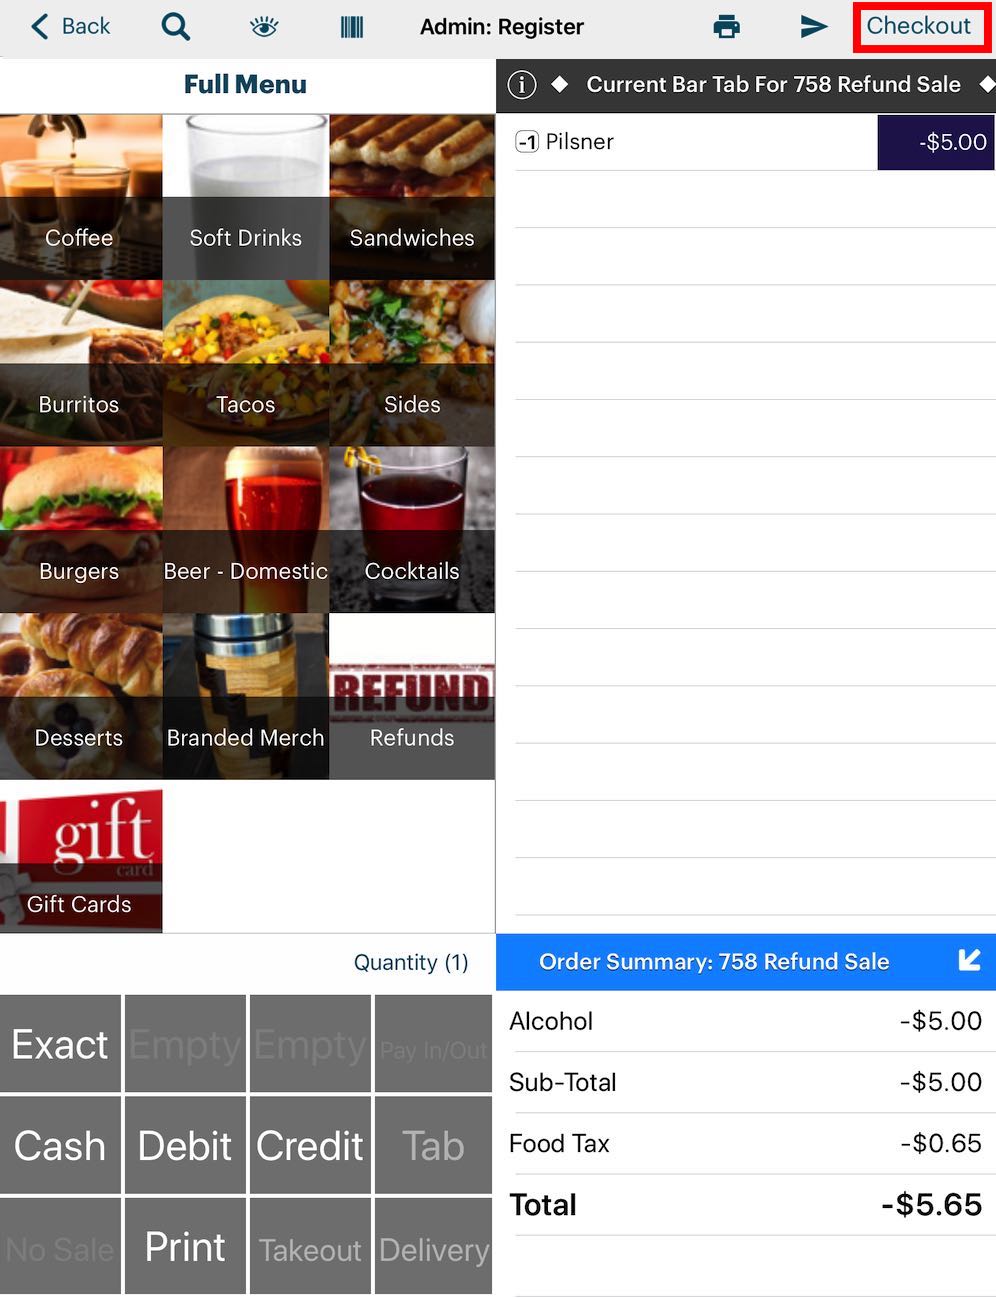
8. Verify only the items you want to refund remain and then tap Checkout.
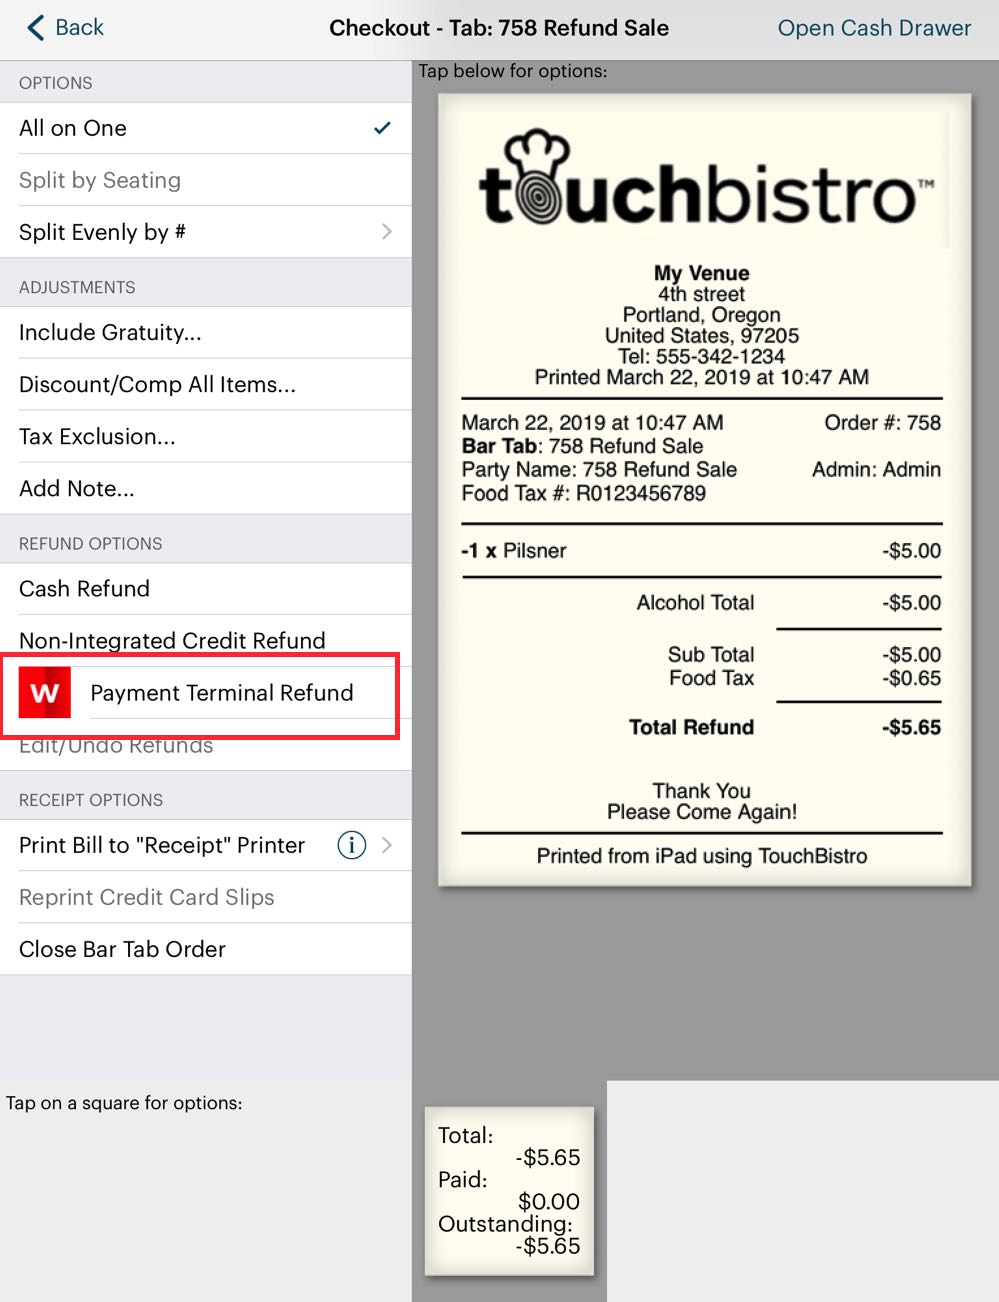
10. Tap the Refund option.

11. Follow the prompts on the Worldpay terminal and swipe or insert the card when prompted.
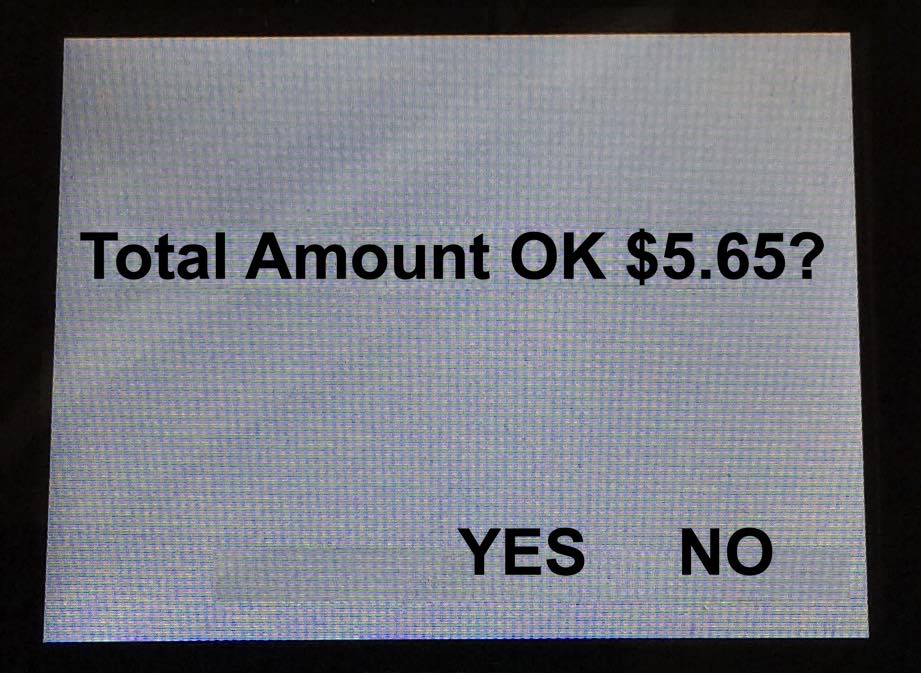
12. Verify the amount and press F3 on the PINpad to confirm.
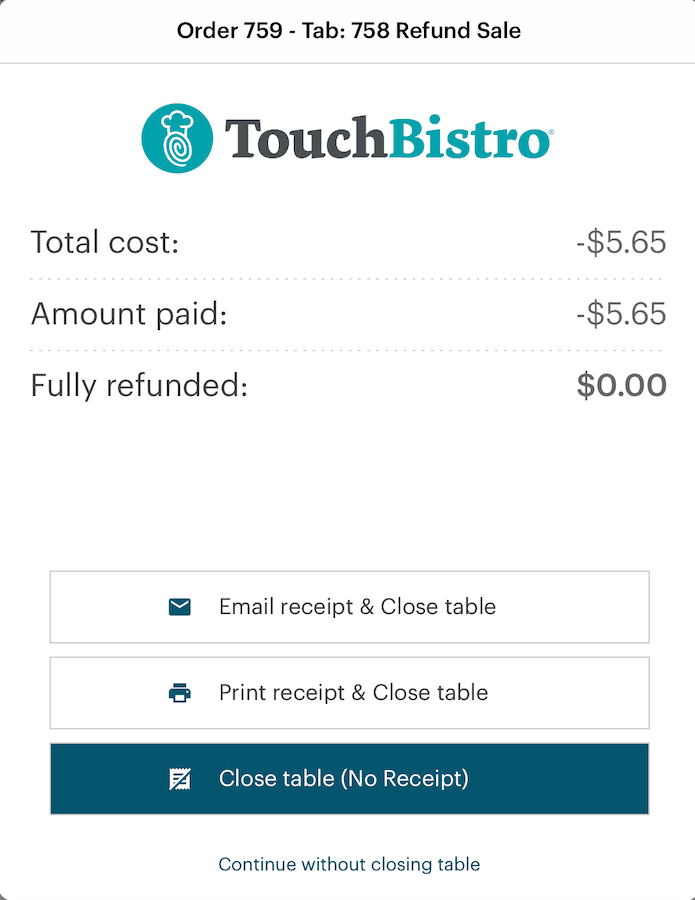
13. Close the sales refund invoice.
Section 5. Processing a Void
WorldPay uses a batch system. Money is not deposited into your merchant account until the batch is submitted. This has the advantage of allowing you to void transactions before they get submitted. It can be helpful if you have correct an error (for example, the customer used the wrong credit card). The advantage of using a void is no transaction is registered on the customer’s credit card report. Voids can only be performed as long as you have not submitted your batch. After a submission, you need to refund a purchase to correct any error.
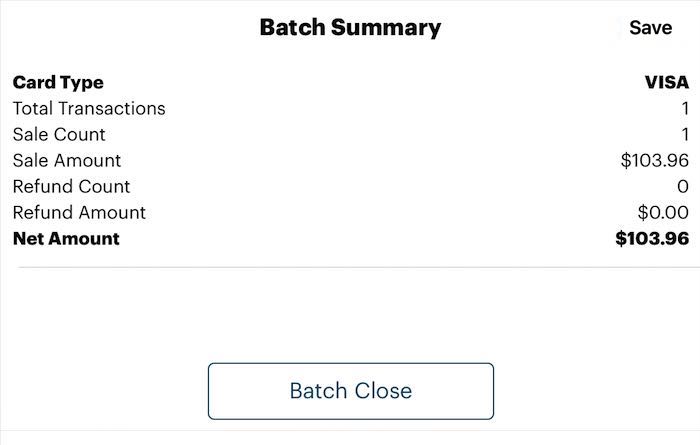
In the example image above, imagine we’ve done one transaction so far for the day. If we examined our batch (Admin | Payment Gateway Options), we would see that transaction (plus any tip left) in the batch. Until you tap Batch Close, you still have the opportunity to void that transaction. To void:

1. Tap Orders.
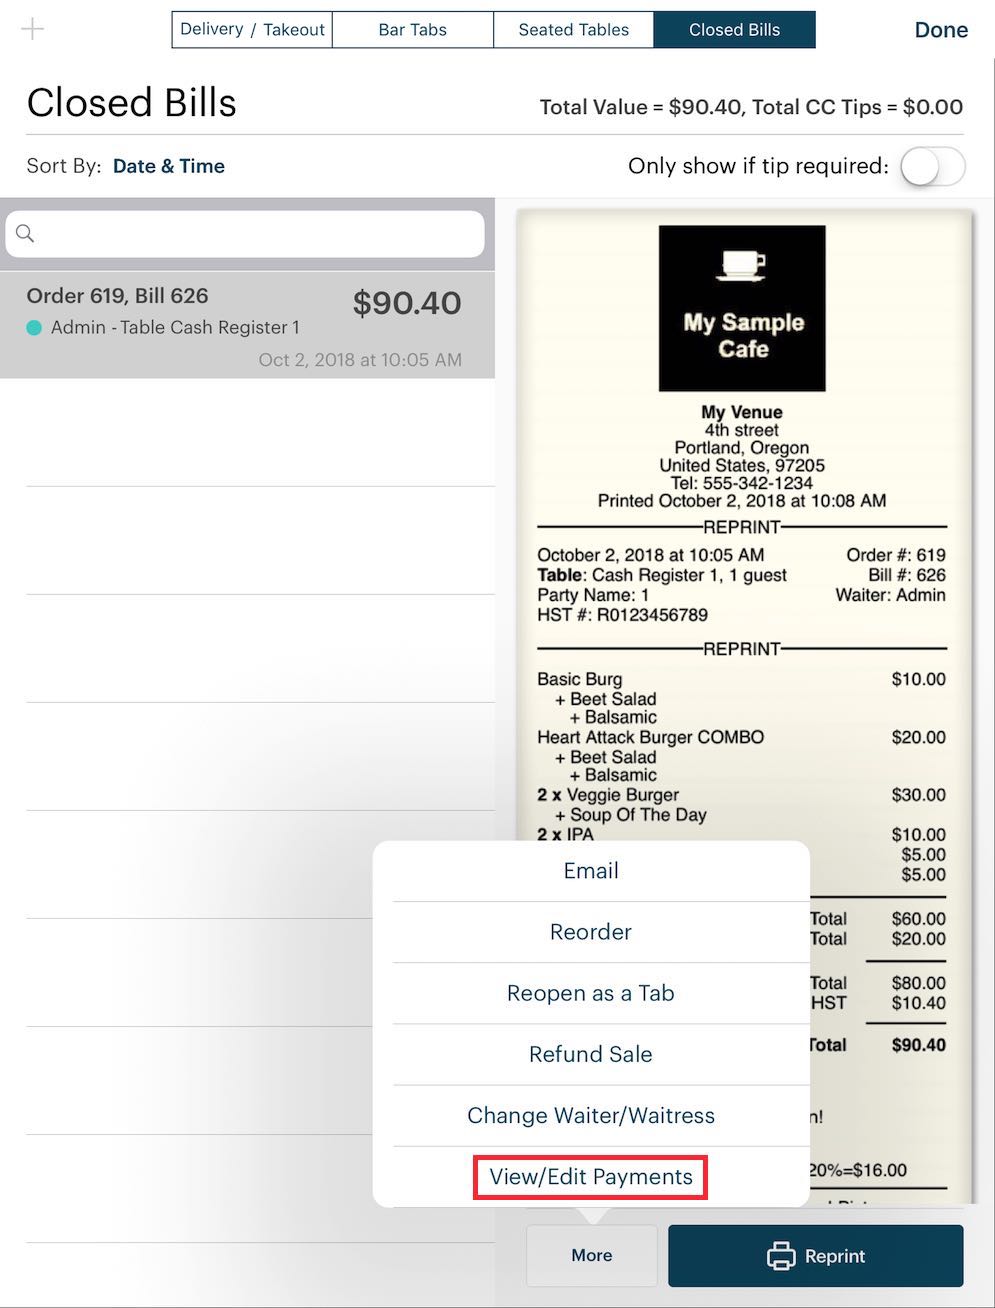
2. Tap the Closed Bills tab, tap the closed order you wish to void, tap More, and then tap View/Edit Payments.

3. Tap the Information ![]() icon associated with the payment and then tap Void Payment.
icon associated with the payment and then tap Void Payment.
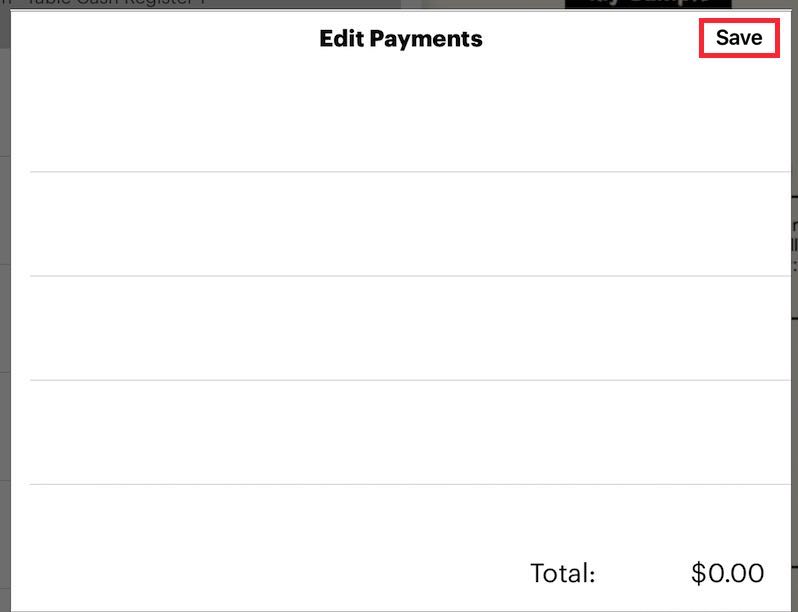
4. You will be given a warning. After acknowledging the warning, you will see your payment is now gone. Tap Done. At this point the payment has been deleted from the batch. There is no way to get it back.
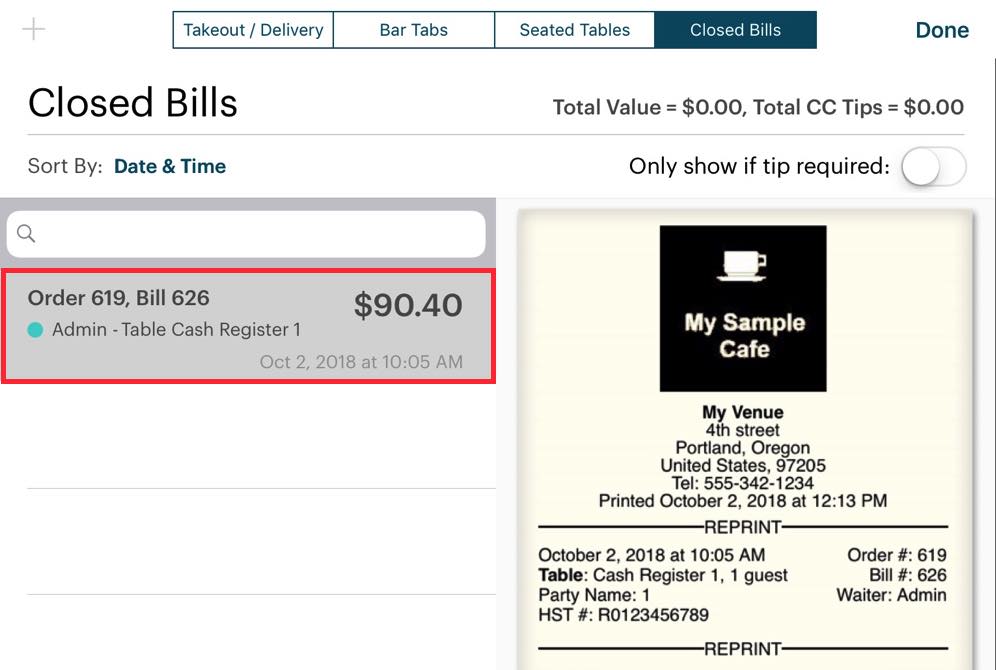
5. You are returned to the Close Bills tab. Although you voided the payment, the void does not delete the closed bill. It just removes the integrated payment. If you were to close your day at this point, you would have $90.40 in sales but no matching payment. You need to balance this voided bill with a non-integrated refund.
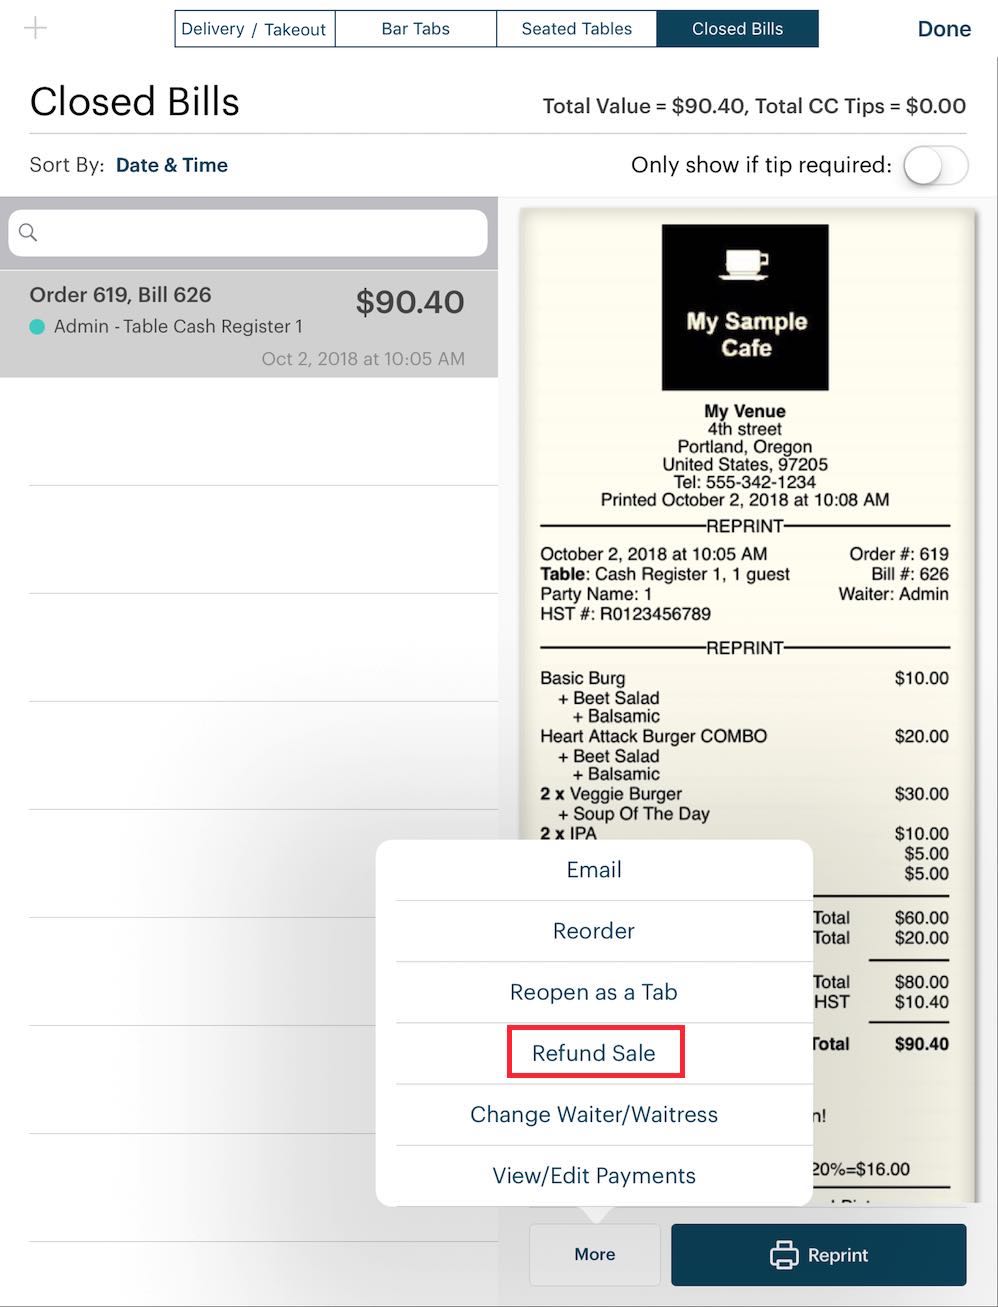
6. Tap the voided bill, tap More, then tap Refund Sale.
7. After tapping Refund Sale, TouchBistro creates the refund sale invoice under Bar Tabs. So tap that.

8. The refund sale invoice is automatically named after the bill number of the refunded bill. Tap it and tap Edit Order to open it (or right swipe on the order).

9. When you open the refund sale invoice, you will notice all items in the refunded bill are negative quantities. If the items have programmed mandatory modifiers, ignore the warning. If the refunded items are inventoried, TouchBistro returns the inventory count. As well TouchBistro correctly calculates the refunded tax. Tap Checkout to close out this refund invoice.
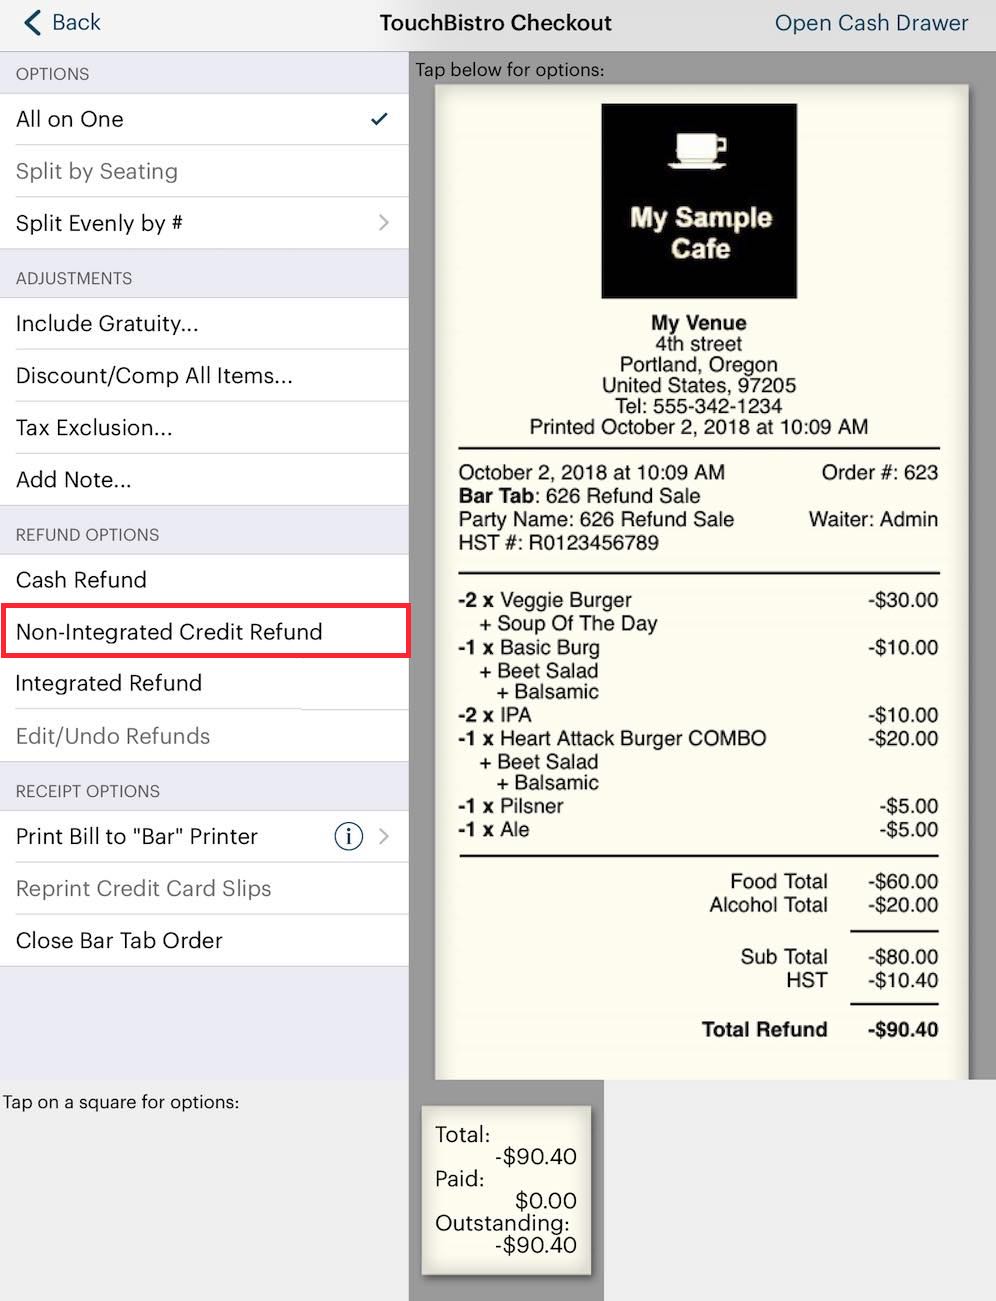
10. Do not tap Integrated Refund option at this point. Close this refund invoice using the Non-Integrated Credit Refund option.
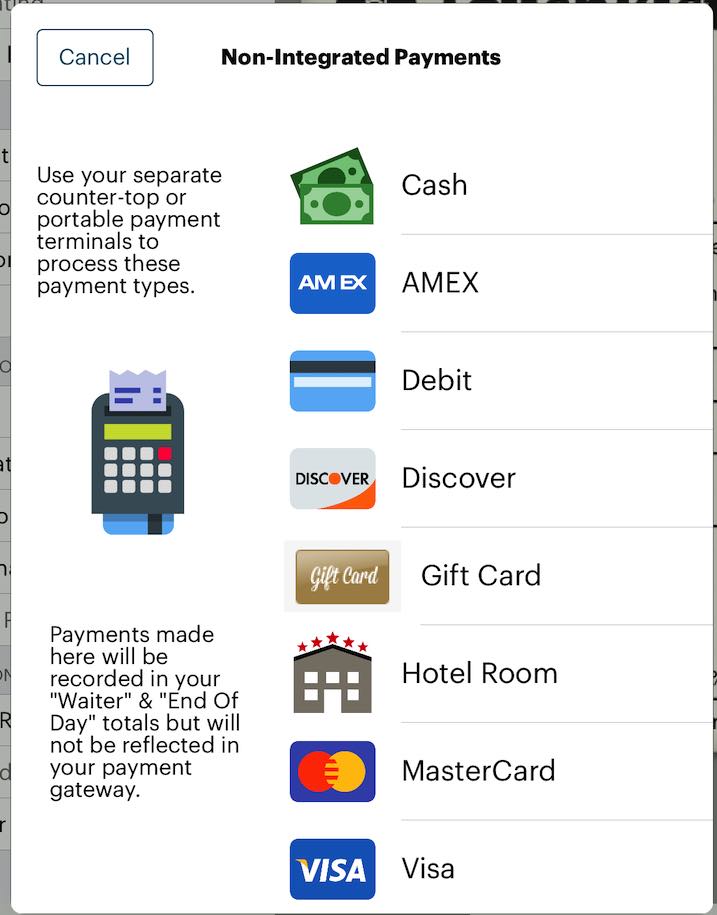
11. Select the card type you voided. For example, if you voided a Visa transaction, tap Visa.
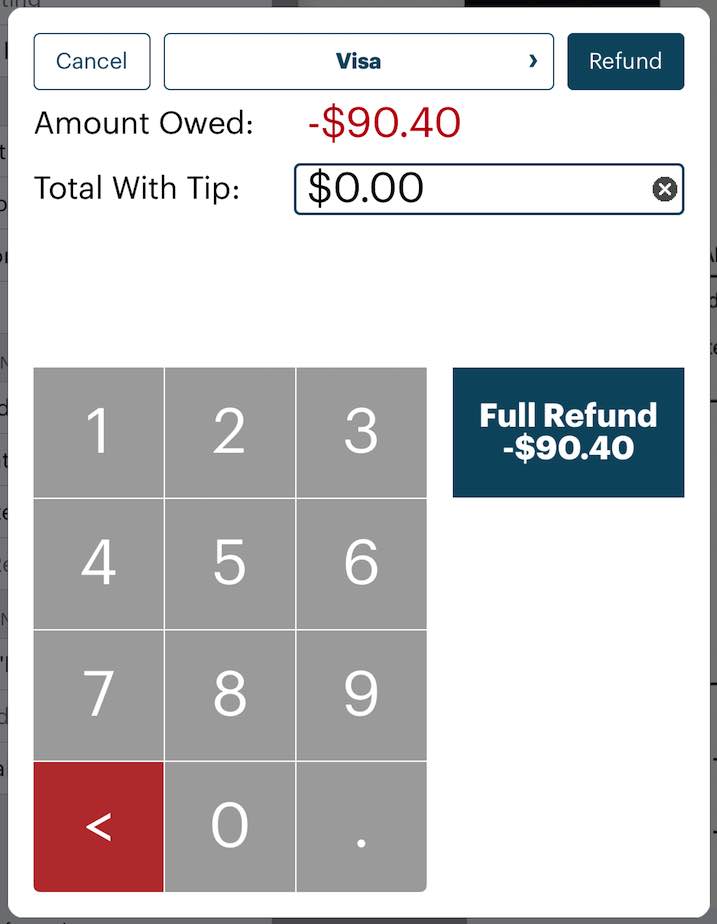
12. Tap Full Refund.

13. Close the sales refund invoice.
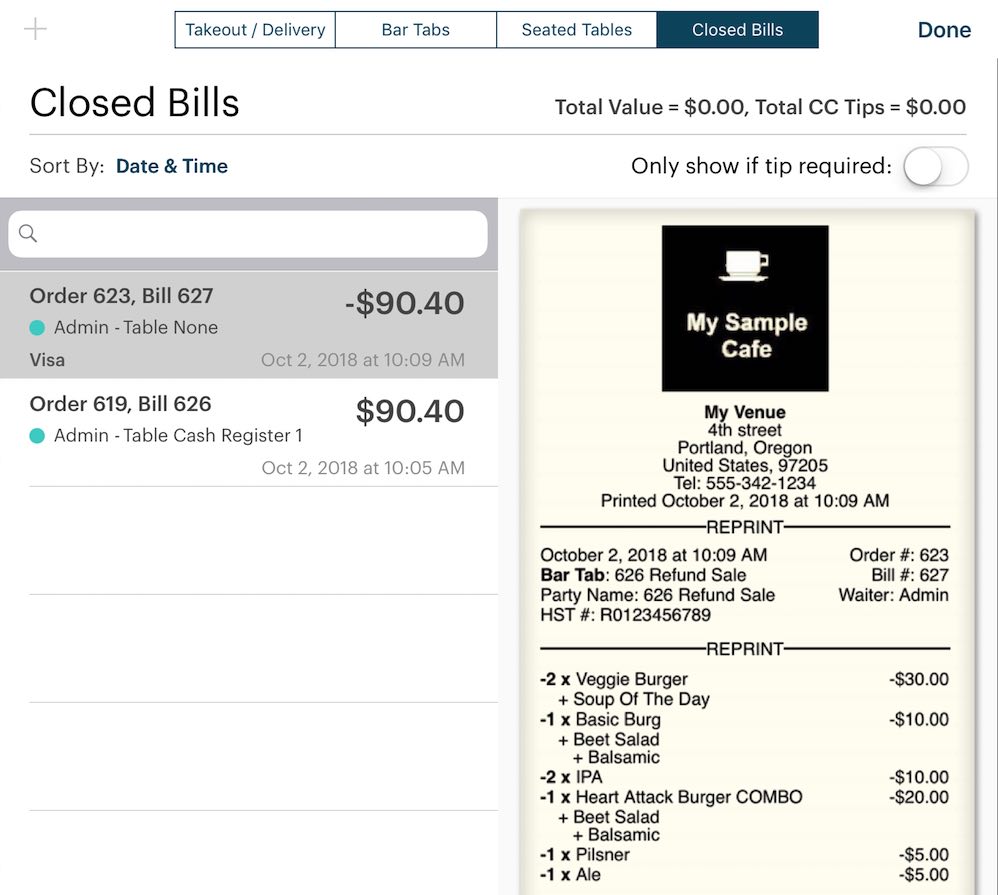
14. If you were to return to your Closed Bills tab, you’d see your original closed bill and the negative refund that balances out the void.

15. Similar to a refund, if this was the only transaction you did for the day, your sales would be properly balanced out to zero.

16. As well if you examined your batch, you would find it empty (or less the bill plus tip amount if there were additional, non-voided charges).
Section 6. Doing a Manual Refund

1. From the floor plan layout screen, tap Orders.

2. Tap the Closed Bills tab, tap the closed order you wish to manually refund, tap More, and then tap View/Edit Payments.
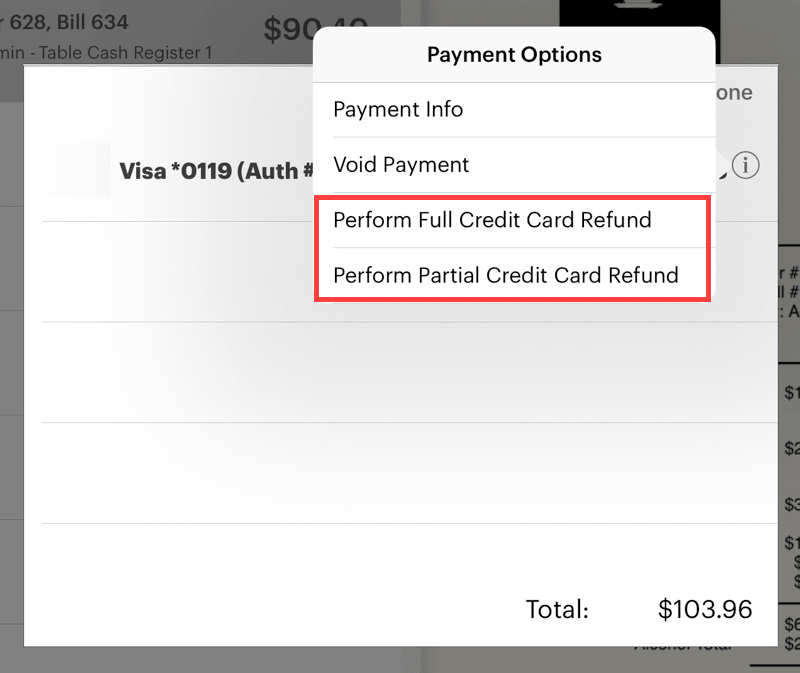
3. Tap the Information ![]() icon associated payment and tap either Perform full Credit Card Refund or Perform Partial Credit Card Refund. The return will appear on the credit card bill and can be performed if you’ve submitted a batch.
icon associated payment and tap either Perform full Credit Card Refund or Perform Partial Credit Card Refund. The return will appear on the credit card bill and can be performed if you’ve submitted a batch.
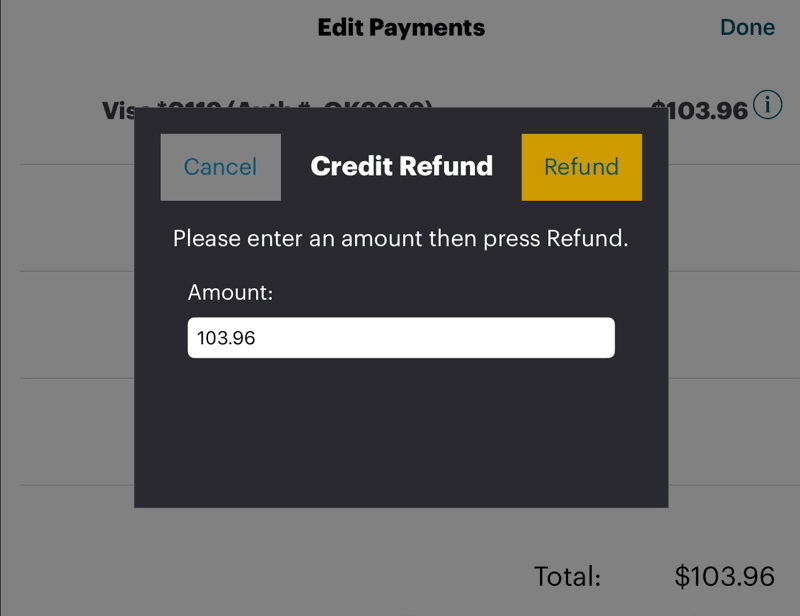
4. Enter the amount and tap Refund.
5. Confirm you want to process the return.
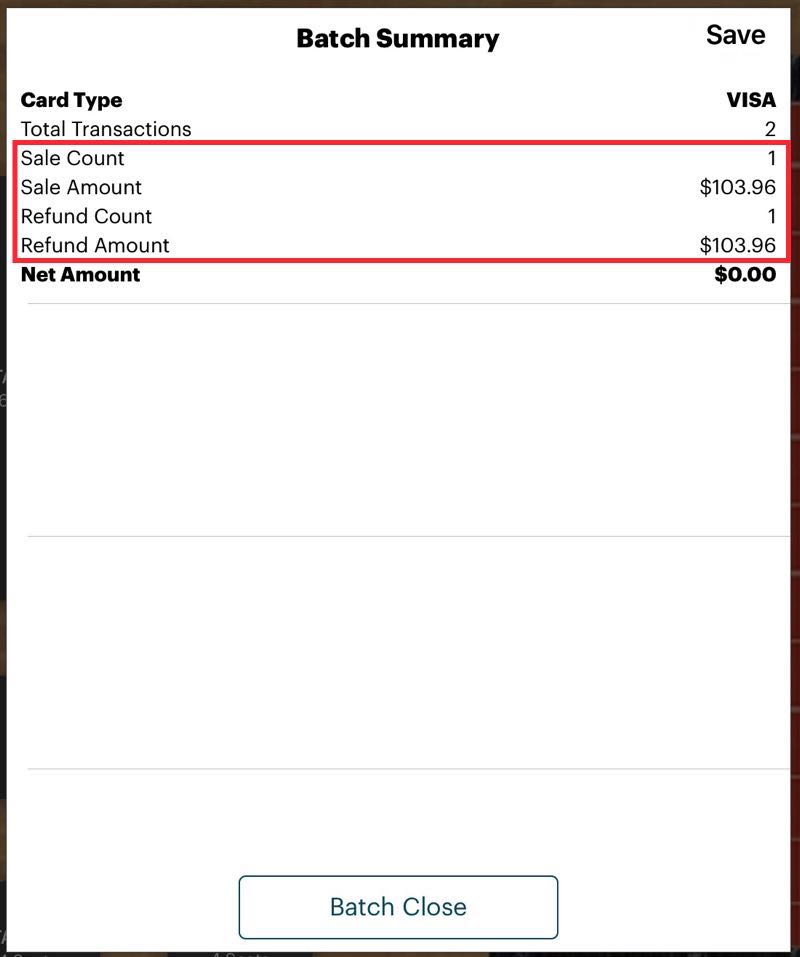
6. Unlike a void, a manual refund will submit both the original charge and the refund in the batch. A refund item may show up on the customer’s credit card statement if you use this option.
Chapter 3. Closing Your Batch
Before you close your day, you should close your batch. When you close your batch, TouchBistro submits credit card payments to Worldpay so the funds can be deposited in your merchant account.
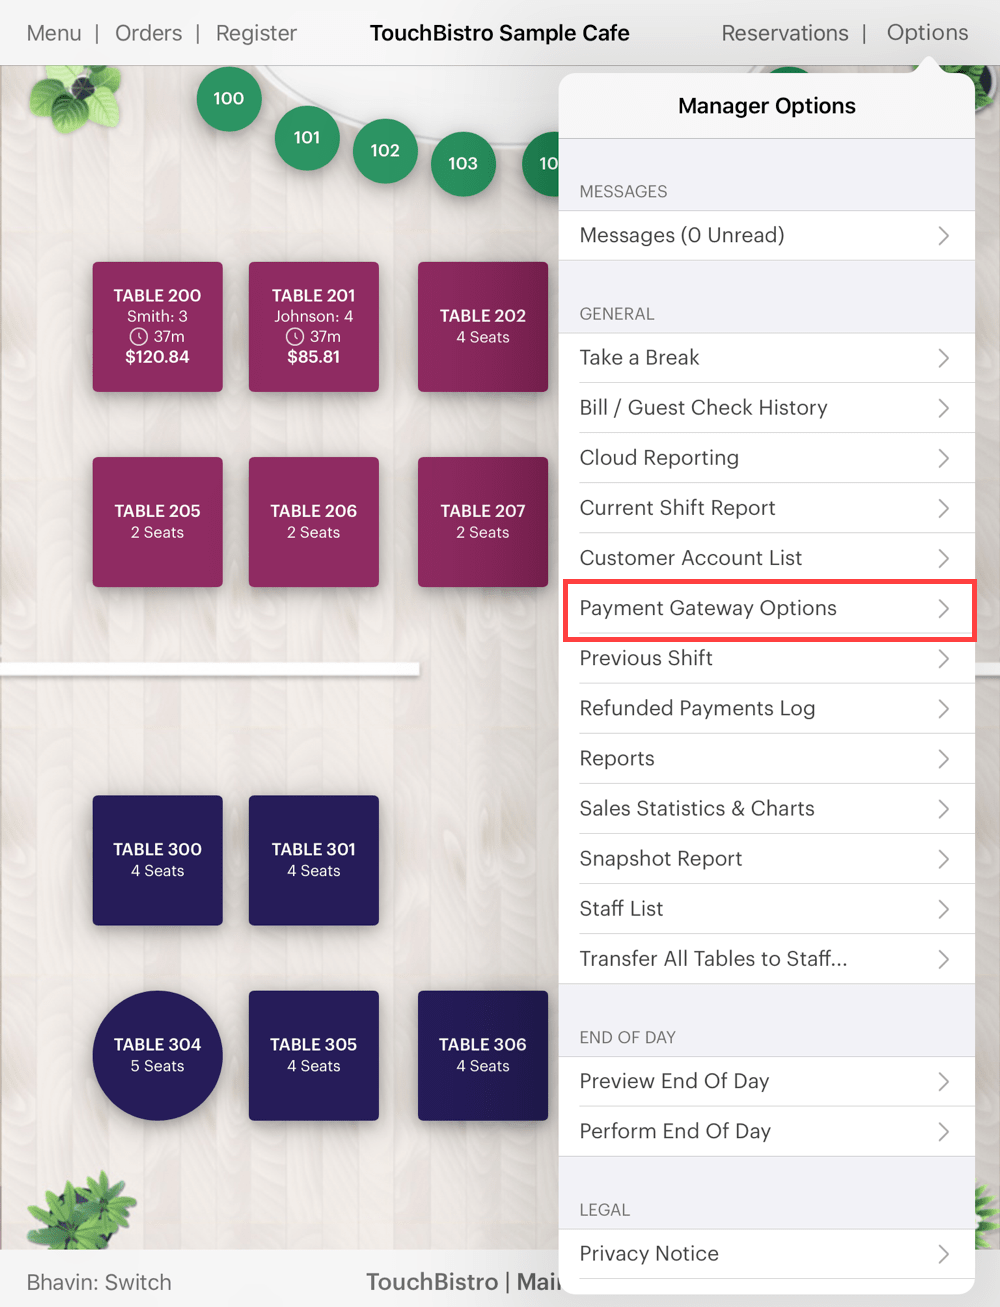
1. Tap Admin | Payment Gateway Options.
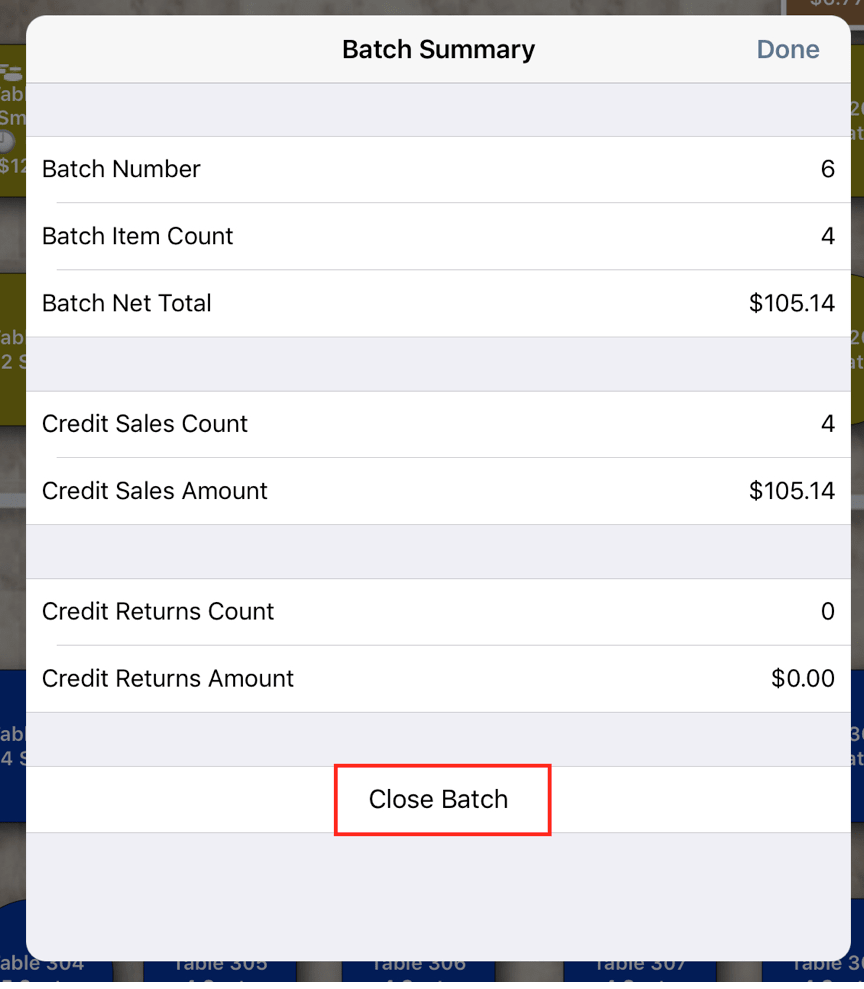
2. Tap Close Batch.


 Email
Support
 Frequently
Asked Questions
