What’s New in TouchBistro 8.7
Table Of Contents
Chapter 1. Are You Using the KDS App?
Section 1. Please Read Before Updating to TouchBistro 8.7
Section 2. KDS 2.1 New Features
1) Intelligent Ticket Size Scaling
Chapter 2. New iPad Menu Item List Report
Chapter 3. New Printers Supported
Chapter 4. Support for New Colombian Receipt Requirements
Chapter 5. Pre-Auth Tip Correction in TB Payments
Chapter 6. Order Input Screen Now Has Better Screen Size Scaling
Section 1. WISK.AI Integration
Chapter 1. Are You Using the KDS App?
Section 1. Please Read Before Updating to TouchBistro 8.7
In conjunction with the TouchBistro 8.7 update, we have released a KDS 2.1 update. TouchBistro 8.7 is designed to work only with the newer KDS 2.1 update. That is, if you update TouchBistro to 8.7, you cannot send tickets to any version of KDS (2.0, 1.2, 1.1, or 1.0). Likewise, if you update your KDS to 2.1, any version of TouchBistro lower than 8.7 (8.6, 7.x, 6.x) will not be able to send tickets to KDS 2.1.
1) Minimum iOS for KDS
KDS 2.1 requires the iPad running the KDS to be updated to iOS 9.x. The only generation of iPad that can’t be updated to 9.x is the original iPad model. If your KDS iPad is still running an iOS lower than 9.x, you will need to update your KDS iPad’s iOS before installing the KDS update.
Section 2. KDS 2.1 New Features
1) Intelligent Ticket Size Scaling
In previous versions, we provided two options for changing the ticket size.
1. Settings had an option that let you change the size of the ticket font.
2. On the Menu bar, there was a drop-down box that let you change the ticket width.
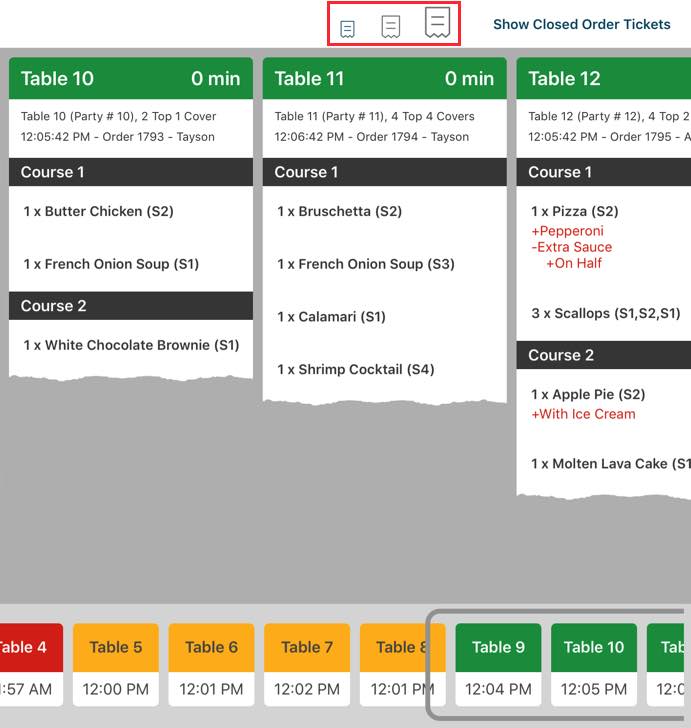
KDS 2.1 has removed these options and rolled them into three scaling icons on the menu bar (highlighted in red above). As you go from the small to large ticket size, KDS now automatically adjusts font size to match the selected ticket width.
2) Restoring a Closed Ticket
If you accidentally closed a ticket, you can now restore it.

Tap on Show Closed Order Tickets.
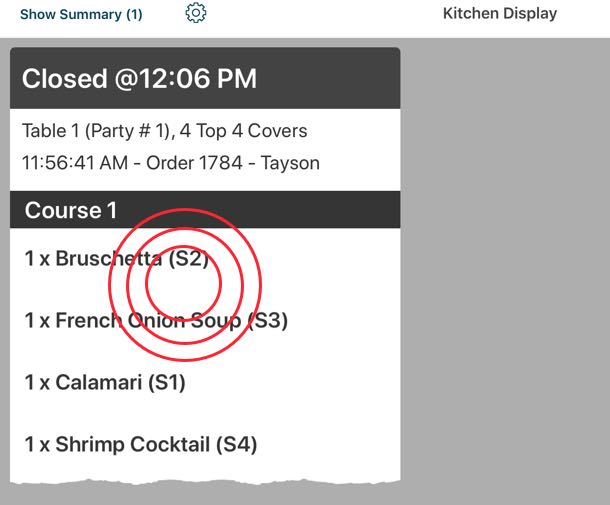
Tap three times on the ticket you wish to restore. It will be restored to the open ticket screen. The ticket age counter will not reset.
Chapter 2. New iPad Menu Item List Report

Under Admin | Reports | Menu, you can now generate a Menu Item List Report.

The Menu Item List Report lets you view (and export as CSV) a list of all your current menu items (grouped by Menu Category), their current menu prices, and their costs. You can use this report to quickly verify the menu item prices as well as see menu items that lack food cost details or have unusually high/low food costs. As well, this report can be useful if you need to export your menu and prices. For example, you want to use the raw export text as the basis for a printed menu or for posting online.
Chapter 3. New Printers Supported
Section 1. mC-Print3
TouchBistro now supports Star’s new multi-interface mC-Print3 thermal printer. The mC-Print3 comes in two model types: one that supports both an Ethernet and USB/Lighting cable connection and one that additionally supports a Bluetooth connection.

To support each mC-Print3 interface, we’ve added mC-Print3 mode options on the Printer setup screen.
1) Ordering the Printer
Currently TouchBistro has a limited supply of these printers. We anticipate having quantities in stock in the coming months. However, if you’ve purchased one from another source, you can use it with the 8.7 update.
Section 2. TM-T88VI
TouchBistro has added support for the new Epson TM-T88VI via its Ethernet port. Unlike the Star printers, you cannot set the TM-T88VI printer to a static IP through the TouchBistro Printer setup screen.

To set up a static IP, you will need to access your iPad’s app store install an app on your iPad called the Epson TM Utility. You can use that app to set the static IP address.
Chapter 4. Support for New Colombian Receipt Requirements
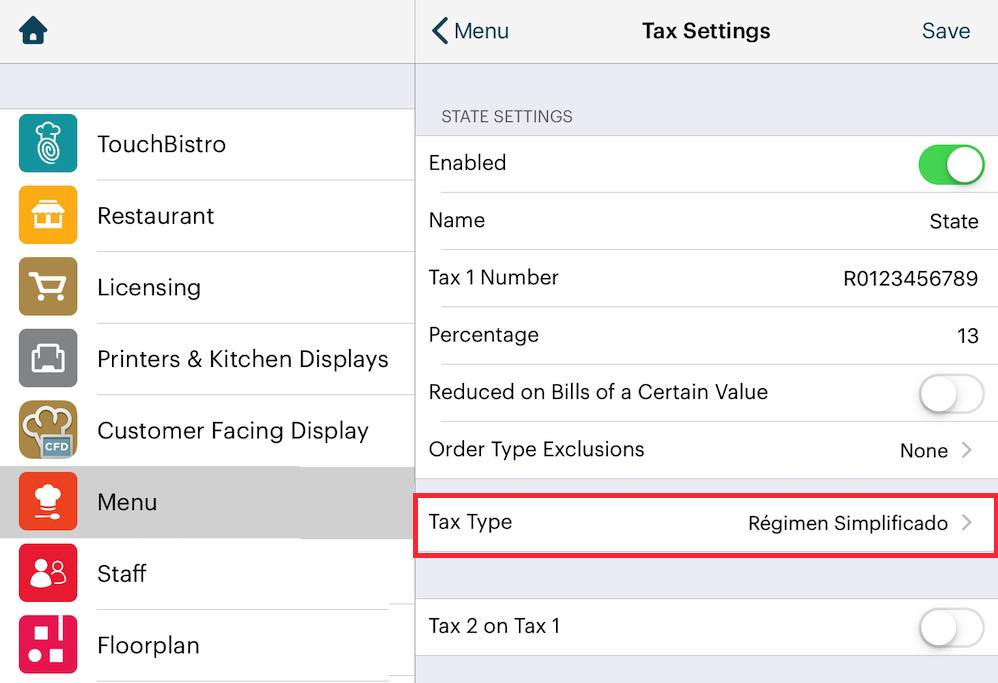
If your iPad’s region setting is set for Colombia, the Tax Settings screen will offer you a Tax Type setting. Select your appropriate tax type.
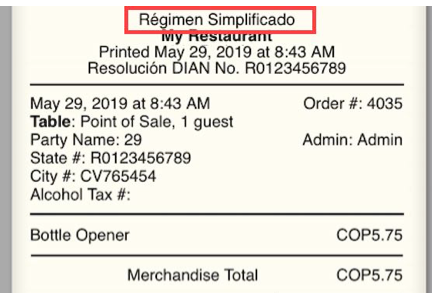
Once selected, per Colombia’s receipt requirement, the selected tax type will appear at the top of the guest check.
Chapter 5. Pre-Auth Tip Correction in TB Payments
If you are using pre-auths (tips written on the credit card slip), TB Payments now has a feature that lets you correct an improperly entered pre-auth tip.
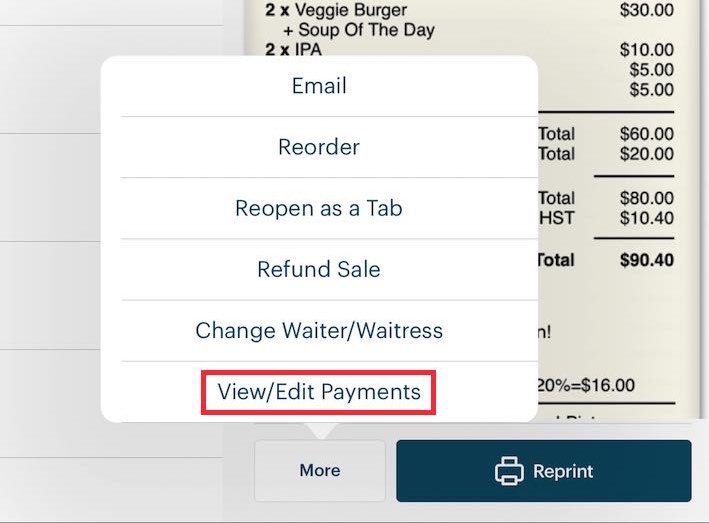
From the Closed Bills tab, tap the bill with the incorrectly entered tip and select View/Edit Payments.

Select the new Adjust Amount option.

Enter the correct tip in the Tip field.
Note: this feature is only available if the closed bill is still in the batch. TB Payments automatically submits the batch at 11:30 PM EST.
Access to this feature is only available to the Admin account and, typically, a Manager staff type.
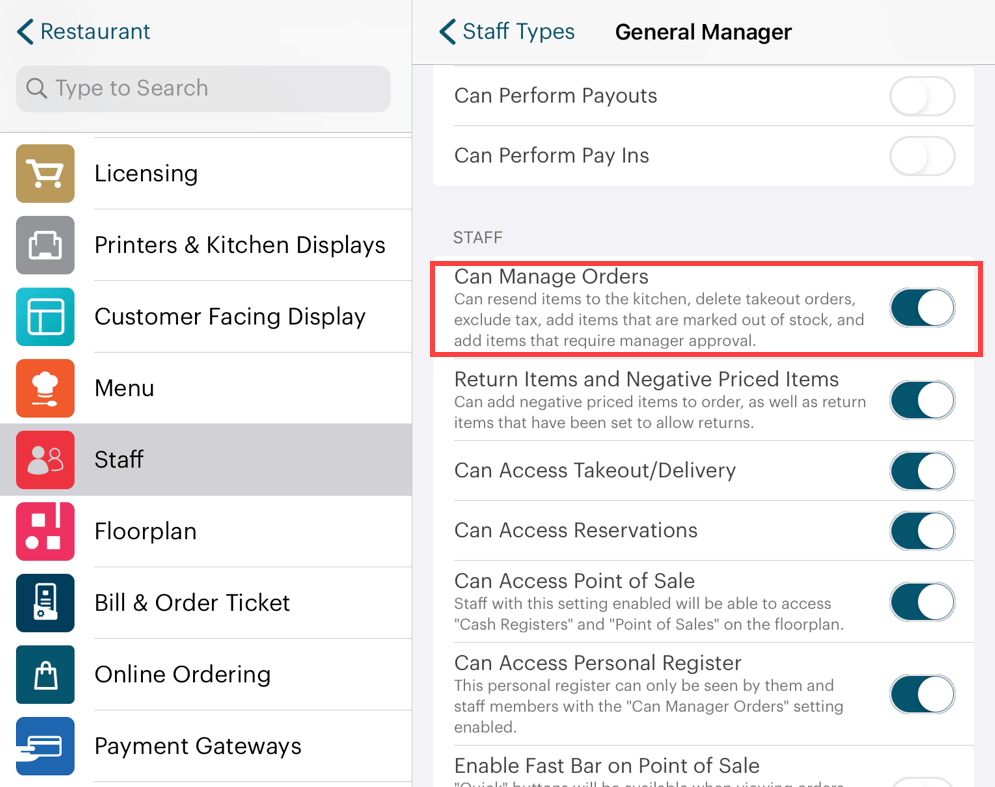
You can enable access or disable access for the staff type by enabling or disabling the staff type’s Can Manage Orders permission.
Chapter 6. Order Input Screen Now Has Better Screen Size Scaling
The Order input screen’s menu area now scales better, particularly for the new generation of iPads with 10.5″ and 11″ screen sizes. Improved scaling will be particularly noticeable if you use TouchBistro in landscape mode.
Chapter 7. Cloud Portal
Section 1. WISK.AI Integration
TouchBistro now integrates with WISK.AI. WISK.AI can be enabled via TouchBistro Cloud. WISK.AI offers advanced restaurant and bar analytics and forecasting based on artificial intelligence. See what difference weather or time of day makes on sales of a particular item. Quickly see patterns between your best and worst selling items and use that knowledge to boost your profits quickly.
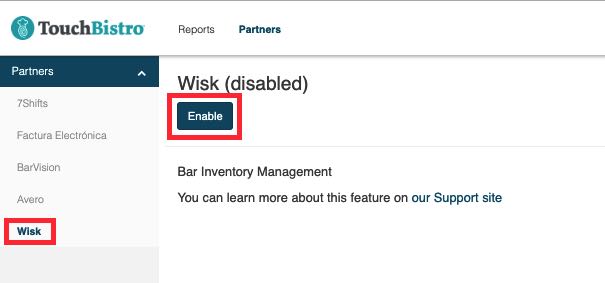
Access the Partners page and enable WISK.AI. Once enabled, TouchBistro will send sales data to WISK.AI’s platform.
Section 2. Avero Enablement and Day Part Setting Updated
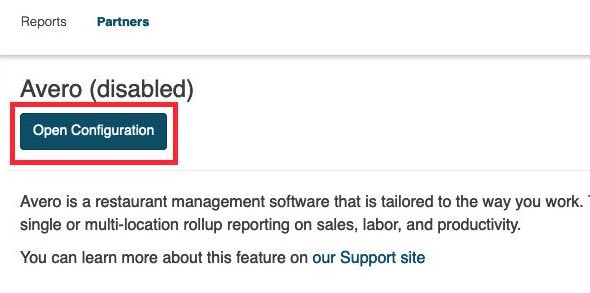
If you are using the Avero integration, enable/disable and day part configuration has been moved to a standalone configuration page.
1) Enable/Disable
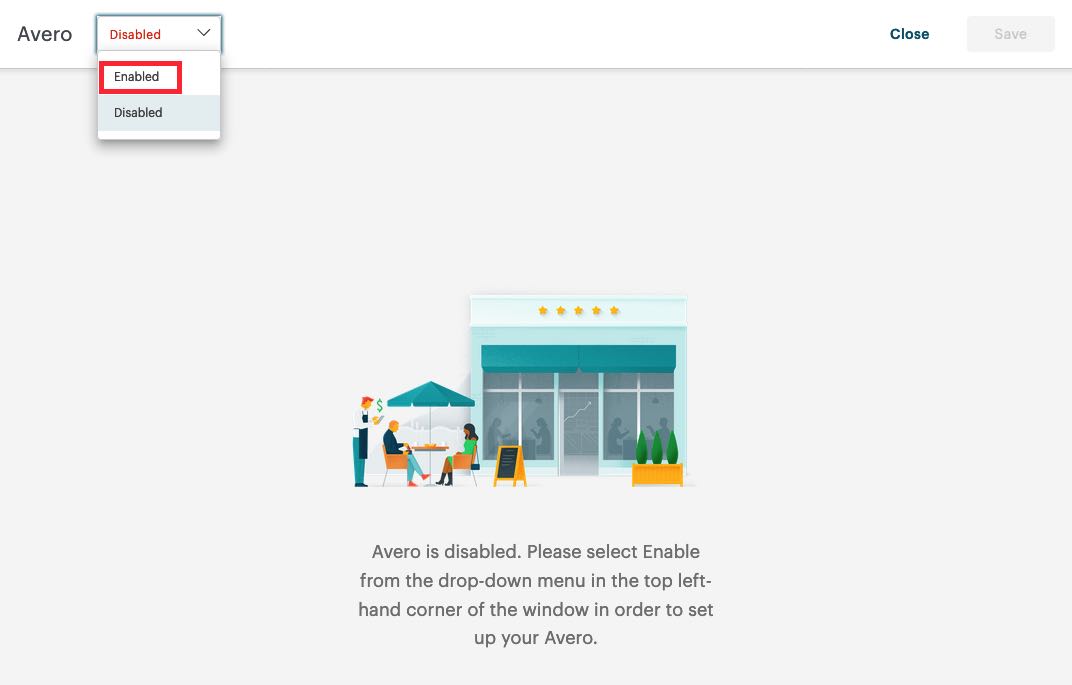
After clicking Open Configuration, you can now enable or disable the integration from the drop-down dialog box.
2) Day Part Editing
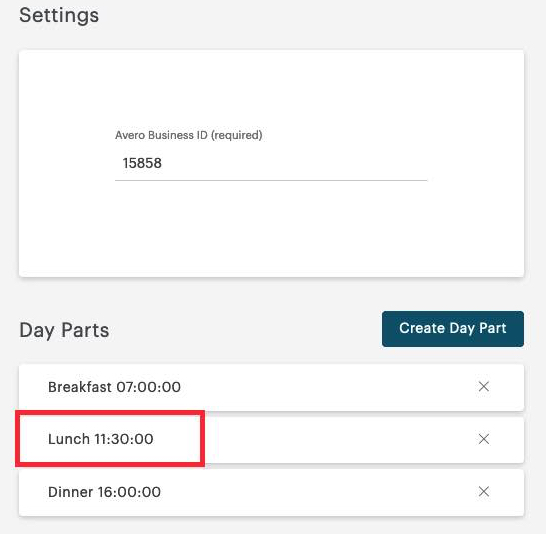
If enabled, you will see your Avero Business ID and Day Parts for editing.

Any changes you make are now saved by clicking Save. Click Close to return to your Cloud portal.


 Email
Support
 Frequently
Asked Questions