Reservations – Working with Employees
Table Of Contents
Chapter 2. Creating Profiles for Employees
Section 1. Creating Additional Admin Users
Section 2. Creating Employees Who Can Open TouchBistro Reservations from the Sign-In Screen
Section 3. Creating Employees Who Cannot Open TouchBistro Reservations
Section 4. Adding an Extra Layer of Security for Admin Access
Section 5. Restrict Locking and Unlocking of Tables and Hours
Chapter 3. Adding Servers to Timeslots
Chapter 4. Assigning Servers Tables
Chapter 5. Table and Cover Statistics
Chapter 1. Introduction
Your admin profile (username/password) should only be used to configure TouchBistro Reservations for your venue. You should not allow non-admin staff members use your login and passcode to manage day-to-day reservations, walkins, and waiting lists.
To allow staff to use TouchBistro Reservations without granting them access to administrative areas of the program, you should set up employee profiles and assign them passcodes. Employees can then use their passcode to manage reservations, walkins, and waiting lists.
Chapter 2. Creating Profiles for Employees
You can create three kinds of profiles for employees:
1. Trusted employees with Admin rights.
2. Employees who can open TouchBistro Reservations from the sign-in screen.
3. Employees who have passcode only access.
Section 1. Creating Additional Admin Users
You should only give Admin access to a trusted staff member. If the staff member leaves, you should immediately change the staff member’s password or delete the profile entirely. It is also good practice to periodically change employee passwords (particularly those with Admin access).
1. Click the Settings ![]() tool.
tool.
2. Click Employees & security and then click the Add + icon at the top right of the Employees section.
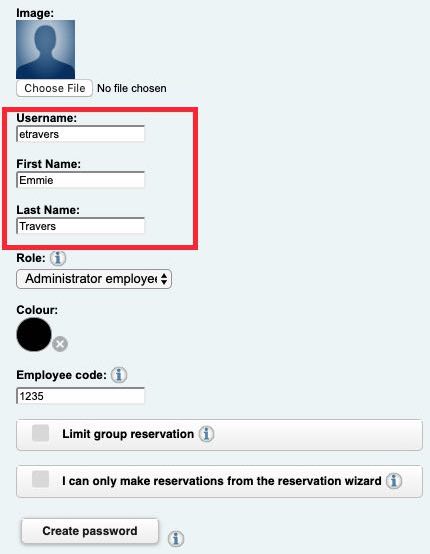
3. Give this employee a username. This will be the username the employee uses to launch TouchBistro Reservations from the Merchant Sign In page. You might, for example, use the employees first initial and last name as the username. So “Emmie Travers” would use the username etravers.
4. Enter the employees first and last name.
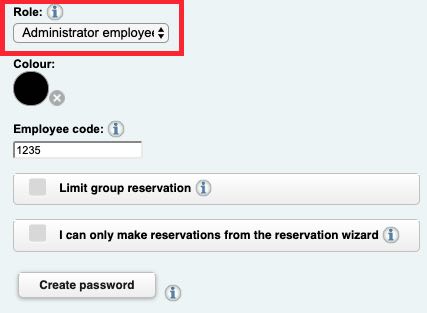
5. Ensure Role is set to Administrator employee. You can also select a color to represent this employee. For example, you might want all Admin employees to have a black color.
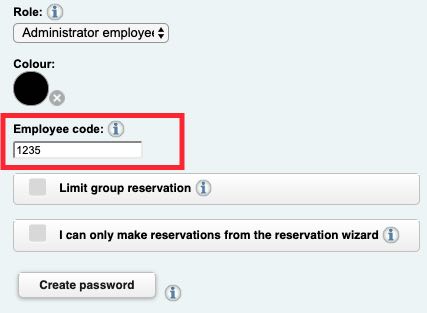
6. Enter a passcode in the Employee code field. We recommend a minimum of four digits. A passcode will not allow an employee to open TouchBistro Reservations from the sign-in page.

7. Click Create password. This will be the password the employee uses in conjunction with the username to open TouchBistro Reservations from the sign-in page.
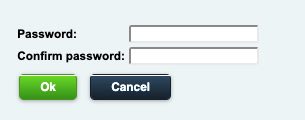
8. Enter the password and re-enter it in the confirmation field. Click Ok.
9. Click Save to save this profile.

10. Your new admin profile will be added to your list of employees.
Section 2. Creating Employees Who Can Open TouchBistro Reservations from the Sign-In Screen
If you to create an employee profile that can open TouchBistro Reservations from the Merchant Sign-In page.
Note: Any instance of TouchBistro Reservations started by a non-admin will not allow any access to Admin only areas by any admin profile launched by the passcode.
1. Click the Settings ![]() tool.
tool.
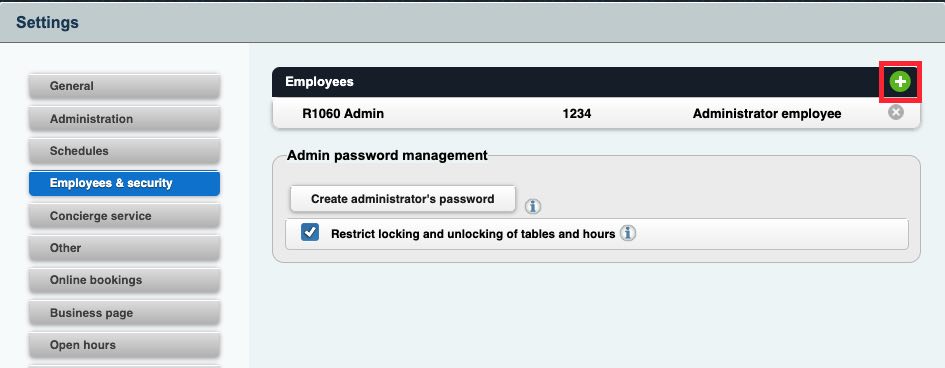
2. Click Employees & security and then click the Add + icon at the top right of the Employees section.
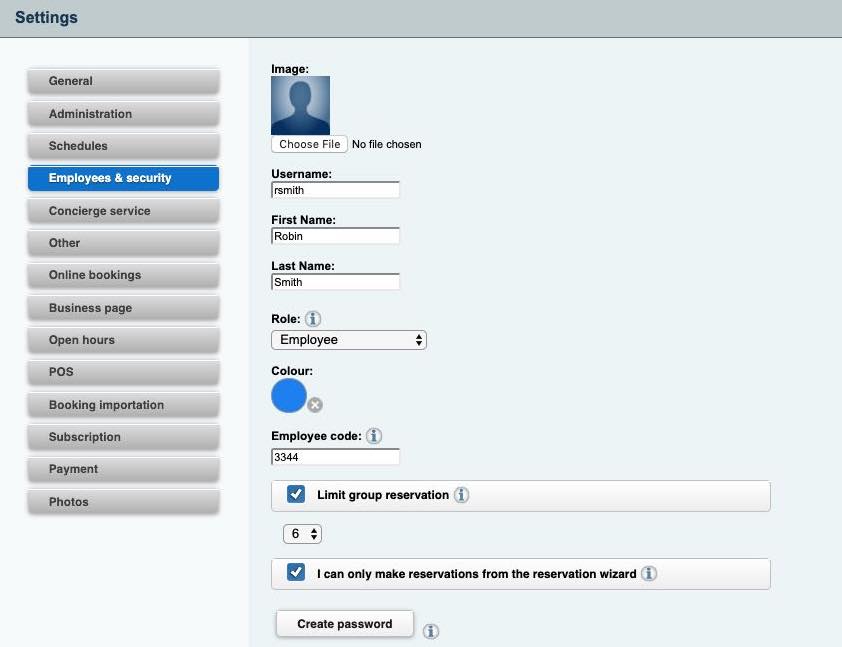
3. Enter a Username. This will be the username the employee can use to open TouchBistro Reservations from the Merchant Sign In page.
4. Enter other details like first name and last name.
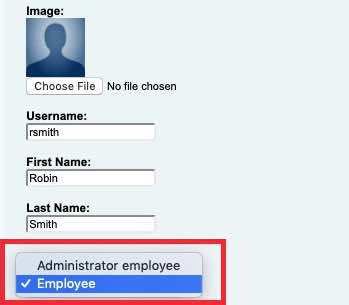
5. Click on the Role drop-down box to select Employee rights.
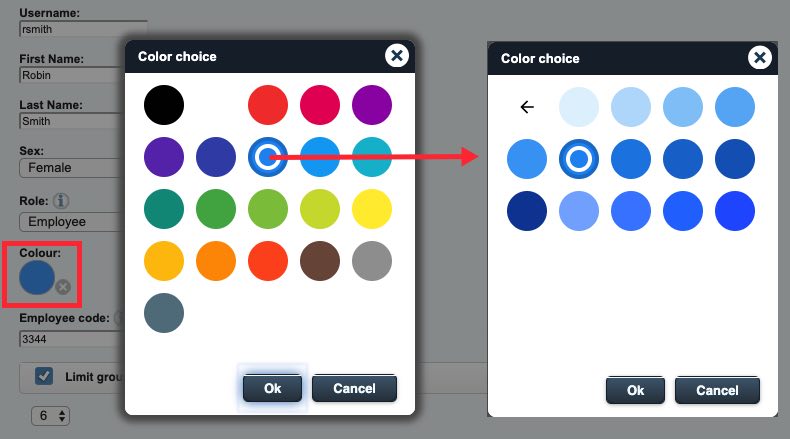
6. Select a color to represent this employee. If the color has a shade option, you will be prompted to select the color’s shade.
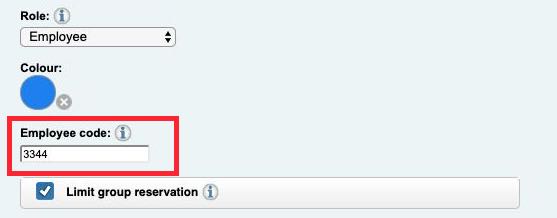
7. Employee codes are used to quickly change who is using TouchBistro Reservations. Enter this employee’s numerical code. We suggest a minimum of 4 digits. A passcode will not allow an employee to open TouchBistro Reservations from the sign-in page.

8. Click Create password. This will be the password the employee uses in conjunction with the username to open TouchBistro Reservations from the sign-in page.

9. Enter the password and re-enter it in the confirmation field. Click Ok.
10. Click Save to save this profile.

11. Your new employee profile will be added to your list of employees.
Section 3. Creating Employees Who Cannot Open TouchBistro Reservations
This kind of employee is assigned a passcode only. The employee is not given a password.
1. Click the Settings ![]() tool.
tool.

2. Click Employees & security and then click the Add + icon at the top right of the Employees section.

3. Enter a Username. A Username is require even if you do not intend to give this employee a password for the Merchant Sign-In screen.
4. Enter other details like first name and last name.

5. Click on the Role drop-down box to select Employee rights.

6. Select a color to represent this employee. If the color has a shade option, you will be prompted to select the color’s shade.

7. Employee codes are used to quickly change who is using TouchBistro Reservations. Enter this employee’s numerical code. We suggest a minimum of 4 digits.

8. You might also consider limiting this employee’s ability to make large reservations. For example, our largest table seats 6. Although we can accommodate larger parties by pushing tables together, we don’t necessarily want to authorize this employee to book those kinds of reservations.
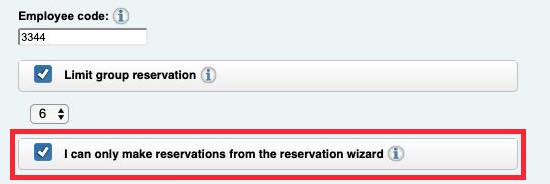
9. Check if you want to limit the methods an employee can use to make a reservation. If enabled, the employee will only be able to make a reservation using the Reservation ![]() tool.
tool.
10. Do not click Create password.
11. Click Save to save this profile.

12. Your new employee profile will be added to your list of employees.
Section 4. Adding an Extra Layer of Security for Admin Access
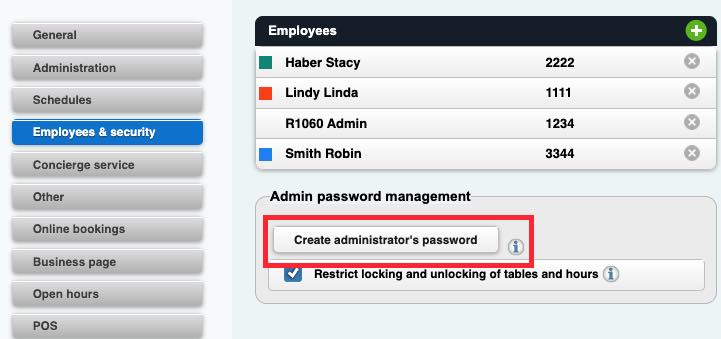
If you would like to add an extra layer of security, you can create an administrator’s password by clicking Create administrator’s password. When created, Admin accounts will require this additional password to access certain critical areas of TouchBistro Reservations.
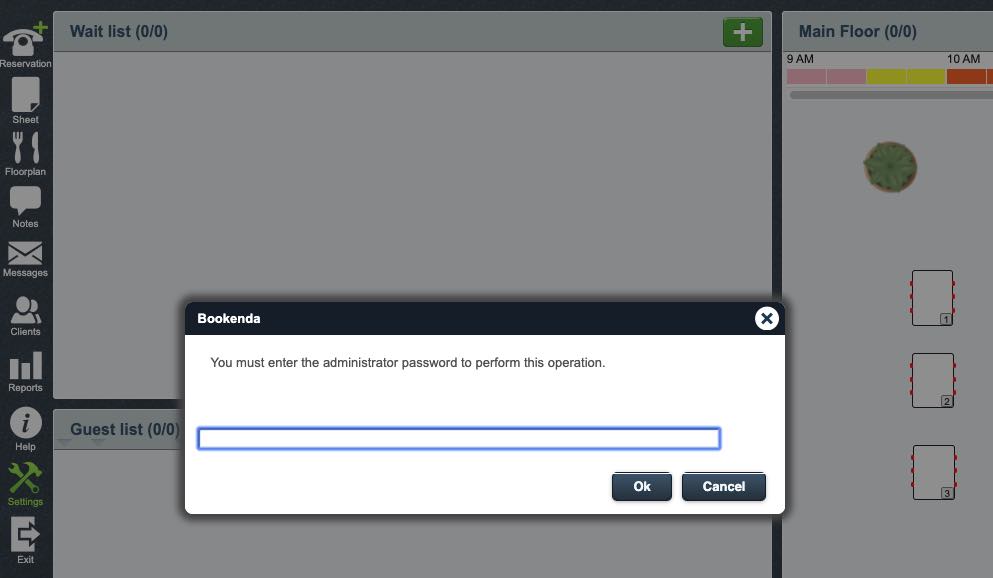
For example, even though we are using TouchBistro Reservations via an admin account, if the admin user clicks the Settings tool, TouchBistro Reservations will require the password you configured under Create administrator’s password for access.
If you create such a password, this ensures if you passcode in with your Admin profile but forget to switch out, non-authorized employees won’t be able to use your signed in Admin account to make changes unless they know this password.
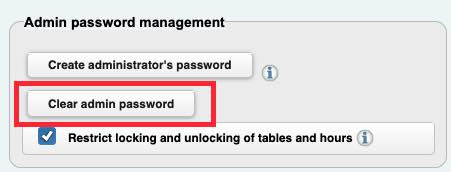
If you want to remove the administrator’s password, revisit this page and click Clear admin password. You will need to enter the administrator’s password.
Section 5. Restrict Locking and Unlocking of Tables and Hours
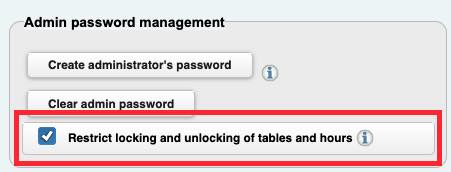
Enable Restrict locking and unlocking of tables and hours if you wish to prevent non-admin users from being able to lock tables.
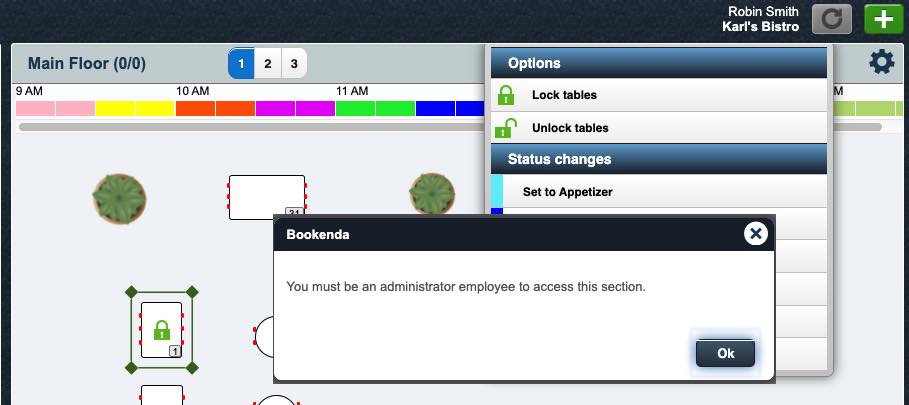
If enabled, non admins will be prevented from locking or unlocking tables.
Chapter 3. Adding Servers to Timeslots
You can use TouchBistro Reservations to manage which servers are available for a particular day’s timeslot. To do this:
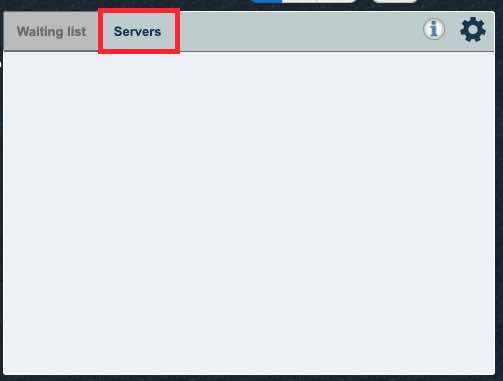
1. Click on the Servers tab.
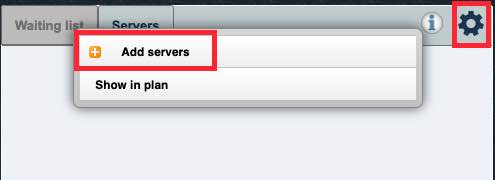
2. Click the Gear icon and click Add servers.

3. Click on which servers will be on the floor for that day’s Timeslot. Click Ok.
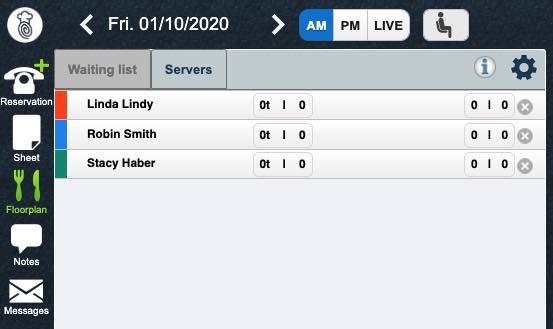
4. Your selected servers will be added to the Servers panel for that day’s Timeslot. In the pictured example, we’ve added three servers for the Friday AM Timeslot.
Chapter 4. Assigning Servers Tables
After adding your servers, you can assign each a table or group of tables.

1. Click on a server. On the floorplan click, hold, and then drag to select multiple tables this server is responsible for. You can also click on tables individually.
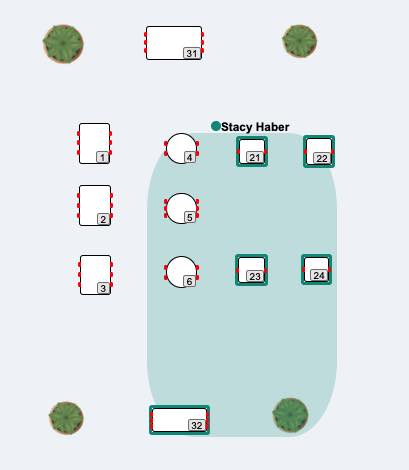
2. TouchBistro Reservations highlights the selected tables using the server’s Employee color. As well, it shades the area of the floorplan covered by this server.
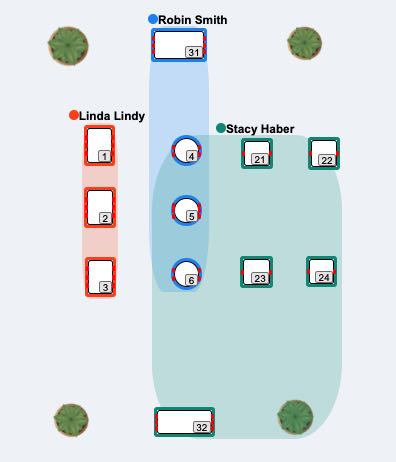
3. Repeat for the remaining servers.
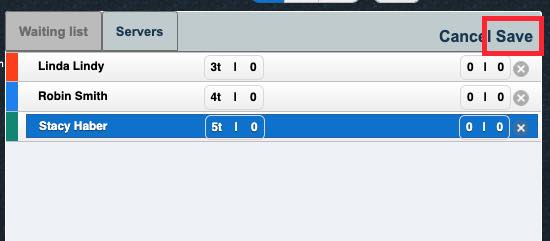
4. After assigning tables, click Save.
Chapter 5. Table and Cover Statistics
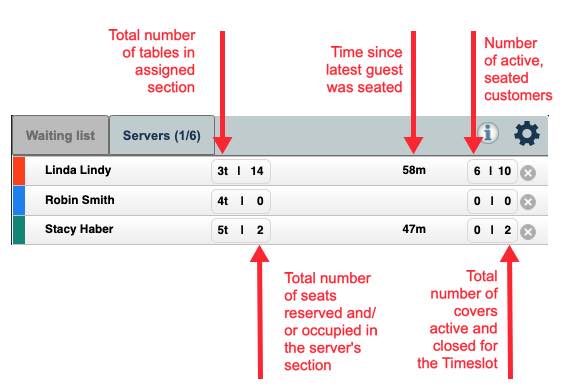
As you add reservations to your floorplan, seat customers, and close tables, the Servers panel reflects this activity by server.
The first number cell represents the total number of tables in the server’s section. For example, Linda Lindy has 3 tables in her section. Robin Smith has 4 tables assigned to her in her section.
The second number represents the total number of seats reserved for the server during this timeslot. As well if a walkin has been seat, this number will also represent the number of seats occupied walkins accommodated in the server’s section.
In the middle of the server’s line, you will see a minute count up since the last time a table was seated in the server’s section. For example, we can see it’s been 58 minutes since Linda’s last table was seated. If another party came in and was seated, the count up would be reset to 0 minutes.
The third number represents the total number of currently occupied seats in the server’s section. For example, Linda has 6 seats currently occupied.
The fourth number represents a running total of all seats that are currently occupied and were occupied. For example, for this Timeslot, Linda has served 10 customers. Based on the third number, we can reason 6 of the 10 are customers at tables that have yet to be closed. Four of the 10 are customers that have paid their bill sometime earlier in the Timeslot and freed up their table.
Chapter 6. Hiding the Section Shading

If you find the section shading distracting, click on the flooplan’s Gear icon and click Hide server sections.
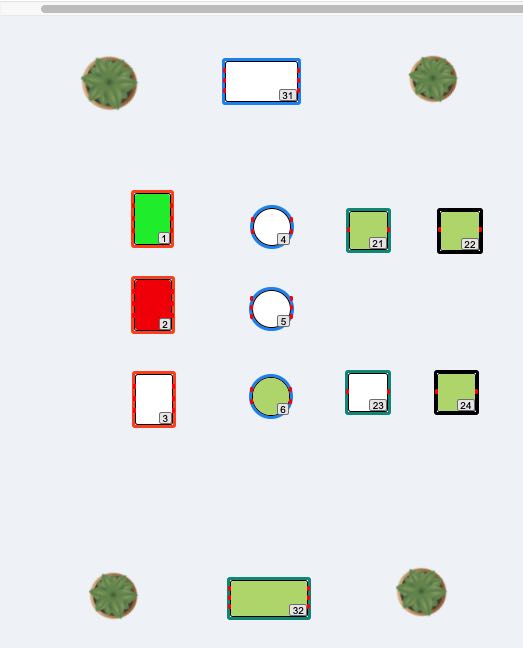
When hidden the shading (but not the table highlight) will be removed from the floorplan.
Chapter 7. Logging in from the Merchant Sign In Screen
1. In your browser access your Merchant sign-in page.
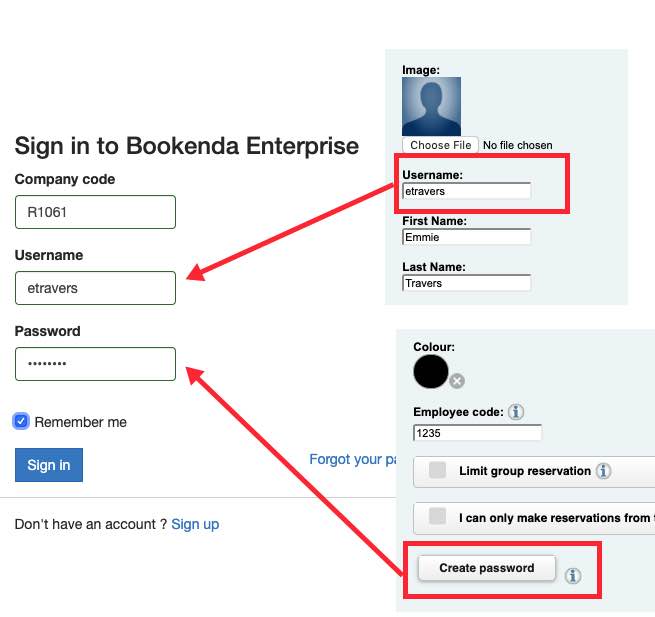
2. In Company code, enter the company code you were given when you first signed up for TouchBistro Reservations.
3. Username is either admin or the username you created for the employee profile.
4. Password is the password you created for the employee profile. If there was no password associated with the username, the employee cannot use his/her username to launch TouchBistro Reservations from the Merchant sign-in page.


 Email
Support
 Frequently
Asked Questions
