POS Connectivity for Integrated Pro Server
Table Of Contents
Chapter 2. Manage Connected Devices
Section 2. Disconnecting iPads
Section 3. Logging out All Other iPads
Section 4. Backing up your Restaurant Data to the Main Device iPad
Section 5. Restoring from Backup
Section 6. Deleting Older Backups
Section 1. Repair Restaurant Data
Section 2. Upload Restaurant Data to Support
Section 3. Download Support Patch
Chapter 6. Send Screen Shots to Support
Chapter 1. Introduction
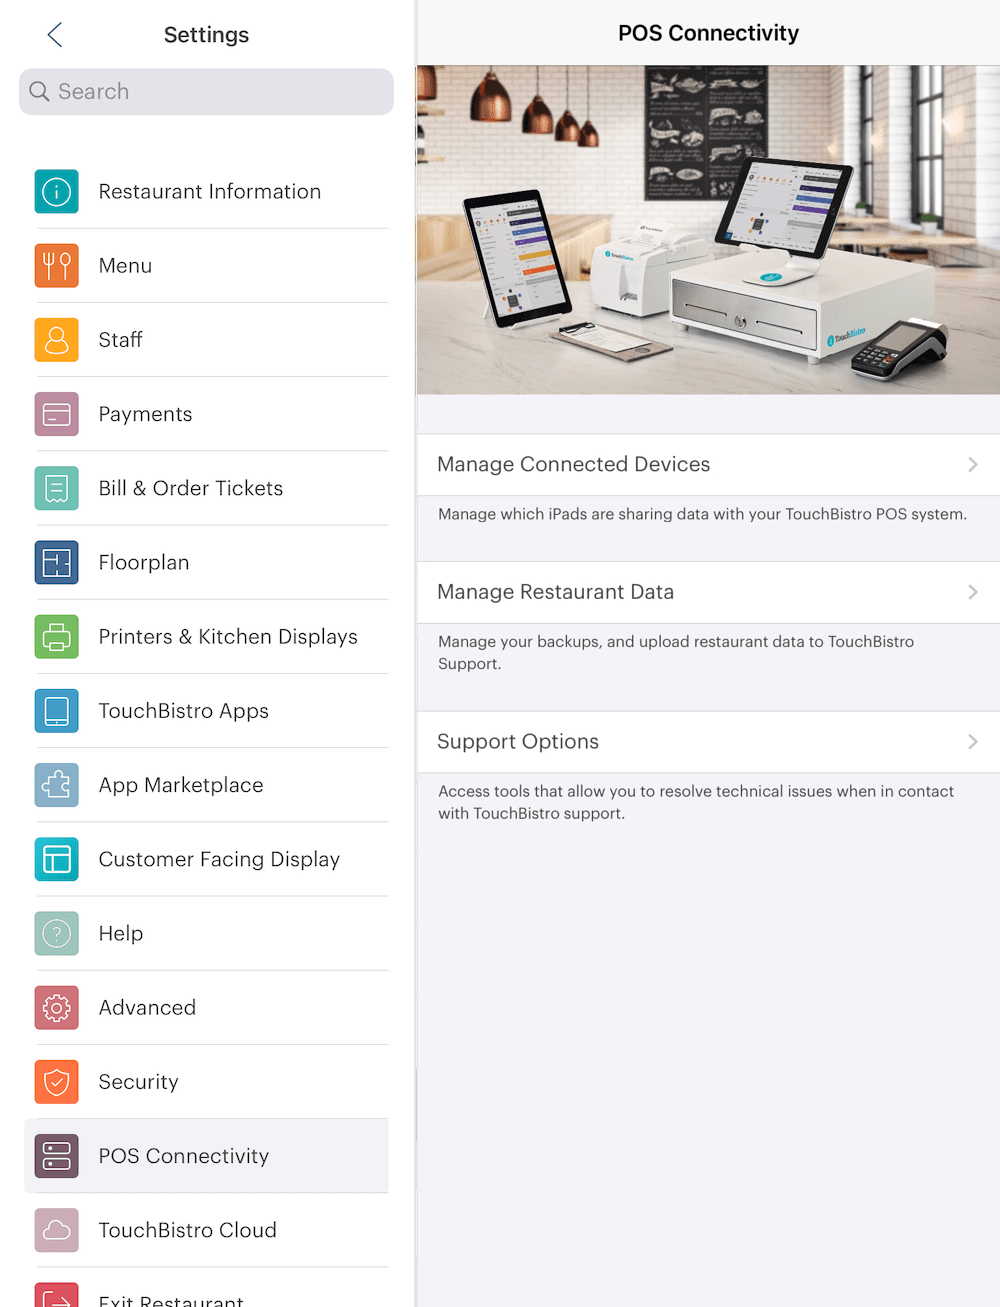
If you are using more than one iPad with TouchBistro, tap POS Connectivity. This section gives you access to three sections:
- Manage Connected Devices
- Manage Restaurant Data
- Support Options
Chapter 2. Manage Connected Devices
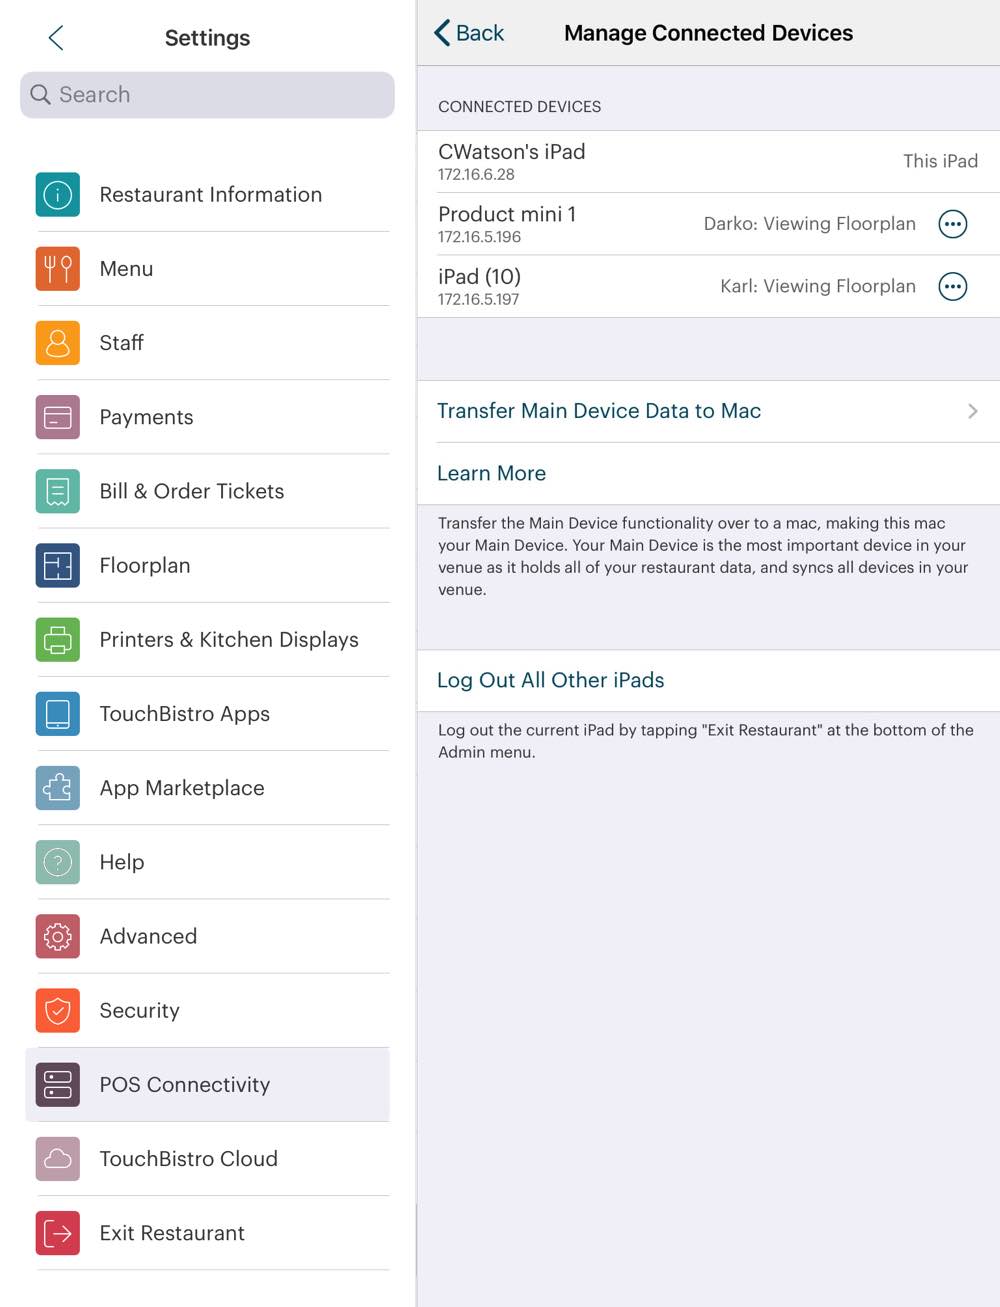
In the Connected Devices section, you are able to see all of the iPads connected to your TouchBistro POS system. This section will allow you to log off users from your POS system, as well as disconnect iPads altogether.
Section 1. Logging off iPads
You can remotely log off a user from an iPad in instances where users may have taken a break, and left their iPad logged-in. This can be problematic if a user with Managerial access has left their Admin Options exposed. This process signs the user off of the iPad, making it available for other users to log in.
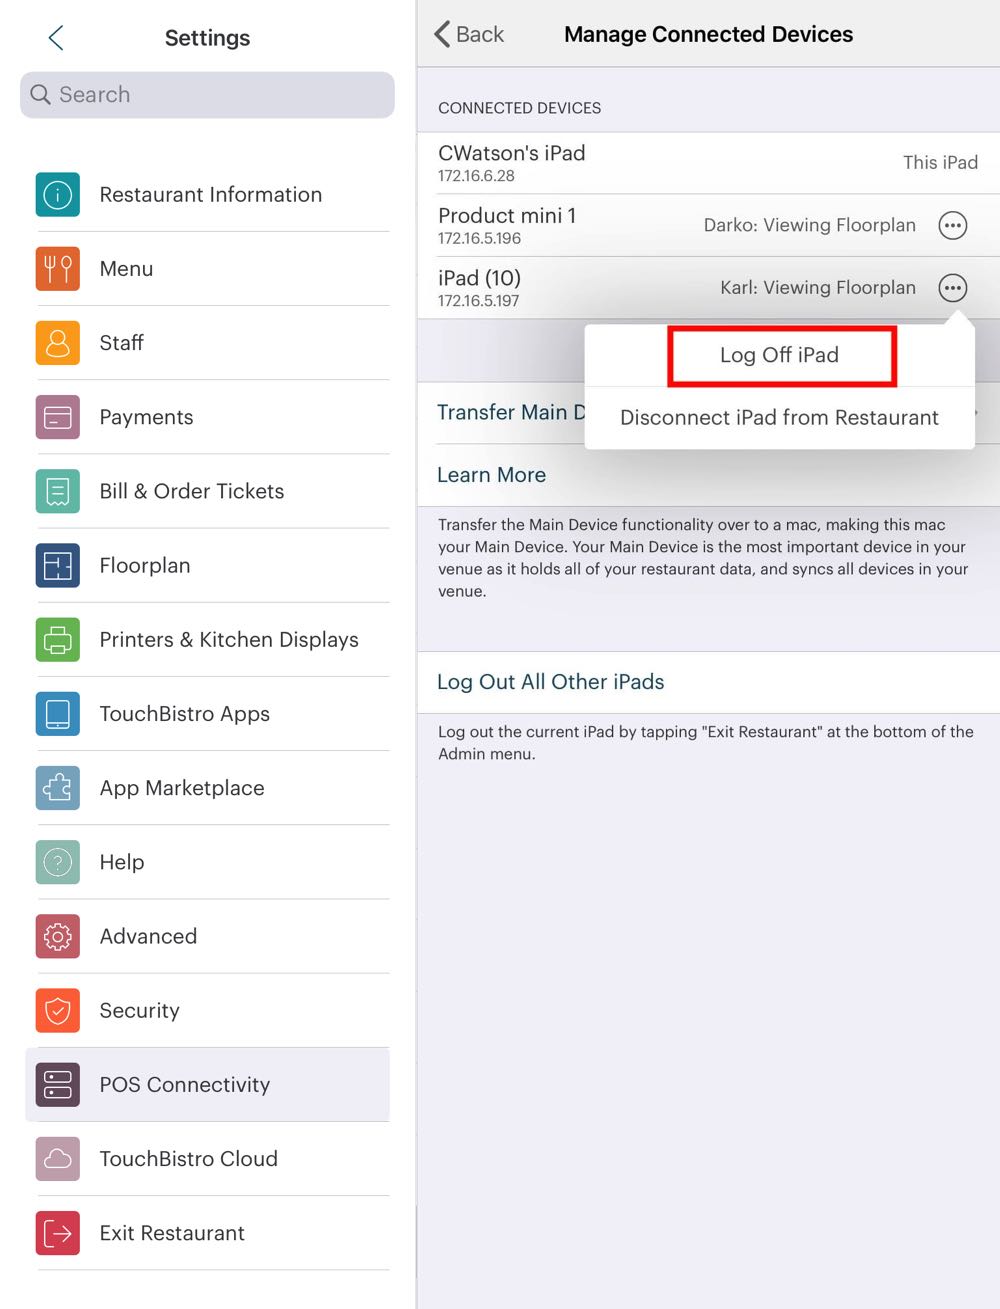
1. Tap the ellipsis button ![]() and select Log Off iPad.
and select Log Off iPad.
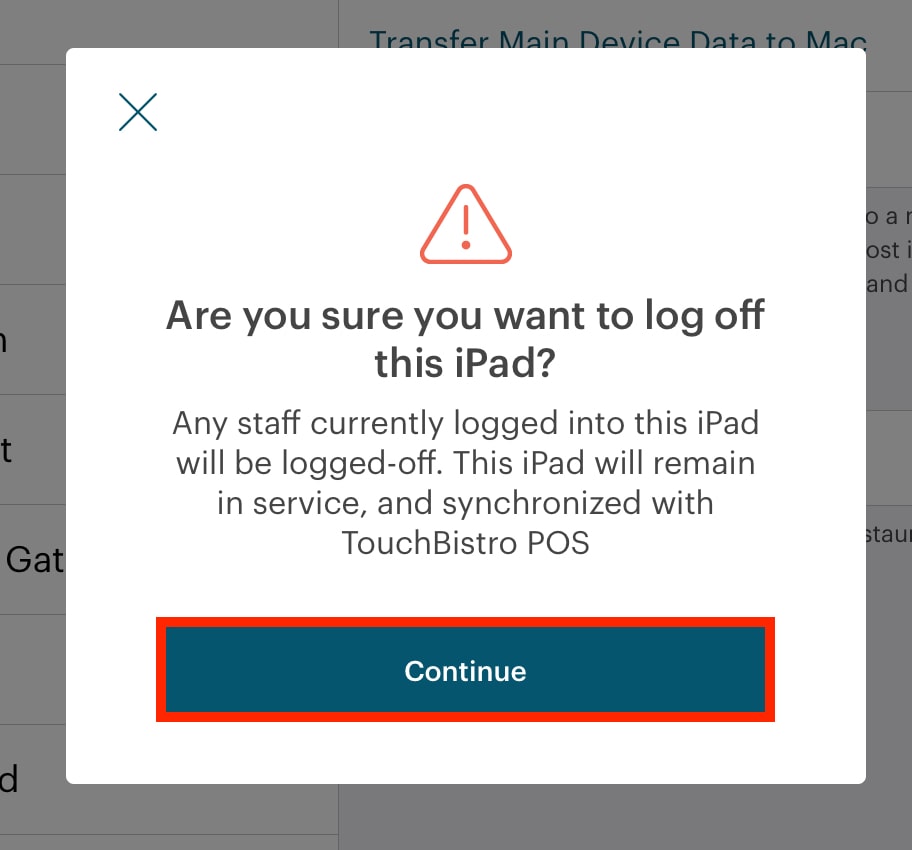
2. In the Are you sure… dialog box, tap Continue.
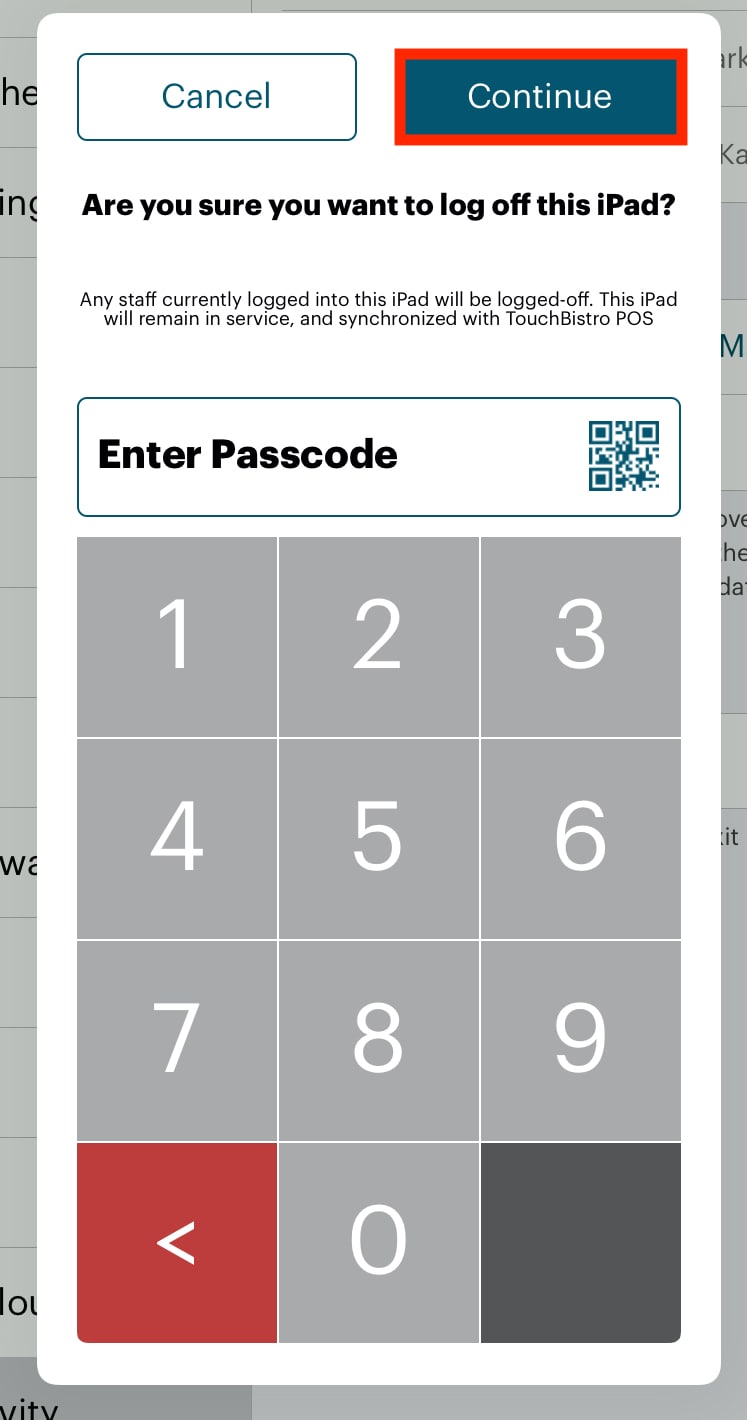
3. Enter your Admin passcode and press Continue.
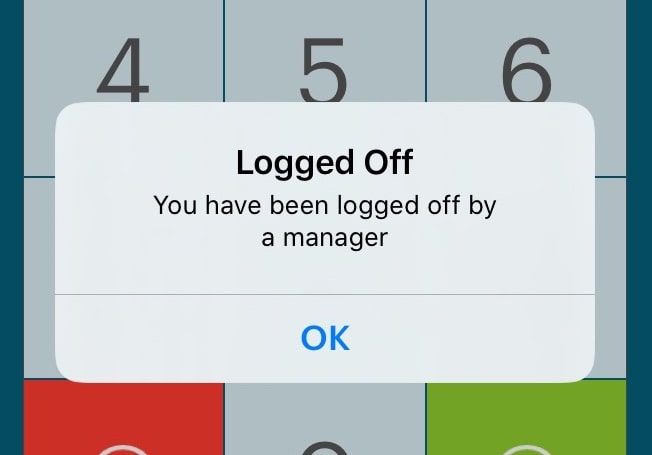
4. The iPad you logged-off will now display the above dialog box, and display the login screen. Tap OK and this iPad is now ready for a new user to log in.
Section 2. Disconnecting iPads
You can disconnect an iPad from the system when it is running out of battery, and you want to use a different iPad. If you are licensed for a certain number of iPads, but find that you’re having trouble keeping them fully charged, you might buy a 6th or 7th iPad as backup devices. However, you must disconnect the depleted iPad before you can connect a fully-charged iPad, in order to stay within your iPad limit.
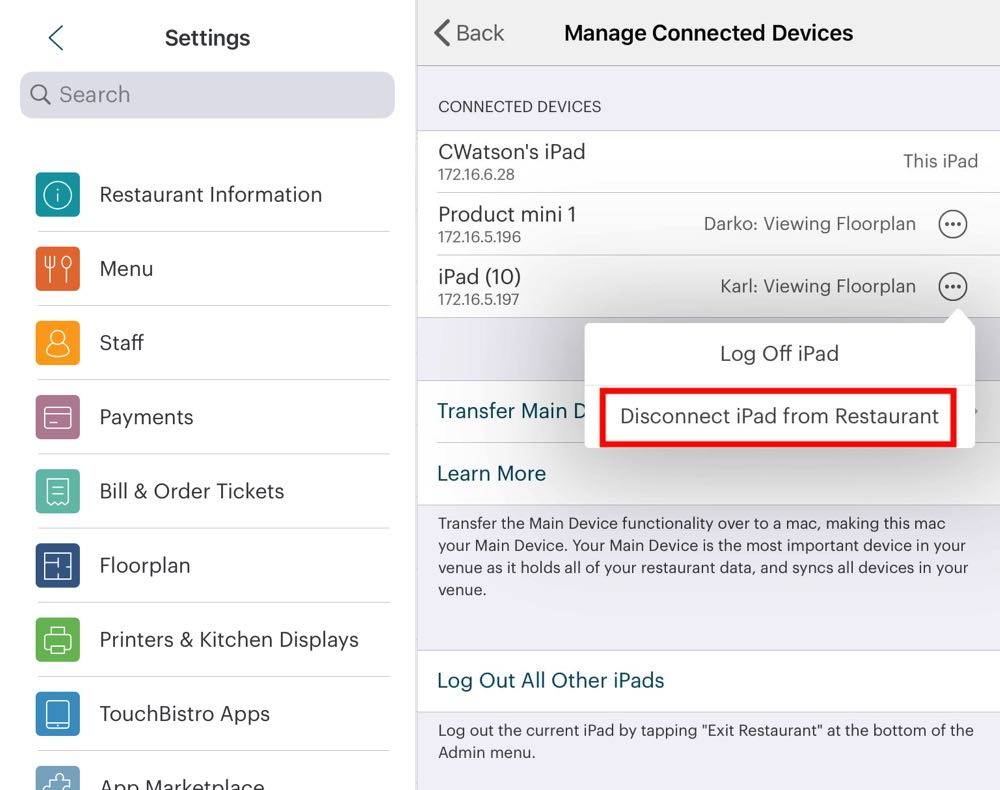
1. Tap the ellipsis button ![]() and select Disconnect iPad.
and select Disconnect iPad.
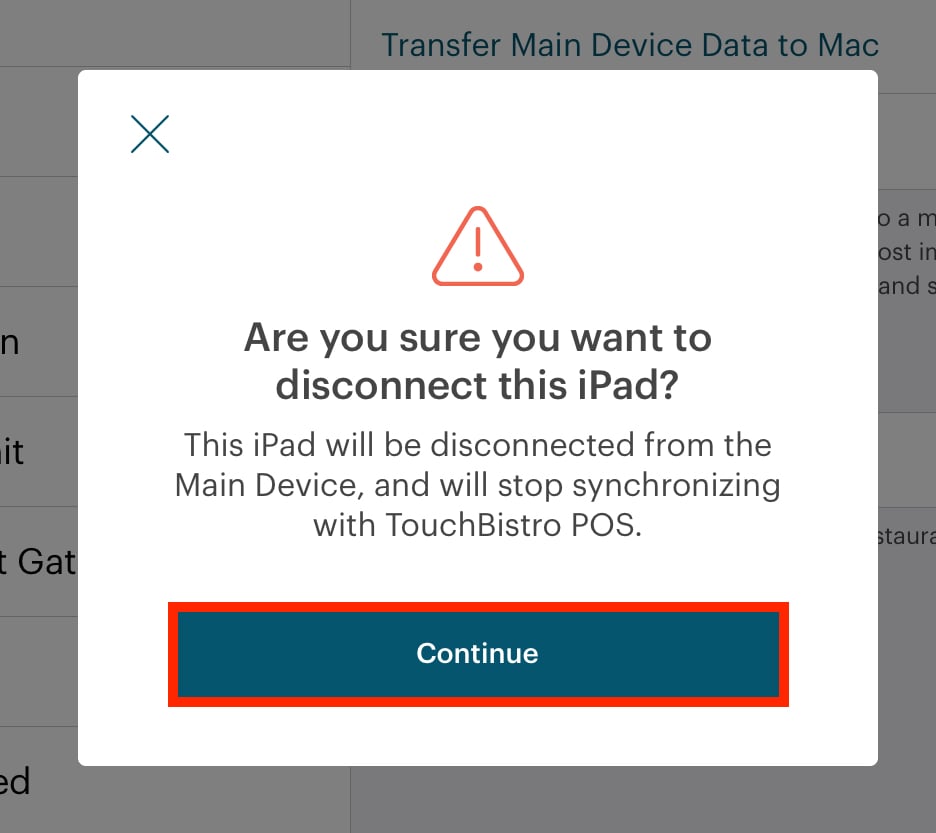
2. In the Are you sure… dialog box, tap Continue.
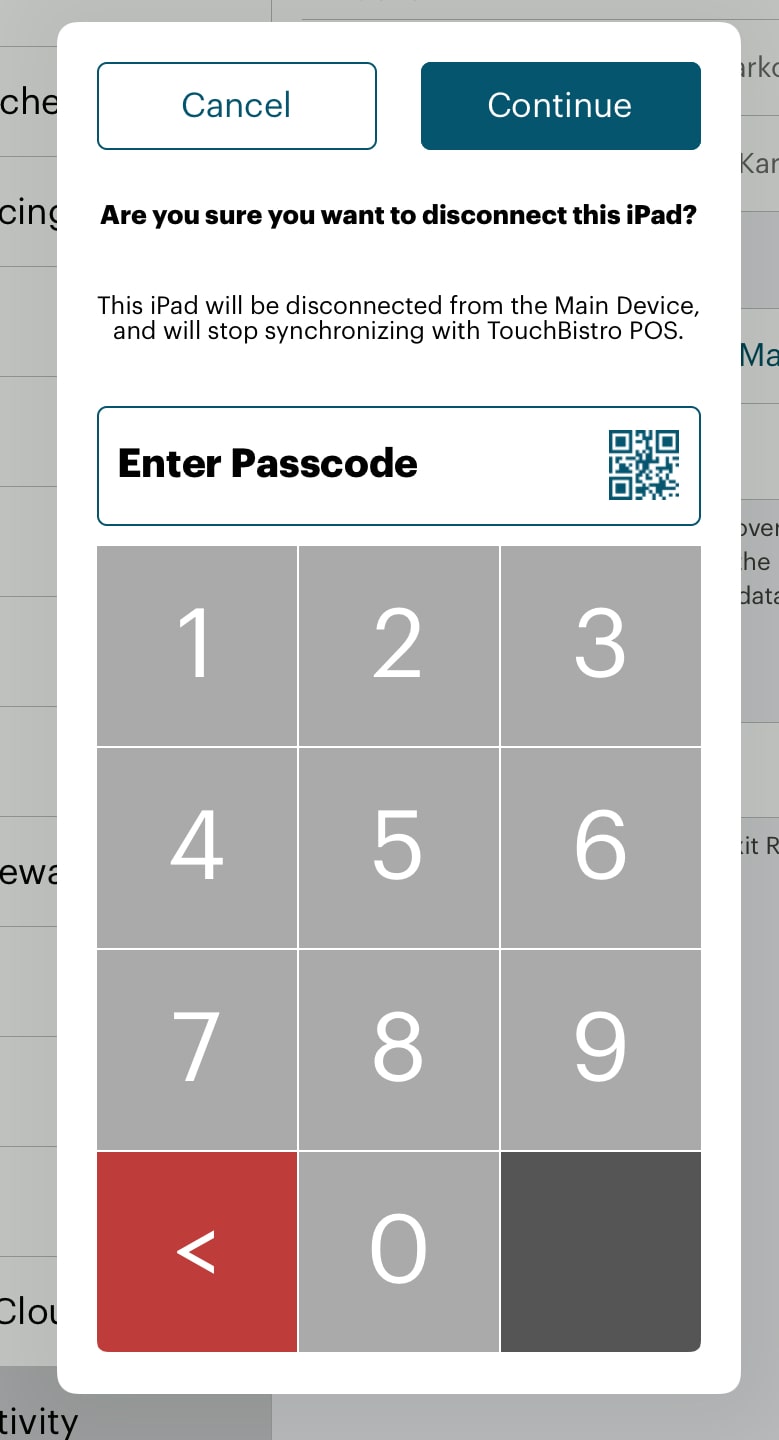
3. Enter your Admin passcode and press Continue.

4. The iPad you logged-off will now display the above dialog box, and display the Available Restaurants screen. Tap OK and this iPad is now disconnected from TouchBistro and ready to be charged back up again.
Section 3. Logging out All Other iPads
You can remotely log off all users from all iPads making them all available for new users to log in.
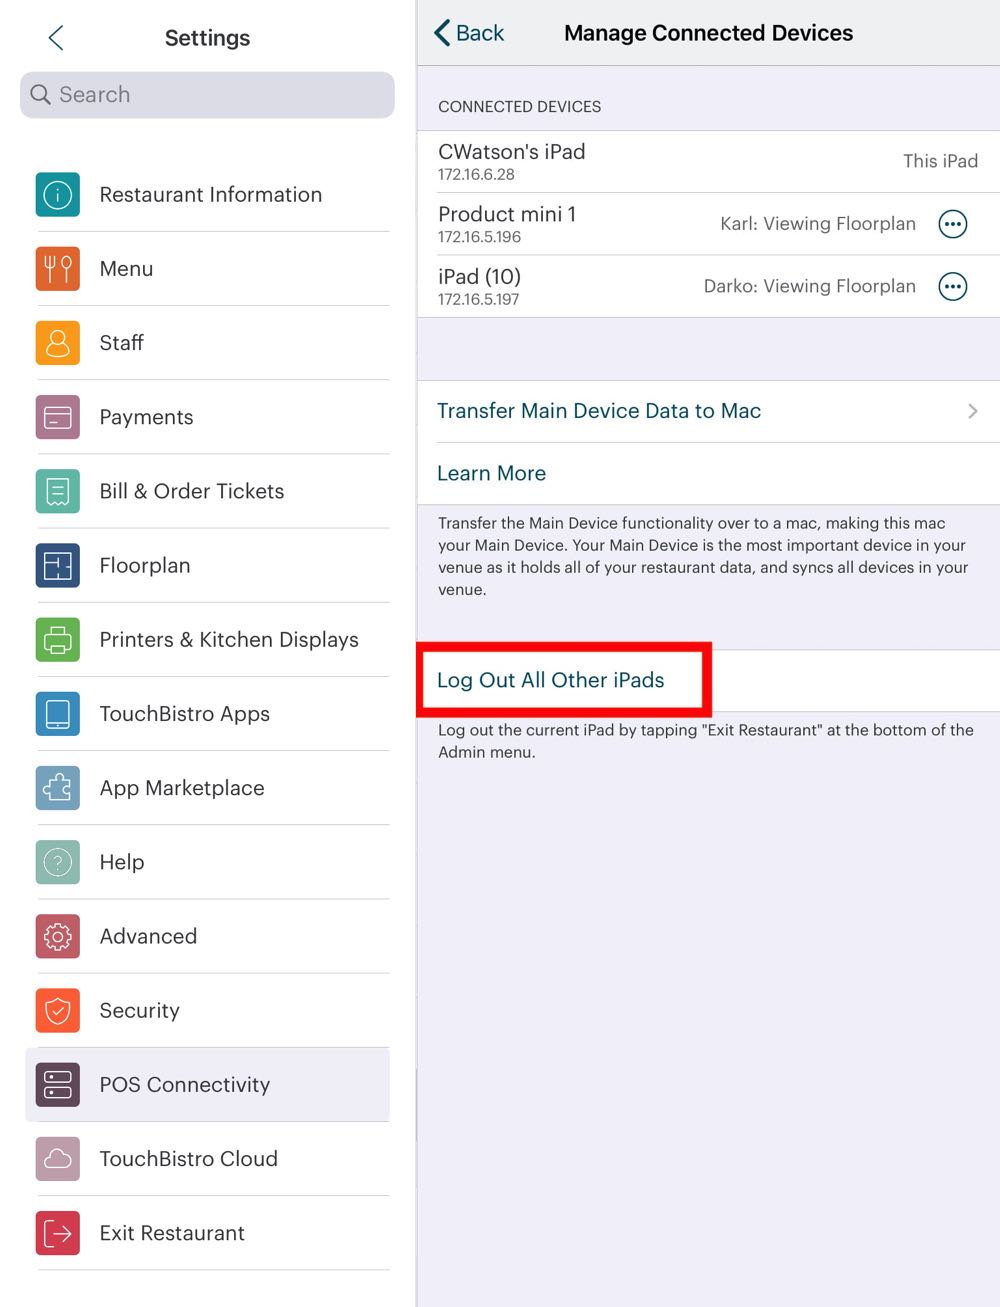
1. Tap Log Out All Other iPads.
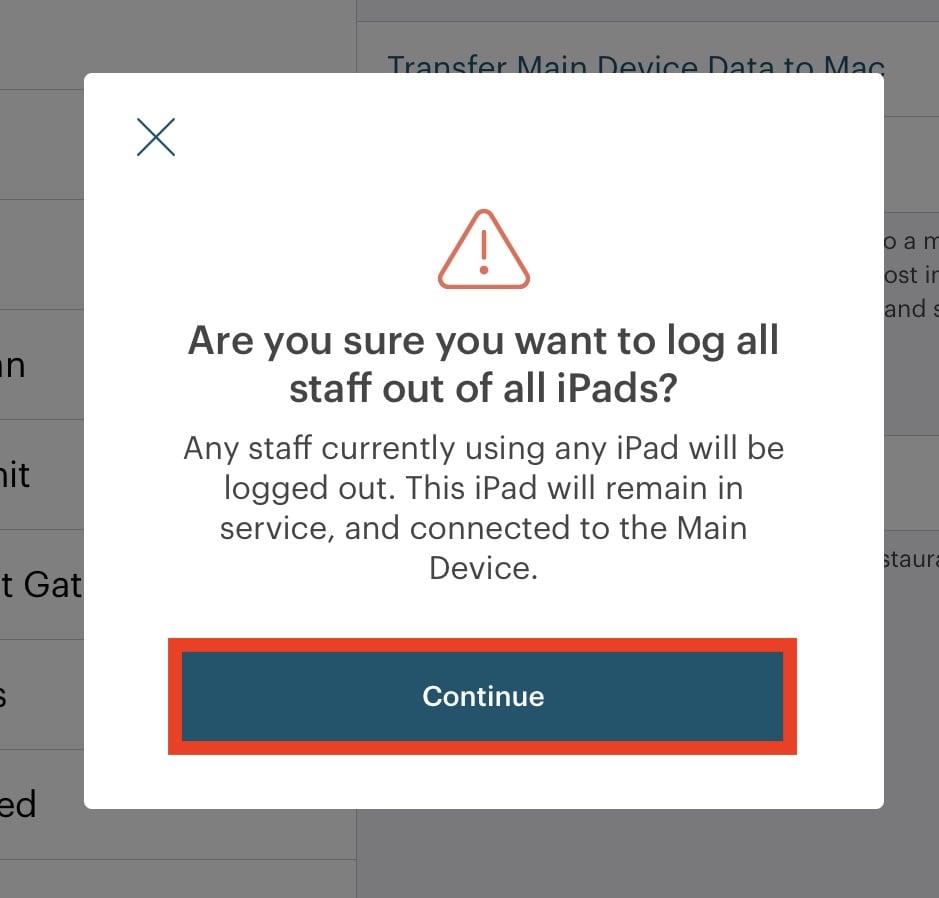
2. In the Are you sure… dialog box, tap Continue.

3. Enter your Admin passcode and press Continue.

4. The iPads you logged-off will now display the above dialog box, and display the login screen. Tap OK and these iPads are now ready for new users to log in. Manage Restaurant Data
This section allows you to manage your backups, and upload restaurant data to TouchBistro Support.
Section 4. Backing up your Restaurant Data to the Main Device iPad
You can do a manual backup of your restauant data at any time by tapping Create Backup. This stores a backup locally to your Main Device iPad. If you need to restore to your restaurant data to a previous point in time, you can subsequently restore your system using your backed-up restaurant data.
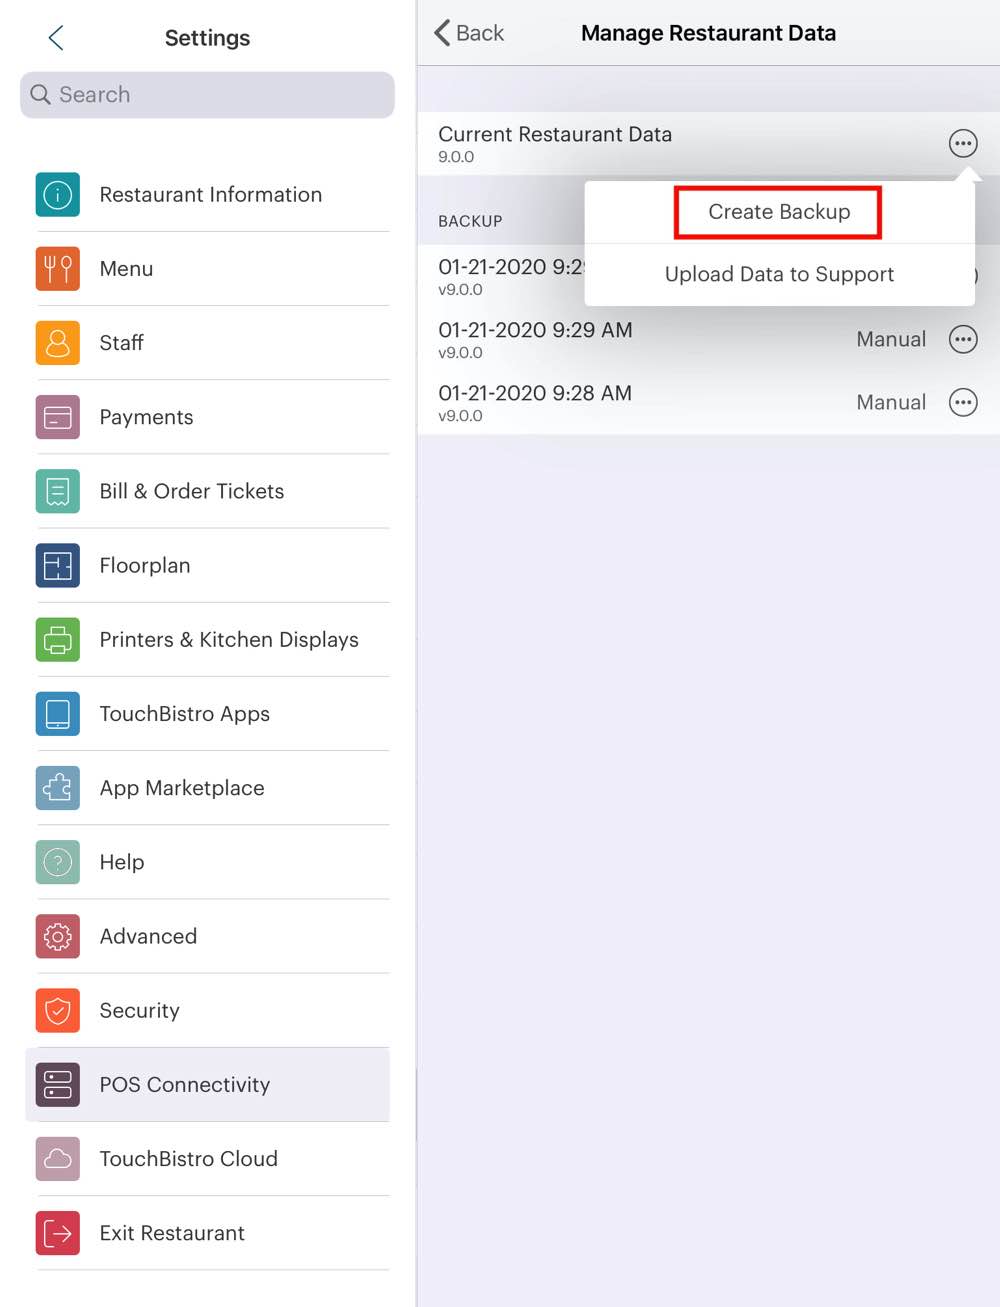
1. Tap the ellipsis button ![]() and select Create Backup.
and select Create Backup.

2. Tap OK.
Section 5. Restoring from Backup
You should only restore from backup when you are experiencing technical difficulties, and you are prepared to potentially lose data that may have been acquired since the last backup.
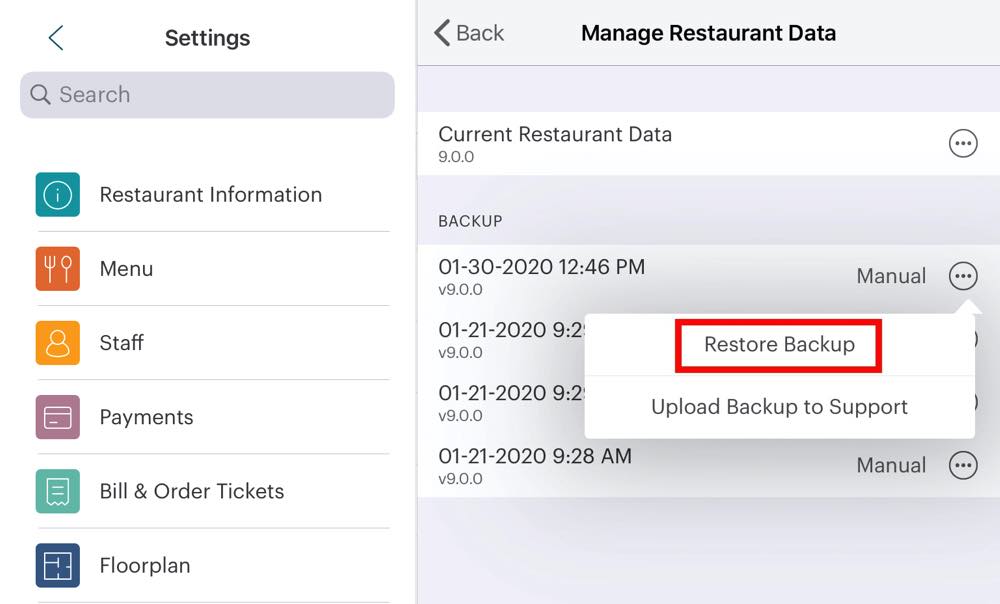
1. Tap the ellipsis button ![]() to the right of the backup you wish to restore from and select Restore Backup.
to the right of the backup you wish to restore from and select Restore Backup.
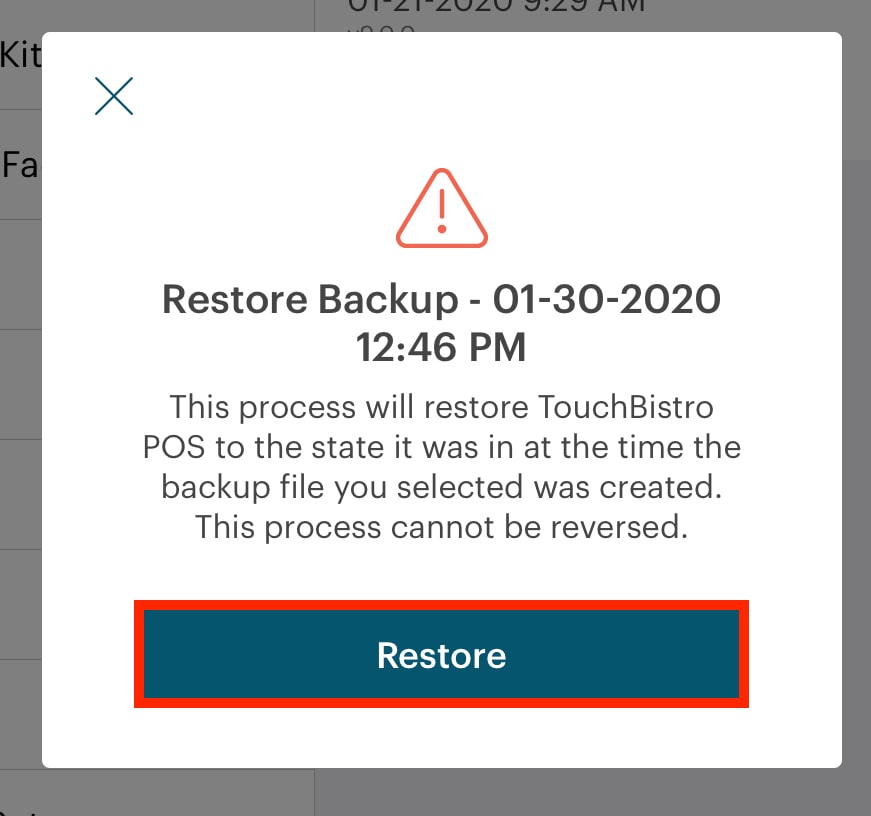
2. Tap Restore.
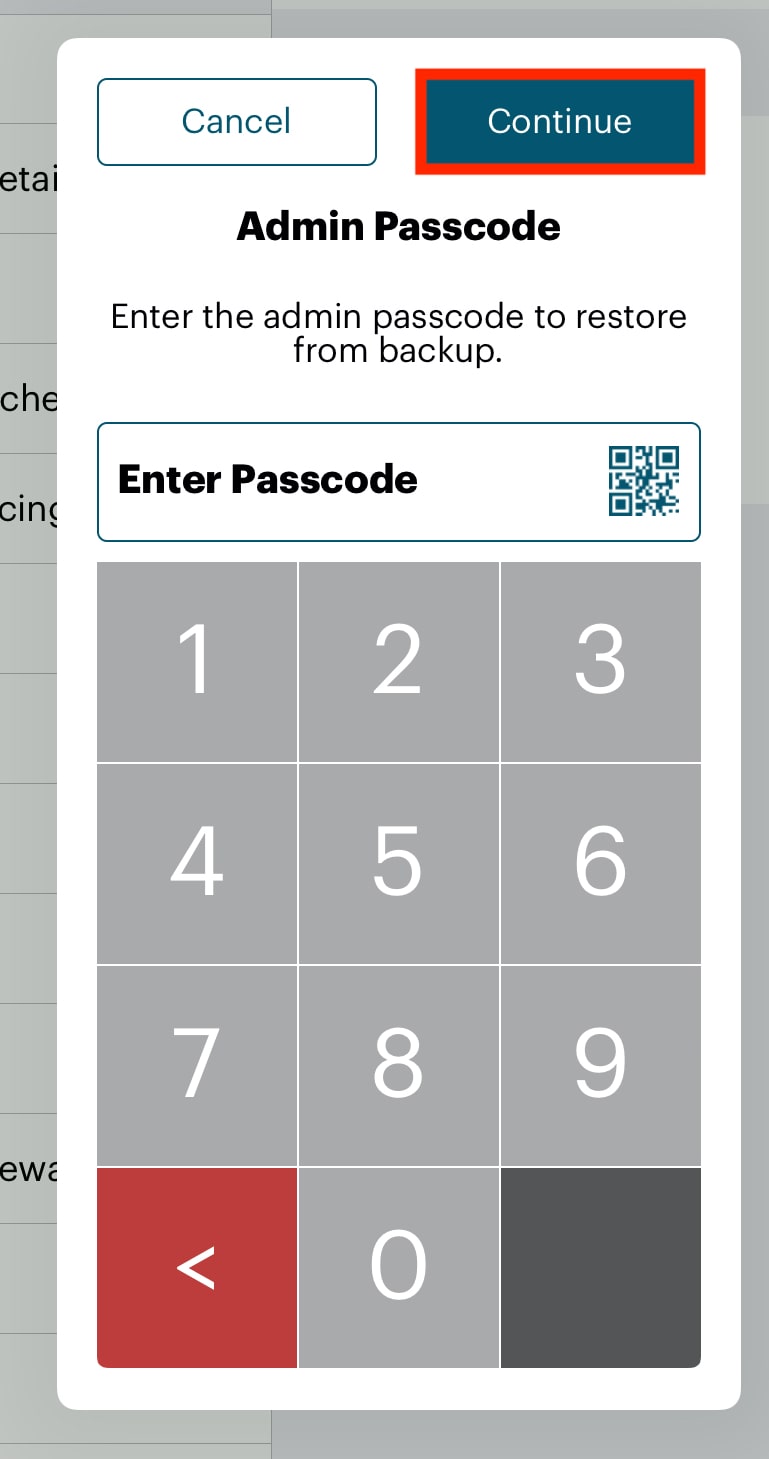
3. Enter your Admin passcode and press Continue. Your TouchBistro POS system will now resume using the data from the selected backup.
Section 6. Deleting Older Backups
Backups take up space on your iPad. Older backups may be deleted in order to make space on your device.

1. Tap the ellipsis button ![]() to the right of an older backup and select Delete Backup.
to the right of an older backup and select Delete Backup.

2. Tap Delete. The backup will be instantly erased.
Chapter 3. Support Options
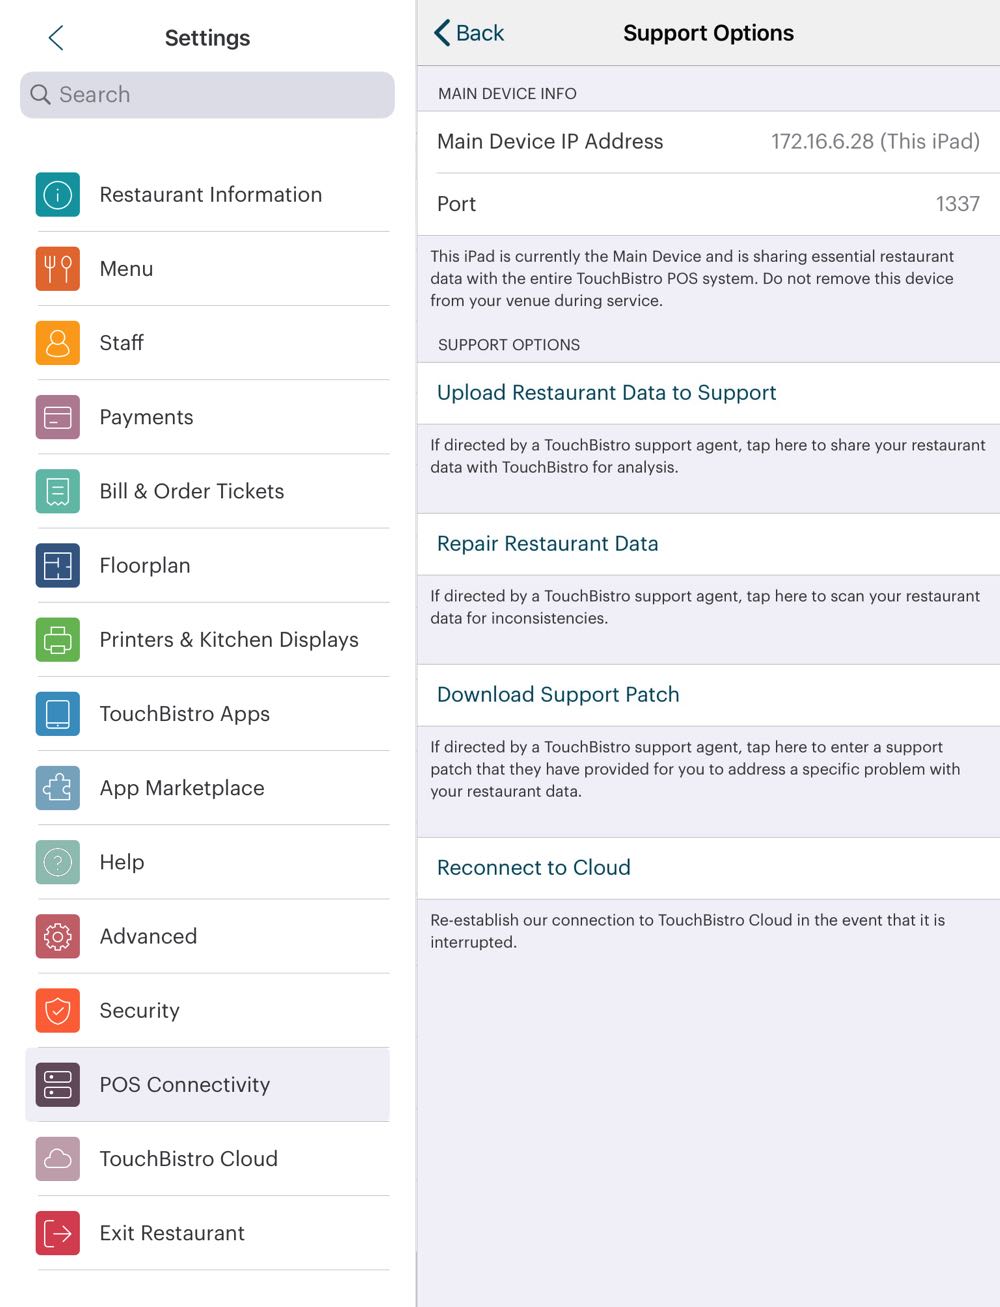
Section 1. Repair Restaurant Data
If directed by support, click this to scan and repair any inconsistencies found in the restaurant’s SQL data file.
Section 2. Upload Restaurant Data to Support
Click Upload Restaurant Data to Support to send TouchBistro your Pro Server restaurant data (that is, your SQL files). Only send these files if you’ve been asked by support to send your restaurant data. When you click Upload Restaurant Data to Support, TouchBistro prompts you to add contact information and comments to aid support in diagnosing your problem. Complete this and click Upload.
Section 3. Download Support Patch
This option lets you download a prepared patch for your Pro Server’s restaurant data. Again, only use this option if instructed to by TouchBistro.
Section 4. Reconnect to Cloud
Log in with your TouchBistro Username and Password if prompted, or in instances where you find that your data in Cloud hasn’t been updating normally.
Chapter 4. Support Mode
If your Main Device iPad has been updated to iPad OS 13, you can access support features listed above without having to open the app. This can be useful if your TouchBistro app is crashing upon opening.
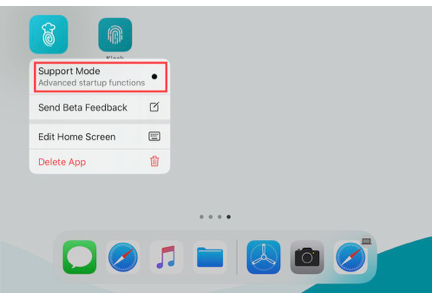
Locate your TouchBistro POS icon and tap and hold on it for a few seconds. Tap the Support Mode menu item.
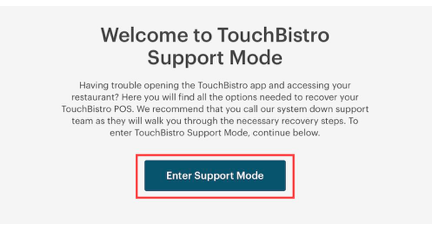
TouchBistro will launch in support mode. To access support mode options, tap Enter Support Mode.
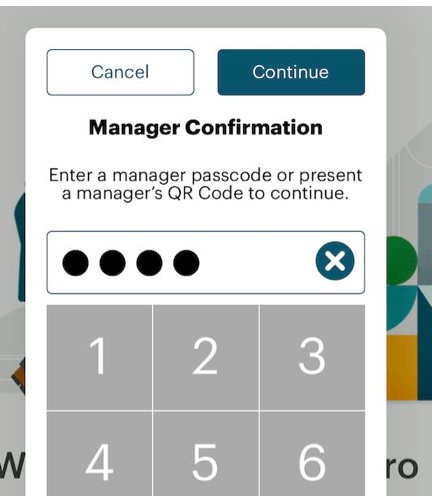
You will be required to supply an Admin passcode. You cannot use a manager passcode.
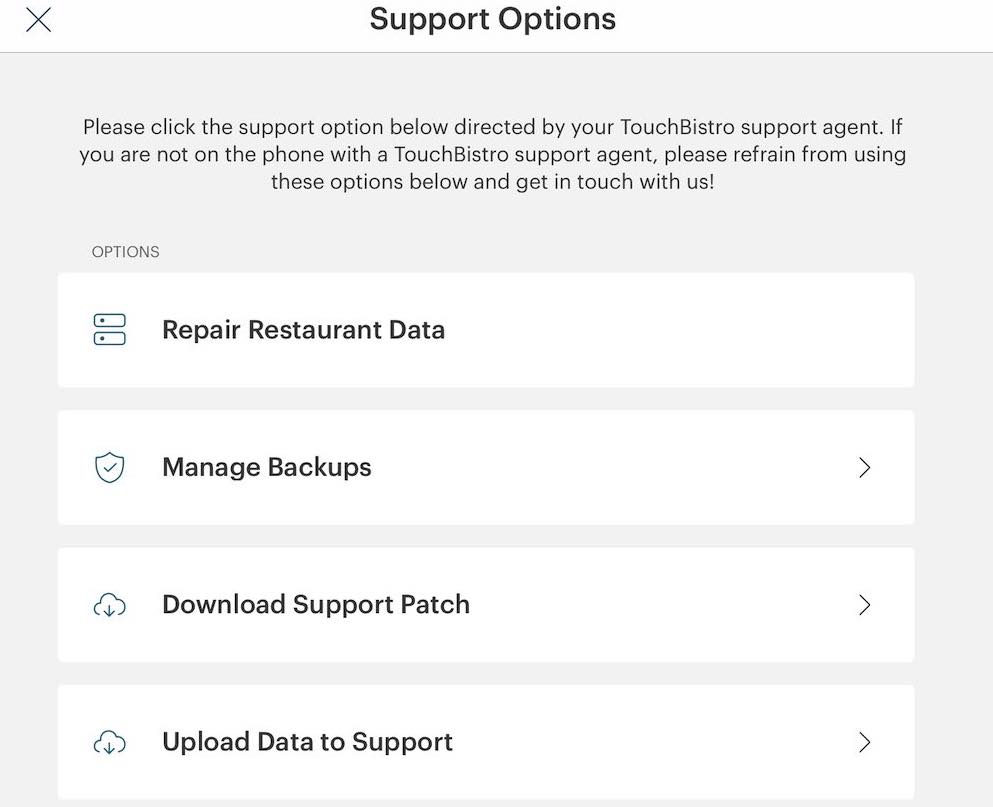
Once you passcode in, you will access to your support options. These options are only to be used at the direction of a TouchBistro Support representative. You should not use these options without express instructions from you TouchBistro Support representative.
Chapter 5. iPad Diagnostics

Tap TouchBistro from your Admin settings screen to get key data about an individual iPad, network, and details about TouchBistro. If you call or email support, this information may be requested. Note, Last Archived Date is no longer used.
Additional diagnostic tools are below:
|
Option
|
Description
|
|
Online Diagnostic Test
|
Tap to quickly run a connectivity test for your integrated payment provider and cloud syncing.
|
|
Online Help
|
This will launch your iPad browser and take you to this help site.
|
Chapter 6. Send Screen Shots to Support
At times, support might need you to send a screen capture of what you’re seeing on your iPad screen, for example, your diagnostic screen.
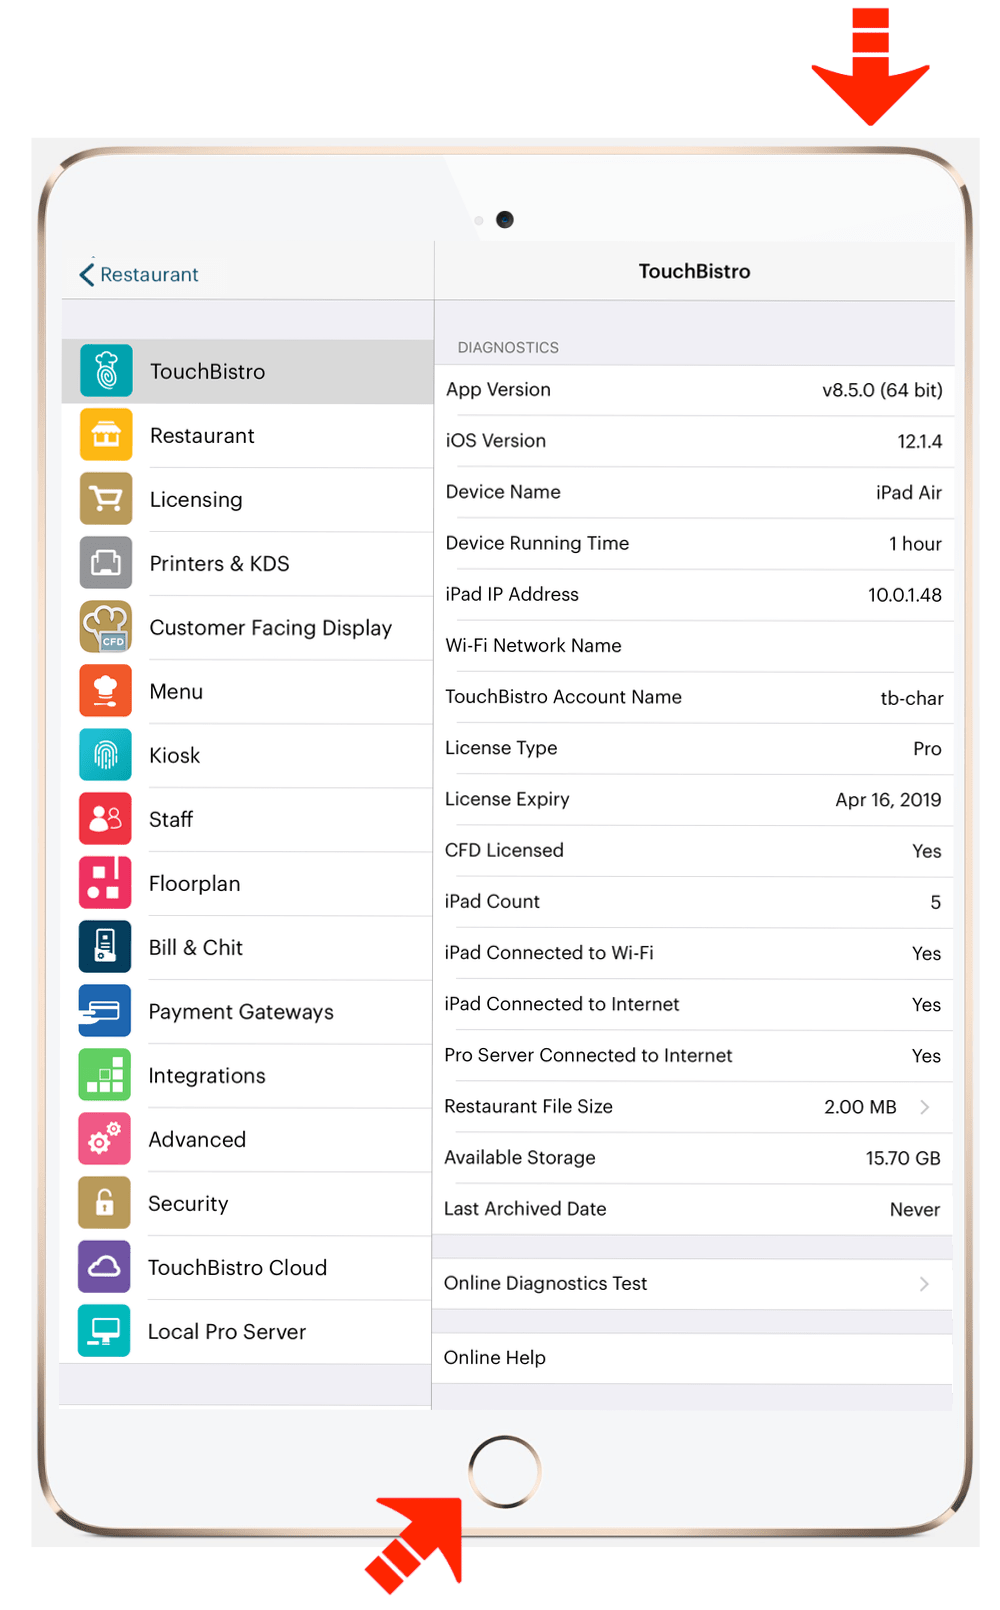
When you’re in TouchBistro, simultaneously press the lock/power button and the Home button. If your iPad doesn’t have a Home button, simultaneously press the lock/power button and the volume up button. Release and you will hear a shutter sound.

TouchBistro will ask you if you want to send the screen capture to support. You can add a comment to the screen capture, helping you add additional information for support purposes.
Chapter 7. Wi-Fi and Internet Connectivity Check

Most wireless TouchBistro operations only require a local Wi-Fi connection. Some features like credit card processing, accessing cloud reporting or emailing receipts also require an Internet connection. To aid support in determining your connectivity, your TouchBistro diagnostic screen provides details about your network.
Wi-Fi and Internet Connectivity Check from your Login Screen
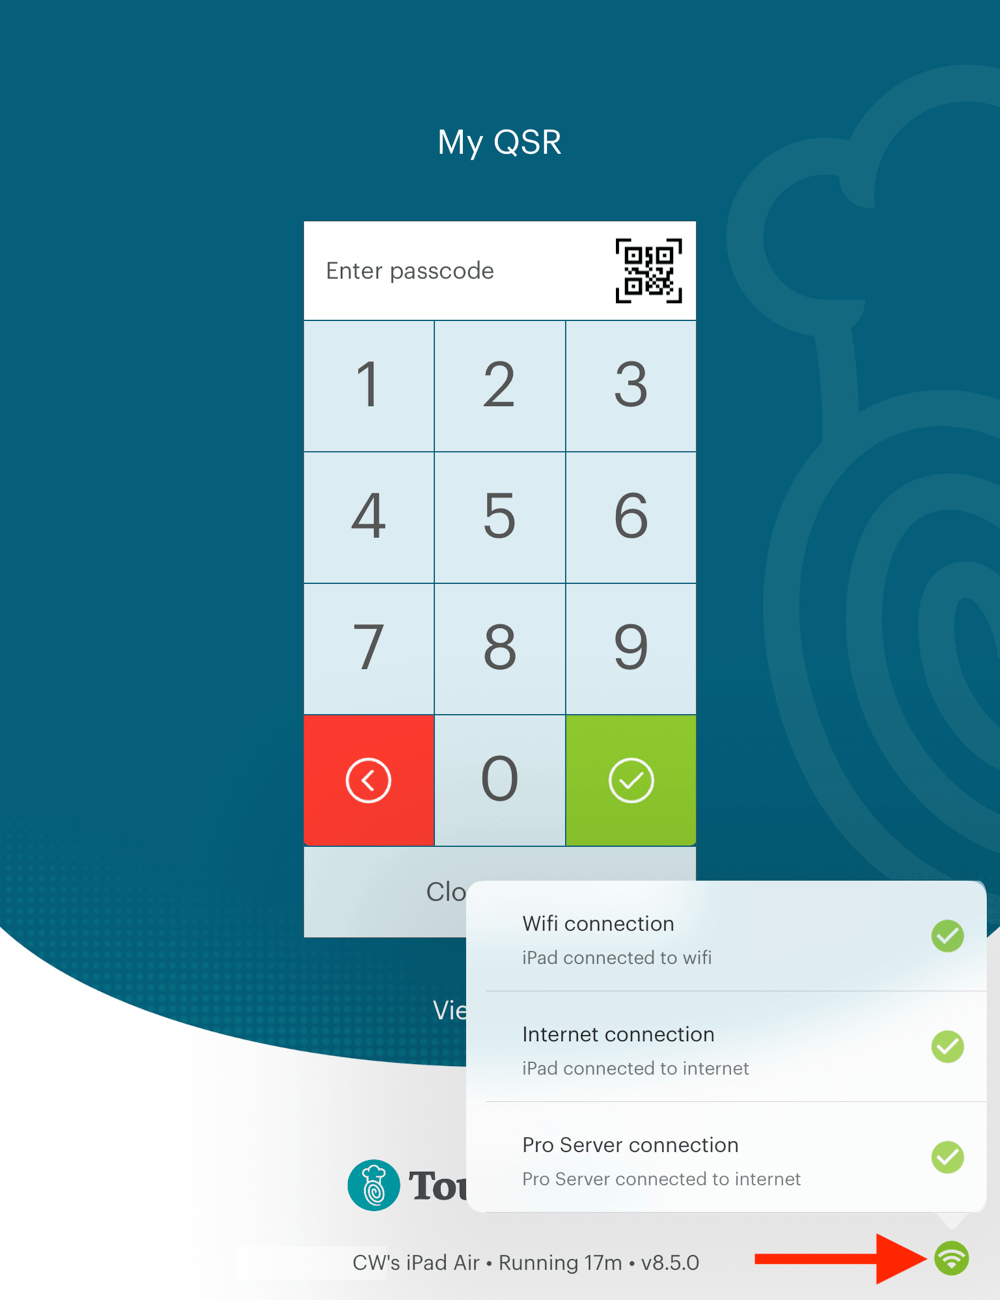
You can also get a quick check of your connectivity status from your login screen. The color of the icon provides the following information.
|
Color
|
Status
|
|
|
You have no Wi-Fi and no Internet connection.
|
|
|
You are missing either a Wi-Fi or Internet connection. If you are using the Pro version a yellow status might also indicate your Pro server has no connection to the Internet.
|
|
|
You have both a Wi-Fi and an Internet connection.
|
If your Connectivity Status ![]() is yellow tap the icon to see details of what is missing.
is yellow tap the icon to see details of what is missing.
Chapter 8. TeamViewer Integration

Tap the Admin or Option menu item and tap Help.
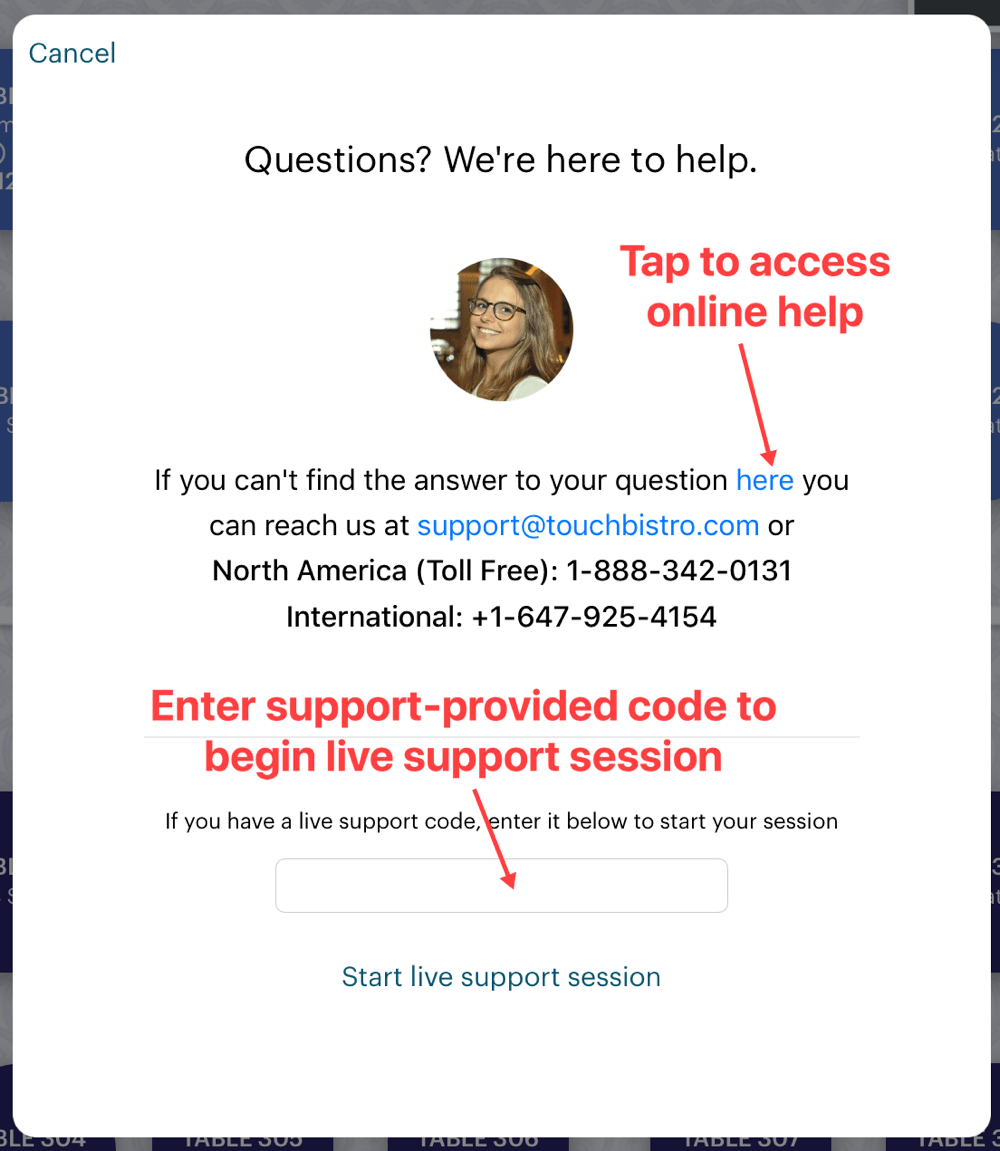
From this dialog box you can, if directed by support, launch a live support session. Also if you tap here, you can access TouchBistro’s online help section. Note: You must have been given an invite code to get the live support session to work.


 Email
Support
 Frequently
Asked Questions
