Setting Up your Airport Extreme for TouchBistro Standard (Single iPad)
Table Of Contents
Chapter 2. Enable Wi-Fi and Connect to Your AirPort
Chapter 3. Configure Your AirPort
Chapter 4. Connect Your AirPort to the Internet
Section 1. Router Supplied by Internet Service Provider
Chapter 1. Power Up AirPort
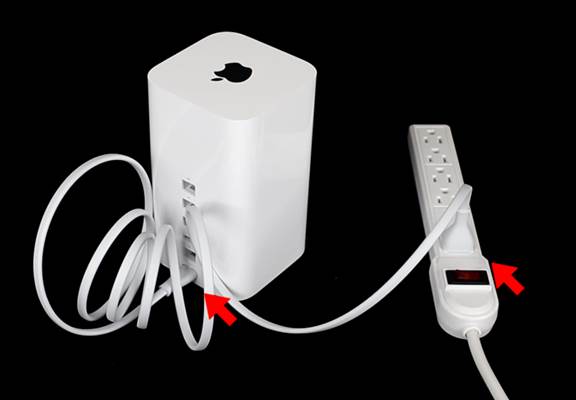
1. Plug the power cable into your AirPort and plug it into an electrical socket.
2. On the front of the AirPort, ensure it has an orange light.
Chapter 2. Enable Wi-Fi and Connect to Your AirPort
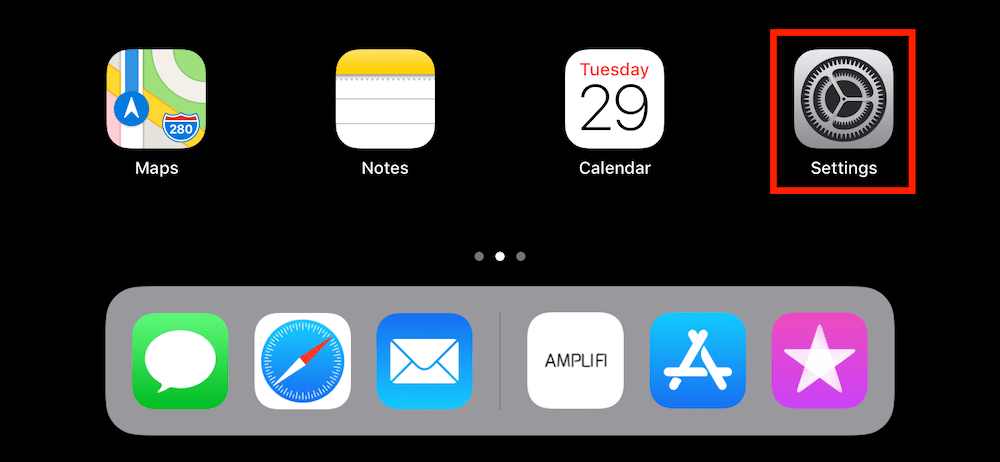
1. Tap your iPad’s Settings.

2. Tap Wi-Fi. If Wi-Fi is not enabled, enable it.
3. If you are connected to another Wi-Fi network, tap the Information ![]() icon next to the connected network.
icon next to the connected network.
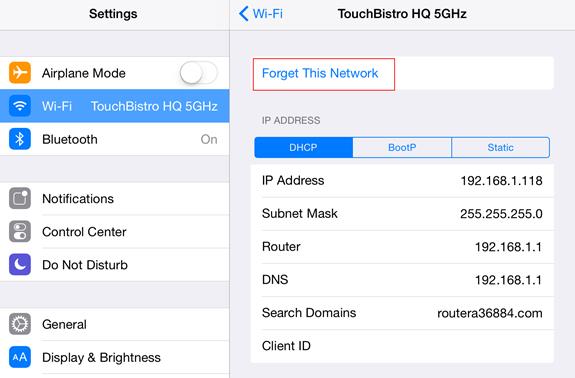
4. Forget the network.

5. Look for your AirPort under Set Up New AirPort Base Station. It may take a minute or two for your iPad to locate your new AirPort. When it appears, tap it. Your iPad will take a minute or two to gather information.
Note: If you are already using an AirPort or Express at your venue, the new AirPort will prompt you to join the network. Do not join the network.

6. Next to Network, enter a new network name.
Note: We suggest you name your network and device after your venue with “TB” at the end.
7. Enter your network password and verify. Your password must be at least 8 characters.
8. Tap Next.
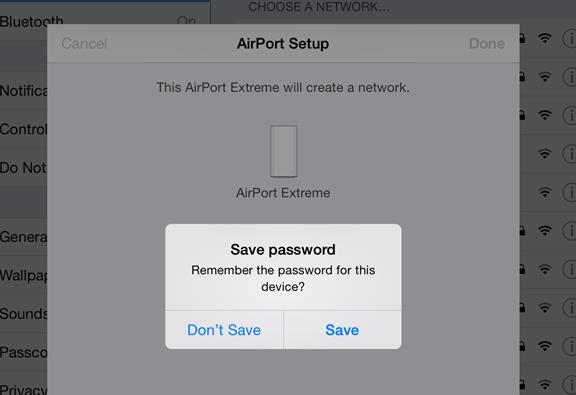
9. Save the password.
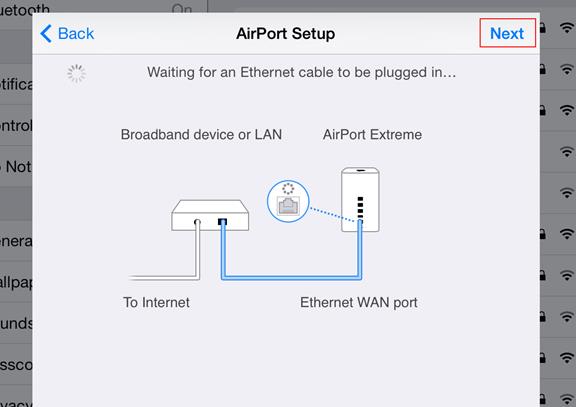
10. Ignore the warning about waiting for an Ethernet cable to be plugged in. Tap Next.
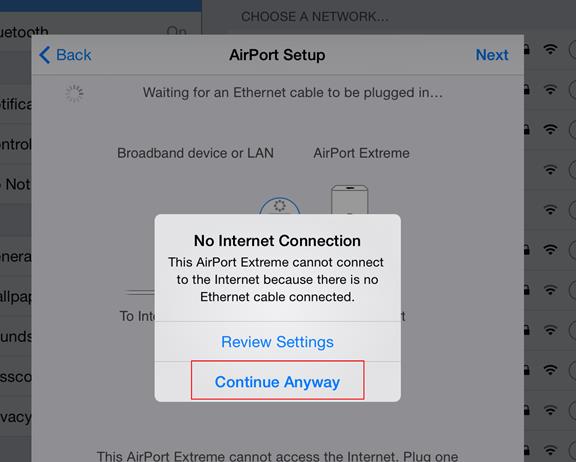
11. Ignore the warning about no Internet connection. Tap Continue Anyway.

12. When prompted to send diagnostic information, tap Don’t Send and tap Next.

13. Wait until your iPad prompts you Setup Complete. Tap Done.
Chapter 3. Configure Your AirPort
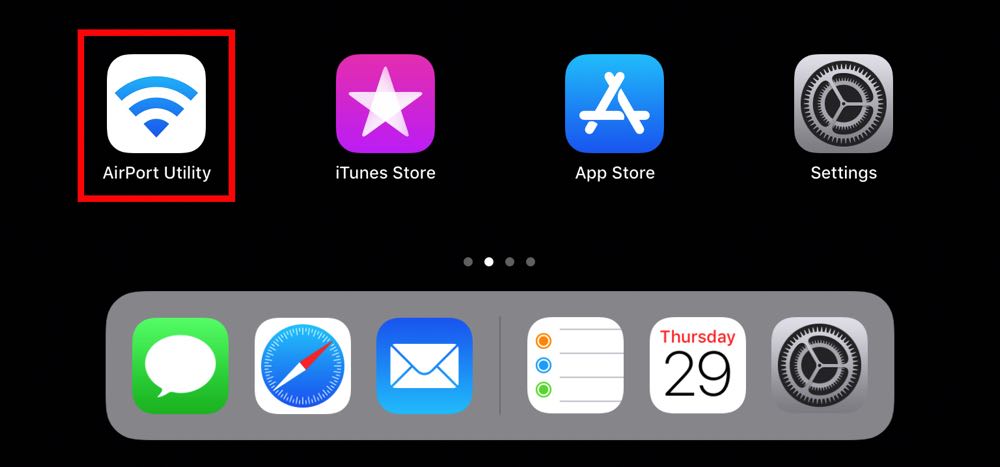
1. Access the AirPort Utility app on your iPad. Wait until your AirPort Utility auto detects your AirPort. It could take a minute or two for AirPort Utility to find your AirPort.
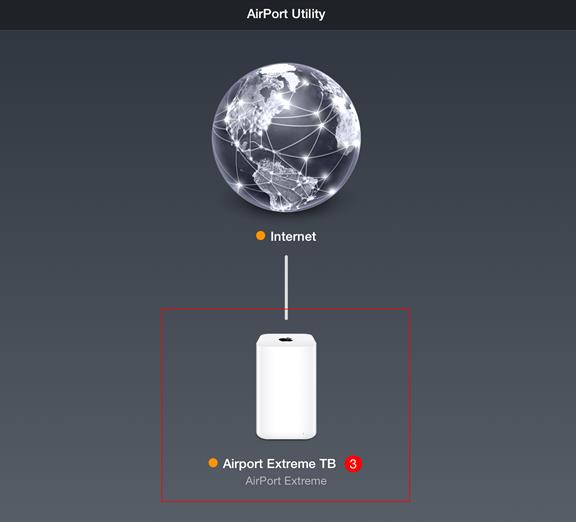
2. Wait until you get an orange indicator under the AirPort icon and then tap the icon.

3. Tap Status Messages.
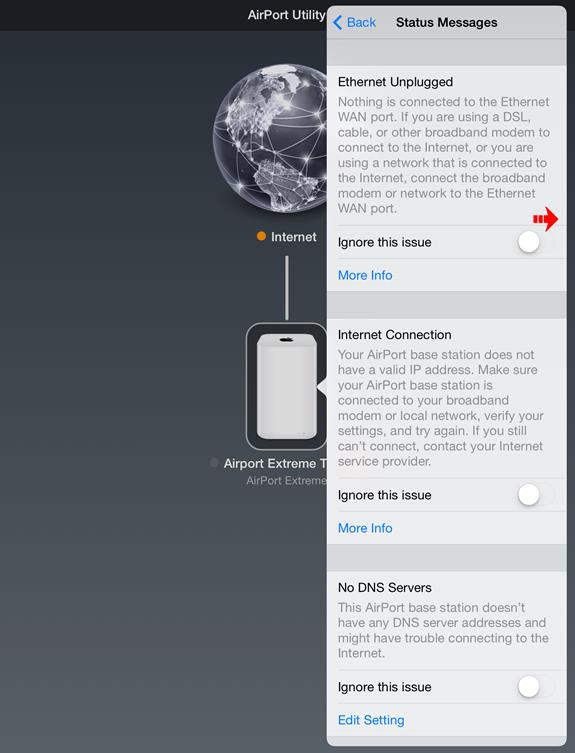
4. Swipe to ignore the first message.
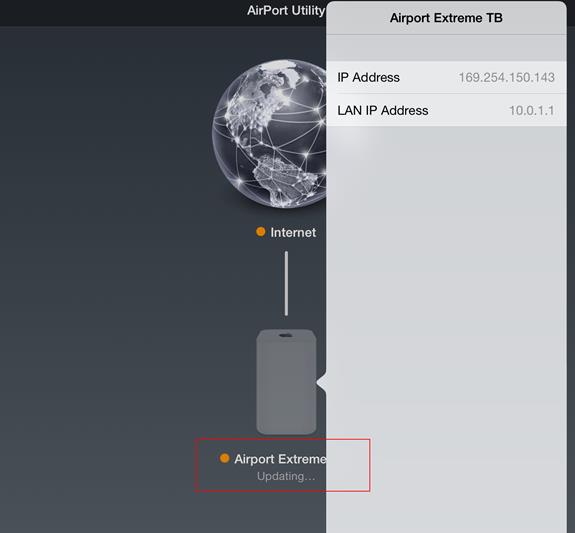
5. AirPort Utility will report it’s updating your router. It takes a minute or two for the router to update itself.

6. Wait until you’re returned to the details menu. You will see you have 2 remaining status messages to deal with. Tap Status Messages again.

7. The first message you ignored will be at the bottom. Now slide to ignore the message at the top.
8. Again AirPort Utility will take a minute or two to update your AirPort.
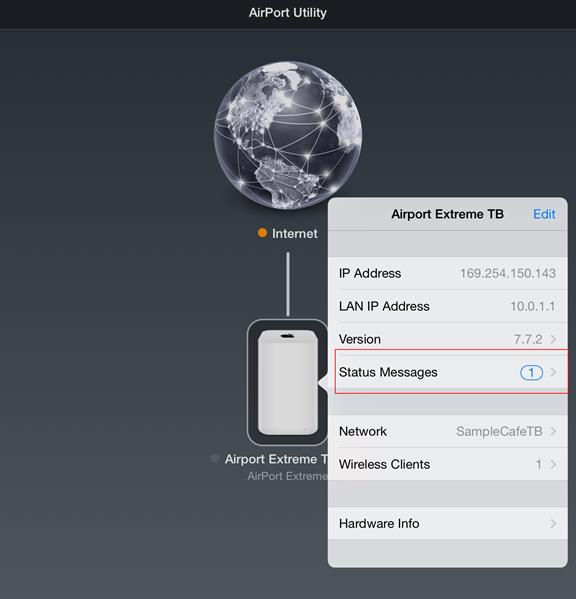
9. After updating, you will see you have one remaining status message to deal with. Tap Status Messages again.

10. The first message and second you ignored will be at the bottom. Now slide to ignore the message at top.
11. Again AirPort Utility will take a minute or two to update and then return you to the details menu with no status messages waiting.
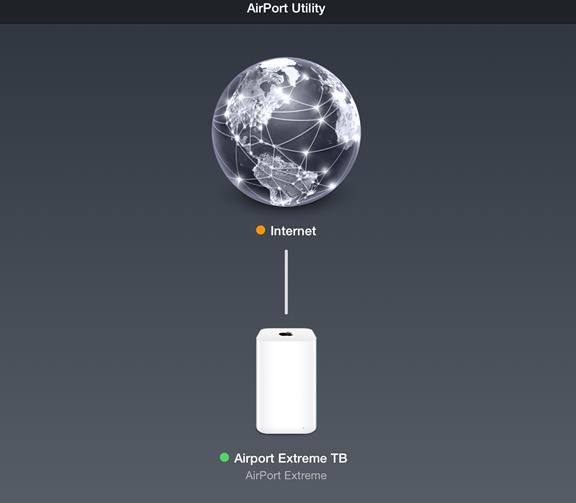
12. Ensure you have a green light on your AirPort (both the hardware and a green indicator on AirPort Utility). This could take a minute or two. When you get both green indicators, you have now established a Wi-Fi connection between your iPad and the AirPort.
Chapter 4. Connect Your AirPort to the Internet
(Mandatory for Integrated Payment Processing and Cloud Reporting)
If you have signed up with an integrated payment processor, you need to have Internet access. You can now connect your AirPort to the router or modem provided by your Internet service provider.
Note: Do not try to setup your payment processor at this time.
Section 1. Router Supplied by Internet Service Provider
If you have a router supplied and setup by your Internet Service Provider (ISP), you will need to connect your Airport router to the ISP’s router.
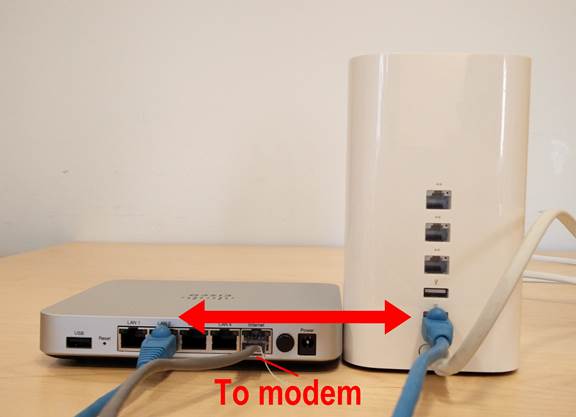
1. Plug a Cat5 Ethernet cable into your Airport’s WAN port (the port just above the power socket). Plug the other end into any of the available LAN ports on your ISP-supplied router. Ensure a Cat5 Ethernet cable goes from your ISP-supplied router to your ISP-supplied modem.

2. Launch AirPort Utility on one of your iPads.

3. Tap on the icon representing your Airport. You should see it now reports one issue: a Double NAT error. Tap on it and ignore it.
Section 2. No Router Supplied by Internet Service Provider
If you contracted Internet service after setting up TouchBistro or in conjunction with setting up TouchBistro, you may not have been supplied a router by your Internet Service Provider (ISP). If this is the case you need to connect your Airport router directly to the Internet modem supplied by your ISP. You should only follow these steps if you have no ISP supplied router already connected to your Internet modem.
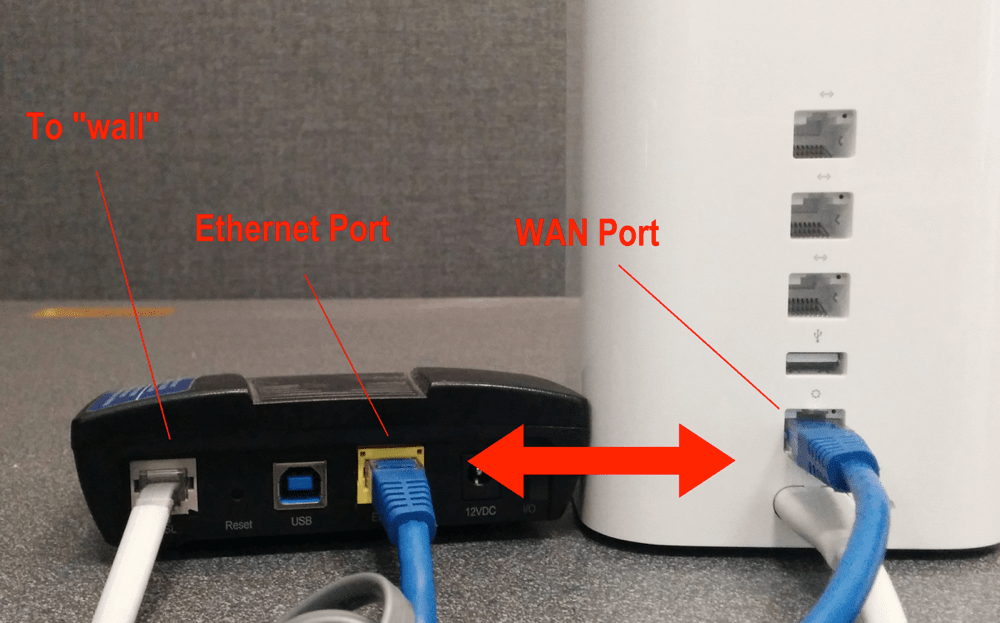
Connect your AirPort to the modem by running an Ethernet cable between your AirPort’s WAN port (the port on the bottom of the AirPort) and the Ethernet/WAN port on the modem provided by your ISP. Your modem will likely be different from the one illustrated above. However ensure the Ethernet cable plugged into your AirPort is plugged into a port either identified as an Ethernet port or a WAN port. Ensure you do not disconnect the cable that goes to your wall port (which of course gives you connectivity to the Internet).
Do Not Use This Router for a Guest Network or Any Other Kind of Network Using Device
TouchBistro does not recommend enabling a guest network (for, say, customers) on the same router that is being used for TouchBistro connected devices. This is to ensure speed, security, and easy troubleshooting when dealing with TouchBistro support. Do not add additional devices that would use this network, for example security cameras. Also do not use the network with bandwidth hungry services like music streaming services.
Note: the USB port on the Airport is not used by TouchBistro. It is intended to to provide connectivity to peripherals like external hard drives that come with their own source of power. It does not supply enough power to charge an iPad.
Chapter 5. Related Articles
Changing the Password on your Airport Router
Extending Your Network
How to configure an Airport Extreme Router
How to Factory Reset an Airport Extreme


 Email
Support
 Frequently
Asked Questions