
 Email
Support
Email
Support Frequently
Asked Questions
Frequently
Asked Questions
Setting Up Menu Categories
Video Tutorial
Step by Step Instructions
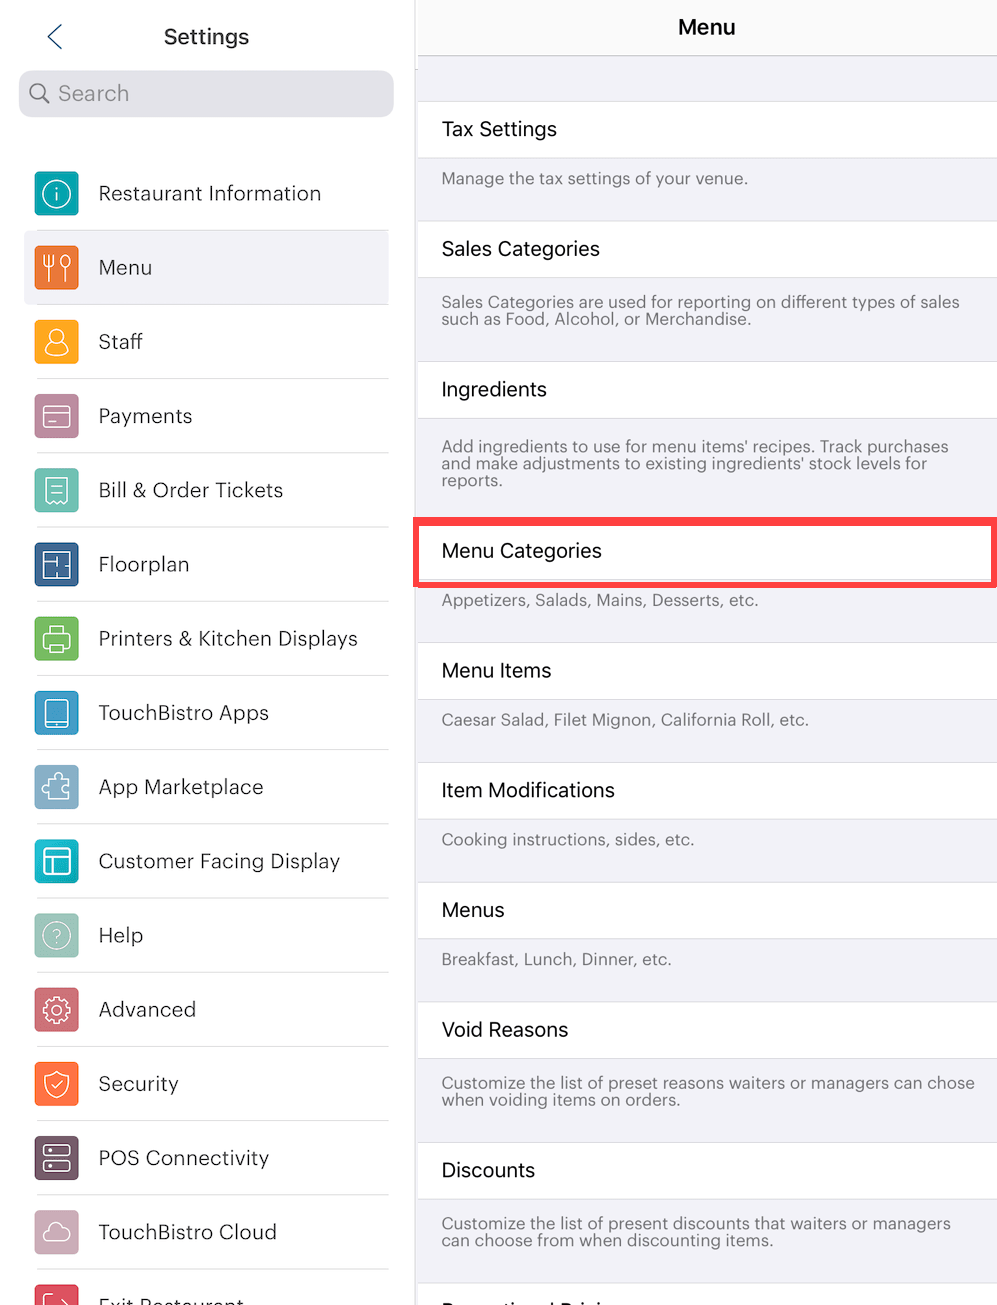
After setting up or reviewing Sales Categories, you need to configure Menu Categories. Menu categories should reflect how your physical menu is organized. For example, you might have categories like Appetizers, Sandwiches, Mains, Desserts, Soft Drinks, Beer, Wine. Each category can have some basic default settings that get applied to actual menu items added to the category. This way when you add actual menu items to a category, you don’t have to set each menu item’s course/taxes/kitchen ticket printer etc.
Note: if you later change some Menu Category settings, some of the Menu Category settings do not get propagated to existing menu items. See this guide for a chart of which Menu Item settings do not inherit subsequent Menu Category changes.
To add your categories:
1. Tap on Menu Categories.
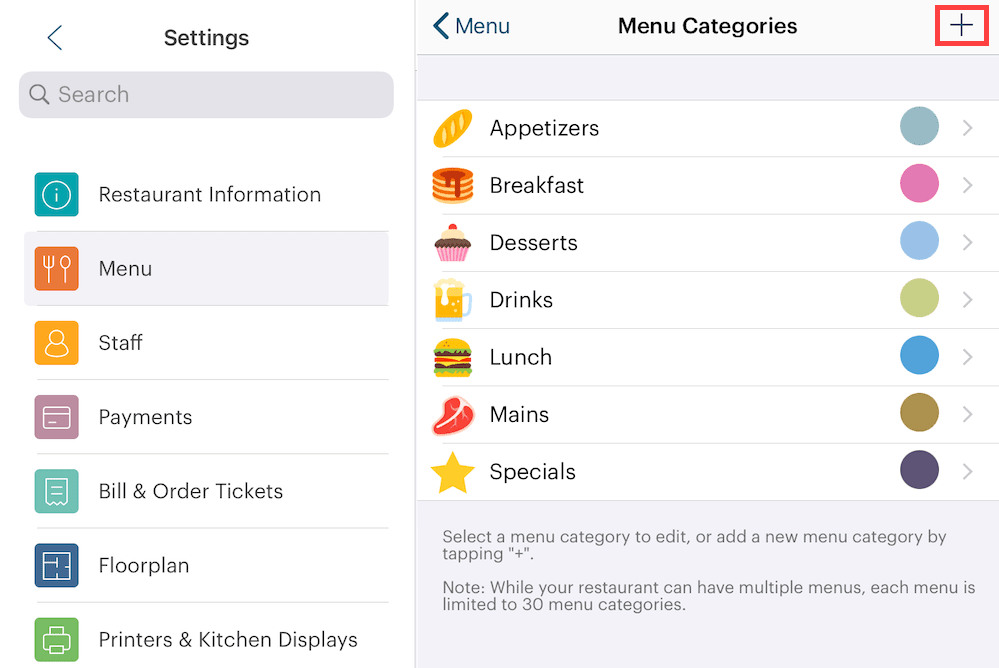
2. To add a new Menu Category, tap the Add + icon.
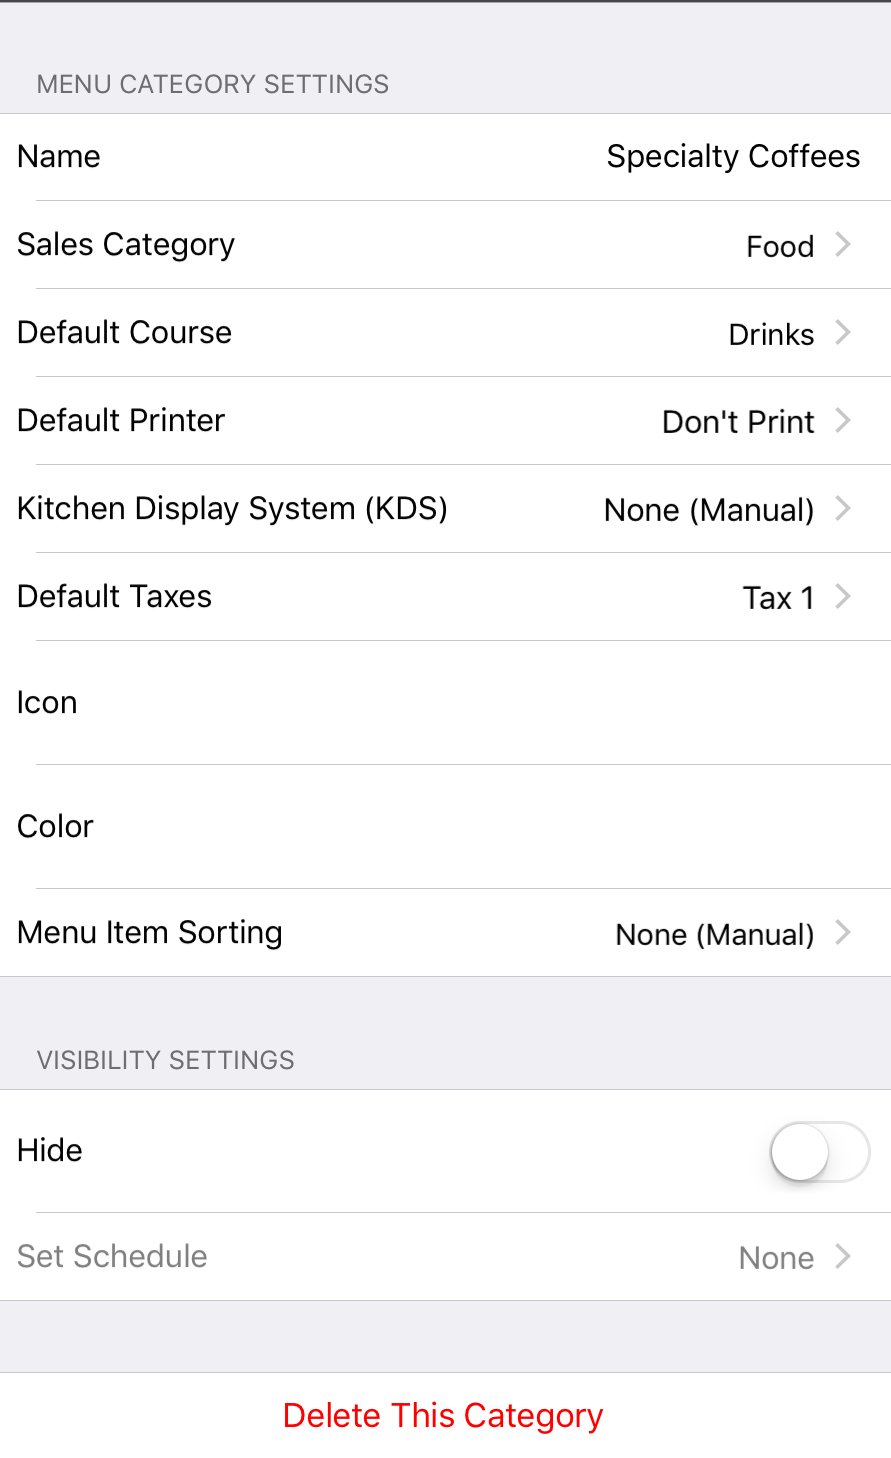
3. Enter the category’s name in the Name field.
4. Tap Sales Category to specify one of the Sales Categories you created previously.
 x
x
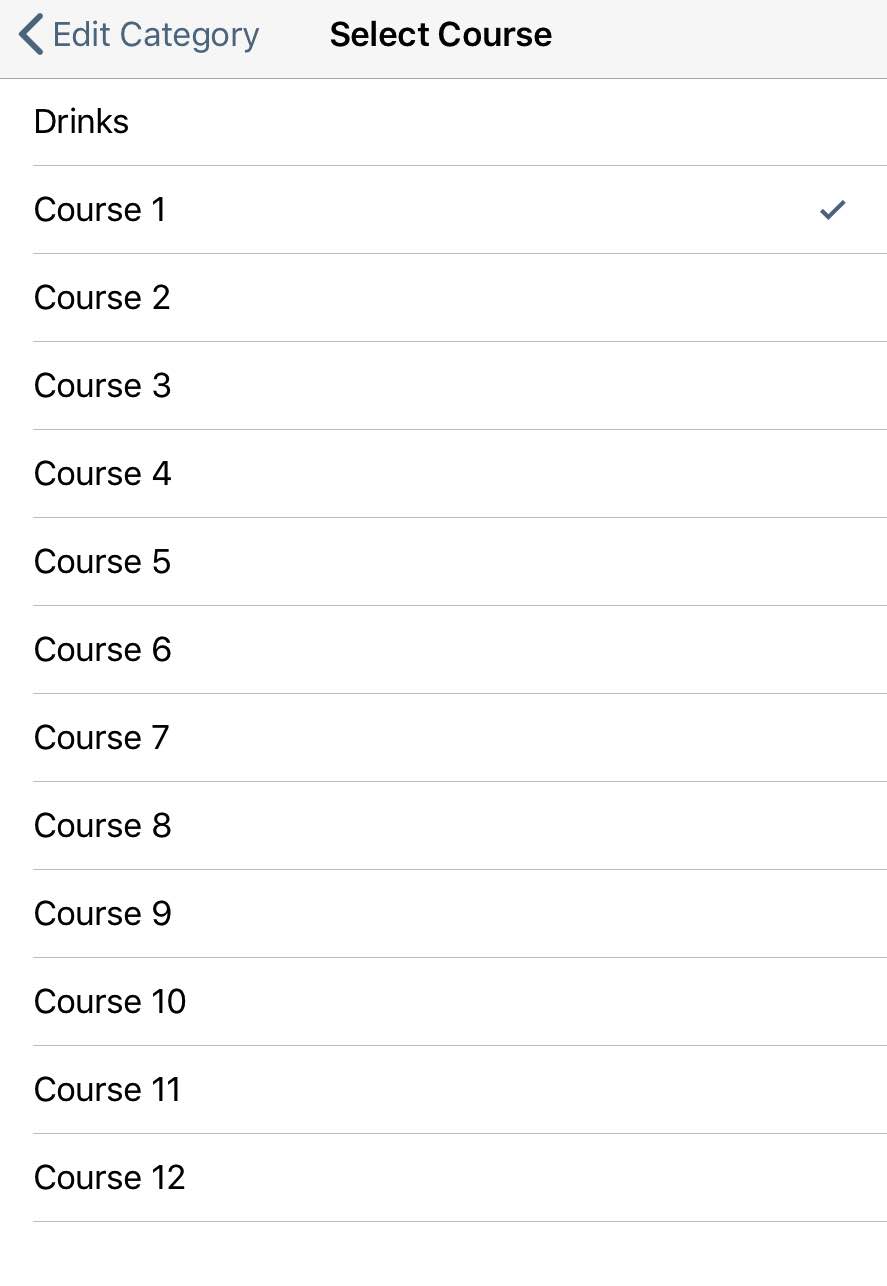
5. Tap Course. If all items in this category are drinks, taps Drinks. If items in this category are food, select the course: Course 1 (if, say, an appetizer), Course 2 (if, say, a main), Course 3 (if, say, a dessert). Set the course appropriate for your system.
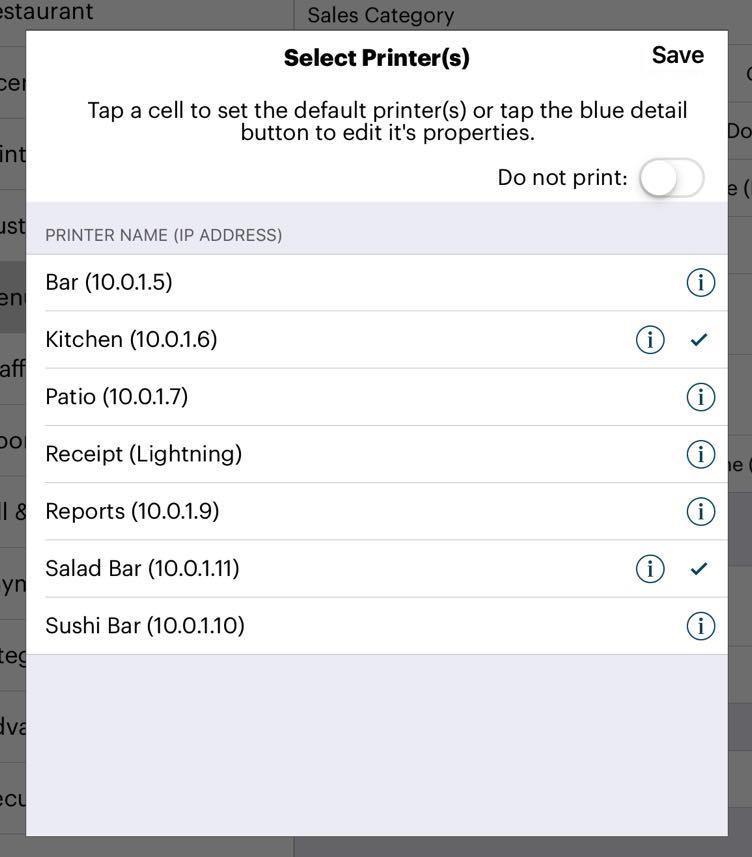
6. If you need items ordered under this category to print as chits/ticket to the kitchen or the bar, tap on the Printer button (by default it is set to Don’t Print). Typically drink type categories are set to Don’t Print. If your waitstaff prepare drinks themselves or pass verbal orders to a bartender, set Printer to Don’t Print. If you have purchased the TouchBistro KDS system, see this guide for information on how to set up a kitchen display using the TouchBistro KDS system.
7. Turn off Do not print this item with the slider.
8. Tap the desired printer name. If the order items should go to a bar chit printer, tap Bar. If the order items should print chits in the kitchen, tap Kitchen. You can also select multiple printers. For example, all menu items under the menu category need to go to both a kitchen printer and a salad bar printer.
9. Ensure there’s a ![]() checkmark in the desired printer’s row.
checkmark in the desired printer’s row.
10. Tap Save. You will be returned to the Configure Menu Categories page.
11. If you’re not using a kitchen chit printer and instead you have purchased the TouchBistro KDS (Kitchen Display System), tap Kitchen Display System to select your configured KDS.
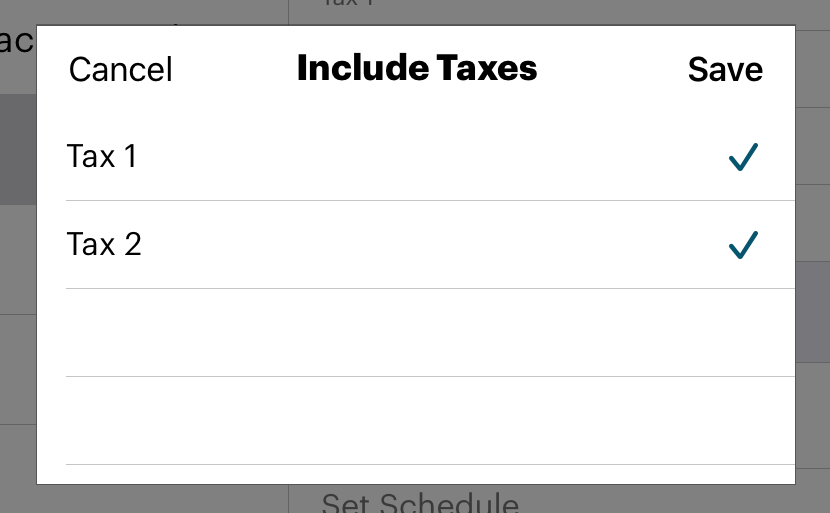
12. Tap Default Taxes to specify which taxes should or should not apply to items in this category. Note: If later you change these tax settings (for example you disable a tax or add a new tax to the menu category), the associated menu items will not be set for the new tax settings. Open each individual menu item and adjust the tax settings.
13. If this is a new category, tap on the Icon button to add an icon to represent the category.
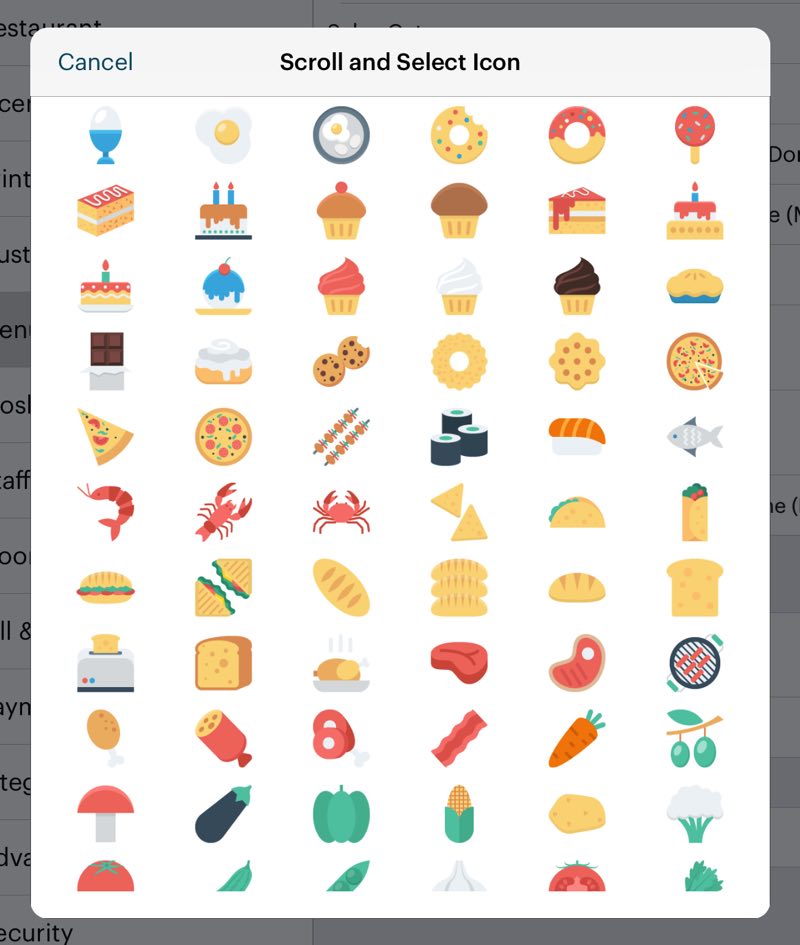
14. Tap on an appropriate icon. You will be returned to the Configure Menu Categories page.
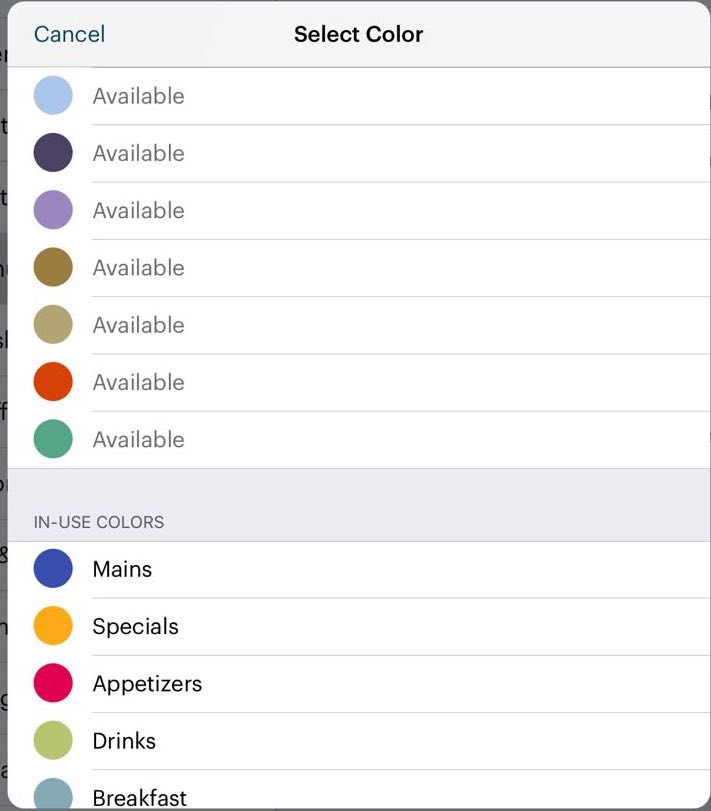
15. Tap Color to set what color the Text view should use for this category. Select an available color or reuse an in-use color.
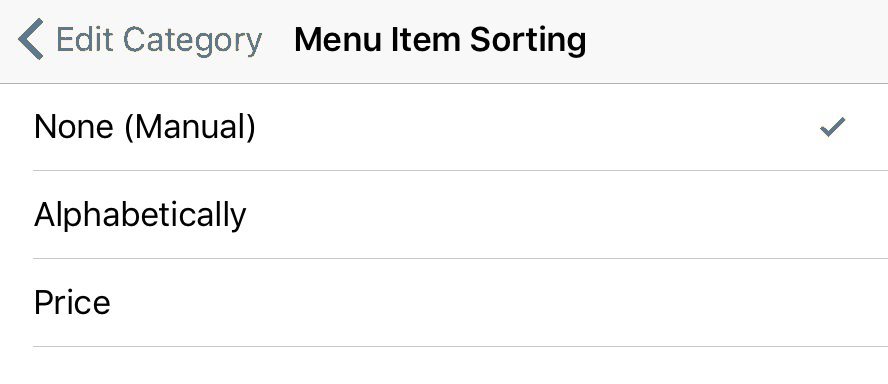
16. Under menu item sorting, tap how menu items under this category should be sort. Experiment with the menu sorting to find the most efficient sorting for your restaurant.
Note: See Setting Up Menus on how to sort your actual Menu Categories.
17. If this category needs to be temporarily removed from the menu (for example, it’s a seasonal category like “crab fest”), slide Hide to the green position.
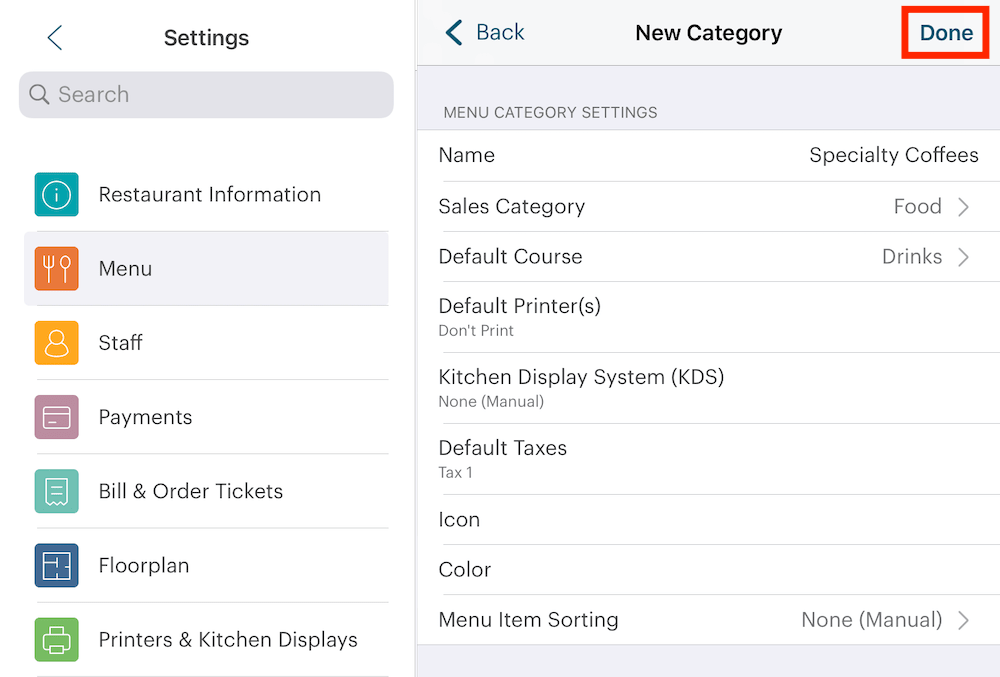
18. Tap Done.
19. You can now tap the Add + icon to add a new category.
20. Tap Menu in the top left to return to the Menu Settings page.
 Return to Table of Contents