TouchBistro Payments Online Portal
Table Of Contents
Section 1. Viewing Your Transactions
Section 2. Processing a Refund
Chapter 3. Modifying Your Account Details
Section 2. Edit Business Information
Chapter 1. Logging In
1. Locate the email from Ingenico Mobile Solutions with your Portal User ID and a temporary password.
2. Access https://merchant.roamdata.com/home_login with a web browser.
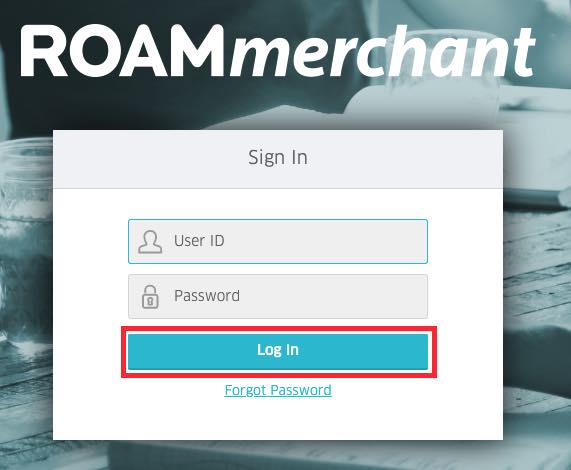
3. Enter your User ID and password.
4. Click Login.
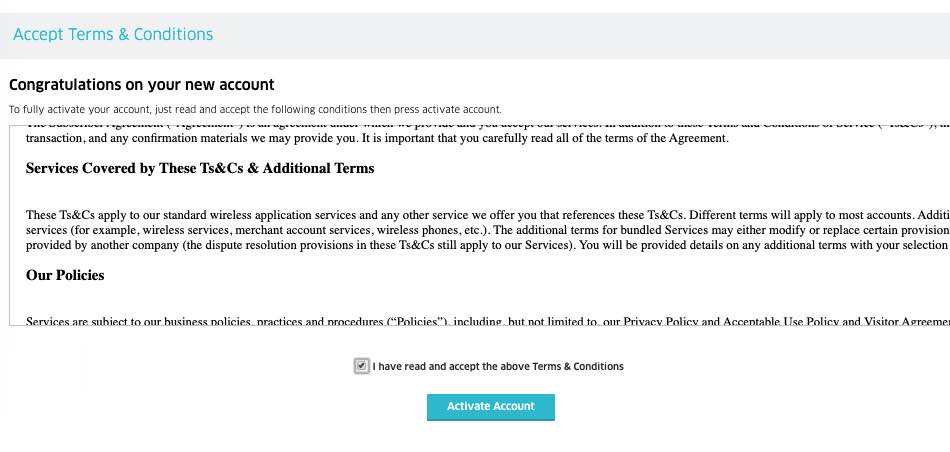
5. After login you will be prompted to accept the terms of service. Check to accept the terms and click Activate Account.
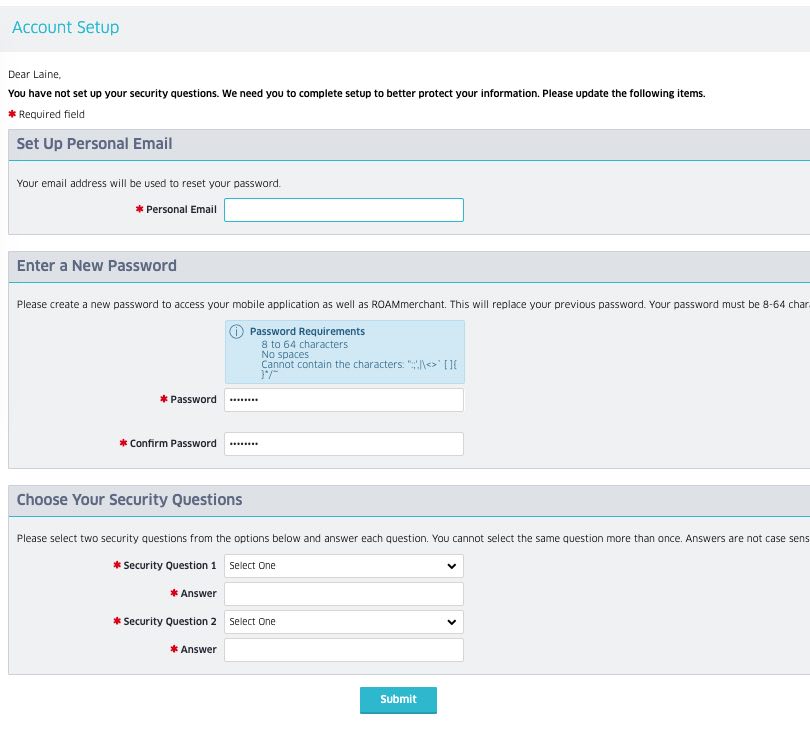
6. After accepting the terms of service, you will be prompted to change your temporary password. Your password has to be a minimum of 5 letters or number. It cannot contain non-alphanumeric characters, like keyboard characters (e.g., $#@*).
Chapter 2. Using the Portal
Section 1. Viewing Your Transactions
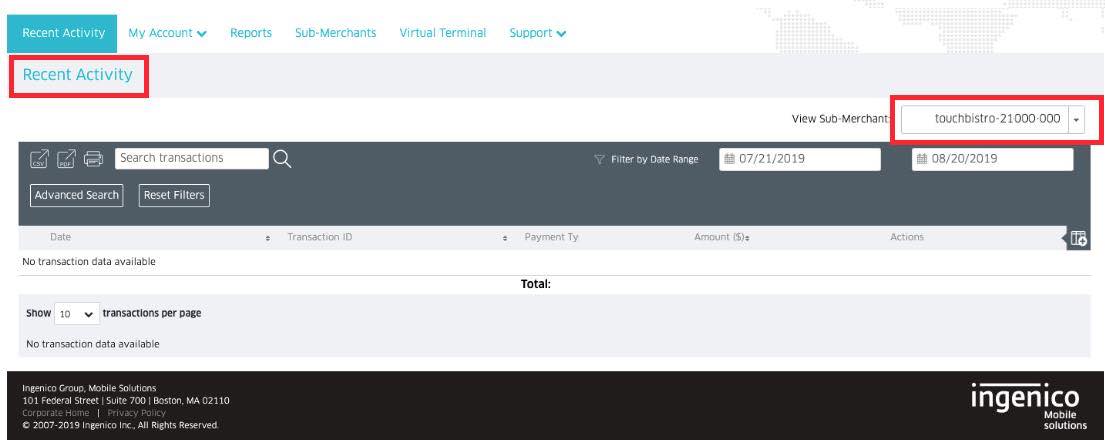
1. Click Recent Activity.
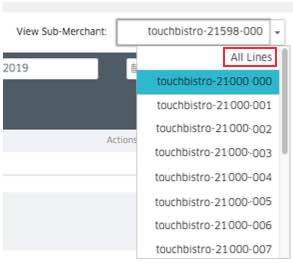
2. Click on the View Sub-Merchant drop-down box and select All Lines. There should be one Sub-Merchant number for each payment terminal you have at your business. If you have only one device, you will see only one Sub-Merchant number. If you have more than one, you will see multiple Sub-Merchant numbers. The Sub-Merchant numbers are not tied to specific payment devices. They only represent whatever Sub-Number was available to the active payment device to process the transaction.
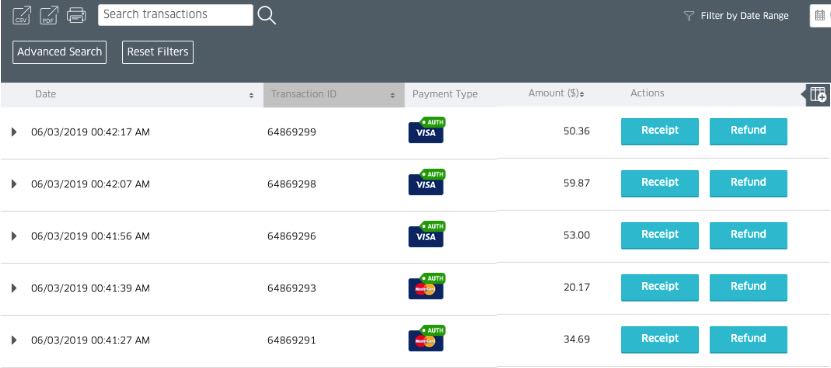
3. You will see all transactions listed by date. Click on a column header to resort the transactions list by the header. For example, to see payments sorted by payment time (Visa, MasterCard, Amex etc.), click on the Payment Type header.

4. If you click on the triangle ![]() button associated with a payment, you can expand for more details about that payment.
button associated with a payment, you can expand for more details about that payment.
5. You can also filter this list by using the Search transactions field. Search on an amount, date, or range of dates.
6. If you want a hard copy of your transactions, click the Printer icon.
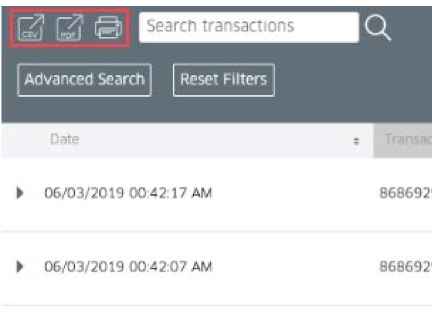
7. Alternatively, you can use the CSV or PDF button to export the transaction list as either a comma-separated value file (a plain text file) or an Adobe PDF file.
Section 2. Processing a Refund
If you are unable to process a refund via TouchBistro, you can use the portal to process a refund. You may use this in the event the customer cannot come in with the card to complete the refund steps in TouchBistro. (TouchBistro used a “card present” refund process.)
1. Generate a list of transactions (see Viewing Your Transactions above).
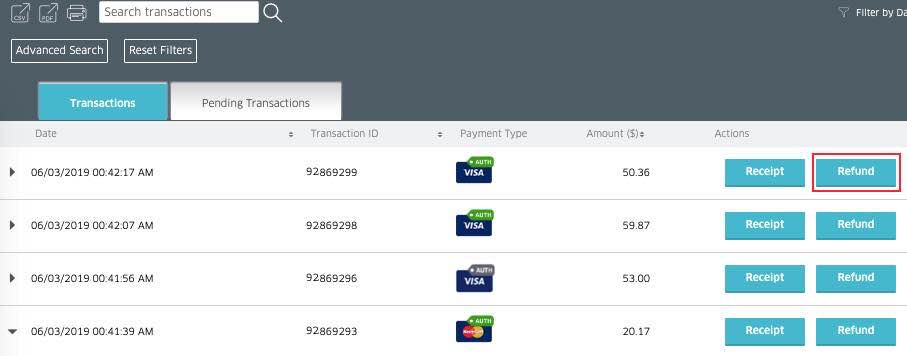
2. A green ![]() Auth icon above the payment type indicates the transaction and tip have been processed and you can process a refund. A grey
Auth icon above the payment type indicates the transaction and tip have been processed and you can process a refund. A grey ![]() Auth icon indicates you still have to complete a pre-auth within TouchBistro. You cannot refund the transaction until the pre-auth reconciliation has been completed in TouchBistro.
Auth icon indicates you still have to complete a pre-auth within TouchBistro. You cannot refund the transaction until the pre-auth reconciliation has been completed in TouchBistro.
3. Click the Refund button associated with the payment you wish to refund.
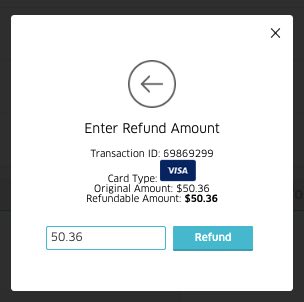
4. The portal, by default, suggests refunding the full amount charged to the card. If you wish to refund a partial amount, enter the amount to refund. Click Refund.
Note: Processing the refund within the portal will not adjust your sales within TouchBistro. You will need to refund the sale in TouchBistro using the non-integrated refund process to insure your sales account for the refunded payment. See the guide Doing a Cash or Non-Integrated Credit Card Refund for details.
Section 3. Reprint a Receipt
You can normally reprint the credit card slip through TouchBistro. However, the portal site gives you that ability as well. Printing the receipt via the portal site will not direct the receipt to your thermal printer. It will print the receipt on whatever printer you have attached to your computer. To reprint a receipt:
1. Generate a list of transactions (see Viewing Your Transactions above).
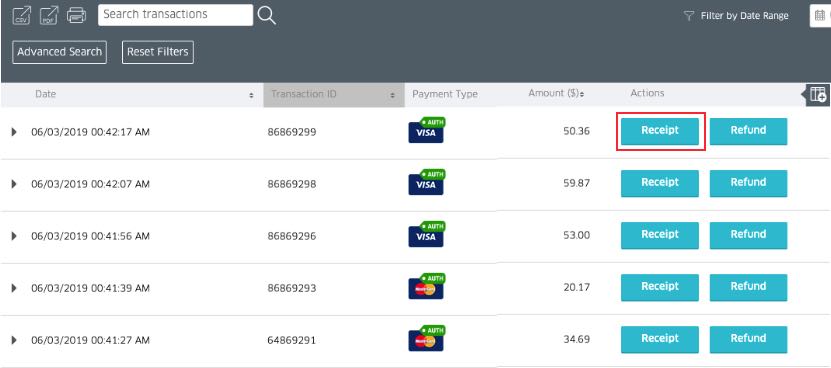
2. Click the appropriate Receipt button. A green ![]() Auth icon above the payment type indicates the transaction and tip have been processed and you can print the completed credit card slip. A grey
Auth icon above the payment type indicates the transaction and tip have been processed and you can print the completed credit card slip. A grey ![]() Auth icon indicates you still have to complete a pre-auth within TouchBistro. You cannot print the credit card slip until the pre-auth reconciliation has been completed in TouchBistro.
Auth icon indicates you still have to complete a pre-auth within TouchBistro. You cannot print the credit card slip until the pre-auth reconciliation has been completed in TouchBistro.
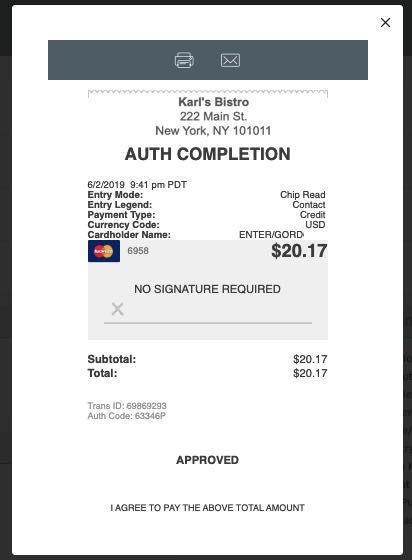
3. Click the Print button associated with the payment you wish to print a credit card slip for.
4. Click the printer ![]() button to print a hard copy of this receipt to your connected printer. This will not print to your TouchBistro thermal printer. Alternatively, click the email
button to print a hard copy of this receipt to your connected printer. This will not print to your TouchBistro thermal printer. Alternatively, click the email ![]() button to email the receipt to the customer.
button to email the receipt to the customer.
Chapter 3. Modifying Your Account Details
Section 1. Edit Email Receipt
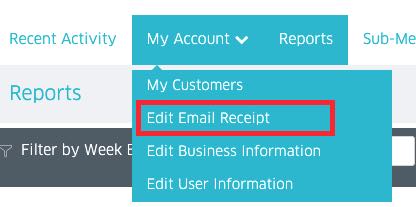
1. Click My Account.
2. Click Edit Email Receipt.

3. Click Upload New Logo to add or modify the image that gets included with your emailed receipts.
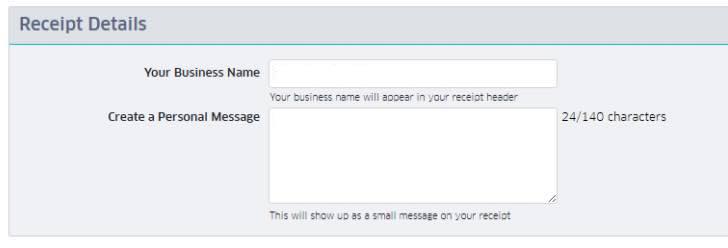
4. In the Your Business Name field, enter the name of your business. This will appear at the top of the receipt.
5. In the Create a Personal Message field, enter a message to be included with all receipts. There is a 140 character maximum.
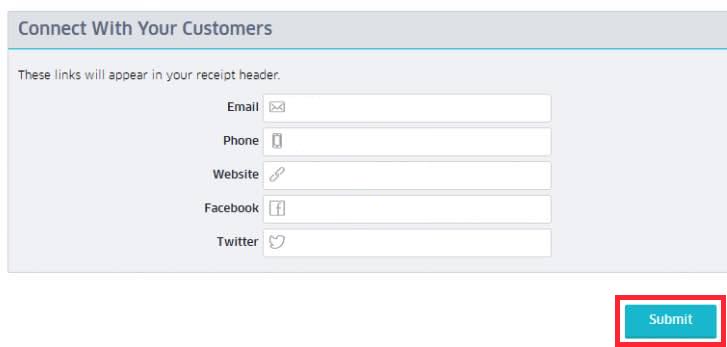
6. In the Connect with Your Customers section, enter contact methods (email, phone, web, Twitter, etc.). For your web site, include the http:// portion. For Facebook, give the full URL to your business page. For example, https://www.facebook.com/mybusiness. For Twitter, enter the @ symbol followed by your Twitter account name. For example @mybusiness. These will appear as clickable links in your email.
7. Click Submit.
Section 2. Edit Business Information
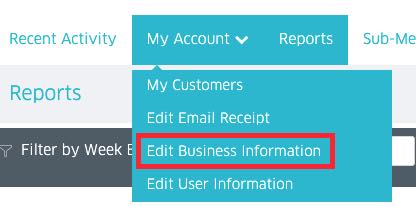
1. Click My Account.
2. Click Edit Business Information.
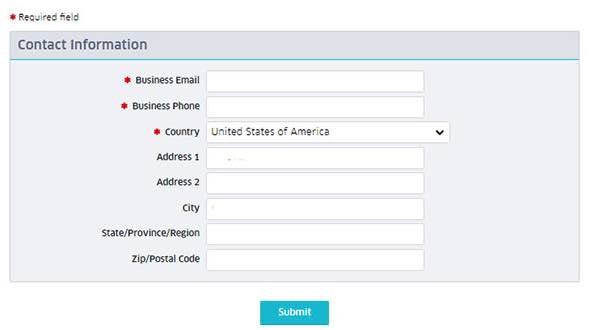
3. If you need to edit or add your business’s contact information, edit the appropriate field.
4. Click Submit.
Section 3. Edit User Information
1. Click My Account.
2. Click Edit User Information.
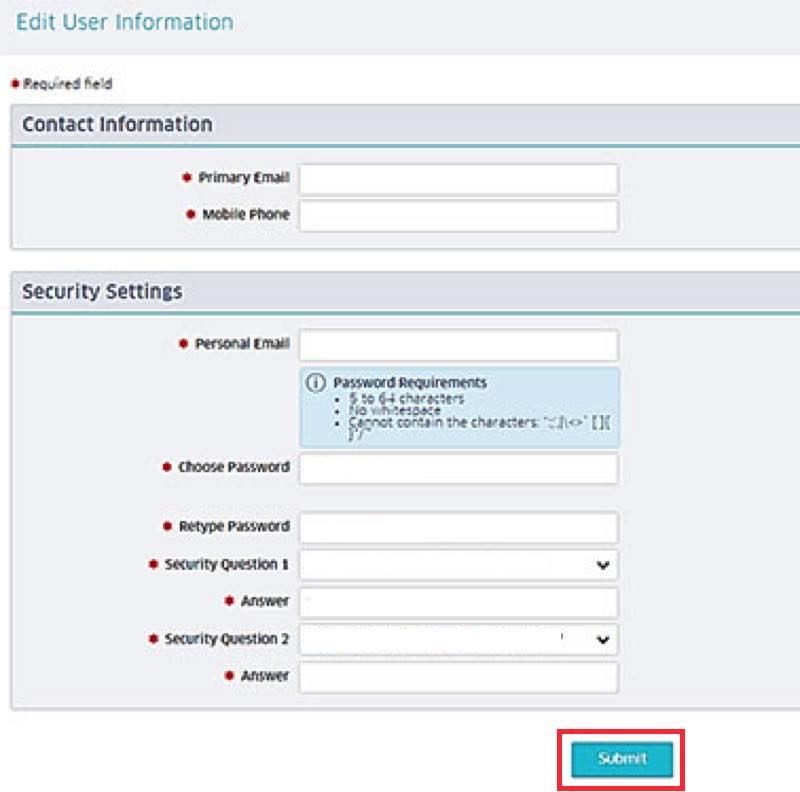
3. If you need to edit or add your user information, edit the appropriate field.
4. If you need to change your password, you can change it here. Your password has to be a minimum of 5 letters or number. It cannot contain non-alphanumeric characters, like keyboard characters (e.g., $#@*).
5. Select two security questions and type in an easy-to-remember answer.
6. Click Submit.
Section 4. My Customers
To view your customer list, do the following:
1. Click My Account.
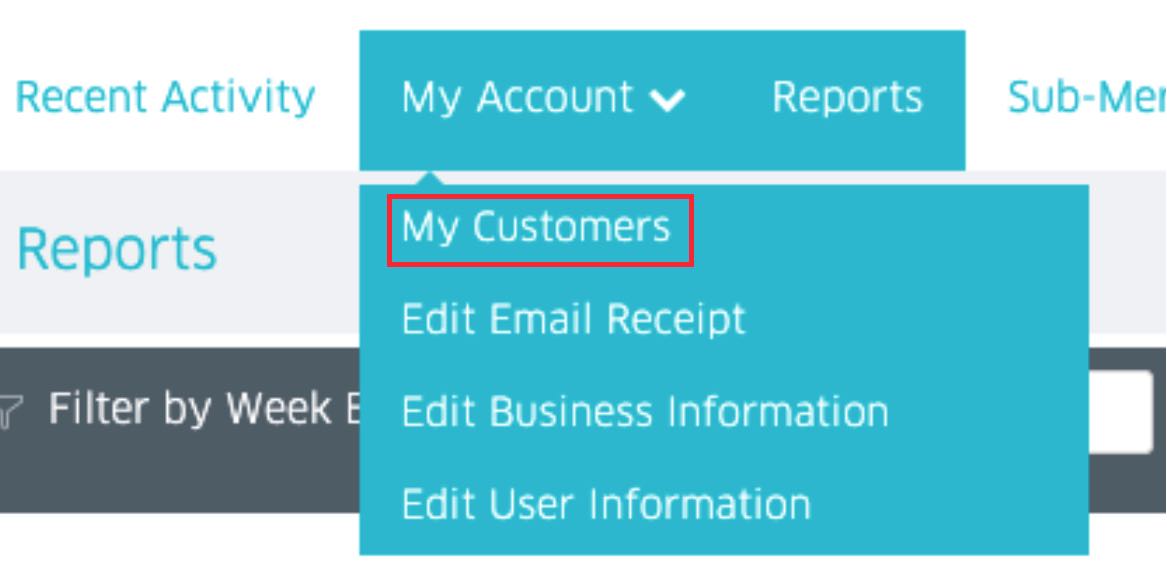
2. Click My Customers.
Chapter 4. Activating or De-activating a Sub Merchant
You should only use this feature with the guidance of TouchBistro support. Never deactivate a Sub-Merchant without the express instruction of a TouchBistro support representative.

A Sub Merchant represents the number of channels you have available to conduct simultaneous credit card authorizations. If you have, say, three payment devices, you should have three Sub Merchant numbers. When you run a payment, the payment device will grab one of these Sub Merchant number channels to open a line of communication to authorize your payment. If another payment device is activated while the first payment device is in the process of completing a payment, it will grab the next available Sub Merchant number.
This page will show you if all your assigned Sub Merchants are active. You should not make any modifications to this screen.


 Email
Support
 Frequently
Asked Questions
