Using TouchBistro and iPad OS 14
Table Of Contents
Chapter 2. Disable Private Address for Your Wi-Fi Connection
Chapter 3. Launching TouchBistro After the iPadOS 14 Update
Chapter 4. Connectivity Problems – Ensure Your Local Network Permission is Enabled
Chapter 5. Ensure Your Bluetooth Privacy Setting Is Still Enabled for TouchBistro POS
Section 1. How to Pair Bluetooth Devices You May Be Using with TouchBistro
Chapter 1. Introduction
iPadOS 14 has a few permissions that need to be configured for TouchBistro to work properly. This guide will walk you through the permissions you need to configure.
Chapter 2. Disable Private Address for Your Wi-Fi Connection
If your iPad (or iPads) are updated to iPad OS 14, do the following:
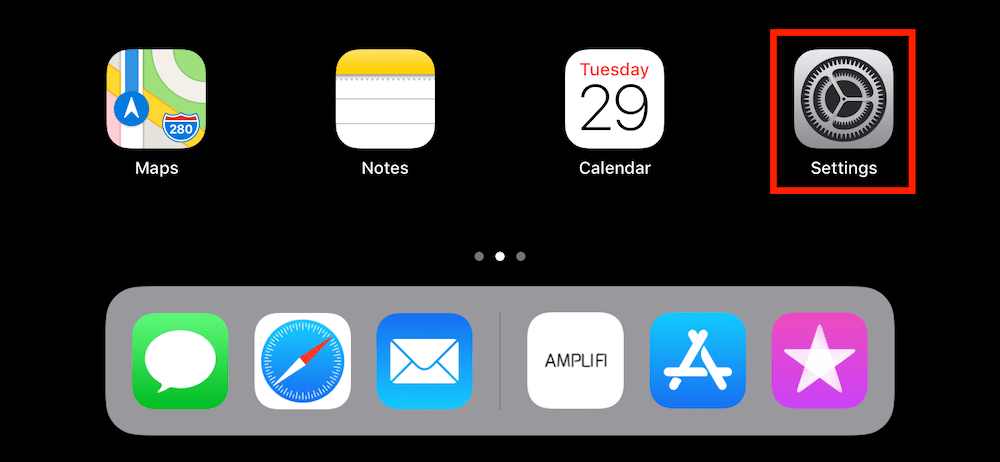
1. Tap your Settings icon.
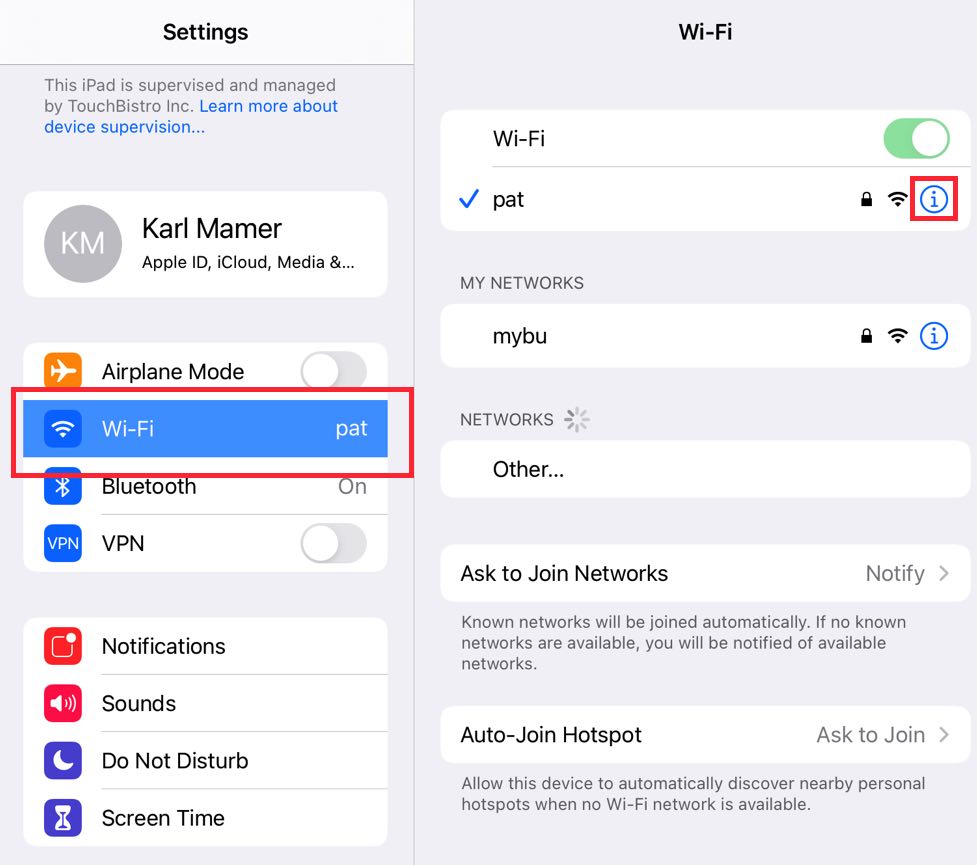
2. Tap Wi-Fi and then tap the Information ![]() icon next to your connected network.
icon next to your connected network.
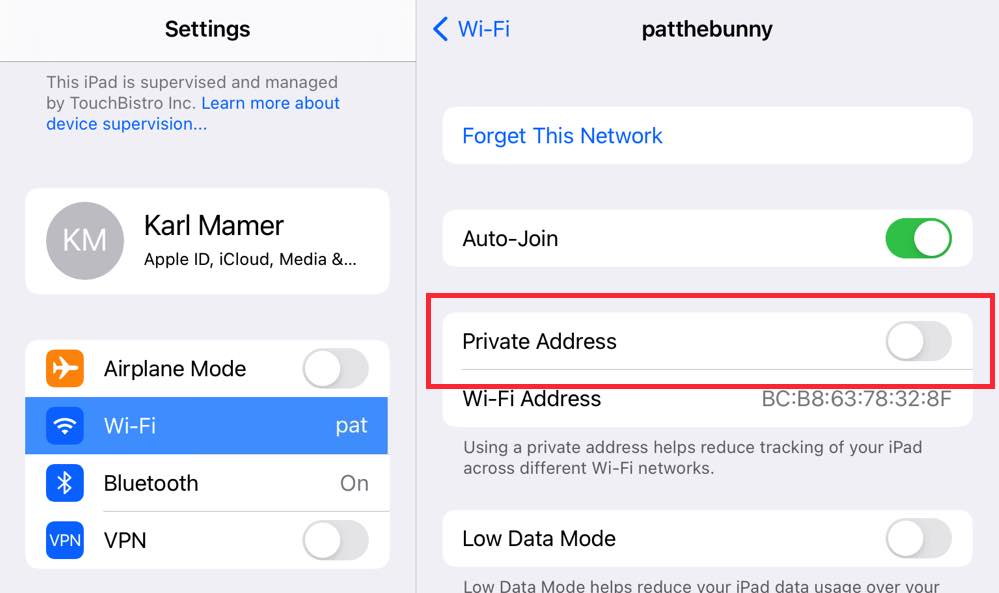
3. If Private Network is enabled, disable it.
4. If prompted, rejoin your network.
Chapter 3. Launching TouchBistro After the iPadOS 14 Update
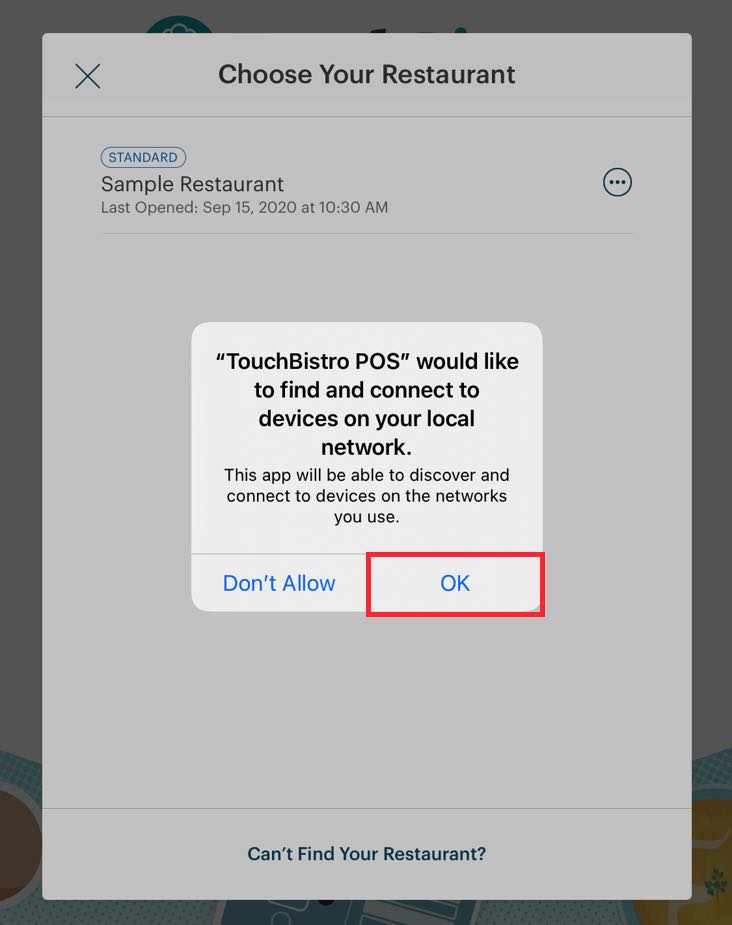
If you update your iPad(s) to iPad OS 14, please be aware when you launch TouchBistro POS after the update, you will be prompted to allow TouchBistro to access devices on your local network. You must tap OK and allow this permission.
If you have the following companion apps, you will likewise need to enable the Local Network permission after launching those apps for the first time after updating to iPadOS 14:
1. Customer Facing Display (CFD)
2. Kitchen Display System (KDS)
3. Kiosk
Chapter 4. Connectivity Problems – Ensure Your Local Network Permission is Enabled
If you accidentally declined the permission or you’re not sure if the permission was enabled, you should do the following (notably if you’re experiencing any connectivity issues with TouchBistro or a companion app after updating to iPadOS 14):

1. From your iPad desktop locate Settings and tap it.
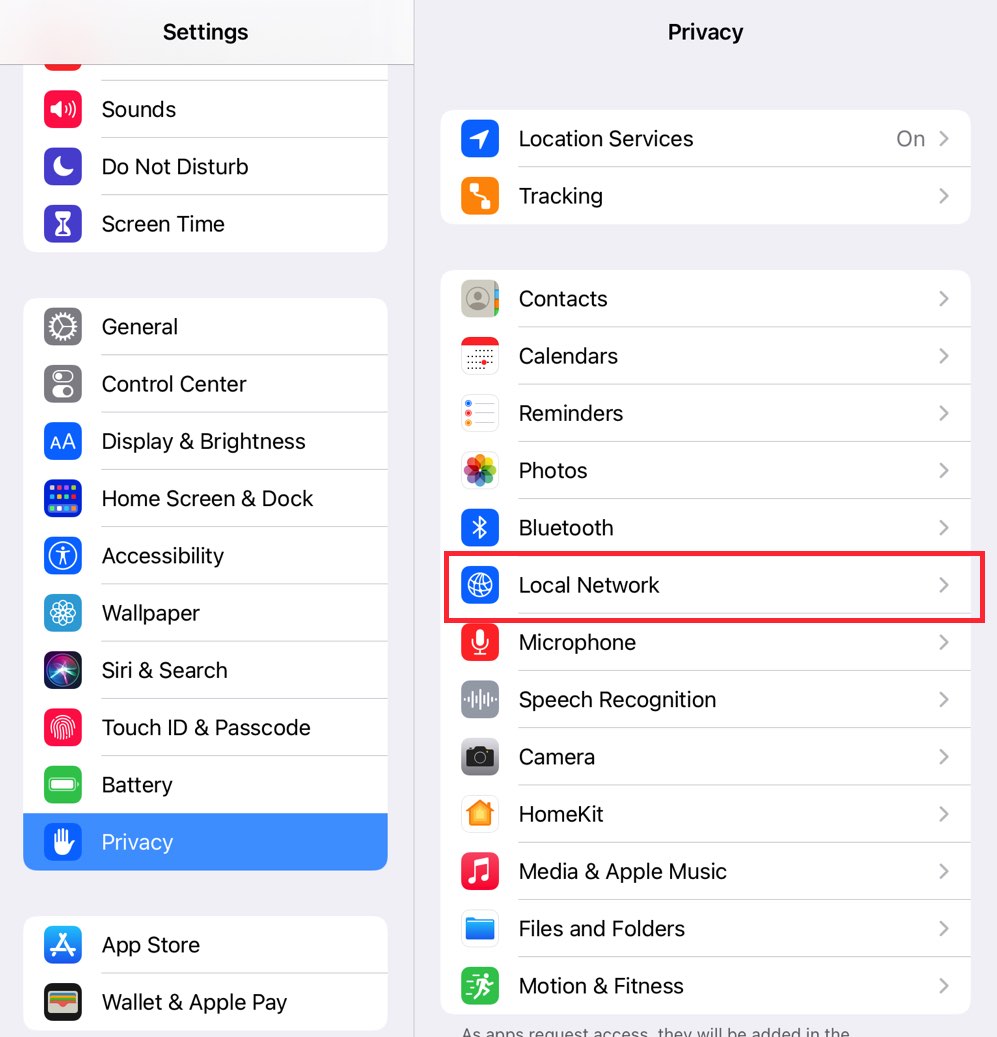
2. Tap Privacy and then Local Network.
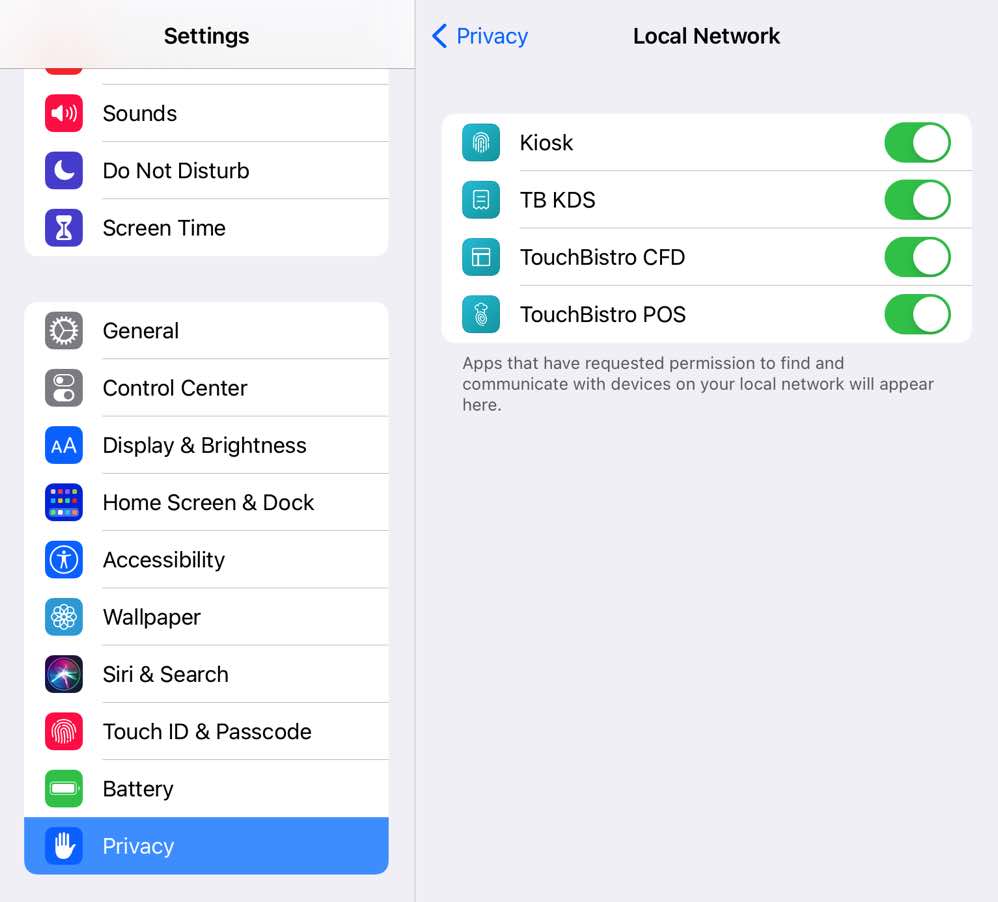
3. Ensure TouchBistro POS and all other companion apps have the Local Network permission enabled.
Chapter 5. Ensure Your Bluetooth Privacy Setting Is Still Enabled for TouchBistro POS
TouchBistro POS talks to some hardware integrations (like TouchBistro Payments RP457C or Moby8500 devices) via Bluetooth. After installing iPadOS 14, ensure Bluetooth access is enabled for TouchBistro POS. To do this:

1. Tap Settings.
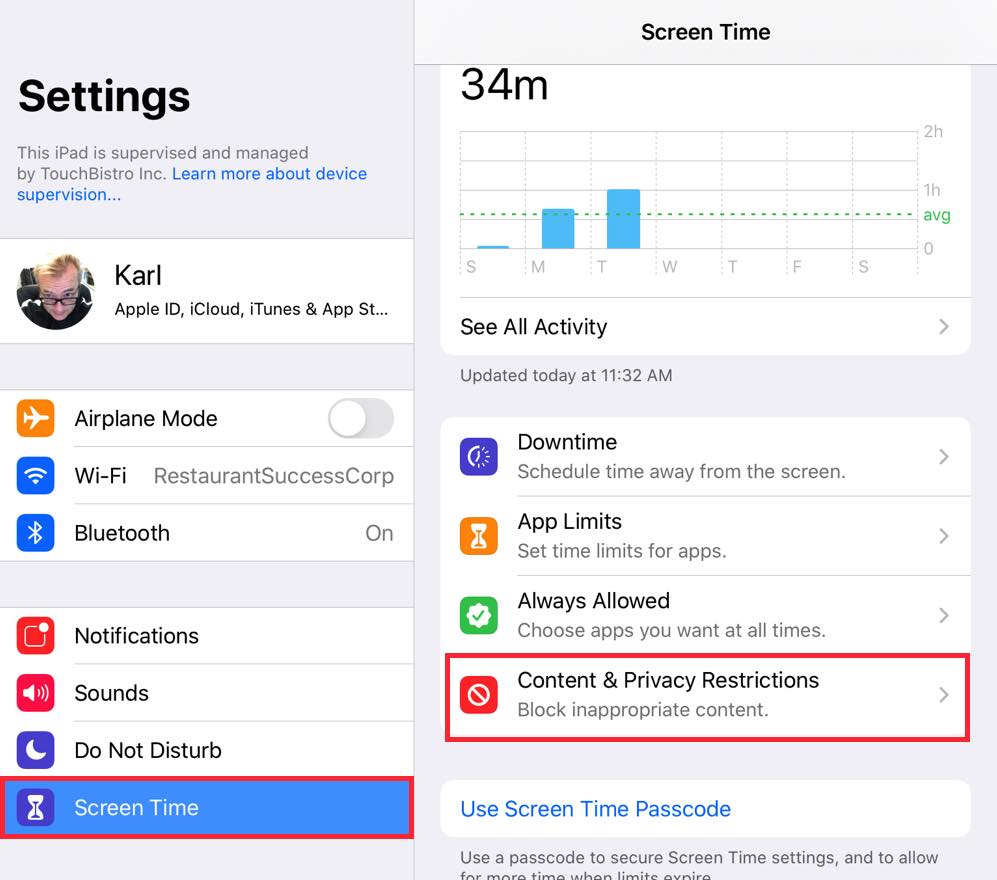
2. Tap Screen Time and then Content & Privacy Restrictions.
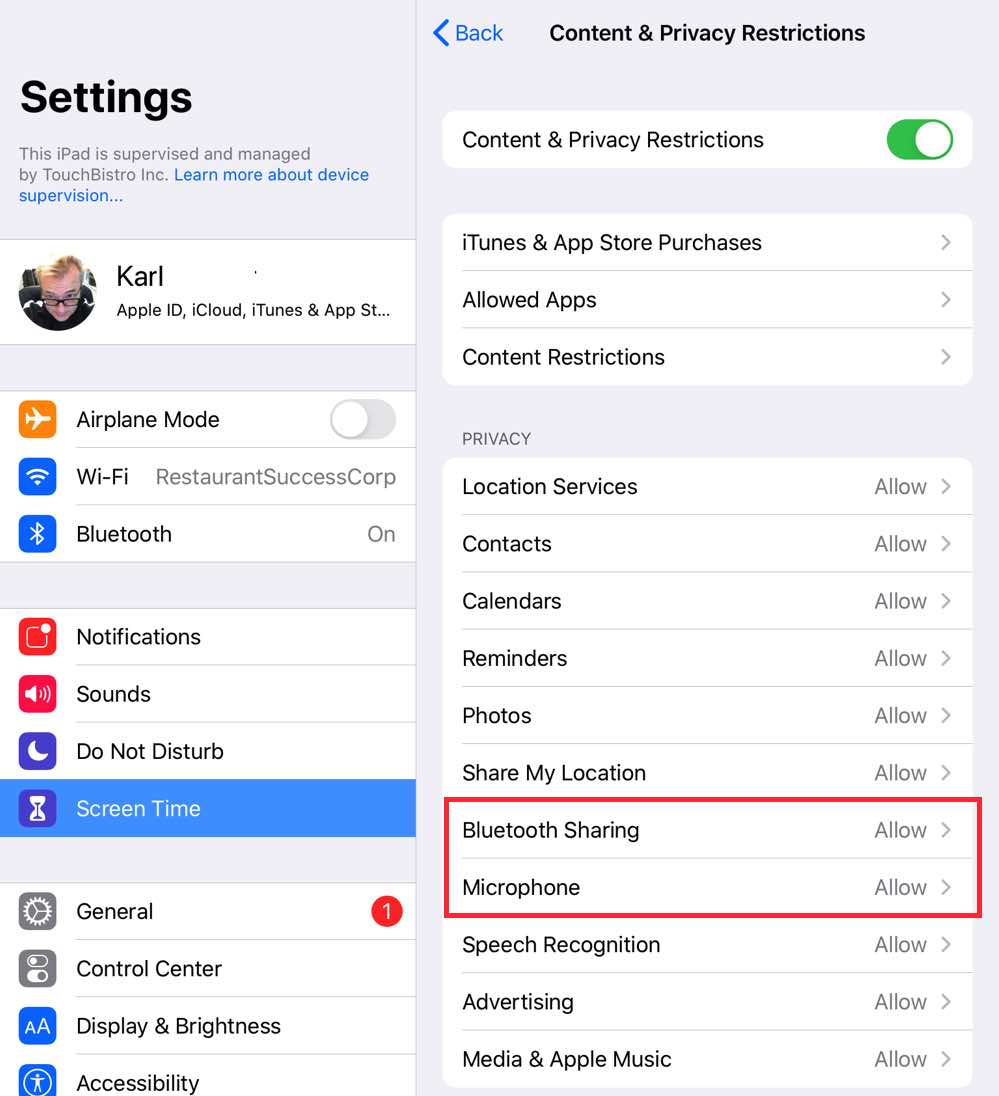
3. Enable Content & Privacy Restrictions and ensure Microphone and Bluetooth Sharing are both set to Allow Changes.
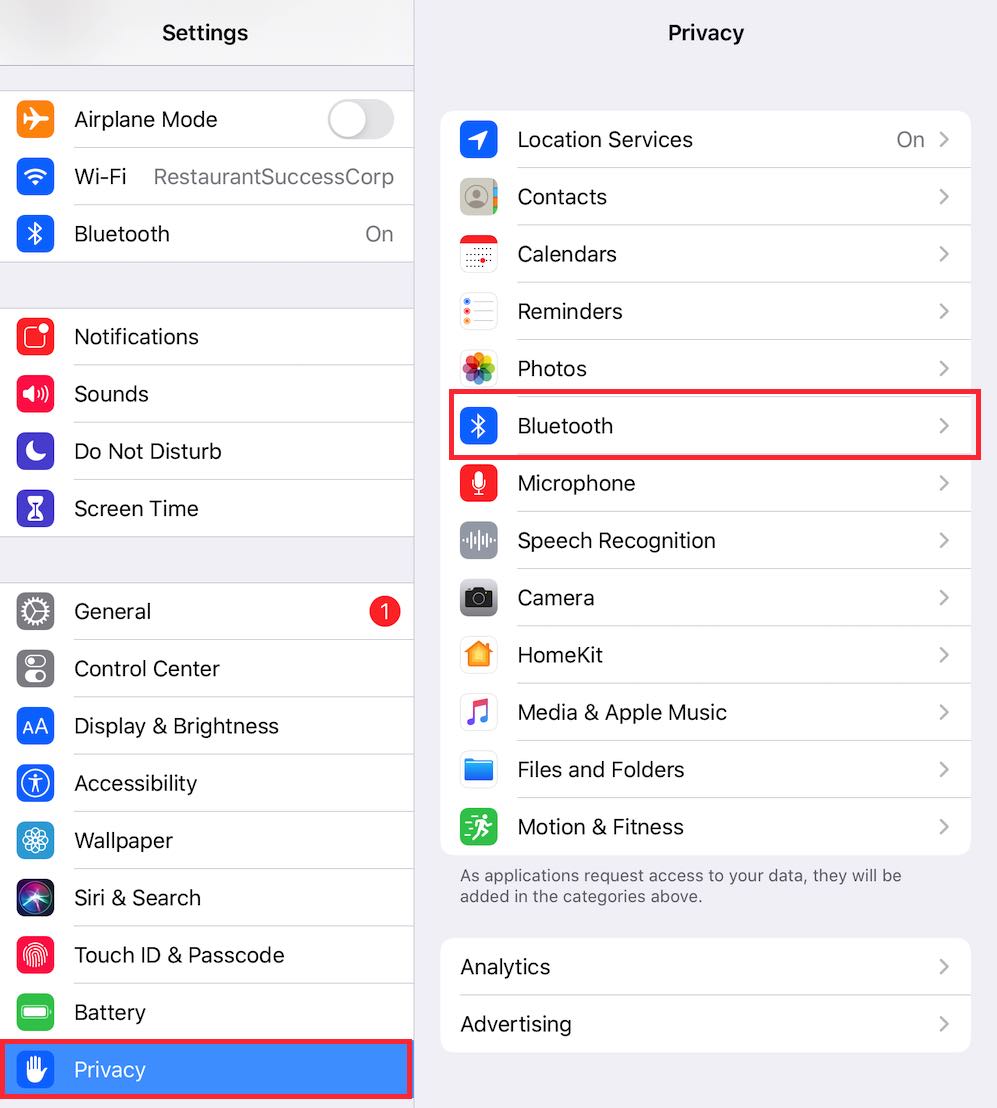
4. On the left, scroll down to Privacy and tap Bluetooth.
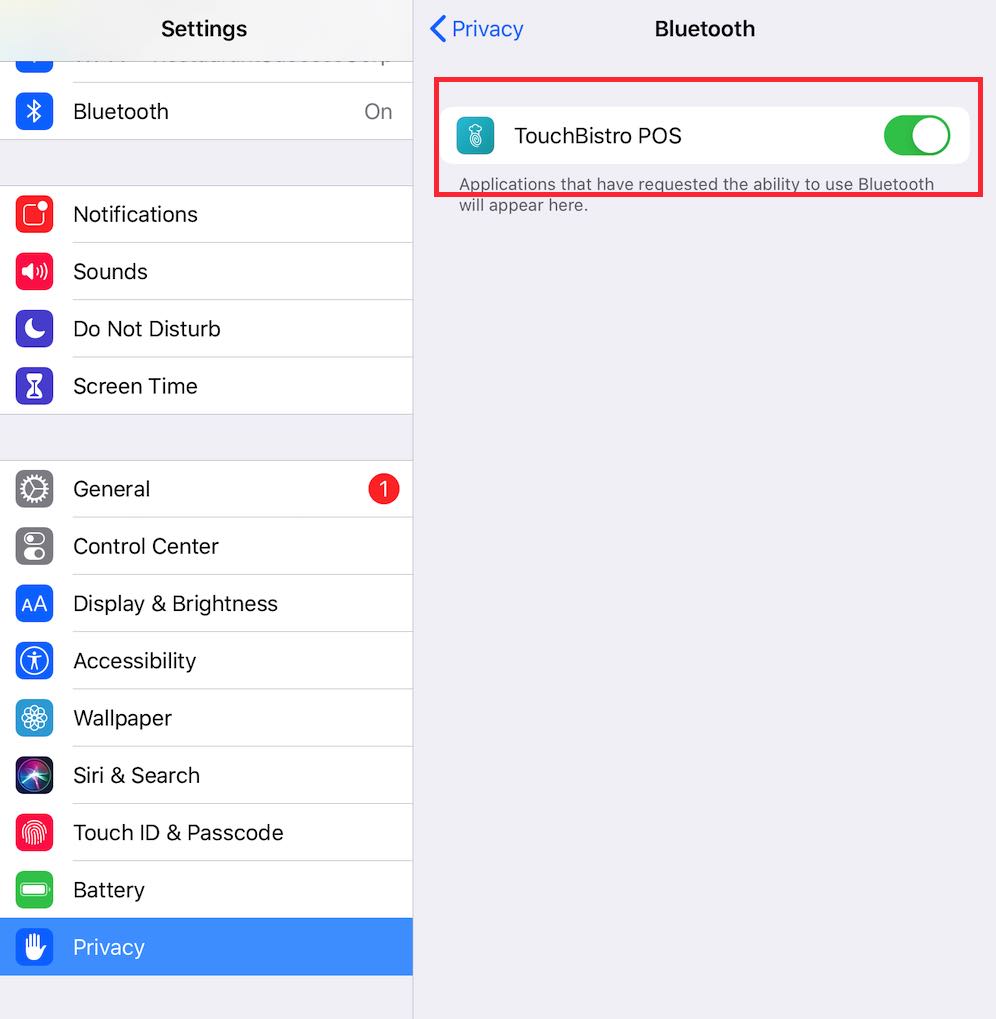
5. Ensure TouchBistro POS is enabled. If you do not see TouchBistro POS here, it means you’ve not using any Bluetooth devices with TouchBistro No change is necessary then.
Section 1. How to Pair Bluetooth Devices You May Be Using with TouchBistro
If after installing iPadOS 14, if you find TouchBistro no longer seems to be able to connect to a previously paired Bluetooth-based device (payment device, printer, or Bluetooth barcode scanner), find your device below and click on the associated link and then select the indicated chapter/section from the guide’s Table of Contents for detailed steps on how to pair with the device.
|
Device
|
Detailed Guide
|
|
TouchBistro Payments RP457C
|
Setup Guide (see Chapter 3)
|
|
TouchBistro Payments Moby8500
|
Setup Guide (see Chapter 3)
|
|
TSYS Genius Mini
|
Setup Guide (see Chapter 3, Section 2)
|
|
Square Chip/Contactless Reader
|
Setup Guide (see Chapter 2, Section 1)
|
|
Star MC-PRINT3
|
Setup Guide (see Chapter 5)
|
|
Star TSP143BI
|
Setup Guide (see Chapter 3)
|
|
Barcode Scanner
|
Setup Guide (see Chapter 3 and 4)
|


 Email
Support
 Frequently
Asked Questions